No Jointer? How to Flatten and Square Boards with a Planer
Learn how to flatten and square boards using a planer and simple jigs. Perfect for small shops and budget-friendly woodworking.
If you don’t have a jointer, you’re in good company. My shop is tiny, and for years I flattened and squared boards with whatever tools I had… which usually did not include a jointer. I even have a post showing how I square edges with my table saw.
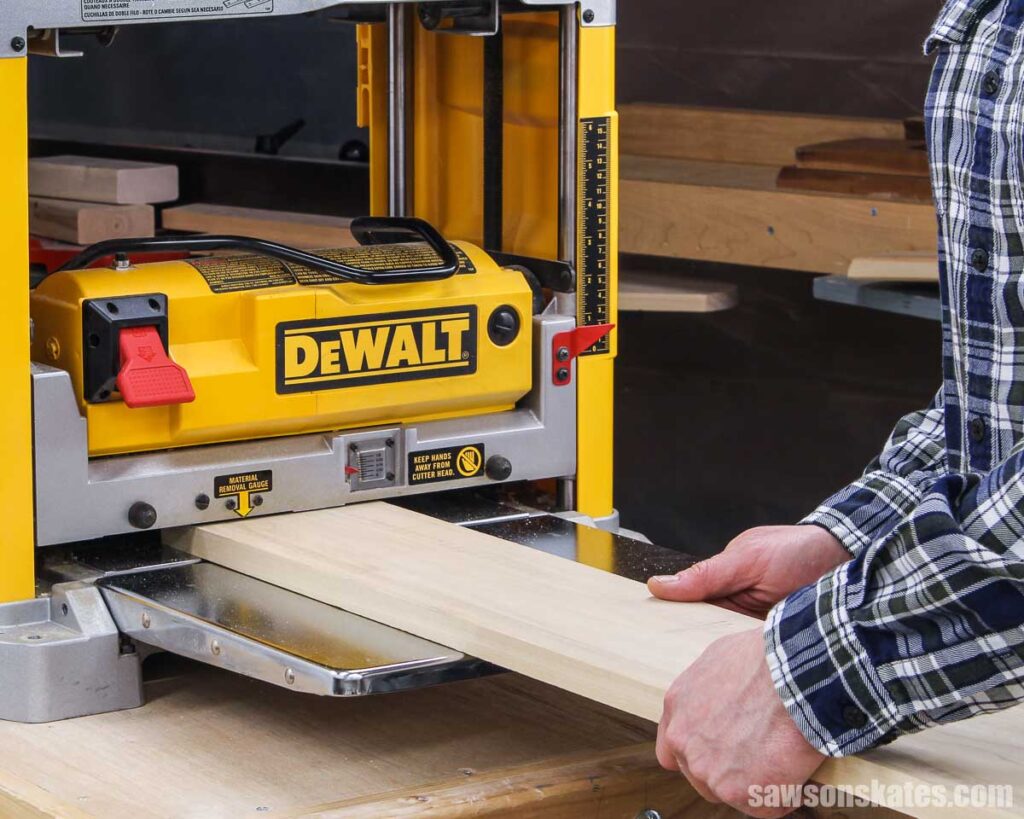
The good news? Your planer can do a lot more than just make boards thinner. With a couple of easy tricks, it can flatten faces, straighten edges, and help you get boards ready for glue-ups
Is it exactly like having a jointer? Nope. But for small shops or tight budgets, it works surprisingly well — and chances are, you already have everything you need. Let me show you how.
If you’re still deciding between a jointer and a planer, I’ve got a post that breaks down their differences— and why I usually recommend starting with the planer.
This article contains affiliate links. If you purchase from these links, I may earn a small commission at no additional cost to you. Visit my site policies for more information.
What a Planer Actually Does
Before we turn your planer into a “jointer,” it helps to understand what the planer actually does. A planer doesn’t magically make a board flat. It just makes the top face match whatever the bottom face is doing.
If the bottom is flat, great — you’ll get a flat board.
If the bottom is twisted, bowed, or cupped? The planer happily copies all of that and gives you a thinner twisted, bowed, or cupped board.
That’s why we need a couple of tricks to make this work. If we can give the planer a temporary flat, stable reference surface, it will plane the top perfectly flat. Then, once that first face is flat, the planer can flatten the second face like normal.
That’s the whole secret: the planer follows the bottom. So our job is to make the bottom behave.
When a Planer Can Substitute for a Jointer
A planer can absolutely pinch-hit for a jointer — you just need the right setup. It shines in a few specific situations:
• Flattening a cupped, bowed, or slightly twisted board
Pop it on a planer sled, shim the wobble out, and the planer will treat the sled as the “flat bottom.” That first pass gives you a true face to work from.
• Taking a board that’s almost flat and making it glue-up ready
Sometimes a board is close, but not jointer-close. One or two light passes on a sled will get it there without eating up shop space or budget.
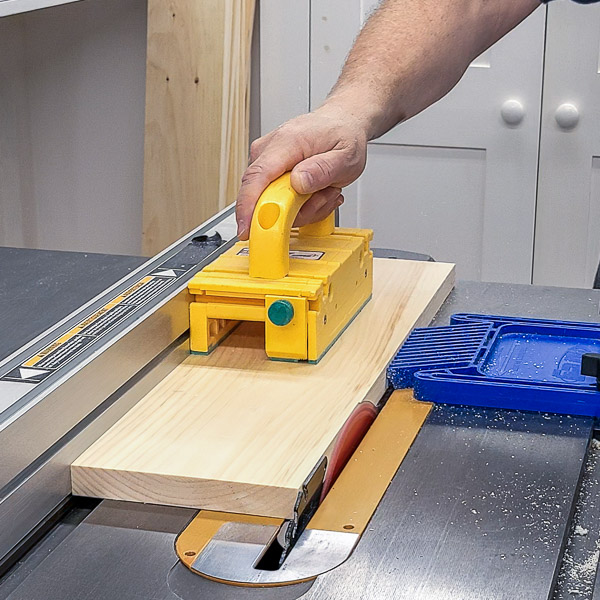
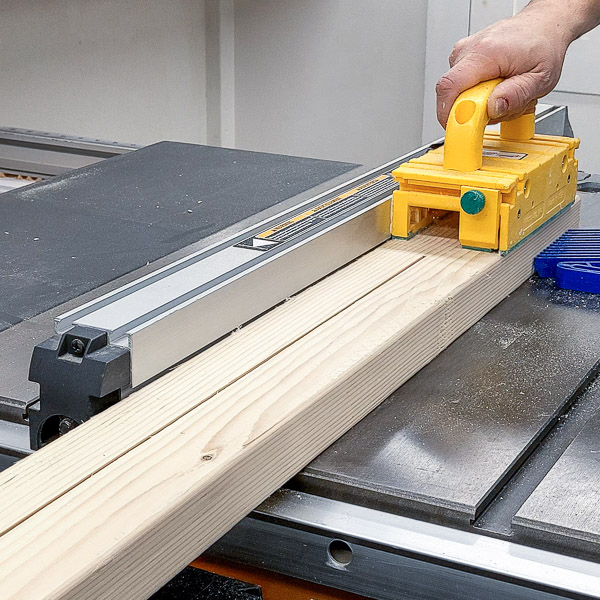
• Squaring an edge with a simple jig
A planer isn’t designed to joint edges, but if you stand the board up in a vertical jig, the planer will shave the high spots and give you a surprisingly straight, square edge.
It’s not a perfect replacement — more on that later — but for most small-shop woodworkers, a planer plus two quick jigs will cover 80% of what a jointer does. And you don’t need to rearrange your entire shop (or take out a second mortgage) to use them.
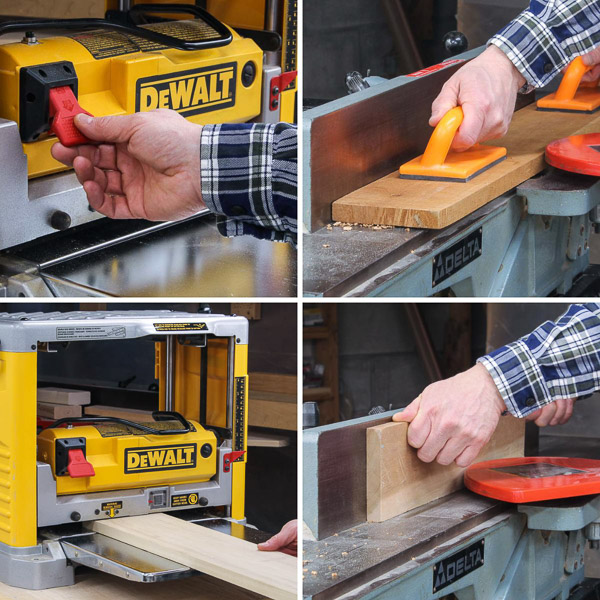
Flattening a Board with a Planer Sled
Flattening a board in a planer starts with one helpful accessory: a sled. Think of the sled as a stand-in with a perfectly flat bottom surface. If your board is cupped, twisted, or rocking like a seesaw, the planer will just copy that shape. But when you set the board on a flat sled and support the low spots with a few shims, you “lock” it in place so the planer sees everything as flat and stable.
Once the board can’t wiggle, the planer trims the high spots on top and gives you a true, flat reference face. From there, you can flip the board over and plane the second face just like normal.
It’s a simple trick, but it works incredibly well — especially for small shops or anyone dealing with rough lumber. If you want to see the sled setup in action, here’s a YouTube video that walks through the whole process.
Squaring an Edge with a Planer
You can also use your planer to straighten and square an edge, as long as you give it a little guidance. A planer isn’t designed to joint edges on its own — the board will just tip or follow whatever curve it already has. But if you stand the board upright in a simple jig that keeps it perfectly vertical, the planer will shave off the high spots and give you a clean, consistent edge.
The jig acts like training wheels, keeping the board from wobbling while the planer takes off the high spots. After a few light passes, the edge is usually straight enough to square the other side with your planer or table saw.
It’s not as fast as a real jointer, but for a small shop (or the occasional project), it works surprisingly well. And if you want to see exactly how the jig works, I’ve found a YouTube video that shows the full setup.
The Limitations (and When It May Not Be Worth It)
Using a planer as a jointer works, but there are some trade-offs. It’s not fast — between setting up the sled, shimming, and making passes… it all takes time. And this trick works best on boards that just need a little help. If it’s twisted like a propeller, you may end up fighting it more than fixing it.
Edge-jointing has its own quirks, too. You’re limited by the height of your planer, and narrow or really long boards may feel a little tippy.
So, when is it not worth it?
If you’re prepping a big batch of lumber or you regularly work with twisted rough stock, a real jointer saves a ton of time. But if you’re in a small shop or only need to true up boards here and there, the planer tricks get you 80% of the way there without adding another giant machine to your space.
Final Thoughts
If you don’t have a jointer, you’re not stuck. With a planer, a simple sled, and an edge-jointing jig, you can flatten faces, square edges, and get boards ready for glue-ups without adding another big tool to your shop. It takes a little more setup and a little more patience, but the results are surprisingly good — especially for small shops or occasional lumber prep.
Once you try the sled method, you’ll see how much control it gives you. And after you’ve got one flat face, the planer takes care of the rest. Same with the edge jig: not as fast as a jointer, but it absolutely gets the job done.
If you want to see these methods in action, check out the videos I linked. They walk through each setup so you can try it in your own shop with confidence.
Pin This For Later

Hi there – I’m Scott, a woodworking enthusiast and creator of Saws on Skates, a site I started in 2015 to share easy-to-follow tutorials, space-saving shop tips, and project inspiration for DIYers at any skill level. Learn more about my woodworking journey here.