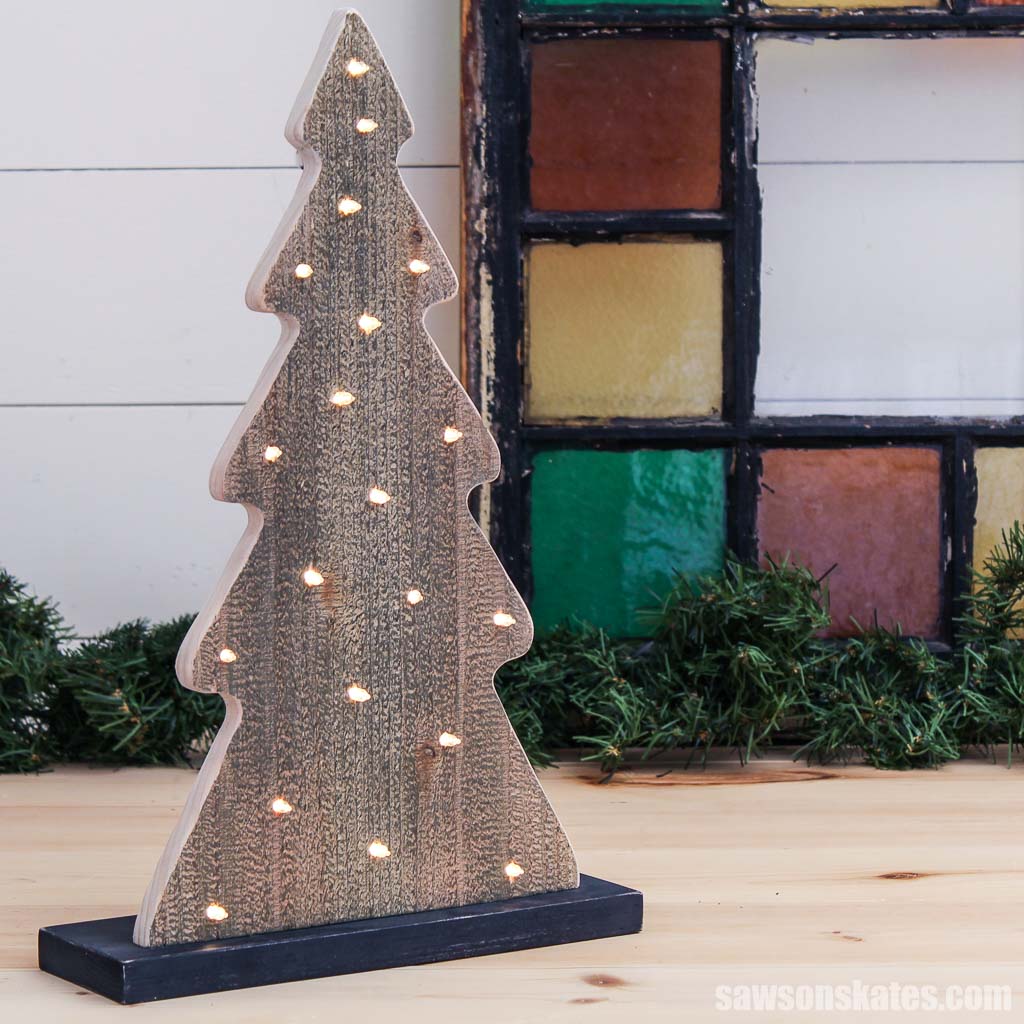
DIY Rustic Wooden Christmas Tree with Lights
Bring a touch of rustic charm to your home with this light-up wooden Christmas tree. Perfect for the holidays, it adds a warm glow to any room.
What Should I Build Next?
That's the question I help answer.
Every week, I send woodworking ideas to 17,000 DIYers who love building things.
You'd fit right in.
Bring on the cozy vibes with this rustic wooden Christmas tree. Made with just a few supplies and battery-operated lights, it’s easy to make and adds a warm, inviting glow to your home. It’s perfect for your mantel, sideboard, or anywhere that needs a bit of extra sparkle—and the best part? I’ve included a template to ensure perfect results every time.
And here’s a bonus: those mirrored scraps you’ll have left over? You can turn them into a completely separate project. I used mine to make a rustic Christmas Tree Candle Holder, so this build is basically two projects in one! Here’s the tutorial if you’d like to make that too.
Table of Contents
This article contains affiliate links. If you purchase from these links, I may earn a small commission at no additional cost to you. Visit my site policies for more information.
Inspiration for This Project
My favorite thrift store never disappoints. It’s constantly inspiring me with new project ideas to share with you. This time, I scored an amazing find: a handmade wooden Christmas tree with lights.
It brought back memories of those classic vintage ceramic trees. Anyone who knows me knows I love anything with a vintage feel, so this little gem (or should I say, tannebaum) was coming home with me.
Back at my shop, I made a few tweaks to the tree’s shape and base design. The result is this adorable, rustic light-up tree.

What Wood Should You Use?
While the inspiration tree was made from plywood, I wanted a more rustic look. I made my tree using rough-sawn cedar pickets, but you can make yours with just about any kind of wood.
I used a scrap piece of pine for the base, but a hardwood like oak or walnut would be an elegant touch.

What Tools Do You Need?
I used four tools to make my wooden tree:
- Miter saw
- Scroll saw
- Drill press, but you could use a handheld drill
- Pocket hole jig
Optional:
Table saw: To create a strong bond between the fence pickets; I cut their rough edges using a table saw, removing any unevenness that could weaken the glue joint. You won’t need a table saw if your boards already have clean, straight edges.
Portable spindle sander: I use my portable spindle sander to smooth the saw marks and refine the tree’s shape, but you can use sandpaper if you don’t have one.
What Lights Should You Use?
I used this string of 20 battery-operated lights, but almost any set should work.
How to Make a Wooden Christmas Tree with Lights
Printed Plan
Get the PDF plan here (includes detailed instructions, measurements, and bonus tips)
Materials
- Wood (per the printed plan)
- Wood Glue
- 1″ Pocket Hole Screws
- Battery-operated Christmas Lights
- Zip Ties (optional)
- ¼” Staples (optional)
Tools
- Tape Measure
- Kreg Multi-Mark
- Scroll Saw
- Table Saw (optional)
- Portable Spindle Sander (optional)
- Drill Press or Handheld drill
- ⁵/₁₆” Brad Point Bit
- ¹³/₆₄” Pilot Point Bit
- Pocket Hole Jig
Step 1. Prepare the Template
I began by assembling the tree template included with the printed plan.
TIP: When printing the template, make sure the scale is set to 100% (usually found under “more settings”).
The sheets have a white border around them, but they need to be joined together at the edges.
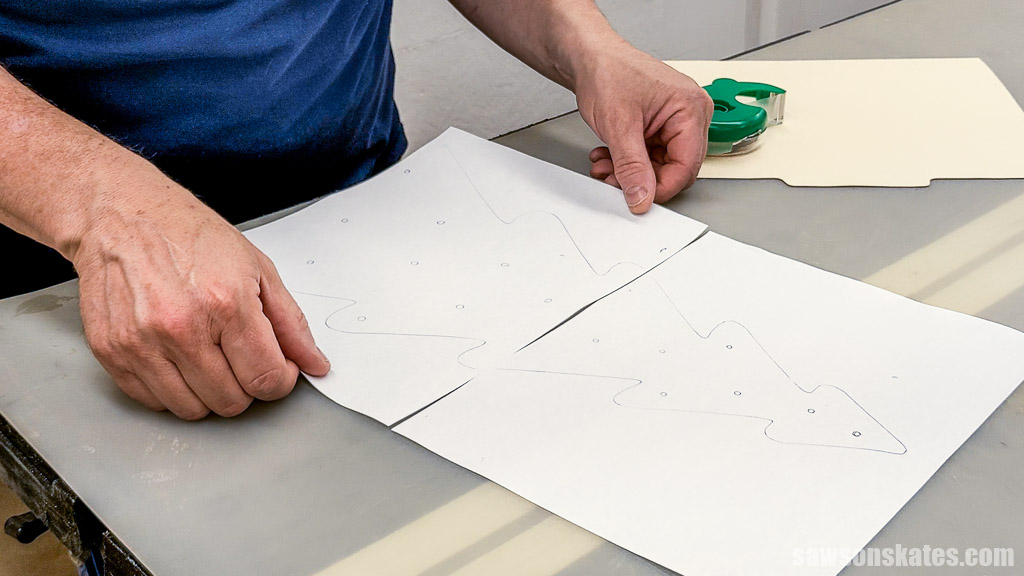
I positioned the sheets by eyeballing the tree’s outline and joined them using tape.
You can transfer the pattern using carbon paper, placing it between the template and the wood, dark side down, and tracing the lines with a pen or pencil.
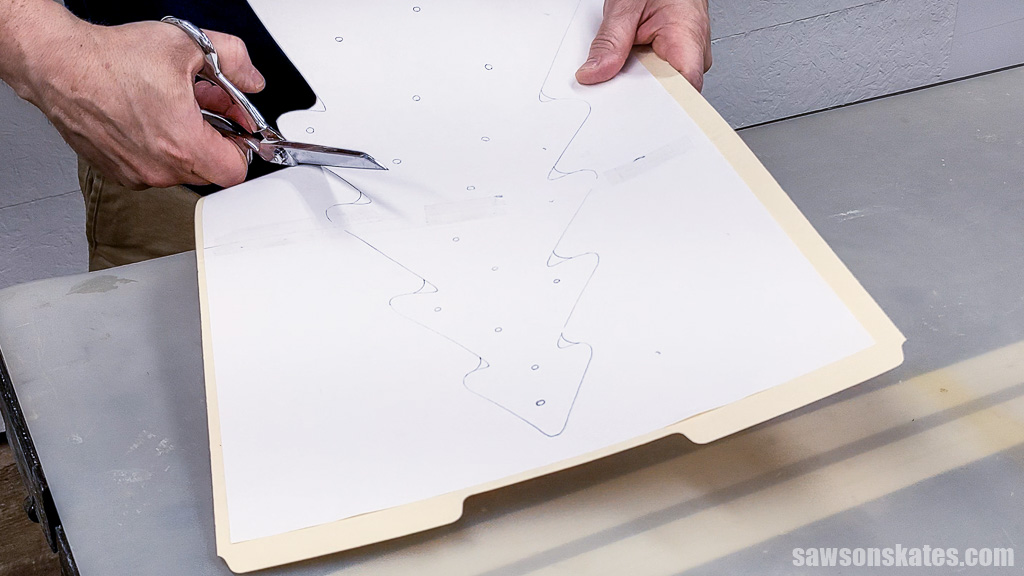
For easier and more accurate tracing, I prepare my templates by attaching them to a manila folder using spray adhesive.
I prefer this method because the folder’s edge provides a handy lip for the pencil to follow.
Optional: Sanding the area where the branches intersect could be challenging by hand, and sanding isn’t my favorite activity. I wanted to use my spindle sander to make things easier. Tracing a dime at each intersection created the perfect shape to tackle those tight corners.

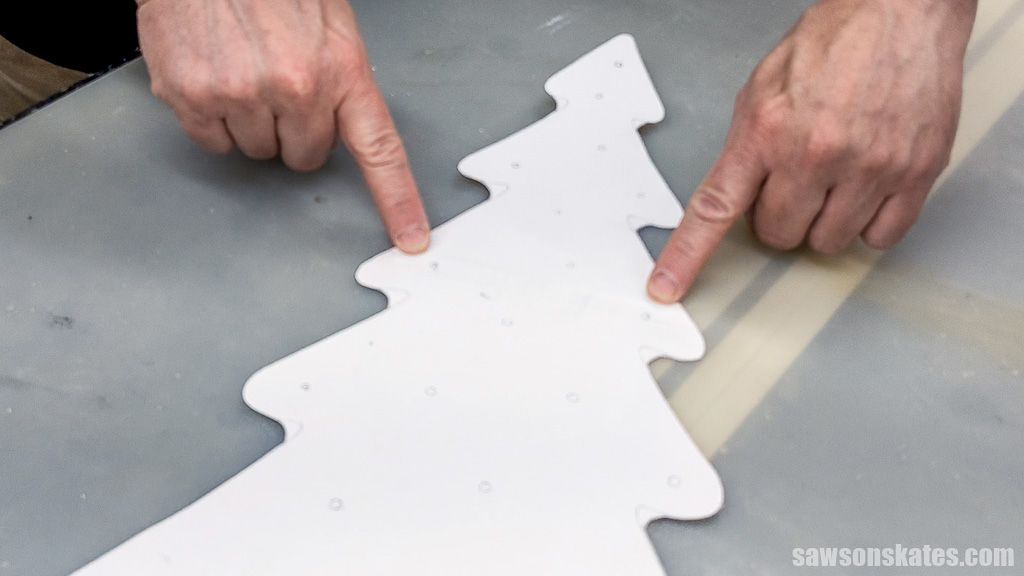
Using scissors, I cut out the template.
IMPORTANT: You’ll need to add three light locations to your template. One I forgot to trace from the inspiration piece.
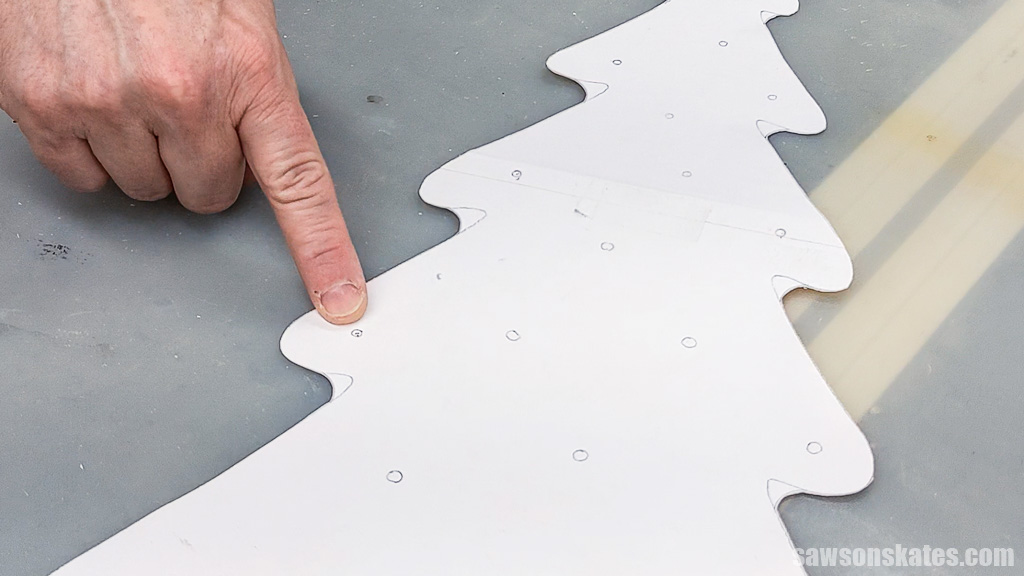
And two fall in the margin, outside the printed area. The locations don’t need to be precise; just eyeball them.
Step 2. Cut Out the Shape
The tree shape requires a blank. I made mine with two boards glued together to create a wider panel. You can also experiment with different thicknesses, but remember to adjust the depth of your light holes to ensure they still protrude from the front of the tree.
To ensure a strong glue joint, I started by removing one edge from the boards using my table saw. I placed the board so the blade shaved off a thin amount of material. I repeated this step for the other board.
Related: How I Joint Edges Without a Jointer (for Panels and Table Tops)
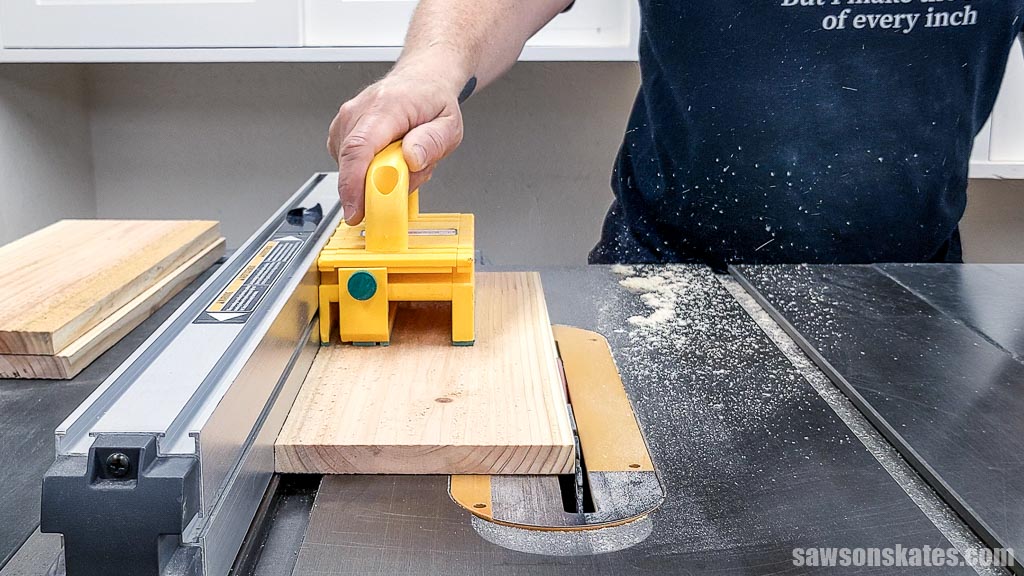
Then, I placed the cut edge against the fence and adjusted it to shave a thin amount off the second side, leaving me with two clean edges.
TIP: Wide boards, like the ones I used, are prone to cupping, when a board’s edges are higher than its center. To help minimize this, you can try ripping the boards in half lengthwise, then flipping one piece and gluing them back together.
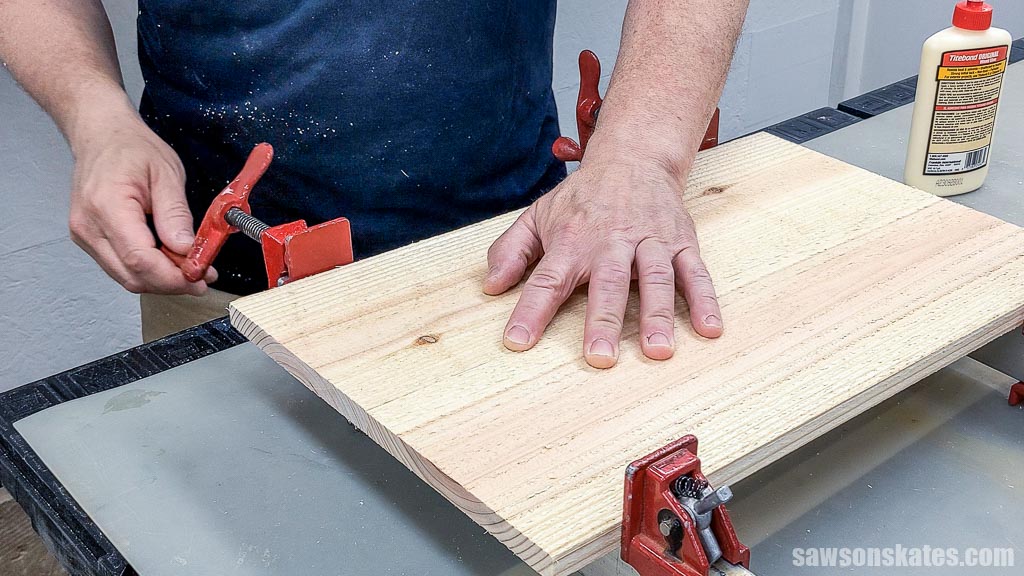
I applied glue to one board, positioned it against the second, and moved it back and forth to spread the glue.
I tightened the clamps until they were just snug.
When the glue was dry, I inspected the panel, looking for the best surface to face outward on the finished tree. Once I made my decision, I placed it on my workbench with the back surface facing upward.
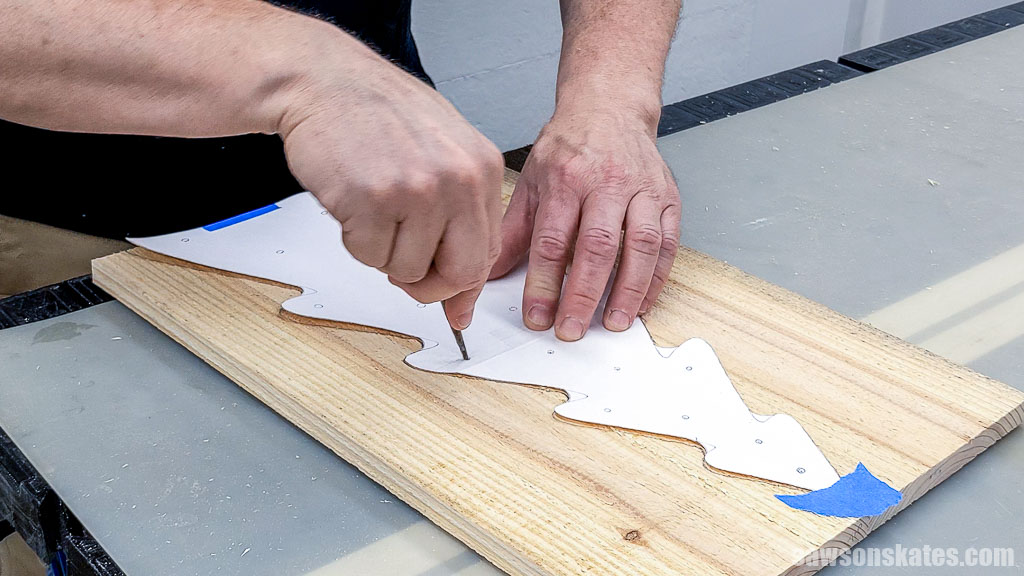
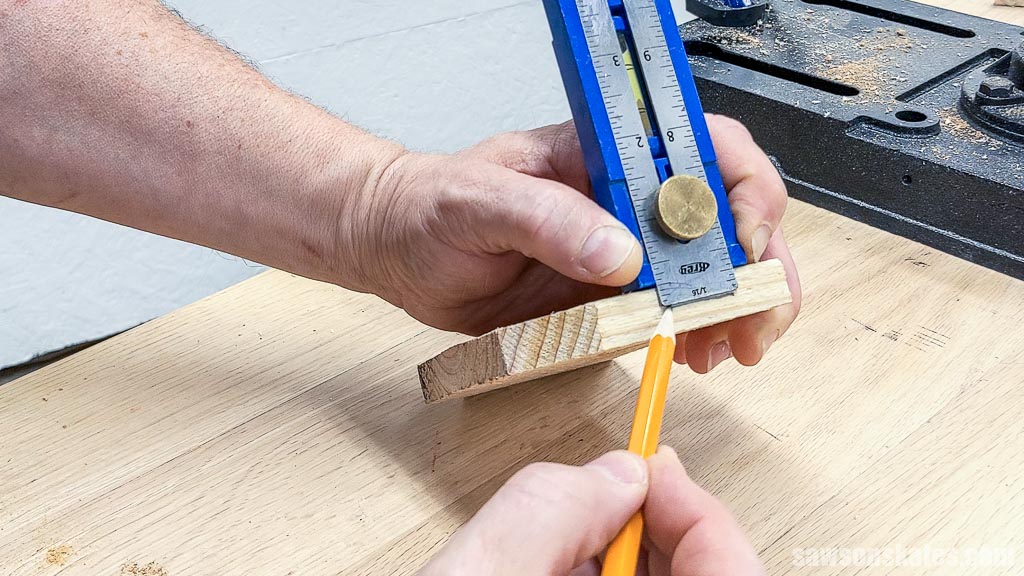
I temporarily attached the template to the blank with painter’s tape and traced its outline with a pencil.
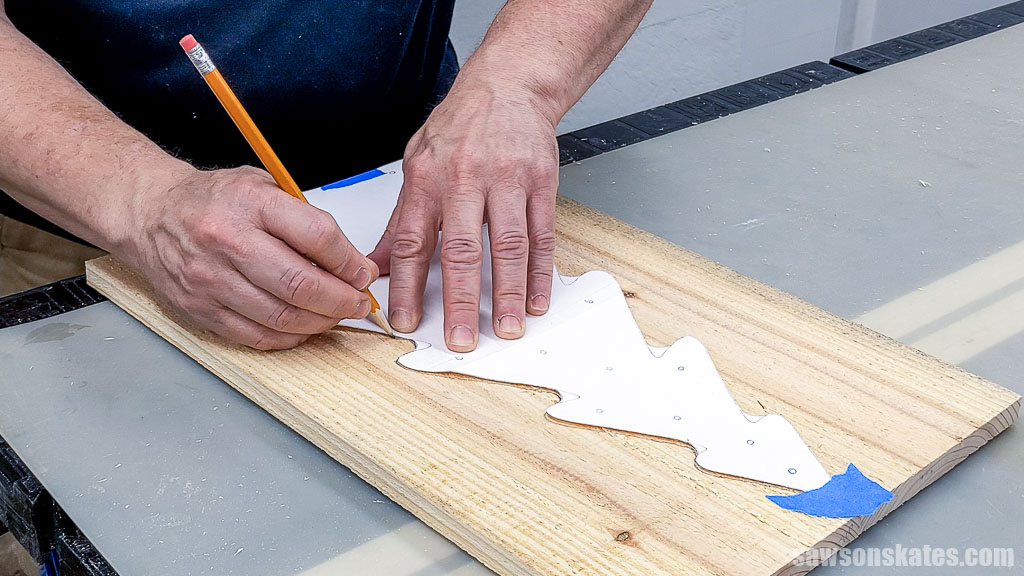
Using an awl, I marked the location for the lights.
Related: What is an Awl? (& How to Use it)
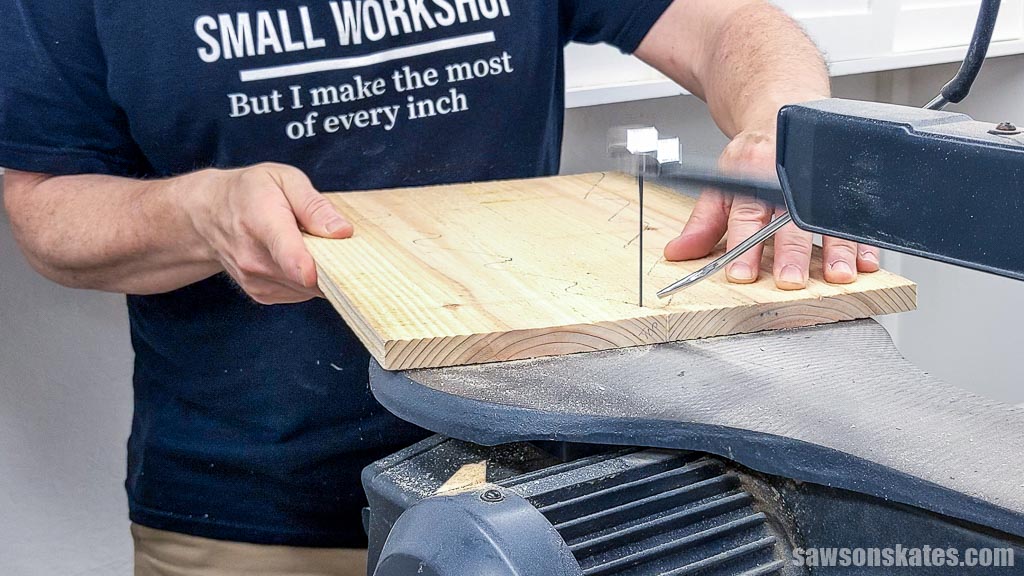
I used my scroll saw to cut out the shape but you might be able to use a jigsaw instead.
TIP: When you’re done cutting, hang on to those scrap pieces. You can use them to make a quick little Christmas Tree Candle Holder project.
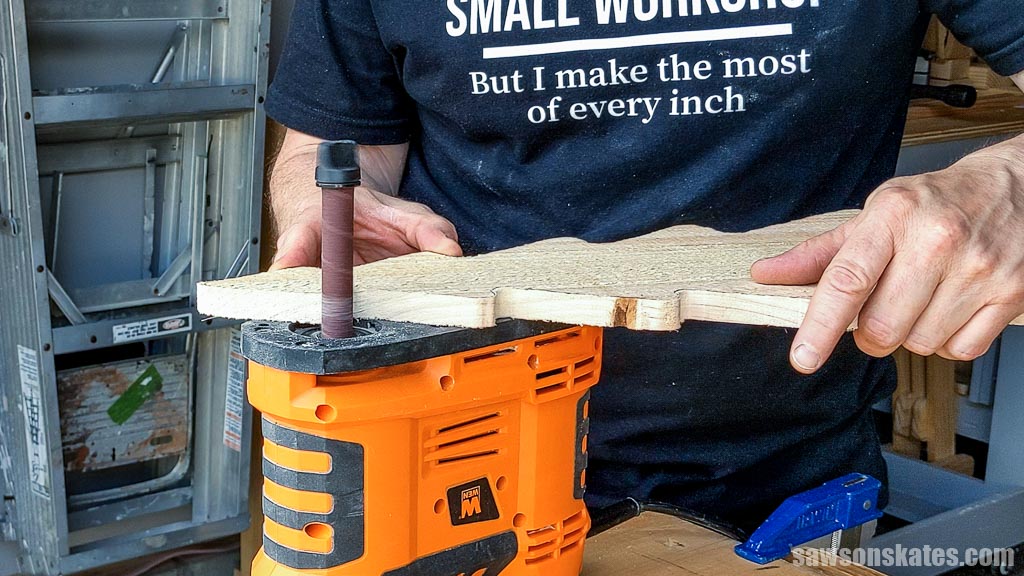
I mentioned earlier that I wanted to use my portable spindle sander to smooth the saw marks and refine the shape, but you can use sandpaper instead.
Step 3. Drill the Holes
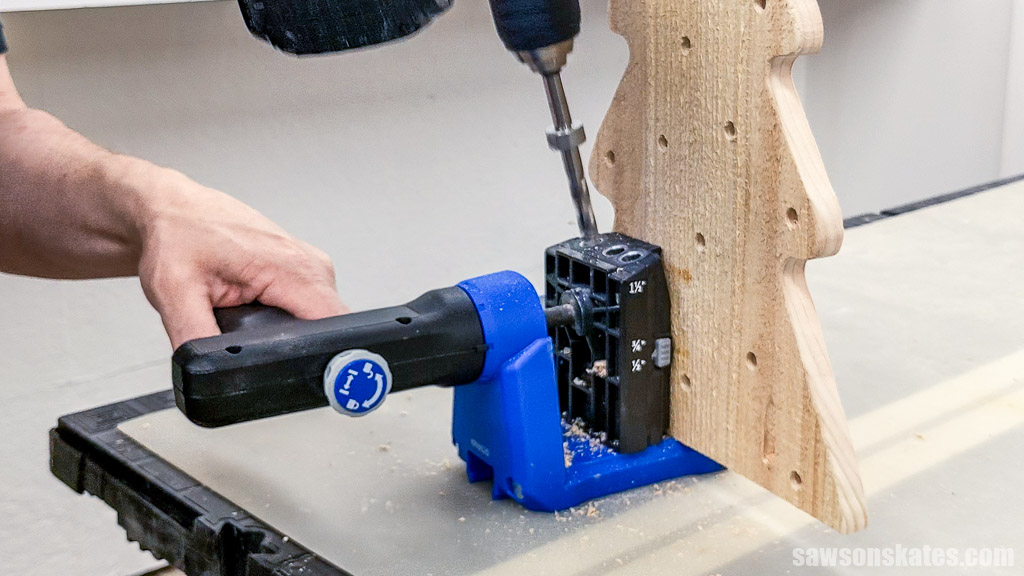
I used my drill press to make the holes for the lights, but you could use a handheld drill instead.
Related: How to Use a Drill
TIP: I used these lights for this project, but if you plan to use different ones, I recommend buying them before you drill the holes and testing the setup on a piece of scrap wood to ensure the hole diameters I used will work for your lights.
To set up the drill press’s depth, using my Multi-Mark, I made a reference line on a piece of scrap wood the same thickness as my tree.
I installed a brad point bit in my drill press and placed the scrap wood beside it.
NOTE: I would have typically used a Forstner bit, which creates a hole with clean sides and a flat bottom, just like the one in the inspiration piece. However, I didn’t have one that matched the size needed. A brad point bit is a good alternative for this project.
With the drill press off, I lowered the bit, aligning its cutting edge with the pencil mark, and adjusted the depth stop.
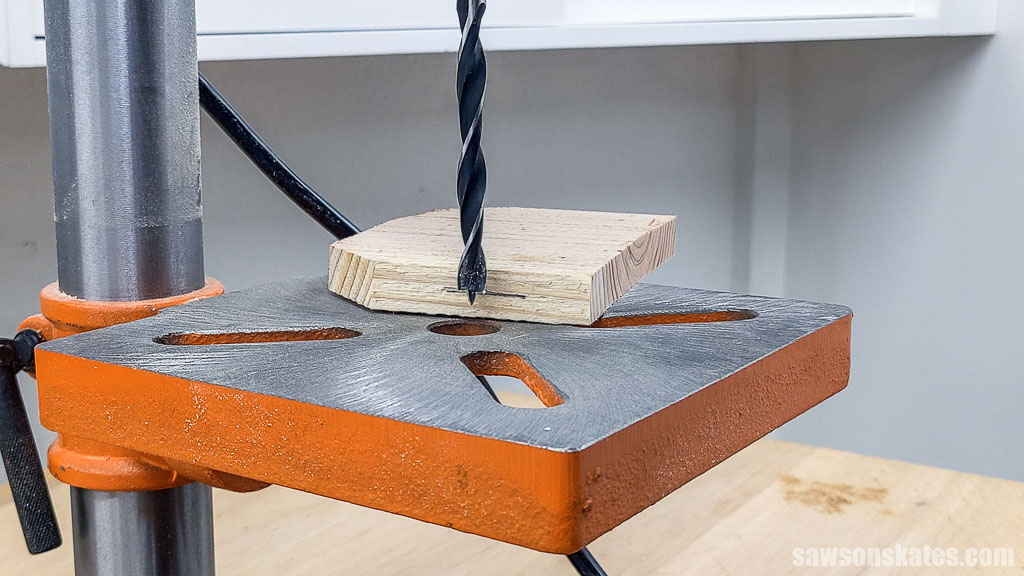
Again, with the drill press off, I lowered the bit, positioning its tip in the indentation I made with the awl.
Once in position, I raised the bit, turned the drill on, and I lowered it to make the hole. I repeated this process for the remaining marks.
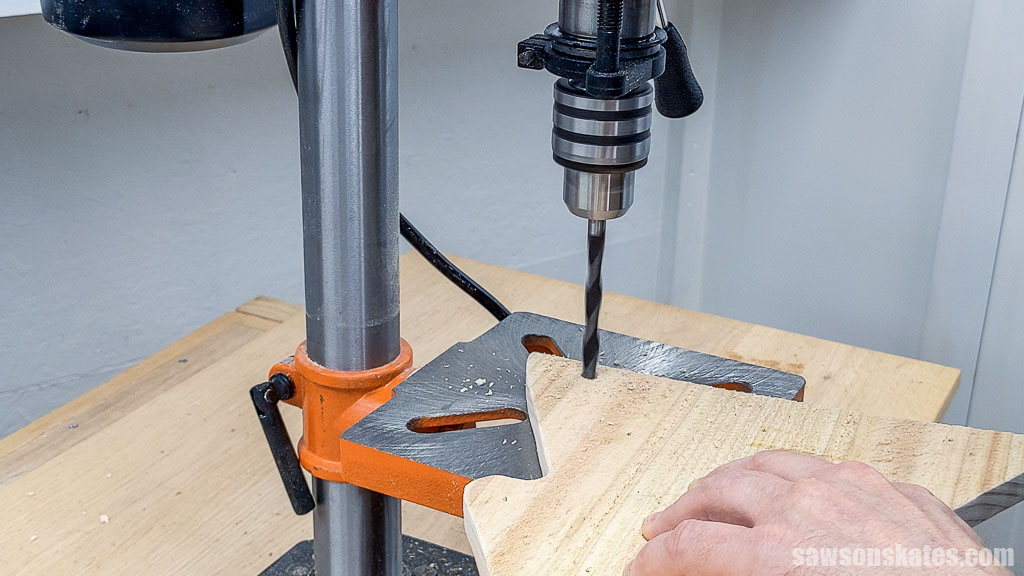
The second hole goes all the way through the workpiece. I placed a sacrificial board on my drill press to:
- Protect the bit from potentially drilling into the table
- Reduce the risk of tear-out on the front side of the tree
I installed a pilot point bit (I didn’t have a Forstner bit or brad point bit in this size) in my drill press. With the drill off, I lowered the bit, positioning it in the indentation made with the brad point bit.
Related: What is a Forstner Bit? (& How to Use It)
Once in position, I raised the bit, turned the drill on, and I lowered it to make the hole. I repeated this process for the remaining marks.
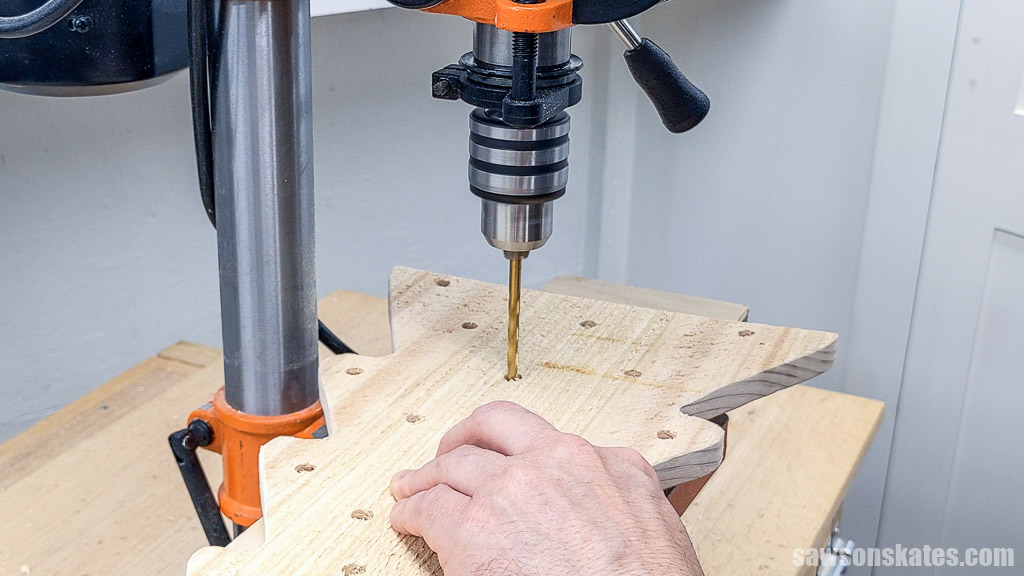
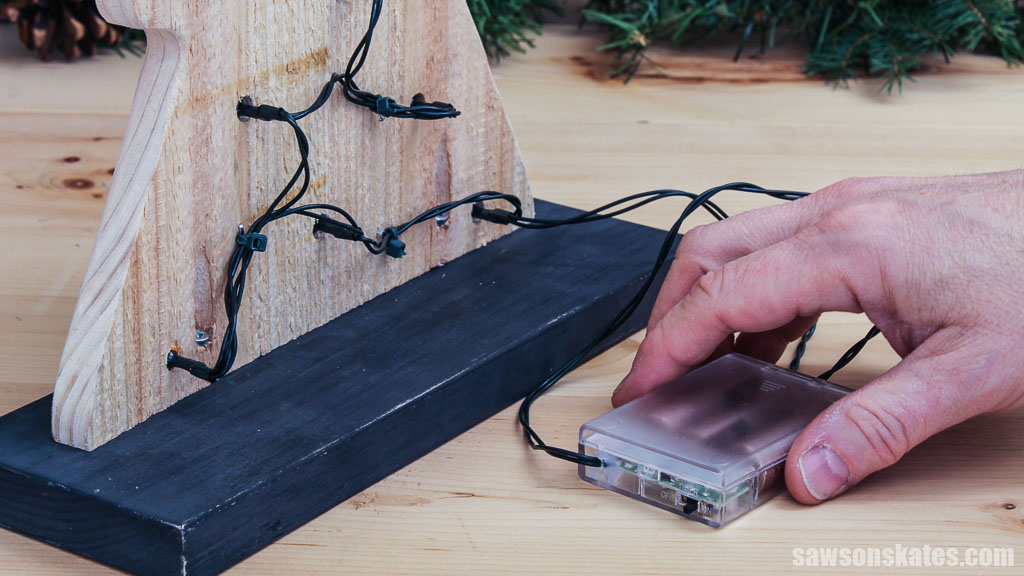
With the holes drilled, I checked the lights’ fit. I wanted a friction fit, but some were a little snug. I installed the pilot point bit in my handheld drill and gently widened any holes that were too tight.
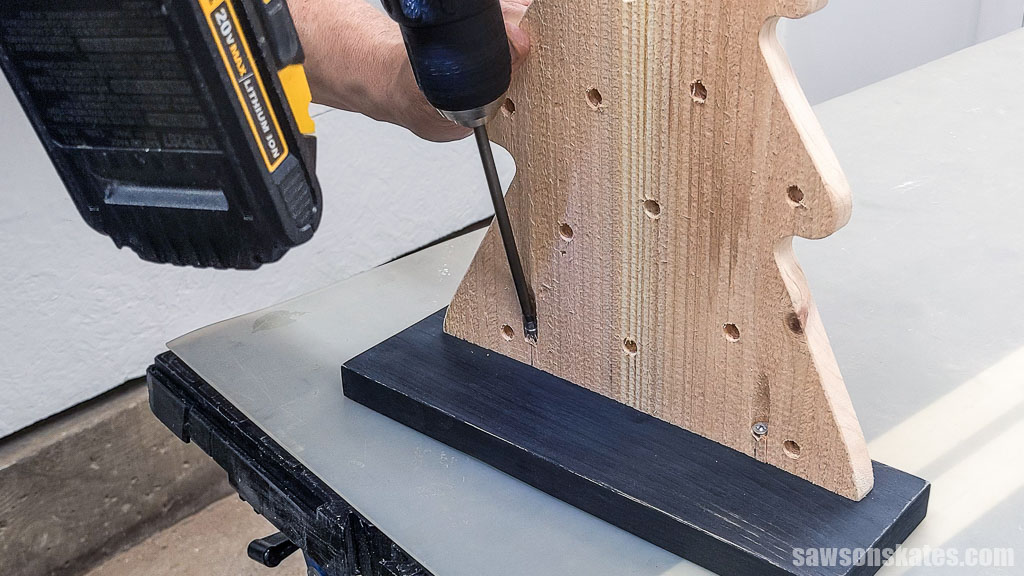
An easy way to attach the tree to the base is using pocket holes.
To position the pocket holes, on the back side, I measured in from each side ensuring they wouldn’t overlap any light holes.
Using my pocket hole jig, I drilled one at each mark. Be sure to adjust your pocket hole jig to your material’s thickness.
Related: How to Use a Pocket Hole Jig (& Beginner Pitfalls to Avoid)
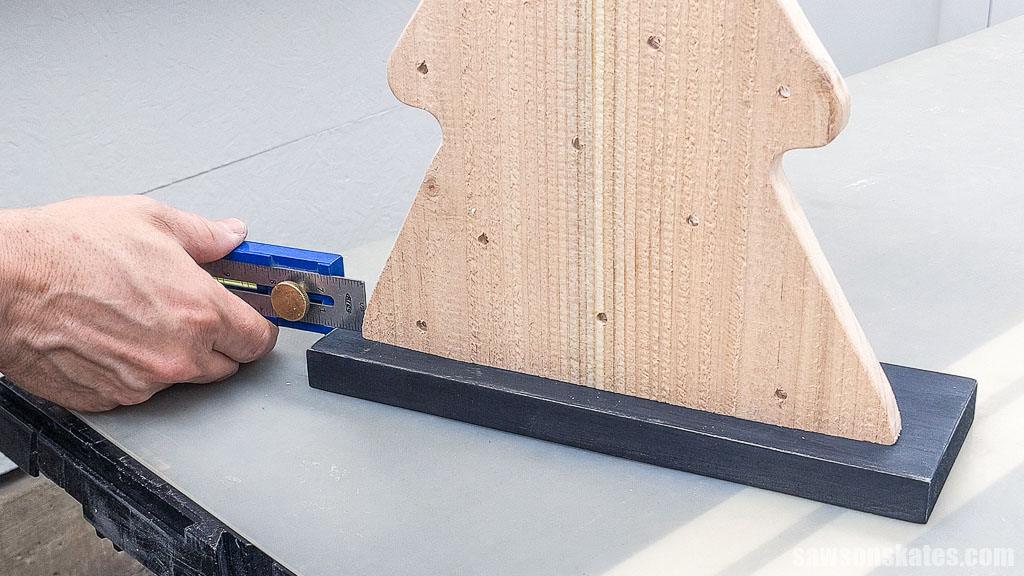
Step 4. Attach the Tree to the Base
Using my miter saw, I cut one piece of wood to length for the base. I finished mine with black chalk-type paint, but you can finish yours any way you want.
Using my Multi-Mark, I positioned the tree on the base, set in from the front and sides.
Then, I attached it using 1” pocket hole screws.
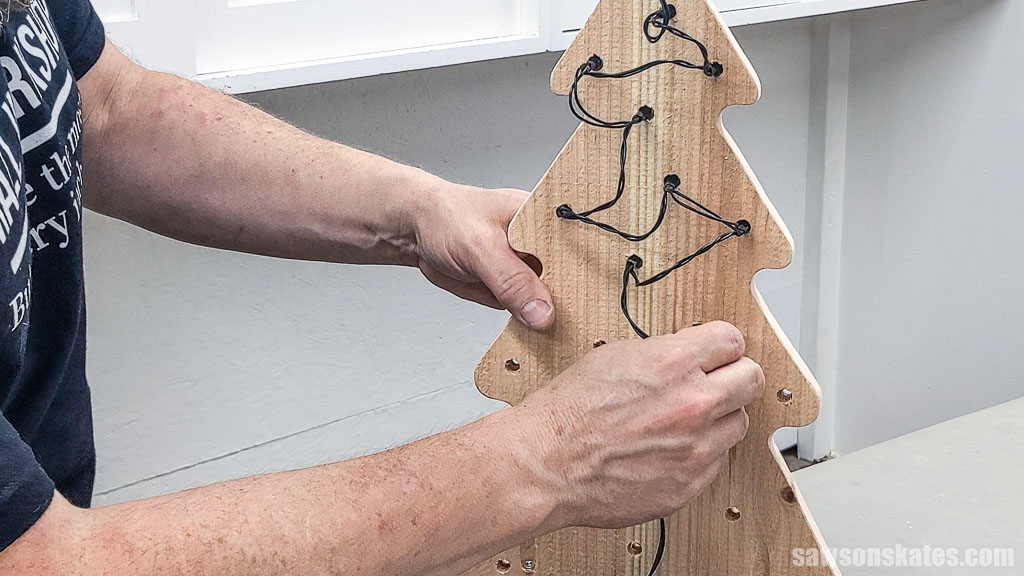
The last thing to do is insert the lights into the holes, add some batteries, and enjoy the glow.
TIP: Inserting lights into the tree can create messy wire loops at the back. You can secure the excess by attaching a zip tie to the tree using a stapler for a cleaner look.

Includes:
- List of tools and materials
- Complete measurements (in inches)
- Easy-to-follow instructions
- Step-by-step photos
- Detailed diagrams
or get the best value:
Final Thoughts
In no time, you can make this wooden Christmas tree that will bring a touch of rustic charm to your home. With its warm glow, this DIY project will be a treasured holiday staple for years to come.
Don’t wait. Get your PDF plan (including the detailed instructions and measurements) now!
Thank you for stopping by. If you enjoyed this tutorial, would you please take a moment and pin it to Pinterest? I’d really appreciate it!
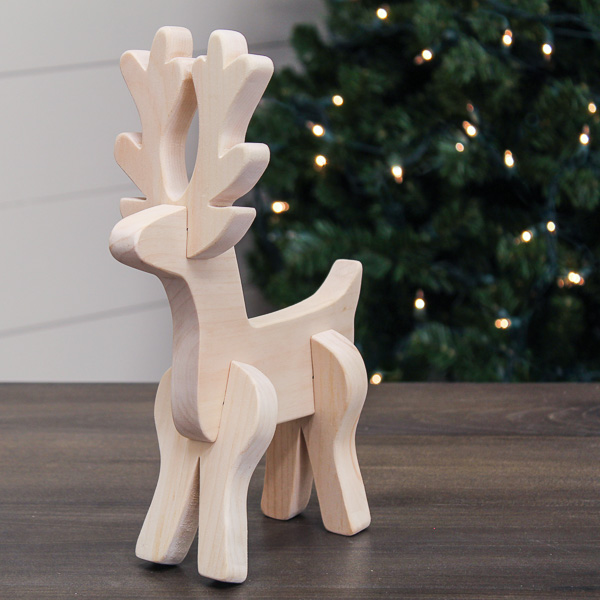
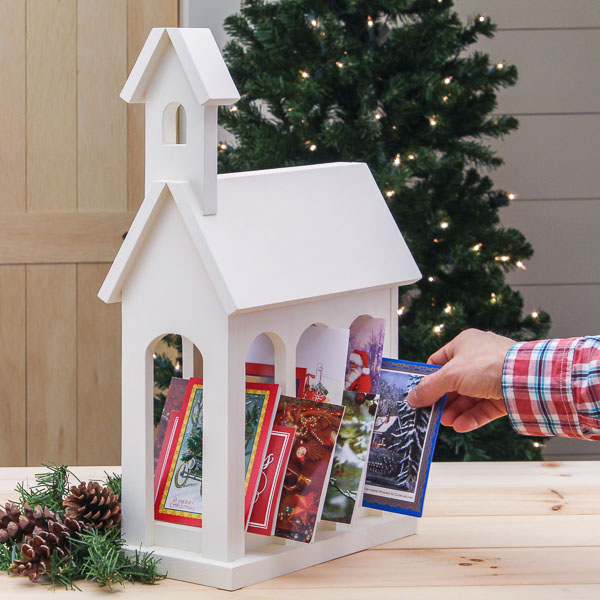
Recommended For You

Pin This For Later

Hi there – I’m Scott, a woodworking enthusiast and creator of Saws on Skates, a site I started in 2015 to share easy-to-follow tutorials, space-saving shop tips, and project inspiration for DIYers at any skill level. Learn more about my woodworking journey here.