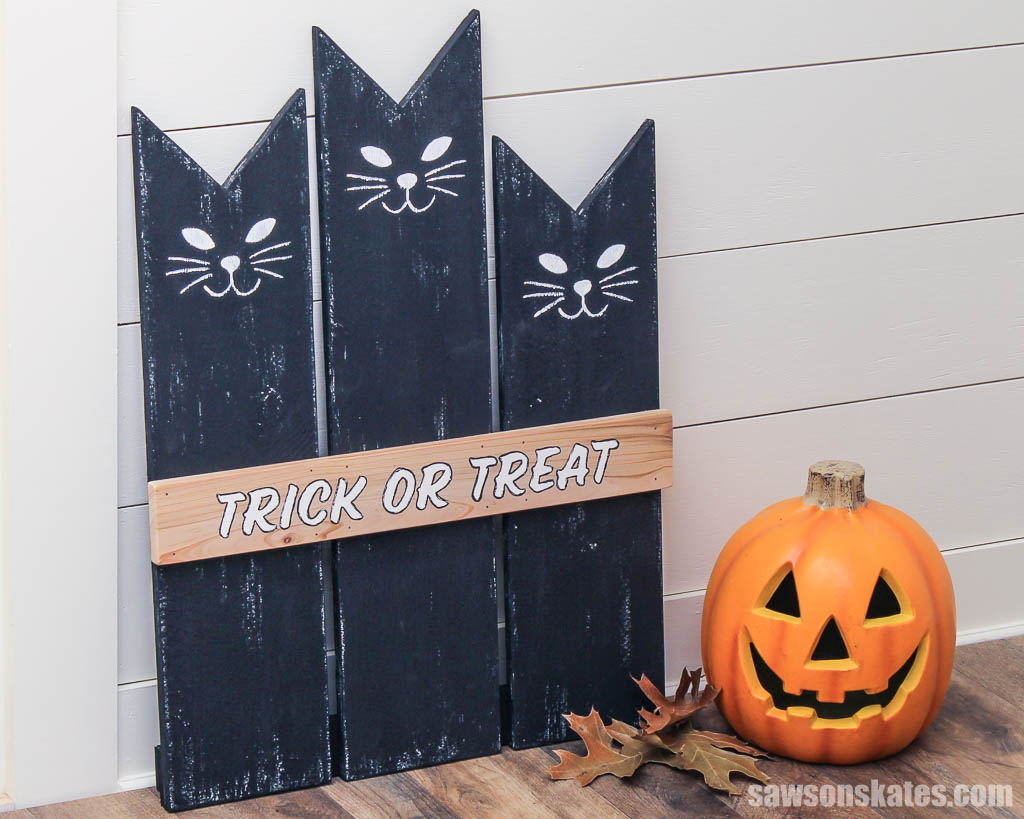
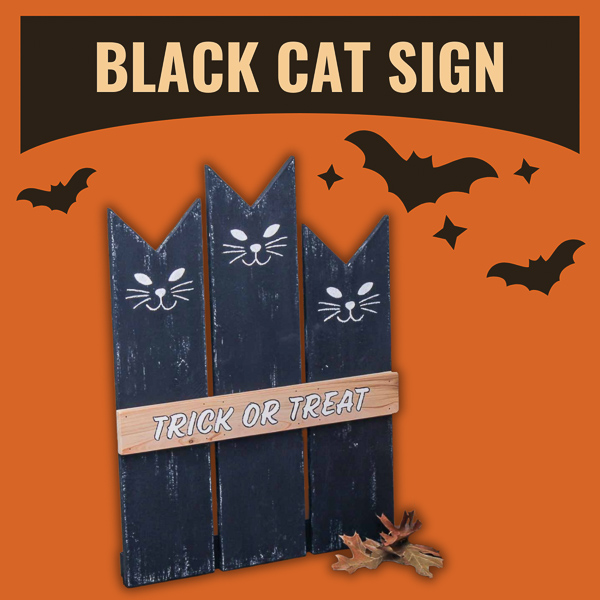
DIY Black Cat Halloween Sign
Add some Halloween cuteness to your decor with this DIY sign. Featuring vintage-style kitties, it’s the purr-fect way to welcome trick-or-treaters.
What Should I Build Next?
That's the question I help answer.
Every week, I send woodworking ideas to 17,000 DIYers who love building things.
You'd fit right in.
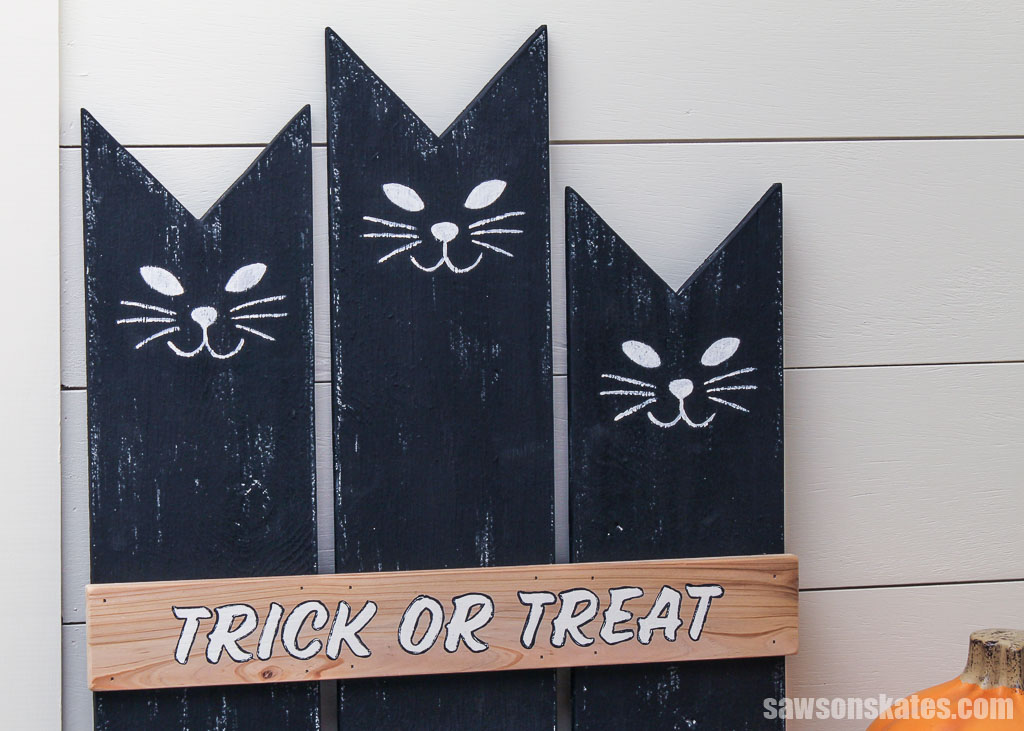
With a trio of vintage-inspired felines holding a playful “trick or treat” banner, this easy-to-make project is perfect for your porch, mantel, or any spot craving a touch of Halloween spirit.
It’s a breeze to make with this step-by-step plan. Plus, templates for the cat faces and lettering to help you complete the look.
Get ready to add a purr-fect touch to your Halloween decor.
Table of Contents
- What Wood Should You Use?
- What Tools Do You Need?
- How Do You Draw the Cat Faces?
- Step-by-Step Tutorial
- Get the PDF Plan
This article contains affiliate links. If you purchase from these links, I may earn a small commission at no additional cost to you. Visit my site policies for more information.
What Wood Should You Use?
You could make your porch leaner using pine boards. They’re usually pretty cheap and easy to find at most home improvement stores.
Related: How to Buy Wood
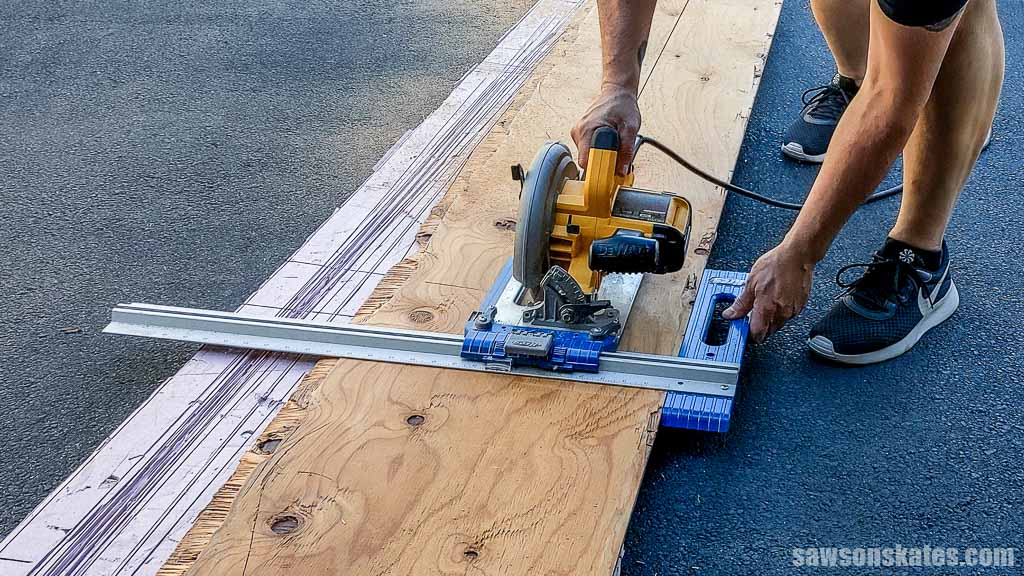
But I decided to go a different route. I had some T1-11 (a type of plywood siding) lying around from a garage repair project. So, instead of buying new wood, I ripped the plywood into strips using my circular saw and Kreg Rip-Cut.
For a bit of contrast on the banner, I used a scrap piece of cedar I had left over from building my raised planter.
What Tools Do You Need?
This Halloween cat sign is easy to make with only three common tools:
- Miter Saw
- Jigsaw
- Brad Nailer
OPTIONAL: Since I was repurposing plywood, I also used a circular saw and Kreg Rip-Cut to cut it to the correct width for the cats. You won’t need these tools if you’re using pine boards.
How Do You Draw the Cat Faces?
Sketching the cat’s face and lettering the sign could be tricky, especially if you’re like me and don’t have a knack for drawing. Fortunately, the PDF plan includes templates that take the guesswork of drawing the face and lettering the trick-or-treat text.
Grab your plan, print the patterns, trace them, and you’re good to go.
How to Make a DIY Black Cat Halloween Sign
Printed Plan
Get the PDF plan here (includes detailed instructions, measurements, and bonus tips)
Materials
- Wood (per the printed plan)
- 1-¼” Brad Nails
Tools
- Tape Measure
- Miter Saw
- Jigsaw
- Speed Square
- Brad Nailer or Hammer
Step 1. Make the Cats
I designed the cats so you could make them with store-bought boards. However, I had some T1-11 (a type of plywood siding) lying around from a garage repair project. So, instead of buying new wood, I ripped the plywood into strips using my circular saw and Kreg Rip-Cut.
Related: Beginner’s Guide to Wood Sizes
Using my miter saw, I cut three pieces to length for the cats.
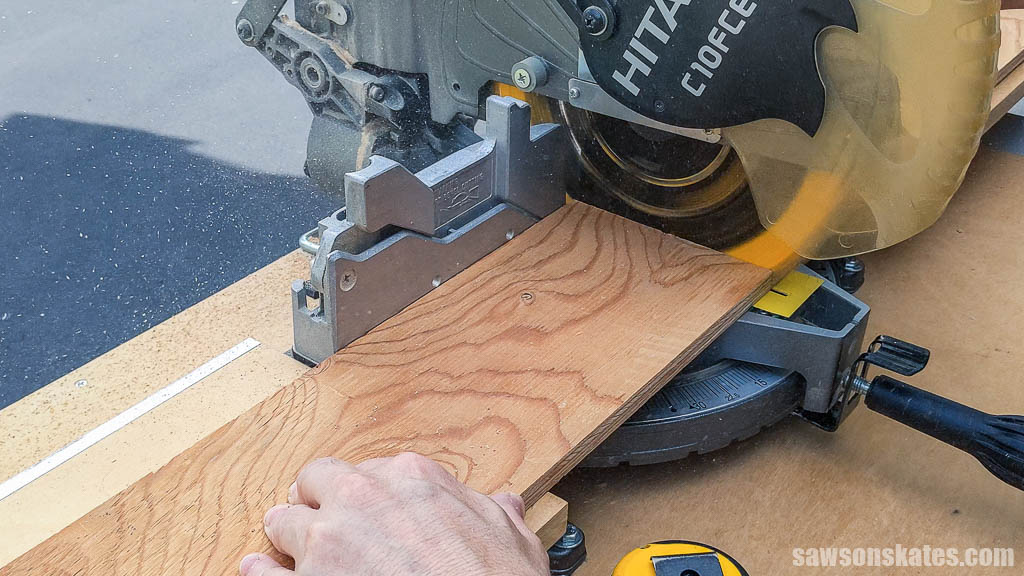
With a speed square, I marked two lines at a 45-degree angle from each corner on one end of the board to shape the cat’s ears.

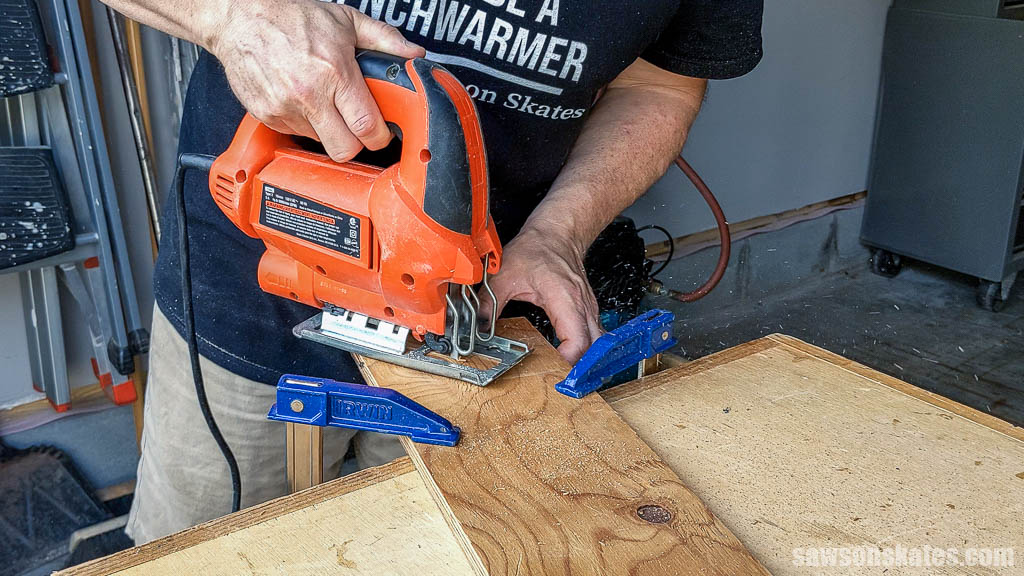
Using a jigsaw, I cut out the area between the ears.
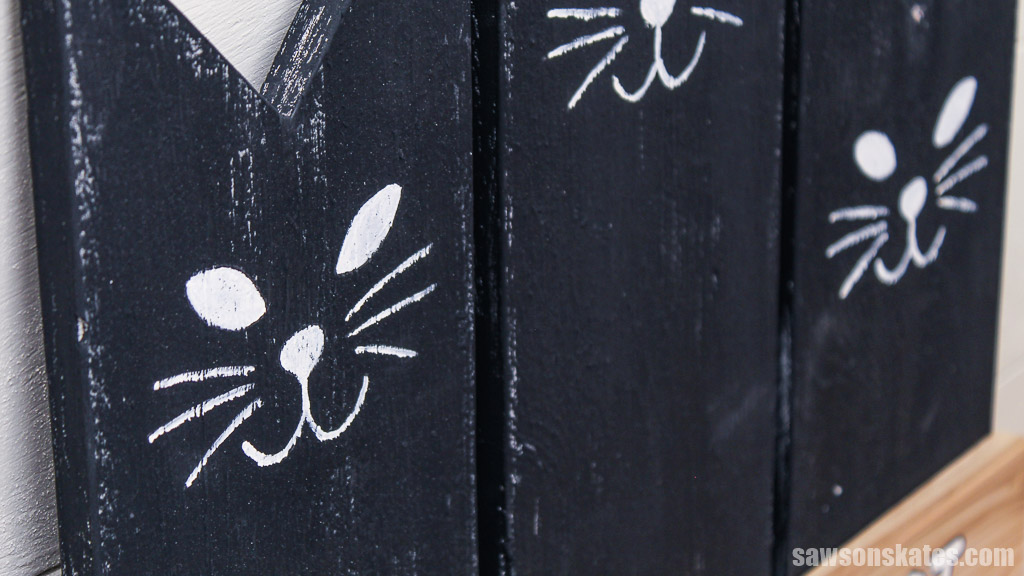
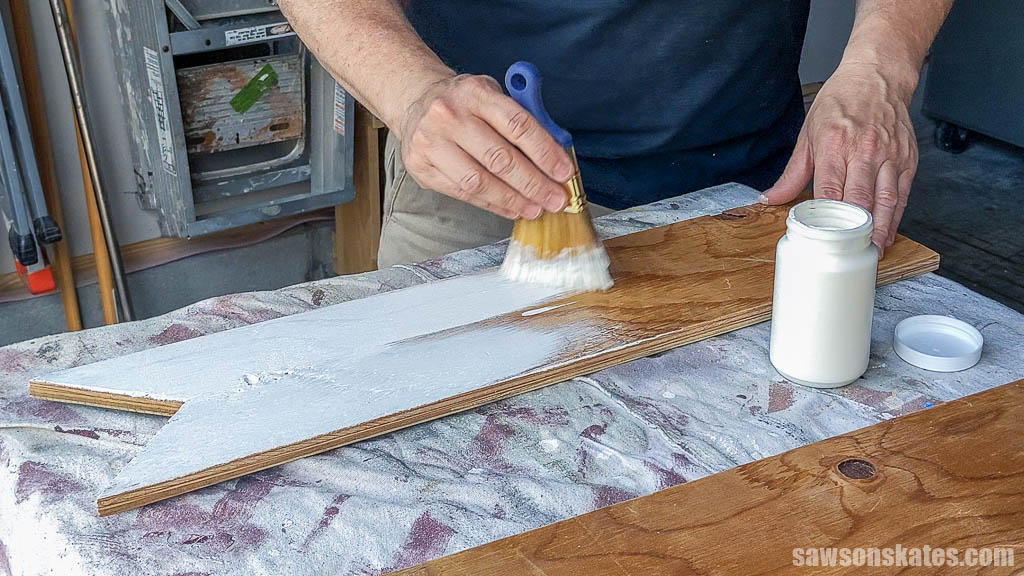
I first painted my cats with white chalk-type paint, then applied black, allowing some of the white to show through for a rustic look.
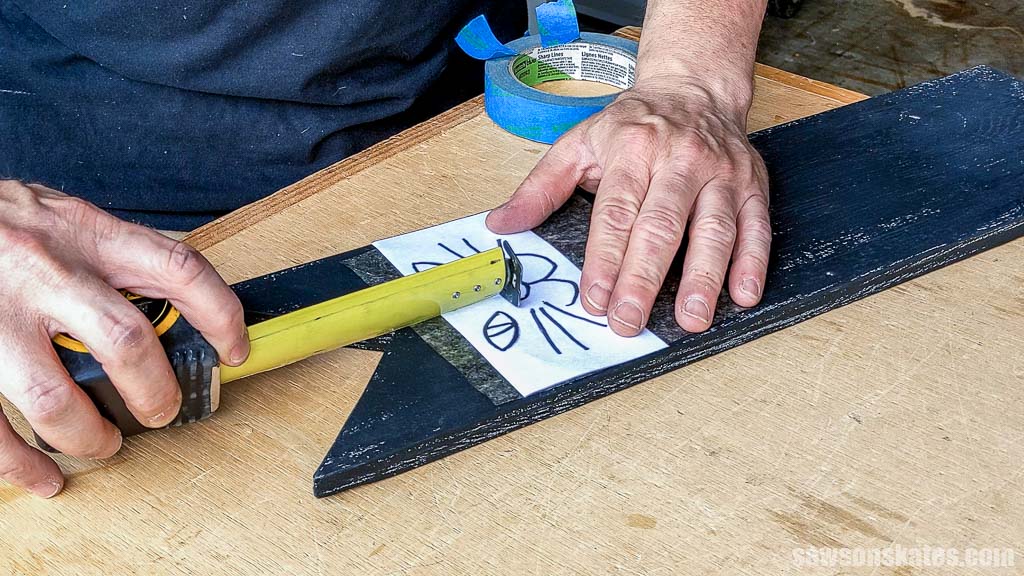
I placed a piece of carbon paper on the board, then positioned the cat face template (included with the plan) about two inches from the center of the ears to the top of the nose. I secured it with painter’s tape and traced the outline with a pencil.
TIP: When printing the template, make sure the scale is set to 100% (usually found under “more settings”).
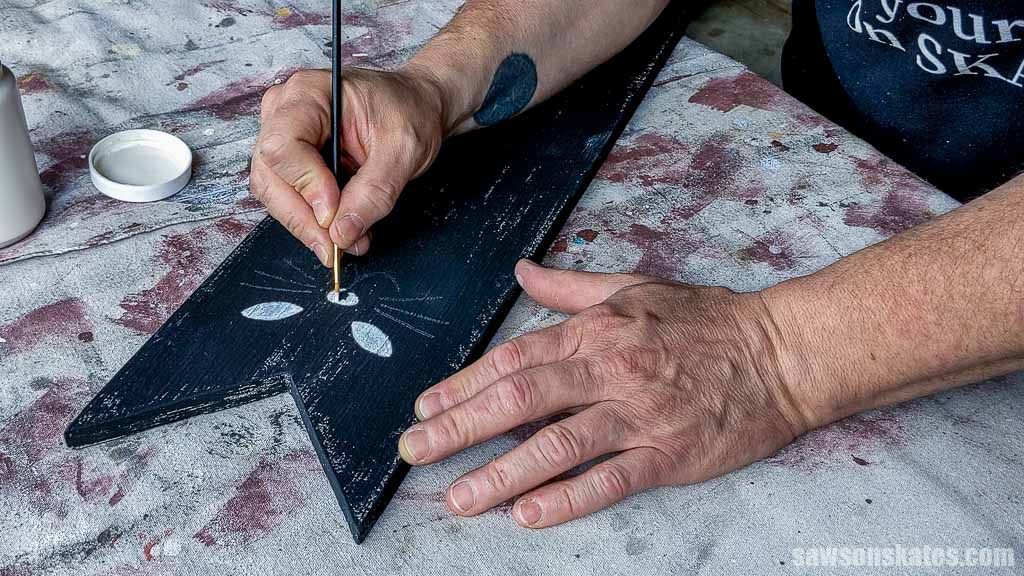
I painted the cat’s face using white chalk-type paint and an artist’s brush.
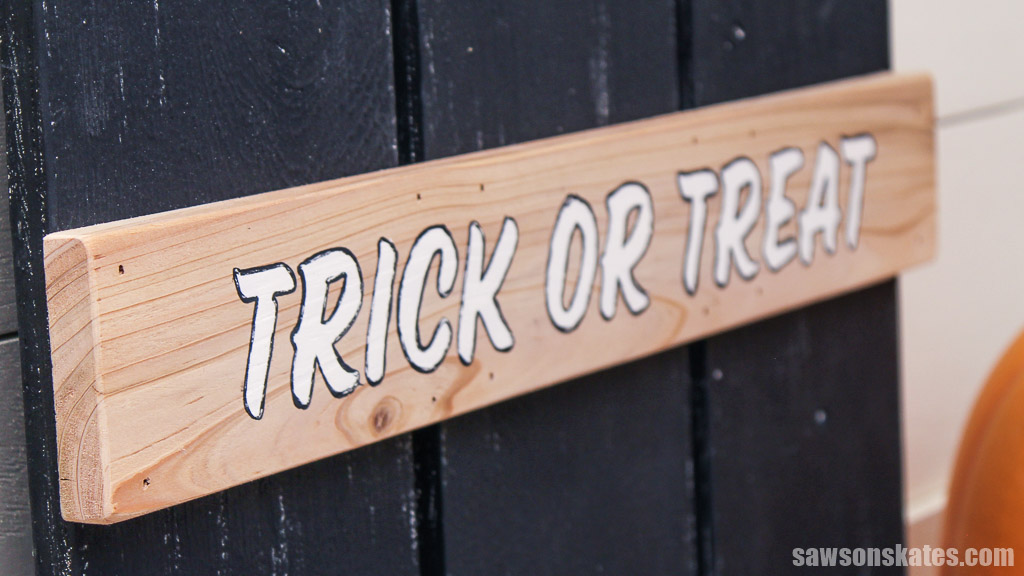
Step 2. Make the Banner
Again, I used repurposed material for the banner, this time a cedar board leftover from making my raised planter.
I traced the “trick or treat” template onto the board and painted the letters with an artist’s brush.
Step 3. Assemble the Cats
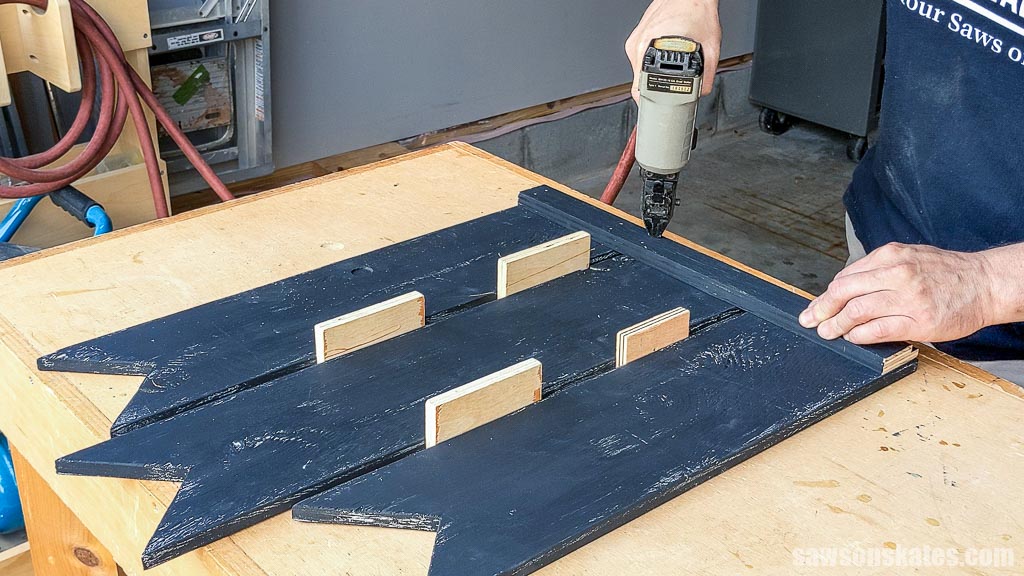
To help set the spacing between the cats, I placed scrap pieces of MDF between them.
You can use just about any board to join the bottom of the cats The its width isn’t critical as it sits behind the cats and is just meant to hold them together.
I positioned the board flush with the bottom of the cats and attached it with brad nails.
On the front side, to position the banner, I cut scrap wood pieces to length and placed them flush with the bottom of the cats.
Above the scrap wood, I centered the banner from side to side and attached it using brad nails.

Includes:
- List of tools and materials
- Complete measurements (in inches)
- Easy-to-follow instructions
- Step-by-step photos
- Detailed diagrams
- PDF templates
- BONUS: SVG files
or get the best value:
Final Thoughts
There you have it – a charming, Halloween cat sign to welcome trick-or-treaters. With a bit of creativity and these easy-to-follow steps, you can create a one-of-a-kind piece that’s sure to be the cat’s meow of your Halloween decor.
Don’t wait. Get your PDF plan (including the detailed instructions and measurements) now!
Thank you for stopping by. If you enjoyed this tutorial, would you please take a moment and pin it to Pinterest? I’d really appreciate it!
Recommended For You
Pin This For Later

Hi there – I’m Scott, a woodworking enthusiast and creator of Saws on Skates, a site I started in 2015 to share easy-to-follow tutorials, space-saving shop tips, and project inspiration for DIYers at any skill level. Learn more about my woodworking journey here.