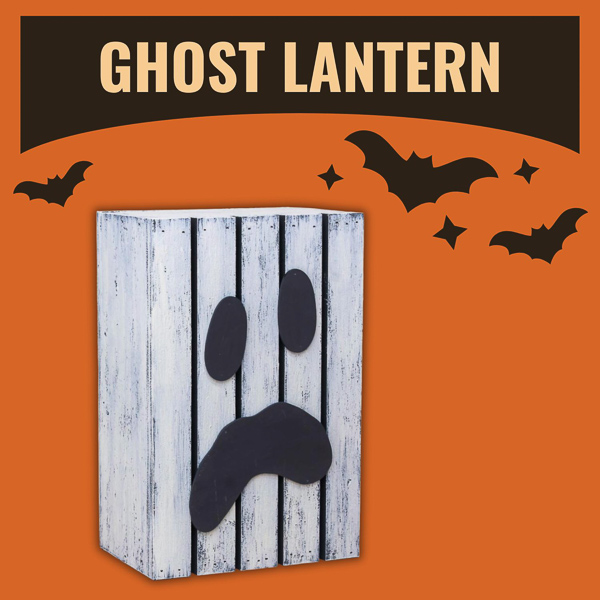
DIY Spooky Ghost Lantern (Includes Pattern)
Get into the Halloween spirit with this supernatural DIY ghost lantern! It’s easy to make with this template and step-by-step plans.
What Should I Build Next?
That's the question I help answer.
Every week, I send woodworking ideas to 17,000 DIYers who love building things.
You'd fit right in.
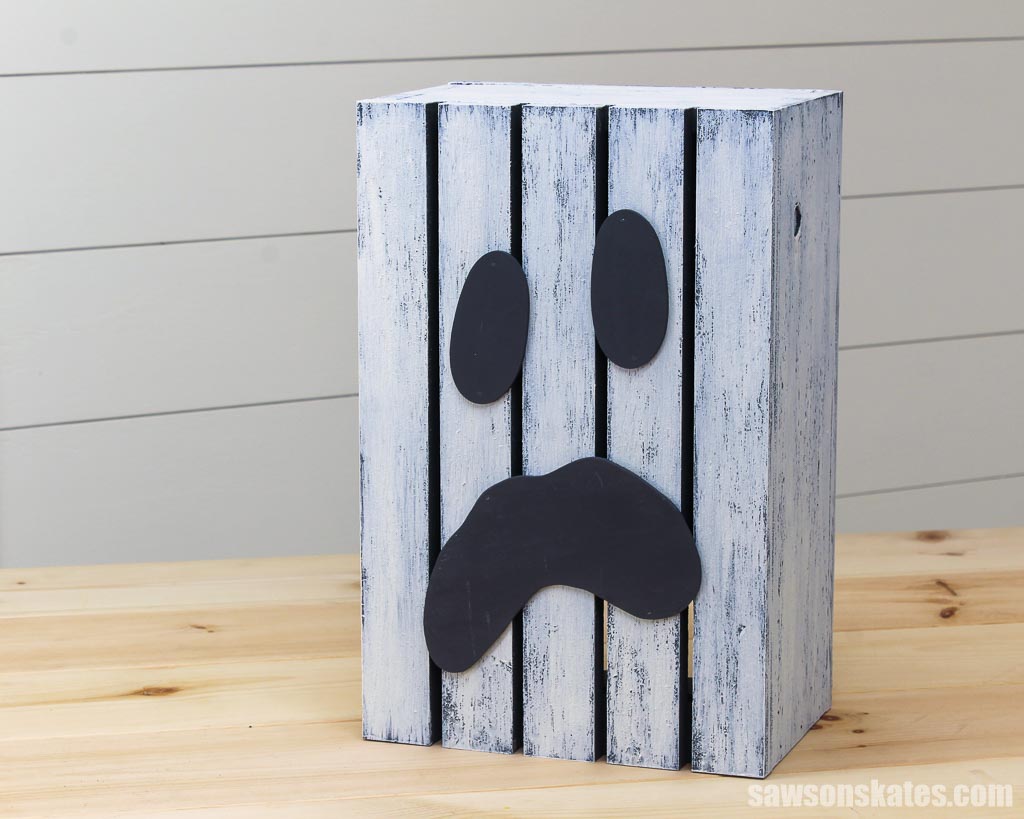
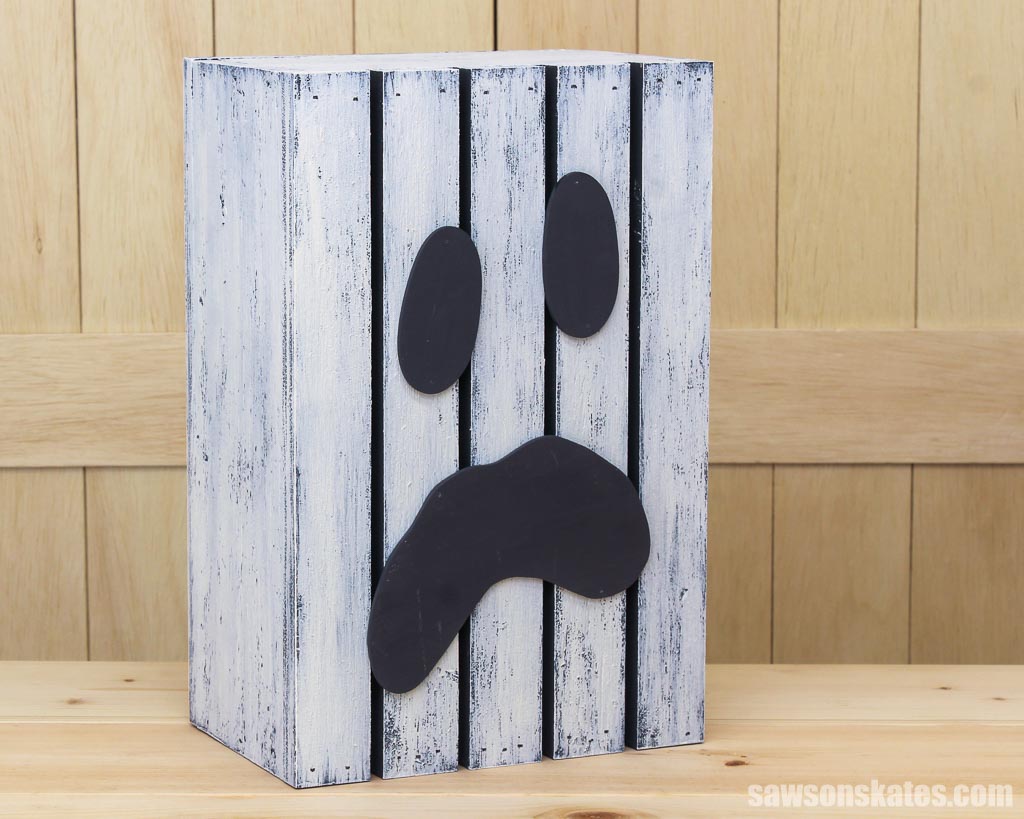
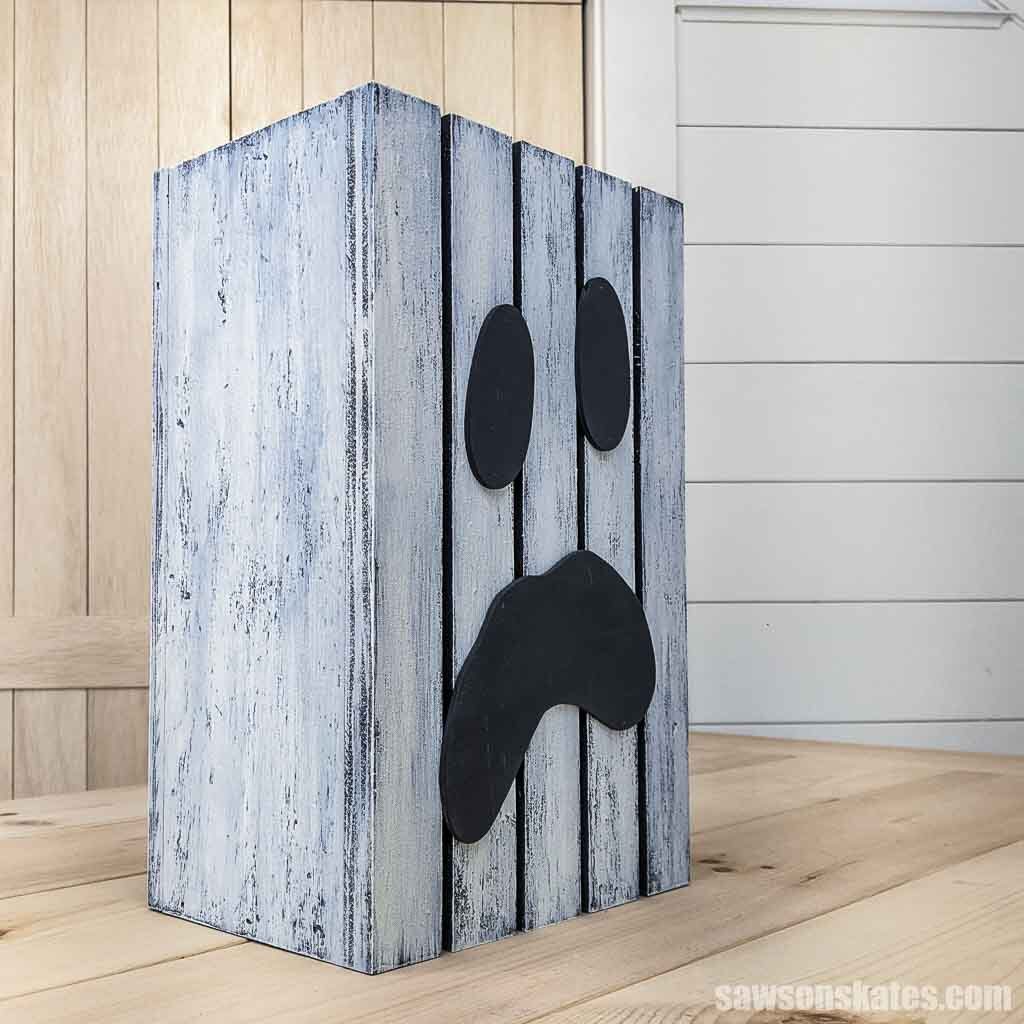
Looking for a spooky DIY project to do this Halloween? Check out this wooden ghost lantern! This simple project can be completed in just a few steps, and it’s perfect for adding some frightful fun to your holiday decor. Plus, the printable plan includes a pattern so you can get started right away.
Table of Contents
- Inspiration for This DIY Ghost Lantern
- What Tools Do You Need?
- What Wood Should You Use?
- How Do You Draw the Ghost’s Face?
- What Candles Should You Use?
- How Do You Finish the DIY Wooden Ghost Lantern?
- How to Make a DIY Ghost Lantern
- Get the PDF Plan
This article contains affiliate links. If you purchase from these links, I may earn a small commission at no additional cost to you. Visit my site policies for more information.
Inspiration for This DIY Ghost Lantern
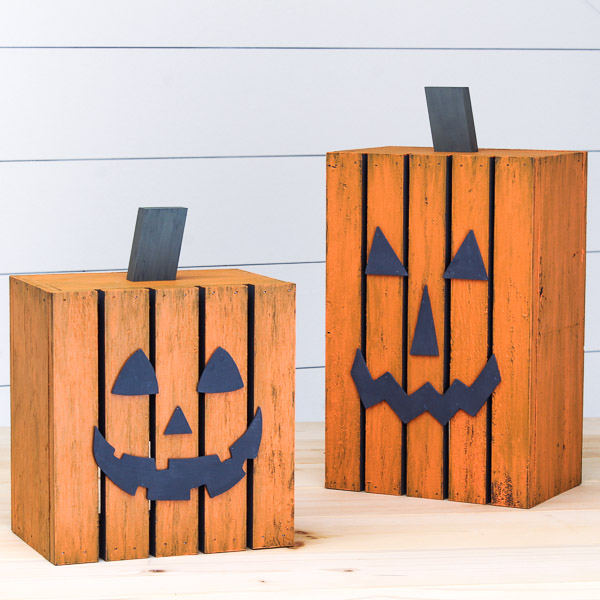
A while back, I shared how to make these wooden pumpkin lanterns. People loved them, so I thought it would be fun to create another version.
Those easy-to-make pumpkin lanterns inspired this ghost lantern, but instead of a jack-o-lantern face, this project has an eerie ghost face. So if you made the pumpkins, you’ll want to add this new version to your collection!
What Tools Do You Need?
The only tools you need for this simple project are a miter saw and a scroll saw. I also used a pin nailer and a brad nailer to speed up the assembly process, but they’re not required.
Though I designed the printed plan to use boards, I used plywood instead. This change required some different tools that I’ll explain more about in the wood section below.
Miter Saw
I cut all parts to length for this project using a miter saw.
Scroll Saw
A scroll saw is ideal for cutting the ghost’s face. If you don’t have one, a jigsaw might work too but go slowly and use caution as the pieces are small. We want all ten of your fingers at the end of this project!
Nailers (optional)
If you have a brad nailer and a pin nailer, those work best to assemble the lantern and attach the ghost’s face. If you don’t have these tools, no problem! You could always use a hammer and nails instead.
Related: Pin Nailer vs Brad Nailer (Differences + Which to Use)
What Wood Should You Use?
All you need to make this lantern are some inexpensive pine boards that you can find at almost any home improvement store. You don’t need much material, so scrap wood would work perfectly for this project!
Related: 71 Scrap Wood Projects (Clever Ways to Reuse Old Wood)
I had some leftover T1-11 plywood siding from repairing my garage, so instead of buying new boards, I ripped the siding into strips using a circular saw and my Kreg Rip-Cut.
Related: 4 Ways to Make Straight Cuts with a Circular Saw

Your lantern might look slightly different because the plywood siding I used is thinner than pine boards, but it will still be spooktacular!
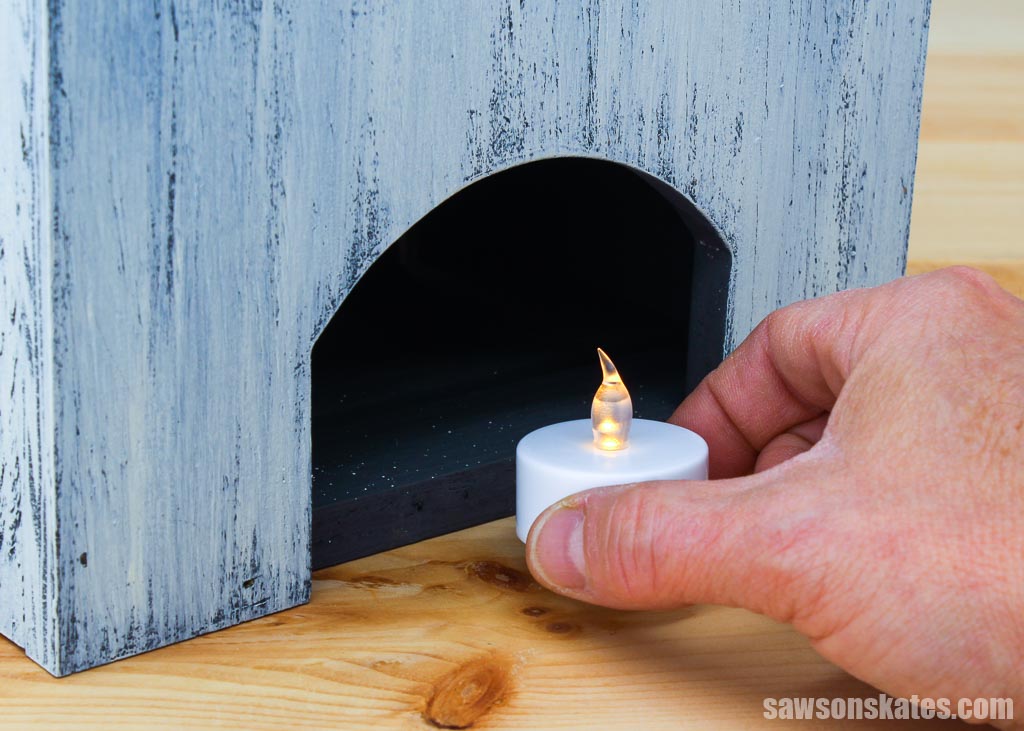
The downloadable plan calls for multiple boards to make the lantern’s back, but I only needed one because I used plywood siding, and I cut an opening in the plywood for the flameless candle using a jigsaw.
I made my ghost’s face out of leftover 3mm plywood from making these picture frame Christmas ornaments. I am always looking for ways to use up scraps, and this was a perfect opportunity!
If you don’t have or don’t want to buy 3mm plywood, nearly any thin material, like lauan, hardboard, etc., will work.
How Do You Draw the Ghost’s Face?
If you’re not confident in your ability to draw a ghost’s face, don’t worry! The printable plan includes a pattern for his eyes and mouth.
Just grab your plan, print the pattern, trace it, and then use a saw to cut the parts.
What Candles Should You Use?
For your safety, please only use flameless LED candles in this lantern. It’s made of wood, so real candles would be a fire hazard!
How Do You Finish the DIY Wooden Ghost Lantern?
You can leave your lantern natural or paint it, but if you want your ghost to look weathered and creepy like mine, follow these steps.
First, I applied a coat of charcoal chalk-type paint to the plywood strips before beginning assembly, as this would be easier than attempting to brush the paint on after putting everything together.
Once the lantern was assembled, I white-washed it with several thin coats of white craft paint. I allowed the charcoal color to show through, which created an aged effect.
How to Make a DIY Ghost Lantern
Printed Plan
Get the PDF plan here (includes detailed instructions, measurements, and bonus tips)
Supplies
- Wood (per the printed plan)
- Wood Glue
- 1-¼” Brad Nails
- ½” Pin Nails
Tools
- Tape Measure
- Miter Saw
- Scroll Saw
- Brad Nailer (optional)
- Pin Nailer (optional)
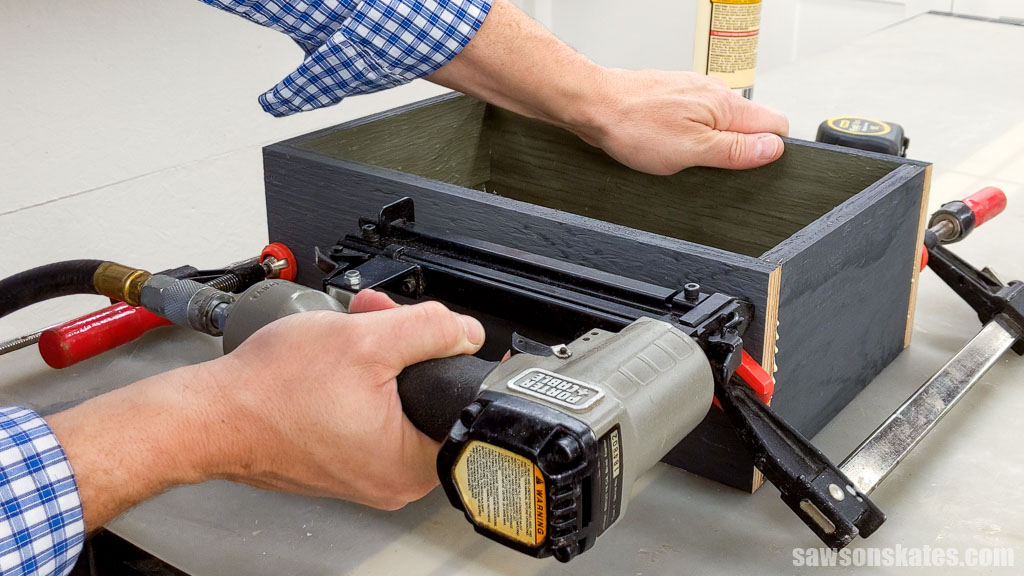
Step 1. Make the Box
Cut four pieces of wood to length, two for the top and bottom and two for the side panels.
To attach the sides, apply glue to the ends of the top and bottom. Next, position the sides and attach them using brad nails.
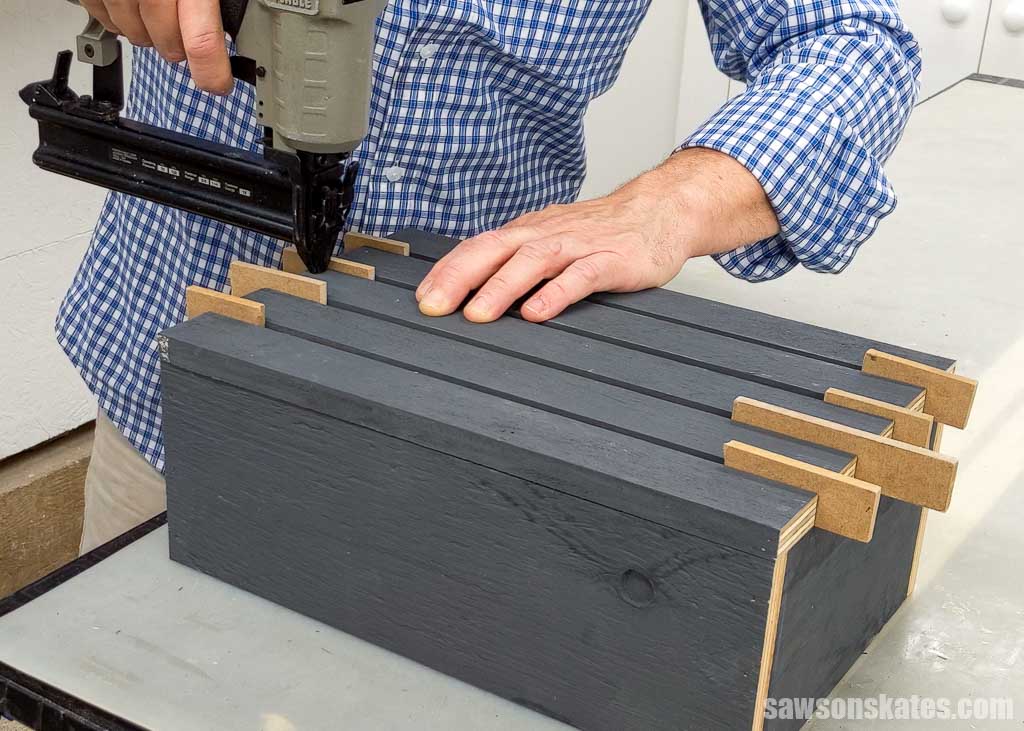
Step 2. Attach the Slats
You’ll need five pieces of wood cut to length for the slats.
Refer to the diagram in the printed plan to arrange the slats on the box, then attach them using brad nails.
TIP: I positioned the slats by placing MDF pieces between them, but you could use any wood, such as plywood.
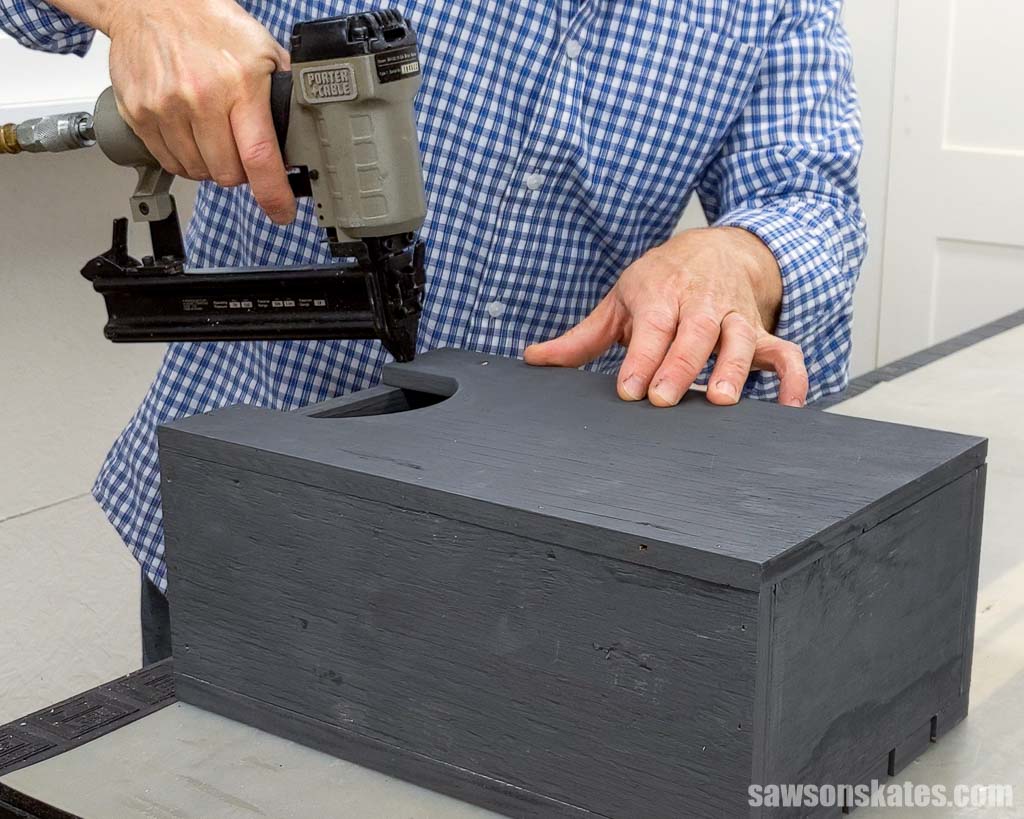
Step 3. Attach the Back
You’ll need three pieces of wood cut to length for the back.
Place the pieces on the back and attach them using brad nails.
NOTE: The back of the lantern is open at the bottom, allowing you to insert the LED candle easily.
The printed plan calls for three boards at the back, but I only needed one because I used plywood. I cut an opening for the flameless candle using a jigsaw.
Step 4. Paint the Ghost Lantern
See How Do You Finish the DIY Wooden Ghost Lantern for more information.
Step 5. Attach the Face
Print out the pattern for the ghost’s face located on the last page of the plan.
I prefer my templates to be rigid, so the pencil has a guide to follow. To do this, I spray adhesive on a manila folder, place the face over it, and then cut out the design with scissors.
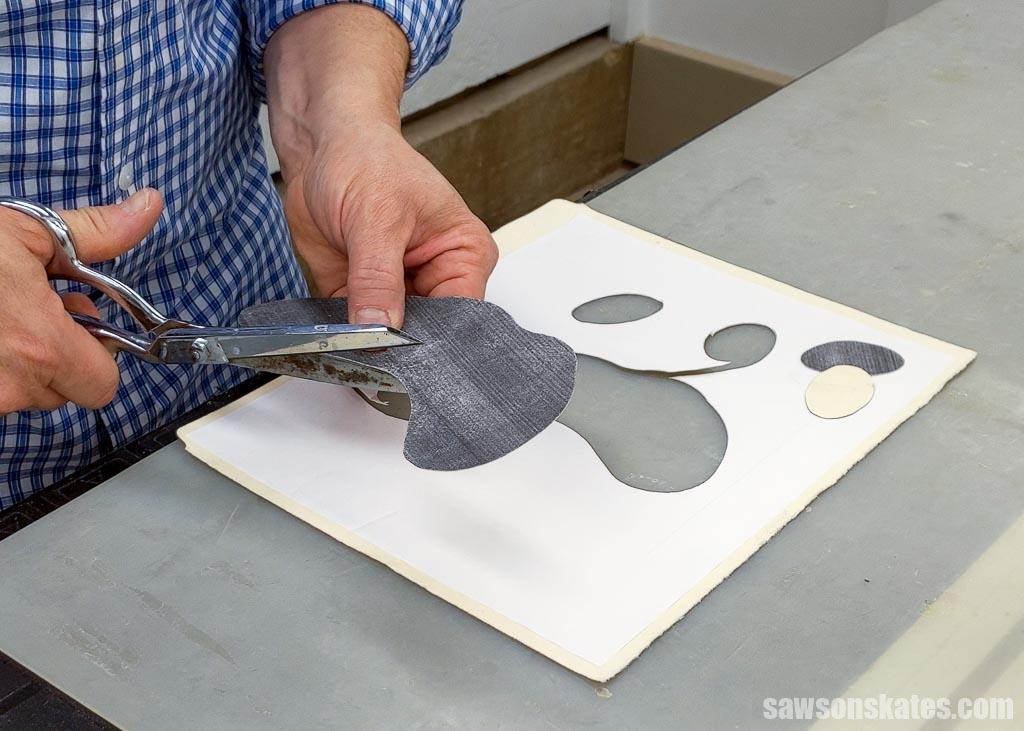
I traced the face onto 3mm plywood, but you can use any thin material like hardboard, paneling, or lauan.
Next, I used my scroll saw to cut out the face shapes.
After cutting the wood, I sanded any rough edges with 120-grit sandpaper.
Then, I painted the eyes and mouth with the same charcoal paint I used for the lantern.
Once the paint was dry, I attached the shapes to the lantern with glue and pin nails.
Includes:
- List of tools and materials
- Complete measurements (in inches)
- Easy-to-follow instructions
- Step-by-step photos
- Detailed diagrams
- Ghost face template
- BONUS: SVG ghost face
or get the best value:
Final Thoughts
This DIY ghost lantern is a great way to get in the Halloween spirit. With just a few simple steps, your wooden ghost will be ready to haunt any room of your home!
Get your PDF plan (including the detailed instructions and measurements) now!
Thank you for stopping by. If you enjoyed this tutorial, would you please take a moment and pin it to Pinterest? I’d really appreciate it!
Recommended For You
Pin This For Later

Hi there – I’m Scott, a woodworking enthusiast and creator of Saws on Skates, a site I started in 2015 to share easy-to-follow tutorials, space-saving shop tips, and project inspiration for DIYers at any skill level. Learn more about my woodworking journey here.