DIY Wooden Bottle Opener (Pop Tops in Style)
From stash to splash. Make a stylish, DIY handheld bottle opener with scrap wood and basic tools. Step-by-step plan and template included.

What Should I Build Next?
That's the question I help answer.
Every week, I send woodworking ideas to 17,000 DIYers who love building things.
You'd fit right in.
Do you love a refreshing beverage but are tired of boring openers? Uncap your creativity with this easy DIY project. I’ll show you how to create a unique wooden bottle opener using scrap wood, basic tools, and my template. Get ready to impress your guests with this easy-to-make project that will have you popping tops in no time.
This article contains affiliate links. If you purchase from these links, I may earn a small commission at no additional cost to you. Visit my site policies for more information.
Inspiration for This Handheld Bottle Opener
Has anyone ever given you a project idea that’s clever, functional, and affordable?
That’s what happened to me recently when Gerald, a faithful reader with a passion for the metric system, suggested making a wooden handheld bottle opener. He makes his top popper’s handle using scrap wood and an inexpensive washer for the opener itself.
I thought it was brilliant, especially as a gift idea for birthdays, Mother’s Day, Father’s Day, or even a stocking stuffer, so I decided to give it a try with a few tweaks to its size and shape.
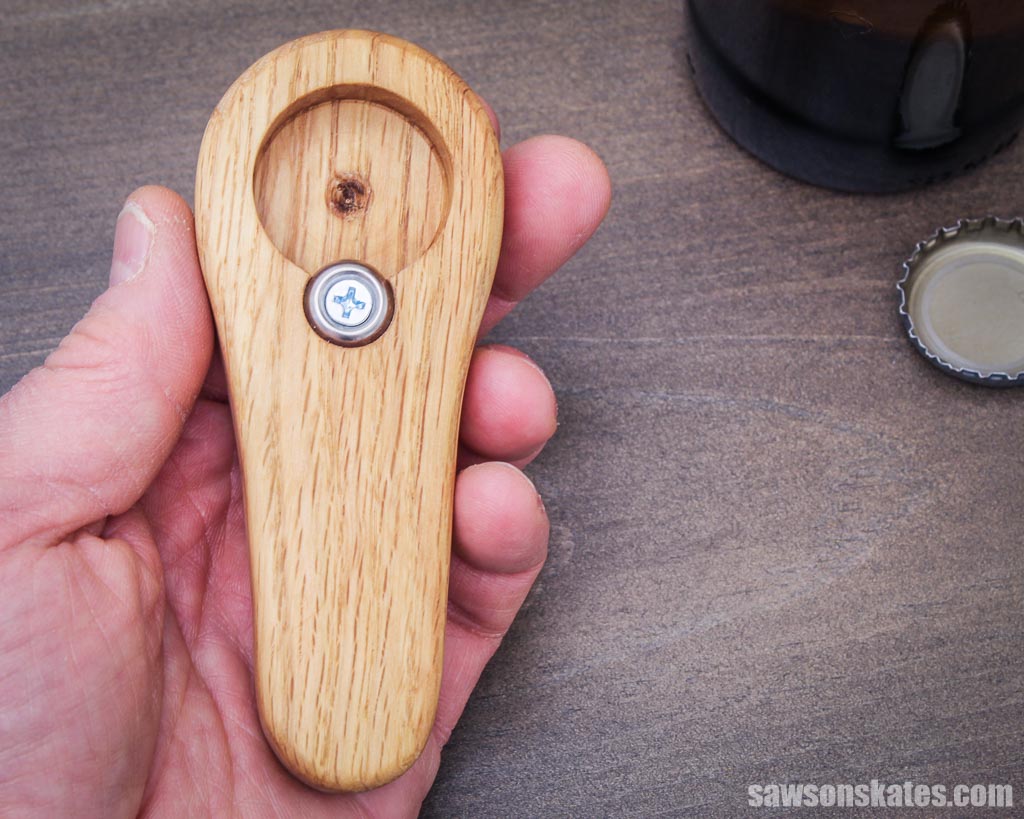
The result? A beautiful, functional, solid wood bottle opener with a timeless design.
What Wood Should You Use for a DIY Bottle Cap Opener?
Gerald hit the nail on the head when he cautioned that it’s important to consider the type of wood you use for this project: “It must be sturdy enough to sustain the stress of opening a bottle.”
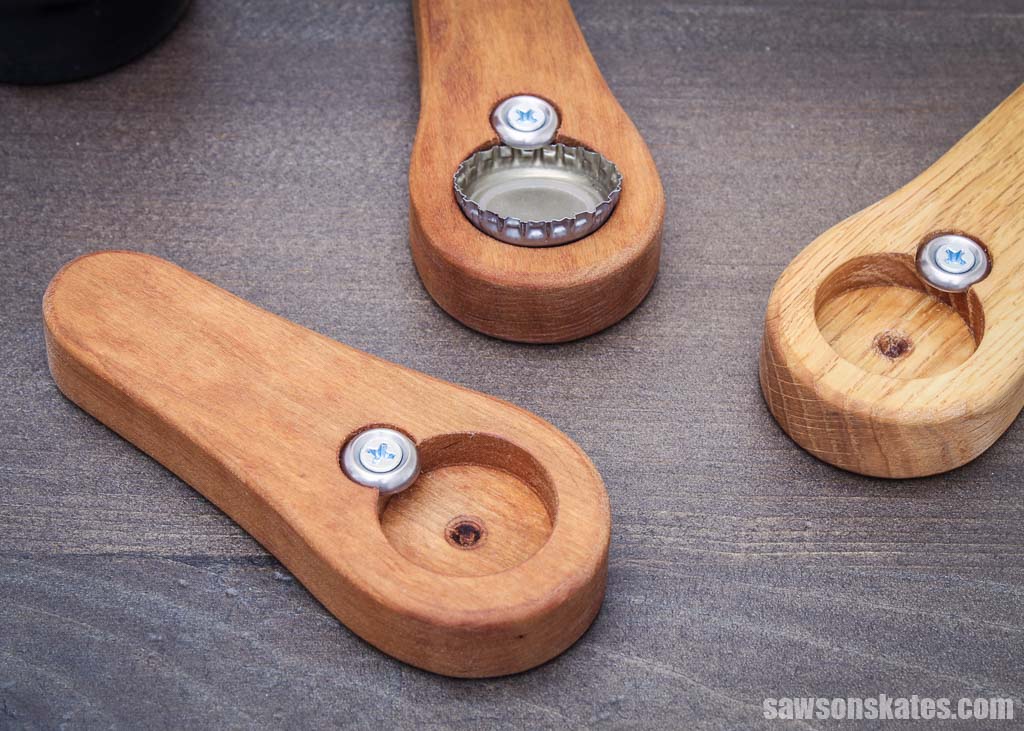
Softwoods like pine just won’t cut it (pun intended) as they dent too easily. Hardwoods like oak and walnut are the way to go – they are super sturdy, and their beautiful grain patterns make for a stunning result.
Another bonus? This project doesn’t require a lot of material, so it’s a perfect way to use your cutoffs. I used some cherry and white oak I had lying around, and they worked great.
What Tools Do You Need to Make a Wooden Bottle Opener?
I used three tools to make my wooden bottle openers:
- Drill press: I used my drill press and a Forstner bit to make the holes in the opener.
- Scroll saw: I used my scroll saw to cut out the handle’s shape, but you might be able to use a bandsaw instead.
- Trim router: I used my trim router and an ⅛ inch roundover bit to soften the handle’s edges.
Optional:
For smoothing the saw marks and fine-tuning the handle’s curves, I reached for my portable spindle sander. While you could use sandpaper, the sander allows for faster, more even results.
How Do You Draw the Bottle Opener’s Shape?
Skip the measuring. Gerald provided me with the measurements, which I used to create a handy template, eliminating the need for any measuring.
Print the template. Trace it on your board, and you’re good to go.
Customize Your Bottle Opener
You can transform your bottle opener from functional to fabulous with a laser engraver. If you have access to one, you can personalize your opener with names, initials, or quotes for a unique gift or conversation starter.
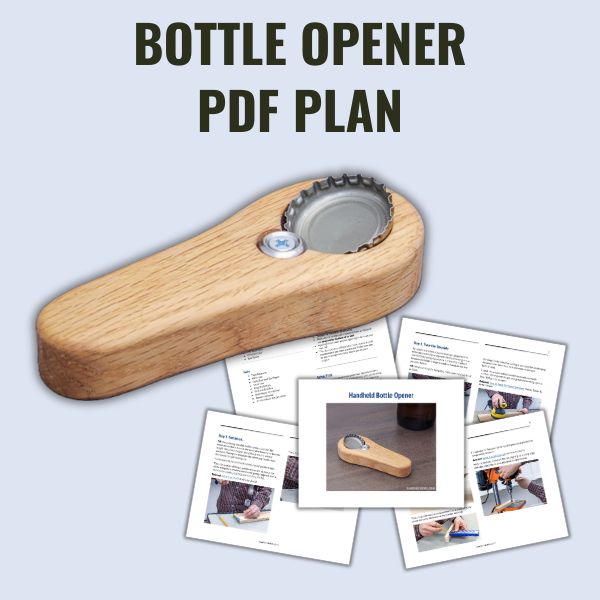
How to Make a DIY Wooden Bottle Opener
Printed Plan
Get the PDF plan here (includes detailed instructions, measurements, and bonus tips)
Materials
- Wood (per the printed plan)
- #6 Countersunk Washer
- #8 Countersunk Washer
- #6 ½” Wood Screw
Tools
- Kreg Multi-Mark
- Scroll Saw or Band Saw
- Drill
- Drill Press
- ½” Forstner Bit
- 1″ Forstner Bit
- ⁷/₆₄” Drill Bit
- Router
- ⅛” Roundover Bit
- Portable Spindle Sander (optional)
Before You Begin
Huge thanks to Joe, a faithful reader, for catching a discrepancy in the bottle opener’s measurements. He went the extra mile by making a few samples to figure out the correct spacing and shared the info with me. I’ve updated the PDF plan with the corrections and included some of his helpful tips.
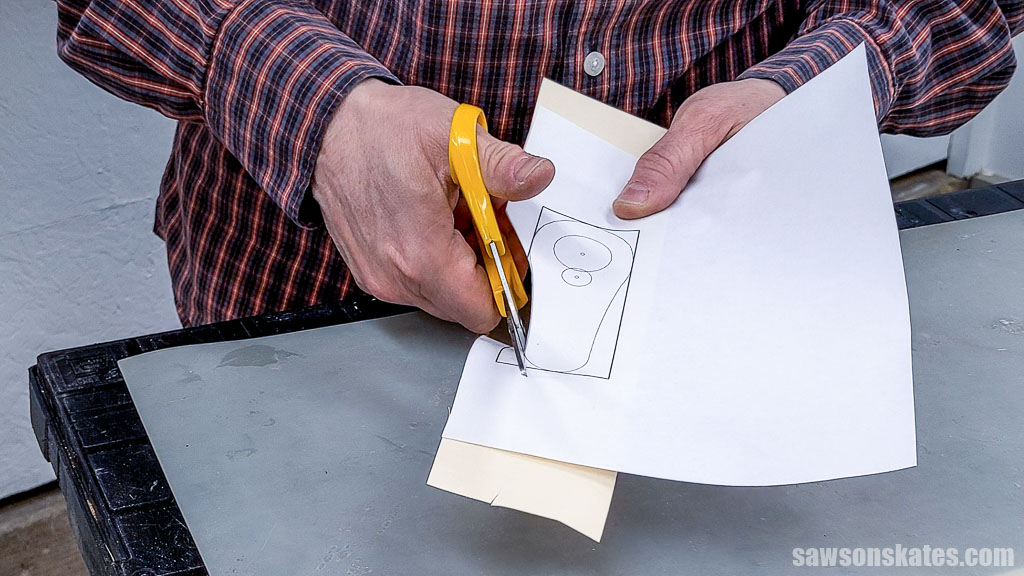
Step 1. Trace the Template
For easier and more accurate tracing, I prepared the template (located at the end of the printed plan) by attaching it to a manila folder using a glue stick. I prefer this method because the folder’s edge provides a handy lip for the pencil to follow.
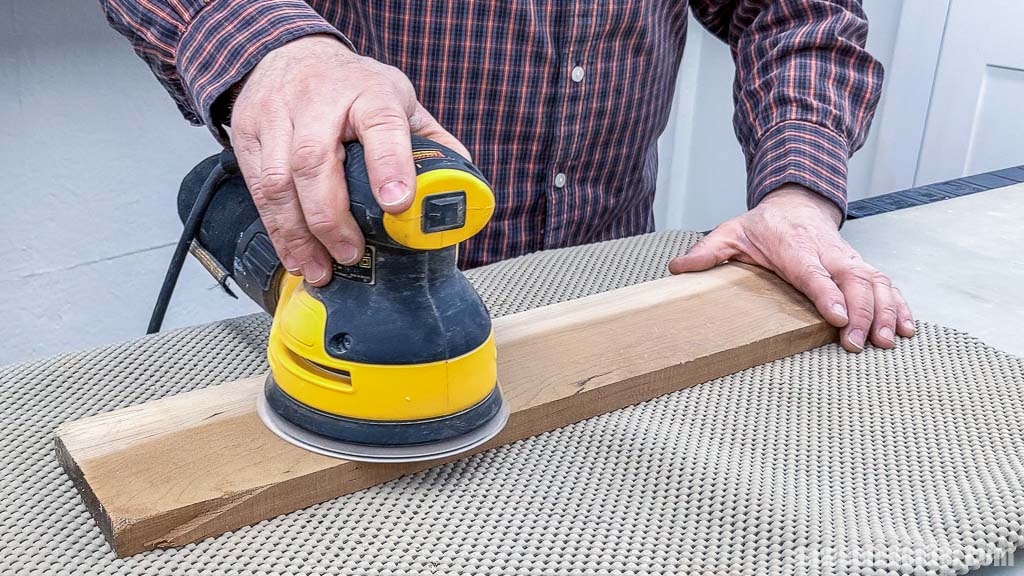
Sanding the handle after cutting it out could be challenging because of its small size, so I recommend doing it beforehand.
I used my random orbital sander to create a smooth surface, starting with 80-grit and gradually working up to a finer 150-grit sandpaper.
Related: How to Sand DIY Wood Furniture (Faster, Easier & Better Result
TIP: For a strong, durable bottle opener, position the template so that it runs in the same direction as the board’s length. Wood is strongest along the grain and weaker across it. Placing the template the other way could cause the opener to split during use.
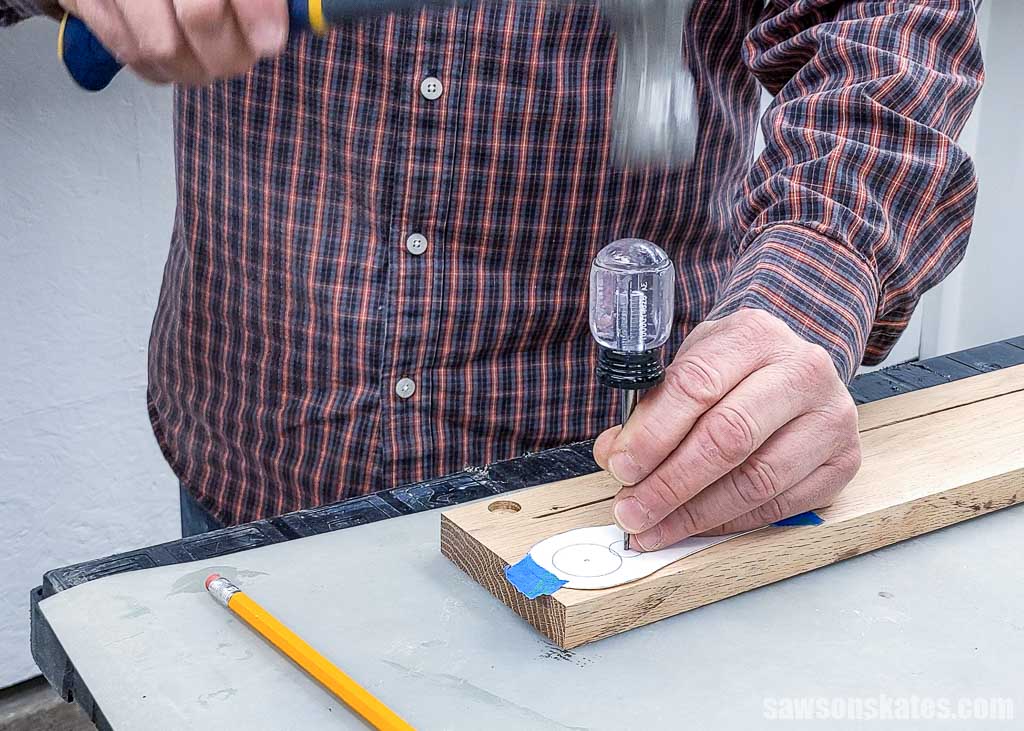
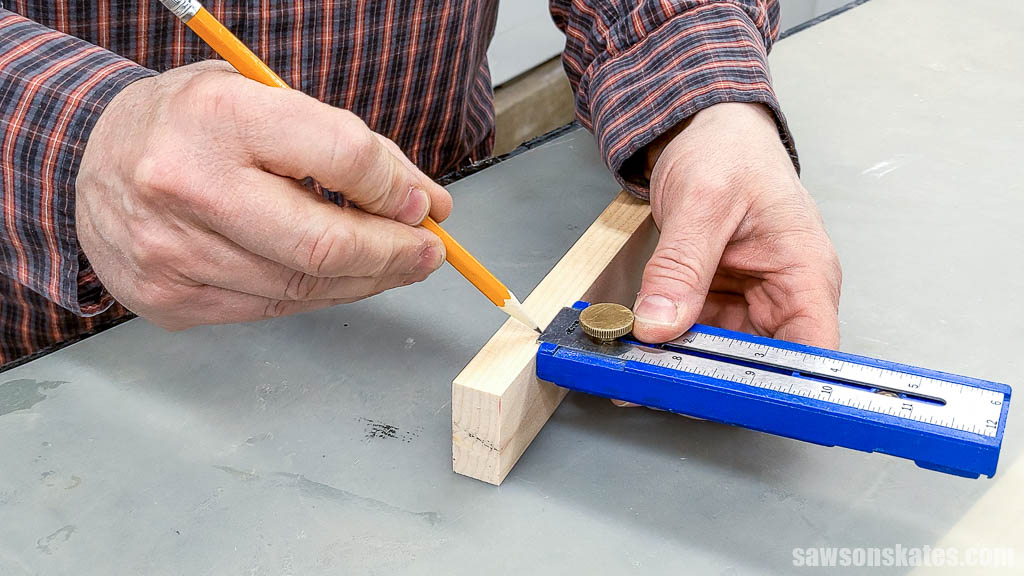
To temporarily secure the template, I used painter’s tape. Then, for precise drilling, I positioned an awl at the center of the template’s smallest circles and gently tapped it with a hammer to create a starting point for the drill bit.
Related: What is an Awl? (& How to Use It)
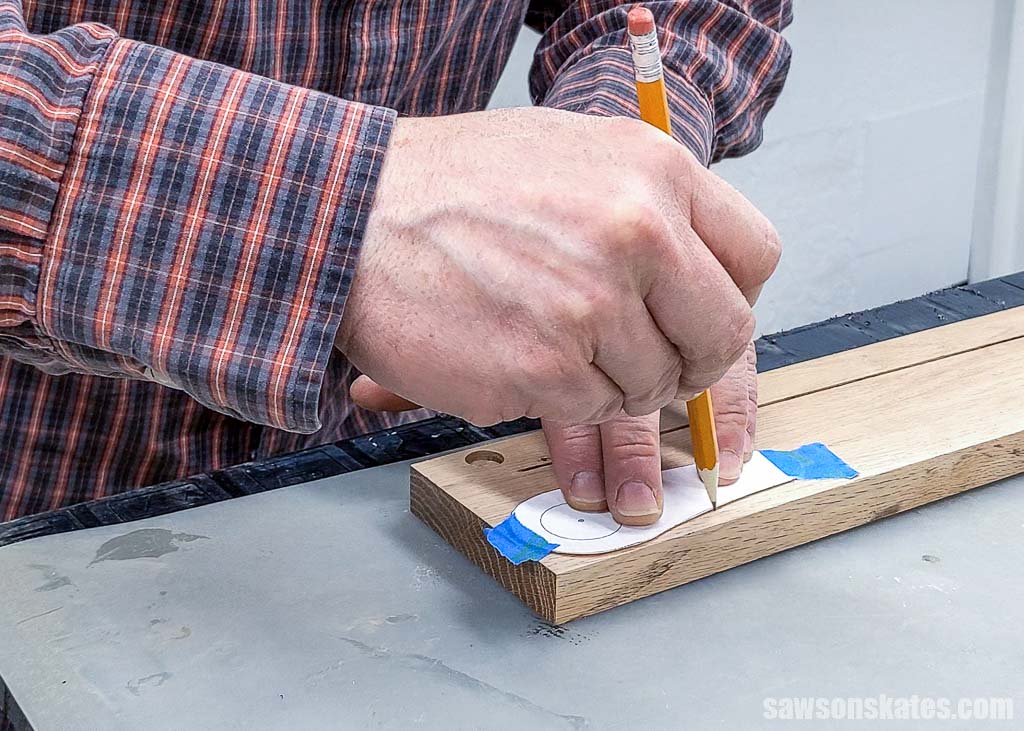
Then, I traced the template’s shape onto the board.
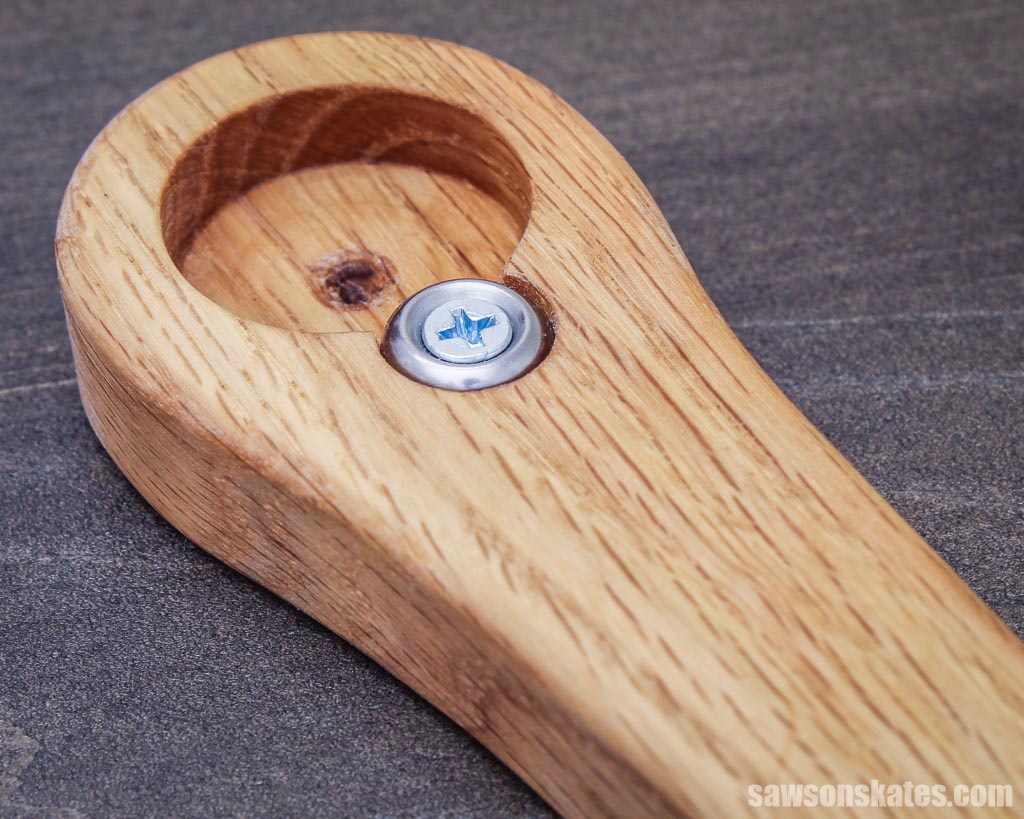
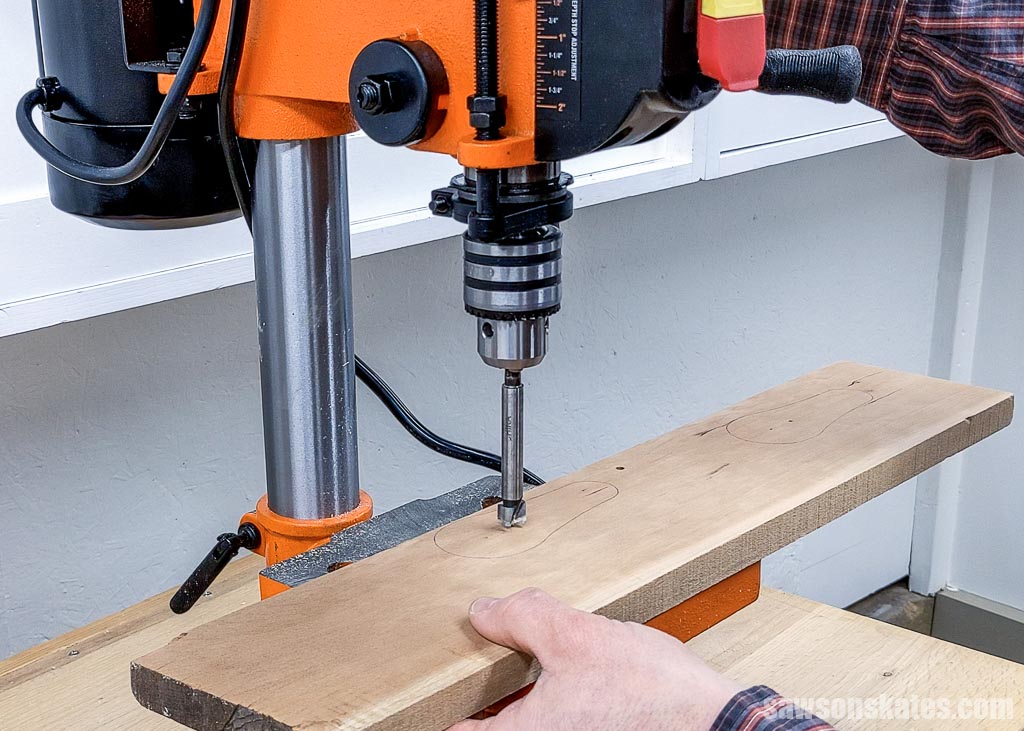
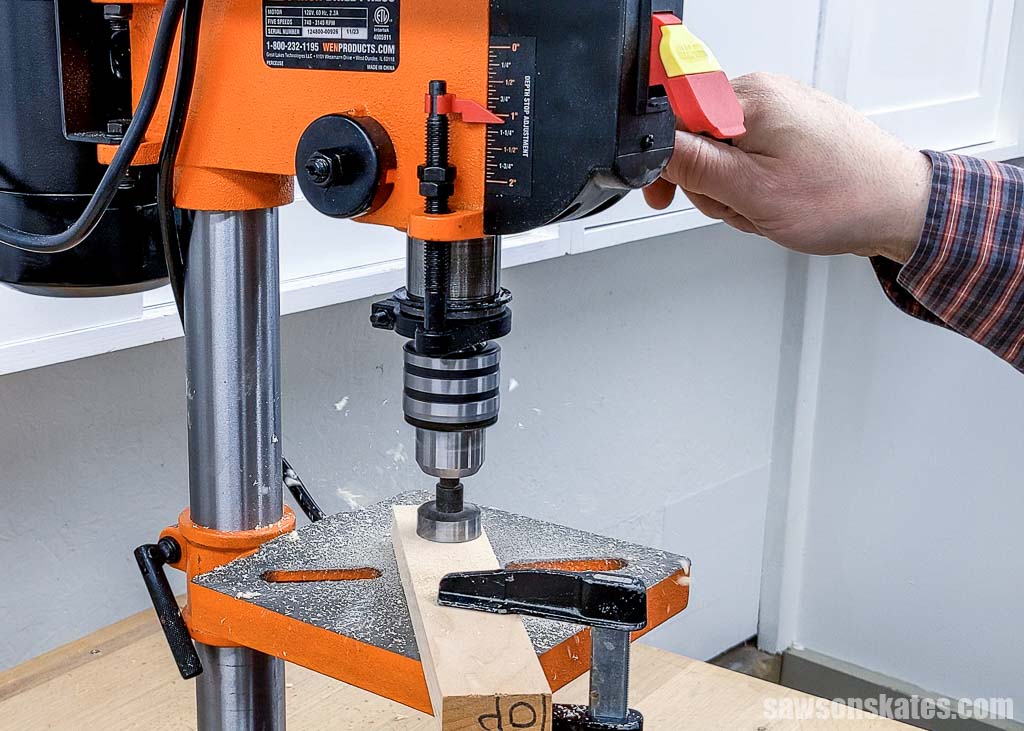
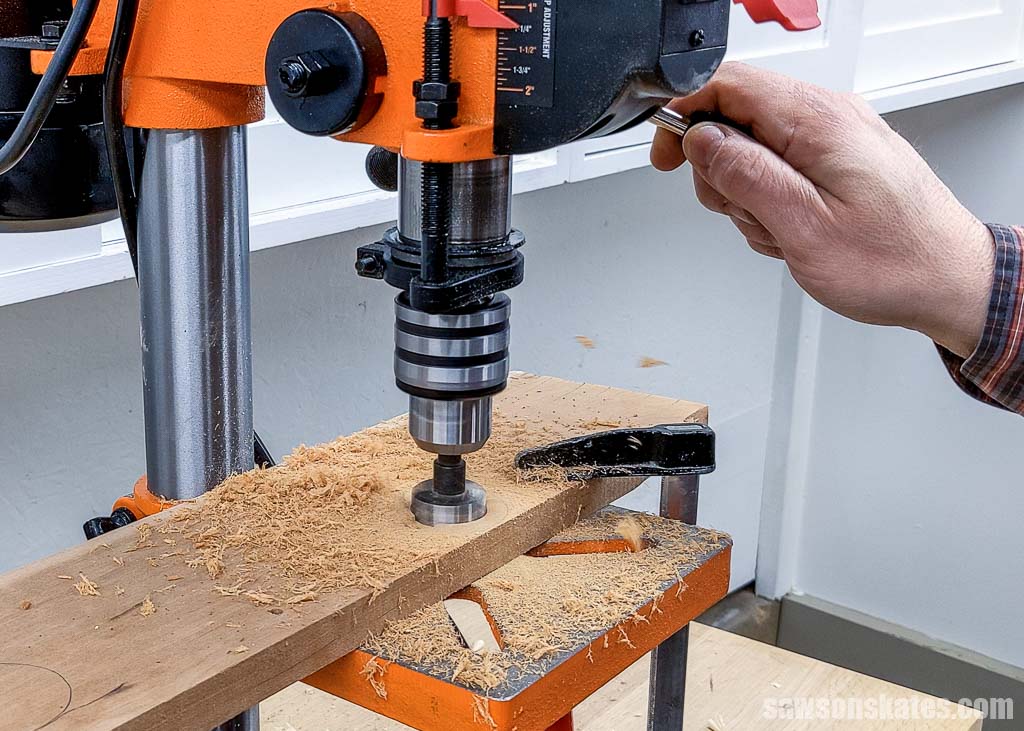
Step 2. Make the Washer Recess
I set my Kreg Multi-Mark and transferred that measurement to a piece of scrap wood the same thickness as my handle material.
I installed a Forstner bit in my drill press and placed the scrap wood beside it.
Related: What is a Forstner Bit? (& How to Use It)
With the drill off, I lowered the bit, aligning its cutting edge with the pencil mark, and adjusted the depth stop.
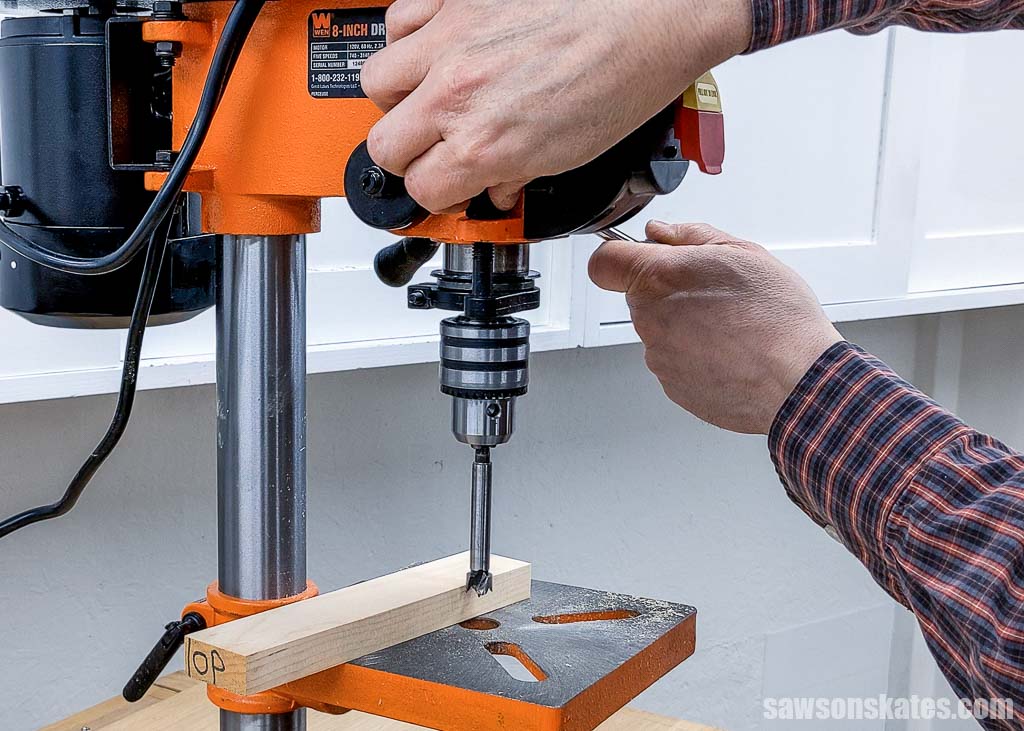
With the drill still off, I double-checked its function, ensuring it stopped when it touched the pencil line.
I secured the scrap wood to the drill press’s table with a clamp and drilled a practice hole to test the depth setting.
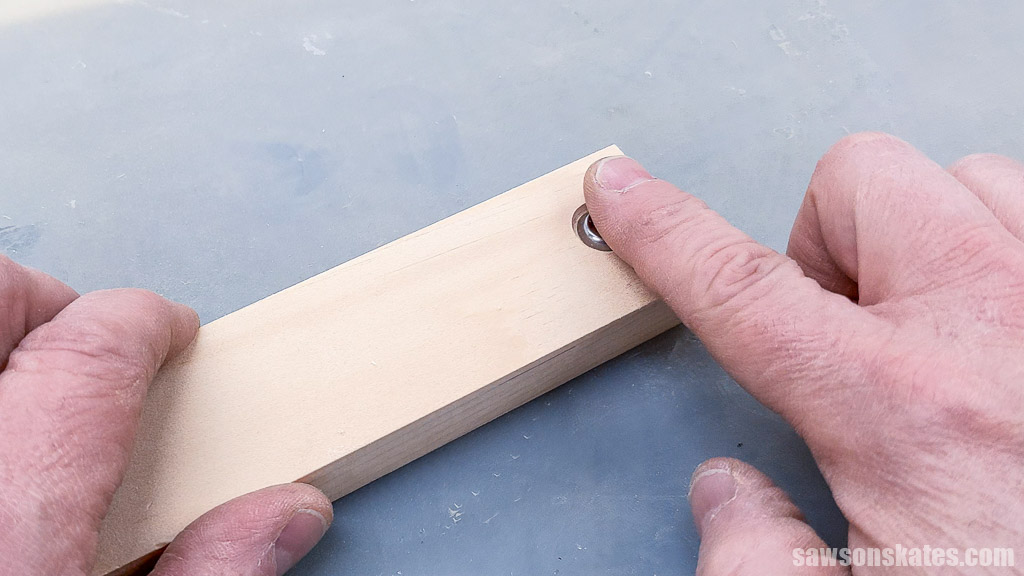
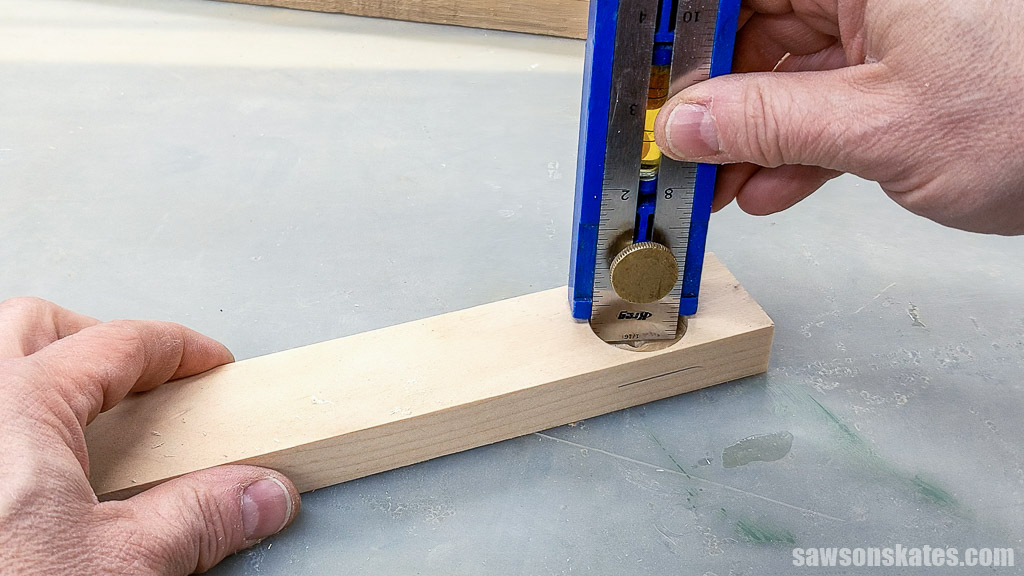
To check the fit, I placed a washer in the hole. Running my finger over the opening, It felt slightly recessed, sitting just below the wood’s surface. I was satisfied with the fit, so I turned my attention to the handle.
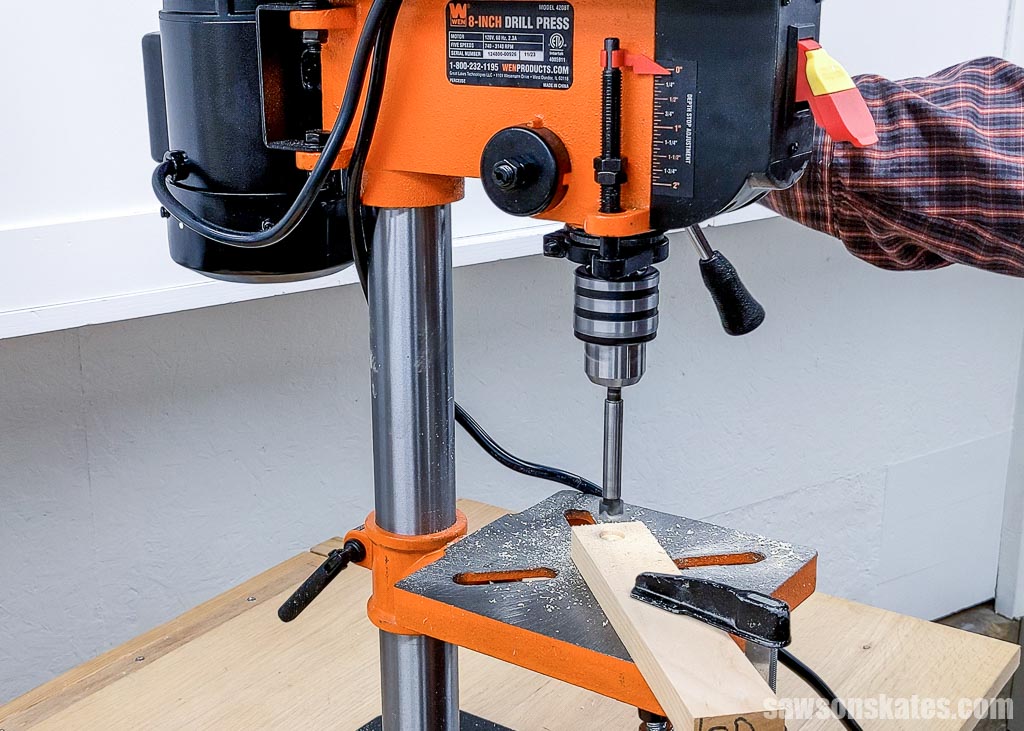
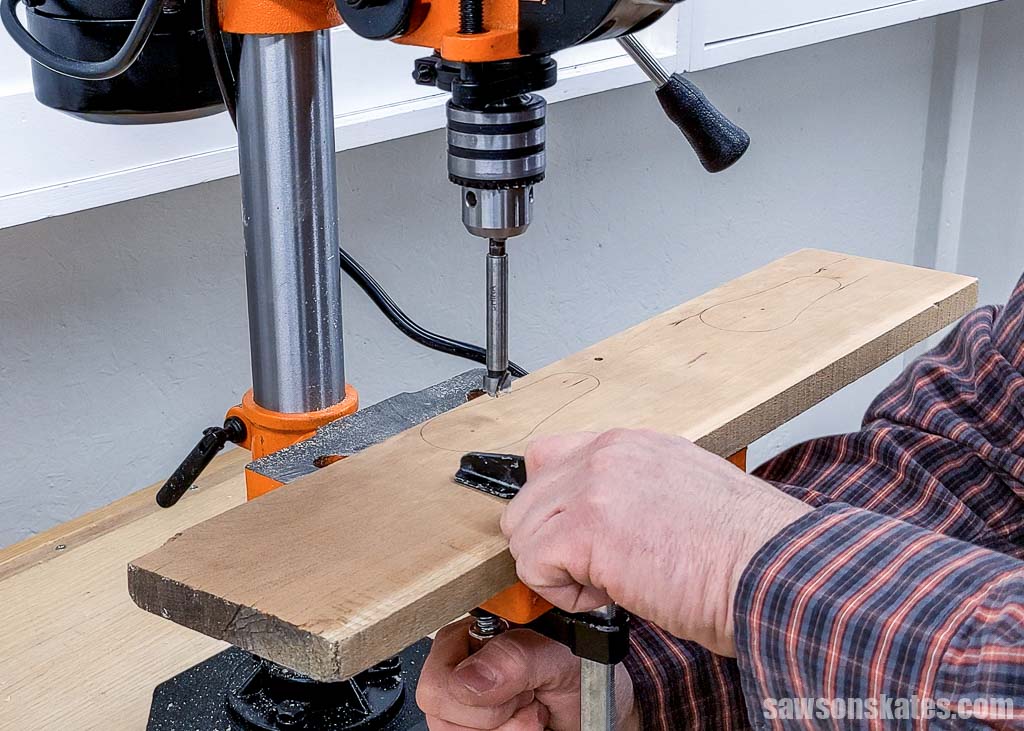
With the drill press off, I lowered the bit, positioning its spur in the indentation I made with the awl.
Once in position, I clamped it to the drill press’s table.
TIP: Forstner bits work best at moderate pressure and speed. Going too fast or applying too much force can lead to overheating, resulting in a damaged bit.
I recommend drilling a pilot hole for the screw that attaches the washer to the handle. I waited until the end to drill mine, but that’s not ideal because there’s so little material between the screw hole and the cap recess; you risk splitting the material if you drill later. Do yourself a favor and drill the pilot hole now.
I drilled a pilot hole using a bit and painter’s tape as a depth stop.
Related: How to Drill Pilot Holes (Why, When & Correct Size)
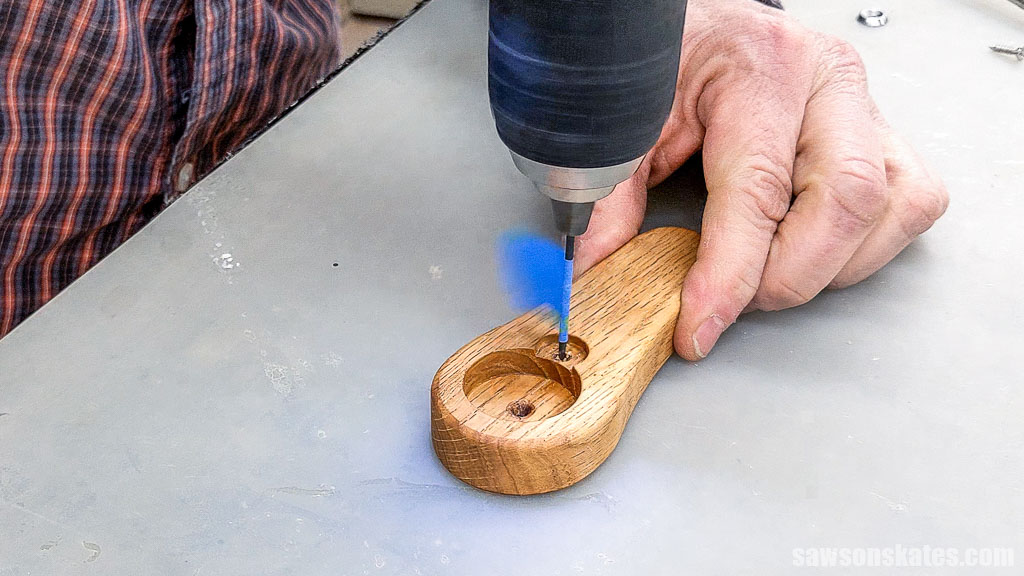
As I mentioned, there’s not much wood between the screw hole and the cap recess; Joe shared some ideas with me for strengthening this material.
Joe’s Tips:
“Just for insurance, I am going to put a drop of CA glue into each pilot hole to toughen up the wood fibers.”
Related: What is CA Glue? (Pros, Cons & Common Uses)
Afterward, he said, “I tried another tip that I liked better. I drilled the pilot hole slightly oversized, then filled it with fast-set epoxy. This made the surrounding wood fibers very strong. After the epoxy cured, I re-drilled a proper size pilot hole, thereby having the screw threads gripping epoxy instead of wood. It seemed very robust but added some time to the build. It seemed so much stronger than using CA glue that I will continue using epoxy in the future. I must add that the CA worked fine for my first batch, but I’m just more comfortable with the epoxy.”
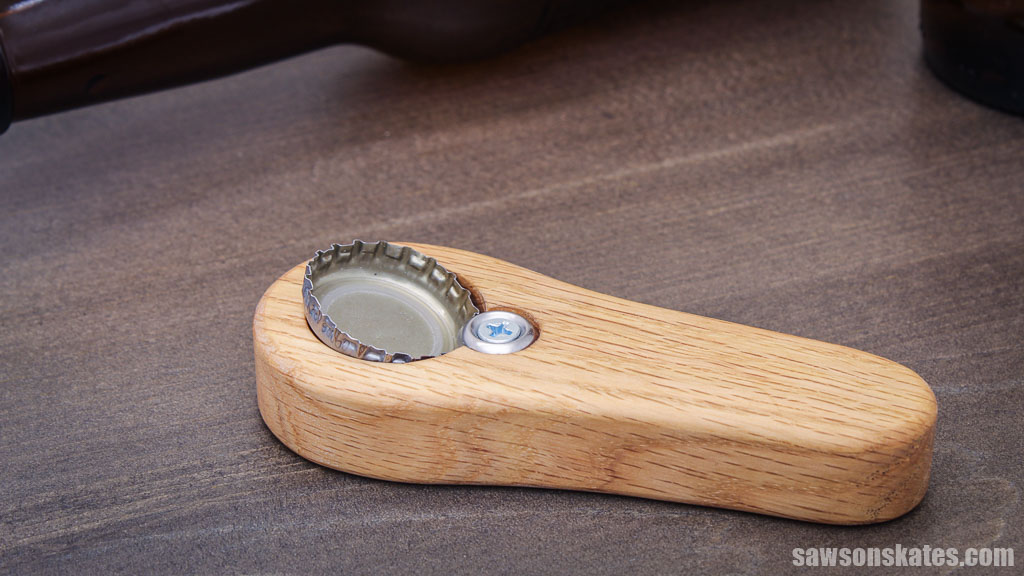
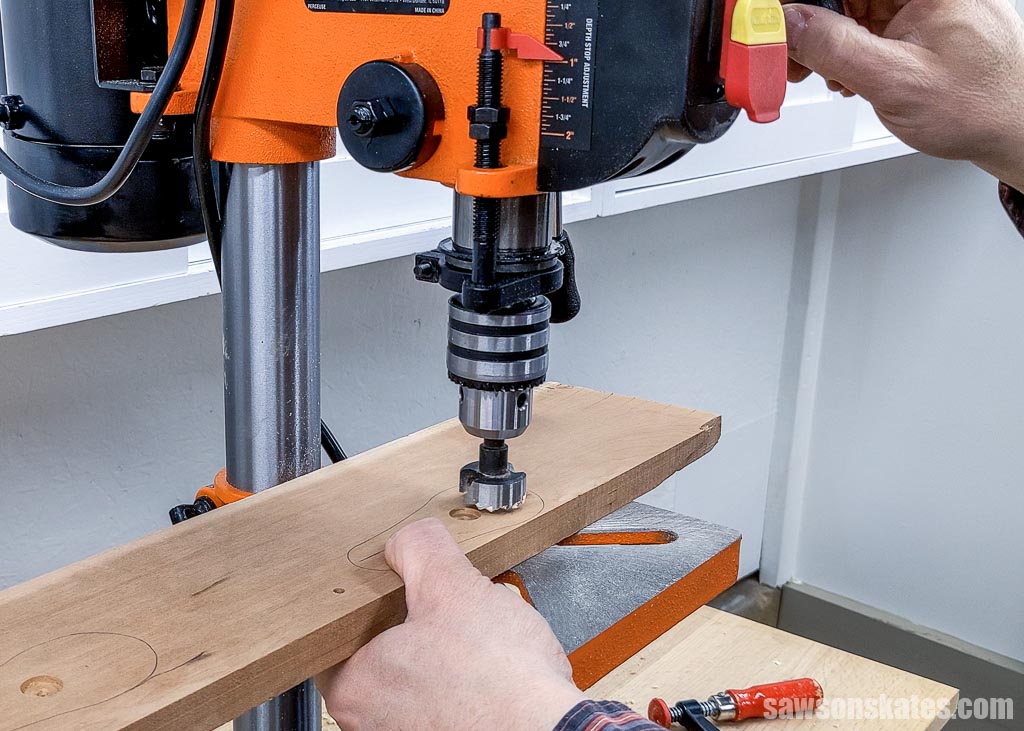
Step 3. Make the Bottle Cap Recess
Making the bottle cap recess involves similar steps as making the one for the washer:
- Marking a pencil line on a test piece.
- Positioning the bit’s cutting edge on the pencil line and setting the depth stop.
- Drilling a test hole.
- Measuring the test hole’s depth.
- Drilling the hole on the handle.
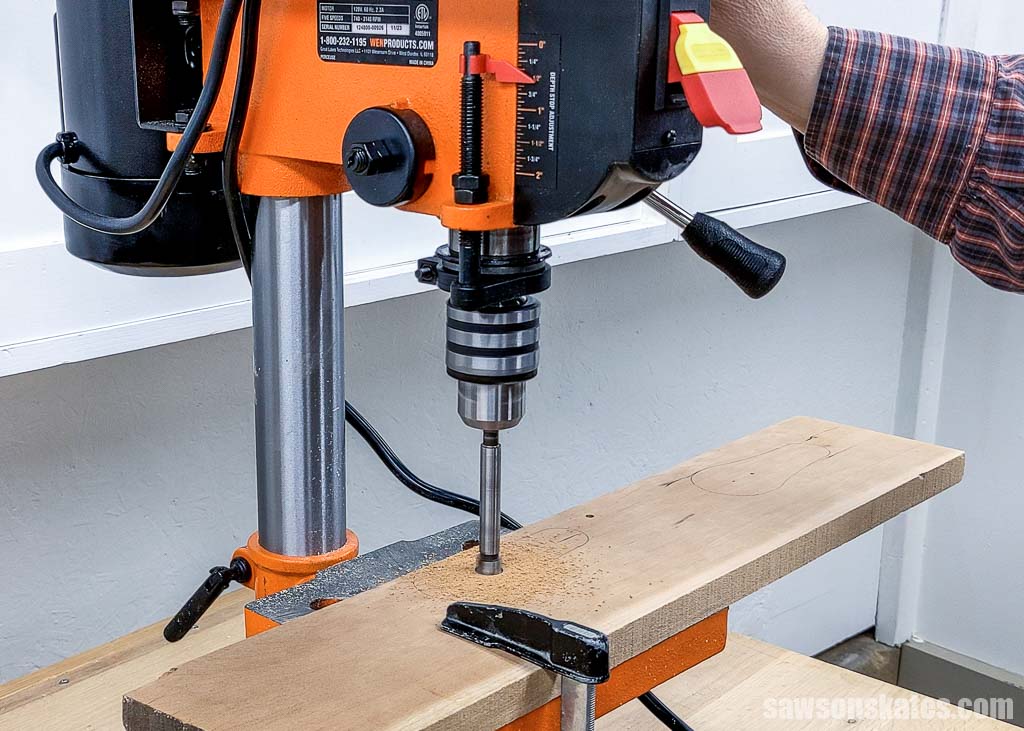
Aiming for a ⅜” deep bottle cap recess, I used my Kreg Multi-Mark to draw a line on a piece of scrap wood.
I installed a Forstner bit in my drill press and placed the scrap wood beside it.
With the drill powered off, I lowered the bit’s cutting edge to the pencil mark and set the depth stop.
With the drill still powered off, I tested that the bit stopped at the pencil mark when I lowered it.
After clamping the scrap wood to the drill press’s table, I drilled a test hole to confirm the depth setting.
I checked the depth using my Kreg Multi-Mark.
Keeping the drill press turned off; I lowered the bit’s spur into the small hole I made with the awl.
With the workpiece in position, I clamped it to the table.
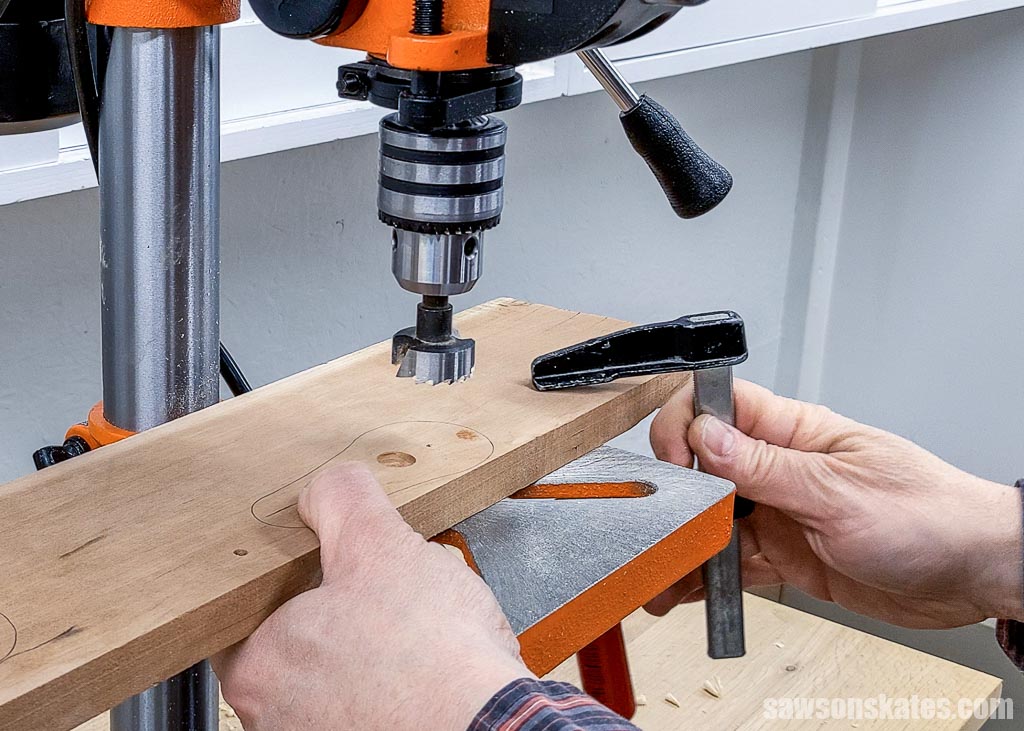
Remember, use Forstner bits with moderate pressure and speed for optimal performance. Rushing or using excessive force can cause overheating and damage the bit.
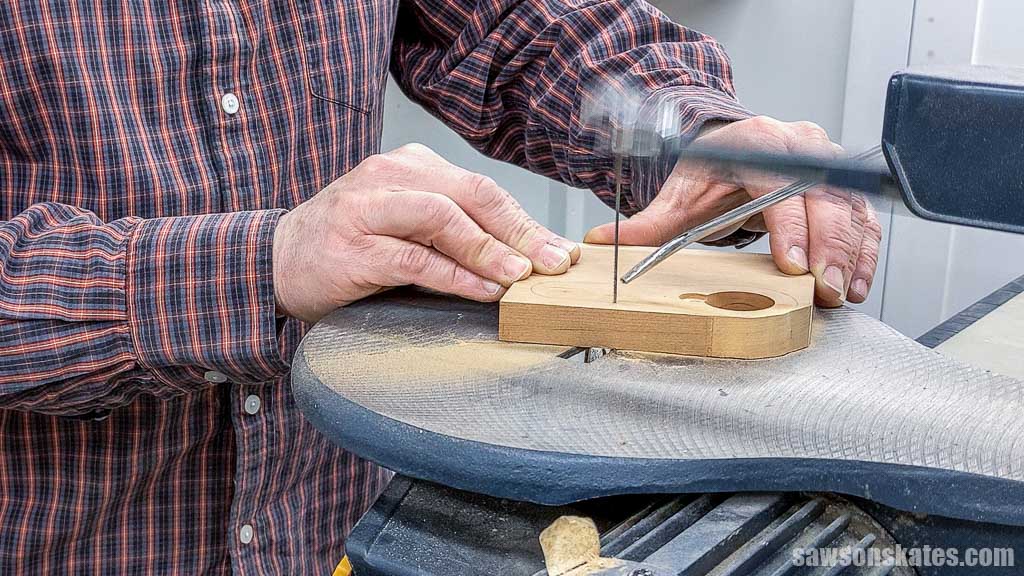
Step 4. Cut the Wooden Handle
Using a scroll saw, I cut the handle’s shape, but you might be able to use a bandsaw instead.
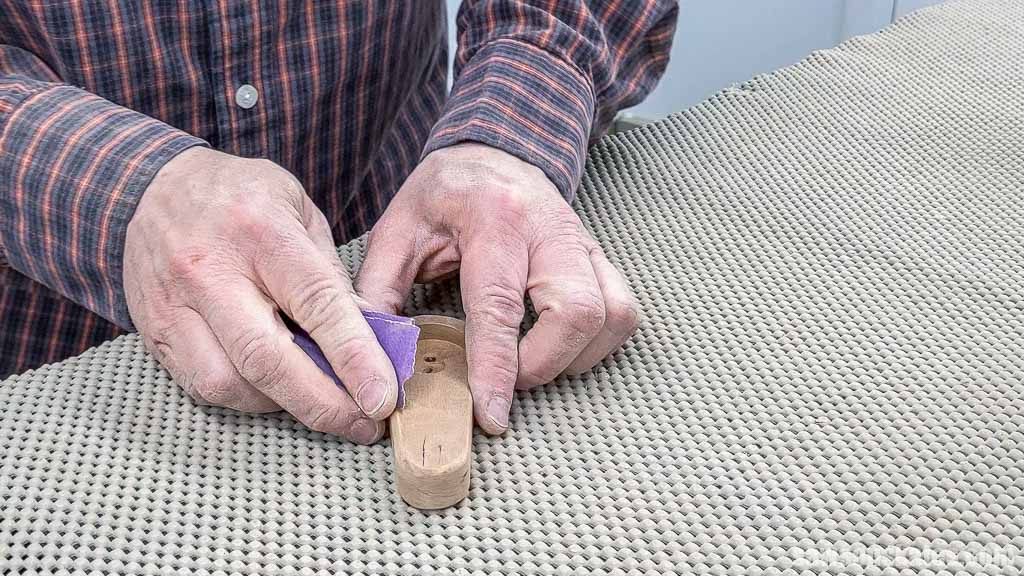
A portable spindle sander is the quickest, most efficient way to smooth the handle’s curved edges. You can achieve similar results with sandpaper; however, it may take a bit longer.
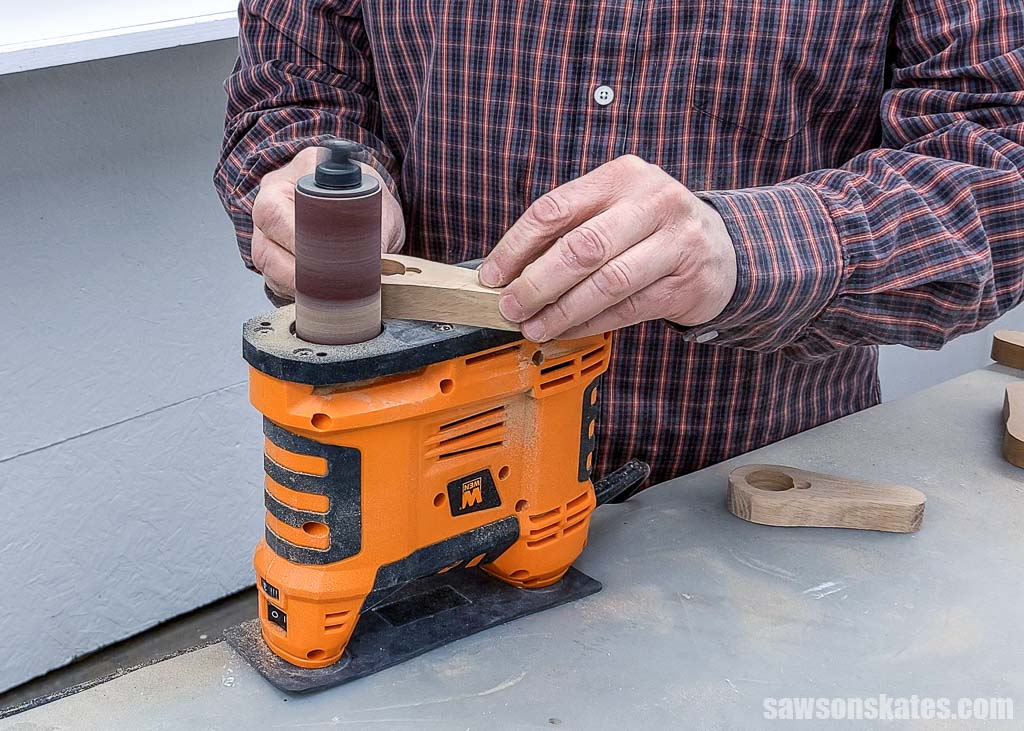
I sanded the edges with progressively finer grits until they matched the smoothness of the handle’s faces.
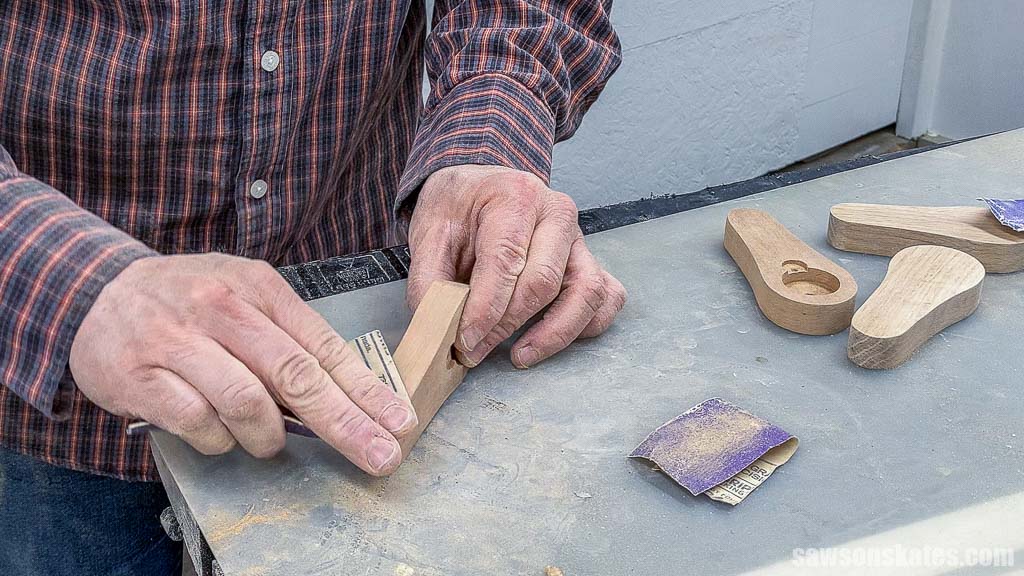
To soften the handle’s edges, I used my trim router and a roundover bit, placing the workpiece on a router mat to prevent slipping.

I touched up any rough spots using sandpaper.
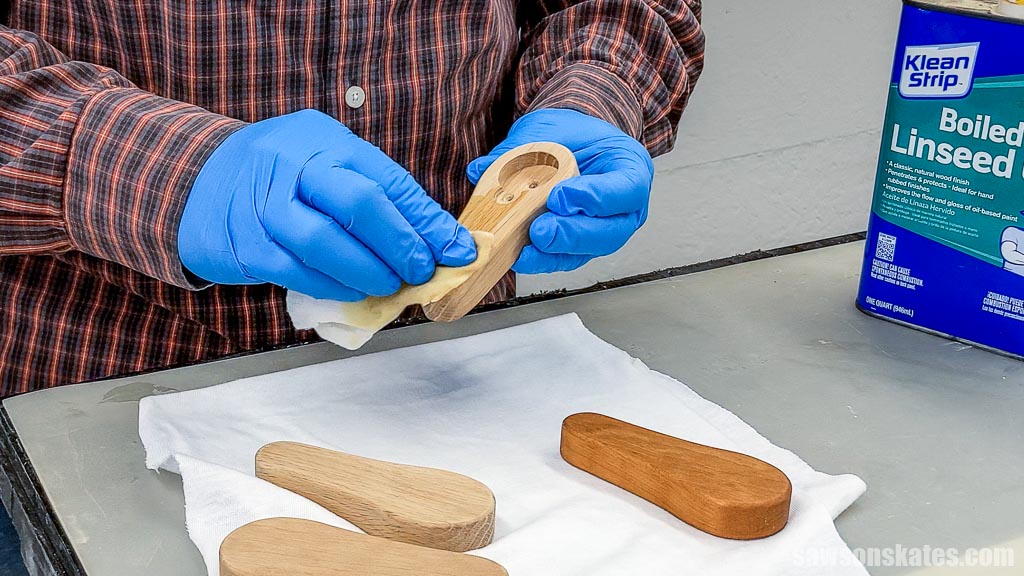
Step 5. Apply the Finish
To prepare the opener for a top coat, I used a microfiber tack cloth to remove any sanding dust.
Related: What is a Tack Cloth? (& How to Use It the Right Way)
Protecting my hands with disposable gloves, I applied a thin coat of boiled linseed oil with a clean rag. I let it sit for about 5 minutes before wiping away any excess with a fresh rag. After 24 hours, I repeated these steps to apply a second coat and let it dry completely for another 24 hours.
IMPORTANT: Boiled linseed oil and rags soaked with it are combustible. Dispose of them properly after use.
Joe’s Tip: Joe used a #6 countersunk washer (also called a finish washer) nestled inside a #8 countersunk washer and secured them with a wood screw. He said, “It seems very rigid, and I see no deformity of the washers from opening the bottles. There also appears to be sufficient wood left to hold the screw.”
That’s it. Your bottle opener is ready to pop some tops!

Includes:
- List of tools and materials
- Complete measurements (in inches)
- Easy-to-follow instructions
- Step-by-step photos
- Bottle opener template
Final Thoughts
With a few basic tools, you can transform scrap wood into a clever, functional conversation starter. Ditch the flimsy store-bought openers and pop bottles in style. This bottle opener makes a fantastic handmade gift, or keep it and enjoy the satisfaction of using something you crafted yourself.
Don’t wait. Get your PDF plan (including the detailed instructions and measurements) now!
Thank you for stopping by. If you enjoyed this tutorial, would you please take a moment and pin it to Pinterest? I’d really appreciate it!
Recommended For You

Pin This For Later

Hi there – I’m Scott, a woodworking enthusiast and creator of Saws on Skates, a site I started in 2015 to share easy-to-follow tutorials, space-saving shop tips, and project inspiration for DIYers at any skill level. Learn more about my woodworking journey here.