DIY Mitten Christmas Ornaments
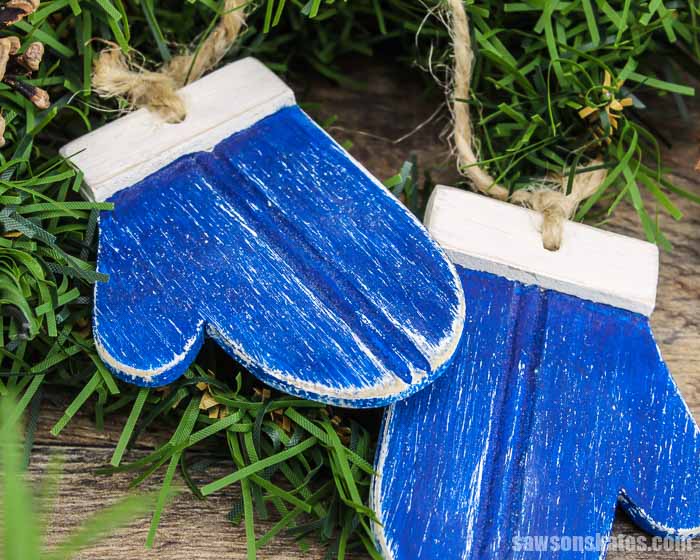
These DIY mitten Christmas ornaments are adorable! They are a quick, easy, and inexpensive afternoon project made with scrap wood, craft paints, and twine.
DIY Mitten Christmas Ornaments
These DIY mitten Christmas ornaments were inspired by my grandmother’s handmade ornaments.
Her original mitten ornaments were made with felt. This is a no-sew version made with scrap wood, craft paints, and twine.
These ornaments are a quick and easy afternoon DIY project. It’s also a great activity for adults and kids. Adults can cut out the mittens and kids can paint and decorate them any way they like.
Make some to decorate your tree or make some as a thoughtful, inexpensive gift for family, friends, neighbors, and coworkers.
The free plan includes all of the measurements, detailed instructions, and a mitten template traced from one of my grandmother’s original ornaments.
Table of Contents
- Inspiration for These Mitten Ornaments
- What Tools Do You Need?
- What Wood Should You Use?
- How Do You Finish the Mitten Ornaments?
- How to Make DIY Mitten Christmas Ornaments
- Get the Free Plan
This article contains affiliate links. If you purchase from these links, I may earn a small commission at no additional cost to you. Visit my site policies for more information.
Inspiration for This Project
One of my favorite holiday traditions has always been decorating the Christmas tree with my grandmother’s handmade ornaments. My grandmother was a crafty lady. She enjoyed making anything from crocheted afghans to her own Christmas ornaments.
Many of her ornaments were cute but there were one or two that were a little unusual. Like her walnut shell diorama ornaments. She coated the inside of the walnut shell with glue and sprinkled it with bright red and green glitter. On the inside bottom of the shell, she attached tiny plastic figurines like reindeer. They were certainly unique, but not some of her best work!
One of her most memorable ornaments was an adorable pair of little mittens. Her mitten ornaments were made of red or green felt, a white felt cuff, and they were connected by a crocheted chain of yarn.
For this project, I wanted to rekindle the holiday magic of years past. So I recreated one of her most memorable ornaments with wood.
I started by tracing one of her original mittens with a pencil. Her original mitten ornaments were tiny. I was concerned that it might be dangerous to cut them with a saw. So I increased the size by about 3x. The pencil tracing of her original ornament serves as the template included in the printed plan.
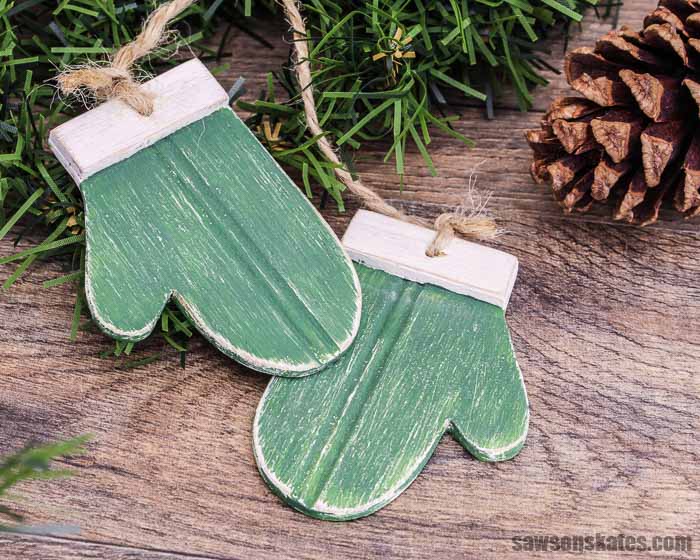
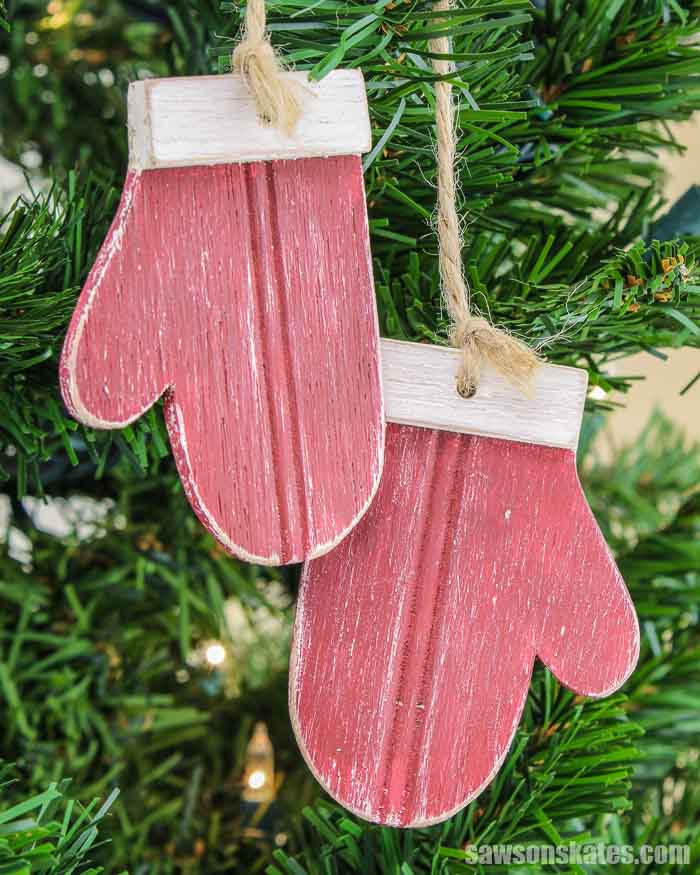
These wooden ornaments were painted in a similar style to my grandmother’s felt mittens. Instead of yarn, I used twine to connect the mittens.
What Tools Do You Need to Make Mitten Ornaments?
These mitten ornaments are a quick project that can be made using basic woodworking skills. This is also a great activity for adults and kids. Adults can cut out the mittens. Kids can sand the parts and glue the cuff to the mitten. Then they can paint and decorate them any way they like.
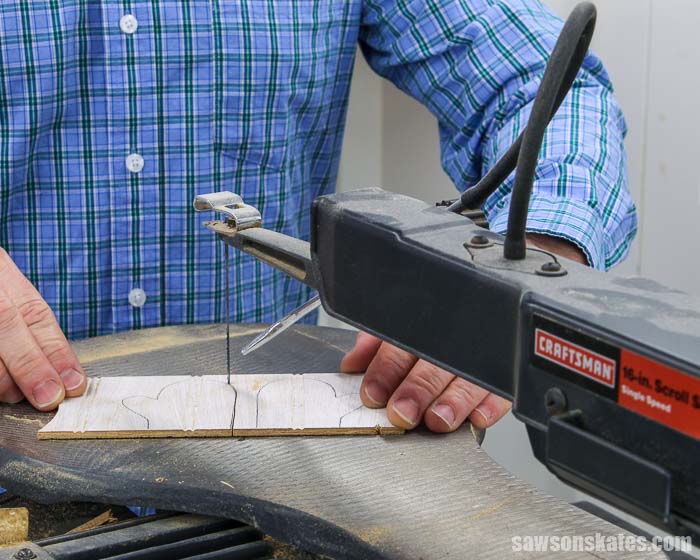
We’ll need just a few common woodworking tools for this project. Tools like a scroll saw and a drill.
I used a scroll saw to cut out the mittens and the cuffs. You might be able to use a jig saw or bandsaw to make these cuts instead.
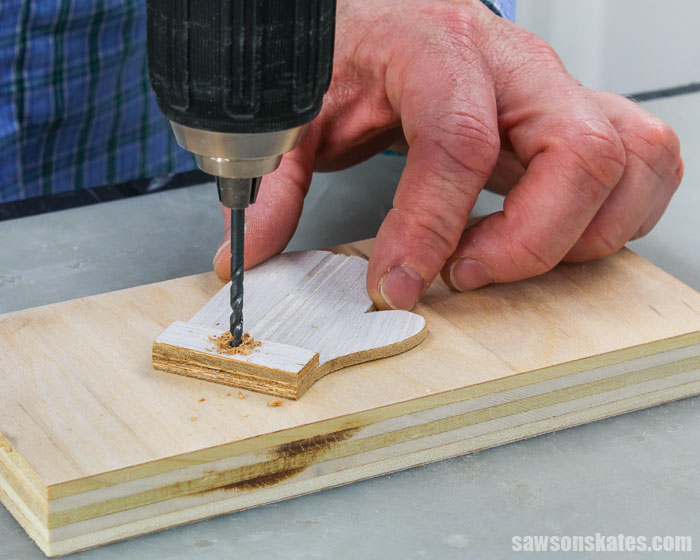
The drill was used to make a hole for the twine.
What Wood Should You Use?
I used pieces of scrap ⅛” beadboard paneling to make my mitten ornaments. You could use just about any thin material like lauan, paneling, etc.
You could also use a smooth material like MDF. But I think a material with wood grain adds texture and a rustic look to this project.
You’ll also want to be sure the wood isn’t too thick. Thicker materials might weigh down the tree limb.
How Do You Finish the Mitten Ornaments?
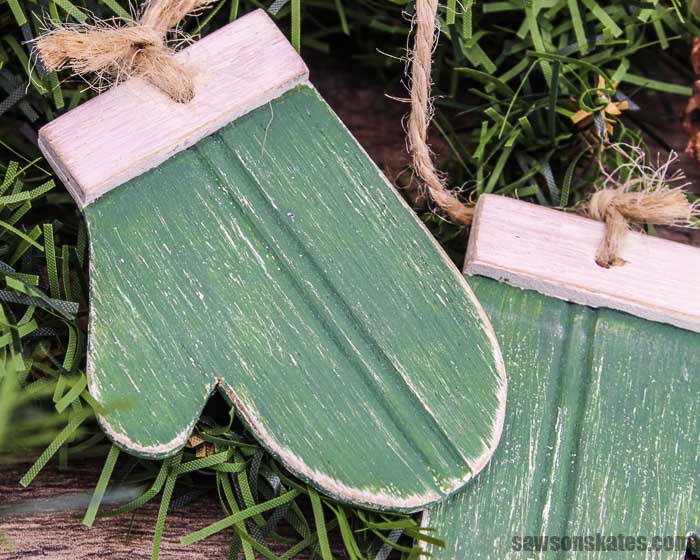
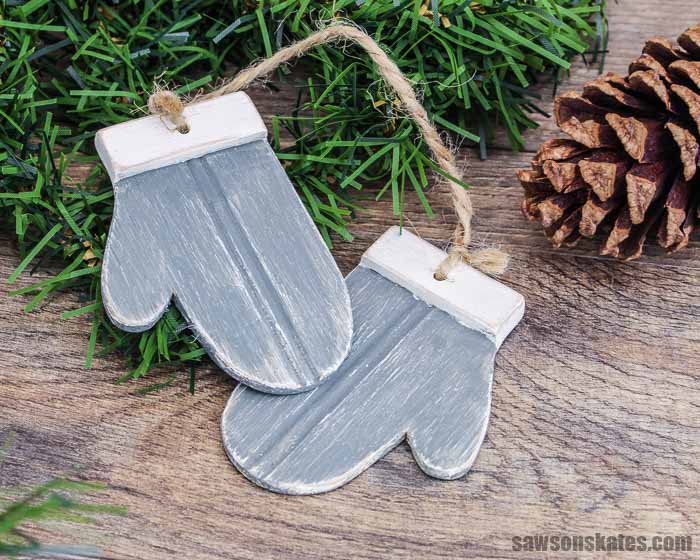
I finished the mittens with chalk-type paint and inexpensive craft paints. Then, I lightly sanded the mittens to give them an aged, worn look.
Related: DIY Craft Paint Storage Caddy
How Do You Hang the Ornaments?
My grandmother’s original mitten ornaments were connected with a simple crocheted chain of yarn. If you know how to crochet, you connect the mittens just like my grandmother did.
I used twine to hang my ornaments but you could also use baker’s twine, raffia, etc.

DIY Mitten Christmas Ornaments
Printed Plan
Get the FREE plan here (includes detailed instructions, measurements, and bonus tips)
Supplies
- Wood (per the printed plan)
- Wood Glue
- Chalk-Type Paint (I used this one)
- Craft Paints
- Paintbrush
- Twine
- Scotch Tape
- Painter’s Tape
Tools
- Scroll Saw
- Drill
- ⅛” Drill Bit
Step 1. Assemble the Mittens
Use the template in the printed plan to trace the mitten onto the wood.

💡 TIP: If you’re using a material with a pattern, like beadboard, be sure to make a right and left mitten.
I prefer templates to be rigid that I need to trace around. So I applied some spray adhesive to a manila folder and placed the template on top. Then I cut out the template with scissors. The manila folder provides a lip for the pencil to trace around.
I used a scroll saw to cut out the mittens. You might be able to use a jig saw or bandsaw to make these cuts instead.
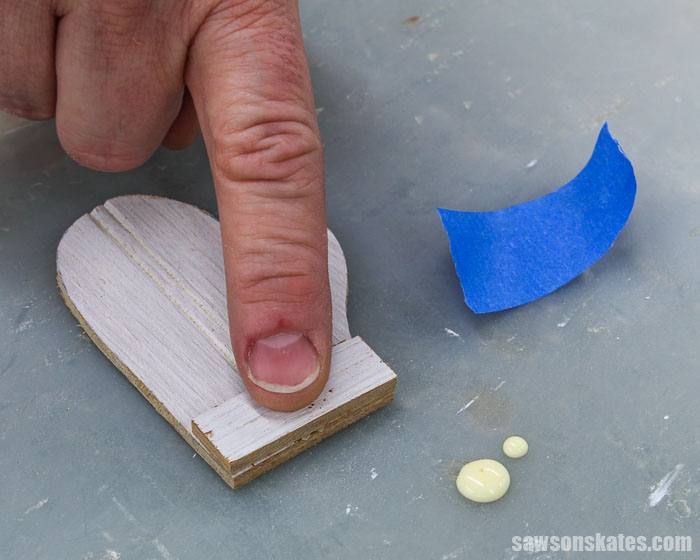
To make the cuff, I measured in a ½” on each edge of the beadboard paneling. Then I used a straightedge to connect the marks with a pencil. I used the scroll saw to cut ½” strips of wood. Next, I cut the strips to length to fit the cuff area of the mitten.
The cuff was attached to the mitten with wood glue. I held the cuff in place with painter’s tape until the glue was dry.
When the glue was dry, the edges of the mitten were smoothed with sandpaper.

Next, I used a drill to make a hole for the twine.
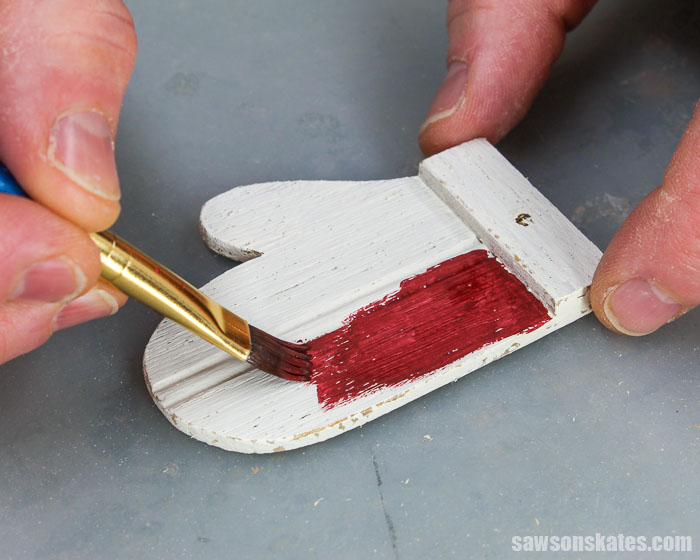
Step 2. Paint the Mittens
I applied one coat of this chalk-type paint to the front and back of the mitten.
When the paint was dry, I painted the hand area of the mitten with craft paints. I left the cuff area white.
Related: DIY Craft Paint Storage Caddy
💡 TIP: The handle of the paintbrush is an easy way to make polka dots.
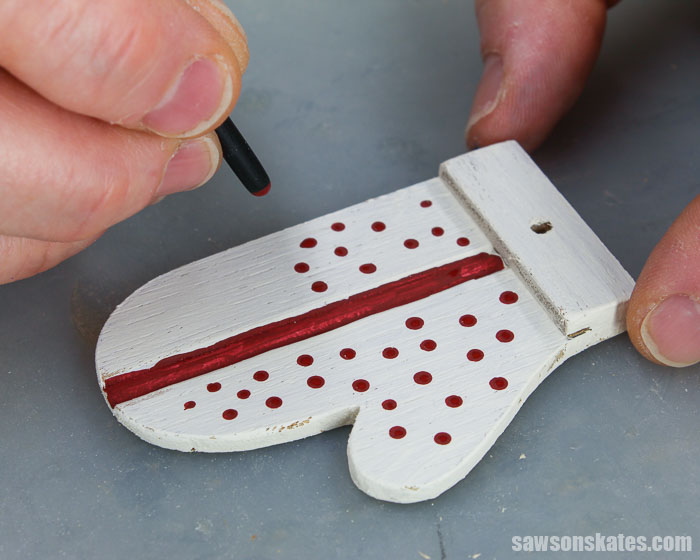
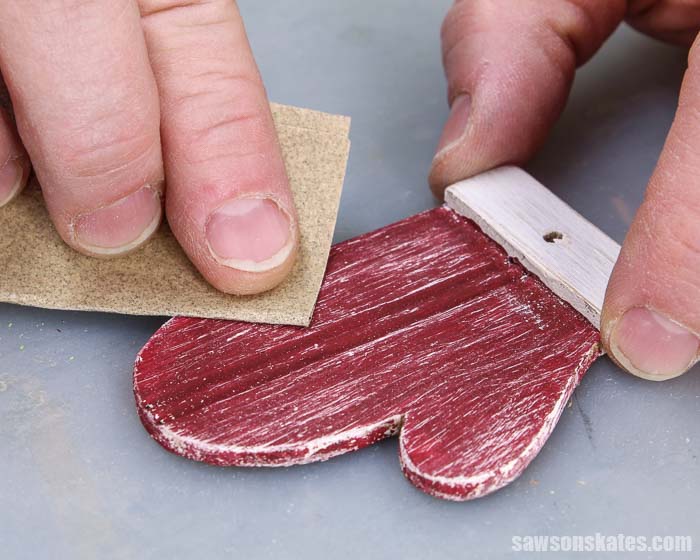
When the craft paints were dry, I lightly sanded the mittens to give them an aged, worn look.
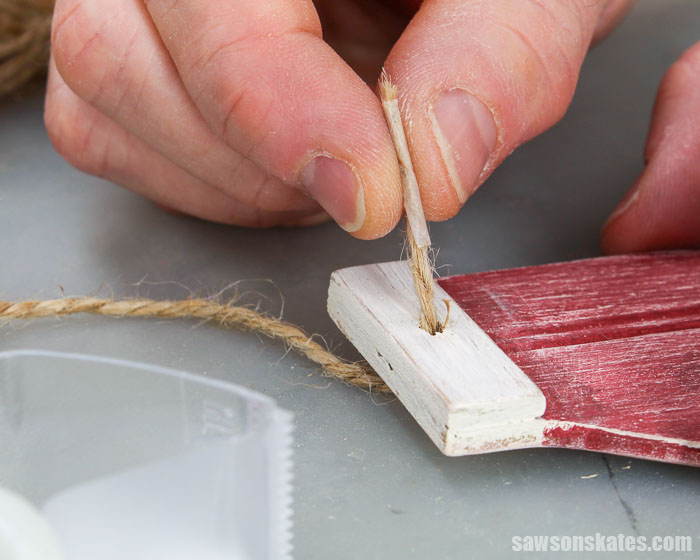
Step 3. Attach the Twine
I wrapped scotch tape around one end of the twine and pushed it through the hole in the mitten. The tape makes it easier to insert the twine into the hole.
I pulled the twine through the hole, tied a double knot, and cut off the excess. Repeat for the other end of the twine.
Final Thoughts
These DIY mitten Christmas ornaments are a quick and easy afternoon project made with scrap wood, craft paints, and twine.
They are also a great activity for adults and kids. Adults can cut out the mittens and kids can paint and decorate them any way they like.
Make some to decorate your tree or make some as a thoughtful, inexpensive gift for family, friends, neighbors, and coworkers.
Click here to get the free plan (including the detailed instructions and template) now!
Thank you for stopping by. If you enjoyed this tutorial, would you please take a moment and pin it to Pinterest? I’d really appreciate it!
Recommended For You

Pin This For Later

These are adorable!!
Thank you, Colleen!
I just love the things you have been sending me very much. The mittens are so dang cute I just have to make a set of 3.
Hi Gordon – Thank you for the kind words! I’m glad you’re enjoying the plans.
Oh my gosh!! These are so cute and farmhouse-y. LOVE them, Scott 🙂
Thank you, Diana!