DIY Wall-Mounted Display Cabinet (Antique Inspired)
Showcase your treasures in style with this antique-inspired DIY wall-mounted display cabinet. Easy-to-follow plan and templates included!
What Should I Build Next?
That's the question I help answer.
Every week, I send woodworking ideas to 17,000 DIYers who love building things.
You'd fit right in.
DIY Display Cabinet
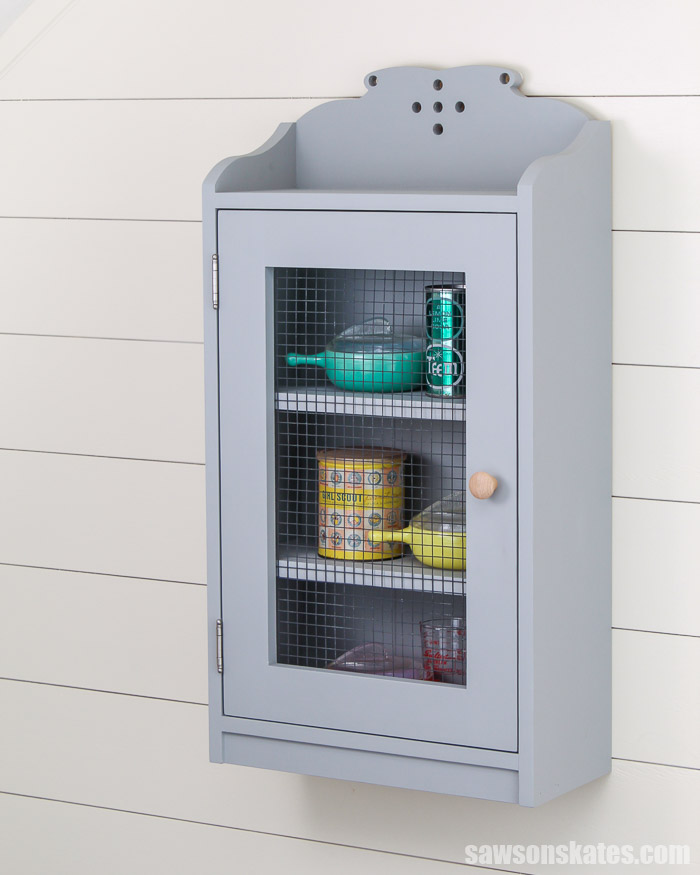
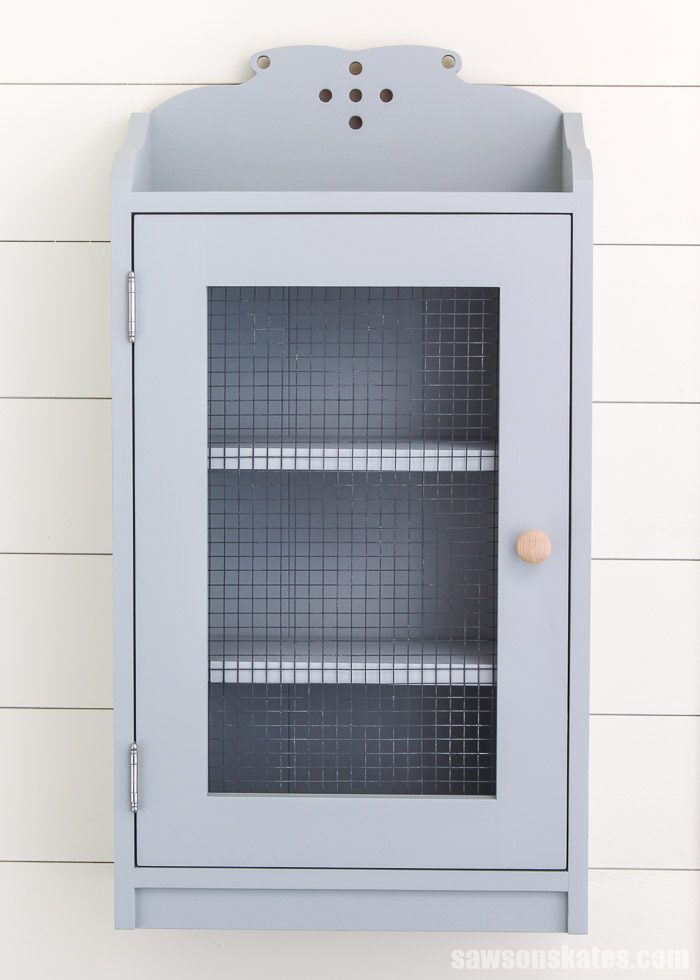
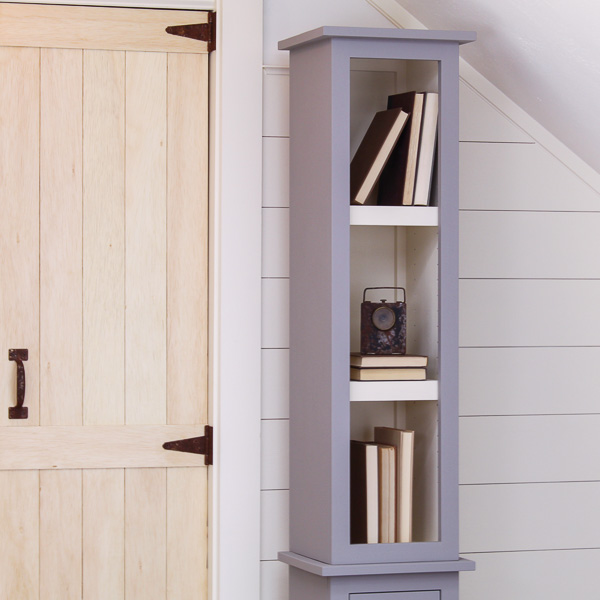
This DIY display cabinet looks like something you might see at grandma’s house displaying her favorite treasures or something you might find while rummaging through an antique store.
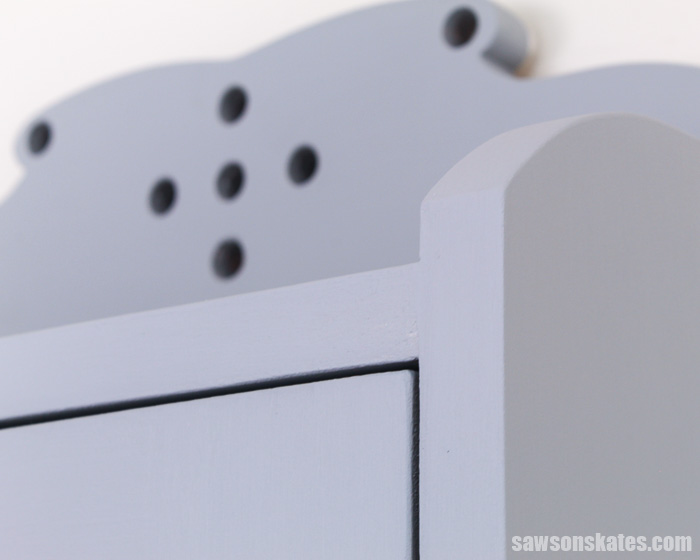
It was inspired by an antique cabinet that I found at a local historical society. It features curved details, decorative holes, a rustic wire mesh door, and adjustable shelves.
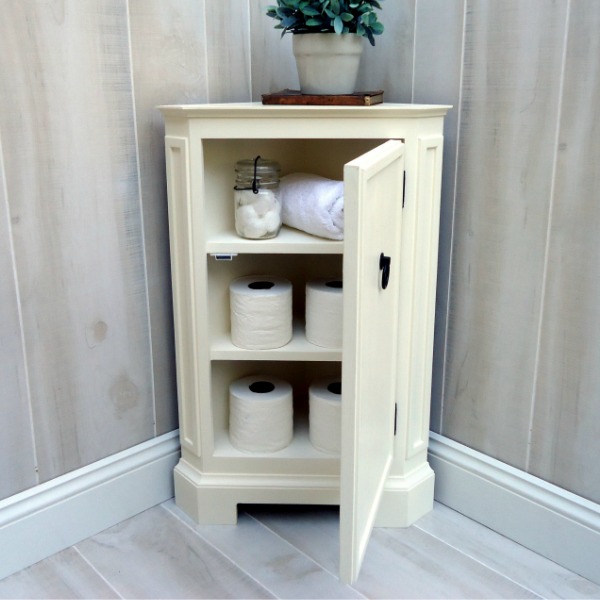
It’s easy to build and the perfect way to display your favorite collection. It’s also an attractive way to organize toiletries in a bathroom or to organize spices in a kitchen.
The plan includes all of the measurements, detailed instructions, and two templates to layout the curved details.
Table of Contents
- What Tools Do You Need?
- What Wood Should You Use?
- Customize Your Display Cabinet
- How Do You Finish the Display Cabinet?
- How to Make a Wall-Mounted DIY Display Cabinet
- Get the PDF Plan
This article contains affiliate links. If you purchase from these links, I may earn a small commission at no additional cost to you. Visit my site policies for more information.
Inspiration for This Wall-Mounted Display Cabinet
I recently started volunteering at a local historical society, and their museum is a 100-year-old, one-room schoolhouse.
One day, I was poking around the museum’s storage room and noticed a small antique display cabinet.
The cabinet was handmade. The top had curved details and decorative holes. It had been painted green. The paint was worn and chipping in all the right places. A glass door opened to reveal three fixed shelves.
I asked the Book Buddies what the cabinet would have been used for. The Book Buddies are a group of friends who archive donations to the museum, coordinate events, and do whatever they can to keep the museum (and local history) alive.
They weren’t sure of the original purpose of the cabinet. And they weren’t sure if the cabinet was original to the schoolhouse or was a donation to the museum.
Either way, this little handmade cabinet was adorable. And it was the inspiration for this DIY version.
This DIY display cabinet is not an exact copy of the original but it is about the same size with similar details.
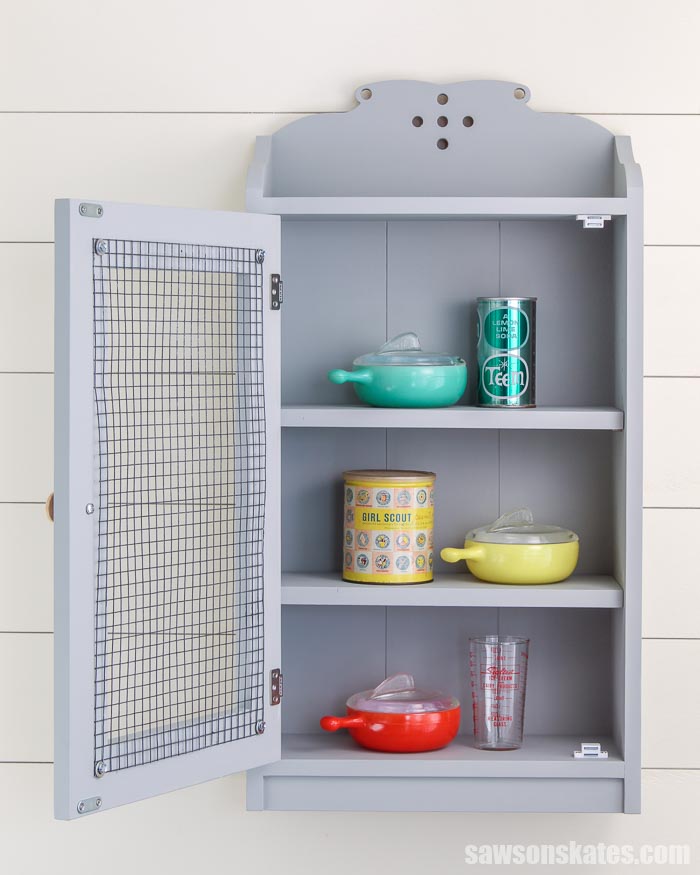
The original version had fixed shelves. This DIY version has two adjustable shelves. The height of the shelves can be easily adjusted to display items of different shapes and sizes. I included two shelves, but you could make additional shelves to display more items.
The original cabinet had a glass door. For this do-it-yourself version, I swapped out the glass for a rustic wire mesh door.
What Can You Display in the Cabinet?
- Antique and Vintage Items
- Teacups
- Dolls and Figurines
- Toys
- Watches and Jewelry
- Glassware
- Kitchenware like Pyrex, Fire-King, Glasbake, etc.
- Much more
What Tools Do You Need to Make a Display Cabinet?
This wall-mounted display cabinet may look complicated, but it’s as easy as making a simple box. It’s a weekend project you can build using basic woodworking skills and a few common woodworking tools.
Tools like a miter saw, pocket hole jig, and a drill. You’ll also need a Forstner bit, a saw to cut the back, and a saw to cut the curved details at the top of the cabinet. A shelf pin jig was used to make the adjustable shelves.
You can use any pocket hole jig to drill the pocket holes. The user-friendly Kreg Jig 320 is an inexpensive choice to drill the pocket holes for this project.
Related: How to Use a Kreg Jig 320
The Forstner bit was used to drill the decorative holes in the top of the cabinet. I recommend using a Forstner bit because it drills a hole with smooth, clean sides and a flat bottom. This means less sanding is needed to smooth the holes.
You could drill these holes with a regular drill bit, a spade bit or a hole saw, but these bits tend to tear the wood and produce a hole with rough, jagged sides. This means more sanding is needed to smooth the hole.
I used a table saw to cut the back panel for my project, but these cuts can be made with a circular saw instead.
Related: 4 Ways to Make Straight Cuts with a Circular Saw
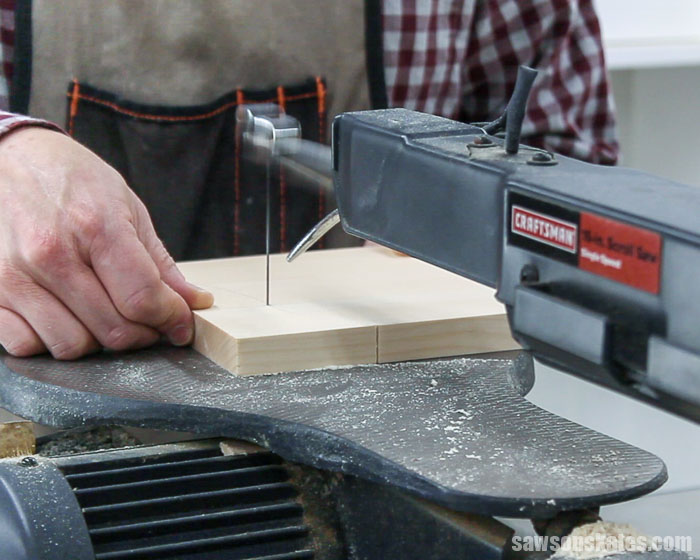
I used a scroll saw to cut the curved details at the top of the cabinet but you might also be able to make these cuts with a jigsaw or bandsaw.
A shelf pin jig was used to add adjustable shelves to this project. If you don’t have a shelf pin jig, you can build this cabinet with fixed shelves instead.
Related: How to Use a Shelf Pin Jig
What Wood Should You Use?
This display cabinet can be made with just about any type of wood. I used common pine to build mine. Pine is inexpensive and easy to work with.
I purchased the pine 1×2s, 1×3s, 1×4s, 1×6s at my local home improvement store.
I also used a small piece of ½” plywood for the back of the cabinet.
Related: Beginner’s Guide to Wood Sizes
How Do You Make Adjustable Shelves?
I used a Kreg Shelf Pin Jig to drill shelf pin holes in the sides of the cabinet. Then, shelf pins are inserted in the holes to support the shelves.
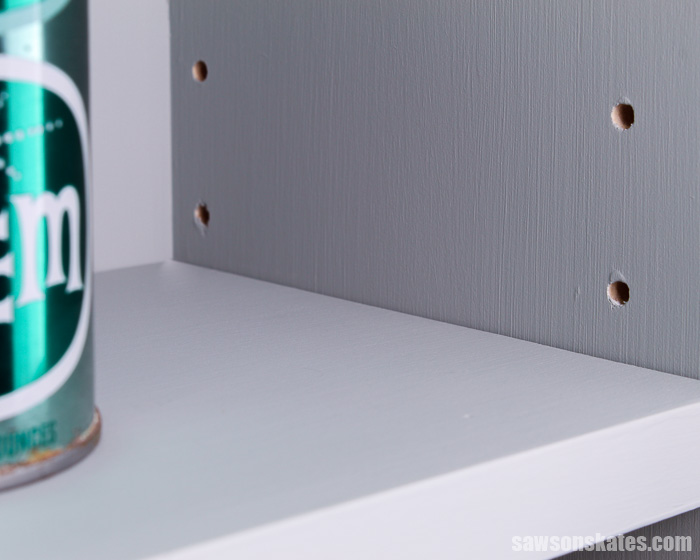
The jig is simple to use. Clamp the jig to the board and drill through the guides in the jig. It’s just that easy.
Related: How to Use a Shelf Pin Jig
Customize Your Display Cabinet
There are a few ways to customize this display cabinet.
I made my cabinet with adjustable shelves. Earlier I mentioned if you don’t have a shelf pin jig that you can build this cabinet with fixed shelves instead. To make the cabinet with fixed shelves, you can make additional top/bottom panels to use as shelves. Position the shelves in the cabinet at the desired height and attach them with pocket screws.
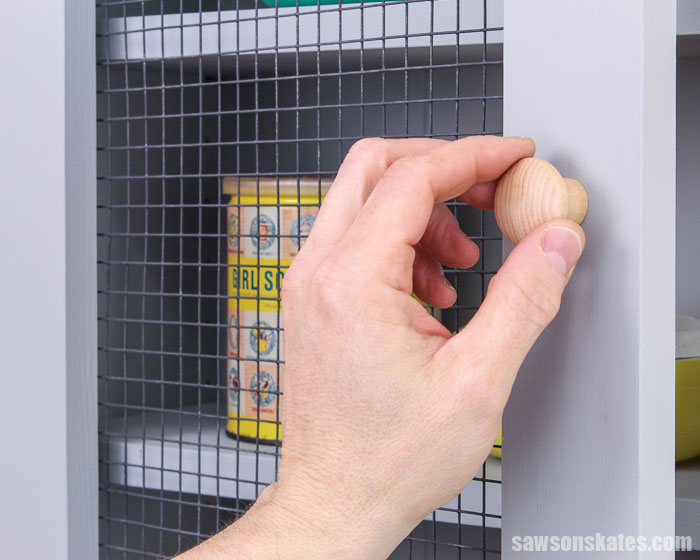
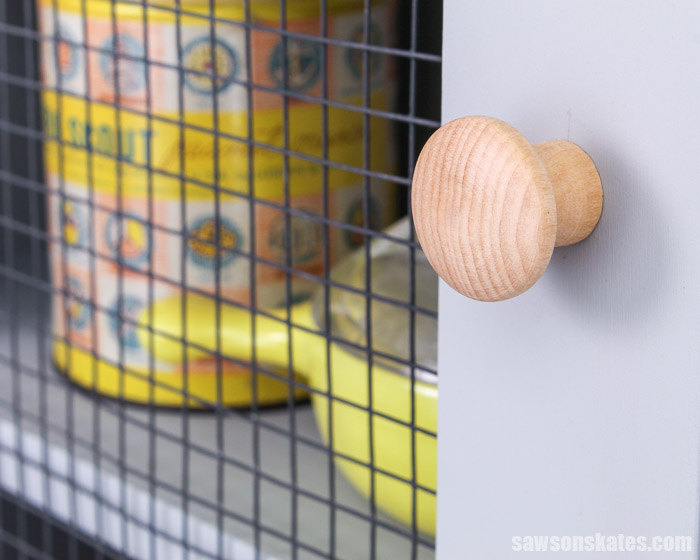
The inspiration piece for this project had a glass door. I wanted to make this project easy to build for DIYers of all skill levels, so I made my cabinet with a wire mesh door.
I was planning to use chicken wire for the door. I used hardware cloth instead because I had some on hand from another project. Using chicken wire instead of hardware cloth would give this project an even more rustic look.
If you have a router, you could make a glass door for your cabinet. If I were going to make a glass door, I would have used a rabbet bit in my router to cut a rabbet on the inside of the door. The rabbet provides a lip for the glass to set into the door.
Related: How to Use a Router Table for Beginners
Next, I would have had a piece of glass cut to fit the opening. Most big box home improvement stores and local hardware stores have a glass cutting department. Just bring them the measurements of the opening in the door and ask them to cut a piece of glass. Then I would install the glass using clips like these.
This project could also be made without the door and the cabinet could be used as open display shelves instead.
How Do You Finish the Display Cabinet?
This display cabinet could be finished in a variety of ways. It could be left natural, painted, stained, or a combination of paint and stain.
For my cabinet, I applied several coats of a shellac-based primer to prevent any knots from bleeding through the paint.
Related: How to Prevent Knots Bleeding Through Paint
Then I applied two coats of a Behr color called “Flipper”.
I left the wood knob natural and applied a few coats of this polyurethane alternative.
Related: Why I Switched to This Polyurethane Alternative
I used a small foam roller to roll a coat of this black chalk-type paint on the front and back of the wire mesh. When I built this outdoor plant stand a few readers suggested that I paint the chicken wire black, saying it would be easier to see inside.
I tested the painted wire mesh on this DIY spice cabinet and this DIY vegetable storage bin. I have to agree. I think it’s easier to see inside when the wire mesh is painted black.
How Do You Hang the Cabinet on the Wall?
This cabinet could become heavy when it’s loaded with collectibles, so it must be securely attached to the wall.
An easy way to attach the display cabinet to the wall is to use one of these heavy-duty french cleats. You can see how I installed one on this DIY medicine cabinet.
Related: How to Make a French Cleat
How to Make a Wall-Mounted DIY Display Cabinet
Printed Plan
Get the PDF plan here (includes detailed instructions, measurements, and bonus tips)
Materials
- Wood (per the printed plan)
- 1-¼” Pocket Screws
- 1″ Brad Nails
- Wood Glue
- 10 ½” Hex Washer Head Screws
- M8 Washers
- Wire Mesh Hardware Cloth or Chicken Wire
- Hinges (I used these)
- Knob
- Magnetic Catch
- Shelf Pins
- Hangman 12″ French Cleat Picture Hanger
Tools
- Tape Measure
- Drill
- Kreg Jig
- Miter Saw
- Scroll Saw or Jigsaw
- Table Saw or Circular Saw and Kreg Rip-Cut
- Shelf Pin Jig
- Brad Nailer or Hammer
- Tin Snips
- ½” Forstner Bit
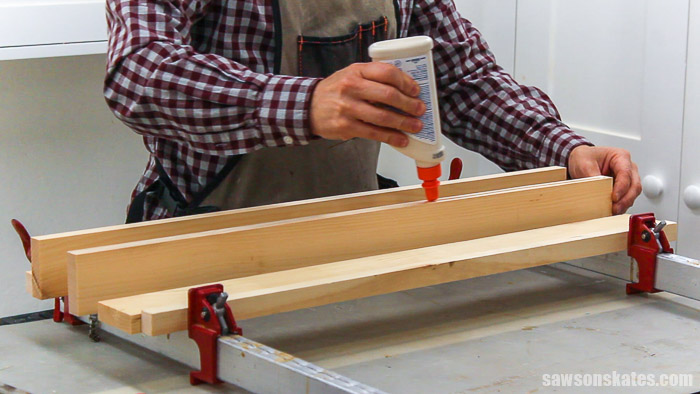
Step 1. Make the Sides
Cut six pieces of wood to length per the printed plan. Apply glue and clamp to form two side panels.
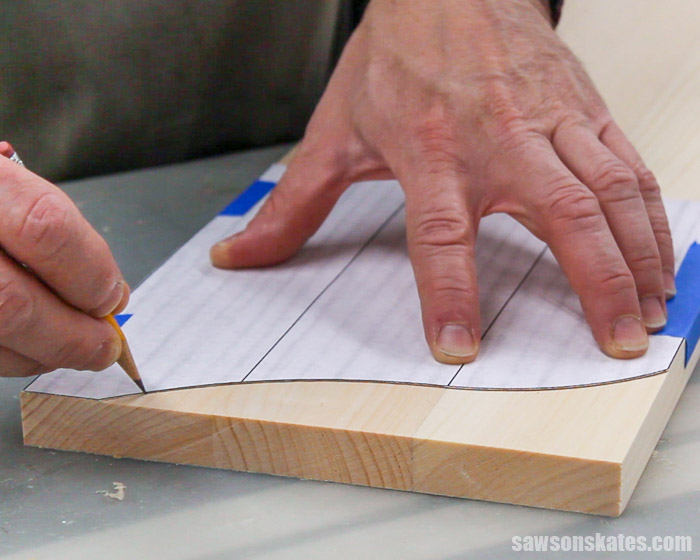
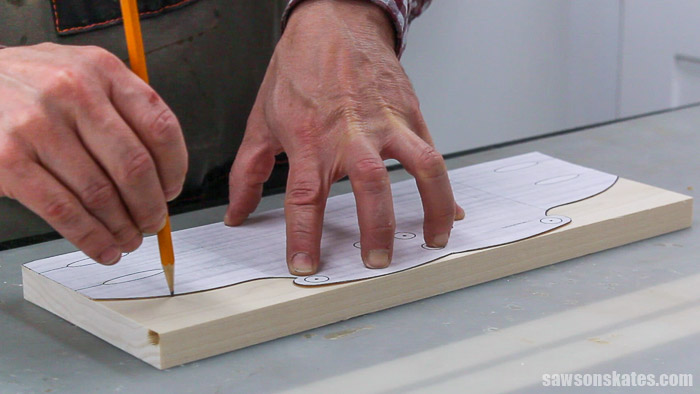
When the glue is dry, use the template (included with the printed plan) to trace the curved detail at the top of the side panel.
I prefer templates that I need to trace around to be rigid. So I applied some spray adhesive to a manila folder and placed the template on top. Then I cut out the template with scissors. The manila folder provides a lip for the pencil to trace around.
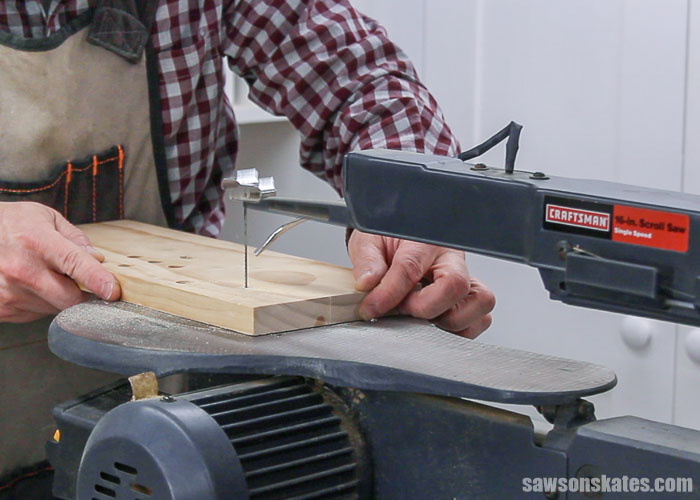
I used a scroll saw to cut out this curved detail but you could also use a jigsaw instead.
I clamped a piece of scrap wood to the bottom of the side. Clamp the shelf pin jig on the edge of the board and against the scrap wood. Drill shelf pin holes along each edge.
Related: How to Make Adjustable Shelves with a Shelf Pin Jig
Step 2. Attach the Top and Bottom Panels
Cut four pieces of wood to length per the printed plan. Apply glue and clamp to make a top and bottom panel.
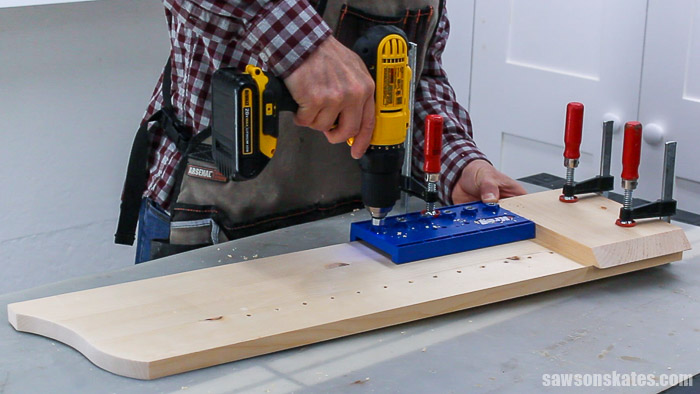
When the glue is dry, use the diagram in the printed plan to layout the location of the pocket holes.
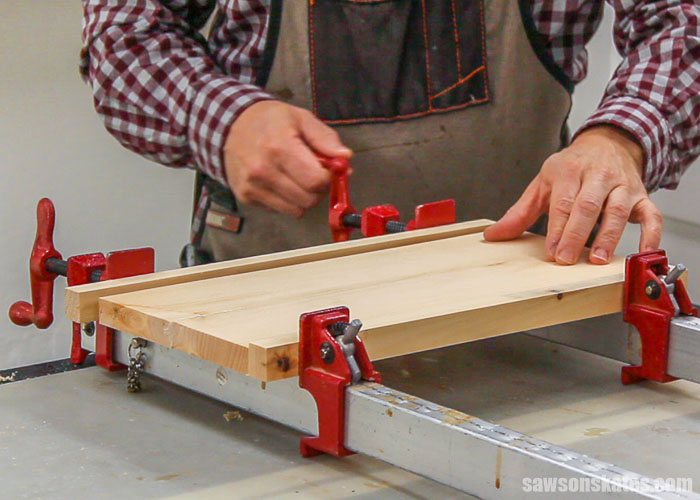
To help position the bottom panel, I clamped two pieces of scrap wood to the bottom of each side.
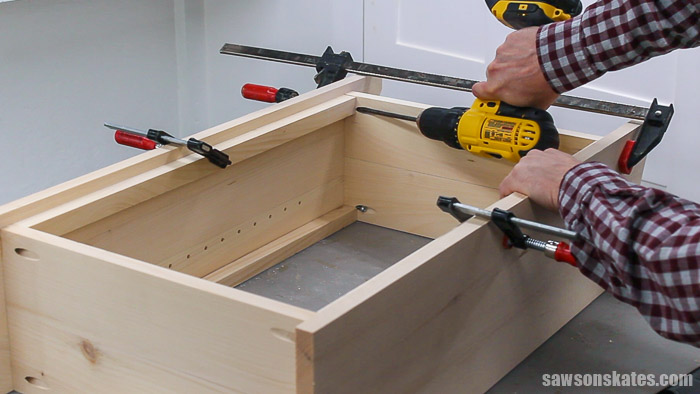
Apply glue to the ends of the bottom panel, position on top of the scrap wood and clamp to the sides. Attach using pocket screws.

To help position the top panel, I placed two pieces of scrap wood on top of the bottom panel and clamped to the sides.
Apply glue to the ends of the top panel, position on top of the scrap wood, and clamp to the sides. Attach using pocket screws.
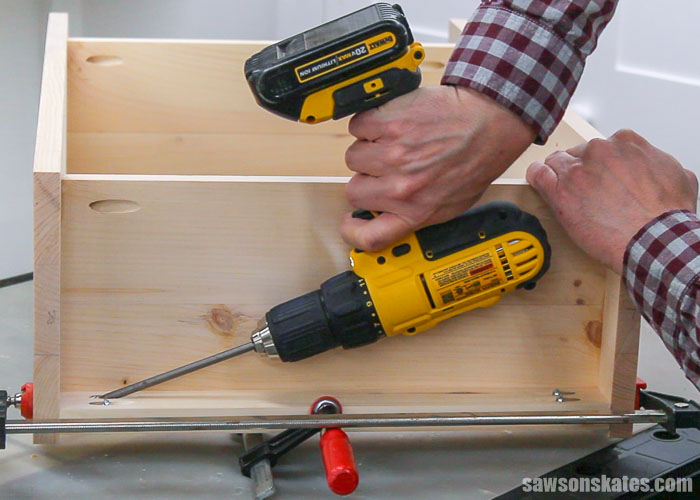
Step 3. Attach the Bottom Rail
Cut one piece of wood to length per the printed plan and drill pocket holes in each end.
Apply glue to the rail, position beneath the bottom panel, and clamp to the sides. Attach using pocket screws.
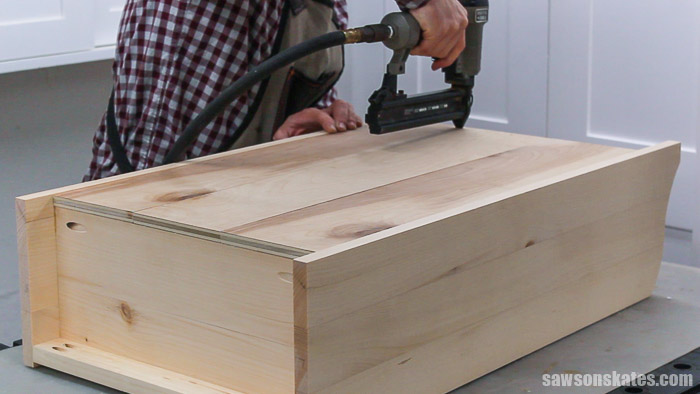
Step 4. Attach the Back
Cut one piece of plywood to size per the printed plan.
I didn’t have enough plywood to make the back with one piece. Instead, I used three pieces of plywood. I used my table saw to rip the pieces to width and then cut them to length. Then, I used a sanding block to lightly sand the edges, giving the plywood the look of beadboard.
Related: 21 Table Saw Safety Rules (& Mistakes to Avoid)
Apply glue to the top and bottom panel and place the back in position. Attach using brad nails.
Step 5. Attach the Top Rail
Cut one piece of wood to length per the printed plan.
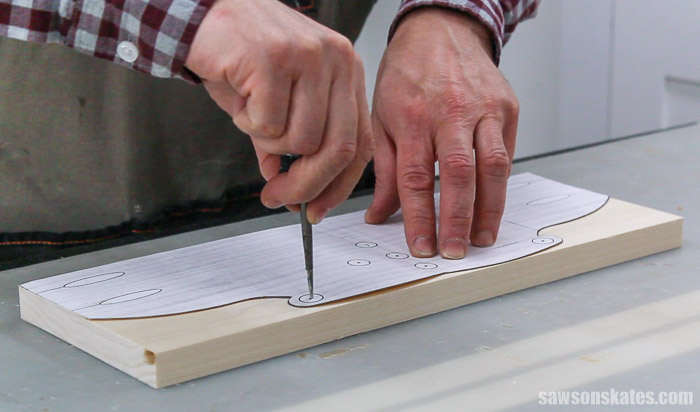
Use the template (included with the printed plan) to trace the curved detail on the top rail.
I prefer templates that I need to trace around to be rigid. So I applied some spray adhesive to a manila folder and placed the template on top. Then I cut out the template with scissors. The manila folder provides a lip for the pencil to trace around.
Then use an awl to mark the locations of the holes.
Related: What is an Awl? (+ How to Use It)
Use a Forstner bit to drill the holes. I recommend using a Forstner bit because it drills a hole with smooth, clean sides and a flat bottom. This means less sanding is needed to smooth the holes.
Related: What is a Forstner Bit? (& How to Use It)
You could drill these holes with a regular drill bit, a spade bit or a hole saw, but these bits tend to tear the wood and produce a hole with rough, jagged sides. This means more sanding is needed to smooth the hole.
💡 TIP: Prevent tear-out at the bottom of the hole by clamping a piece of scrap wood to the workpiece. This way, the scrap wood supports the wood fibers as the bit exits the workpiece.
Then I used a scroll saw to cut out the curved detail but you could also use a jigsaw instead.
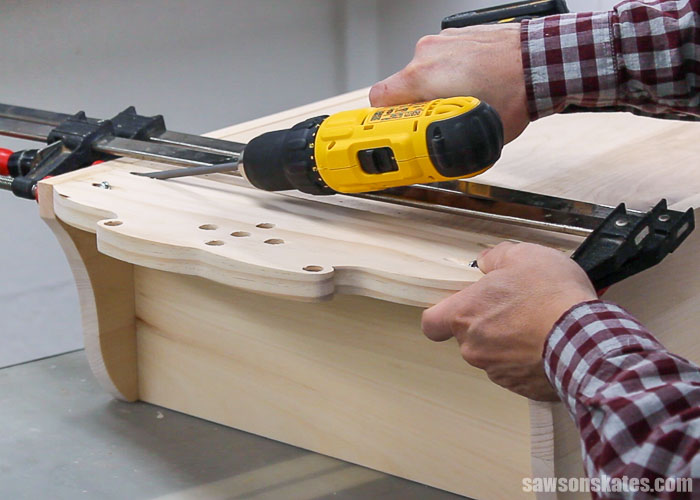
Next, use the template to mark the locations of the pocket holes and drill the pocket holes.
Apply glue to the rail and position at the back of the case. Attach using pocket screws.
Step 6. Attach the Door
📝 NOTE: The door needs about an ⅛” of clearance on each side. Adjust the measurements of the door if necessary.
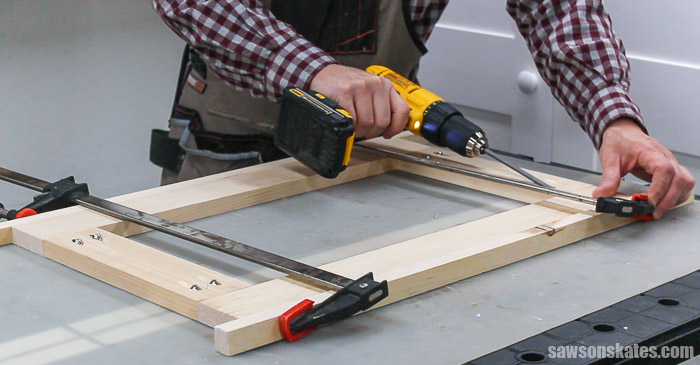
Cut two pieces of wood to length for the stiles. Cut two pieces of wood to length for the rails and drill pocket holes in each end.
Apply glue to rails, clamp to the stiles and attach using pocket screws.
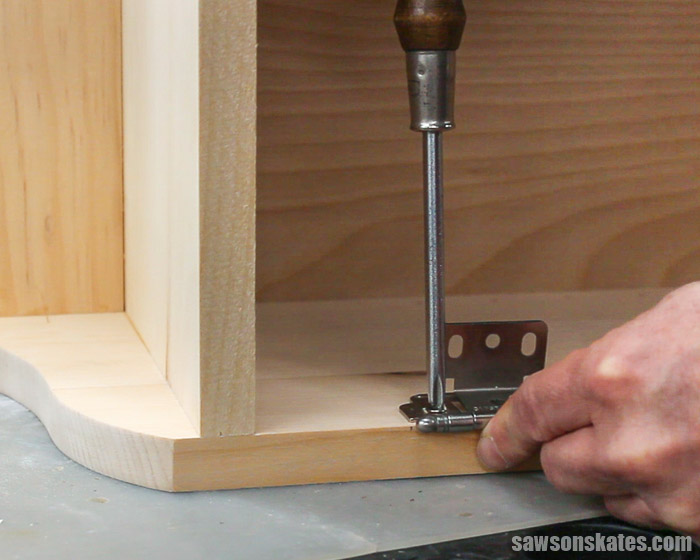
Next, I attached these hinges. You may need to adjust these measurements if you use different hinges.
On the door opening, I positioned one hinge at the top and bottom, and attached them using the screws included with the hinges.
Next, I used playing cards to center the door in the opening. I marked the centers of the screw holes on the back of the door with a pencil. At each pencil mark, I used an awl to make a starting point for the screws.
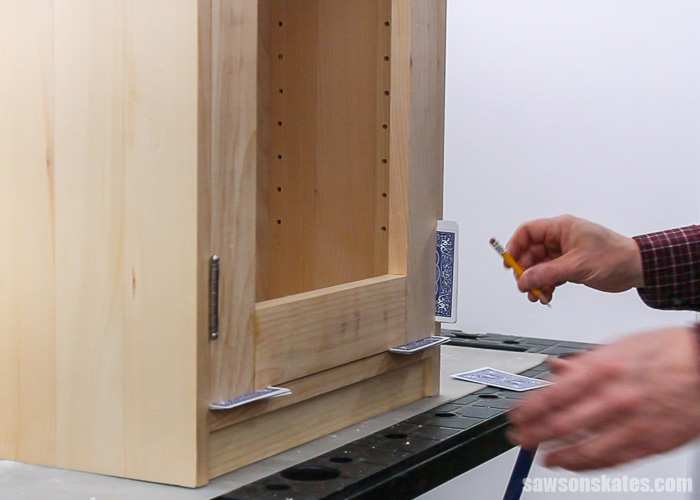
I removed the door, drove the screws into the door, and removed the screws. (This will make it easier to attach the screws when the door is in the cabinet.)
Playing cards were used again to center the door in the opening and screws were attached to the door.
Attach the magnetic catch to the top of the cabinet using the screws included with the catch. The magnet was powerful and made it difficult to open the door.
I adjusted the magnet so that it was at a slight angle and did not make full contact with the catch on the door. This adjustment kept the door closed and made it easier to open.
Then, I removed the door from the cabinet. I applied glue to the pocket holes and inserted a pocket hole plug in each hole. I could have also filled the pocket holes with a filler like Ready Patch. When the glue was dry I used an orbital sander to sand the plugs smooth.
The location for the knob was centered from top to bottom and side to side on the stile. I used a ¼” drill bit to drill a hole at this location.
I used tin snips to cut a piece of hardware cloth to size. The hardware cloth was centered on the back of the door and attached with (4) #10 ½” hex washer head screws, (4) M8 washers.
Step 7. Make the Shelves
Cut four pieces of wood to length per the printed plan. Apply glue and clamp to form two shelves.
Step 8. Finish the Cabinet
See How Do You Finish the Display Cabinet? for more information.
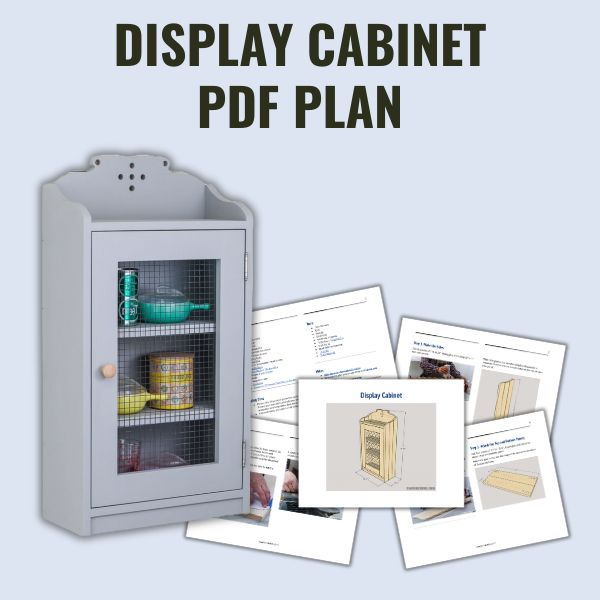
Includes:
- List of tools and materials
- Complete measurements (in inches)
- Easy-to-follow instructions
- Step-by-step photos
- Detailed diagrams
- Two templates
Final Thoughts
This DIY display cabinet looks like something you might see at grandma’s house displaying her favorite treasures or something you might find rummaging through an antique store.
It’s easy to build and the perfect way to display your favorite collection. It’s also an attractive way to organize toiletries in a bathroom or to organize spices in a kitchen.
Click here to get the PDF plan (including the detailed instructions and measurements) now!
Thank you for stopping by. If you enjoyed this tutorial, would you please take a moment and pin it to Pinterest? I’d really appreciate it!
Recommended For You

Pin It For Later

Hi there – I’m Scott, a woodworking enthusiast and creator of Saws on Skates, a site I started in 2015 to share easy-to-follow tutorials, space-saving shop tips, and project inspiration for DIYers at any skill level. Learn more about my woodworking journey here.
You provide very nice easy to use plans for some great ideas. Keep up the good work.
Thank you for the compliments, Clinton. I’m glad you are enjoying the plans.