DIY Outdoor Enclosed Plant Stand (Stylish & Critter-Proof!)
Attention green thumbs! Show off your beautiful blooms and keep pesky critters at bay with this stylish and secure DIY outdoor enclosed plant stand!
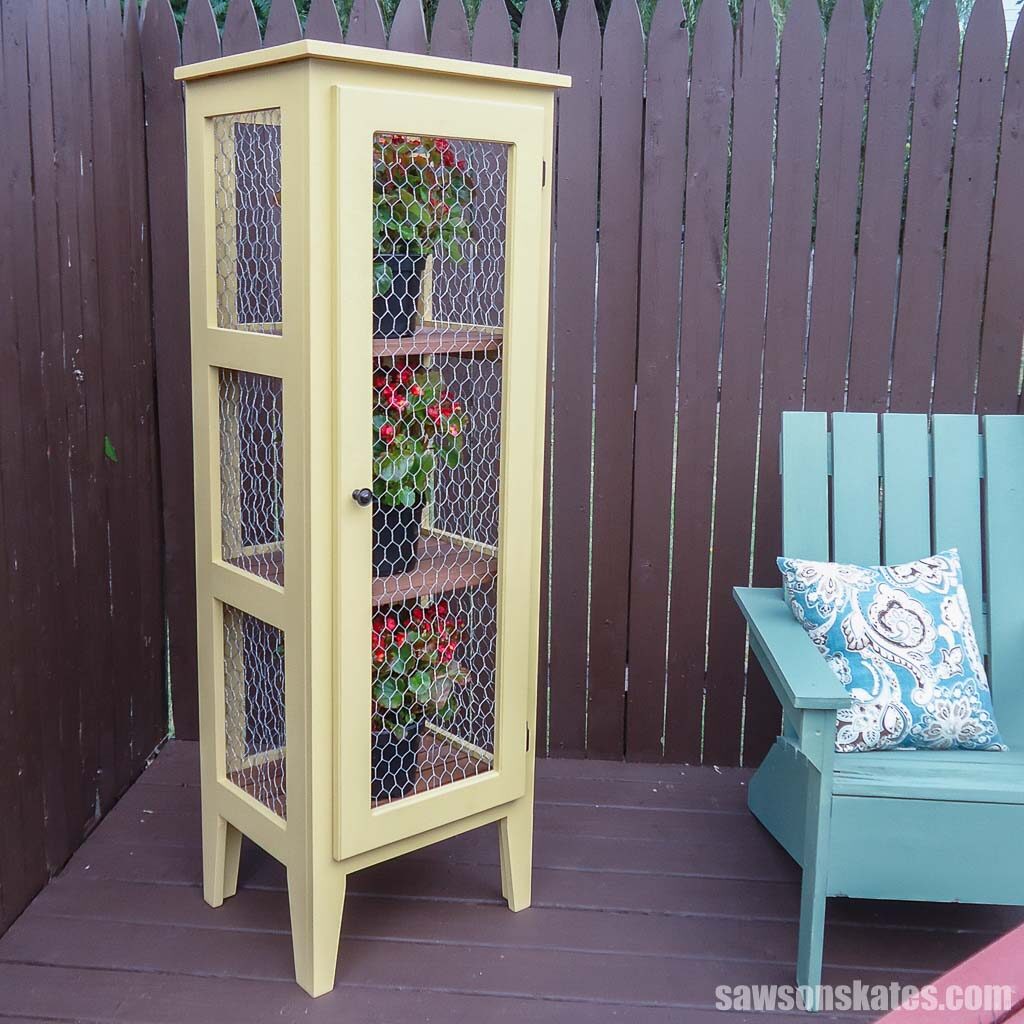
Searching for a way to make your outdoor space stand out while preventing critters from snacking on your flowers, vegetables, and herbs? You’ve come to the right place!
With simple-to-follow instructions, this DIY outdoor enclosed plant stand allows any green thumb to create a stylish and secure enclosure, showcasing your plants without putting them at risk.
Originally published August 2, 2016, updated April 9, 2019, and May 10, 2023.
Table of Contents
- Inspiration for This Outdoor Enclosed Plant Stand
- What Tools Do You Need?
- What Kind of Wood Should You Use For Outdoor Plant Stands?
- How Do You Finish the Outdoor Enclosed Plant Stand?
- How to Make a DIY Outdoor Enclosed Plant Stand
- Get the Free Plan
This article contains affiliate links. If you purchase from these links, I may earn a small commission at no additional cost to you. Visit my site policies for more information.
Inspiration for This Outdoor Enclosed Plant Stand
My friend Linda decorated her deck with flowers several times, but something always devoured the plants before she could enjoy them. One day, looking out the window, she discovered who was to blame. It was a big woodchuck munching on her beautiful blooms, leaving nothing but nubs behind!
She needed a solution that was both attractive and secure – something that would protect her plants from critters while being visually appealing.
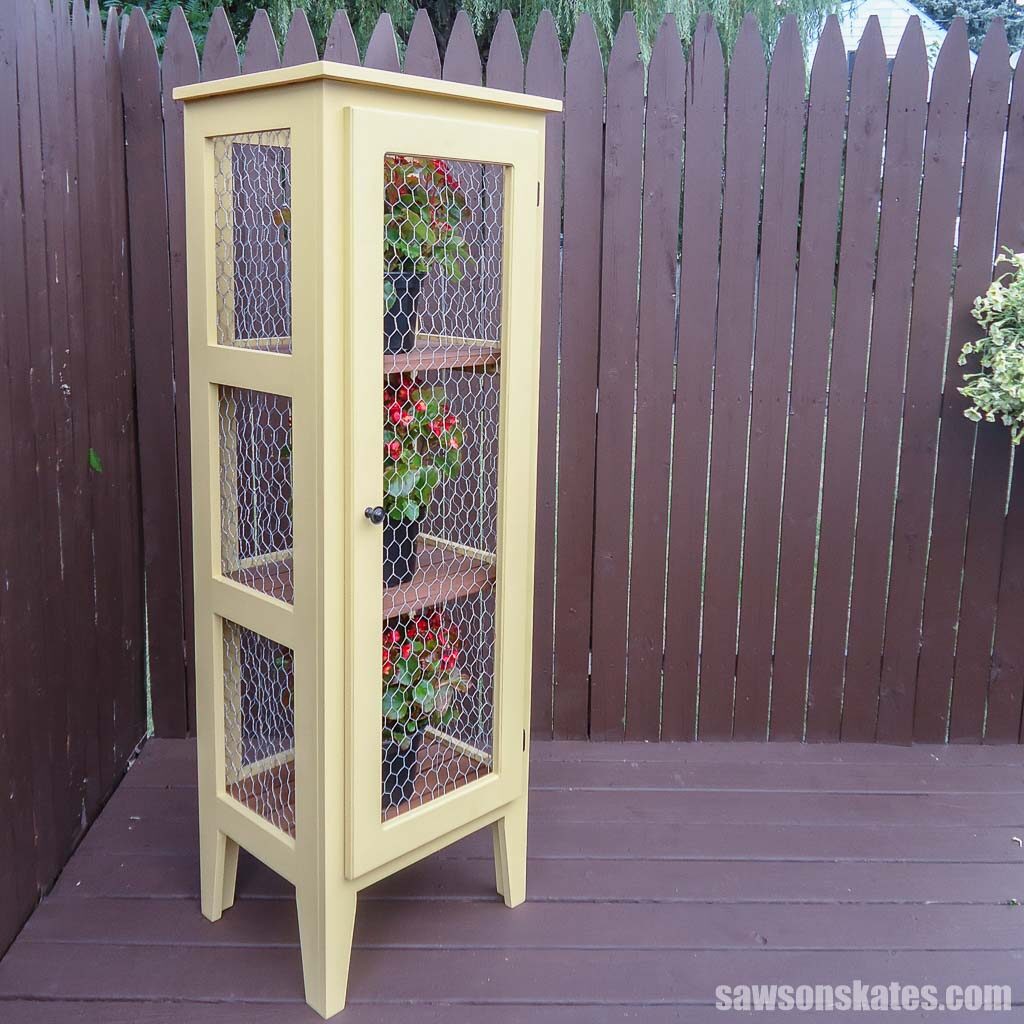
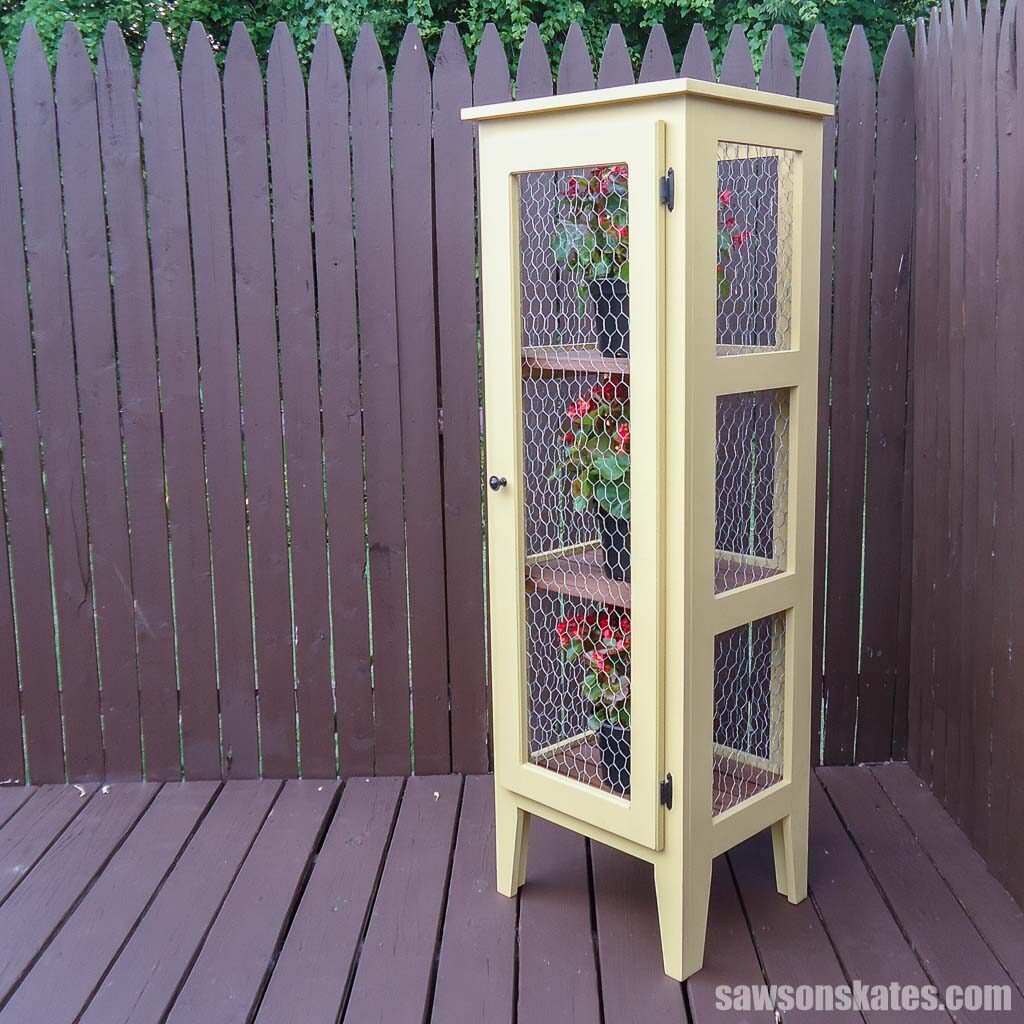
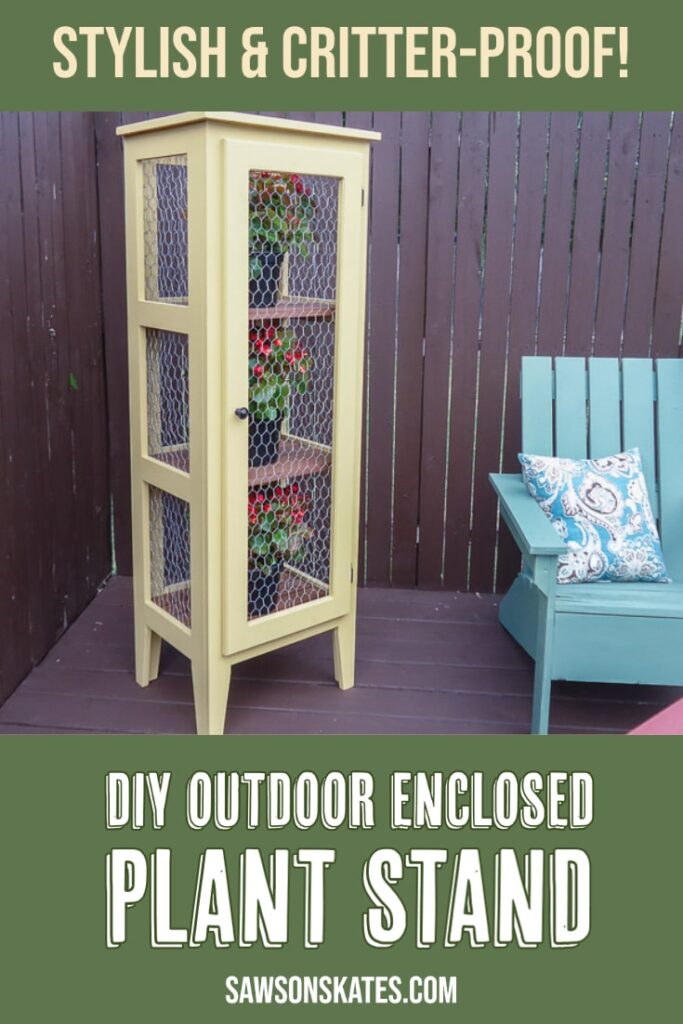
So I got to work, and here’s what I came up with: a tall, outdoor enclosed plant stand inspired by an antique pie safe.
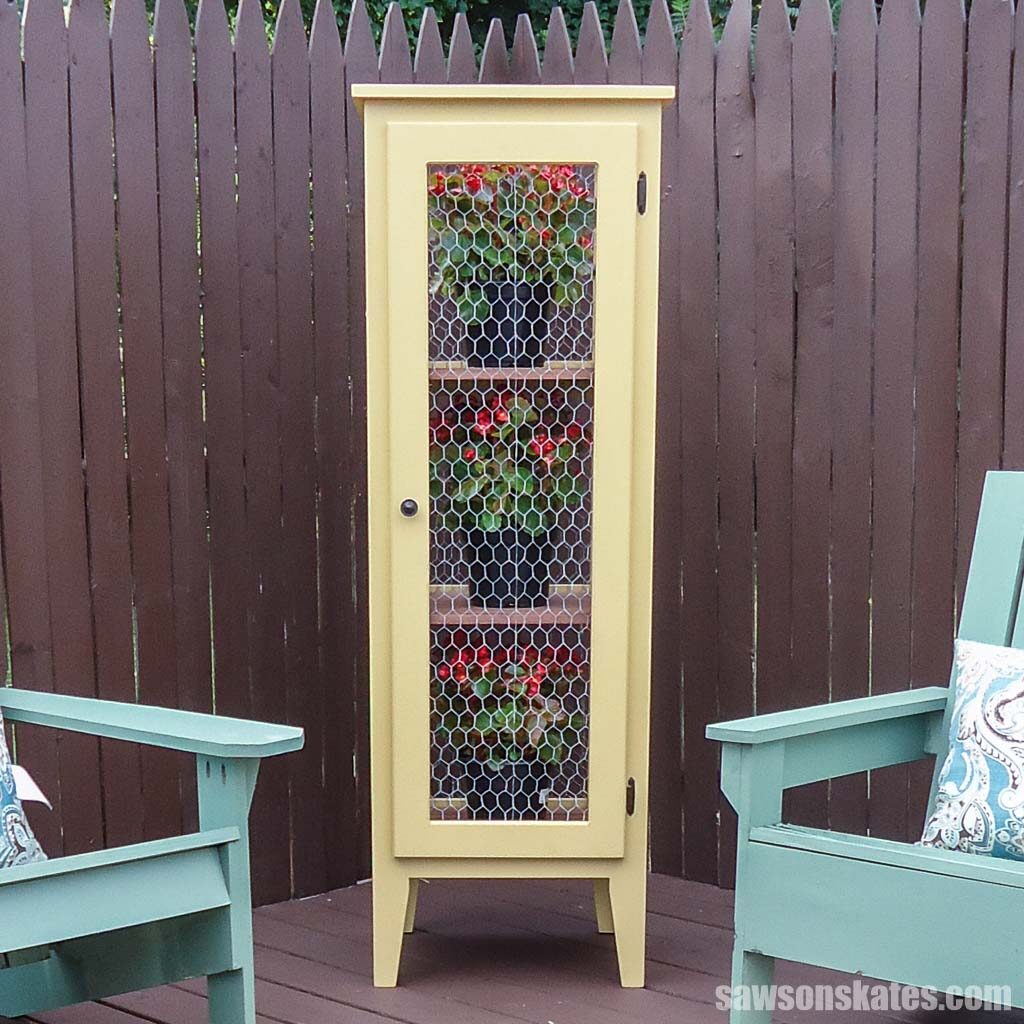
Unlike the tin-punched panels in old-fashioned pie safes, I opted for chicken wire, allowing you to see what’s inside while keeping critters from nibbling on the plants.
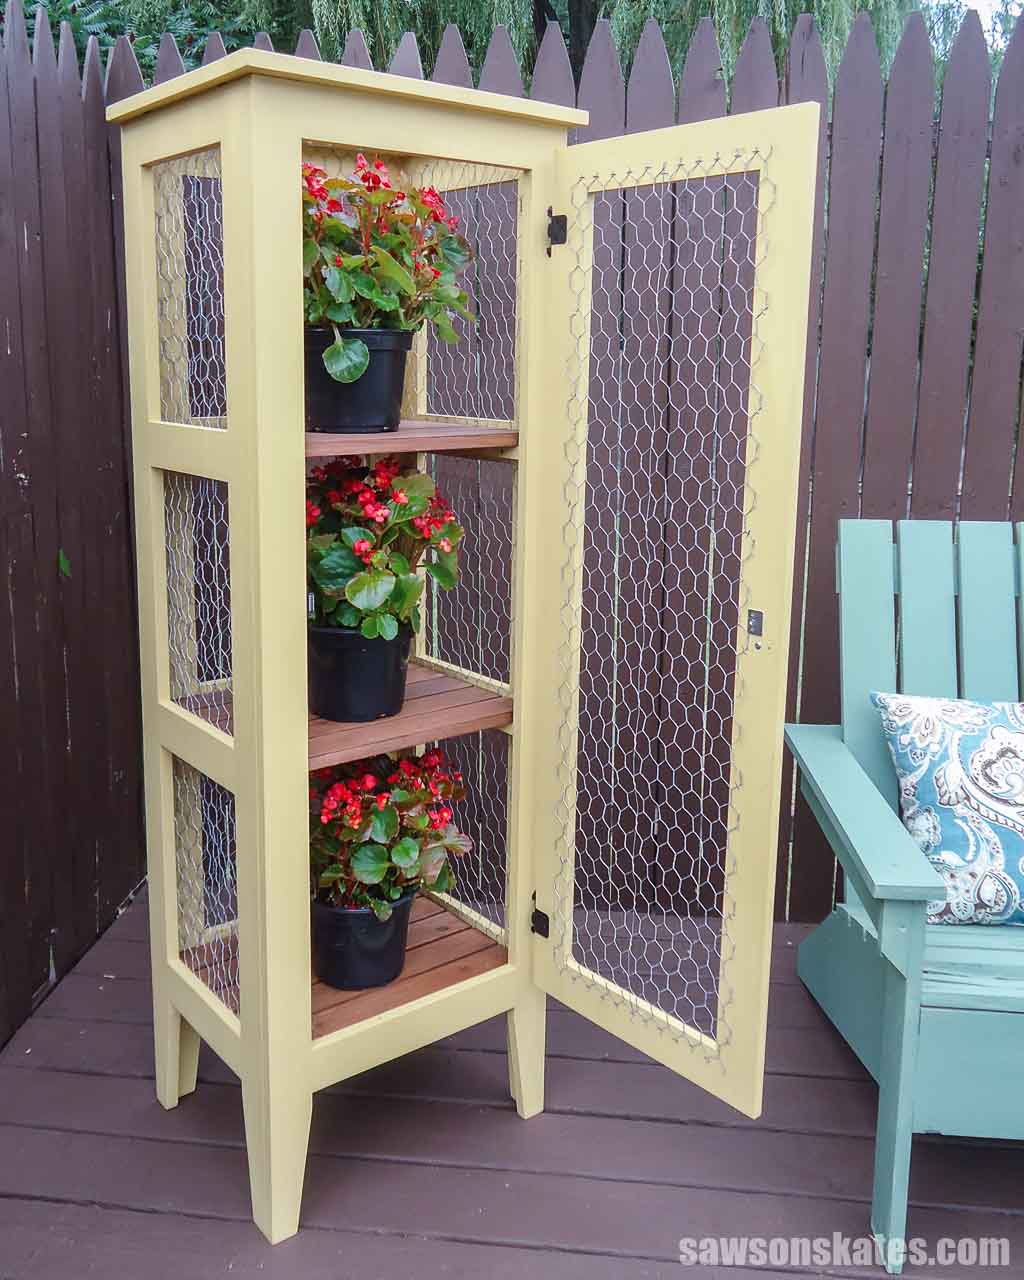
The stand’s vertical design adds height to outdoor spaces and draws your eye upward. Inside, I included three spacious shelves, allowing you to display one large flower pot or groupings of smaller ones, making it a perfect canvas for showcasing your garden.
Linda planned to use her stand to grow flowers, but you could also use it for:
- Succulents
- Herbs like basil, chives, thyme, etc.
- A small container vegetable garden filled with salad greens, onions, etc.
Linda set up her enclosed plant stand on her deck; however, it would also look great on a patio, porch, or balcony.
What Tools Do You Need?
You can build this DIY enclosed plant stand with just a few tools. Here’s what you’ll need:
Miter Saw
I used my miter saw to cut all the stand’s parts to their required lengths.
Jigsaw
I cut the angled feet at the bottom of the stand’s legs using a jigsaw.
Pocket Hole Jig
I used my Kreg Jig to make pocket holes to join the stand’s components, but you can use whichever pocket hole jig you have.
Related: Which Kreg Jig Should You Buy? (Here’s the Answer)
Drill
I made the pocket holes using my drill and used it to drive the screws that connect the stand’s parts.
Stapler
Using a stapler, I attached the chicken wire to the stand’s interior surfaces, preventing critters from getting in.
Brad Nailer (Optional)
I used a brad nailer to attach the slats for the stand’s shelves, but you can use a hammer and nails instead.
Related: Brad Nailer vs Pin Nailer (Differences & Which to Use)
Router (Optional)
I used a handheld router and a round-over bit to add a decorative detail to the door’s outside edge, but you can skip this step if you don’t want to add a decorative edge or don’t have a router.
What Kind of Wood Should You Use For Outdoor Plant Stands?
I used pine for my outdoor plant stand, but it’s not the most durable wood for outdoor projects because it’s prone to insect damage and decay.
If you want your stand to last, I recommend using cedar which is naturally rot-resistant, making it ideal for outdoor projects. Plus, its beautiful color will add a warm and inviting feel to your outdoor living space!
How Do You Finish the Outdoor Enclosed Plant Stand?
Applying a protective coating is essential to safeguard your wood plant stand against weather-related damage.
Suppose you want to enhance the wood’s natural beauty. In that case, I recommend using spar urethane, which is resistant to moisture and temperature changes and contains UV blockers shielding the wood from the sun’s harmful effects.
Related: Spar Urethane vs Polycrylic (Which is Right for You?)
You can also finish your project with exterior paint if you want to add color or choose an outdoor wood stain, which I used for this project.
DIY Outdoor Enclosed Plant Stand
Printed Plan
Get the FREE plan here (includes detailed instructions, measurements, and bonus tips)
Supplies
- Wood (per the printed plan)
- Exterior Wood Glue
- 1-¼” Pocket Screws Blue-Kote
- 1-¼” Exterior Screws
- ⅜” Staples
- 2″ Exterior Screws
- (2) Cabinet Hinges
- Knob
- Magnetic Catch
- Chicken Wire
Tools
- Tape Measure
- Miter Saw
- Jigsaw
- Kreg Jig
- Kreg Multi-Mark
- Drill
- Countersink Drill Bit
- Stapler
- Metal Snips
- Router (optional)
- ¼” Round-over Bit (optional)
Step 1. Make the Side Assemblies
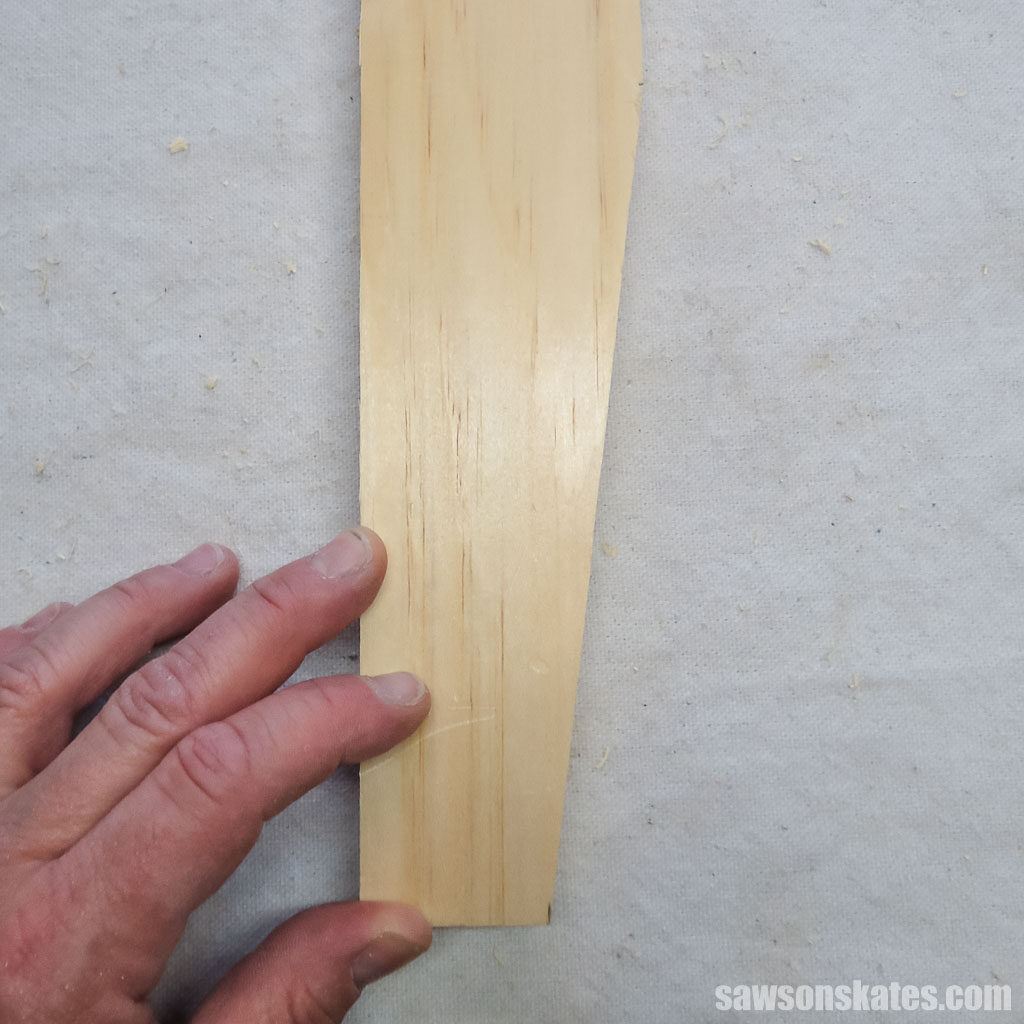
Cut eight pieces of wood to length for the legs. Use the diagram in the printed plan to mark the location for the angled feet and use a jigsaw to cut them out. You’ll use four legs in this step and the others in Step 2 and Step 3.
Related: How to Use a Tape Measure Correctly
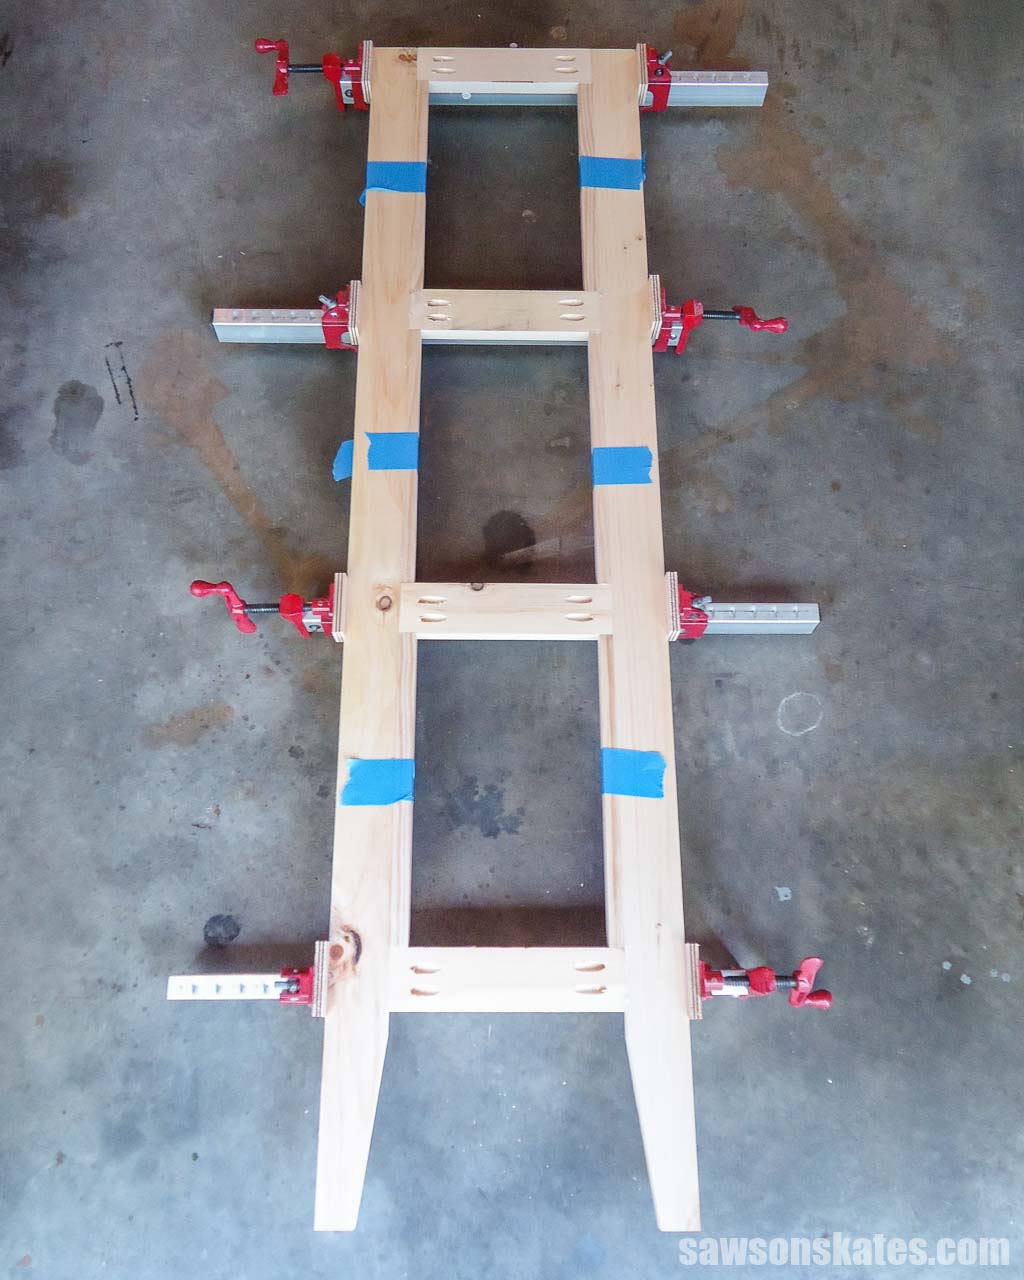
Cut eight pieces of wood to length for the rails and drill pocket holes in each end.
Related: How to Use a Pocket Hole Jig (& Beginner Pitfalls to Avoid)
TIP: To help with positioning the rails, I cut six pieces of scrap wood to length, placed them between the rails, and temporarily held them in place with painter’s tape.
Place two legs on your workbench, making sure the angled feet face inward, then apply glue to the rails and position on the legs. Attach using pocket screws. Repeat for the second side.
The sides attach to the front assembly with pocket screws. Use the diagram in the printed plan to mark the locations and then drill the pocket holes.
TIP: Be sure to make a right and left side.
Step 2. Make the Back Assembly
Cut four pieces of wood to length for the rails and drill pocket holes in each end.
Place two legs on your workbench (from Step 1), making sure the angled feet face inward, then apply glue to the rails and position on the legs. Again, I used scrap wood pieces to help position the rails. Attach using pocket screws.
The back assembly attaches to the side assemblies with pocket screws. Use the diagram in the printed plan to mark the locations and then drill the pocket holes.
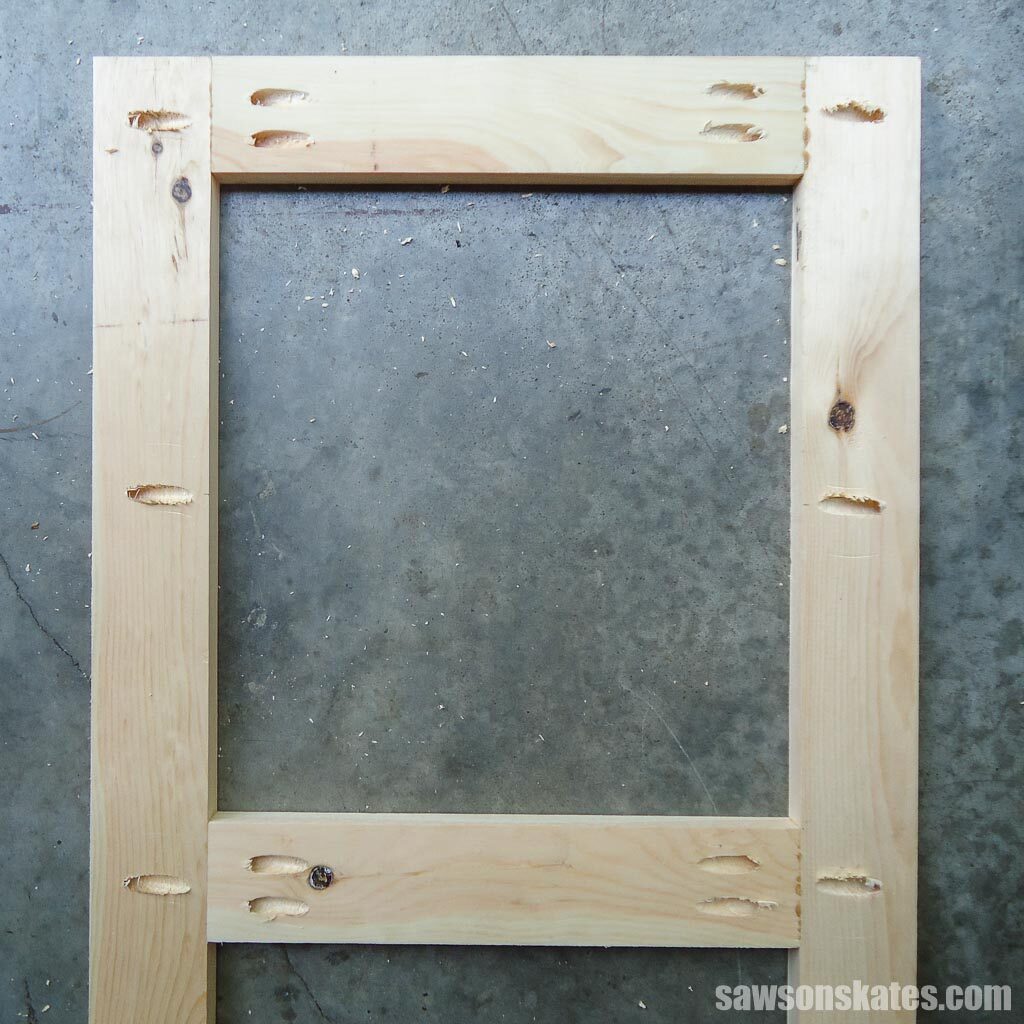
Step 3. Make the Front Assembly
Cut two pieces of wood to length for the rails and drill pocket holes in each end.
Place two legs on your workbench (from Step 1), making sure the angled feet face inward, then apply glue to the rails and position the legs. Attach using pocket screws.
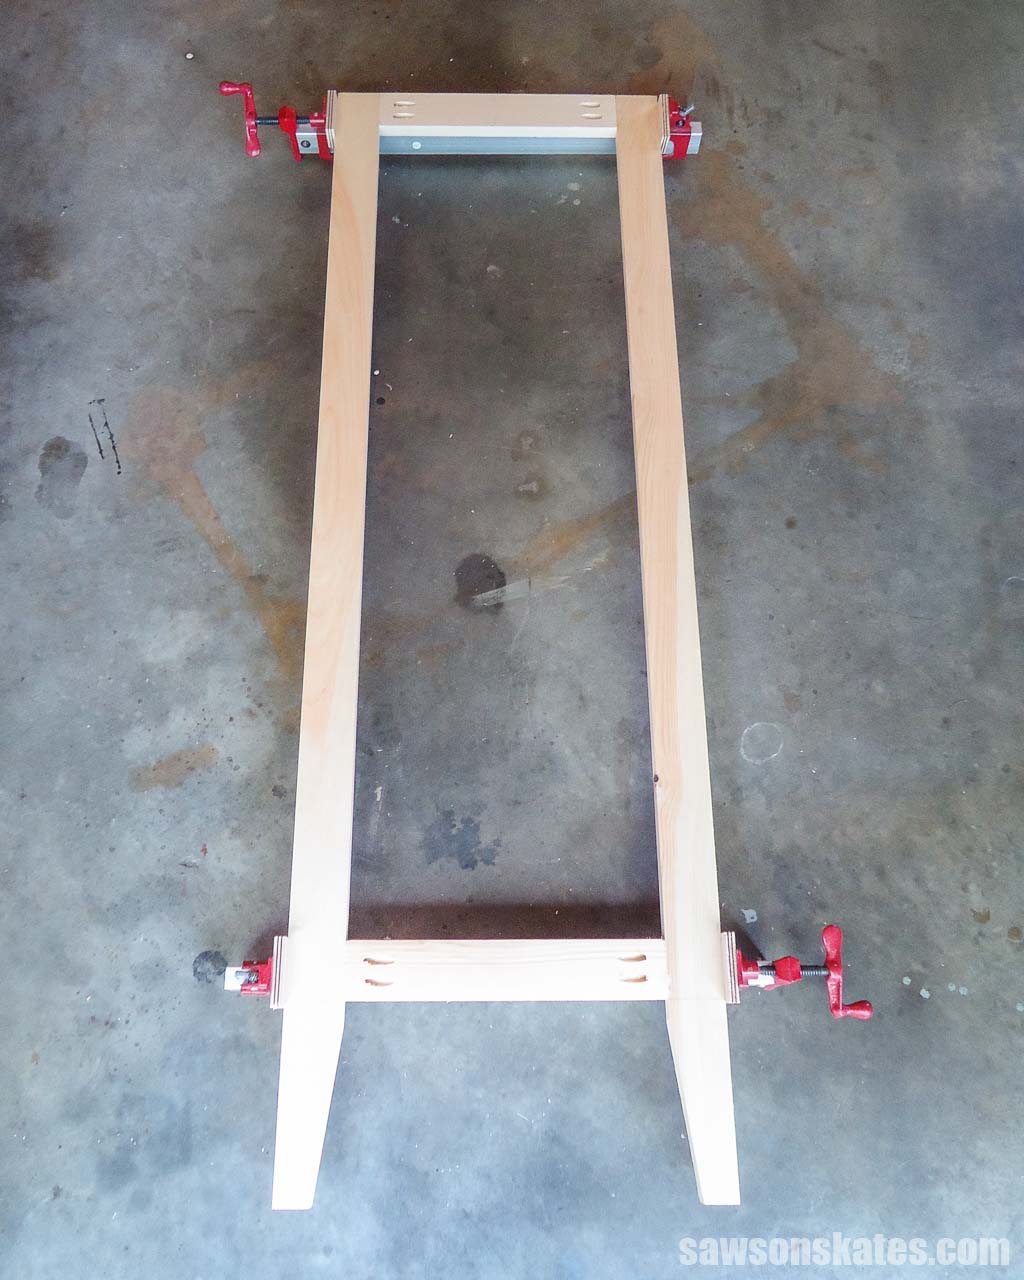
Step 4. Assemble the Plant Stand
It’s easier to sand all of the parts before assembling. I set up my folding workbench and sanded the assemblies with my random orbit sander.
Related: Best Sanders for Furniture (Which One to Buy & Why)
Apply glue to one side and clamp to the front. Attach using pocket screws. Repeat for the other side.
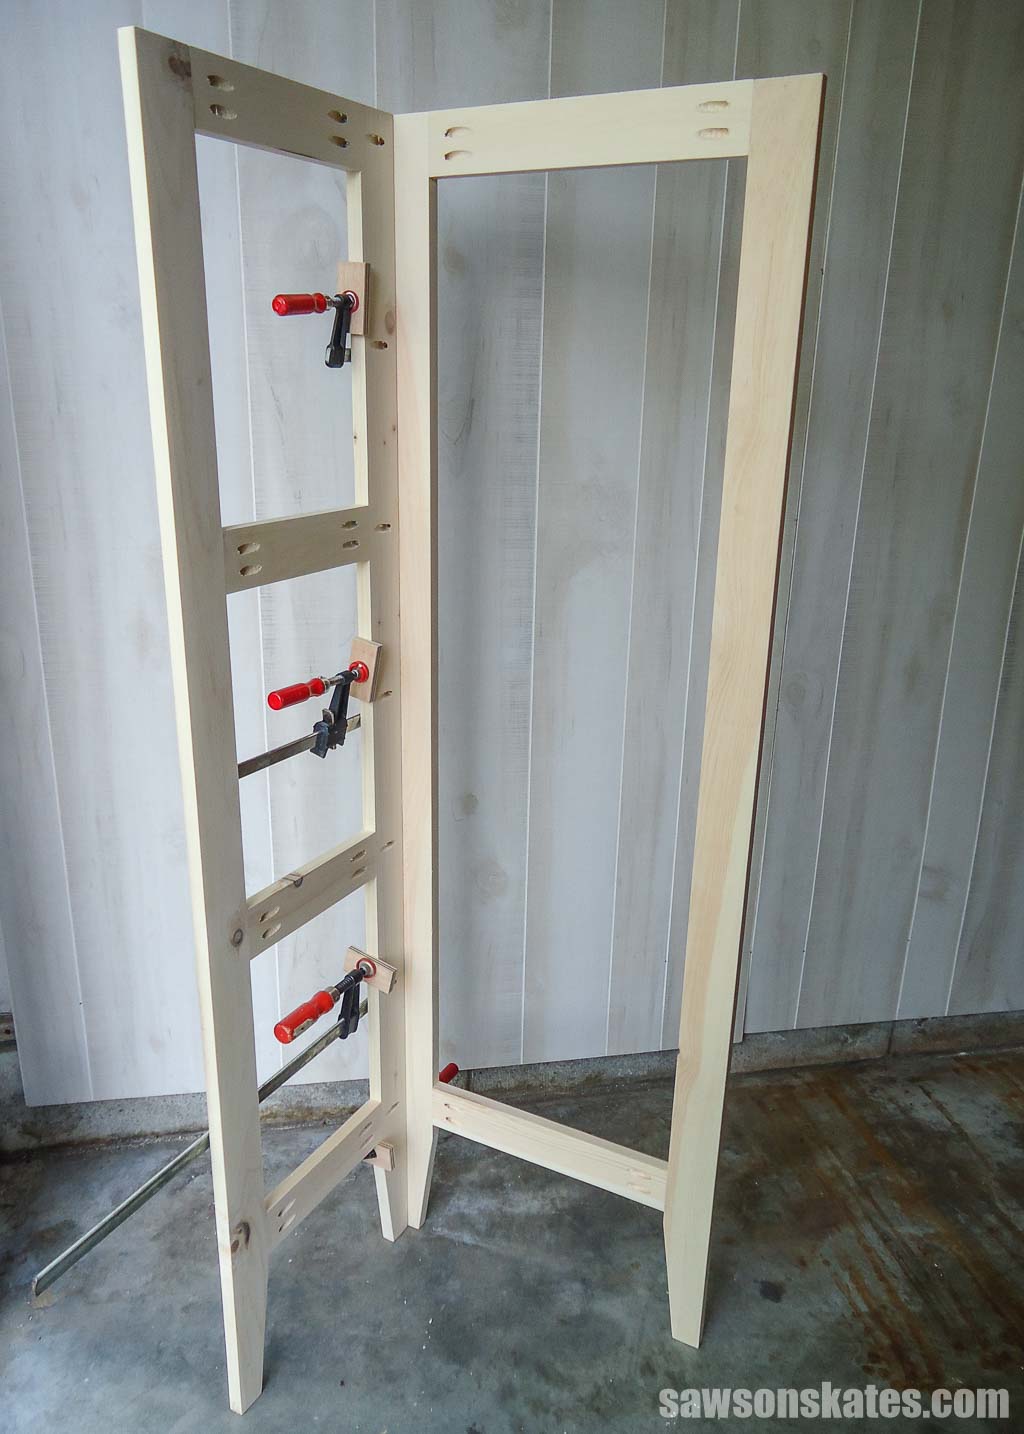
Apply glue to the back, clamp to the sides, and attach using pocket screws.
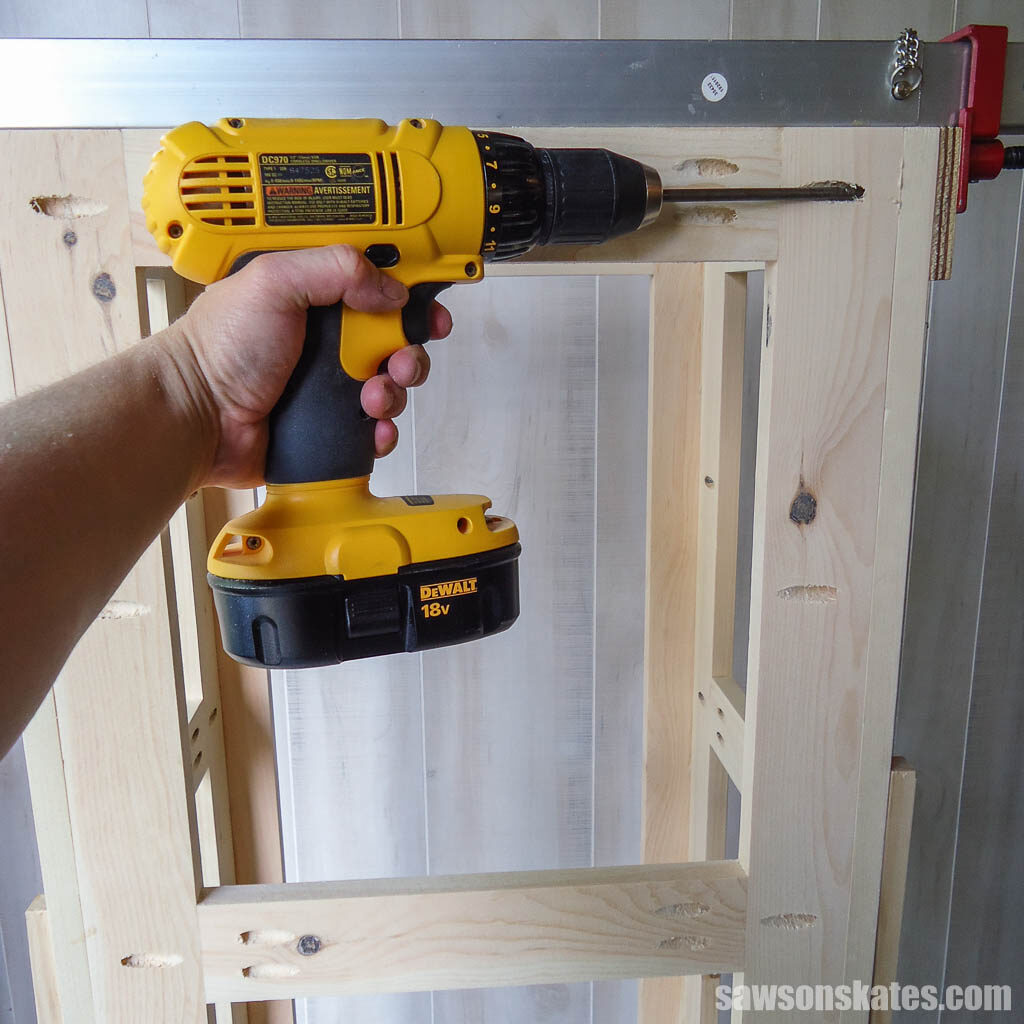
Step 5. Assemble the Door
Cut two pieces of wood to length for the stiles. Cut two pieces of wood to length for the rails and drill pocket holes in each end.
Apply glue to the rails, clamp to the stiles, and attach using pocket screws.
I used a round-over bit in my router to give the door’s edge a decorative detail, but this step is optional.
Related: How to Use a Router Table for Beginners
Step 6. Assemble the Top
Cut two long pieces of wood to length. Cut two short pieces of wood to length and drill pocket holes in each end. Apply glue, clamp, and attach using pocket screws.
Use the diagram in the printed plan to mark the locations for countersink holes that attach the top to the stand.
Use an awl to make a starting point for the drill bit at each mark.
Related: What is an Awl? (+ How to Use It)
Next, use a countersink bit to make a hole at each location.
Related: How to Use a Countersink Bit
Set aside until Step 12.
Step 7. Install the Cleats
Cut six pieces of wood to length for the cleats which support the shelf slats. Use the diagram in the printed plan to drill countersink holes that will attach the cleat to the rails.
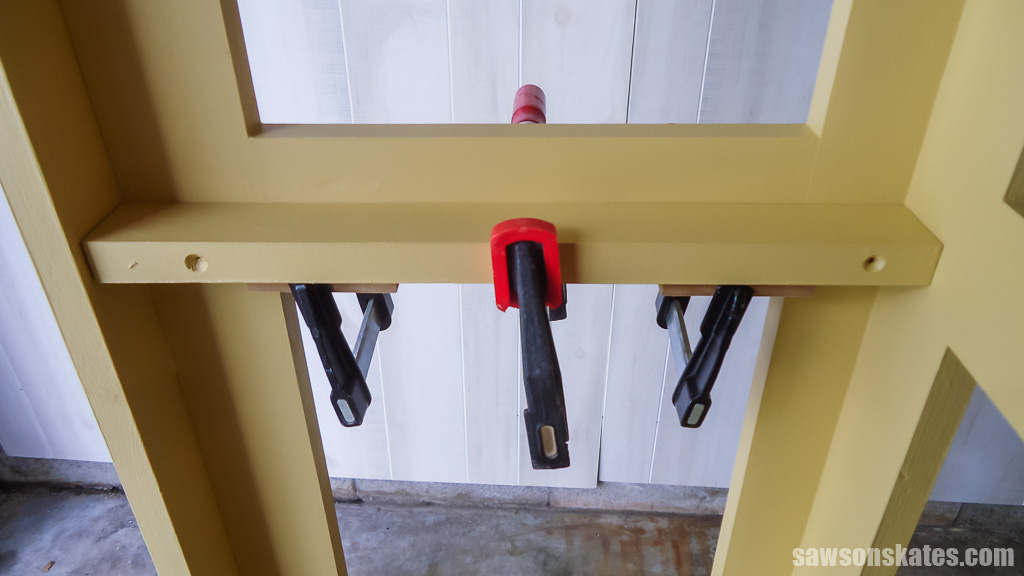
The cleats set up a from the bottom of the side rails. I used a scrap piece of MDF to help position the cleats, clamping it so it was flush with the bottom of the side rail. You can also use plywood if you don’t have MDF.
I placed the cleat on the MDF and clamped it to the side rail. Attach using exterior screws. Repeat for the remaining cleats.
Step 8. Cut the Shelf Slats
Cut 15 pieces of wood to length for the slats. Set aside until Step 11.
Step 9. Paint or Stain the Stand and Slats
It’s easier to paint or stain all the stand’s parts before attaching the chicken wire and hardware.
First, I filled all the pocket holes with Ready Patch to prevent water from collecting and causing the wood to rot prematurely.
Related: How to Make Pocket Hole Plugs (Step-by-Step Guide)
Next, I sealed the stand with two coats of Behr solid exterior wood stain in “Colonial Yellow.”
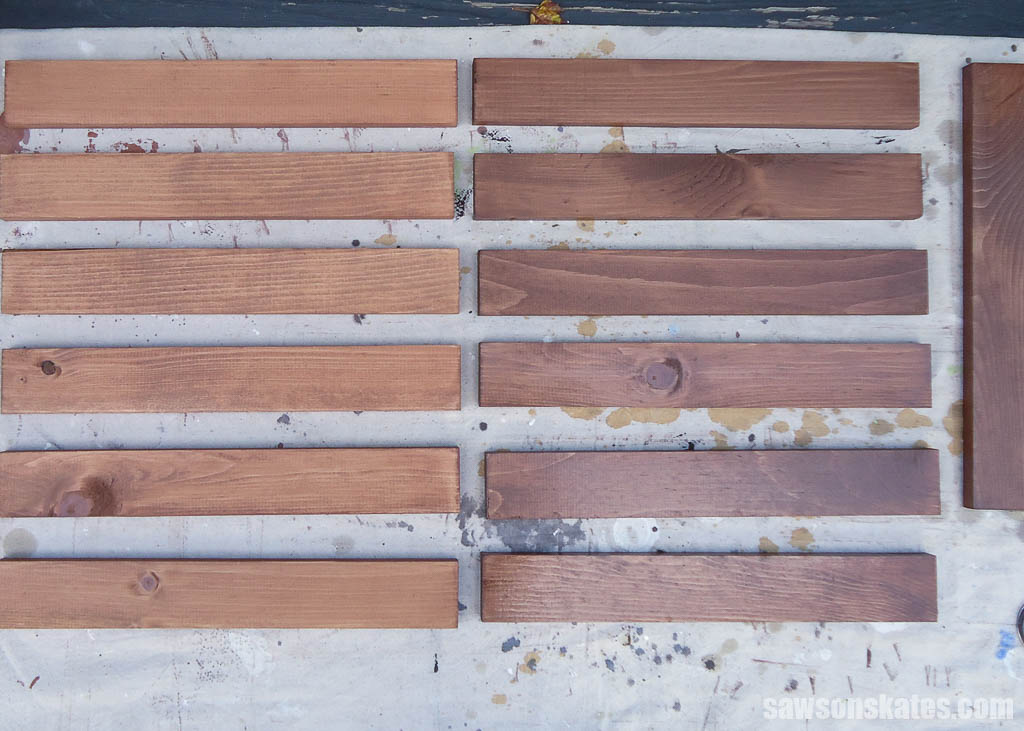
I stained the shelf slats with two shades of Behr semi-transparent exterior stain. The first coat was “Russet,” and the second was “Padre Brown.”
Step 10. Attach the Chicken Wire to the Back
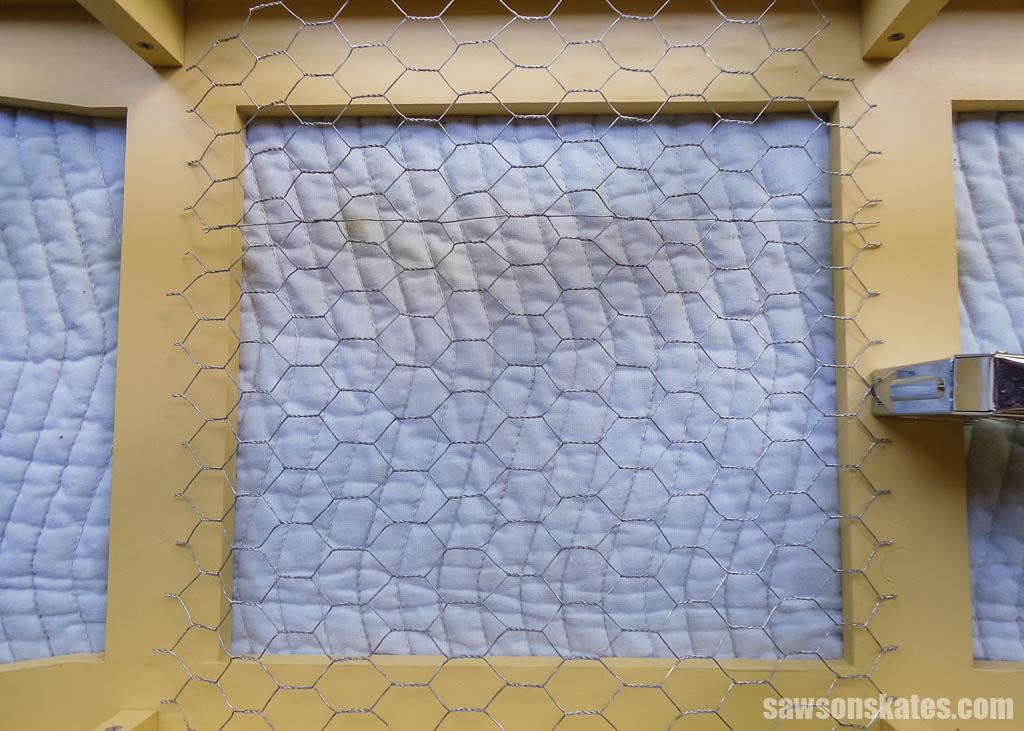
I used metal snips to cut the chicken wire to fit the back’s three openings and attached them using a stapler and staples.
Step 11. Attach the Slats and Chicken Wire to the Sides
I used scrap pieces of MDF to help position the slats. Starting at the front of the cabinet, place a piece of MDF on each cleat, then place a slat and attach using brad nails.
Related: Brad Nailer vs Finish Nailer (Which to Choose & Why)
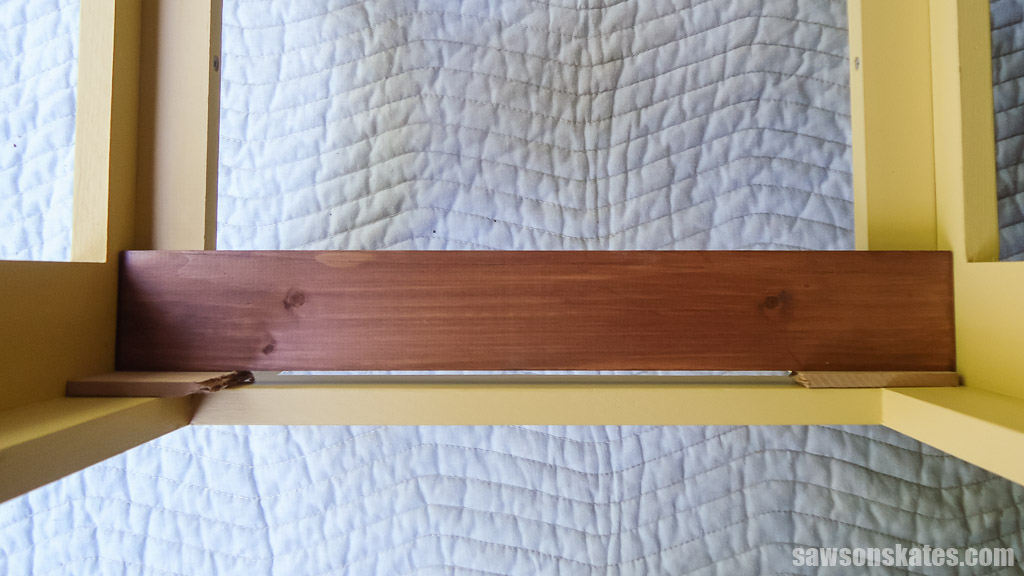
Remove the MDF and position it behind the slat you just installed. Place another slat behind the MDF and attach using brad nails.
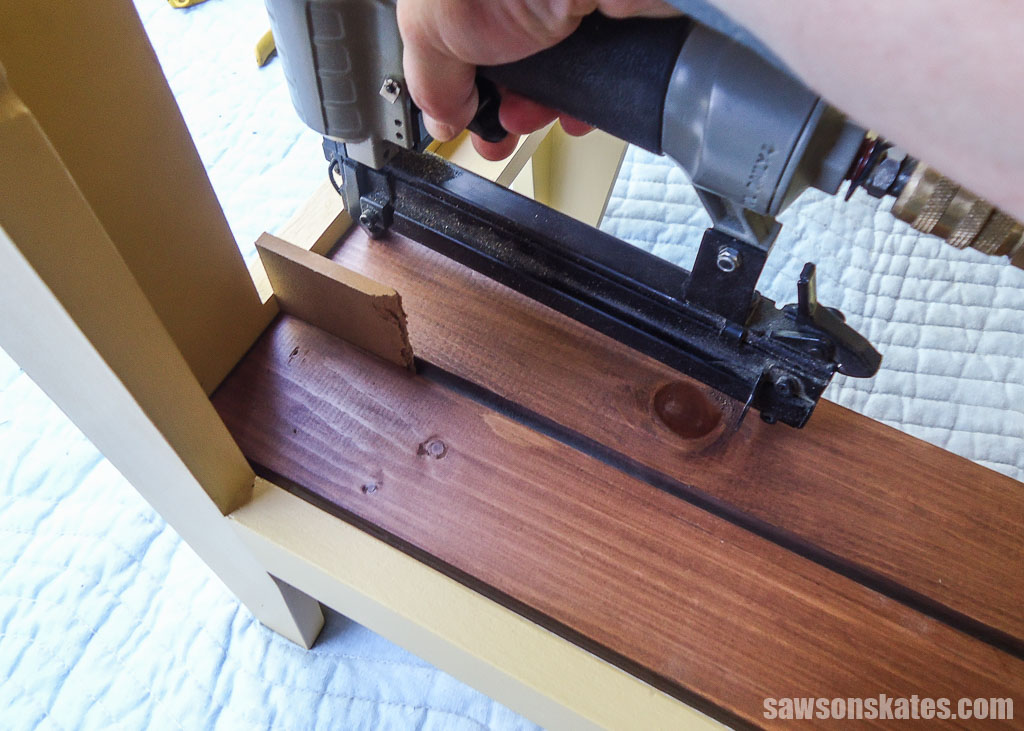
Repeat until you’ve attached all of the slats for that shelf.
Do not install the slats for the other shelves yet.
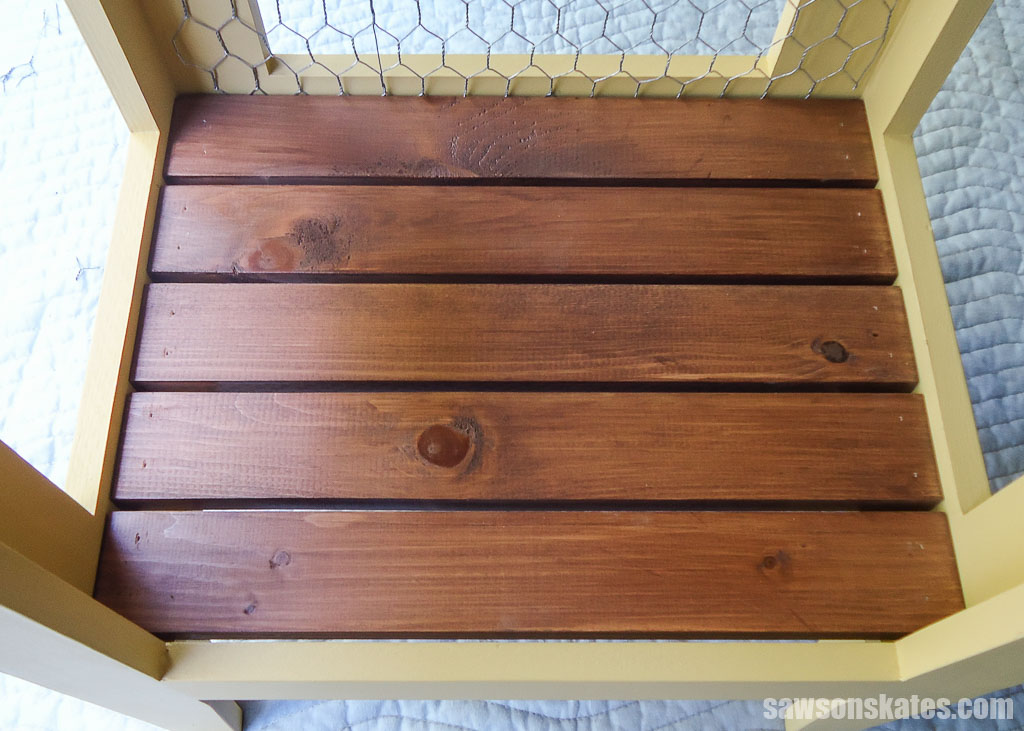
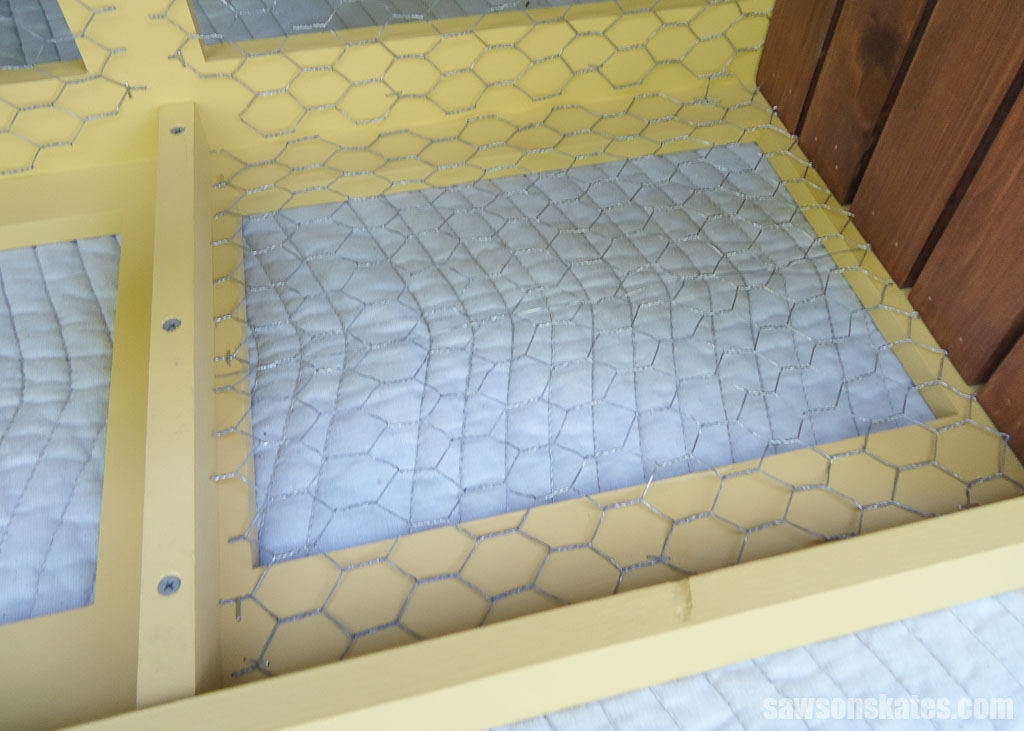
It’s easier to install the chicken to the sides as you complete the installation of each shelf before installing the next. I used metal snips to cut the chicken wire to fit the two side opening and attached it using a stapler and staples.
Then repeat for the remaining shelves and side openings.
Step 12. Attach the Top
Place the top (from Step 6) on the stand. From the inside, use a pencil to trace the inside shape of the stand on the top.
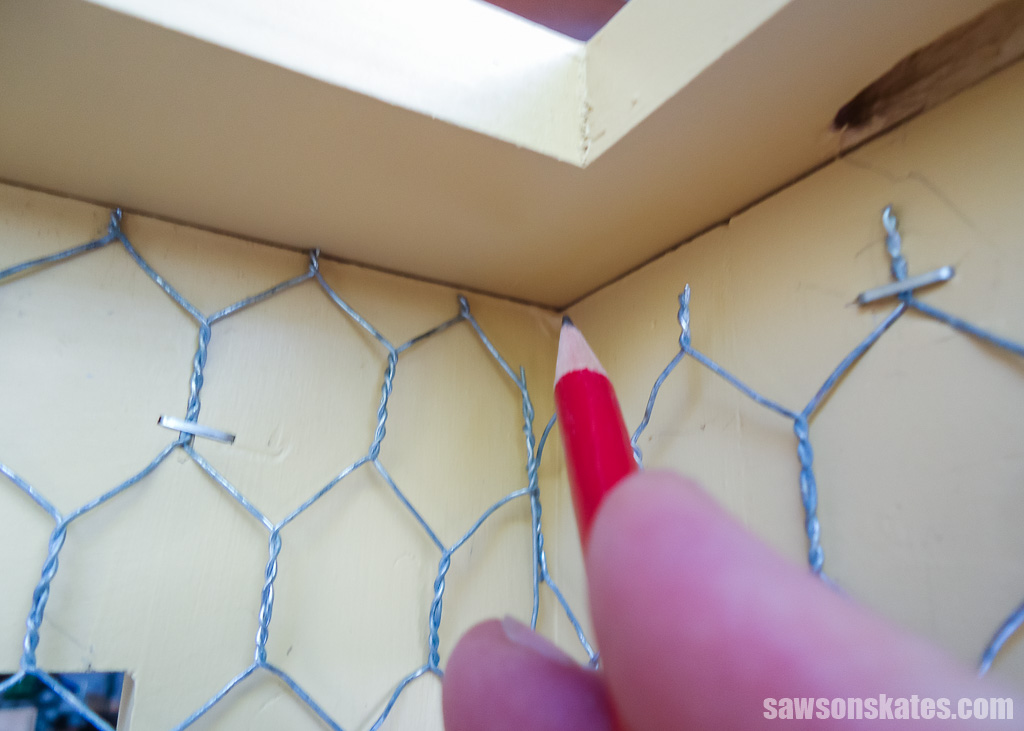
Use metal snips to cut a piece of chicken wire to fit within the pencil lines and attach using staples.
Place the top on the cabinet and attach using exterior screws.
Step 13. Attach the Door
The chicken wire must be attached to the door so it doesn’t interfere with the door opening.
Set your Kreg Multi-Mark and make a pencil line all the way around the door. Use metal snips to cut a piece of chicken wire to fit within the pencil lines and attach it using staples.
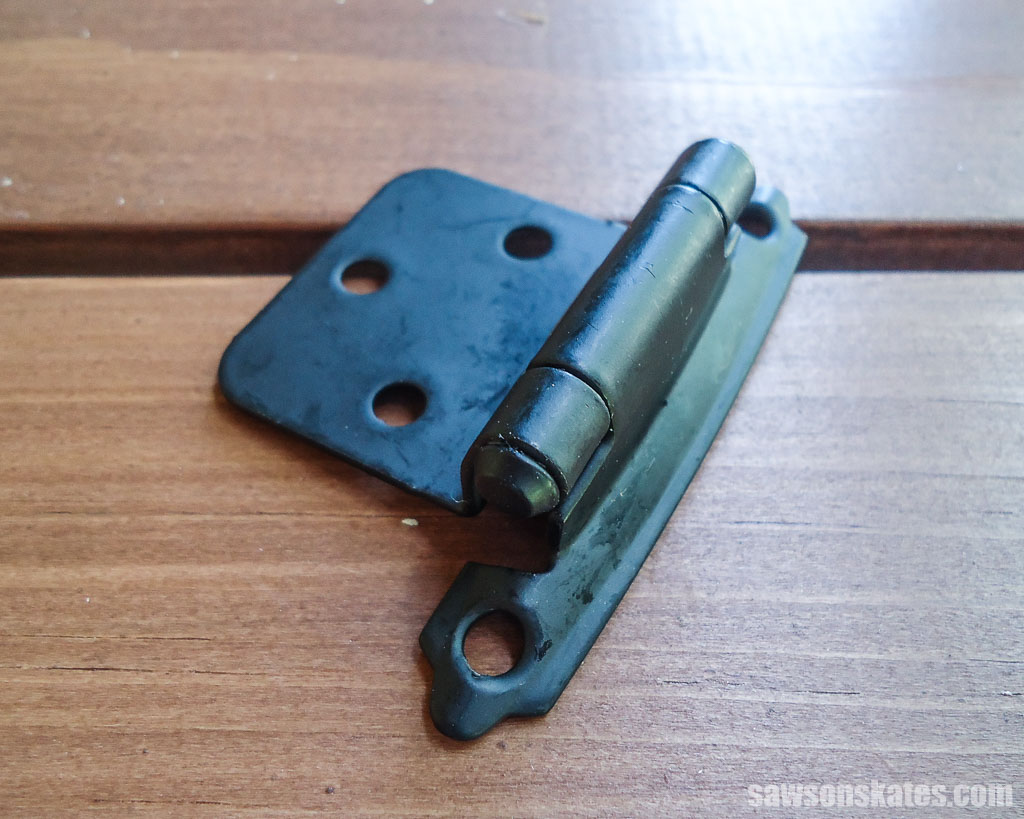
Next, position the cabinet hinges on the back of the door and attach them using the screws that come with the hinges.
I used a piece of scrap wood to help position the bottom of the door.
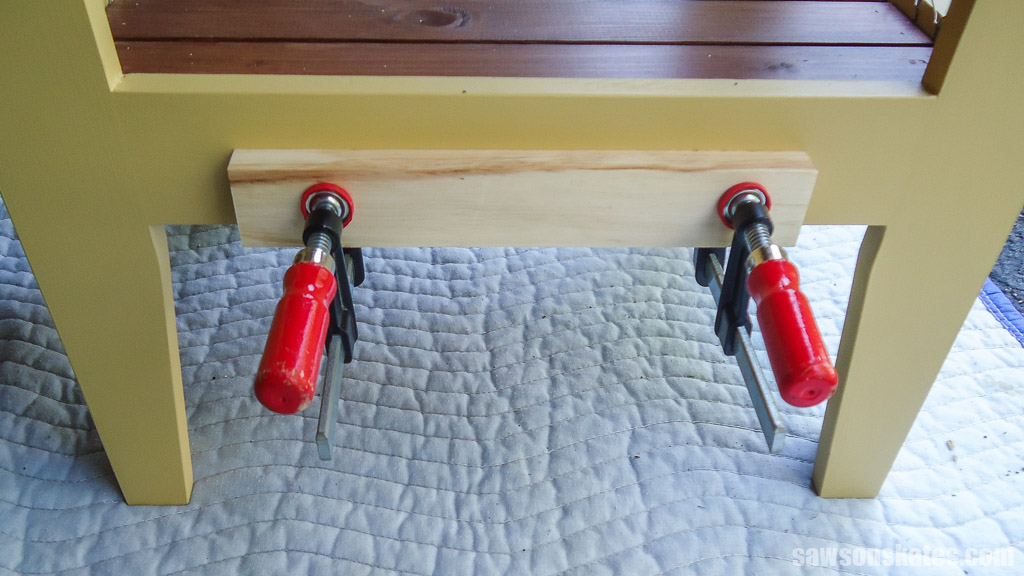
Using a Kreg Multi-Mark, center the door from side to side, then attach the hinges to the stand.
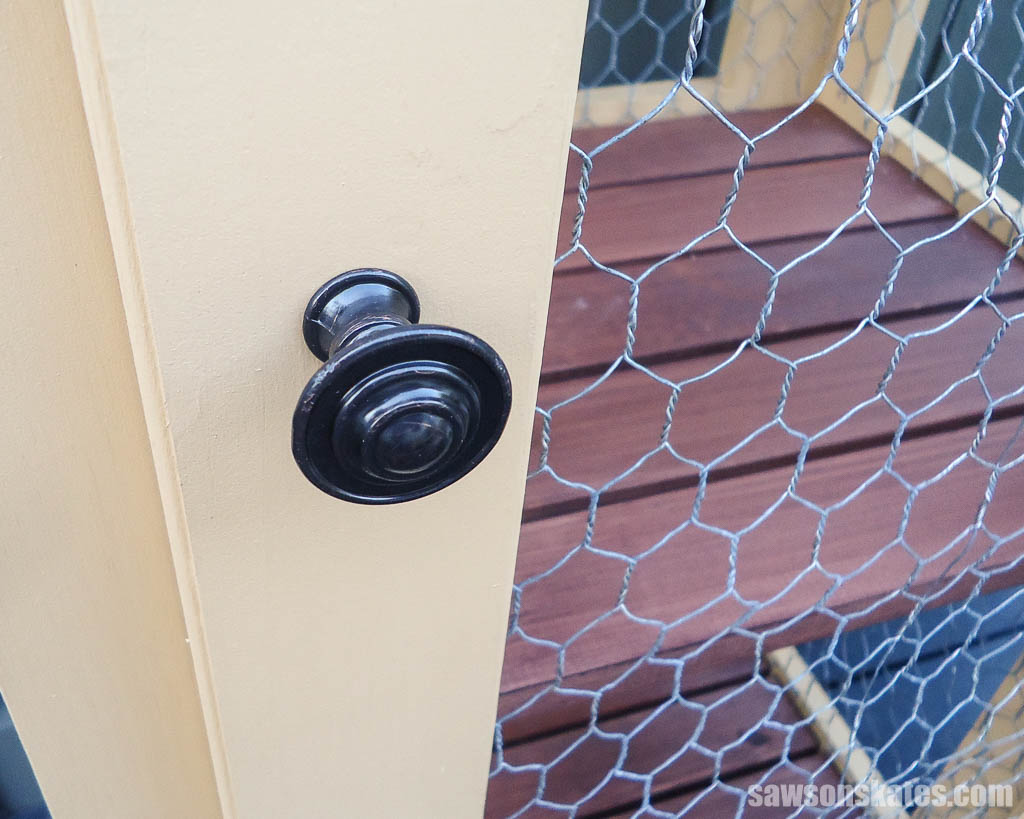
You can attach the knob once the hinges are mounted. I centered mine top to bottom on the door, but you can install it anywhere you like.
I used a magnetic catch to keep the door closed. First, I attached the magnet to the stand and then mounted the corresponding piece on the door.
Final Thoughts
Building a DIY outdoor enclosed plant stand is an easy and attractive project that will allow you to display your flowers and herbs in style while keeping critters from eating them.
Don’t wait. Get your free plan (including the detailed instructions and measurements) now!
Thank you for stopping by. If you enjoyed this tutorial, would you please take a moment and pin it to Pinterest? I’d really appreciate it!

WOW! That came out amazing, Scott.
Nice work — I bet Linda forgave your behind-the-scenes paint machinations when she saw that beautiful cabinet! 🙂
Thank you Bob! She has forgiven me and she agrees the colors of the chairs and cabinet look great together!
I LOVE this cabinet! Such a clever idea and the color fits it so well… This is the perfect idea for keeping plants safe from critters!
Thank you Cher-Ann! So far the cabinet seems to be working… the plants are safe and intact!
Nice job Scott, would you be interested in selling one and how much. I can use something like that to put my water bottle on top of.
Thank you Claude! I’m flattered you would like to buy one, but I’m not building to sell at this point. I’ll definitely let you know if anything changes in the future. Thank you again!
muchas gracias por el tutorial. he seguido los pasos ( a pesar del idioma ) y ya tengo mi armario de jardin. Es precioso
Estoy muy contento de que fueron capaces de seguir el tutorial y construir su propio! Me gustaría ver una foto de su proyecto! He utilizado el traductor de google, así que espero que esto tenga sentido.
I do not know how they upload photos here. I’ve tagged you in instagram so you can see it
https://www.instagram.com/artlowood/
Or use net instead of chicken wire. use chicken wire for the shelves and cool your freshly baked pies.
I saw this and thought to myself that this could also hold bugs IN! I try to raise monarch butterflies in the summer, and needed to upgrade my facilities. The process of butterfly raising entails capturing eggs or caterpillars from the wild, enclosing them in a secure space, feeding them fresh milkweed (preferred diet) and protecting their chrysalis as they evolve from caterpillar to butterfly. For this project, I used scrap wood sized down with a Kreg rip attachment to my circular saw, and replaced poultry wire with metal screen. I made many mistakes. I hope the monarchs don’t mind.
That’s a fantastic idea, Tim. Thank you for sharing! I hope the monarchs love it!