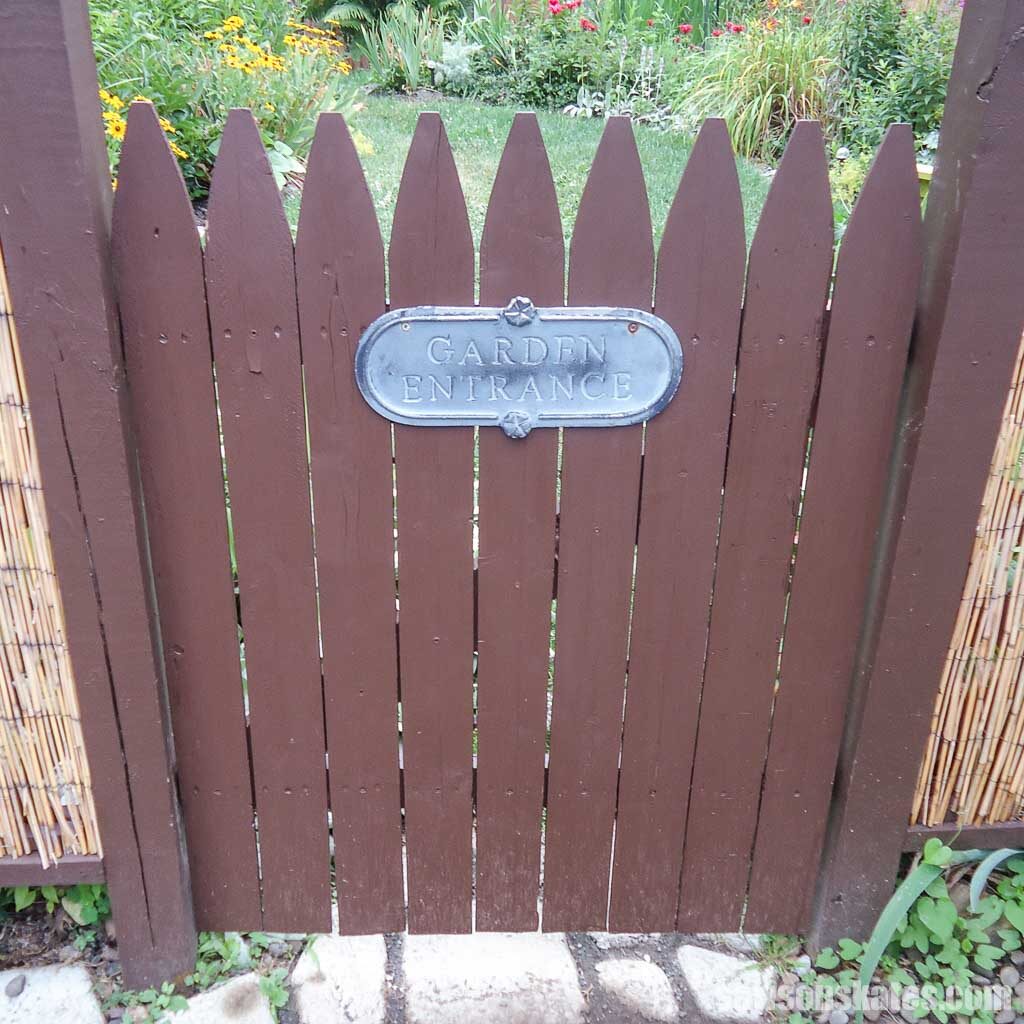
Easy DIY Garden Gate (Simple Step-by-Step Plans)
This simple step-by-step tutorial transforms a basic wooden fence panel into a stylish, easy-to-make DIY garden gate. Perfect for any skill level!
What Should I Build Next?
That's the question I help answer.
Every week, I send woodworking ideas to 17,000 DIYers who love building things.
You'd fit right in.
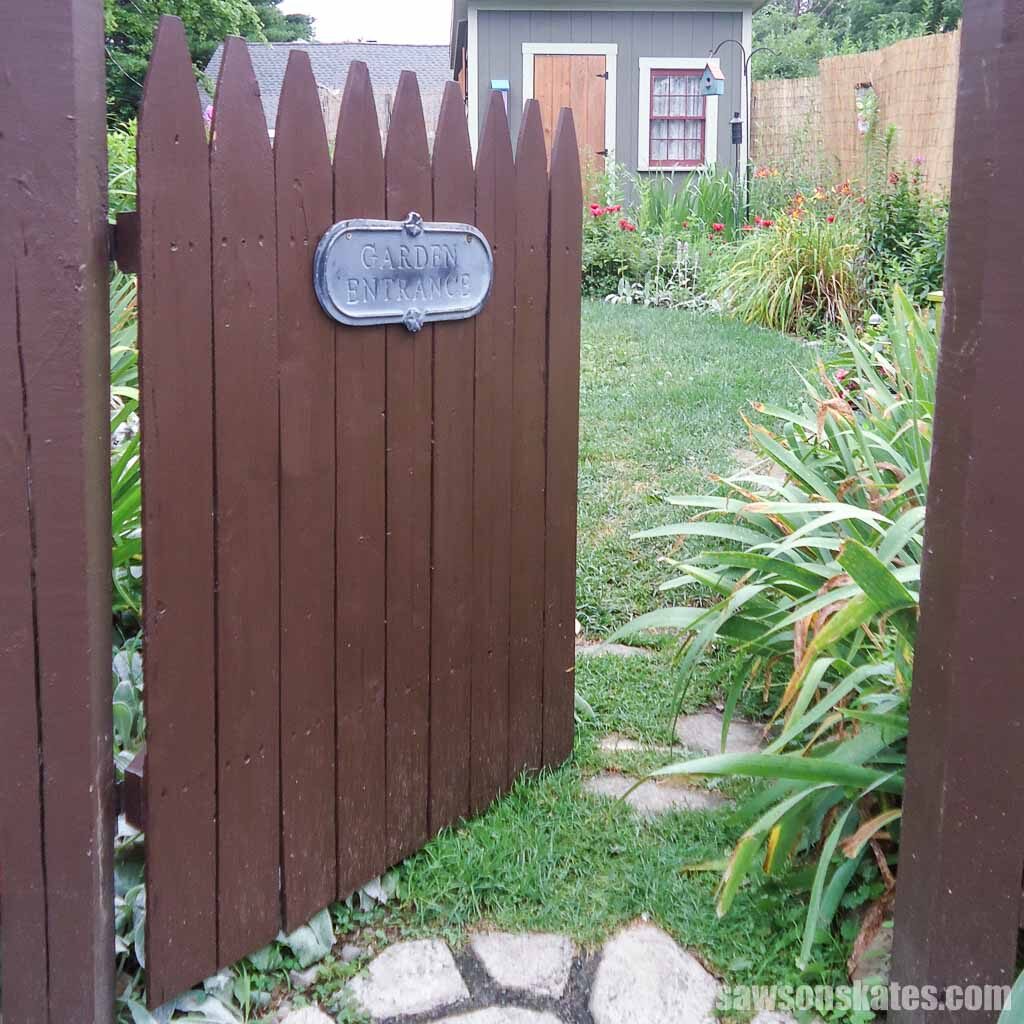
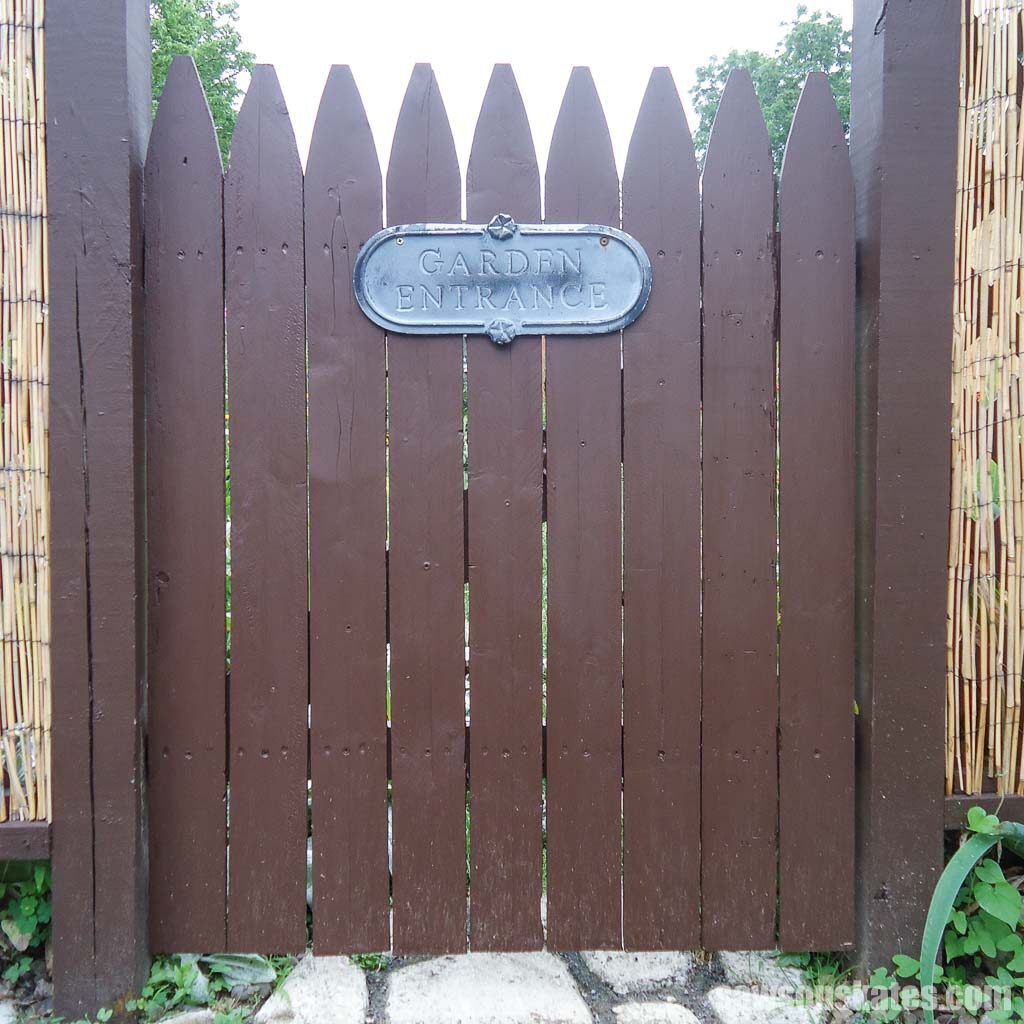
Need a garden gate, but worried building one is too complicated? I have the solution. I’ll show you how to transform a wooden fence panel into an easy-to-make DIY garden gate with just a few simple tools!
Whether you’re a seasoned DIYer or a complete novice, this project is perfect for anyone looking to keep kids or pets in one spot while adding a touch of charm to their backyard or garden.
Originally published July 12, 2016, updated April 25, 2023.
Table of Contents
- What Tools Do You Need to Make a Garden Gate?
- What Kind of Wood Should I Use to Build a Garden Gate?
- How Do You Measure the Gate Opening?
- How Do You Finish the DIY Garden Gate?
- How to Make a DIY Garden Gate
- Get the Free Plan
This article contains affiliate links. If you purchase from these links, I may earn a small commission at no additional cost to you. Visit my site policies for more information.
What Tools Do You Need to Make a Garden Gate?
When building a garden gate, you might think you’ll need an assortment of specialized tools; however, you’ll be pleased to know you can create a stylish, functional gate using only a circular saw and a drill!
Circular Saw
I used a circular saw to cut the fence panel to the correct width and an angled cross brace that strengthened the panel.
Drill
I used my drill to drive screws to attach the brace to the panel and mount the gate hinges and latch.
What Kind of Wood Should I Use to Build a Garden Gate?
I’ve built several garden gates using untreated pine panels. Pine isn’t the best wood for outdoor projects because it’s not resistant to insects or decay. Better choices include cedar, pressure-treated, and other rot-resistant woods.
That said, the panels I used to make gates were given to me for free, so the only investment was my time. And after applying an exterior finish, the pine gates often lasted six or seven years. Not bad for free!
If you’re looking for a low-cost option, check Facebook Marketplace or Craigslist for used fence panels, where you can often find them for free. The fence pickets frequently rot at the bottom, but you can cut a 6′ panel down to a decent size for a gate.
How Do You Measure the Gate Opening?
To ensure the best fit for your garden gate, you’ll need to measure the distance between your posts; however, the opening is rarely square, so I suggest taking two measurements, one at the top and one at the bottom.
Related: How to Use a Tape Measure Correctly
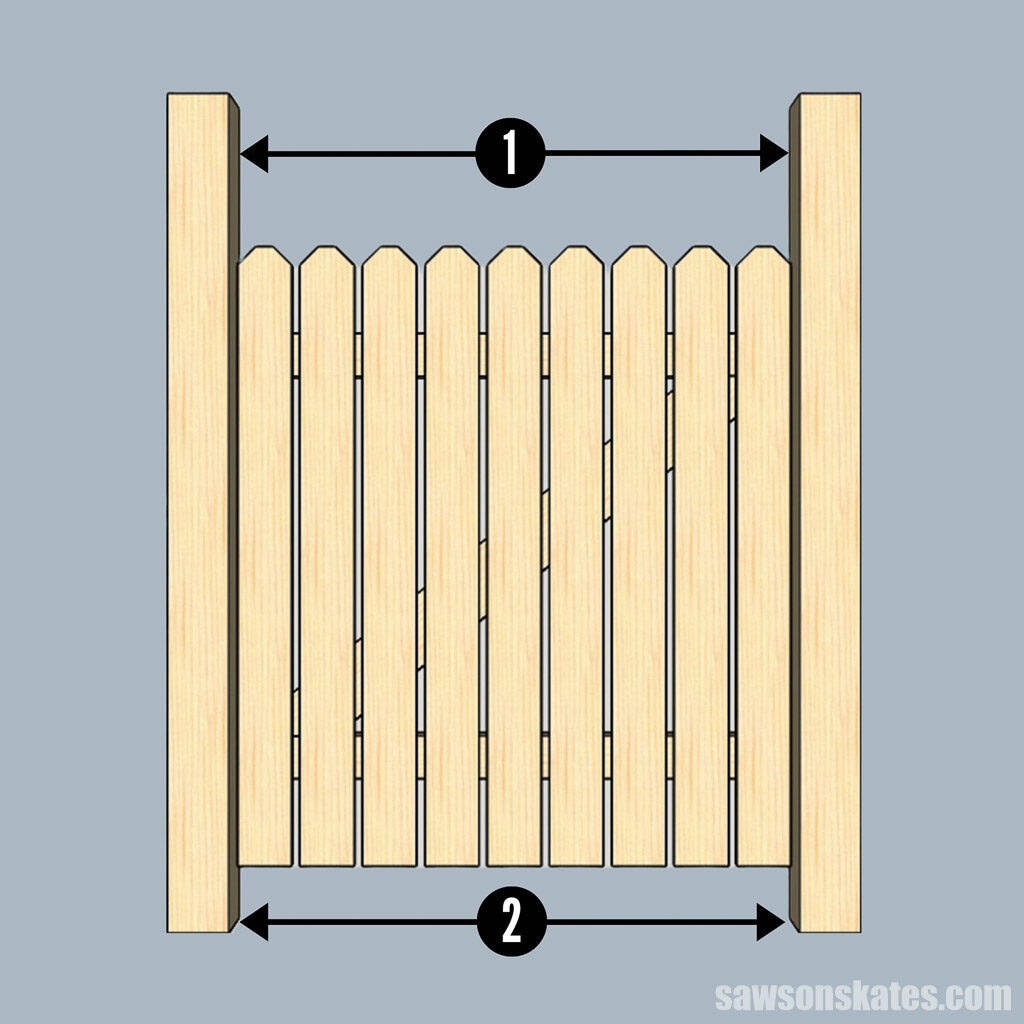
To ensure clearance on either side of the gate, subtract ½” from your smallest measurement, allowing a ¼” gap on each side.
For example, if your gate opening measures 34” less ½” equals 33-½”, so you’ll cut your fence panel to 33-½”.
How Do You Finish the DIY Garden Gate?
After assembling your gate, it’s important to protect it from weather-related wear and tear.
If you want to maintain the wood’s natural beauty, I suggest applying several coats of spar urethane containing UV blockers that protect the wood from sun damage and fading.
Related: Spar Urethane vs Polycrylic (Which is Right for You?)
You can apply exterior paint if you want a bit of color or an outdoor wood stain, which is how I chose to finish this project.
How to Make DIY Garden Gate
Printed Plan
Get the FREE plan here (includes detailed instructions, measurements, and bonus tips)
Supplies
- Wood (per the printed plan)
- 1-¼” Exterior Wood Screws
- Gate Hinges
- Gate Latch
Tools
- Tape Measure
- Circular Saw
- Drill
- Level
Step 1. Measure the Opening
See How to Measure the Gate Opening for more information.
Step 2. Cut the Fence Panel
Once you have the measurement, cut your fence panel to length using a circular saw.
I only needed to cut the fence panel’s rails (horizontal boards) for my project; however, sometimes, you may also need to rip the pickets to width.
TIP: A rip cut is where you cut along the length of a board.

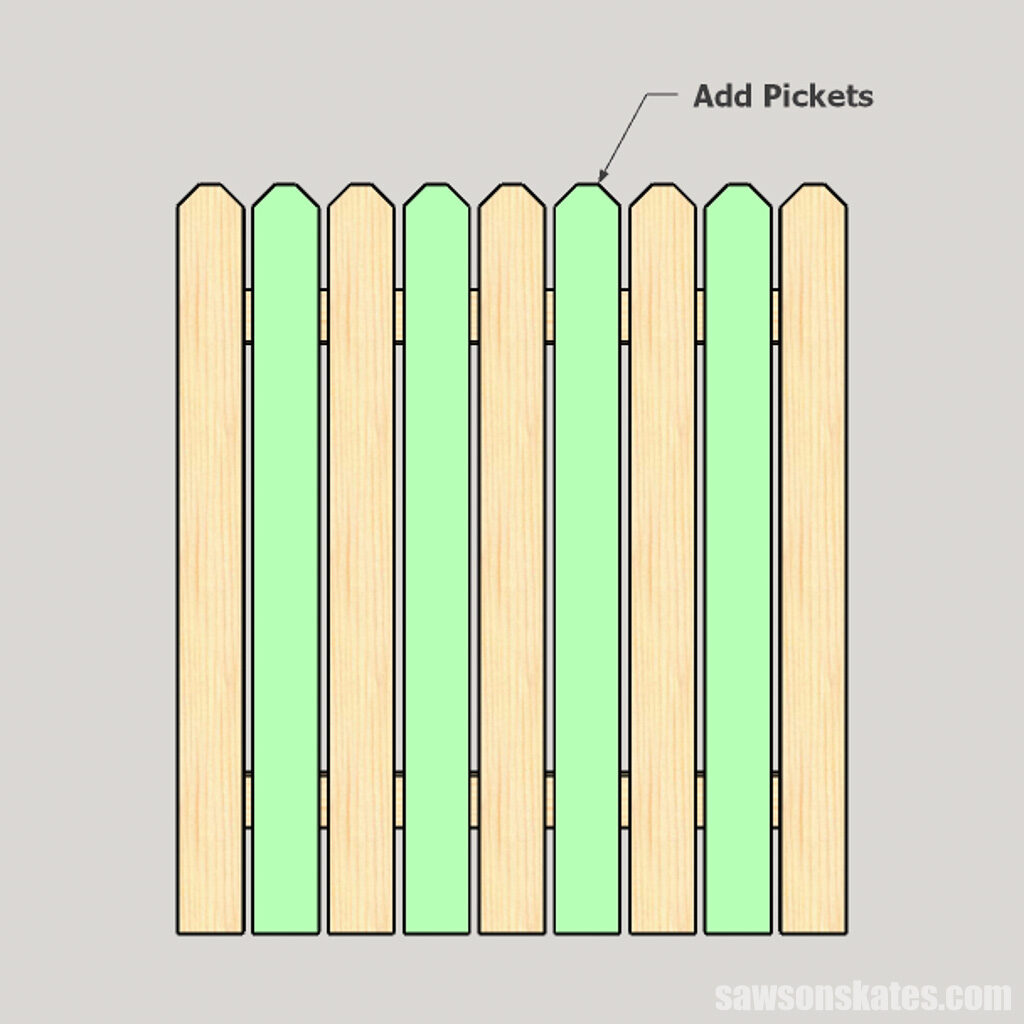
Optional
If your fence panel has large gaps between the pickets, you can add pickets from the section you cut off to give your gate a more solid appearance.
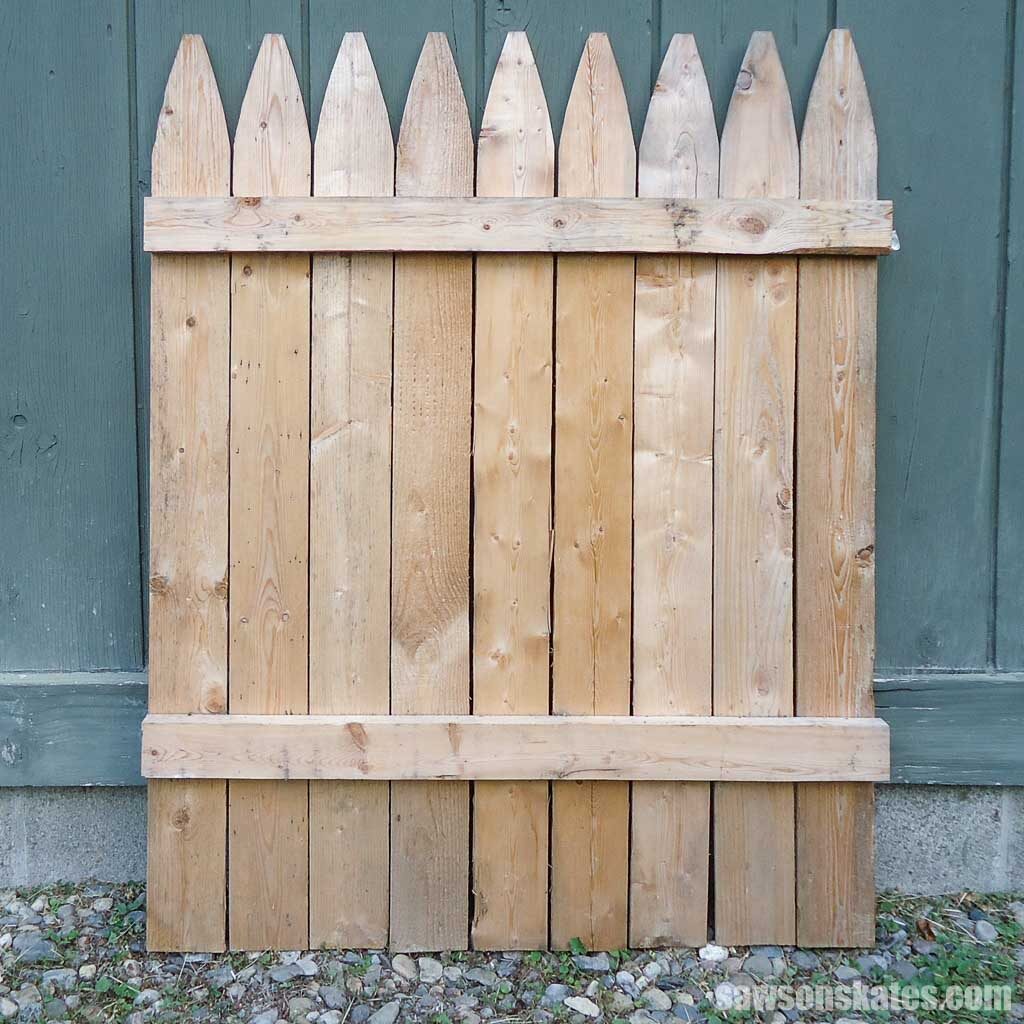
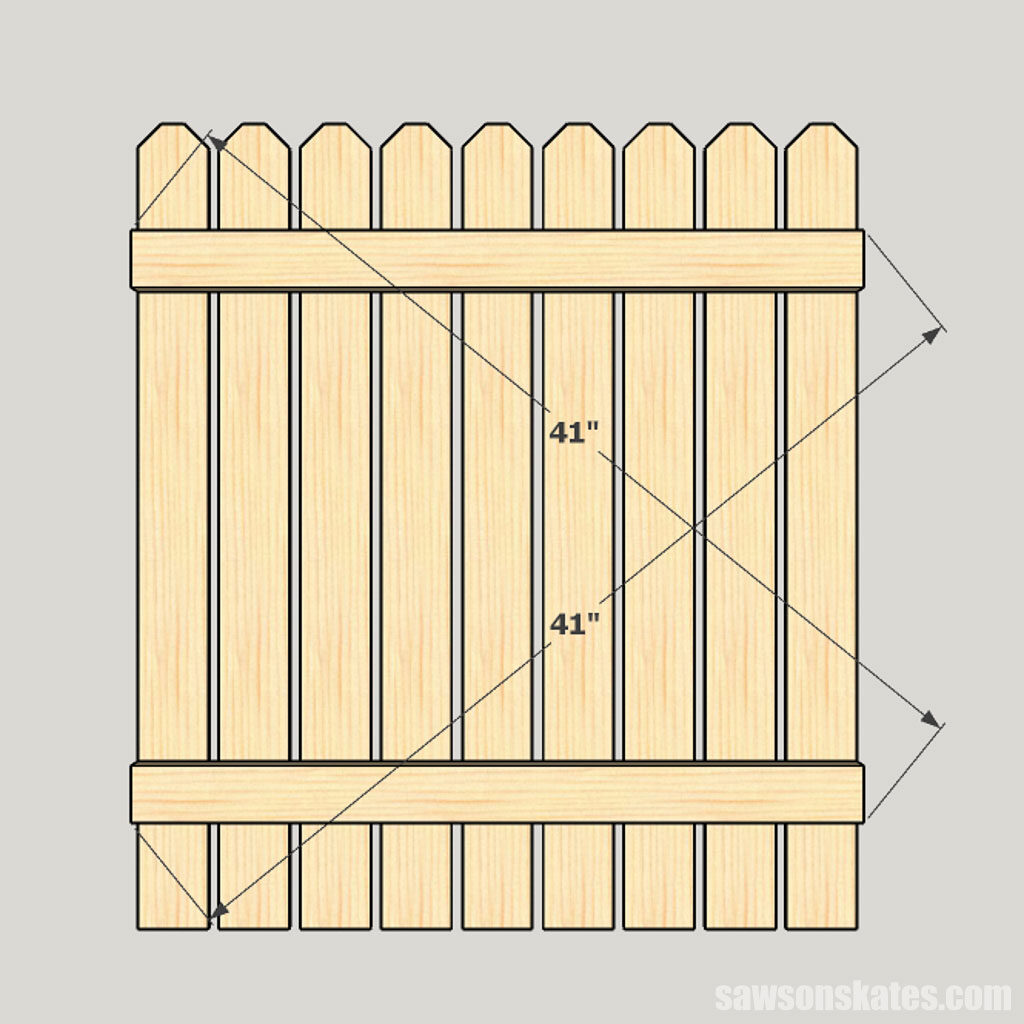
Step 3. Attach the Cross Brace
Before you attach the brace, you’ll want to ensure your gate is square by measuring diagonally from the corner of each rail.
If the measurements don’t match, you can hold the bottom rail and shift the top rail from left to right. Keep checking the measurements and moving as necessary to get the measurements as close as you can.
NOTE: The measurement on the diagram is an example. Yours will vary.
Next, you’ll add the brace to strengthen the fence panel and reduce the risk of it sagging.
NOTE: The top of the brace should angle away from your gate’s hinge side.
Place a board so its corner intersects with the bottom edge of the top rail, and its side intersects with the top edge of the bottom rail. Then use a pencil to mark all of the intersections.
NOTE: You’ll need a board that is longer than the diagonal distance from the rails so you can cut it to the correct length.
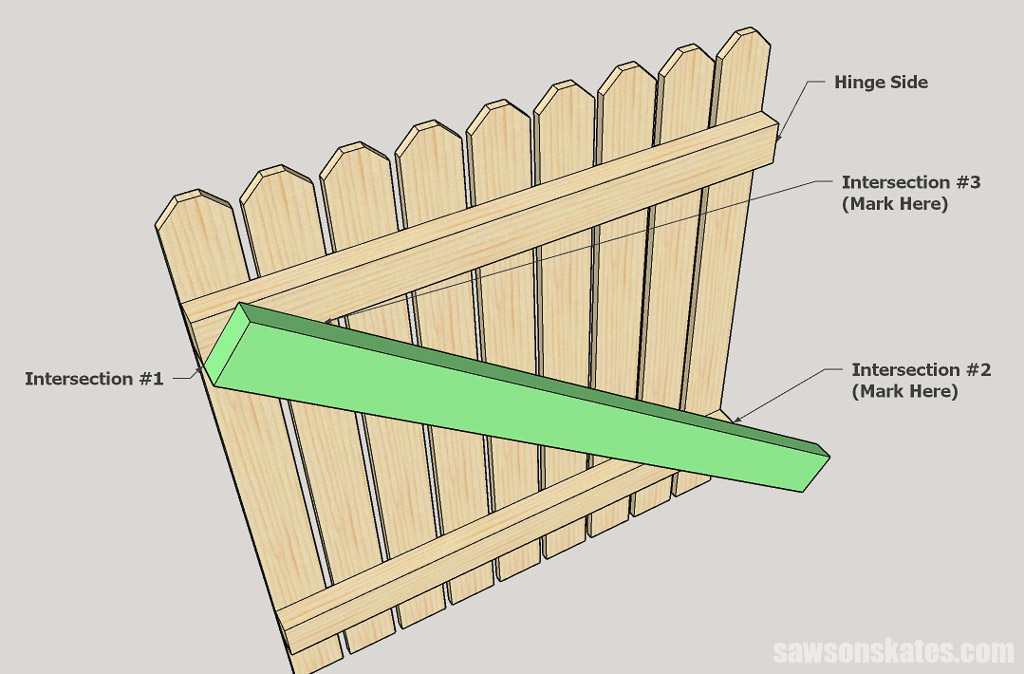
Use a straightedge and pencil to connect the marks. Then use a circular saw to remove the excess material. I recommend cutting next to the pencil line so you can adjust the length.
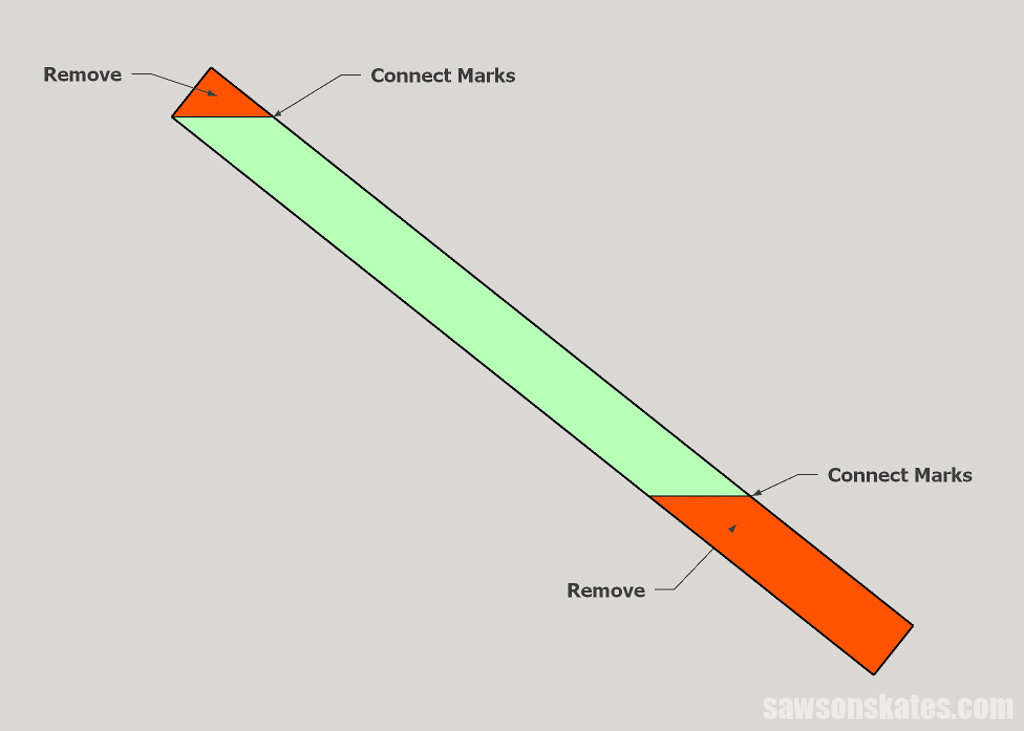
Test fit the brace and fine-tune the fit with your circular saw if necessary.

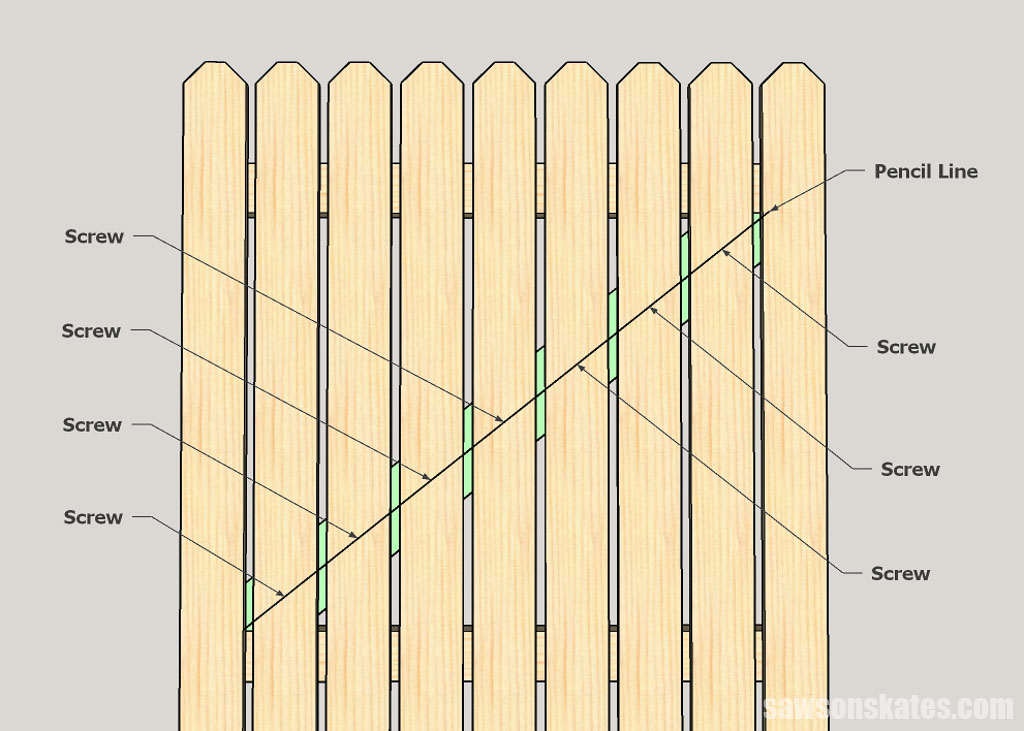
Next, flip the panel over and draw a pencil line over the middle of the brace. Then drive an exterior screw on the line in the middle of each picket.
Step 4. Install the Garden Gate
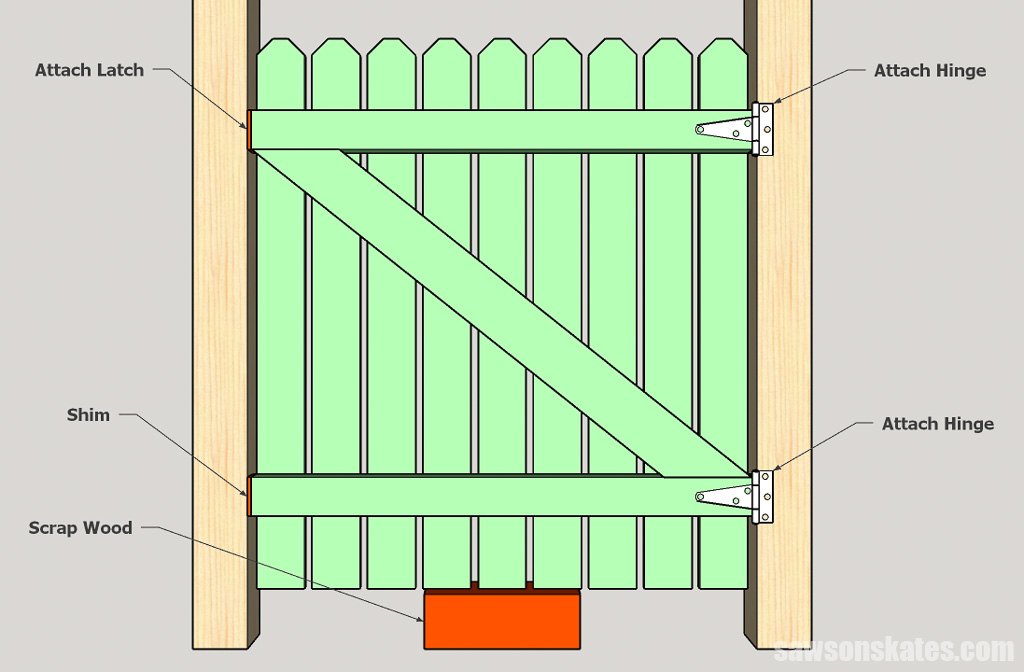
First, attach the hinges to the middle of each rail using the screws it came with.
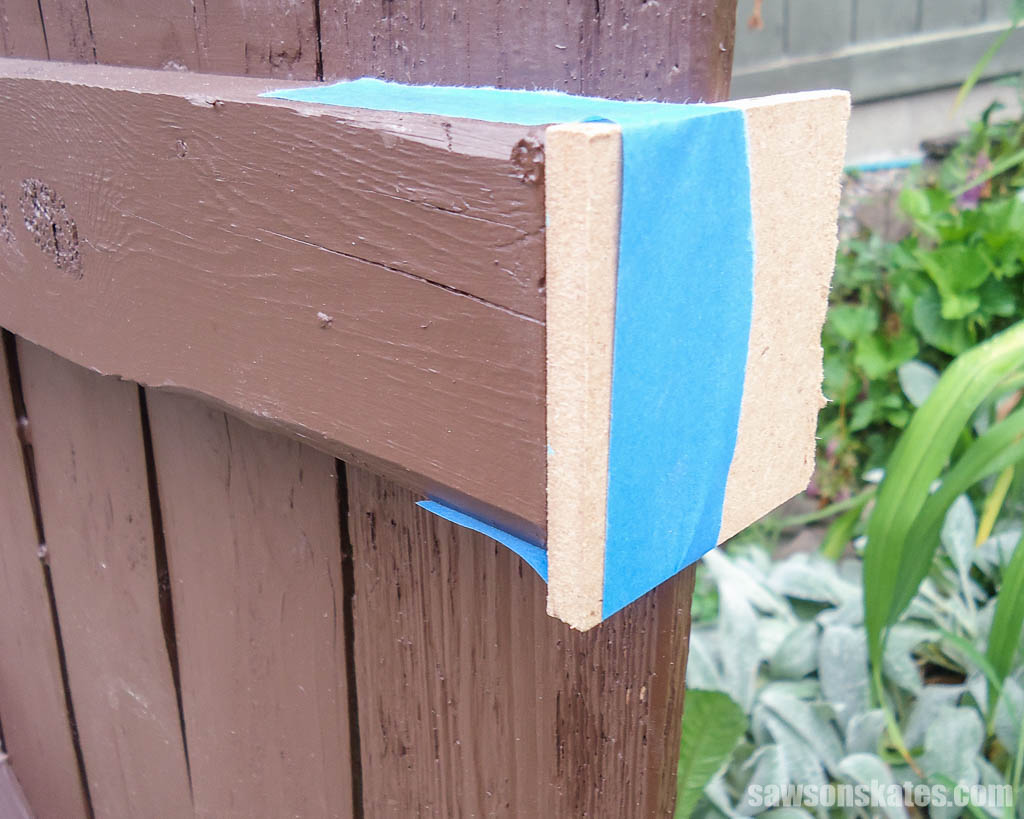
After mounting the hinges to the gate, I recommend temporarily attaching scrap wood shims equal to the gap you allowed when measuring the opening at the ends of each rail with painter’s tape. These shims will help you in centering the gate in the opening.
I also recommend placing a piece of scrap wood at the bottom equal to the distance you want the bottom of the gate off the ground.
Place a level on the top rail and ensure the gate is as level as can be. Often outdoor projects aren’t perfectly level. Then attach the hinges to the gate post using the screws it came with.
Then attach the latch following the instructions on the package.
Step 6. Finish the Garden Gate
See How to Finish the Gate for more information.
Final Thoughts
With a few simple tools and materials, you can quickly transform a wooden fence panel into a stylish garden gate in no time.
Don’t wait. Get your free plan (including the detailed instructions and measurements) now!
Thank you for stopping by. If you enjoyed this tutorial, would you please take a moment and pin it to Pinterest? I’d really appreciate it!
Recommended For You


Pin This For Later

Hi there – I’m Scott, a woodworking enthusiast and creator of Saws on Skates, a site I started in 2015 to share easy-to-follow tutorials, space-saving shop tips, and project inspiration for DIYers at any skill level. Learn more about my woodworking journey here.
I love this tutorial, looks really easy to follow, even for an ammeter like me.
Hi Harvey – Thank you for stopping by. I’m glad you like this project!