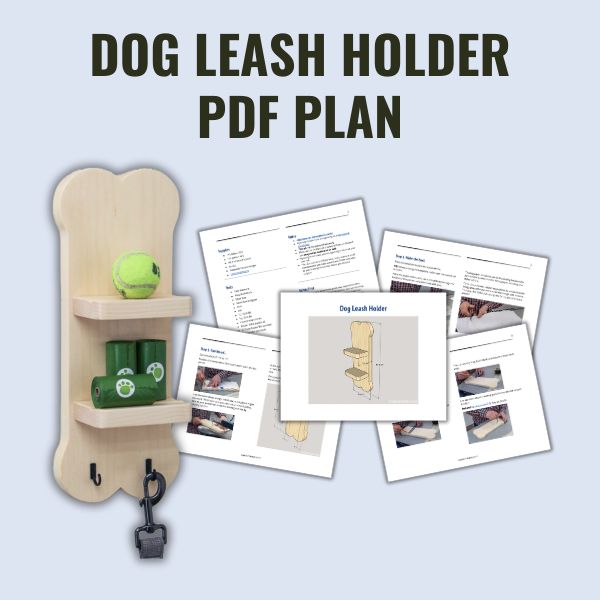
DIY Wall-Mounted Dog Leash Holder (Bone-Shaped)
Get your pup’s gear organized with this adorable bone-shaped DIY dog leash holder and two shelves for toys and treats. Pattern included.
What Should I Build Next?
That's the question I help answer.
Every week, I send woodworking ideas to 17,000 DIYers who love building things.
You'd fit right in.
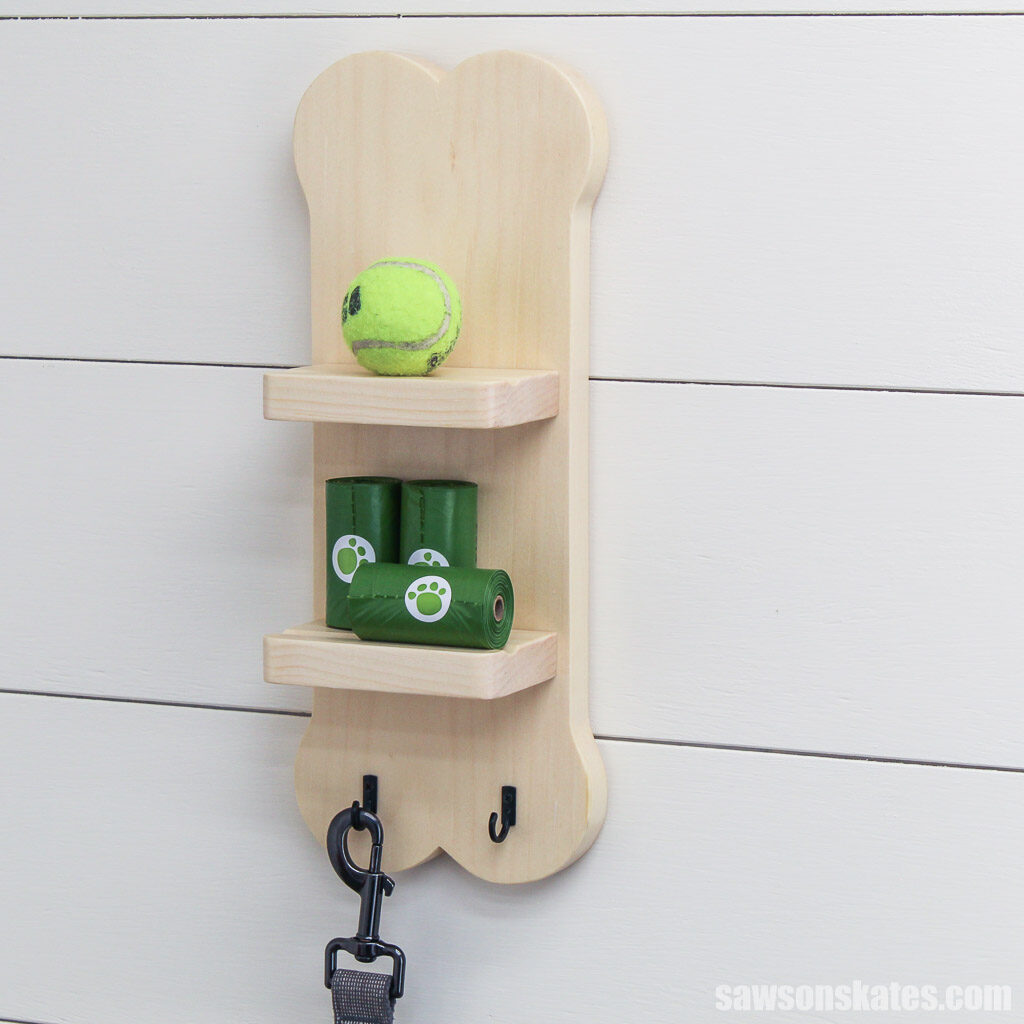
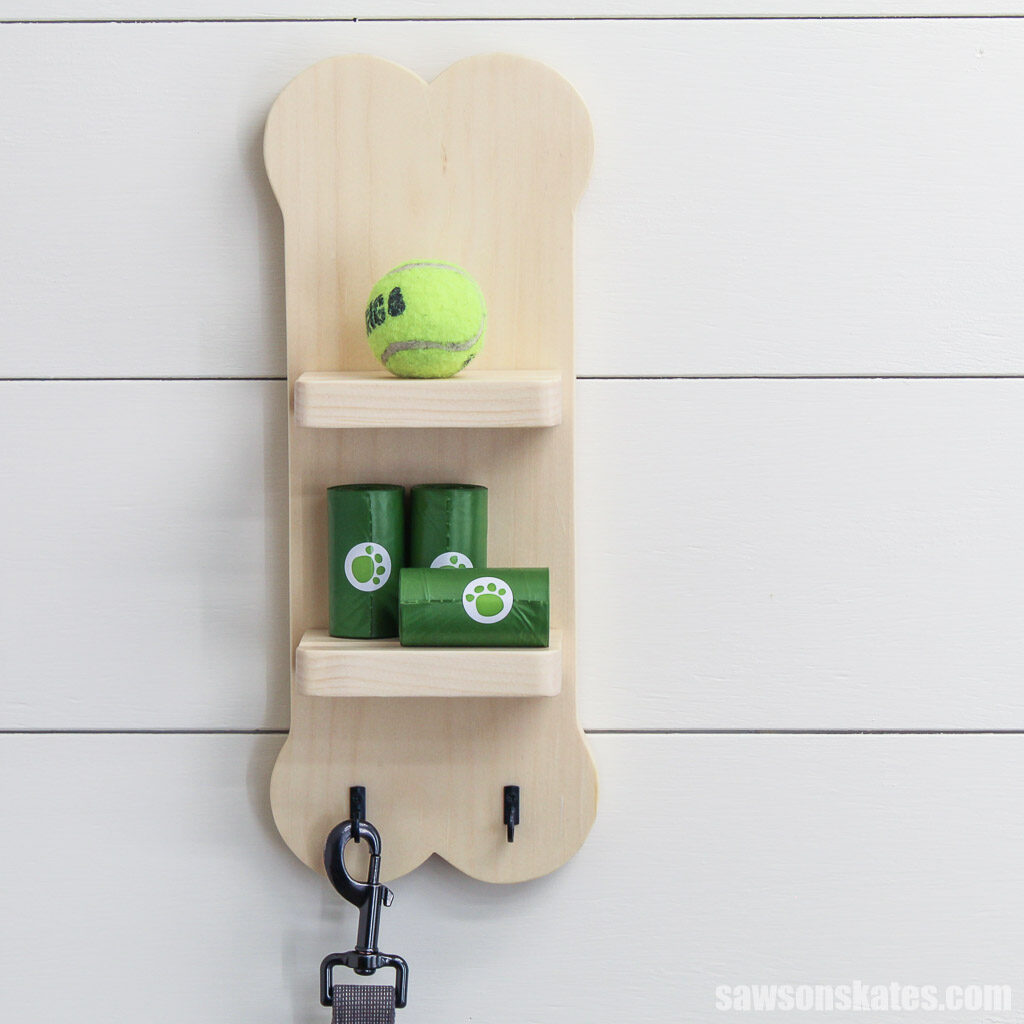
Looking for a fun and functional way to keep your four-legged friend’s essentials organized? This DIY wall-mounted leash holder is the perfect solution! Shaped like an adorable bone, it features two hooks for hanging leashes, and two shelves for storing treats and other supplies.
It’s easy to make, doesn’t require special tools, and the step-by-step plan includes a template for drawing the bone shape. Keep reading for a project that is sure to put a smile on your face every time you walk into the room.
Table of Contents
- Inspiration for This DIY Dog Dog Leash Holder
- What Tools Do You Need?
- What Wood Should You Use?
- How Do You Draw the Bone Shape?
- How Do You Finish the Dog Leash Holder?
- How to Make a DIY Dog Leash Holder
- Get the PDF Plan
This article contains affiliate links. If you purchase from these links, I may earn a small commission at no additional cost to you. Visit my site policies for more information.
Inspiration for This DIY Dog Dog Leash Holder
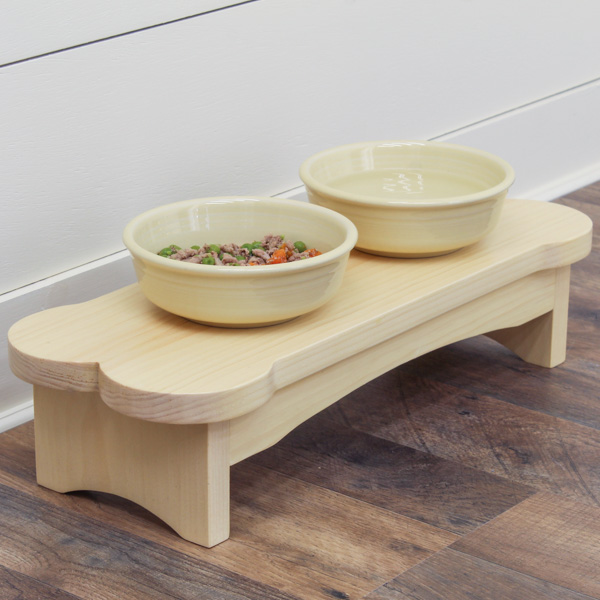
The idea for this leash holder started when I had some hooks left over from this DIY key holder. Inspiration struck again when I placed my pup’s food on his bone-shaped dog bowl stand.
Then, it hit me, why not combine the two projects to create a handy holder for organizing my pup’s essentials? And just like that, I brought the two projects together to create this wall-mounted leash holder that adds charm and functionality to any space.
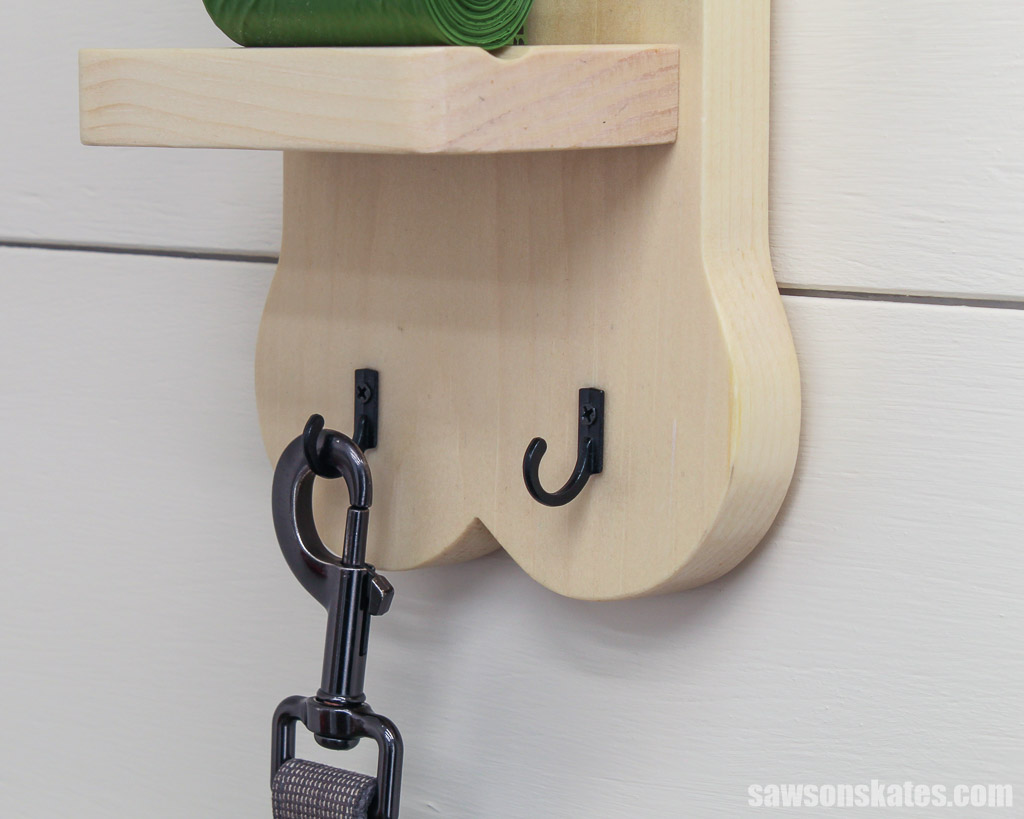
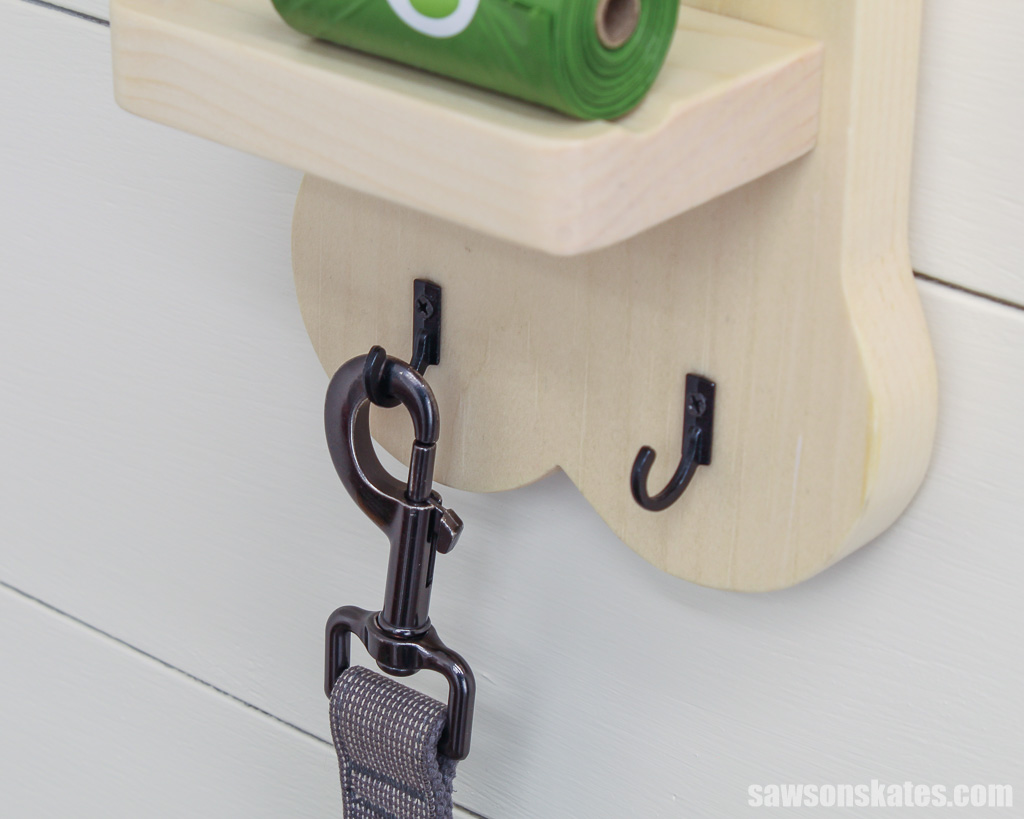
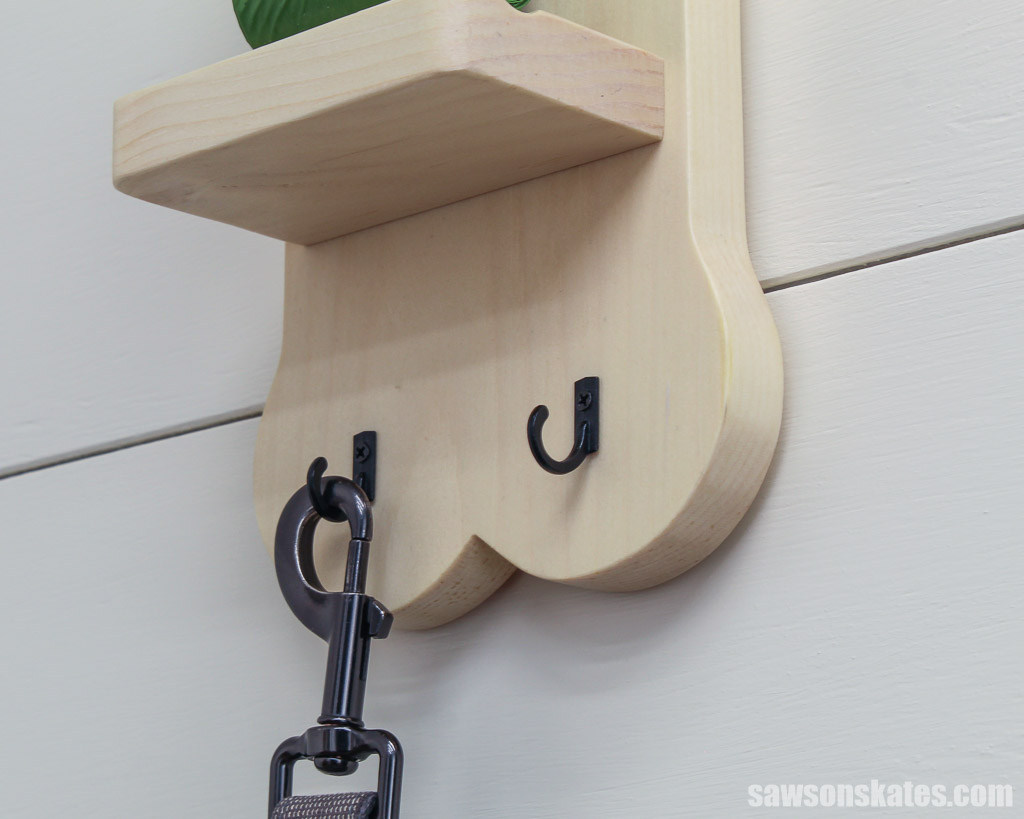
There are two hooks at the bottom for hanging leashes or collars. Above are two shelves, perfect for storing treats, toys, poop bags, and other supplies!
What Tools Do You Need?
To make your leash holder, you’ll need only three basic tools: a miter saw, a scroll or jigsaw, and a drill. I also used my router table and disc sander, but they are optional.
Miter Saw
I used my miter saw to cut the back and shelves to their required lengths.
Scroll Saw
I used my scroll saw to cut the bone shape for the holder’s back panel, but you might be able to use a jigsaw instead.
Drill
I used my drill to make holes and to drive the screws that attach the shelves to the holder.
Router Table
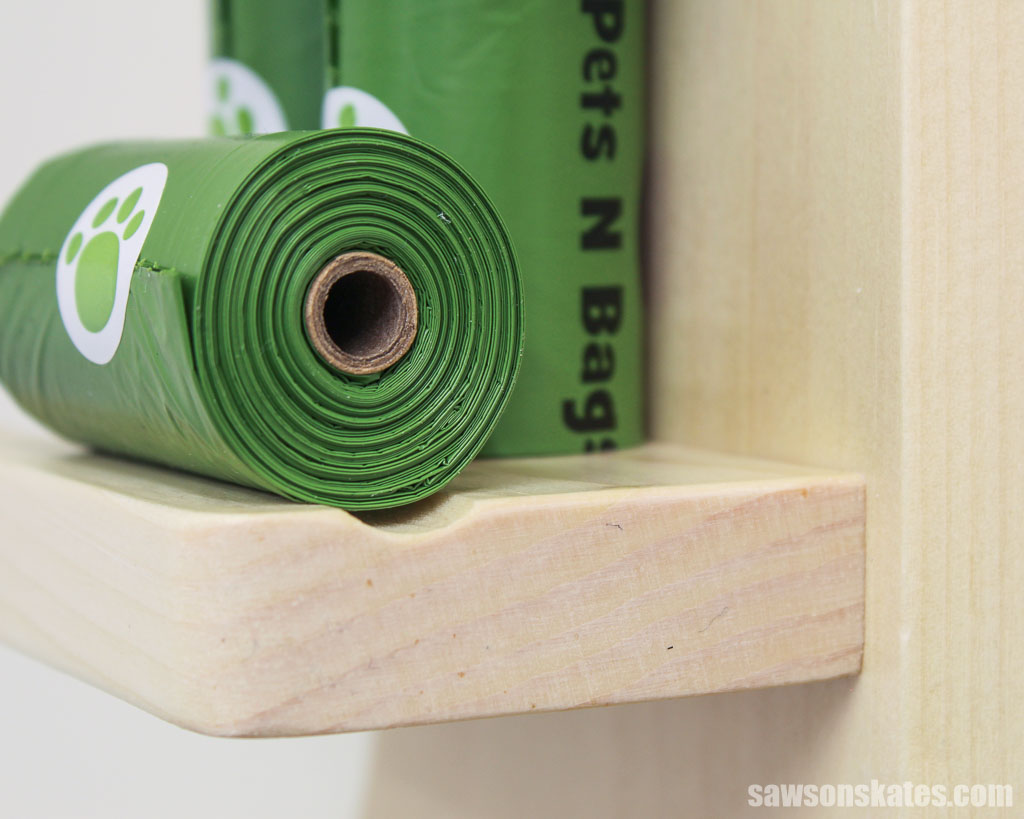
I made a shallow groove in the shelves using a cove bit and my router table. This groove allows you to store objects on the shelves without sliding off. If you don’t have a router, you can skip this step.
Related: How to Use a Router Table for Beginners
Disc Sander
I used my disc sander to smooth the saw marks on the bone’s outside edges. If you don’t have one, you can smooth these surfaces by hand with sandpaper.
What Wood Should You Use?
I used scrap pieces of pine to make my holder, but you can use any wood you have on hand, or that suits your decor. You can even mix and match wood types, such as light-colored wood for the bone and darker-colored wood for the shelves.
How Do You Draw the Bone Shape?
Don’t worry about drawing the bone shape; I included a template in the printed plan.
All you need to do is print it, cut it out with scissors, trace it onto your board, and then cut it out with a scroll saw or jigsaw.
How Do You Finish the Dog Leash Holder?
You have options for finishing your dog leash holder, including painting, staining, or leaving it natural. I kept mine natural and protected it with a few coats of this polyurethane alternative, but you could also use Polycrylic instead.
TIP: For the easiest finish application, I suggest disassembling the holder by removing the shelves, hooks, and sawtooth hanger, applying the finish, and then reassembling.
How to Make a DIY Dog Leash Holder
Printed Plan
Get the PDF plan here (includes detailed instructions, measurements, and bonus tips)
Supplies
- Wood (per the printed plan)
- #8 1-¼” Wood Screws
- Hooks
- Sawtooth Picture Hanger
- Cabinet Bumpers
Tools
- Tape Measure
- Kreg Multi-Mark
- Miter Saw
- Scroll Saw or Jigsaw
- Drill
- Awl
- ⁷/₃₂” Drill Bit
- ⁵/₆₄” Drill Bit
- Countersink Drill Bit
- Router Table (optional)
- ⅜” Cove Router Bit (optional)
- Disc Sander (optional)
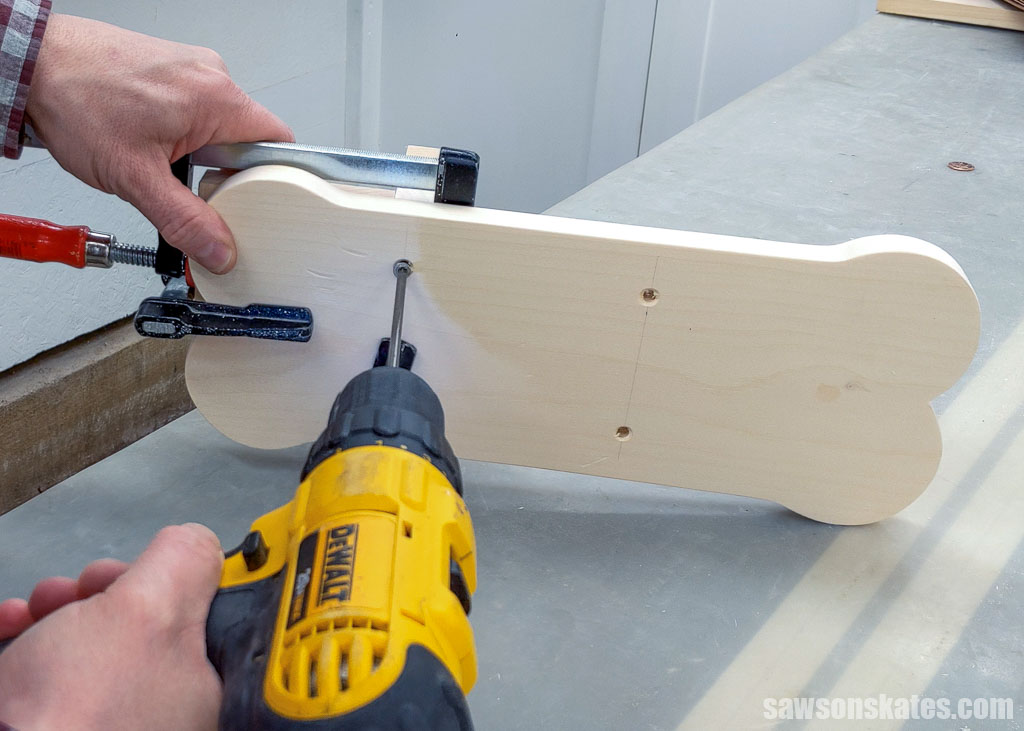
Step 1. Make the Leash Holder’s Back Panel
Cut one piece of wood to length for the back panel.
Print the back template at the end of the plan, position it on the board, and trace it using a pencil.
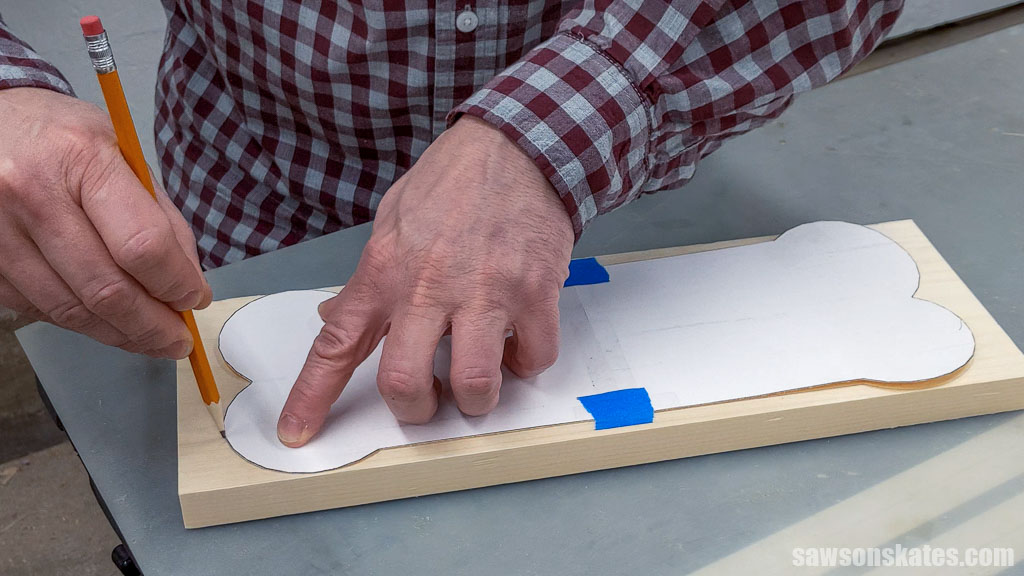
I cut the bone shape using a scroll saw, but a jigsaw might also work. Whichever saw you use, I recommend cutting next to your pencil line, then fine-tuning your cut by sanding up to it.
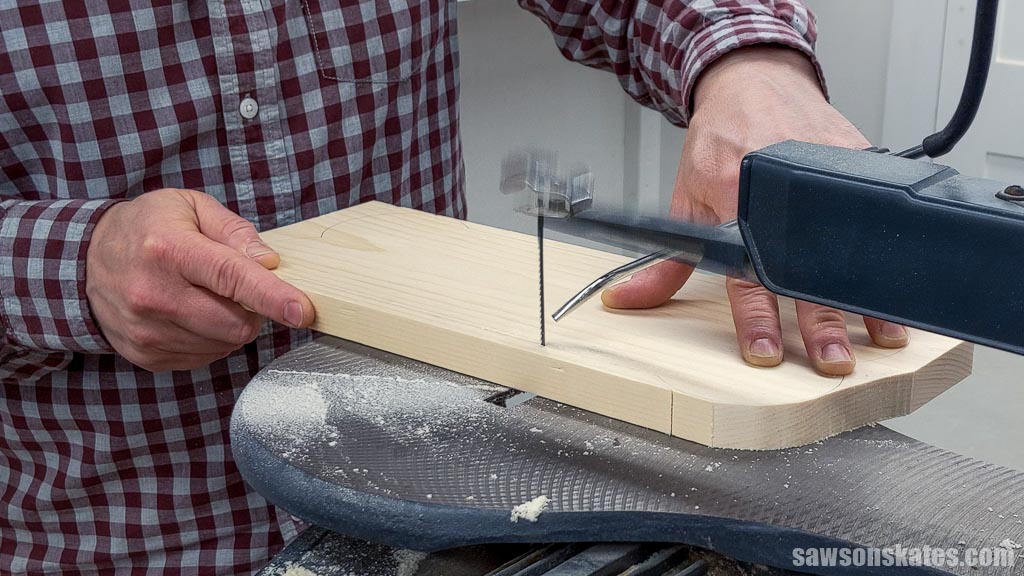
A disc sander is an easy way to smooth the bone’s outside curves; however, you can use sandpaper if you don’t have one.
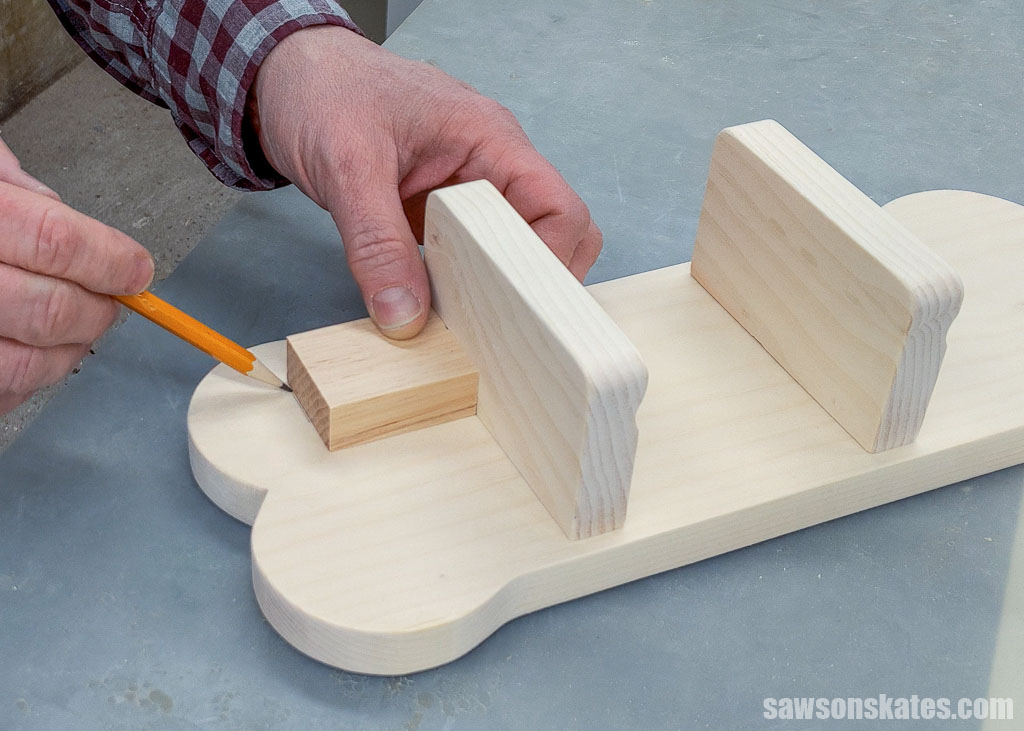
Once you’ve sanded the edges, use the diagram in the printed plan to mark the location for holes that will join the back to the shelves.
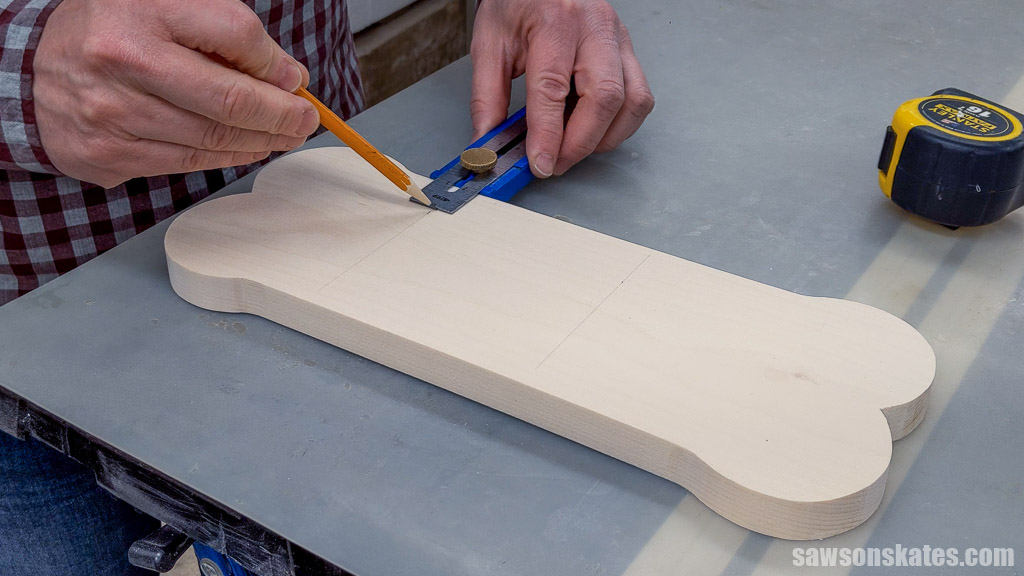
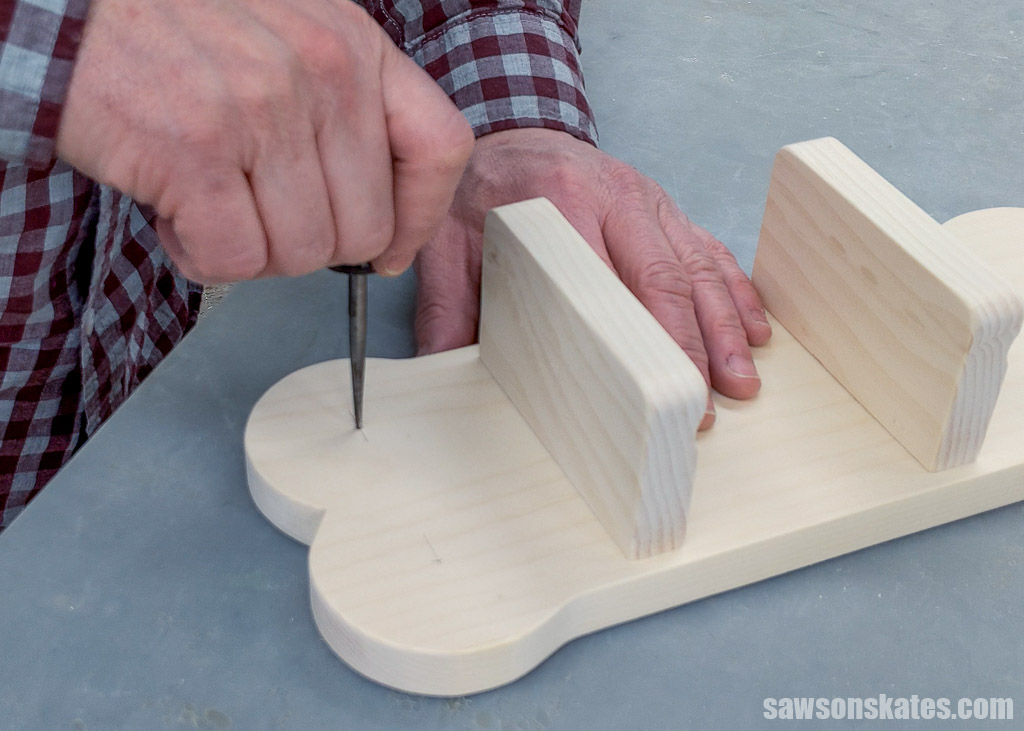
Use an awl to make a starting point for the drill bit at each location.
Related: What is an Awl? (+ How to Use It)

Then use a countersink bit to make a hole at each location.
Related: How to Use a Countersink Bit
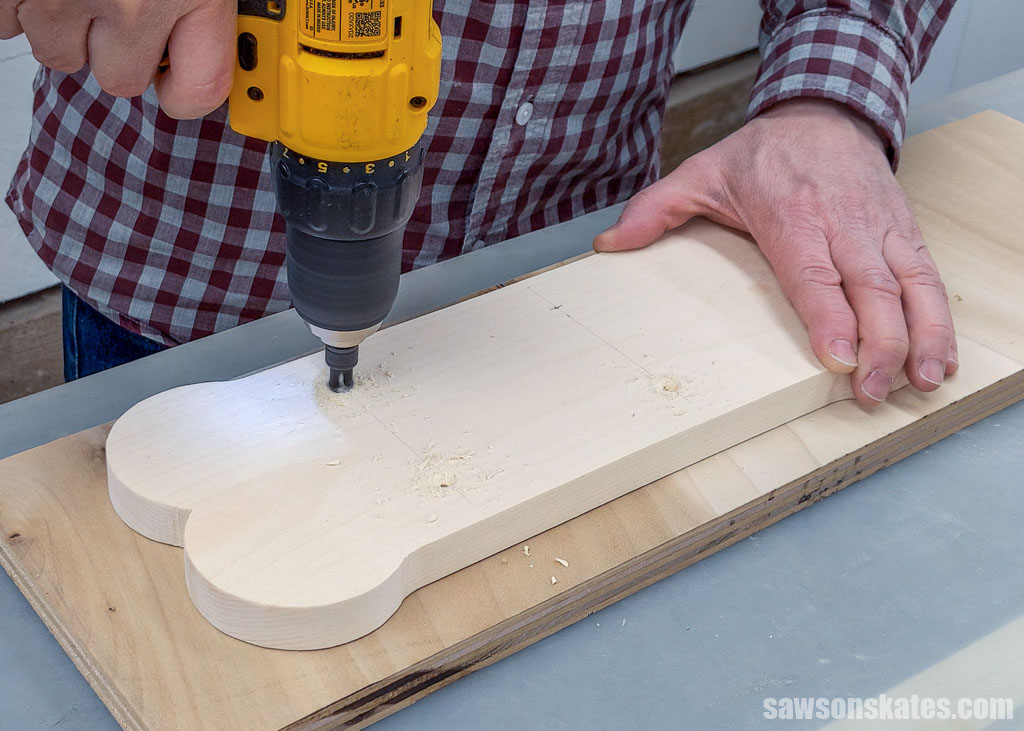
This holder’s design has a drawback: the back panel’s grain is orientated in a different direction than the shelves. As a result, the panel may crack as it expands and contracts with changes in temperature and humidity, as the shelves can restrict its movement.
Related: Mistakes with Wood Can Cause Your DIY Furniture to Crack
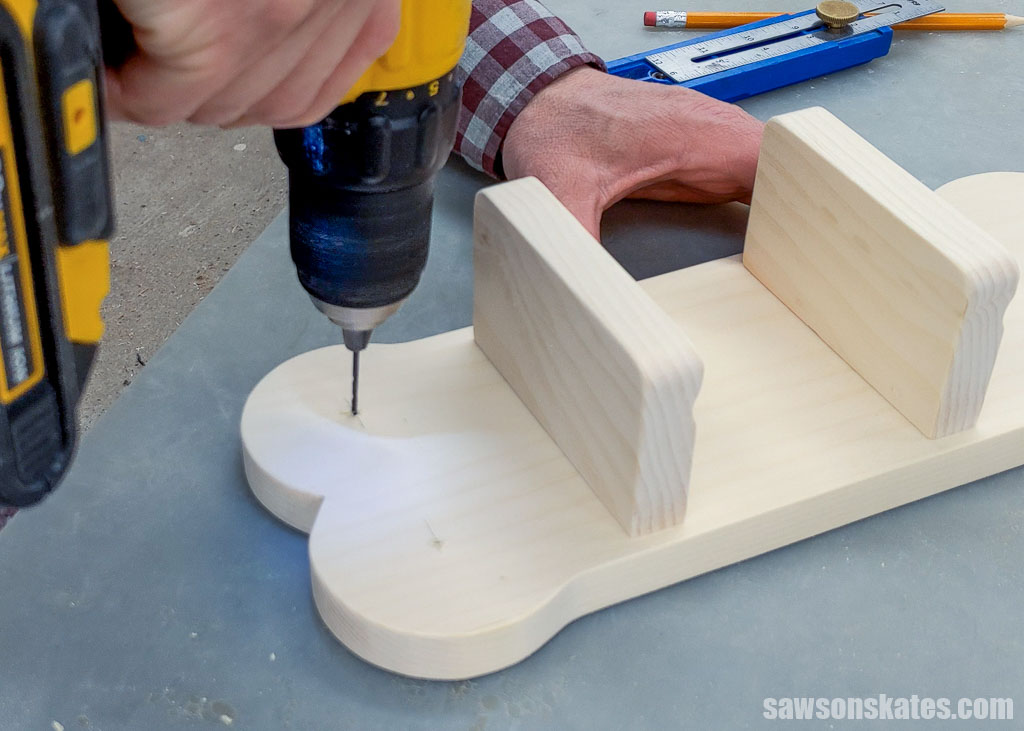
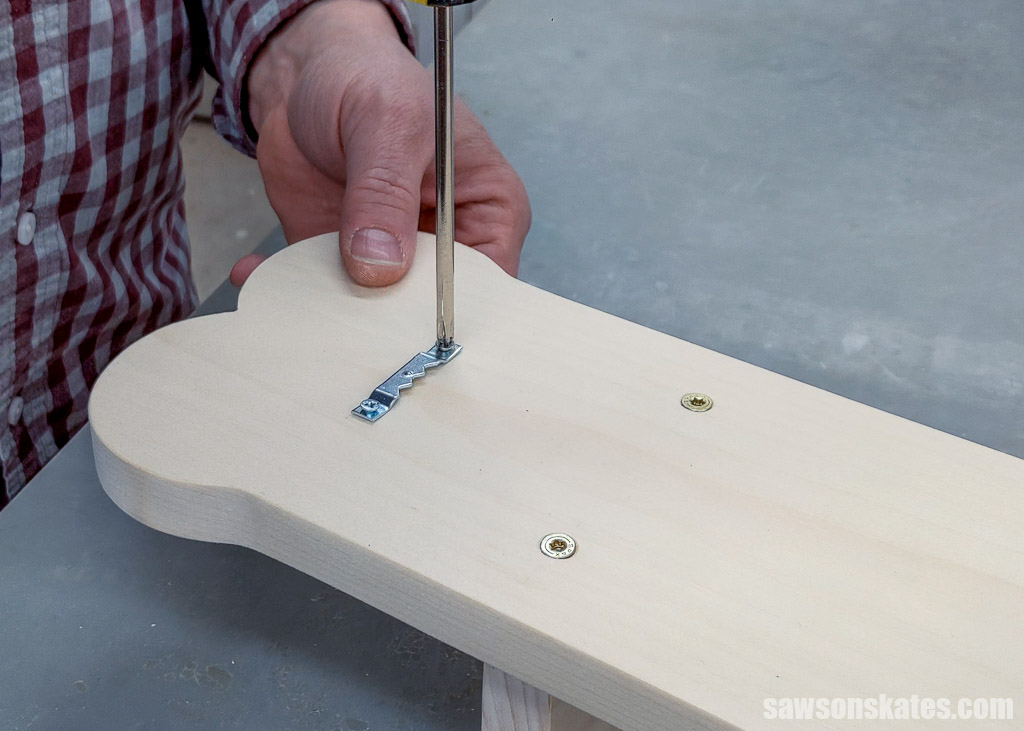
I enlarged the holes with a drill bit to minimize the cracking risk—this created space for the screws to move sideways as the back expands and contracts with seasonal changes.
When the drill bit exits the workpiece, it can cause the wood to tearout on the front side of your project. Placing a sacrificial board under your workpiece will provide support and reduce the risk of tearout.
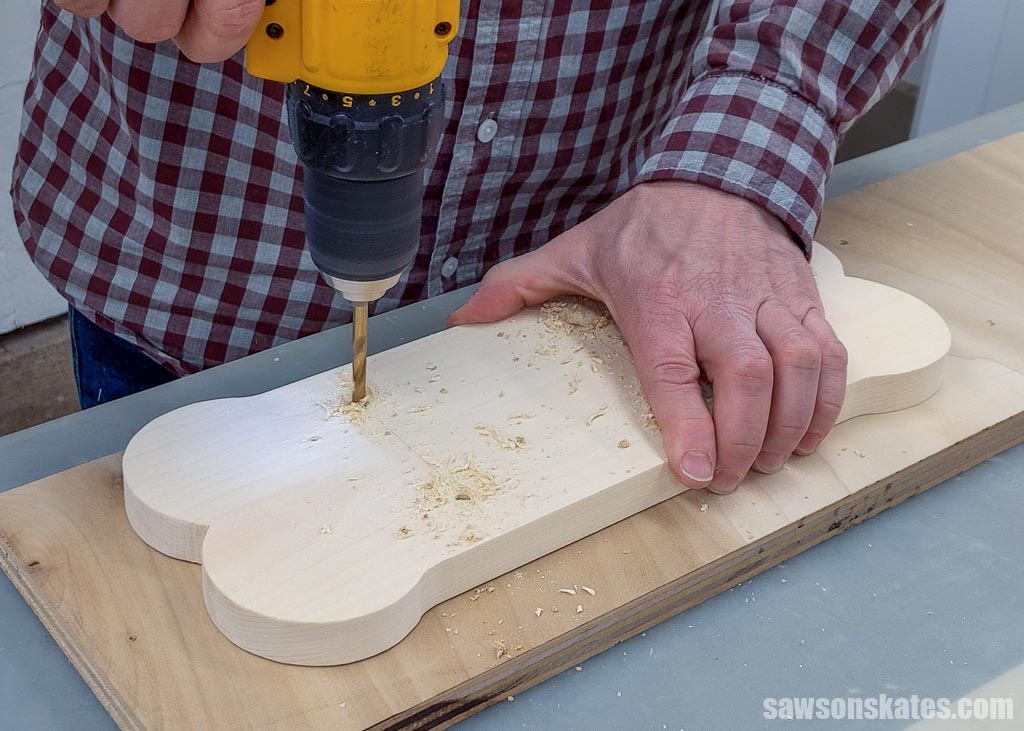
Step 2. Make the Shelves
I created a shallow groove in the shelves using a router to prevent objects from rolling off the edge. However, you may skip this step if you don’t have a router or don’t wish to create a groove. Instead, cut two pieces of wood to length for your shelves.
If you wish to add a groove, I suggest routing it before cutting the shelves to length. So, in that case, cut one piece of wood to length.
Make a Groove (optional)
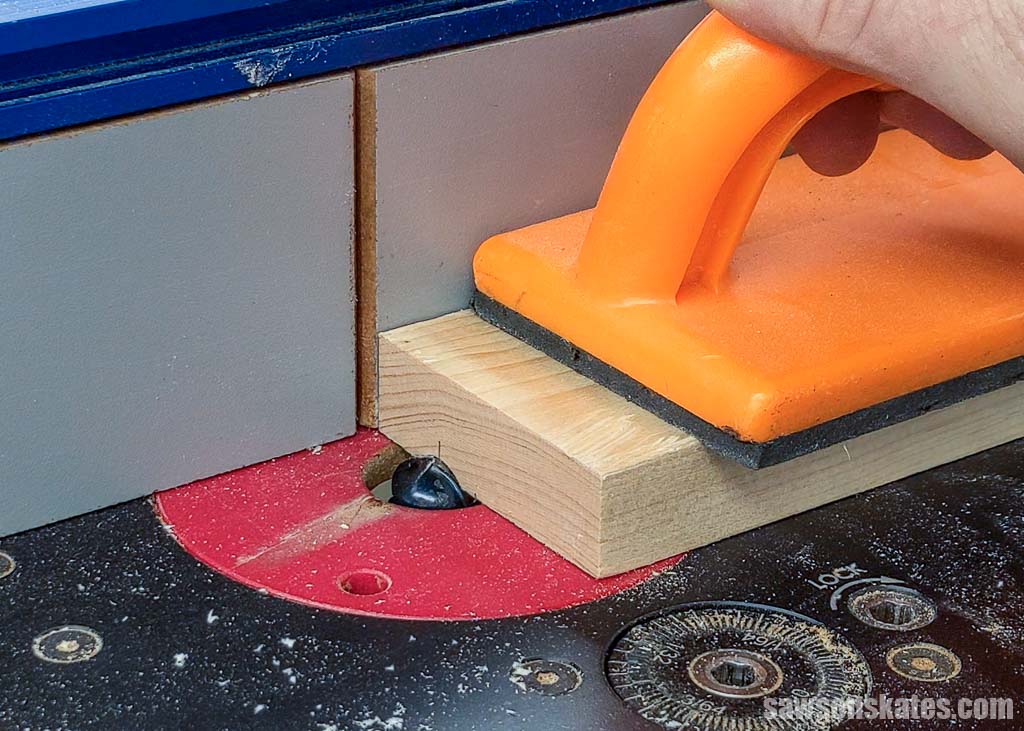
I made a pencil line from the board’s edge using my Kreg Multi-Mark.
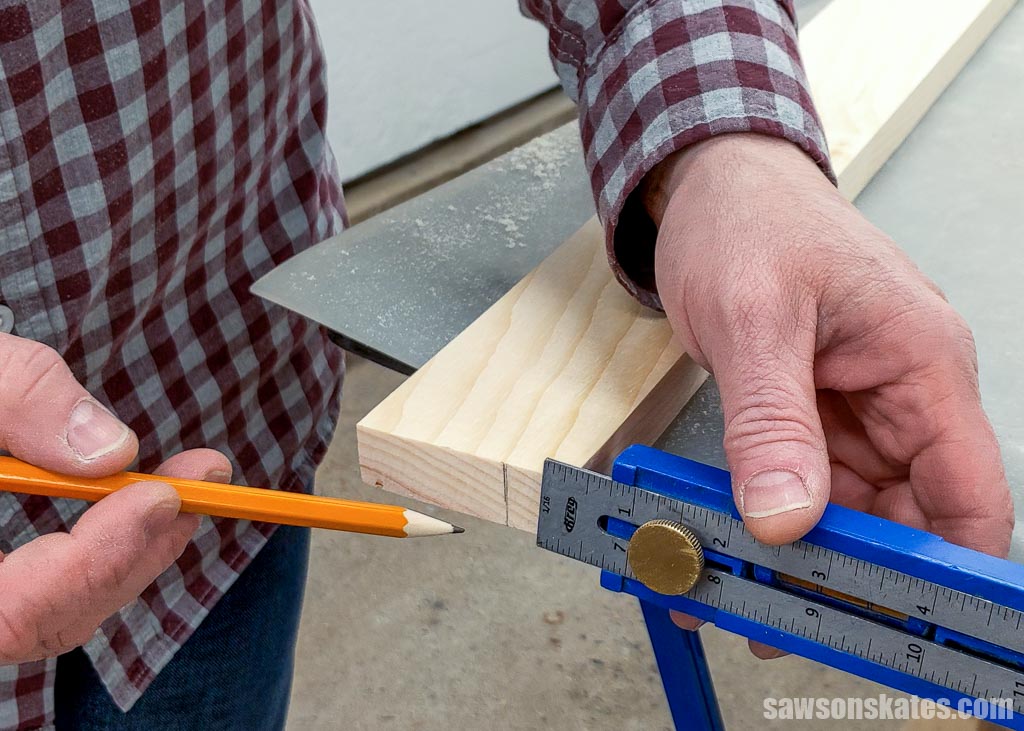
To create the groove, I used a cove bit.
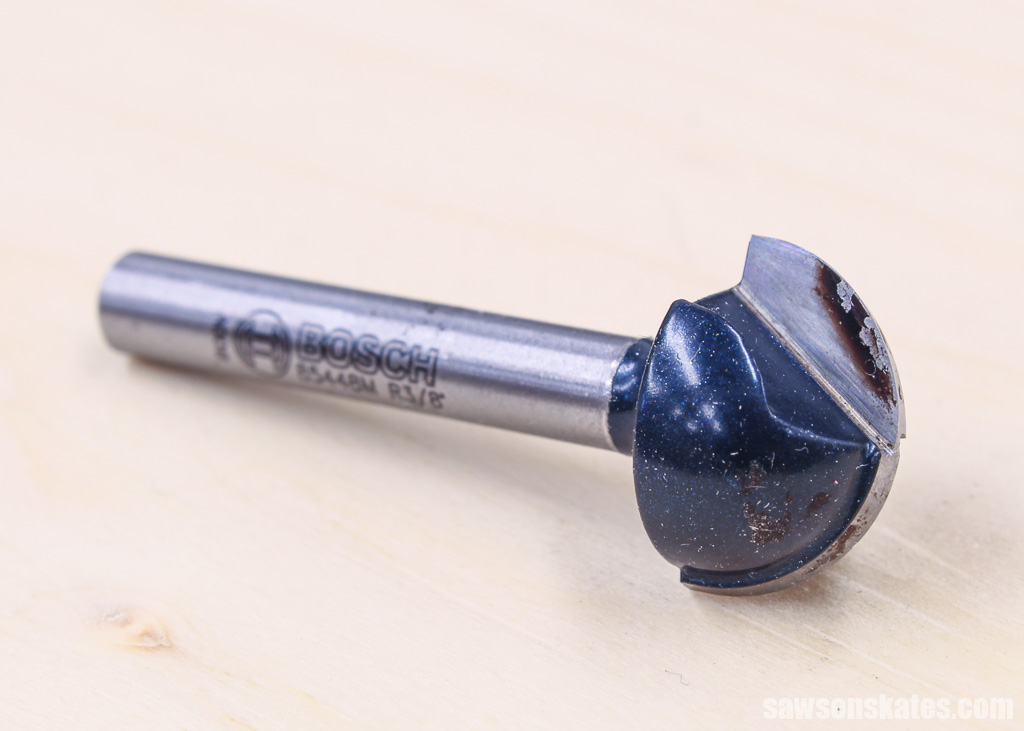
After installing the bit in my router, I adjusted it to remove a small amount of material.
Next, I positioned the router table’s fence to align the pencil mark over the center of the bit and used a push block to feed the material through the router.
Related: How to Use a Router Table for Beginners
Then, cut two pieces of wood to length for the shelves.
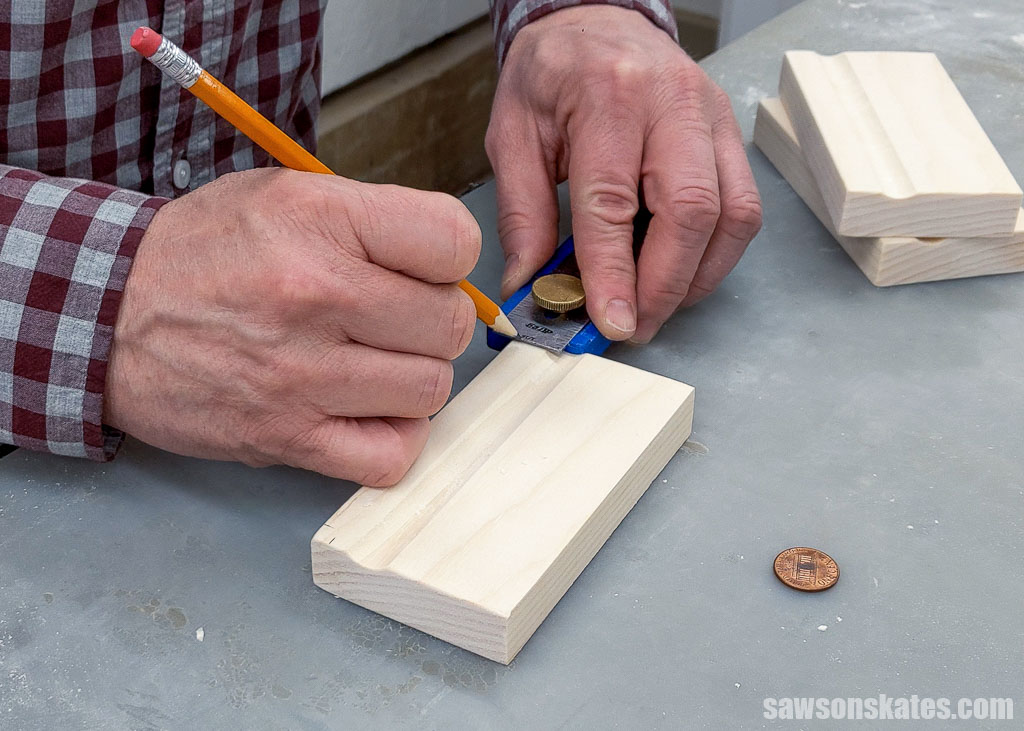
Round the Corners (optional)
The corners appeared too angular, so I decided to round them off.
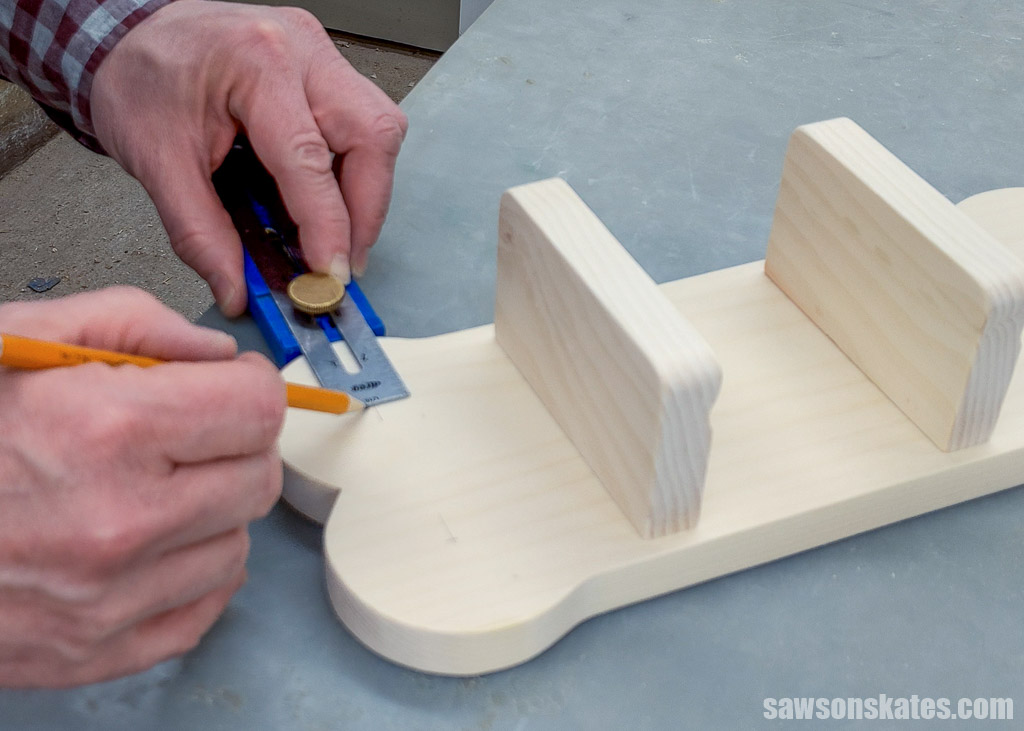
I began by adjusting my Kreg Multi-Mark and marking the front corners.
After making the marks, I placed a penny on top and used a pencil to trace it.
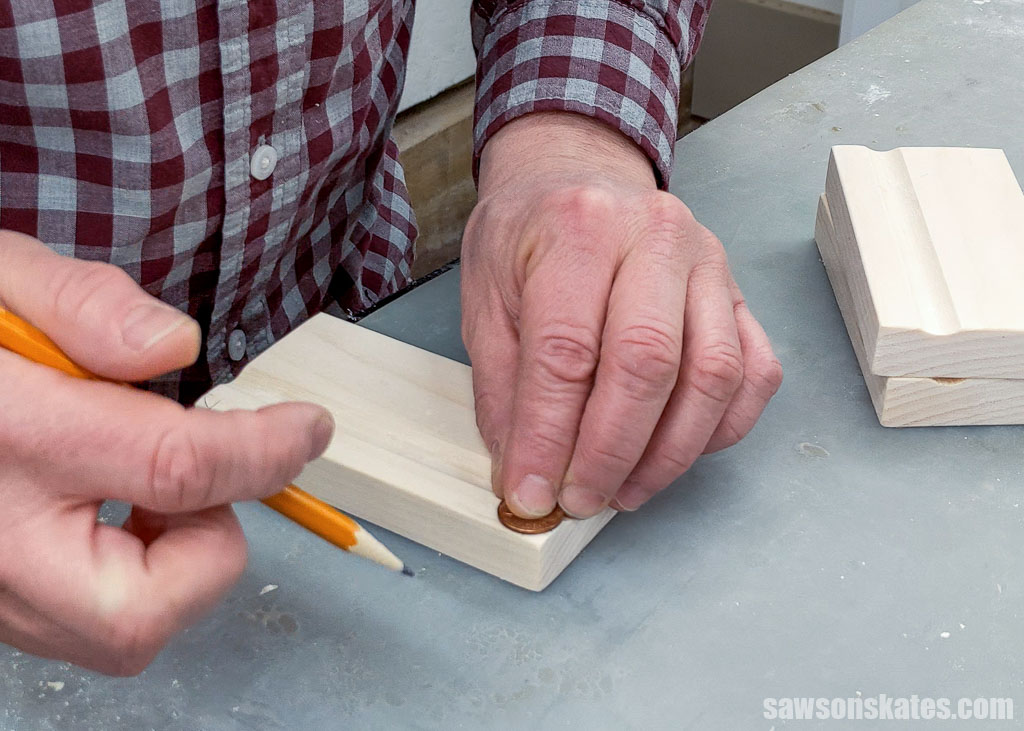
I used a disc sander to remove the corners, but if you don’t have one, a sanding block will work instead.
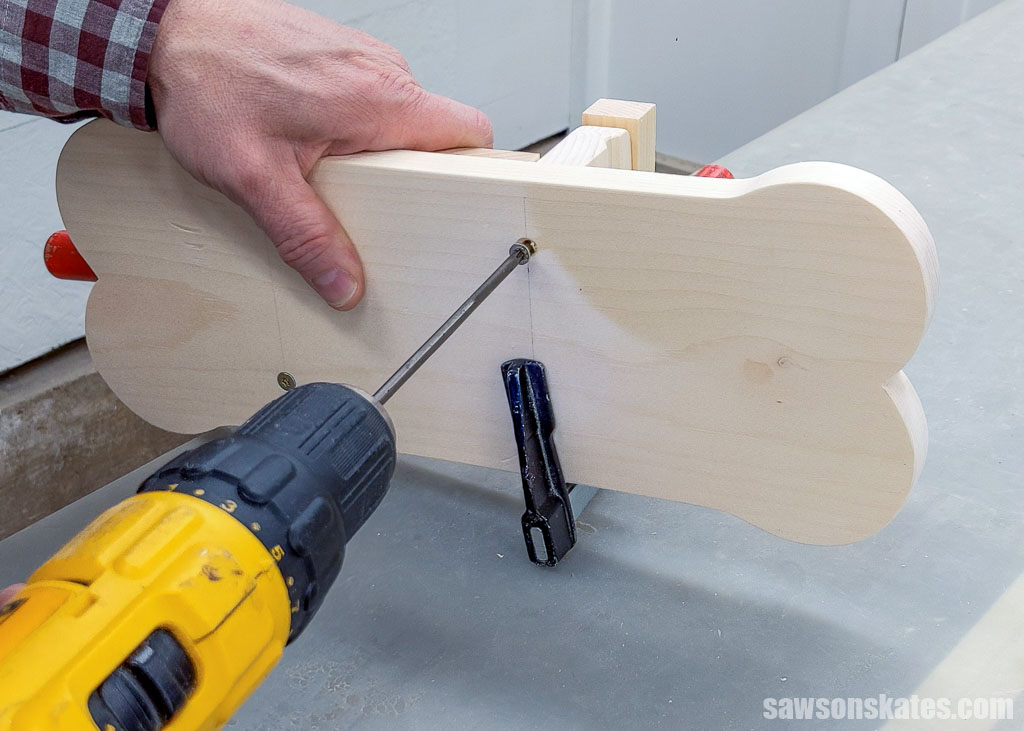
Step 3. Attach the Shelves
If you haven’t sanded your parts, now is a good time to do it.
The lower shelf sets up from the bottom. To help position it, I clamped a piece of scrap wood to the bottom of the back panel.
Next, I placed the shelf on top of the scrap wood, centered it using my Kreg Multi-Mark, and clamped it in position.
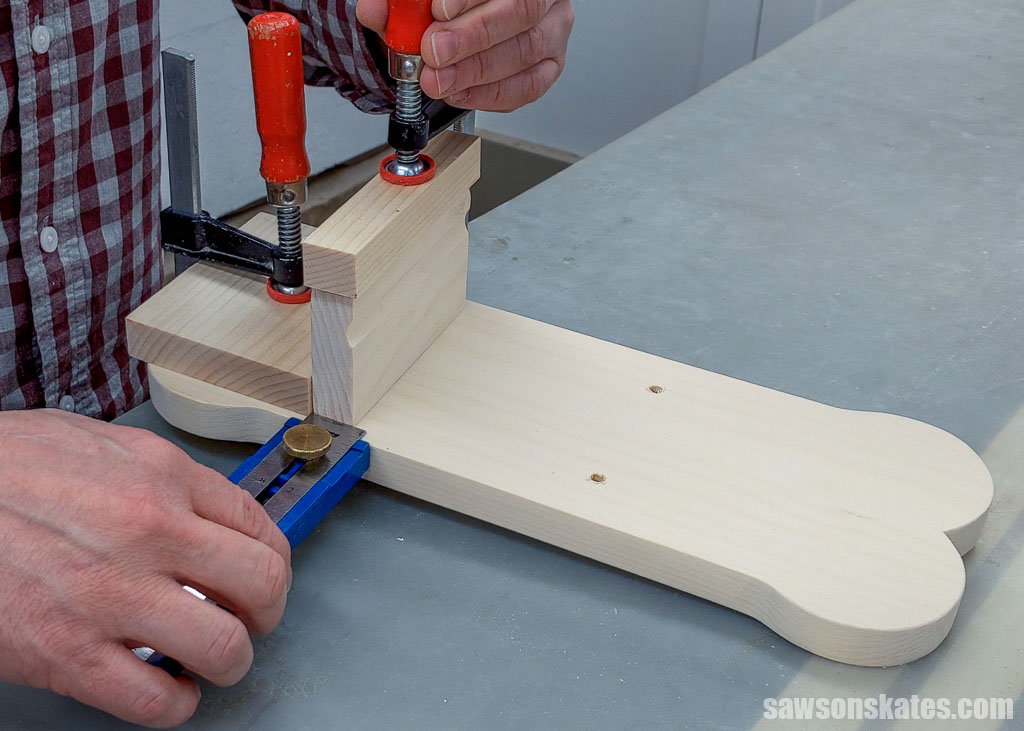
I attached the shelf in place using wood screws.
TIP: To allow the back panel to move with seasonal changes, center the screws in the holes and only tighten them until they are “just snug.”
To help position the top shelf, I clamped a piece of scrap wood above the bottom shelf.
Next, I placed the shelf on top of the scrap wood, centered it using my Kreg Multi-Mark, and clamped it in position.
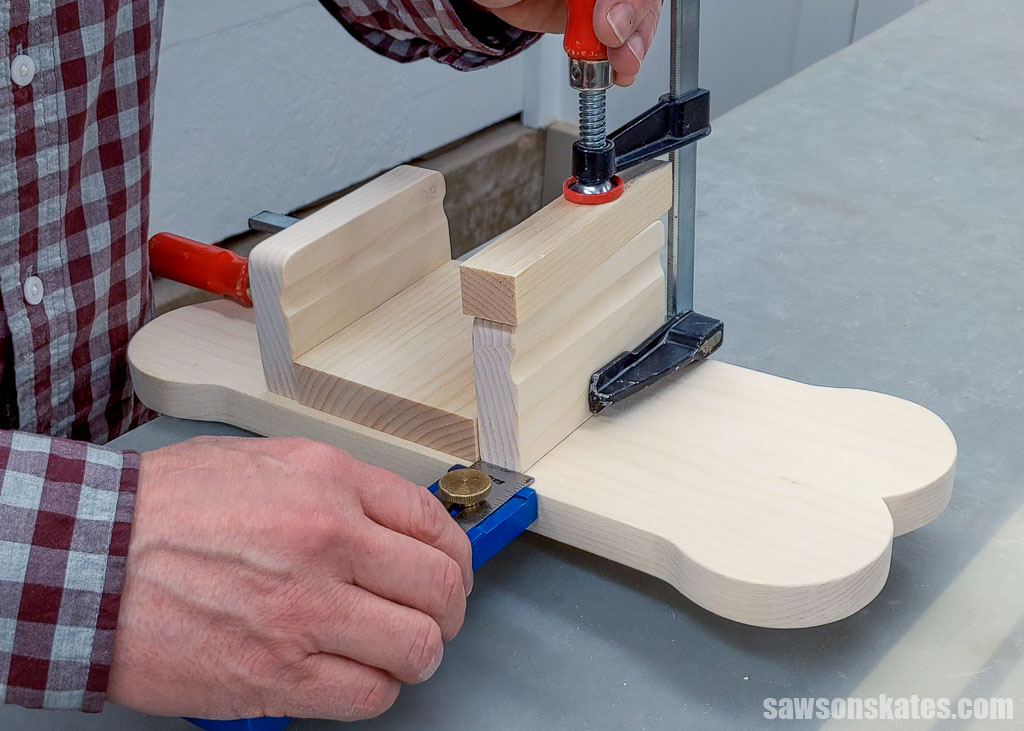
I attached the shelf in place using wood screws.
Step 4. Attach the Hooks
NOTE: Your hook locations may vary if you use different ones than I did for my holder.
I wanted my hooks to set down from the bottom shelf, so I cut a piece of scrap wood to length and made a mark.
I wanted my hooks to set in from the edge, so I set my Kreg Multi-Mark to that distance and made a mark.
I created a starting point for the drill bit using an awl.
Then I made a pilot hole using a drill bit.
Related: How to Drill Pilot Holes (Why, When & Correct Size)
After positioning a hook over the hole, I attached it using the screw it came with. Repeat for the remaining hook.

Step 5. Attach the Hanger
For mounting the holder onto the wall, I attached a sawtooth hanger to the back using the screws that came with it.
Step 6. Finish Your Key Holder
See How Do You Finish the DIY Dog Leash Holder for more information.
To minimize the chances of the holder tipping from side to side, I suggest attaching a cabinet bumper to each bottom corner of the holder’s back after you’ve applied your finish.
Includes:
- List of tools and materials
- Complete measurements (in inches)
- Easy-to-follow instructions
- Step-by-step photos
- Detailed diagrams
- Bone-shaped template
Final Thoughts
Making this DIY dog leash holder shaped like an adorable bone is a fun and easy project that looks great on any wall.
Don’t wait. Get your PDF plan (including the detailed instructions and measurements) now!
Thank you for stopping by. If you enjoyed this tutorial, would you please take a moment and pin it to Pinterest? I’d really appreciate it!
Recommended For You
Pin This For Later

Hi there – I’m Scott, a woodworking enthusiast and creator of Saws on Skates, a site I started in 2015 to share easy-to-follow tutorials, space-saving shop tips, and project inspiration for DIYers at any skill level. Learn more about my woodworking journey here.