DIY Deviled Egg Tray (Party-Perfect Elegance)
Transform ordinary eggs into an elegant centerpiece with this show-stopping wooden deviled egg tray. Easy tutorial and template included.

What Should I Build Next?
That's the question I help answer.
Every week, I send woodworking ideas to 17,000 DIYers who love building things.
You'd fit right in.
Elevate your next gathering with a touch of handmade elegance. I’ll guide you through creating a stunning wooden deviled egg tray using a router and included template. Impress your guests with a party-perfect centerpiece that’s beautiful, functional, and surprisingly simple to make.
Table of Contents
- Inspiration for This Deviled Egg Serving Tray
- What Wood Should You Use?
- What Tools Do You Need?
- What Finish Should You Use?
- How to Make a DIY Deviled Egg Tray
- Get the PDF Plan
This article contains affiliate links. If you purchase from these links, I may earn a small commission at no additional cost to you. Visit my site policies for more information.
Inspiration for This Deviled Egg Serving Tray
Have you ever scrolled through Facebook and stumbled upon something so clever that you instantly wanted to flex your creative muscles? That’s exactly what happened to me when I spotted a unique wooden deviled egg holder in a woodworking group. Unlike anything I’d ever made, I knew I had to give it a shot, especially since my best friend is a deviled egg fan.
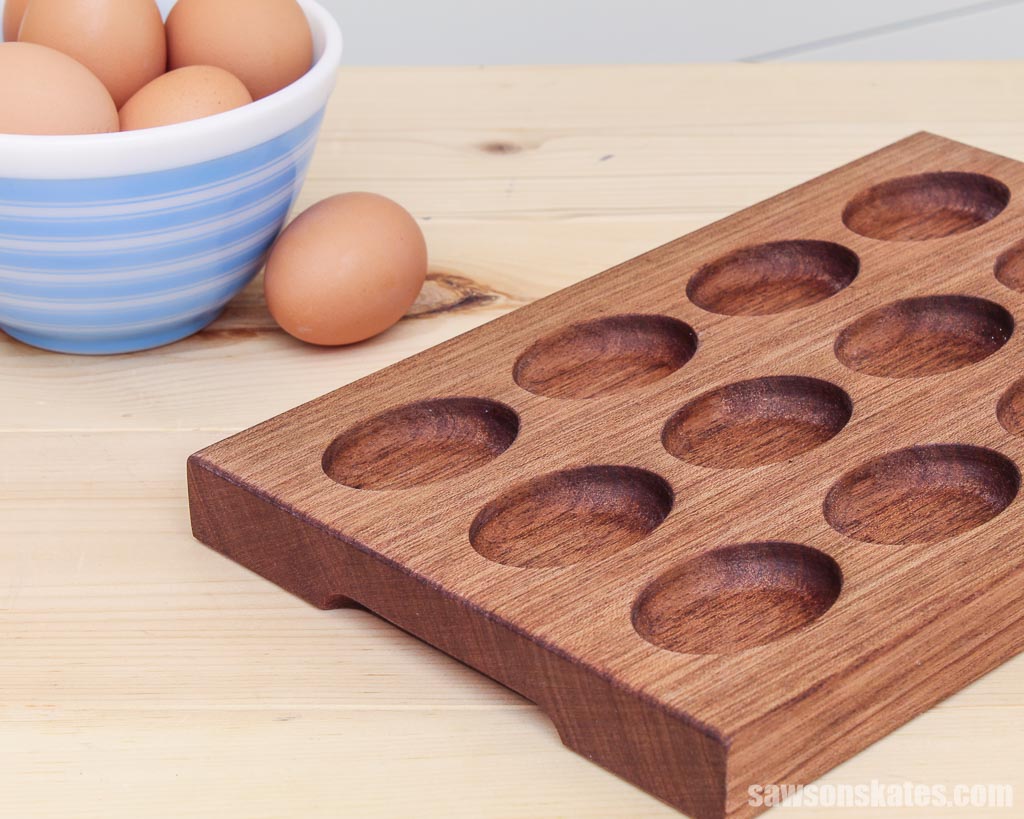
Here’s what I came up with: a beautiful serving tray made from solid wood that cradles twelve delectable deviled eggs. And the best part? The design is easily expandable—simply make more boards to feed a crowd.

What Wood Should You Use for a Deviled Egg Platter?
When selecting material for your deviled egg platter, consider the same hardwoods you might use for charcuterie boards, such as maple, walnut, or cherry.
In my case, I used some leftover 5/4 mahogany (spoken as five-quarter). While mahogany boasts a warm reddish-brown hue and a classic look, my boards weren’t wide enough, so I joined three pieces to achieve the desired width for my trays.
Related: Beginner’s Guide to Wood Sizes
What Tools Do You Need for a Deviled Egg Carrier?
I used four tools to make my wooden egg tray:
- Miter saw: I used my miter saw to cut the boards to length.
- Plunge router: I used my plunge router and a bowl bit to make the concave area for the eggs.
- Router table: I used my router table and a cove bit to make the handle area at the ends of the tray.
- Handheld router: I used my trim router and roundover bit to soften the tray’s edges.
You’ll also need a tool to cut out the template. While I used my laser cutter, a scroll saw would also work.
What Finish Should You Use for a Deviled Egg Board?
When choosing a sealer for your deviled egg tray, ensure it’s a food-safe finish:
- Food-grade mineral oil
- Cutting board oil
I had cutting board oil on hand, so I used it to seal my egg trays.
How to Make a Wooden DIY Deviled Egg Tray
Printed Plan
Get the PDF plan here (includes detailed instructions, measurements, and bonus tips)
Materials
- Wood (per the printed plan)
- Waterproof Wood Glue (such as Titebond III)
Tools
- Tape Measure
- Miter Saw
- Table Saw
- Scroll Saw
- Plunge Router
- Router Table
- ¾” Bowl Router Bit (ensure the shank size is compatible with your router’s collet before buying bits.)
- Cove Router Bit
- ⅛” Roundover Router Bit
Before You Begin
I chose 5/4 wood (spoken as five-quarter) for this project, which is about 1-⅛ inch thick.
Related: Beginner’s Guide to Wood Sizes
I’ve received comments from readers expressing difficulty finding 5/4 in their local stores. While I can find it in my local lumber yard, its availability may be limited in other areas.
I haven’t tested this project with thinner ¾” material, but you could try it and see if it works for you. If you do, please let me know the results.
Step 1. Make the Router Guide
To avoid any mix-ups, I’ll differentiate between the two templates involved in this project:
- Paper Template: This template outlines the placement of the tray’s egg-shaped indentations and is included with the printed plan.
- Router Guide: This template, created using the paper template, guides your router during the shaping process.
The router guide needs to be about ¾” thick, ensuring there’s enough material for the router bit’s bearing to follow as it’s plunged into the wood.
I created my router guide in two steps:
Double-Layered Template
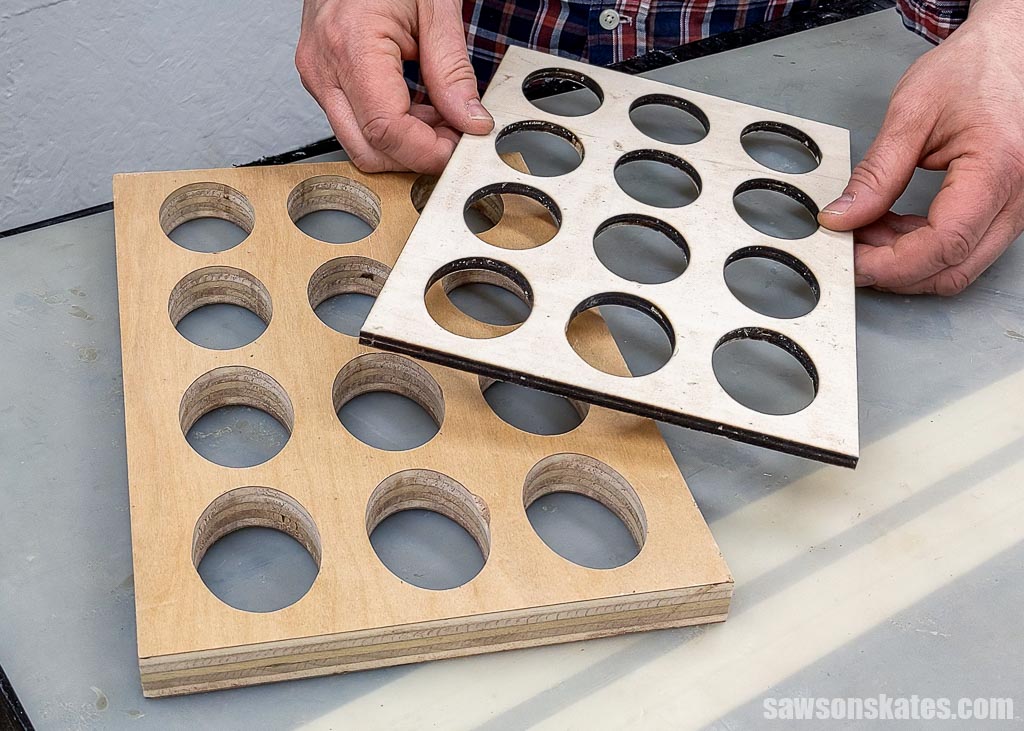
- Using the SVG file (included with the printed plan), I used my laser cutter to create two identical templates from 3mm plywood.
- These were glued together, resulting in a single, sturdier template.
Shaping the Router Guide
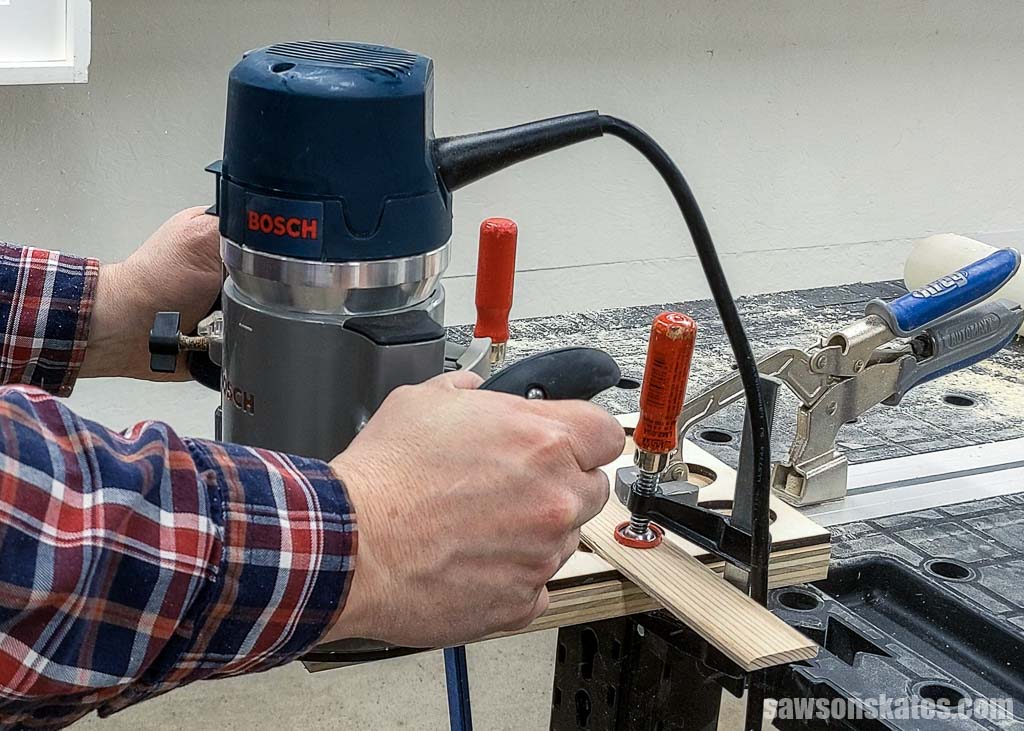
- The laser cut template was temporarily attached to a ¾” plywood blank using double-sided tape.
- I drilled holes within each opening, large enough to accommodate a straight-cutting router bit.
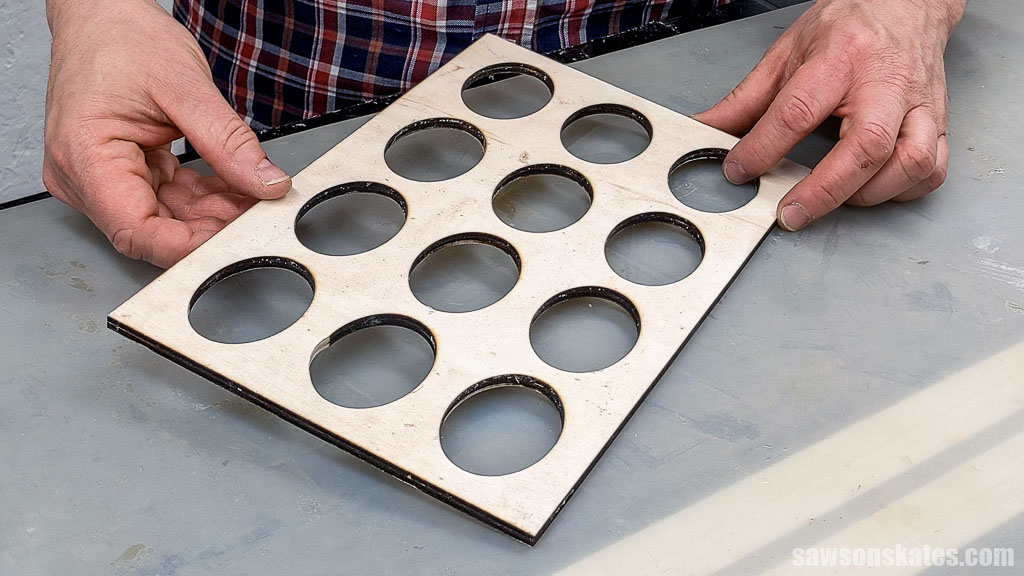
- Using the straight-cutting bit, I cut out the openings in the plywood. This completed router guide was then used to shape the egg tray’s cavities.
Here’s what the router guide looked like after cutting the holes.
No laser cutter? No problem.
While I used a laser cutter, here’s a one-step method using a scroll saw:
- Prepare the plywood: Secure the paper template to a ¾” plywood blank using spray adhesive. I originally planned for a smaller tray size, so the paper template will be slightly smaller than the plywood. No worries though; just center it on your blank, and you’ll be good to go
- Cut the openings: Carefully follow the template outline with a scroll saw to cut out the egg-shaped openings in the plywood.
Step 2. Make the Egg Tray
Since I didn’t have any wood matching the required size for the egg board, I used my table saw to rip several pieces of mahogany to width. Three individual strips were then glued to form a single, wider blank for the tray.
Related: 21 Table Saw Safety Rules (& Mistakes to Avoid)
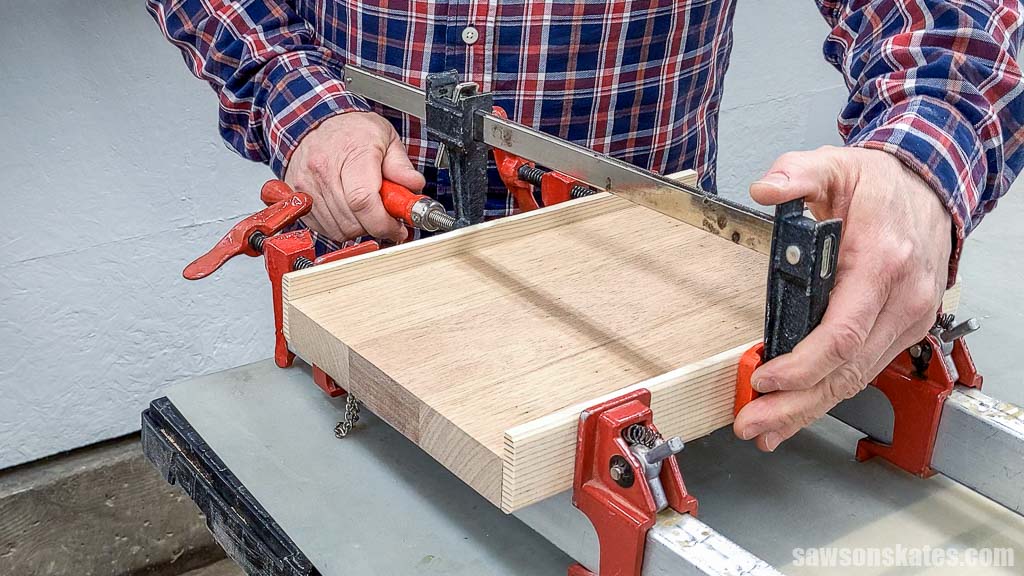
TIP: Gluing boards to form wider panels can sometimes lead to uneven or misaligned edges. If you have a sliding miter saw (capable of handling wider cuts than a standard one), here’s a helpful trick I use:
- Cut your boards slightly longer: When cutting individual boards, I cut them at least ¼ inch longer the final desired length.
- Square up after drying: Once the glue dries, I use my miter saw to trim both ends of the assembled panel, ensuring perfectly square edges for my project.
If you’re using a standard miter saw, one that doesn’t slide:
- Cut to final length: Since the wider panel will be too large to cut in one pass for squaring after glue-up, cut each board to its final dimension before assembly.
- Careful Clamping: During glue-up, pay close attention to maintaining squareness while clamping.
I used my random orbital sander to smooth the boards with progressively finer grits, starting with 80-grit sandpaper, then 100-grit, and finally 120-grit paper.
Related: How to Sand DIY Wood Furniture (Faster, Easier & Better Results)
Setting up the router:
- Bit Installation: I installed the bowl cutting bit in my router.
- Depth Adjustment: Using the plunge router’s depth stop (known as the turret), I set it to the third position from the top, establishing the maximum plunge depth.
- Guide and Depth Fine-Tuning:
- I placed the plywood router guide on the router’s baseplate and adjusted the bit for a final cutting depth of approximately ⅜”.

Once the bit was set, I returned to the depth stop to its highest setting.

Next, I applied double-sided tape to my router guide.
TIP: Avoid using excessive double-sided tape while securing the router guide, as I did on my prototype. I applied four long strips across the entire length, making removal extremely difficult.
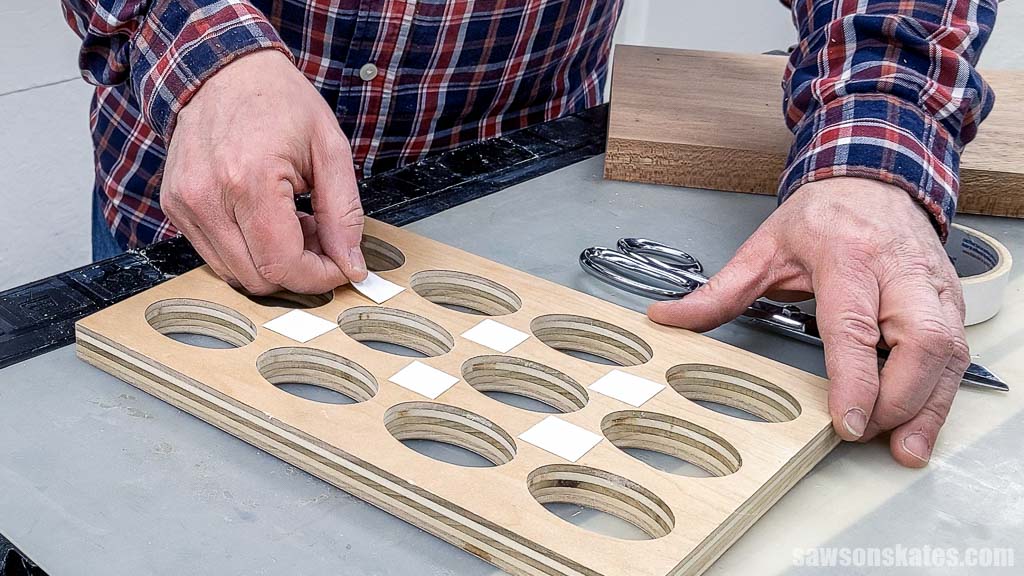
Then, I peeled the tape’s backing.
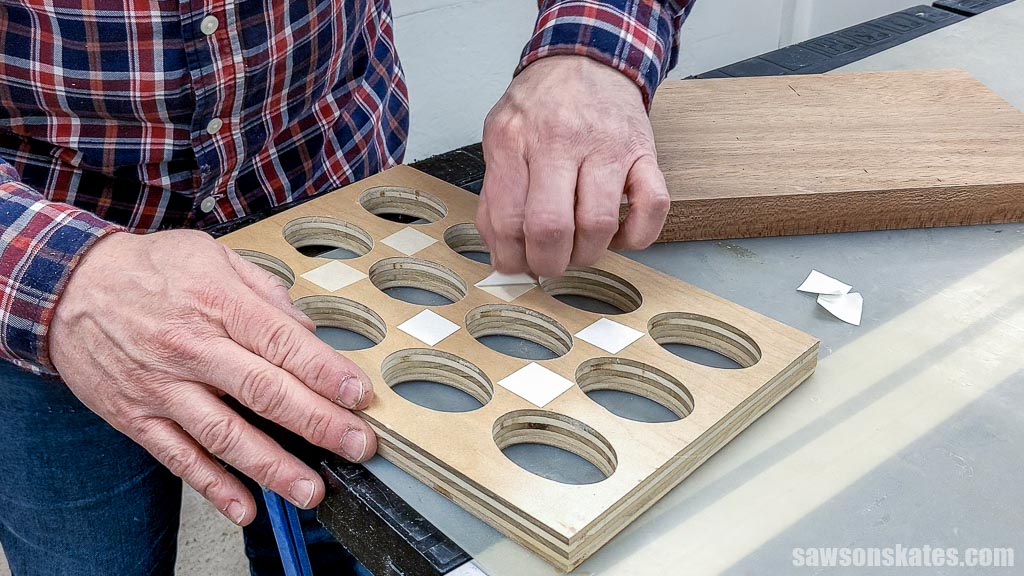
Next, I centered it on my blank.
NOTE: In my photo, the router guide is slightly smaller than the egg tray blank because I originally planned for a smaller tray size. However, following the measurements I outlined in the printed plan, your router guide and tray blank should be nearly identical in size.
And pressed it into position.

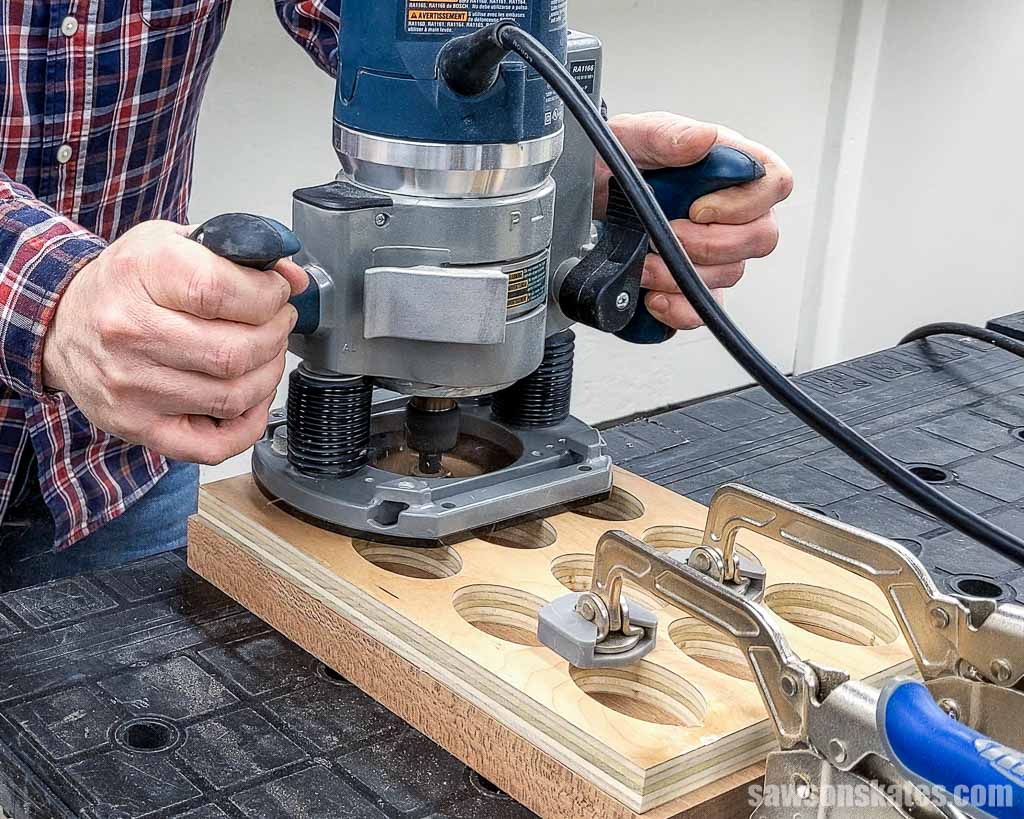
Shaping the material:
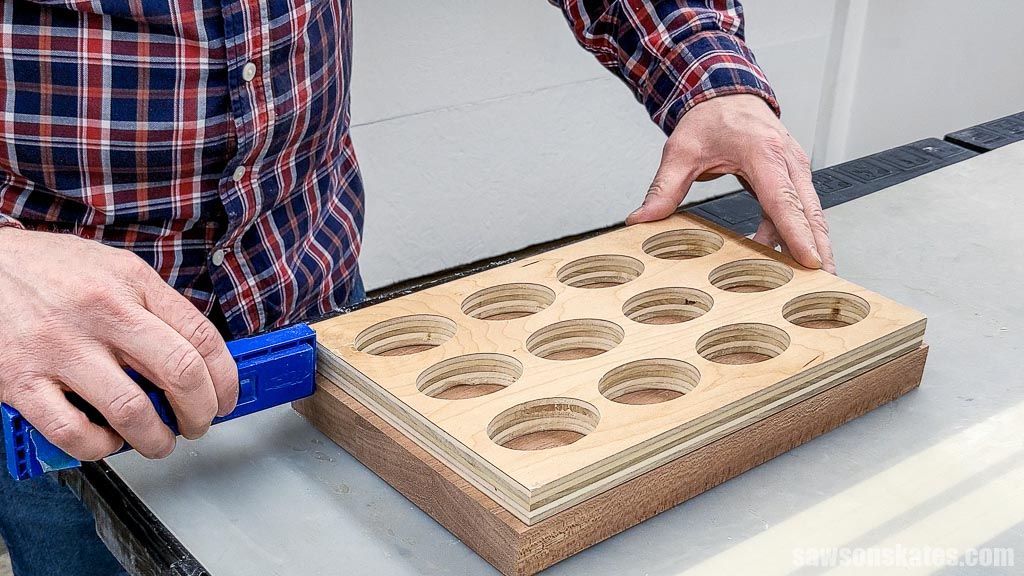
- Clamp firmly: I clamped the workpiece to my workbench, ensuring it didn’t move while routing.
- Stop before reaching the turret: I began by gently plunging the tool straight down into the material until I felt resistance, but not all the way to the depth stop yet.
- Direction: With the bit engaged in the material, I moved it counterclockwise to remove the material.
- Repeat, refine and take your time: I repeated this process two or three times for all of the openings, taking small cuts each time until I reached the first depth stop. This reduces the risk of making divots in the material. Then, I repeated this process until I reached the final depth stop. Shaping the holes is a process, so set aside some time and be patient.
Benefits of this approach:
- Prevents deep marks: Small cuts reduce the risk of creating deep divots requiring significant sanding later.
- Practice for final depth: By incrementally removing material, you get a feel for the process before reaching the final desired depth.
TIP: Cutting the openings produces a lot of dust, so I recommend doing this step outside if possible. My shop was a mess afterward and required a thorough cleaning.
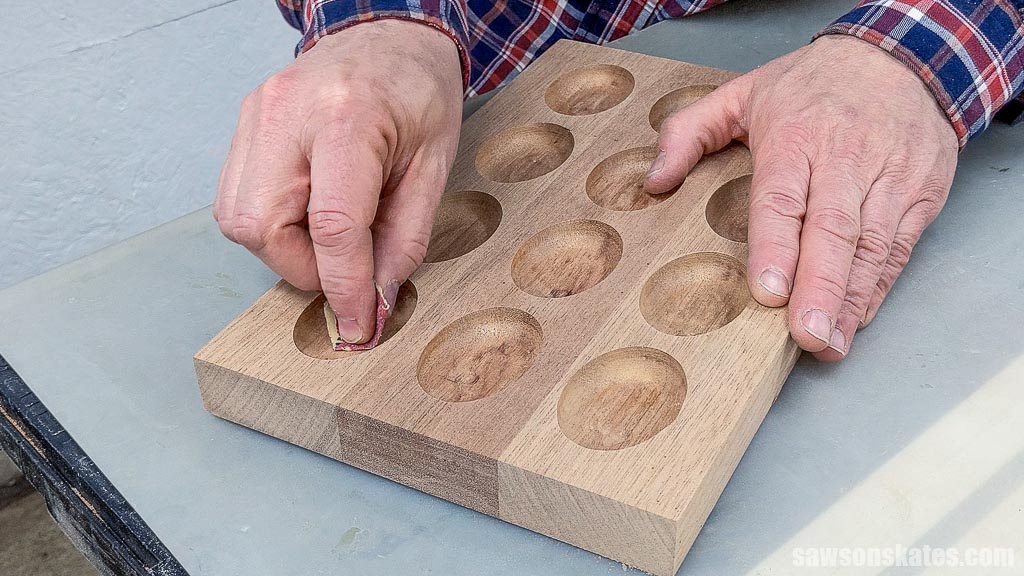
Despite my best efforts, I still ended up with divots at the final depth.
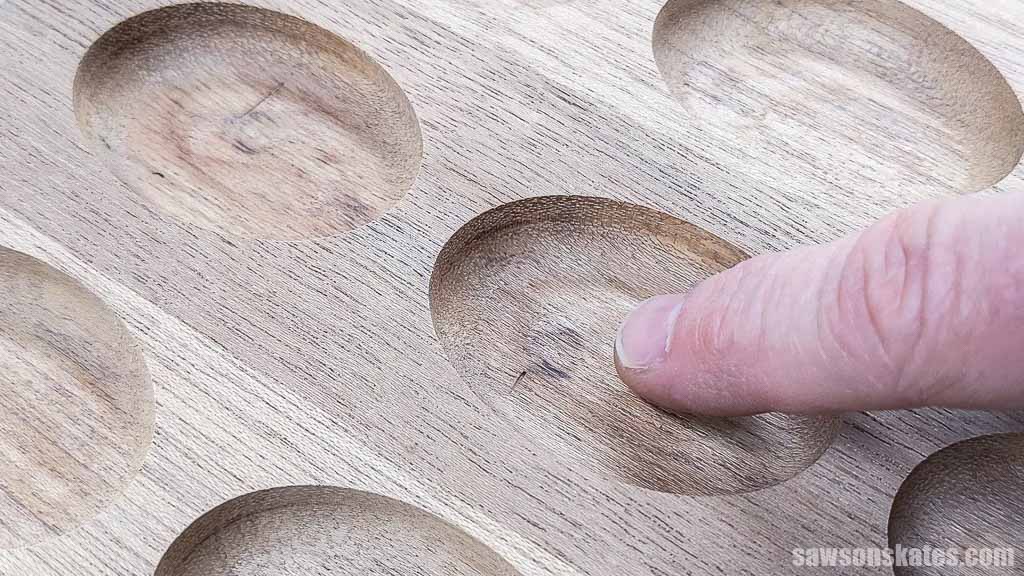
So, I used a small piece of sandpaper to remove them.
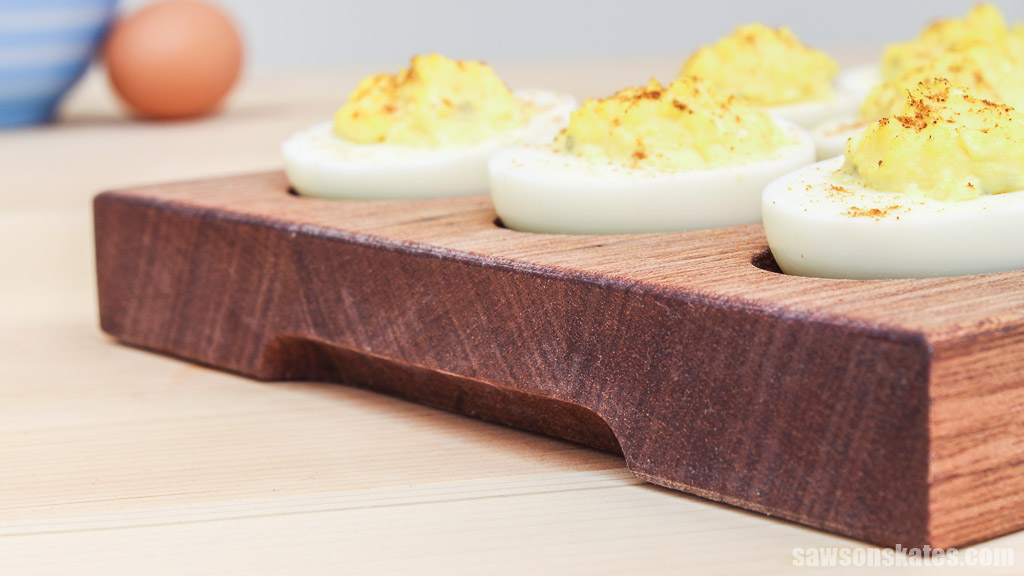
Step 3. Make the Handles
To make the handles:
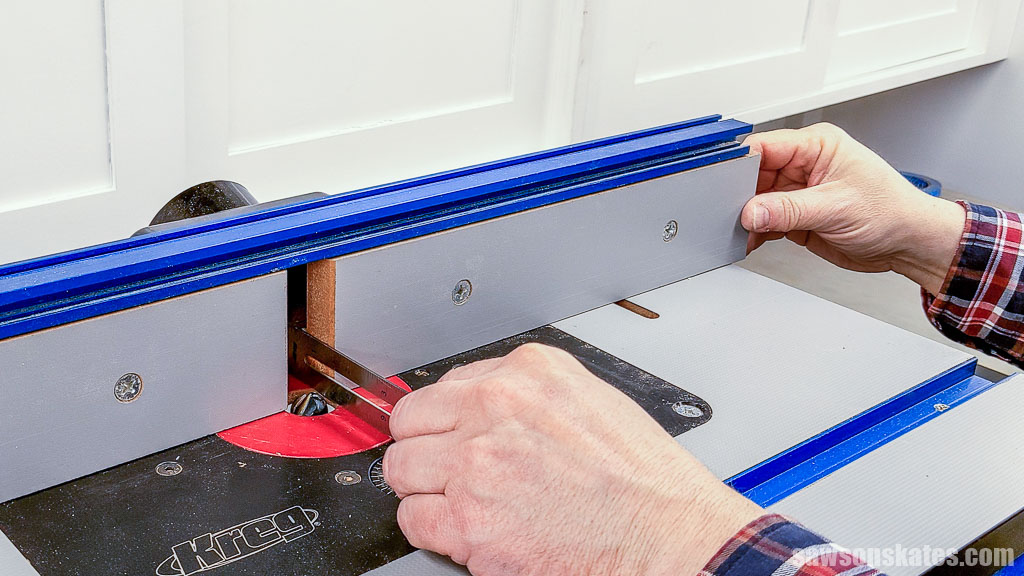
- Router bit: I installed a cove bit in my router table.
- Setting the depth: I adjusted the bit’s height to the desired depth for my handles.
- Creating clearance: I used the thickness of my Kreg Multi-Mark’s ruler to create clearance between the bit and each side of the fence, ensuring the bit wouldn’t damage the fence.
- First pass: I felt my desired depth was a lot of material to remove in one pass, so I lowered the bit to about half that amount to make the first pass.
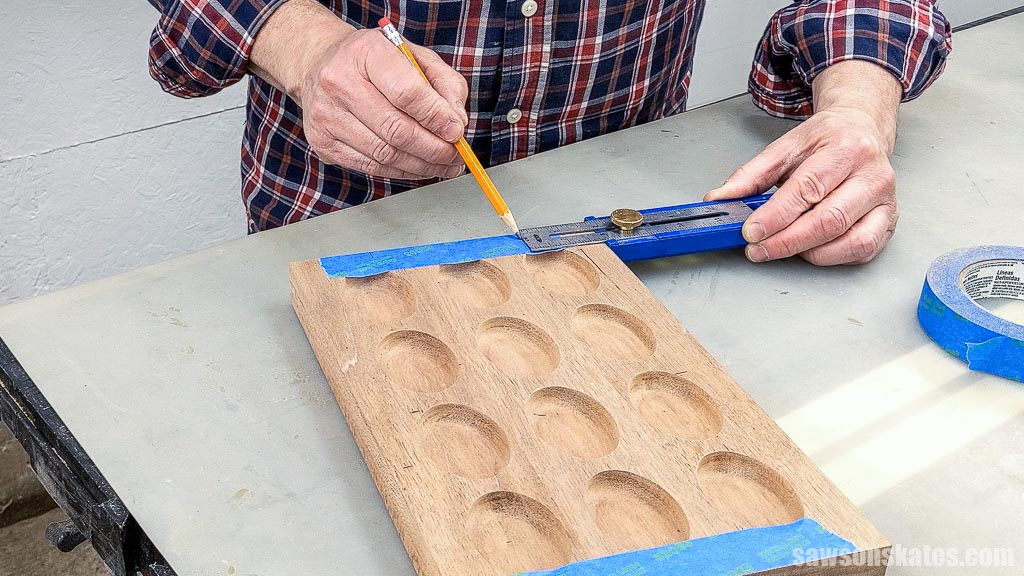
To lay out the handle’s width, I set my Kreg Multi-Mark and made a mark on each side.
TIP: I applied painter’s tape so I wouldn’t have to remove pencil marks from the tray.
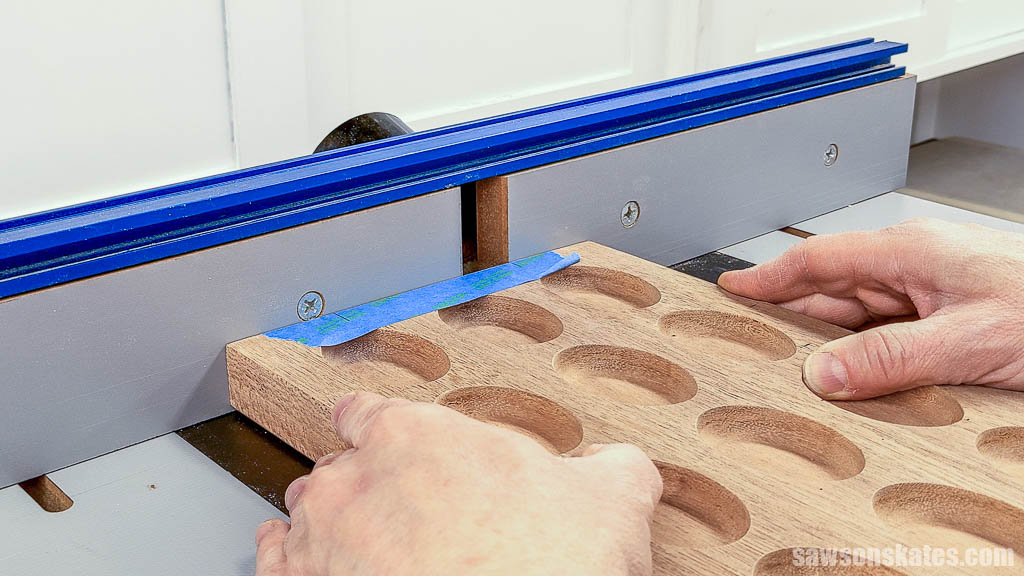
With my router table turned on, I carefully guided the left pencil mark toward the left edge of the router table’s fence.
Related: How to Use a Router Table for Beginner’s

Then, I moved the workpiece to the left until the right pencil mark met the right edge of the fence. I repeated this step for the other handle.
I raised the bit to my desired depth and repeated this step for both handles.
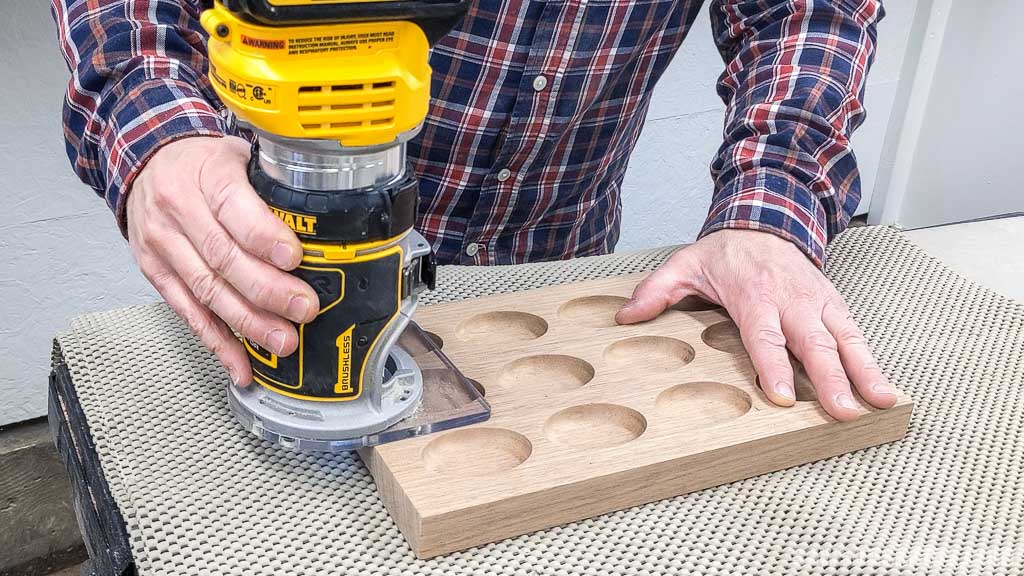
Next, I used my handheld router and a roundover bit to smooth the tray’s top and bottom edges.
Step 4. Apply the Finish
After completing the final sanding, I removed the dust using my ShopVac and a tack cloth.
Related: What is a Tack Cloth? (& How to Use It the Right Way)
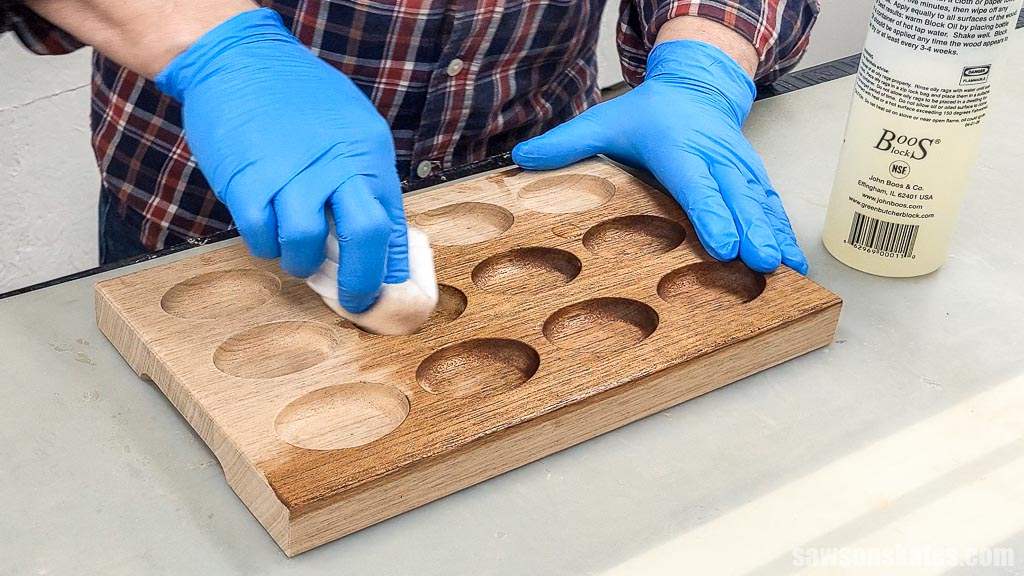
Next, I applied a coat of cutting board oil with a clean rag.
NOTE: The cutting board oil I used is flammable. Always dispose of oil soaked rags properly to minimize the risk of fire.
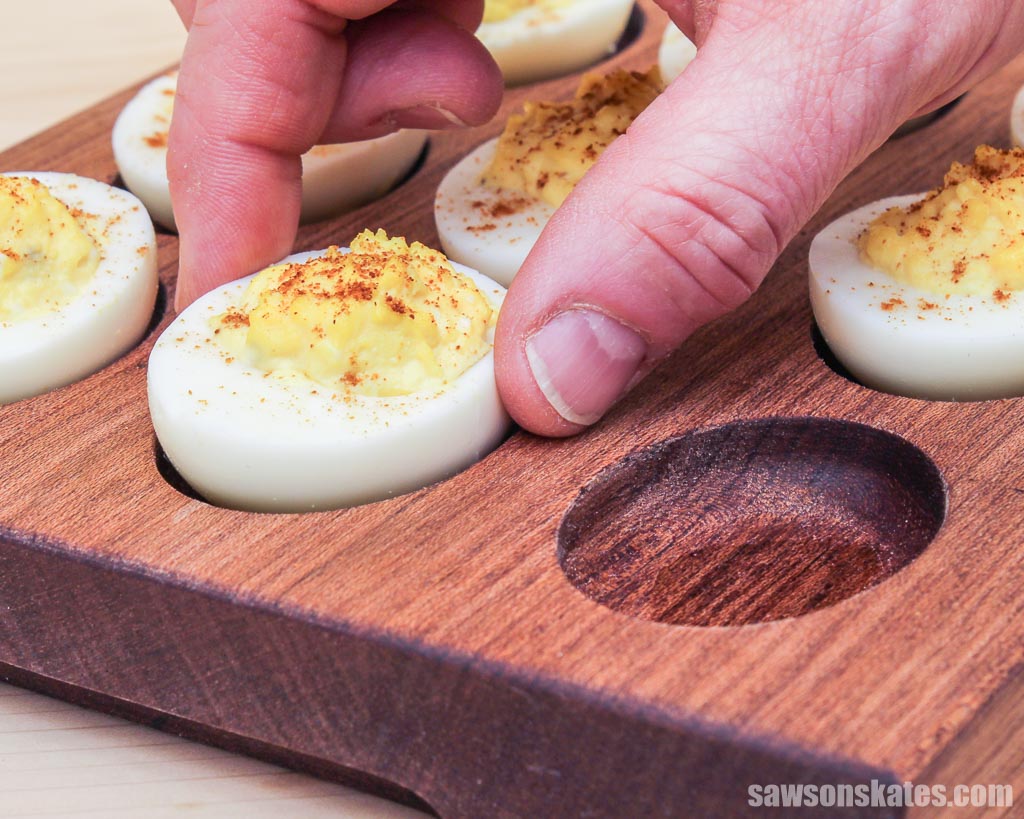
That’s it. Your deviled egg tray is ready to impress your guests!


Includes:
- List of tools and materials
- Complete measurements (in inches)
- Easy-to-follow instructions
- Step-by-step photos
- Detailed diagrams
- PDF, SVG, and DXF templates
Final Thoughts
Ditch the store-bought plastic. This handcrafted deviled egg tray is ready to be the star at your next potluck. Transform your eggs into a stunning centerpiece while adding a touch of personality and warmth to your table.
Don’t wait. Get your PDF plan (including the detailed instructions and measurements) now!
Thank you for stopping by. If you enjoyed this tutorial, would you please take a moment and pin it to Pinterest? I’d really appreciate it!
Recommended For You

Pin This For Later

Hi there – I’m Scott, a woodworking enthusiast and creator of Saws on Skates, a site I started in 2015 to share easy-to-follow tutorials, space-saving shop tips, and project inspiration for DIYers at any skill level. Learn more about my woodworking journey here.