21 Table Saw Safety Rules (& Mistakes to Avoid)
Learn the top table saw safety rules to prevent injuries. Plus, find out the most common mistakes do-it-yourselfers make and how to avoid them.
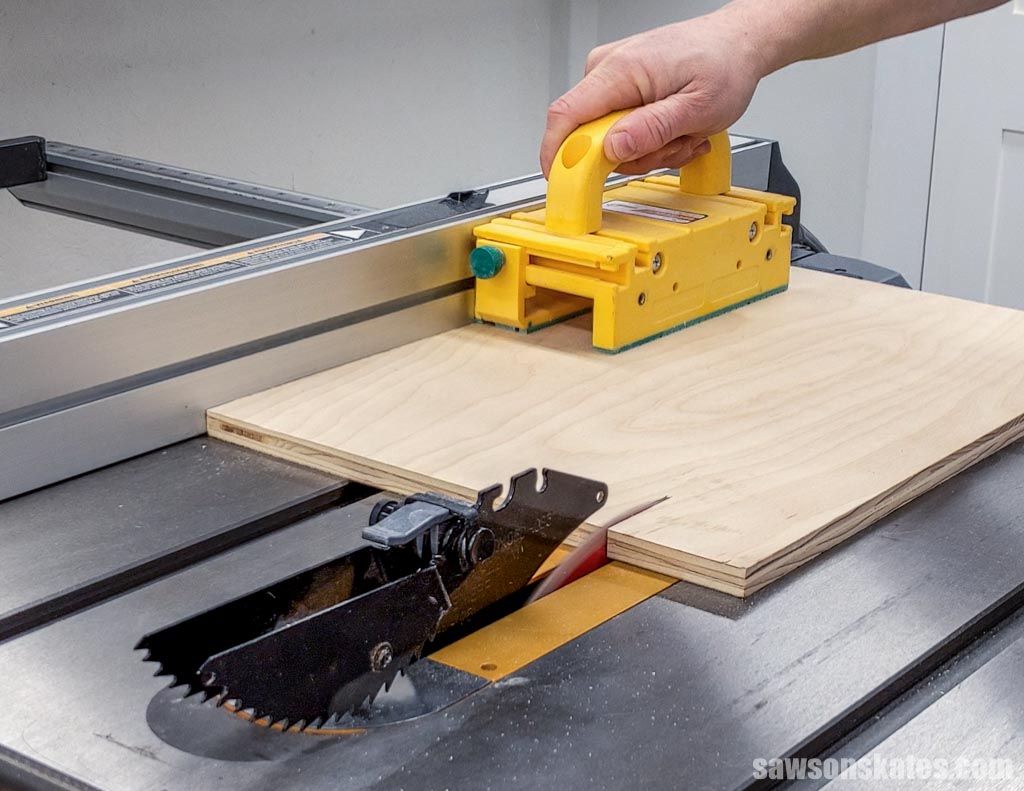
Table saws are an integral part of many workshops, versatile tools you can use for various tasks, from ripping lumber to crosscutting. However, as with any power tool, there’s risk involved with using them.
Taking the necessary precautions will help you minimize the risk. In this article, I’m breaking down the top safety tips and the common mistakes DIYers make, so you can avoid them.
Originally published June 25, 2019, updated February 14, 2023
This article contains affiliate links. If you purchase from these links, I may earn a small commission at no additional cost to you. Visit my site policies for more information.
Table Saw Safety Tips
I had the opportunity to attend a class presented by Chuck Bender called “Table Saw Basics,” where he shared invaluable knowledge about table saw safety.
Chuck is a master furniture maker renowned for creating museum-quality pieces and teaches period-style furniture building classes in his Pennsylvania-based workshop. He was also the Senior Editor of Popular Woodworking Magazine.
Related: Best Woodworking Magazines for Beginners (Survey Results)
Table Saw Basics was a featured class at a Woodworking Shows event, where attendees can explore new tools, experience live demonstrations, and attend woodworking classes – all for the price of admission.
In this article, I’m passing along his expert advice, plus tips I’ve learned from other woodworking classes I’ve attended over the years.
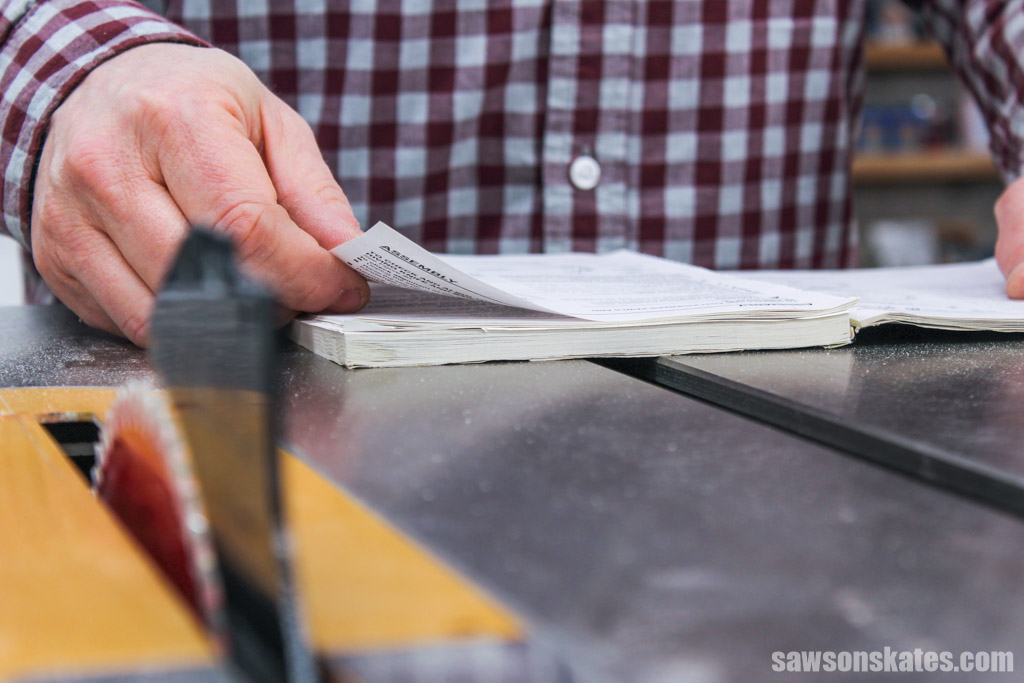
1. Read the Instruction Manual
Before using your table saw or any power tool, always read the instruction manual carefully. Reading the manual will help you understand how your table saw works and how to use it properly.
Familiarize yourself with your table saw’s parts, how to make adjustments and all the safety features of your saw.
If you misplaced your manual, you can usually find it online by searching for the manufacturer’s name and your table saw’s model number.
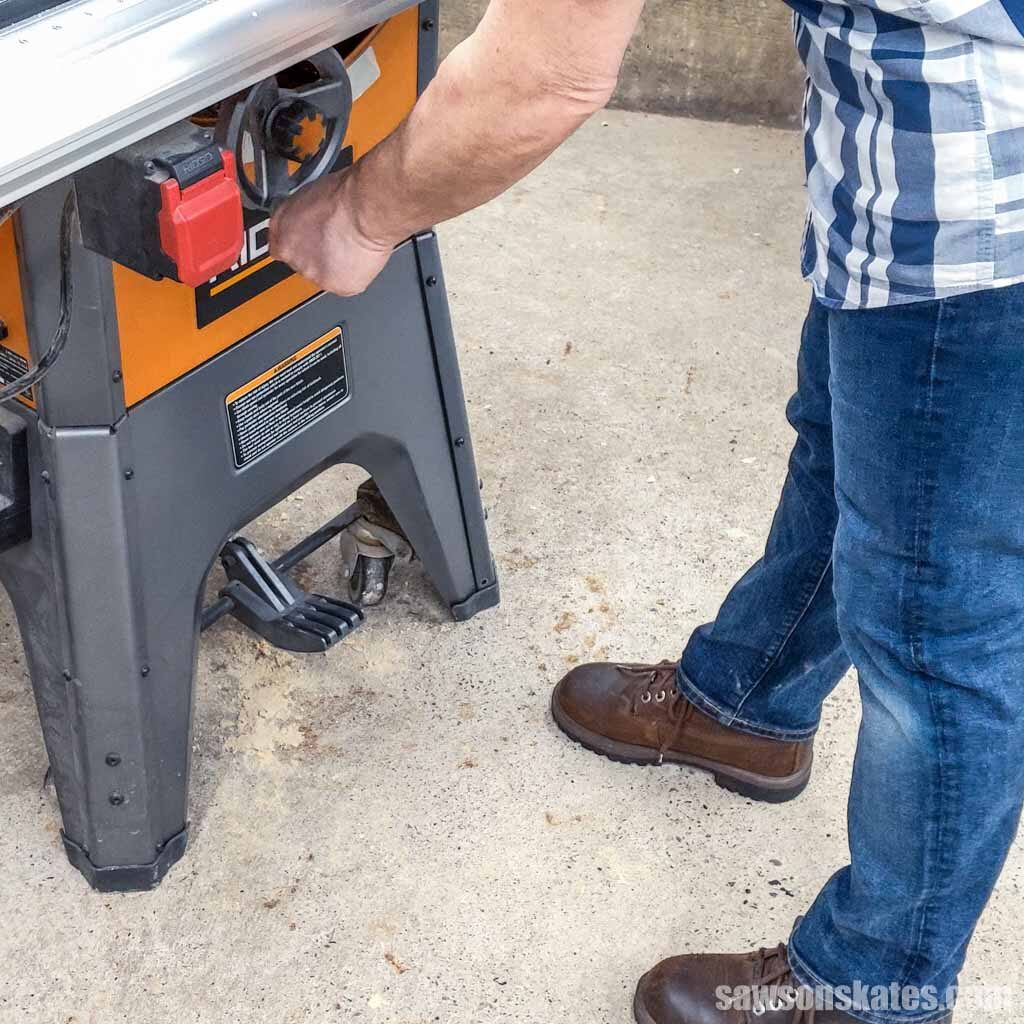
2. Wear the Proper Clothing
When operating a table saw or anytime you’re working in your shop, it’s crucial to dress appropriately. This includes avoiding loose-fitting clothing, long sleeves, jewelry, and tying back long hair that could become tangled in the blade.
It’s essential to wear the proper footwear when working in your shop. Non-slip, closed-toe shoes are a must. Please don’t risk your safety by wearing sandals or flip-flops, as they don’t provide adequate protection.
When I was a kid, I remember my grandfather working in our garage one summer, wearing sandals. He didn’t notice a chainsaw sitting on the floor (not the best place to store a chainsaw, but that’s another story!) Unfortunately, he sliced his foot open, requiring us to visit the emergency room. The moral of the story is always to wear closed-toe shoes when working in your shop.
Should You Wear Gloves When Using a Table Saw?
No, you should not wear gloves when using your table saw for several reasons. First, during the Table Saw Basics class, Chuck urged us to use all of our five senses when using a table saw, and wearing gloves robs us of one critical sense: touch.
You should also avoid wearing gloves for the same reason you shouldn’t wear loose-fitting clothing, as they can easily get caught in the blade resulting in a serious hazard for your hands.
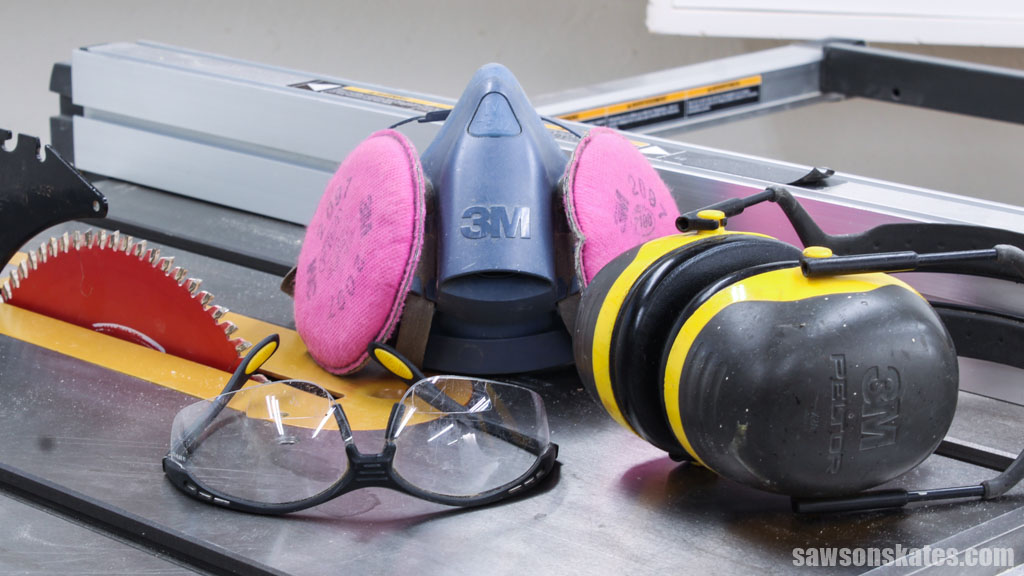
3. Protect Your Eyes, Ears, and Lungs
Wearing personal protective equipment (PPE) is an essential part of table saw safety or when using any power tool.
Safety glasses protect your eyes from flying debris and small wood chips that can get kicked up by the table saw’s blade.
Wearing earplugs or earmuffs is important, as table saws are noisy and can damage your hearing.
Woodworking tools, such as table saws, produce a lot of sawdust, including airborne dust particles that you can see and microscopic dust particles that you can’t see.
Prolonged inhalation of these microscopic particles can significantly reduce lung capacity and lead to other serious health problems. To protect yourself, you must wear a respirator when using table saws and other tools that produce sawdust.
4. Keep Your Work Area Tidy
When working with table saws, a clean workspace is essential.
During a class at my local woodworking club, the instructor advised us to remove unnecessary items from our work area, like tools and materials, and check the floor for tripping hazards, such as power cords. This is excellent advice when working with any tools, including table saws.
Related: 11 Places to Take Beginner Woodworking Classes
In addition to keeping my work area tidy, I ensure the material has enough room to exit the back of the table saw. As my workshop is small, I store my table saw against the wall to save floor space.
Related: 9 Clever Ways to Make Your Small Workshop Feel Bigger
When I need to make a cut, I move the saw away from the wall. I always double-check that it has been pushed out far enough so that the workpiece has enough clearance to exit the saw without crashing into the wall.
5. Remove Distractions
When using a table saw, staying focused on the task at hand is essential. Taking your eyes off while making a cut, even for a second, can be dangerous.
When I’m working in my shop, I make sure to keep distractions to a minimum. I know many shops have them, but I don’t recommend having a TV in your work area. It may be tempting to tune into the big game, but table saws require your undivided attention. If you insist on having a TV in your shop, only turn it on when you take a break or clean up.
I also take my phone out of my pocket so I won’t be distracted by vibrations from incoming calls or text messages.
Perhaps the biggest distraction is when someone walks into your shop while you are making a cut, which can be startling but also incredibly dangerous.
It’s best to discuss with family and friends how dangerous interruptions can be and make a rule that they are not allowed to enter your shop when they hear a saw running. I’m a member of several Facebook woodworking groups, and I’ve seen some members say that they post a sign on the entrance to their shops with a reminder only to enter once they hear the saw stop.
6. Disconnect the Power Before Changing the Blade
Unplugging your table saw before changing the blade ensures that the saw cannot be powered up unintentionally. Even when your saw is turned off, it’s still connected to the power source and could start if you accidentally bump the on/off switch.
7. Keep the Blades Clean
With use, table saw blades accumulate sap and resin. Over time, these substances can cause the blade to act like it’s dull, which affects its performance.
Making cuts with a dirty blade requires more feed pressure, meaning that you have to push harder to advance the material, and it can also burn the edges of your workpieces. Additionally, the resins can corrode your blades.
To clean table saw blades, I use a stiff brush and a blade and bit cleaner. And after photographing my table saw for this article, I realized my blade desperately needs a thorough cleaning!
Related: How to Clean Saw Blades
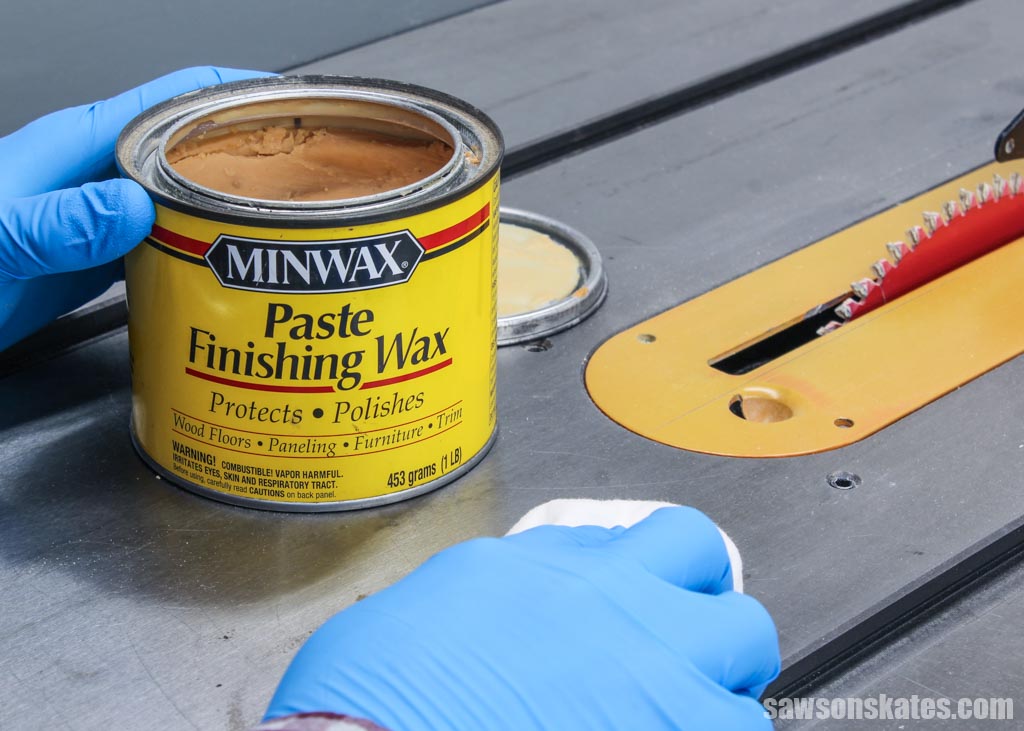
8. Wax the Table and Fence
Just like saw blades, resins can accumulate on your saw’s table and fence, making it difficult to slide workpieces across them.
Applying wax to your table saw reduces friction allowing workpieces to glide smoothly and effortlessly while also helping to prevent sticky resins from accumulating on its top. Waxing your table saw also reduces the chances of it oxidizing.
Choosing a wax without silicone is important because silicone-based products can prevent stains and finishes from adhering to wood surfaces. Automotive wax is not a good choice because many of them contain silicone.
In the past, I used Johnson’s Paste Wax; however, it was discontinued at the end of 2021. I’ve been told Minwax Paste Wax does not contain silicone, so it should be a suitable alternative.
Related: How to Wax Your Table Saw
9. Adjust the Blade Height
Table saw blade height is the amount of the blade visible above the workpiece. When it comes to the blade’s ideal height, there is some debate among woodworkers, as everyone has their own opinion on how much should be exposed.
Chuck said setting the blade higher provides the best performance:
- Less strain on the saw’s motor
- Less friction
- Less heat produced by the blade
On the other hand, he warned setting the blade higher increases the risk of injury because more of the blade is exposed.
Chuck suggested setting the blade lower decreases the risk of injury because a smaller portion is exposed; however, the trade-off is it sacrifices efficiency and increases friction and heat.
So, what option does Chuck use in his shop? He sets his blade low, about an ⅛” above the material.
Before participating in Chuck’s class, I used to set the blade higher. After following his advice and lowering it, I noticed several things. First, the saw’s performance seemed the same as before. Second, even though I remain respectful of how dangerous table saws can be, lowering the blade increased my comfort level with using the tool.
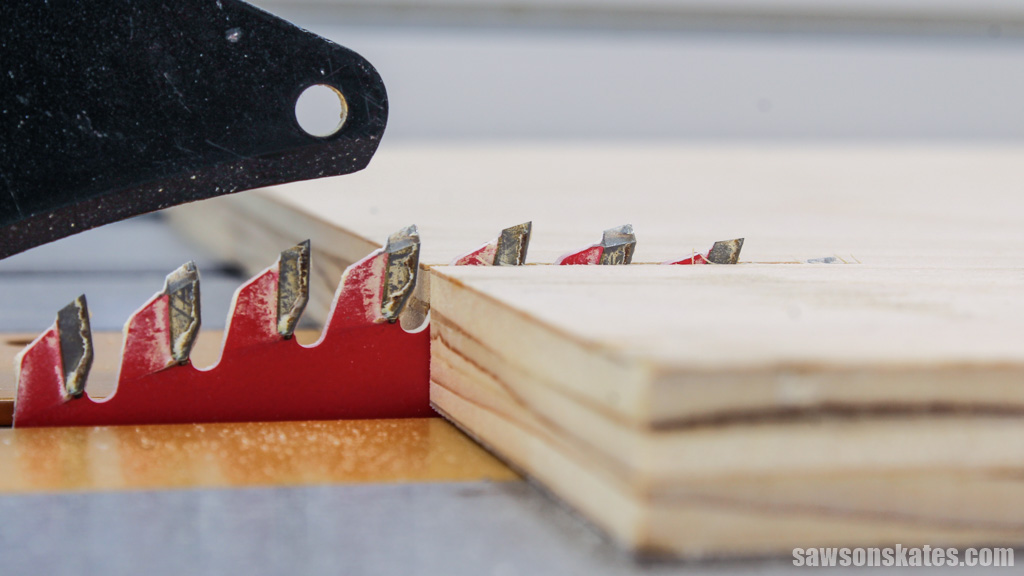
10. Use a Riving Knife or Splitter
A riving knife is an essential safety feature positioned directly behind the blade, following its movements as you raise, lower, or tilt it.
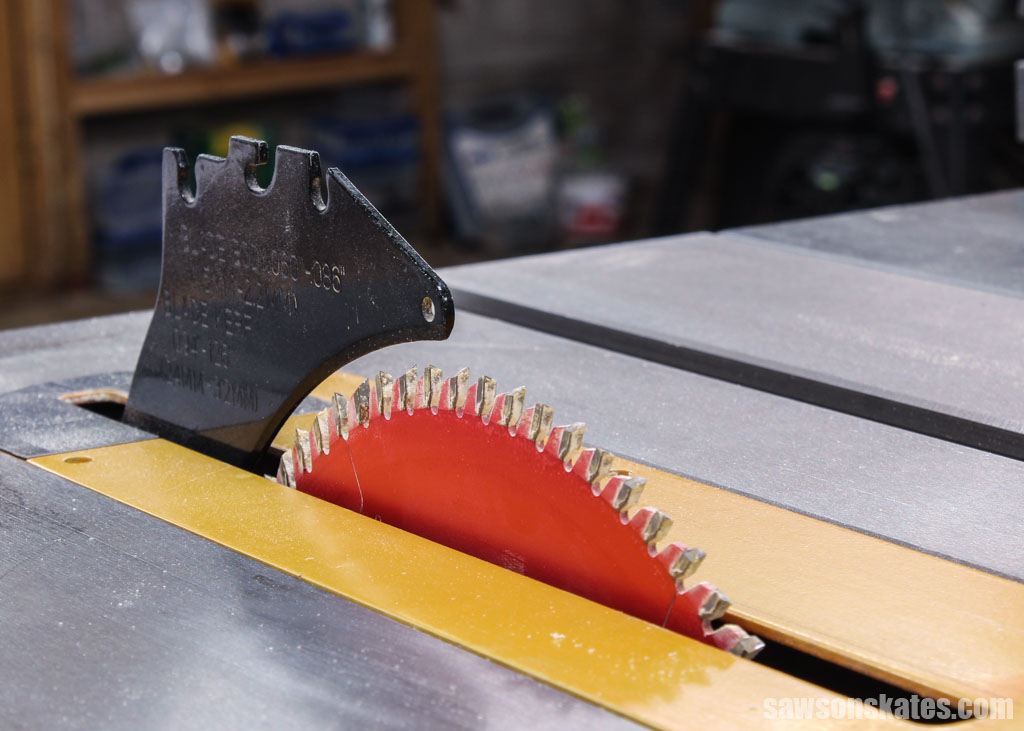
A splitter is similar to a riving knife, except it’s fixed onto the table and remains stationary in relation to the blade.
Both of these devices are designed to reduce the risk of kickback, which is when the blade forces the material back toward you unexpectedly and at high speed.
Related: Table Saw Kickback (Cause, Injuries & How to Avoid It)
Chuck explained that table saw kickback occurs when the workpiece drifts away from the fence and into the blade or when the material pinches against it.
Applying sideways pressure to keep the material against the fence is the best way to prevent it from straying. However, if the material should drift, a riving knife or splitter prevents it from catching on the blade and reduces the chances of it kicking back.
Occasionally, you come across a board that is under a great deal of tension. When cutting the board, the tension is released, causing it to pinch the blade, which can result in kickback. A riving knife or splitter helps to prevent boards from pinching behind your blade, reducing the risk of a dangerous situation.
Many riving knives also have anti-kickback pawls, curved metal pieces with teeth located on each side of the blade. Their purpose is to grab onto the workpiece in case of kickback, helping to prevent it from flying back toward you.
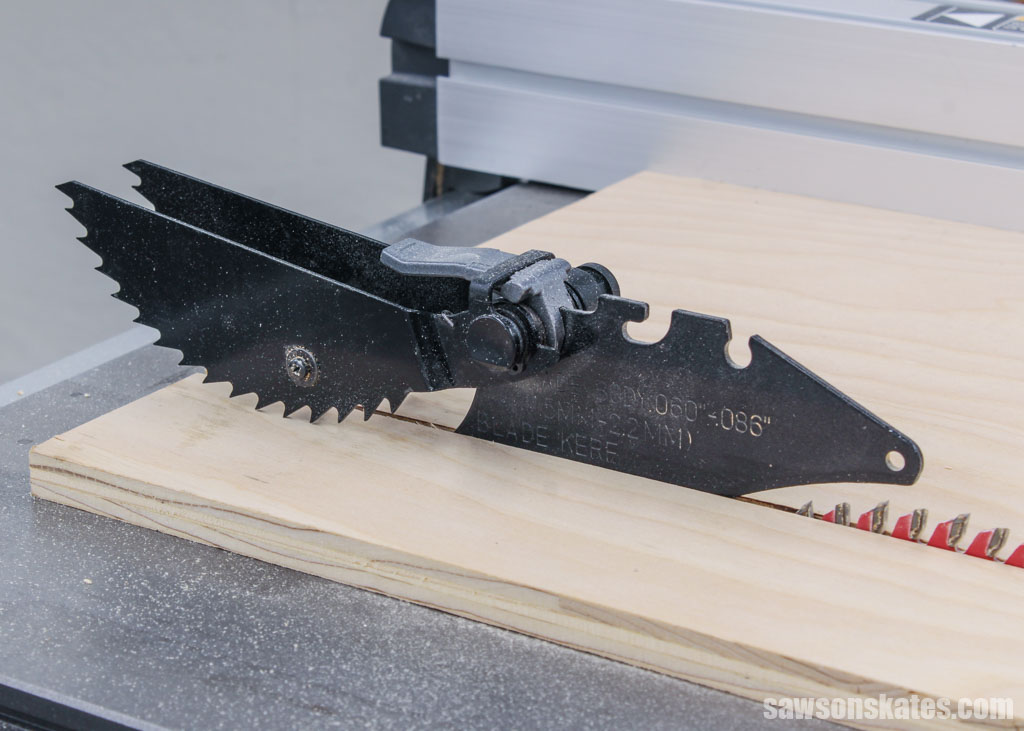
11. Use the Blade Guard
A table saw’s blade guard acts as a shield, blocking your hands from making contact with the blade while it’s spinning.
Although blade guards provide a great deal of protection, many woodworkers never use them saying things like they:
- Are awkward and cumbersome
- Get in the way of making cuts
- Reduce visibility
Recently, I watched a video discussing why so many woodworkers don’t use blade guards. It summed up my thoughts better than I ever could, so I’m sharing it with you below.
12. Check Material for Foreign Objects
Before making a cut, inspect your material for foreign objects such as nails, screws, or staples. I’ve even seen posts where members of woodworking groups discovered a bullet buried in their rough cut lumber!
These objects may not only damage your blade, but they also can fly across your shop as a result of being dislodged, putting you in danger.
Repurposed materials, such as pallets, barn wood, and other salvaged wood, frequently contain hidden objects, so you’ll want to inspect them thoroughly. A metal detector is an excellent tool for locating objects buried in your material.
13. Don’t Start With Material Touching the Blade
Before powering up your table saw, ensure the material isn’t touching the blade. Turning on the saw with your workpiece contacting the blade can cause it to kickback. Instead, turn the saw on, allow it to come up to full speed, and then feed your material into the blade.
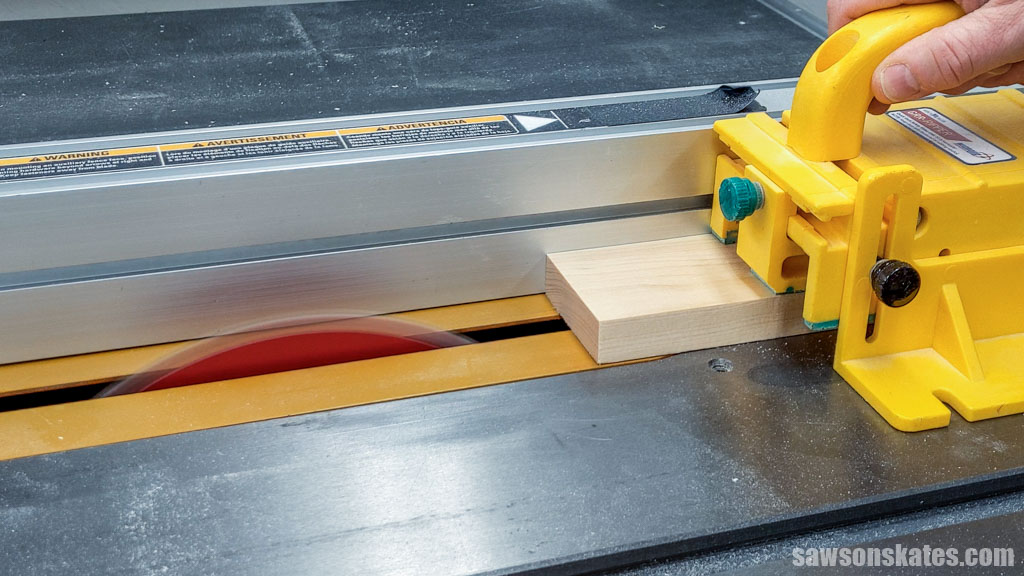
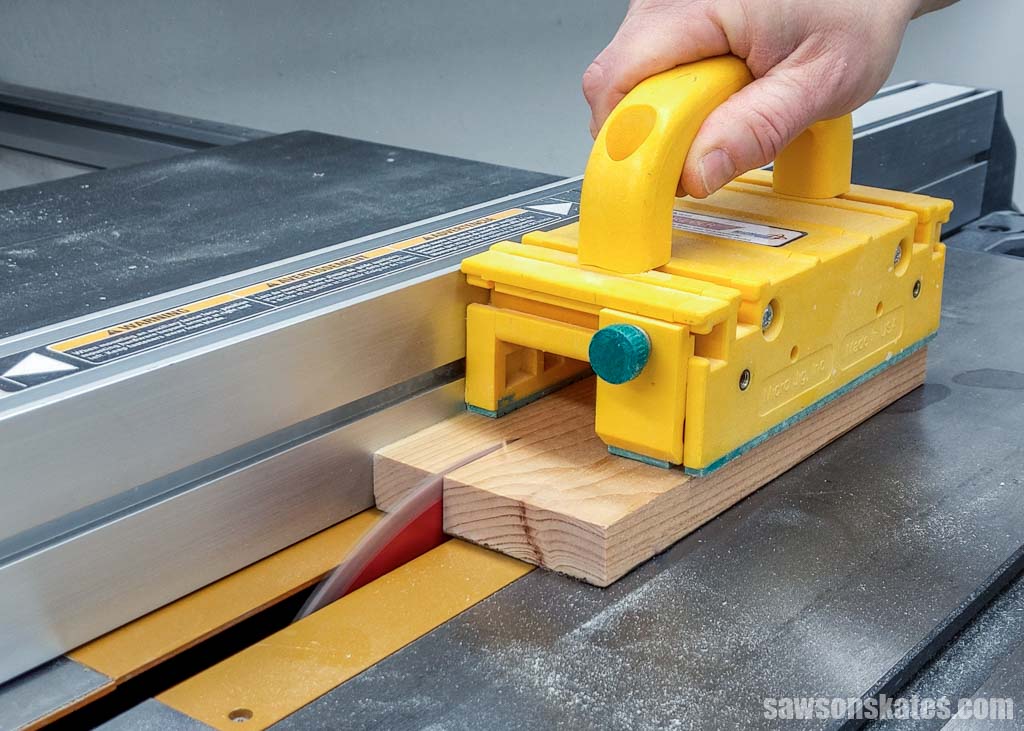
14. Use a Push Block
A push stick is a tool designed to guide the material while cutting, allowing you to apply pressure downward and keep your hands away from the blade.
Push sticks are typically long and made from wood or plastic. Chuck explained the problem with long push sticks are they:
- Give you less control over the workpiece
- Create a pivot point potentially causing your hand to fall into the blade
Instead of a push stick, Chuck prefers a low push block. A push block gives you more control providing both downward and sideways pressure to keep the workpiece against the fence. A push block also has a lower center of gravity, so it doesn’t create a pivot point like a push stick.
15. Maintain a Proper Stance
A common mistake beginners make is standing directly behind the table saw’s blade, a dangerous position if a workpiece were to kickback.
Chuck explained it’s best to adopt a comfortable stance out of the blade’s path. He said if your rip fence is positioned on the right, you should stand slightly to the left out of the cutting path. That way, if a workpiece were to kickback, it would more likely fly past you instead of hitting you directly.
16. Engage Your Senses and Don’t Force It
Chuck insisted any time you use a table saw, it is imperative to engage all five senses: sight, sound, smell, taste, and touch. Stop immediately if any of them are telling you something is wrong. His words were clear and concise – “Don’t Force It!”
- Look: Before beginning a cut, look to ensure your fingers and hands are positioned away from the blade’s path.
- Listen: Stop if you hear a weird sound, a sound you’ve never heard before, or if you hear the saw is beginning to slow down.
- Smell: Stop if you smell something burning or caramelizing because it means something is binding.
- Taste: Stop if you taste something caramelizing in your mouth because it means something is binding.
- Feel: Stop if you feel a vibration or anything “different or weird.”
17. Never Reach
Chuck emphasized you must apply constant pressure on the workpiece for the entire cut until it completely exits the back of the blade. However, you shouldn’t reach beyond the spinning blade because if your hand slips or you lose your balance, it could result in a severe injury.
18. Wait for the Blade to Stop
Before you move your hand near the blade, it’s essential that you wait for it to stop spinning. Too often, I’ve seen people switch off their saw only to immediately go in and grab a workpiece or cut-off and end up cutting themselves! Be patient and wait for the blade to stop spinning before you move your hand anywhere near it.
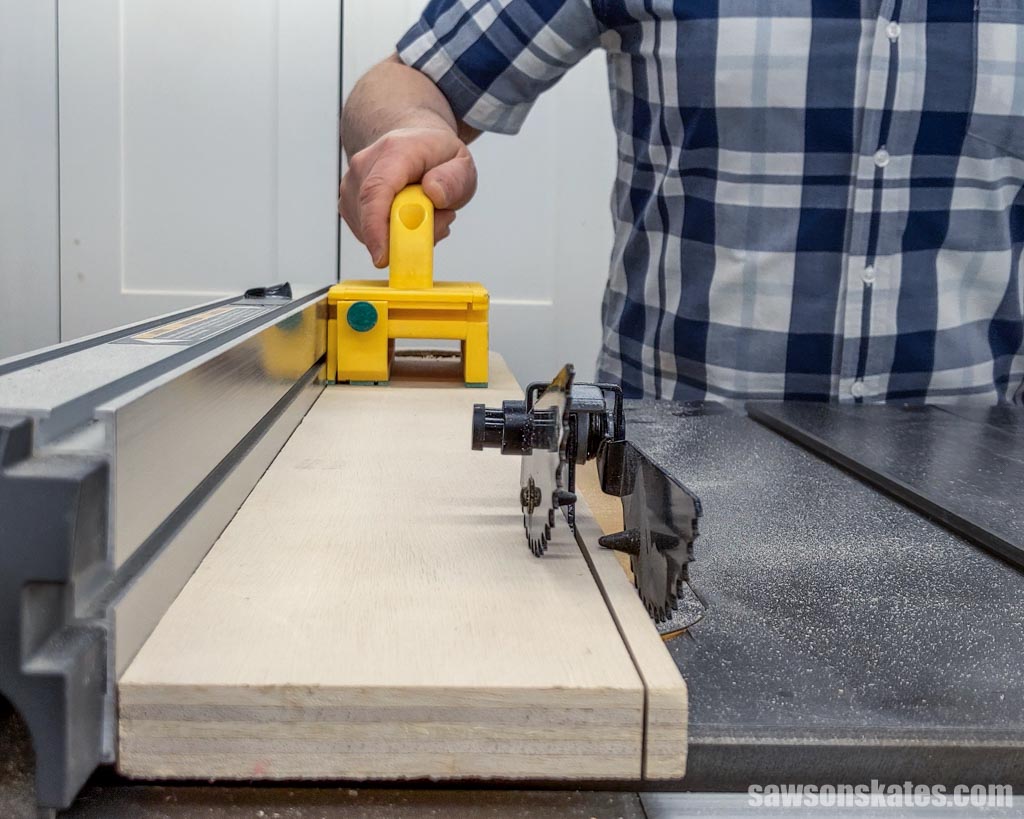
19. Use Outfeed Tables or Roller Stands
As you cut workpieces, gravity causes them to fall to the floor as they exit the back of the saw. Because of their weight, long or large workpieces become unsteady as they fall, causing them to shift, leading to them catching on the blade and resulting in kickback. Using outfeed tables or roller stands supports your workpiece as it exits the saw reducing the risk of it kicking back.
20. Never Cut Freehand
Using table saw accessories such as a rip fence, miter gauge, or sled helps you support the workpiece reducing the risk of it drifting into the blade.
If you were to cut freehand without an accessory, there’s nothing to steady your workpiece, which increases the risk of it catching on the blade resulting in kickback.
21. Don’t Use the Fence and Miter Gauge Together
If you use the rip fence and miter gauge together, your workpiece will likely get pinched between them and the blade resulting in kickback. In other words, use one or the other, but not both simultaneously.
Final Thoughts
Table saws are useful tools but can be dangerous if you use them improperly. It’s essential to follow the best practices to minimize the risk of injury.
Thank you for stopping by. If you enjoyed this tutorial, would you please take a moment and pin it to Pinterest? I’d really appreciate it!
Pin This For Later

Hi there – I’m Scott, a woodworking enthusiast and creator of Saws on Skates, a site I started in 2015 to share easy-to-follow tutorials, space-saving shop tips, and project inspiration for DIYers at any skill level. Learn more about my woodworking journey here.
I’ve seen two schools of thought on the height of blade setting. I saw an article a while back saying that you should run your blade anywhere from an inch to an inch and a half above your wood surface. When the blade is set low, the force of the teeth on the wood is more parallel to the surface of the table. With the blade set higher the force of the teeth of the blade on the wood is more into the table.
Hi Roger – Thank you for stopping by. Before attending the Table Saw Basics class I would set my blade a little higher. I would set the blade so the bottom of the gullets were even with the top of the material. Since taking the class I’ve been setting the blade so it’s about an 1/8″ above the material. Setting the blade this way has worked well for me so far. I’m still cautious working around the blade, but I do feel more comfortable using the table saw with the blade set lower.
Scott,I’m with you as to what the blade height should be. I learned way back in junior hi and high school that the blade should never be more than an 1/8 of an inch above the material being cut. This lesson was brought home several years ago, a friend had never been told about blade height and as a result had the blade up well above the material. though he was paying attention to what he was doing someone dropped something and a very loud noise followed that startled him, he list control, there was a kickback and he lost the tip of his little finger. I can’t stress it enough, blade height, blade height, BLADE HEIGHT. Accidents happen, don’t set yourself up to become the victim of the next one.
Hi Scott,
I just bought a Dewalt 10” table saw. The assembly included an anti kickback device and elaborate blade guard. I haven’t used the saw yet, but I’ve never before seen a table saw that had guards. Any experience with this idea?
Hi Steve – Thank you for stopping by. I just watched a video that Steve Ramsey from Woodworking for Mere Mortals posted on Facebook. The video covers this exact question. I don’t think I could summarize it any better than he did, so I’m sharing the link to the video here.
Thanks for getting back on this one. You’re correct, this video was just what I needed to see. Keep up the outstanding work.
Scott, I’ve been following you for some time. Once again you have hit it out of the park. Thanks for sharing more great information. Steve from Ohio.
Hi Steve – Thank you for following and for the compliments. I’m glad you enjoyed it!
I bought a 10” Craftsman table saw back in the early 70s and it came with blade guard and anti-kickback protection.
Thanks for the information. As a beginning woodworker (a new hobby), I am always looking for pointers on producing better quality items safely.
You’re welcome, CJ. I’m glad this was helpful for you.