7 Miter Saw Tricks Every DIYer Should Know
If you’re like me, the miter saw is one of the tools I use the most to build my DIY furniture projects. Today I’m sharing how we can make the most of one of the tools we use the most… 7 miter saw tricks every DIYer should know!
Miter Saw Tricks Every DIYer Should Know
Before we start our miter saw or pick up any tool for that matter we need to think about safety. Read, follow, and understand the safety instructions for your tools. If you don’t understand, contact the manufacturer or ask a pro. You also need to protect your eyes with safety glasses, your ears with hearing protection and your lungs with a quality respirator.
This tutorial contains affiliate links to supplies and tools. Purchases made using these links help support the Saws on Skates website and allows me to share more projects and tips with you. There is no cost to you for using these links. Visit my site policies for more information.
Table of Contents
1. Tune-Up Your Saw
Miter saws are set at the factory to be sure the saw blade is square to the table and that the fence is square to the blade, but the saw can come out of adjustment during shipping.
Miter saws can also come out of adjustment when they’re moved and during regular use. Like when we get kickback when the saw unexpectedly hits a knot!
It’s always a good idea to be sure our saw is cutting square when we buy a new saw, when we move our saw and routinely throughout the year.
When we tune-up our miter saw, we need to be sure the blade is square to the table and the fence is square to the blade.
Need help adjusting your miter saw? Skate over to How to Adjust a Miter Saw for Accurate Cuts for a complete tune-up tutorial.
2. Replace the Stock Saw Blade
Saw blades with more teeth produce cleaner cuts and blades with fewer teeth produce rough, choppy cuts. Blades with more teeth are great for cutting pieces for our DIY furniture projects.
Blades with fewer teeth are good for cutting workpieces where we don’t care what the cut looks like. For instance, if we were cutting studs to build a house.
Unfortunately for us DIY furniture builders, most miter saws come equipped with a saw blade that is better for cutting studs than pieces for our furniture projects.
One of the first upgrades I made to my miter saw was installing a new miter saw blade. My go-to saw blade is the Freud 100 tooth Diablo Ultra Fine saw blade. This blade cuts through wood like a hot knife through butter. The cuts are smooth and crisp – exactly what I want for my DIY furniture projects.
How Do You Change a Miter Saw Blade?
Need help changing your miter saw blade? Skate over to How to Change the Blade on a Miter Saw for a full tutorial or check out the quick video below.
Is Your Saw Blade Dull or Dirty?
Every time we make a cut wood pitch builds on our miter saw blade. In the Tool Review: Blade and Bit Cleaners article by Wood Magazine they say over time residue left on a saw blade “can corrode the blade”.
Wood Magazine goes on to say “blades with excessive buildup are sometimes mistaken for dull.”
Regularly cleaning our saw blades keeps them cutting at their best. Plus, cleaning our blades is easy to do.
Need help cleaning your saw blades? Please skate over to Clean Saw Blades for Peak Performance and Quality Cuts to see which cleaner I use, the simple procedure I use to clean my saw blades and saw blade cleaning video.
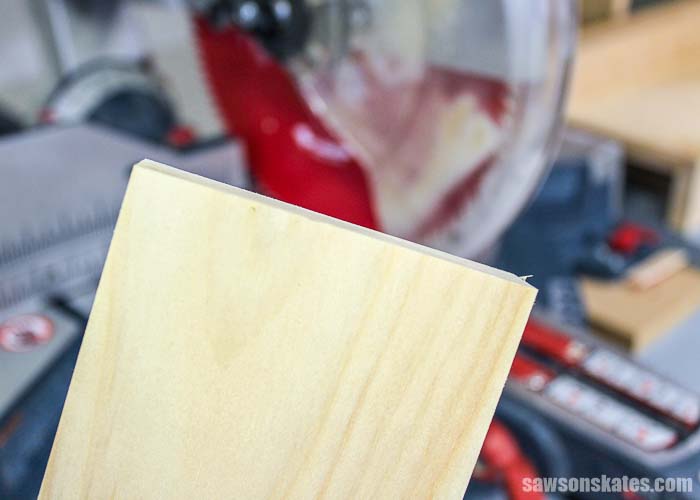
3. Trim the Ends
Wood from the factory isn’t perfect. If we hold a speed square across the end of a board, very rarely will we find a board that is perfectly square.
To improve the quality of our DIY projects we should always square the end of a board before cutting our pieces to length. Just simply make a cut on the end of the board. We don’t need to cut off a lot, just enough to make the end square.
We’re ready to start cutting our board to length once the end of the board is square.
4. Leave the Line
Years ago I attended a timber framing class. One of the takeaways I learned from the class was something the instructor repeated the entire week: “leave the line.”
Over and over he insisted don’t cut on the line. Why? We can always cut it shorter, but we can’t put it back on. Once the wood is gone, it’s gone! So “leave the line!”
Leaving the pencil line when we make miter saw cuts allows us to fine-tune the cut if we need the board to be a little shorter.

5. Let the Blade Come to a Complete Stop
What would happen if we cut a board and raise the blade with the saw still turning? The saw blade would cut the board twice.
It would cut once when we lower the blade and again when we raise the blade. Cutting the board twice could change the measurement of our board.
Remember, we want to leave the line, so we need to let the blade come to a complete stop when we make any cut with our miter saw.
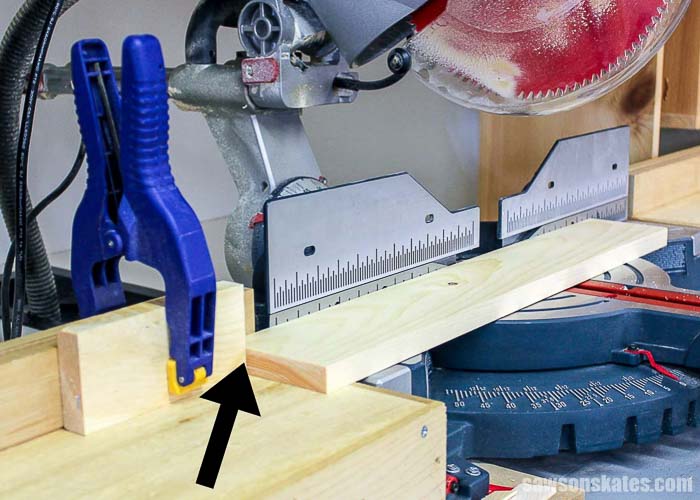
6. Set a Stop for Repetitive Cuts
One of the things I do the most with my miter saw, besides making cuts, is make repetitive cuts.
Projects like the outdoor side table, outdoor plant stand, outdoor coffee table, and the dog gate have many repetitive cuts. Rather than measuring and cutting each piece, I measure once and set up a stop.
The stop is a piece of scrap wood clamped to my miter saw stand with a Quick-Grip spring clamp. Once installed the stop allows me to slide a workpiece up to the stop and cut multiple pieces of wood to the same length.
This ensures a proper fit for all of the project pieces and is a HUGE time saver.
Related: How to Make a Portable Miter Saw Station (includes a Stop)
Bevel the Bottom Edge of the Stop
After just one or two cuts sawdust can begin to build up in front of the stop. Even just a small amount of sawdust can prevent our boards from making contact with the stop. This means our boards might become shorter with each cut.
To prevent this from happening we should cut a bevel on the bottom edge of our stop. The bevel will allow the sawdust to push underneath the stop and our board to seat against the stop. It’s also a good idea to check the stop area before each cut to be sure it’s free of sawdust.
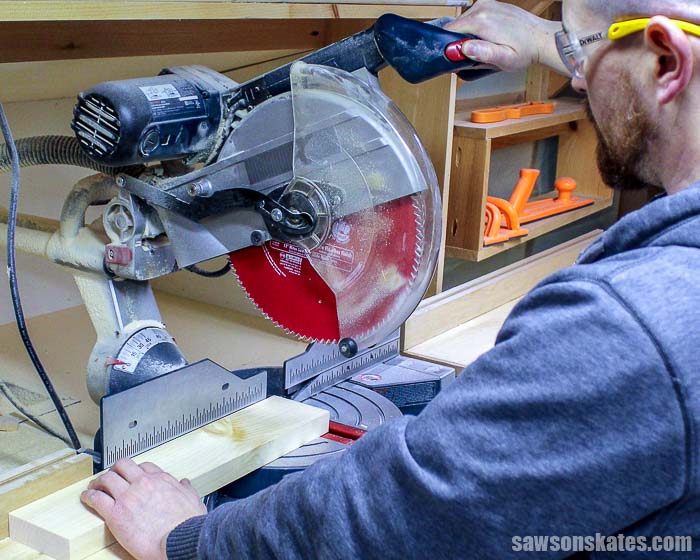
7. How to Make Perfect Miter Saw Cuts
I saved the best miter saw tip for last. This tip pulls all of our previous tips into one ultimate miter saw tip! The secret for making laser-accurate miter saw cuts is using the saw blade to make micro adjustments to the length of our workpieces.
Step 1. Trim the End of the Board
First, we’ll use our miter saw to square one end of the board.
Step 2. Measure the Workpiece
Working from the end of the board we just squared we’ll measure the length we need our workpiece and make a pencil mark.
Step 3. Set a Miter Saw Stop and Leave the Pencil Line
Next, we’ll position our workpiece, so that we’ll leave the pencil line when we make our cut.
Many times I’m making repetitive cuts for my projects, so I’ll set a stop at the end of the workpiece. We don’t need to set a stop if we’re only cutting one workpiece.
Now, we can make our cut.
Let’s measure the workpiece. We’re good to go if the workpiece is the measurement we needed. We’ll move on to Step 4 if the workpiece is a little too long.
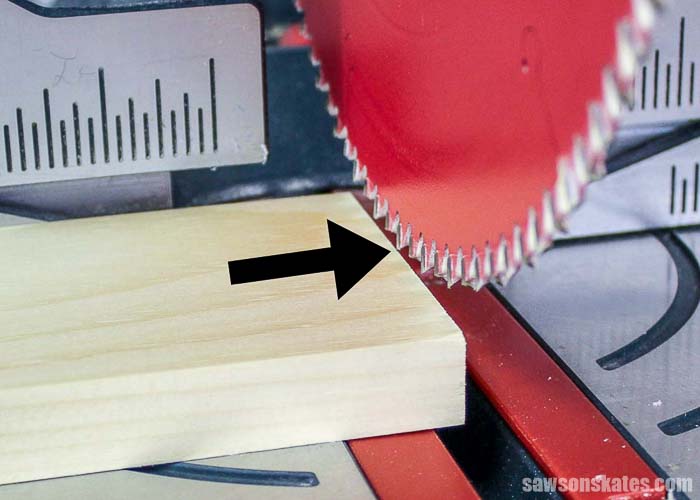
Step 4. Use the Saw Blade to Make Perfect Cuts
If our workpiece is a little too long we can use the blade to help us make micro adjustments and cut the workpiece to the exact length we need.
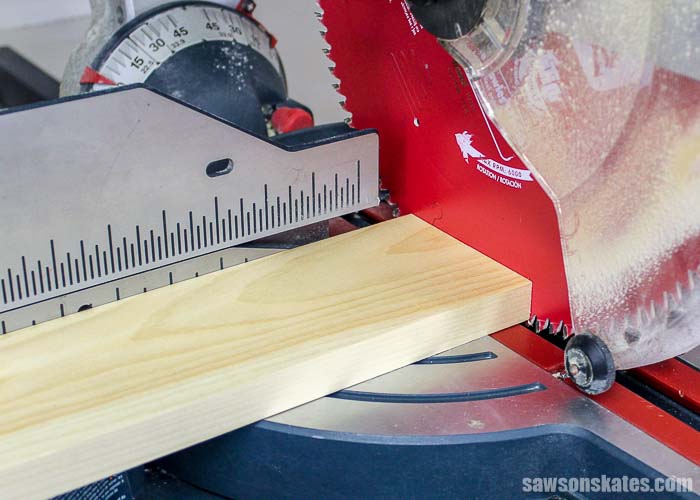
With the saw turned off, lower the blade as far as it will go into the table, and gently slide the workpiece until it touches the side of the blade.
Keep the board in place and raise the blade. Reposition the stop (if we’re using one), so it’s touching the end of the workpiece. If we lower the blade (with the saw turned off) we’ll notice the teeth will just barely touch the end of our workpiece.
Raise the blade again, start the saw, and lower to make the cut. The blade will cut a micro amount off of the board.
Now we’ll measure the workpiece again. We’re good to go if the workpiece is the measurement we needed. We’ll repeat Step 4 if the piece is still a little too long.
Sometimes I may need to do Step 4 two or three times, but using this technique allows me to cut my board to the exact length. Please give it a try. Your workpieces will always be the precise length you need them for your projects!
Make Cleaner Miter Saw Cuts
If you make a cut with your miter saw and then flip the board over is the cut smooth and crisp or rough and jagged?
If you said rough and jagged skate over to Prevent Miter Saw Tear-Out and I’ll share with you how I use a piece of scrap wood to reduce tear-out and make cleaner cuts with my miter saw!
BONUS – Miter Saw Stands
Why would you want a dedicated miter saw stand? Because you know you’re guilty of this… you put your miter saw on your workbench to make some cuts, then move the miter saw to the floor, so you can assemble your project. Then you realize you cut one of the pieces too short, but your project is clamped on your workbench, so now you’re bent over cutting on the floor. Yup, we’ve all done it.
After you have a workbench, I would say a dedicated miter saw stand would be the next upgrade for your shop. No matter if you have a dedicated workshop or a space you can only use temporarily for DIY projects, I think one of these space-saving, easy to make DIY miter saw stands would be a great addition to your shop.
Final Thoughts
Thank you for stopping by to check out my 7 Miter Saw Tricks Every DIYer Should Know. Do you have a miter saw trick? Share it with me in the comments! Oh, and if you found this helpful, would you please take a moment and pin it to Pinterest?
More Like This:
Recommended For You

Hi there – I’m Scott, a woodworking enthusiast and creator of Saws on Skates, a site I started in 2015 to share easy-to-follow tutorials, space-saving shop tips, and project inspiration for DIYers at any skill level. Learn more about my woodworking journey here.
Didn’t know some of these myself! Thanks for the great tips!
You’re welcome Shelly – Thank you for stopping by!
I’m an elderly woman who’s learning to do all kinds of home repair work. The miter saw at the moment is my favourite power tool! Thanks for the useful tips.
DIYing is fun at any age! Glad you found the tips useful. Good luck and keep making sawdust!
Hey Scott I have read these tips a lot around the web but the beauty of it is each time I read it from a new source I Learn a little more
Thanks Scott
I always have my face-side underneath ,so the blade is cutting upwards and therefore leaves a clean cut on the face that shows.
I’m looking to buy my first mitre saw, it was a mitre box and hand saw previously, I’ve a limited budget <£100 what are the best features to look for or what saw recommendations do you have? It will primarily be used for art projects and finer diy work.
Thanks in anticipation
Neil
Hi Neil – Whenever I am looking to buy a tool (or anything for that matter) I start by reading the reviews. Once you’ve narrowed down your choices to the saws that got the best reviews I would then compare features like the size of the blade and the amps then choose the saw that gives you the most bang for your buck. That said I think the Hitachi 10″ miter saw would fit within your budget and usually gets good reviews. I have this saw and use it for projects in the yard or when helping a buddy with a DIY project.
Further on repetitive cuts. After I get my first cut to exact length, I set the exact piece and the next piece to be cut upright on a completely flat surface then clamp them together on one end, then I raise the blade and lay both pieces on the saw with the exact cut on top. I then lower the blade to the top of the next piece to cut and slide the exact cut piece snugly against the blade, remove the clamp and the top exact cut piece, then make the cut on the bottom piece. This works for straight cuts as well as mitre cuts such as picture frames which will come out perfectly.
I would also add that when making repetitive cuts and using a stop you should leave a gap below the stop, or at least cut a notch in the bottom corner of the stop where it makes contact with the stock. That way any stray amounts of sawdust between cuts do not get pushed up and trapped against the stop leaving your next cut boards a little shy of what you intended. The photo shows the bottom of the stock in contact with the base of the saw. If a stop is far away from the blade this is an unlikely problem. On short cuts there is a great chance of sawdust gathering against the stop. Placing a pencil, or other thin piece of scrap, under the stop before clamping it in place, and then removing it, allows for a gap for sawdust to be shoved into, thus avoiding this problem.
Hey Scott, thanks for really useful tips. Very clear explanations and good photos to illustrate your instructions. I am going to have a go at building miter saw stand. That way I will make much more use of my saw. Saskia
Hi Saskia – Thank you for stopping by and the compliments! Good luck with your miter saw stand!
You mentioned having a dedicated miter saw table or bench. Years ago I found an older hospital room table. You know, the kind they have in all the rooms to eat, read or write on. I bought it (at a flea market) and bolted my saw to it. It rolls and adjusts up and down and has been a great addition to my shop. I hope this can be of help to you and your readers.
That’s a great idea, Richard! Thank you for sharing!
I agree. great idea.
I was lucky to find a trolly table in the room I rented, and “temporarily ” put the saw on it… 4 years ago.
I seen the same thing you really do need a space for the sawdust to go or your cut will get smaller each cut.
Regarding tip number 7: Using a stop for repetitive cuts is a great idea however in the photo the stop is flat to the saw table. Better to raise the stop up a bit to prevent the inevitable accumulation of saw dust between the stop and the pieces to be cut. As the amount of saw dust from the cuts increases, the cut pieces will start to shrink.
Hi John – Thank you for stopping by. You’re absolutely right. Thank you for the reminder.