How to Assemble Miter Joints with Pocket Holes
Miter joints are a great way to add a decorative touch to woodworking projects. Learn how to assemble them with pocket holes in this comprehensive guide.

Miter joints add a decorative element to picture frames, cabinet doors, and furniture. However, assembling them with pocket holes can be tricky. You could drill through the side if the pocket holes are too close to the workpiece’s edge. And if they’re too far away, the joint may open up over time. In this step-by-step guide, I’ll show you three foolproof ways to assemble mitered corners, ensuring flawless joints every time.
Originally published November 7, 2017, republished November 4, 2024.
Table of Contents
- Understanding Miter Joints
- Understanding Pocket Hole Joinery
- How to Drill Pocket Holes on Miter Joints
This article contains affiliate links. If you purchase from these links, I may earn a small commission at no additional cost to you. Visit my site policies for more information.
Understanding Miter Joints
Miter joints are created by cutting the ends of two workpieces at an angle, usually 45 degrees. When assembled, the wood grain flows seamlessly across the joint, creating a visually appealing corner connection. Mitered corners are a popular choice for furniture, picture frames and cabinet doors.
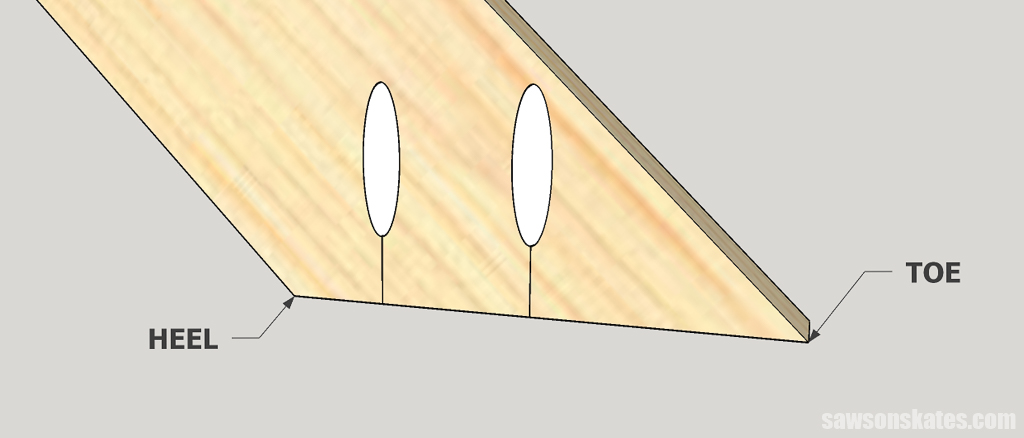
Let’s break down the anatomy of a miter joint. Think of it like a foot:
- Toe: This is the long, narrow, pointed end of the joint.
- Heel: This is the wider end, opposite the toe.
Understanding Pocket Hole Joinery
Pocket hole joinery involves drilling angled holes into one workpiece then driving screws into the edge of another, creating a strong, hidden connection that’s particularly useful for assembling miter joints.
How it works:
- Drilling: You’ll use a pocket hole jig to make an angled hole in a workpiece’s surface.
- Joining: Screws are then driven into the pocket holes, connecting the two pieces of wood.
Want to know more? Check out my article, “How to Use a Pocket Hole Jig (& Beginner Pitfalls to Avoid)”, for a detailed explanation of the process, including tips and tricks for getting the best results.
How to Drill Pocket Holes on Miter Joints
Before You Begin
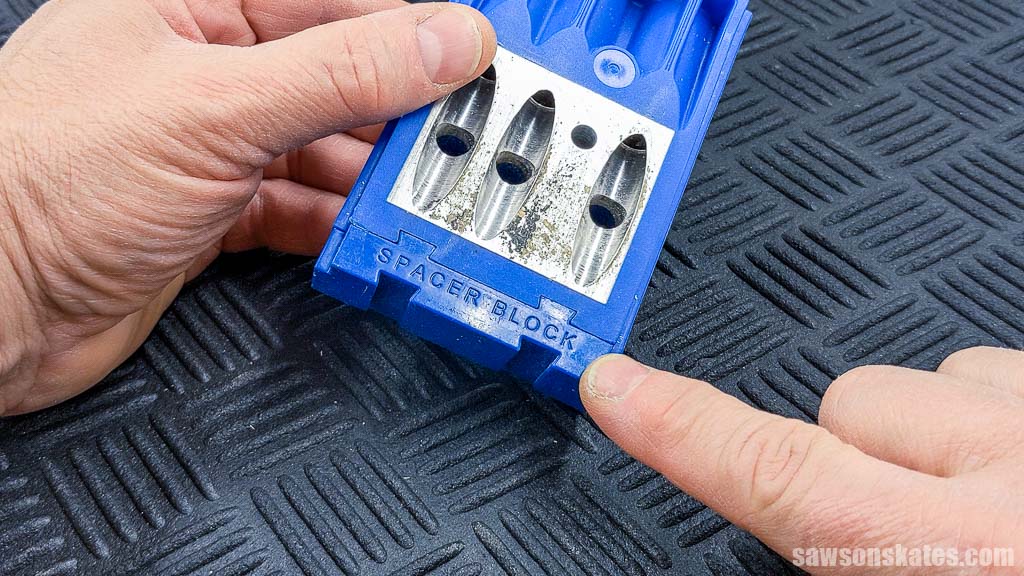
When making pocket holes on miter joints, always inspect the back of the jig before you begin.

Drilling through an exposed hole can result in a pocket hole going through the board’s edge, which is visually unappealing and potentially making the workpiece unusable for your project.
Always make sure the workpiece covers the hole, ensuring the drill bit enters the board’s face, not the edge.

Option 1: Traditional Placement
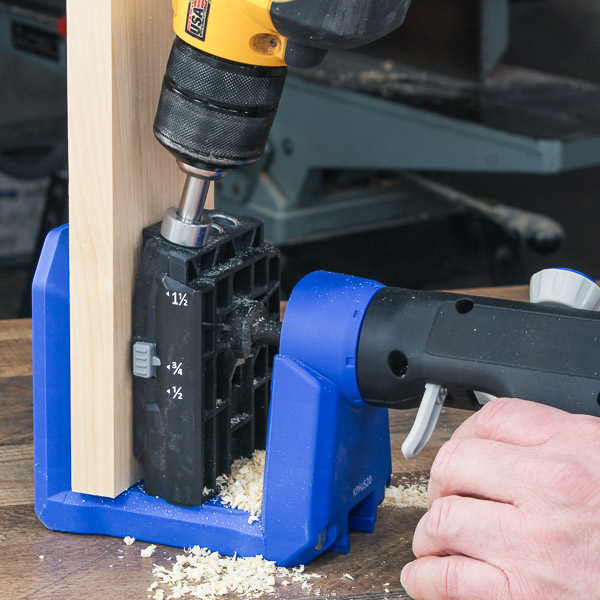
After cutting your workpieces for the miter joint, position one of the boards into the pocket hole jig.
- For boards like a 1×4, use the “A” and “C” guides.
- For boards like a 1×3, use the “B” and “C” guides.
As I mentioned earlier, always inspect the back of the jig before drilling to ensure the wood completely covers the drill guide’s hole; otherwise, you could drill through the workpiece’s edge.
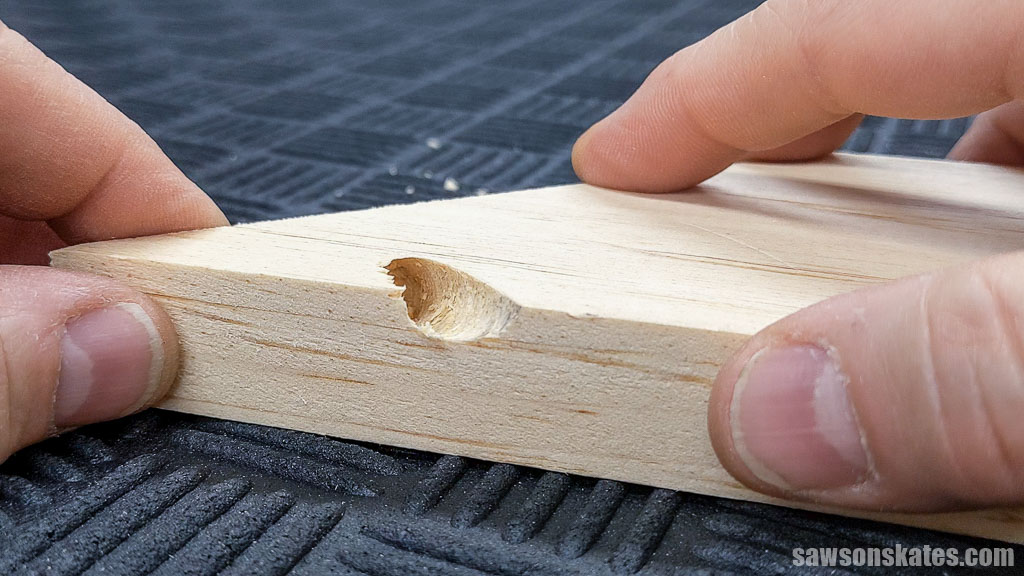
Here’s an example of a completed miter joint on a 1×4 board.

Option 2: Opposing Pocket Holes
For a more secure connection, consider drilling pocket holes on both sides of the miter joint.
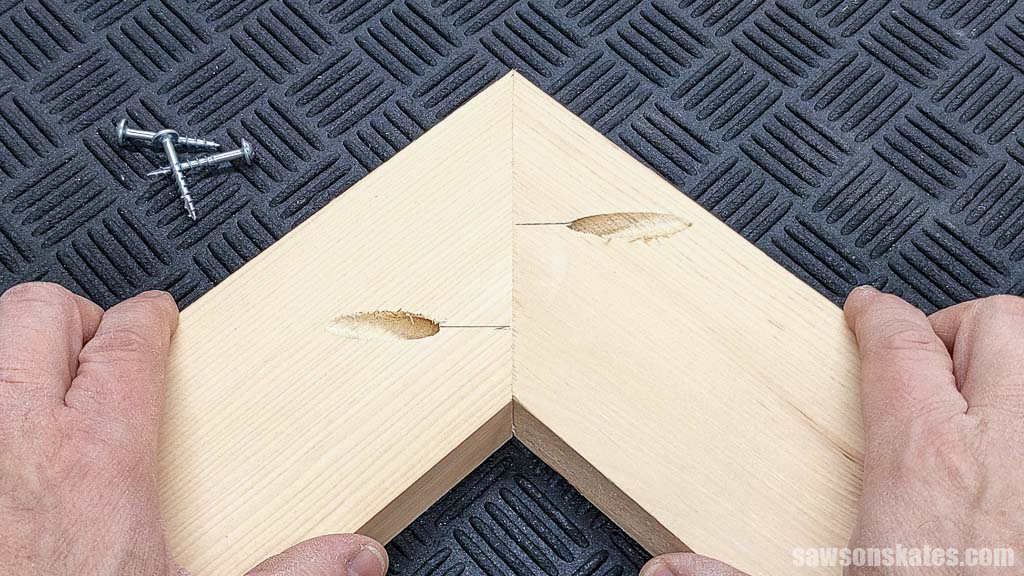
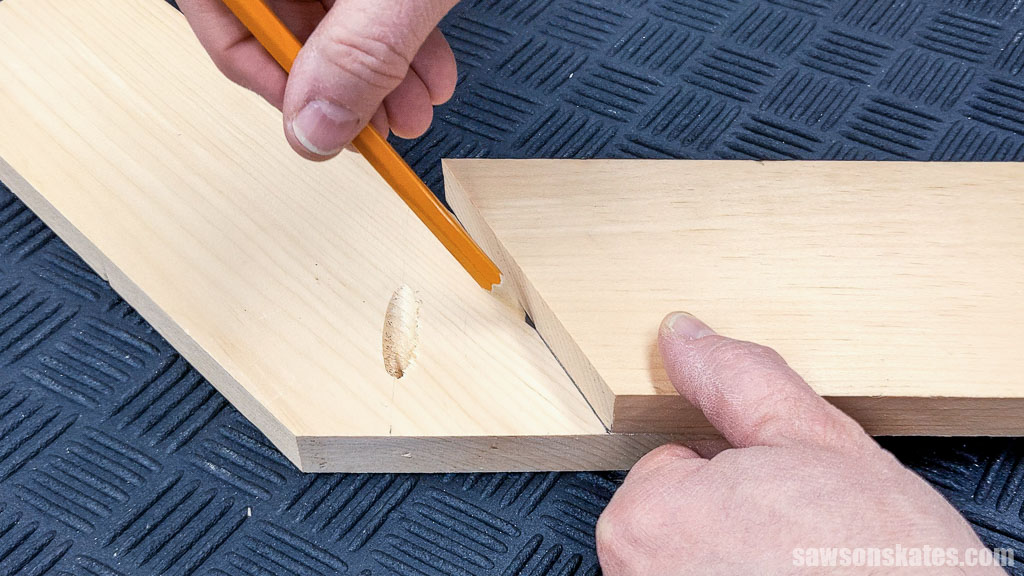
After cutting your workpieces, position them together. On one board, mark the location for a pocket hole near the toe (narrow end) and on the other near the heel (wider end).

Drill a pocket hole at each mark. Again, ensure the workpiece covers the drill guide’s hole.
By drilling pocket holes on both sides, you create a stronger and more durable connection.
Option 3: Strengthening the Toe
When comparing options 1 and 2, you’ll notice that the pocket holes are located away from the toe, which may result in it spreading or opening with changes in temperature and humidity.
Positioning a pocket hole closer to the toe can reduce the risk of the joint opening with seasonal changes.
NOTE: Kreg pocket hole jigs have evolved since I first published this article in 2017. While older models often required a spacer block for ¾” material, many newer models (like the 520 or 720) don’t include one. Drill guide lengths can vary between models, so simply adding a spacer might not be a reliable solution. If you have a newer model without a guide block, I recommend testing the setup on scrap pieces before drilling the pieces for your project.
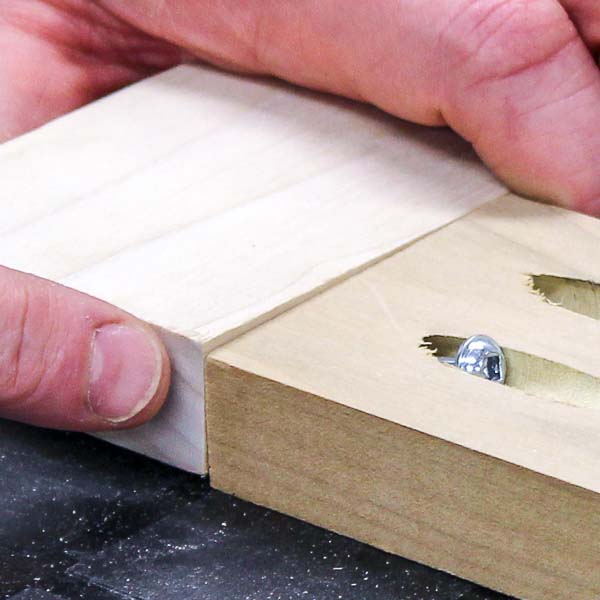
For this option, first insert the board into the jig as you normally would and drill a pocket hole near the heel.
Then, remove the board and the drill guide.
Finally, attach a spacer block to the drill guide if you’re working with ¾” thick material.
Using a Kreg Multi-Mark, measure in from the toe 1-½” and make a mark.
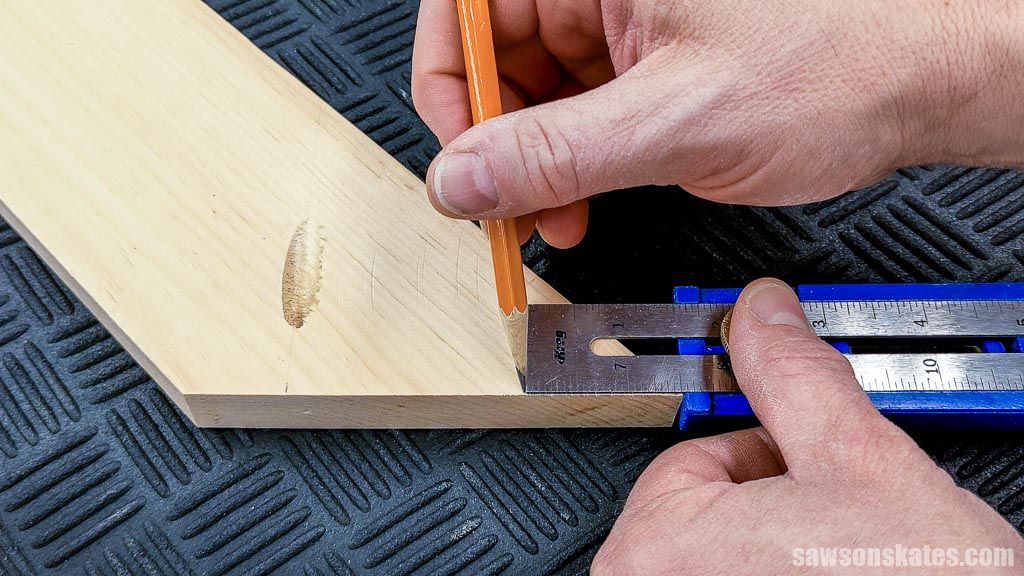
The drill guide needs to be angled away from the toe by 30-degrees. To ensure it’s properly angled, I cut a piece of scrap wood to 30 degrees. I positioned my scrap wood template on the pencil mark, allowing me to make a reference line.
I positioned the drill guide on the reference line, clamped it in place and drilled the pocket hole.

Here’s an example of a completed miter joint on a 1×4 board.

Assembling the Miter Joint
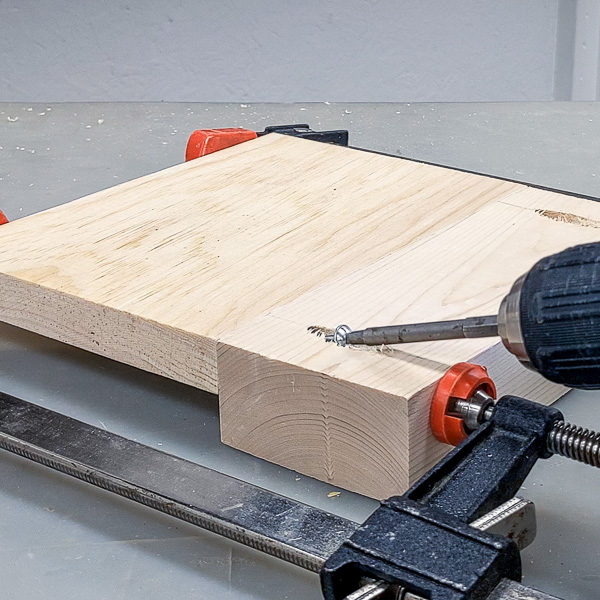
One of the trickiest parts of miter joints is clamping them. Because the edges are at an angle, it can be difficult to get clamps to apply even pressure and prevent the joint from shifting. However, there are a few techniques you can use to make it easier.
Here’s a video demonstrating four different ways to clamp miter joints:
Once you’ve clamped the joint, drive the pocket hole screws to join the workpieces.
Final Thoughts
Assembling miter joints with pocket holes can be tricky, but it’s easy with the right techniques. Following the methods outlined in this guide, you can create strong, lasting joints for almost any project.
Thank you for stopping by. If you enjoyed this tutorial, would you please take a moment and pin it to Pinterest? I’d really appreciate it!

Hi there – I’m Scott, a woodworking enthusiast and creator of Saws on Skates, a site I started in 2015 to share easy-to-follow tutorials, space-saving shop tips, and project inspiration for DIYers at any skill level. Learn more about my woodworking journey here.
Another excellent and useful post, thank you! My big question is this tho: on edge to edge joining like for making table tops, I always see the pocket holes all in a line. Is there a reason for this? Wouldn’t it be better to have the pocket holes in a staggered or offset configuration? I’m brand new to wood working, so it’s just a thought I’ve been having and would love some input. Thanks!
Thank you, Timber! This is a great question. I have always done pocket holes in a row without even thinking about it! For the official ruling, I reached out to my friends at Kreg Tool. Mike at Kreg said “There really isn’t an inherent benefit or disadvantage to staggering the pocket holes when gluing up a panel. The main reason you see them in line is simply for repetition of measurements from board to board.” So there it is! I hope that helps. I love questions, so please let me know if you have any more.
Thanks for your great tips. Im converting a Sprinter va n to a RV. Ive used the Kreig system before and its working great on plywwood pa nels in thed va
That sounds like a fun project. I love vintage campers, tiny houses and RVs. I’d love to see some pics of your project when you finish. Good luck – Scott
Thank you. This was a great article and very good tip. I appreciate your time and effort in sharing your skills with us. Regards from South Africa
Thank you, Johann. Glad you found the info useful!
Great info! Just ran into a hard to reach pocket hole today! Heading out tomorrow to pick up a right angle attachment. Also, are you not supposed to pre-drill with pocket holes or does it matter? Thanks! Michele