How to Cut 2×4s Lengthwise (With a Table Saw)
Discover how to cut a 2×4 lengthwise using a table saw with this step-by-step tutorial. Includes helpful tips and costly mistakes to avoid.
What Should I Build Next?
That's the question I help answer.
Every week, I send woodworking ideas to 17,000 DIYers who love building things.
You'd fit right in.
Do you need to cut a 2×4 in half or remove the round edges for a DIY project, but not sure how to do it? Look no further. I’ll guide you through my step-by-step process of cutting 2×4s lengthwise using a table saw.
Table of Contents
- Before Your Begin
- What Tools Do You Need?
- What Blade Should You Use?
- Selecting the Material
- Setting Up the Table Saw
- How to Cut a 2×4 Lengthwise to Remove Round Edges
- How to Cut a 2×4 in Half
This article contains affiliate links. If you purchase from these links, I may earn a small commission at no additional cost to you. Visit my site policies for more information.
Before Your Begin
WARNING: Table saws are powerful tools capable of causing severe injuries, including lacerations, amputations, eye damage, and broken bones.
Before using a table saw:
- Read and understand the manufacturer’s instructions.
- Wear safety equipment, including eye protection, ear protection, and a dust mask.
- Ensure safety devices are correctly installed and functioning.
Related: 21 Table Saw Safety Rules (& Mistakes to Avoid)
In woodworking terms, cutting lengthwise is called ripping or ripping to width.
Related: Beginner’s Guide to Woodworking Terms
Ripping 2×4s lengthwise is among my least preferred table saw tasks, primarily due to the elevated blade height and the risk of kickback.
Imagine kickback this way: your table saw is humming along, cutting your workpiece. Suddenly, the wood snags on the blade, launching it back at you like a rocket, packing a punch that can break bones. And the danger doesn’t stop there – the blade’s downward force can pull your hand into the spinning teeth, potentially leaving you with deep gashes or even missing fingers.
Related: Table Saw Kickback (Cause, Injuries & How to Avoid It)
In the tutorial below, I’ll share tips for reducing the kickback risk when cutting 2×4s on a table saw.
NOTE: Immediately stop if you are unsure about operating a table saw or are uncomfortable using one. Safety is your responsibility. Never compromise your safety or take unnecessary risks.
Why Cut a 2×4 Lengthwise?
While 2×4s are commonly used in construction, woodworkers frequently transform them into rustic, functional furniture pieces. Their budget-friendly price tag makes 2×4s a DIYer’s dream, often cutting them lengthwise to remove their rounded edges for table tops or ripping them in half for sturdy table legs.
Related: How to Make a DIY Farmhouse Table Top
What Tools Do You Need?
To cut a 2×4 lengthwise using a table saw, you will need the following tools:
- Safety gear: eye protection, ear protection, and a dust mask.
- Table saw with the riving knife installed.
- Rip blade: quality saw blade designed for ripping.
- Rip fence: guides the workpiece parallel to the blade.
- Push block: helps guide the wood through the cut without your hands getting near the blade.
- Featherboard: provides pressure on the workpiece, keeping it against the fence and preventing it from drifting during the cut. This improves control and reduces kickback risk.
- Outfeed table: supports the workpiece as it exits the back of the saw.
- Tape measure: accurately measure the desired width of your cuts.
IMPORTANT: Unplug your table saw before making any adjustments.
Table Saw
Before you begin, check the accuracy of your table saw, ensuring the blade is parallel to the miter slot, the rip fence is parallel to the blade, and the blade angle is precisely set to 90 degrees. A misaligned saw can result in crooked cuts or cause kickback.
Related: How to Set Up Your Table Saw
Riving Knife
A riving knife, positioned behind the blade, is a crucial safety feature that helps prevent kickback.
Construction lumber such as 2×4s sometimes exhibits internal stress, leading to pinching behind the blade. A riving knife reduces this pinching hazard. It also reduces the risk of a workpiece snagging on the blade which could cause it to kick back.
Ensure your table saw has a riving knife or splitter installed and properly adjusted behind the saw blade. Check your saw’s manual if you need help setting it up.
Push Block
Using a push block like the Grr-Ripper keeps your fingers away from the blade while guiding the workpiece through the saw, providing downward and sideways pressure, ensuring it stays firmly against the fence.
Featherboard
A featherboard’s angled fingers provide constant pressure, ensuring clean, straight cuts while reducing the risk of kickback. Think of them as a spring-loaded fence that guides wood smoothly while keeping it firmly against the rip fence. If the workpiece tries to move back, the fingers grip harder, preventing dangerous kickbacks.
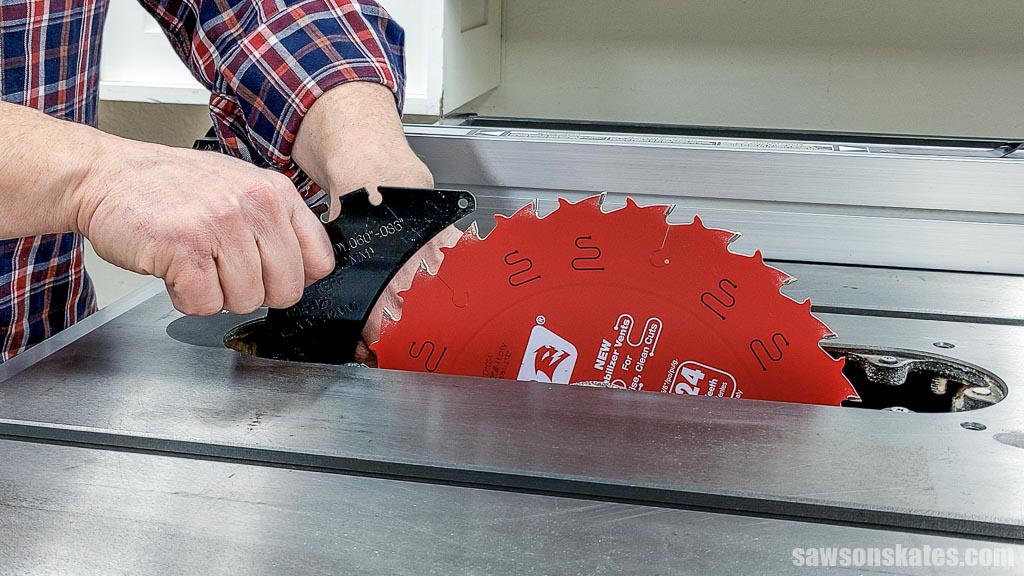
What Blade Should You Use?
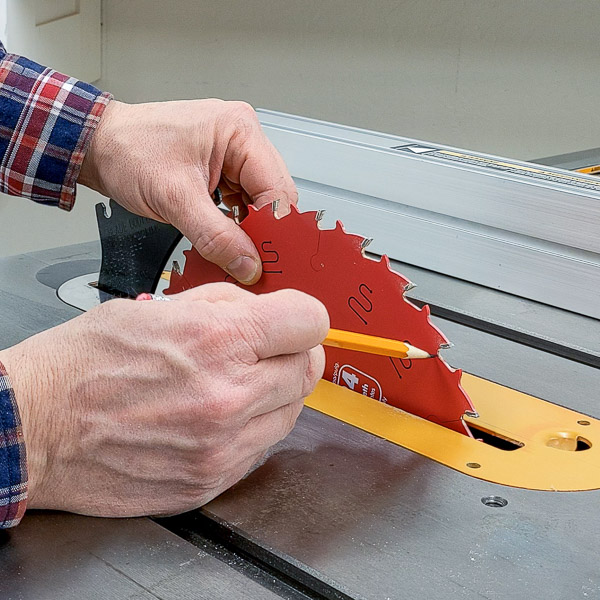
When ripping 2×4s on a table saw, a rip blade reigns supreme over its versatile cousin, the combination blade.
Rip blades typically have fewer teeth (24 to 30) than combination blades (usually 50). Fewer teeth prevent binding, reduce friction, and require less force to push the workpiece, making rip cuts easier, faster, and less demanding on your saw’s motor.
NOTE: Ripping is slow, especially on thick workpieces such as 2×4s. Do not rush or force the cut; instead, take your time and let the blade do its job.
While combination blades offer the convenience of handling both rip and crosscuts (cuts across the grain), they sacrifice dedicated performance in both areas. Their higher tooth count make them less efficient for ripping, leading to slower cuts and potential binding.
For this tutorial, I used a 24-tooth ripping saw blade.
Selecting the Material
Before diving into the rip cuts, let’s ensure you’ve got the perfect 2×4s for the job. Here’s what to consider when selecting your lumber:
Wood Species:
- Spruce or Pine: These are readily available, affordable, and easier to cut, making them ideal for beginners or simple projects.
- Douglas Fir: A stronger option than pine, its slightly higher price tag may be worth it for projects requiring more durability.
- Hardwood: Oak, maple, and poplar offer exceptional strength and beauty, but their hardness can be more challenging to cut. They’re best for experienced woodworkers or projects requiring high strength and aesthetics.
Grade:
- 2×4s come in various grades. For rip cuts, prioritize higher grades like “Select” for a clean, strong, knot-free finish. Knots are formed when a branch grows from a tree’s trunk and are weak spots that can affect the stability of your finished project.
- Inspect for defects: Aim for the straightest boards you can find, avoiding lumber with visible cracks, warping, or excessive knots, which can compromise your project’s quality and structural integrity.
Construction lumber such as 2×4s are often stored outdoors at lumberyards, and bringing it into your climate-controlled workshop can be a recipe for trouble. Wood shrinks as humidity drops, and building with wood that’s still adjusting can lead to cracks in your project.
To avoid headaches, let your 2×4s acclimate to your workshop’s temperature and humidity for at least a week before building, ensuring a successful build.
Related: How to Buy Wood (Top Tips for Choosing Woodworking Lumber)
Setting Up the Table Saw
Once you have your equipment and lumber, it’s time to set up the saw.
Blade Height
The ideal table saw blade height, the amount exposed above a workpiece, is a debate among woodworkers.
At a table saw class I attended, presented by Chuck Bender, who served as Senior Editor of Popular Woodworking Magazine, said while setting it higher promises better performance, argued that greater exposure increases your injury risk.
He recommends setting it around ⅛” above the material, which may sacrifice some efficiency, but the increased safety makes the trade-off worthwhile.
In my experience, the performance difference is negligible. While I still respect the severe injuries a table saw can cause, I feel more comfortable using it with the blade set lower.
Featherboard
Attach the featherboard to your table saw’s miter gauge slot.
- Place it forward of the blade: Never behind or directly next to it, as this can cause binding and kickback.
- Align the fingers against the workpiece: They should lightly contact its edge.
- Clamp secure: Ensure it’s tightly fastened to the table.
Outfeed table
An outfeed table or roller stand supports the workpiece as it exits the back of the saw. Without one, the unsupported end of a long board can tip or bind as it exits potentially causing kickback or loss of control. An outfeed table extends the support surface, preventing these dangerous situations.
- Height: The outfeed table should be about ⅛” to ¼” lower than the table saw’s top. Don’t position the outfeed table higher than the saw as this could cause the workpiece to bind.
- Length: Ideally, the outfeed table should extend at least as far as the longest boards you typically cut, providing ample support and preventing tipping.
- Placement: Position the outfeed table directly behind the table saw, ensuring a smooth material flow from the cut to the receiving area.
How to Cut a 2×4 Lengthwise to Remove Round Edges
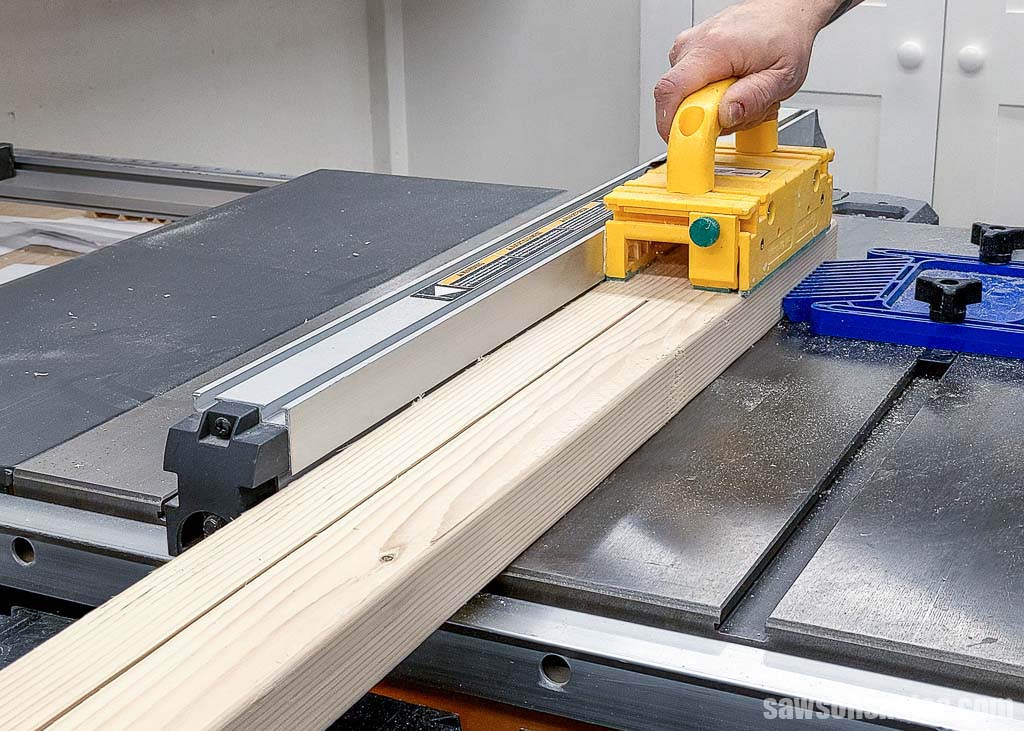
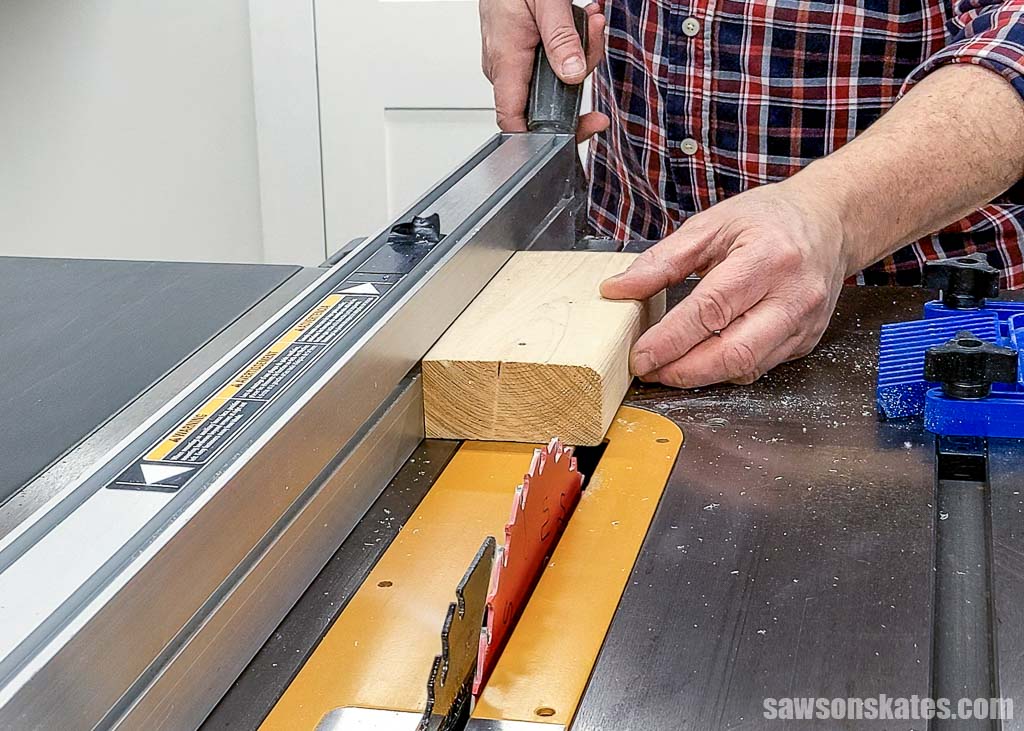
Step 1. Set the Rip Fence
TIP: I recommend cutting the 2×4s to their rough length before ripping them to width, which makes them easier to handle, especially in a small workshop. For example, I cut these bedside table legs about 5″ longer than their required length, making handling them more manageable.
With your table saw set up, it’s time to adjust the rip fence for the first cut.
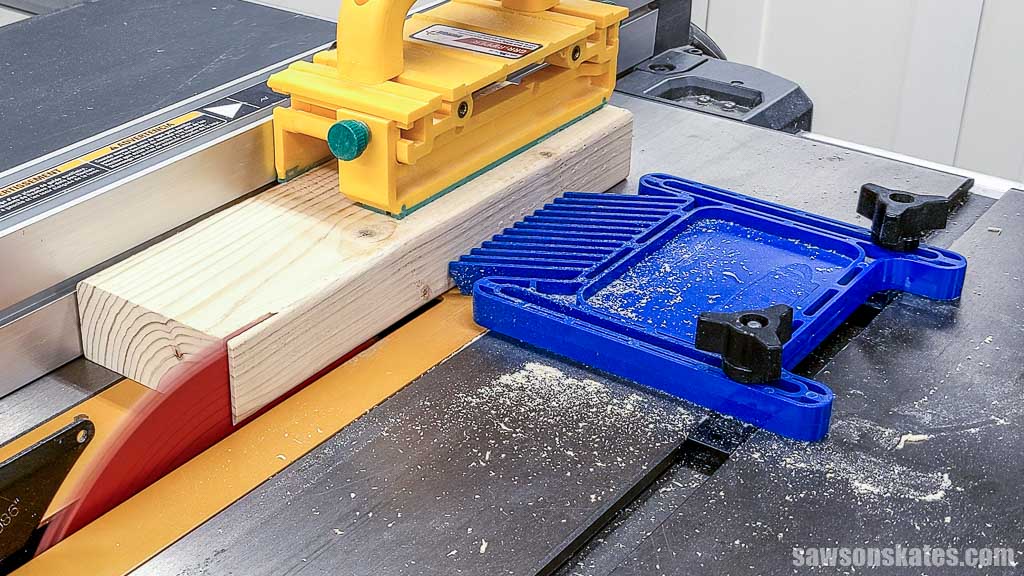
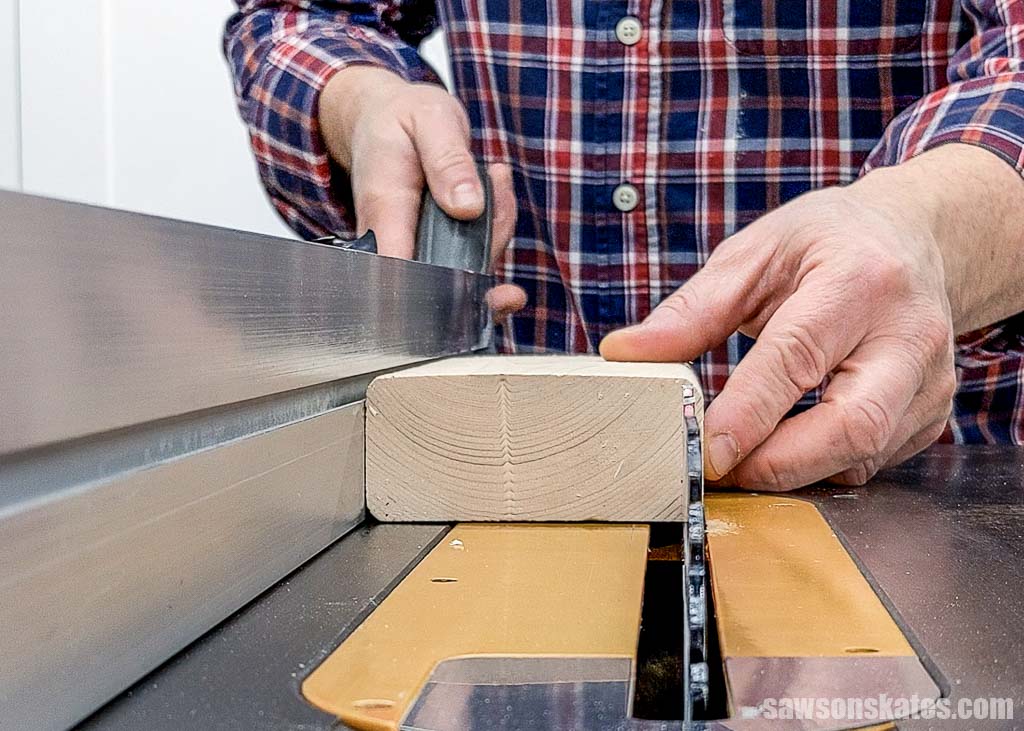
I align the 2×4 with the right side of the saw blade, where the curved edge transitions to the flat face, ensuring the kerf is on the waste side of the workpiece, and lock the rip fence in place.
TIP: Kerf is the width of material removed by the blade.
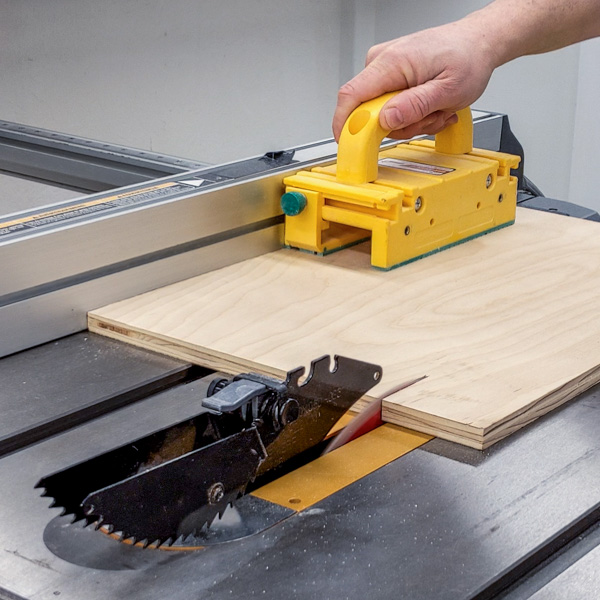
Step 2. Make the First Cut
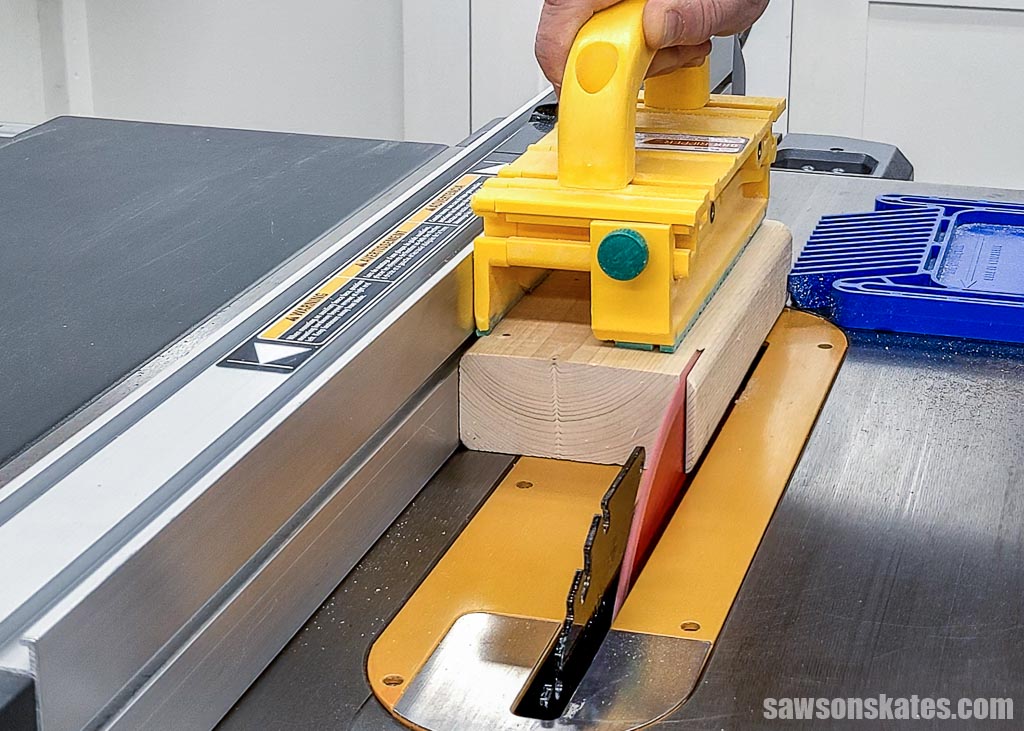
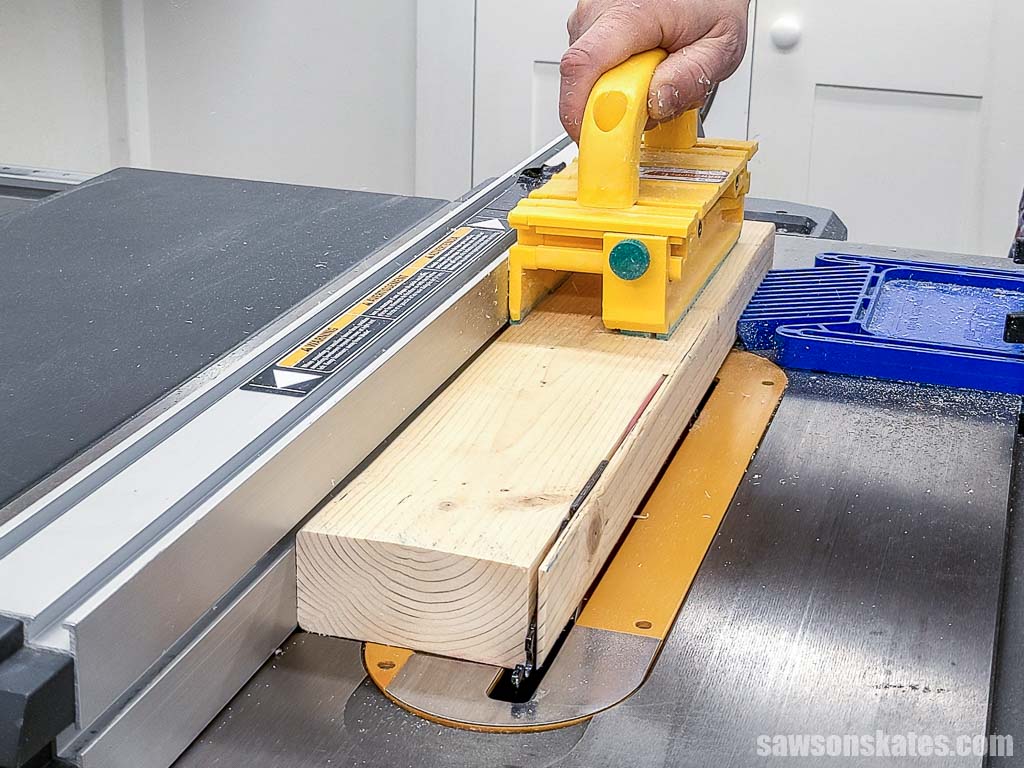
Make the first cut using a scrap 2×4 as a test piece and a Grr-Ripper.
Fine-Tuning the Rip Fence
After your initial cut, checking that you positioned the rip fence correctly is essential. Here’s how to make any necessary adjustments:
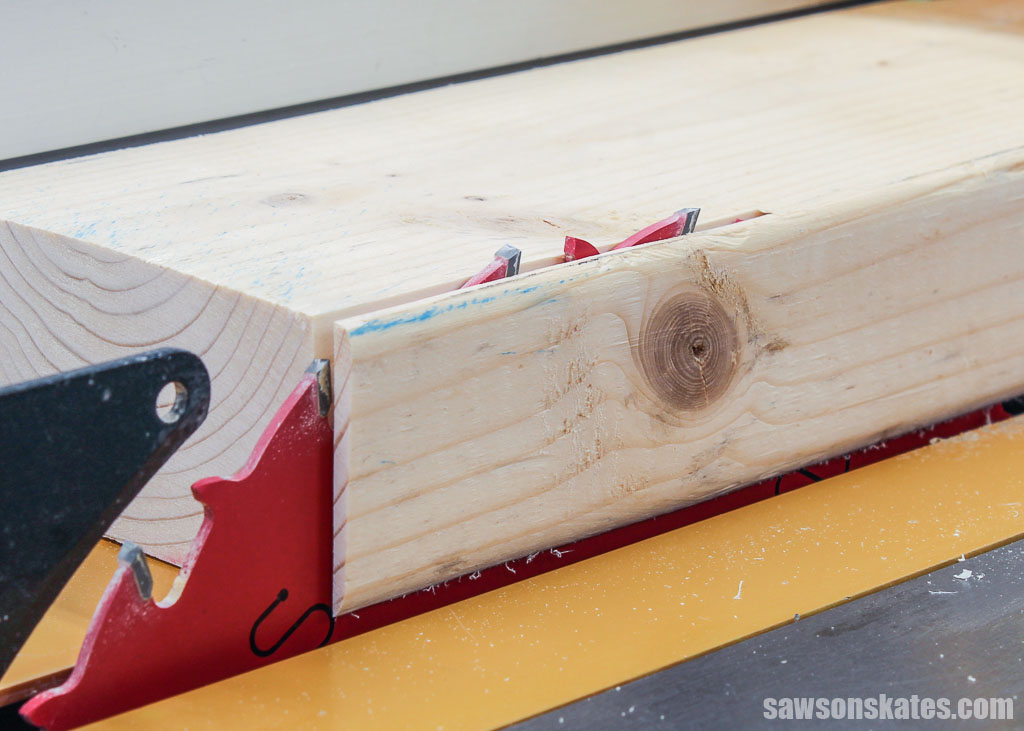
1. Inspect the Waste Piece:
- Look for remnants of the 2×4’s flat face on the waste side, indicating the fence is too close to the blade.
- Move the fence away from the blade if you see the flat face on the waste piece.
2. Inspect the Workpiece:
- Now, check the workpiece itself. If any of the rounded edges remain, it means the fence is too far from the blade.
- In this case, move the fence closer to the blade by a small amount.
3. Test Cuts:
- Continue making test cuts with scrap wood until you achieve a clean cut that removes the desired amount of material from the 2×4, leaving no remnants of the flat face or round edge on either the workpiece or the waste piece.
Once you’ve correctly adjusted the rip fence, cut your workpieces, removing the 2×4’s first curved edge.
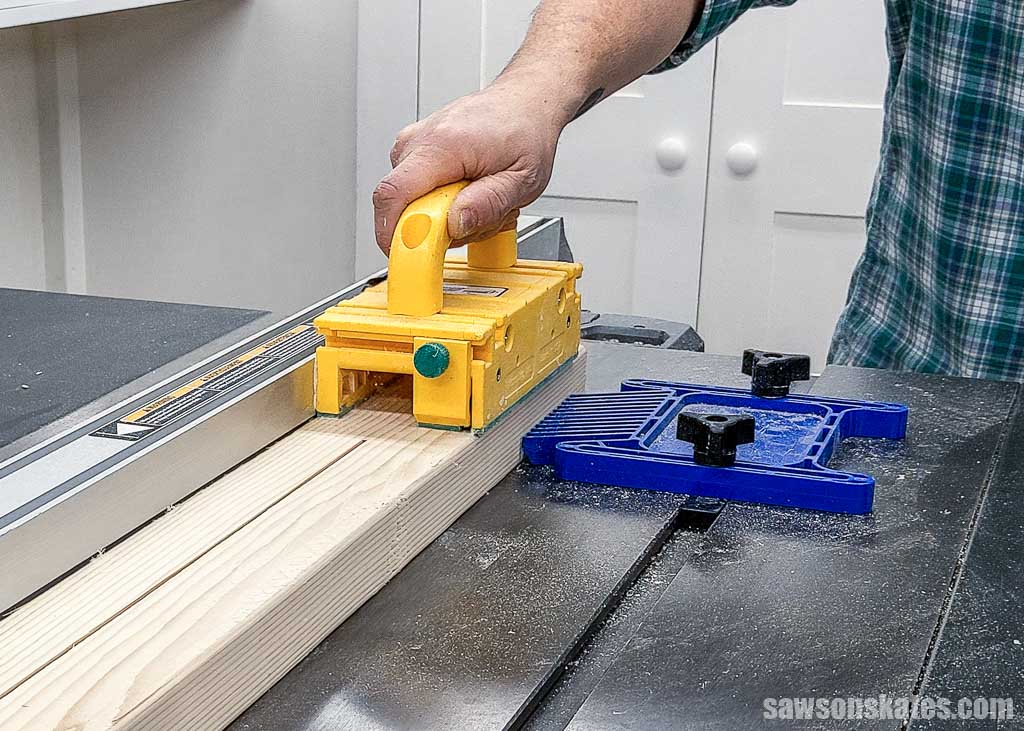
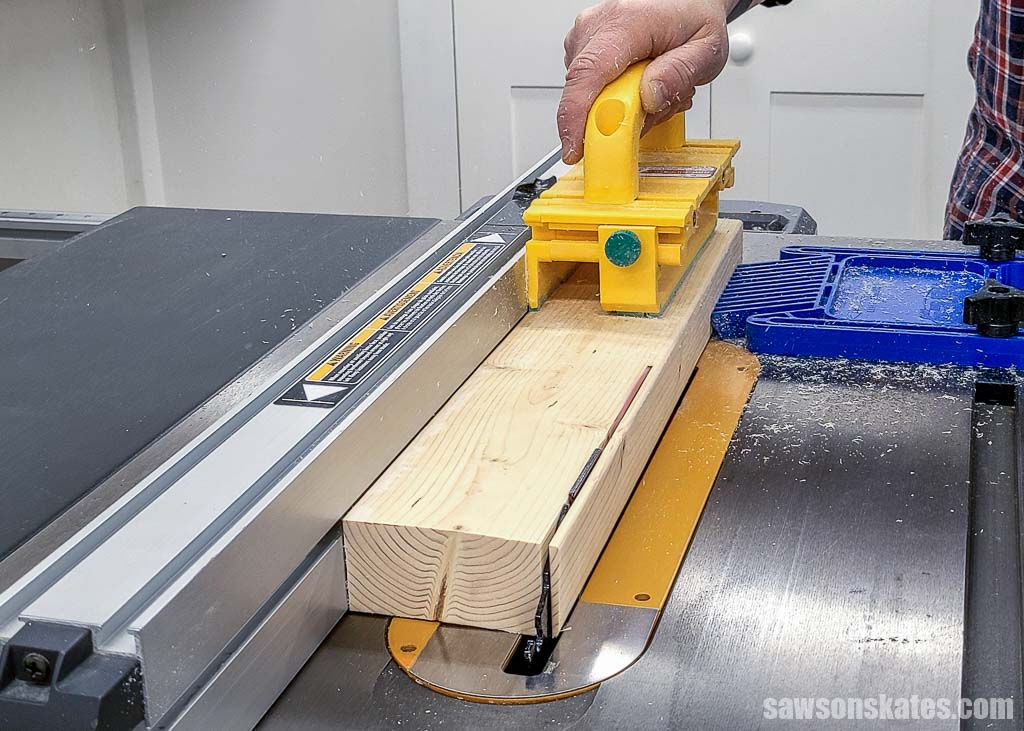
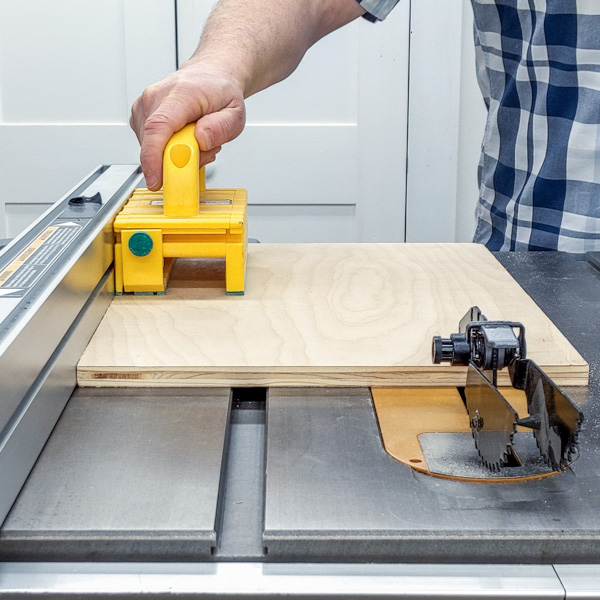
Step 3. Flip and Repeat
After making the first cut, flip the workpiece and repeat the process from Step 2, removing the second curved edge or setting the fence to cut the 2×4 to your desired width.
First, I align the 2×4 with the right side of the saw blade, where the curved edge transitions to the flat face and reposition the featherboard.
Ensure your Grr-Ripper won’t interfere with the saw blade, and adjust its width if necessary. Then, make the second cut using your test piece.
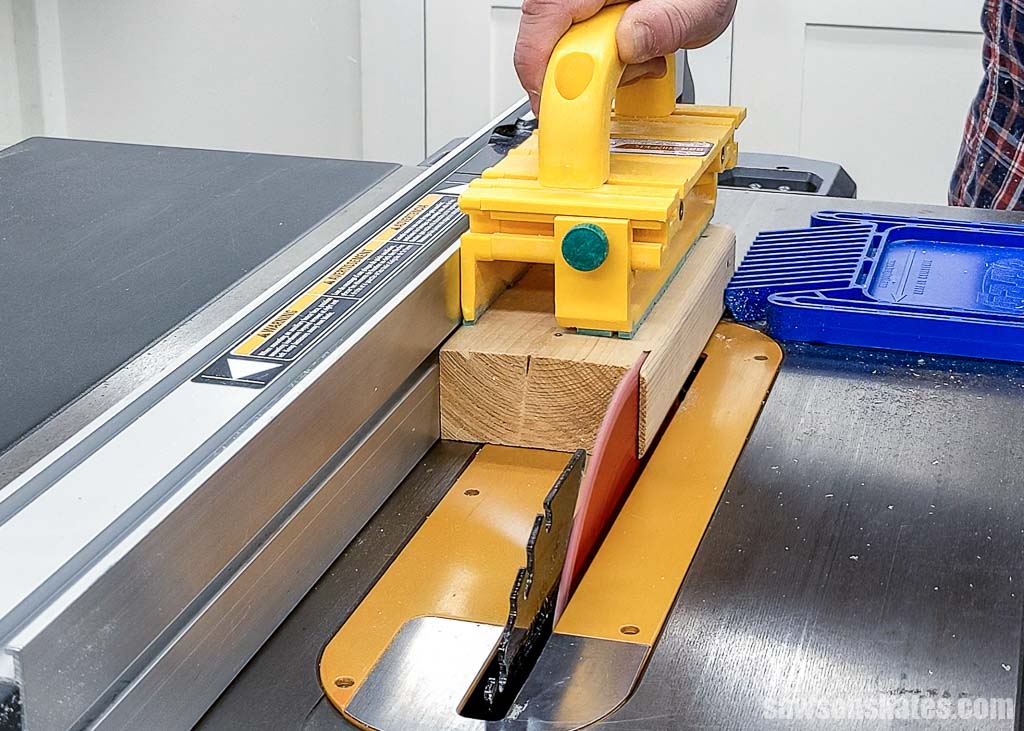
If necessary, fine-tune the fence’s position. Once you’ve correctly adjusted the rip fence, cut your workpieces, removing the 2×4’s second curved edge.
How to Cut a 2×4 in Half
Before You Begin
DIYers often cut 2×4s in half to make 2×2s, which measure 1-½” × 1-½”. This method produces two 2×2s, each with two round edges and two square edges. I’ll demonstrate a technique for contouring the cut edges later in the tutorial. However, I recommend following the above steps if you require 2×2s with four square edges.
TIP: I recommend cutting the 2×4s to their rough length before ripping them to width, which makes them easier to handle, especially in a small workshop. For example, I cut these bedside table legs about 5″ longer than their required length, making handling them more manageable.
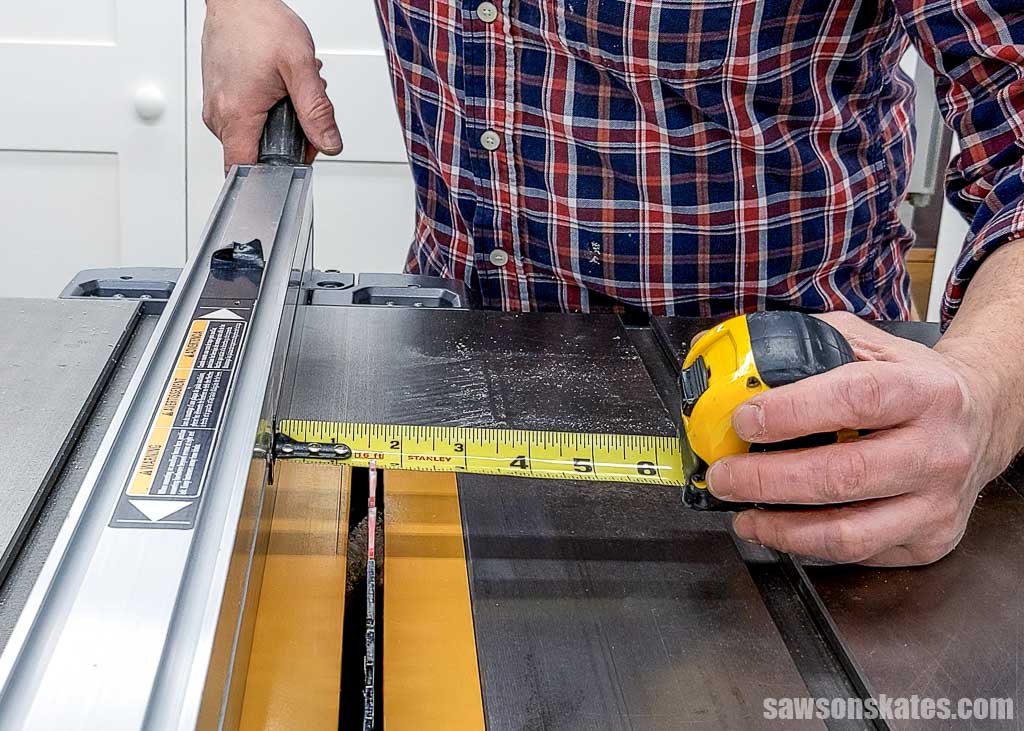
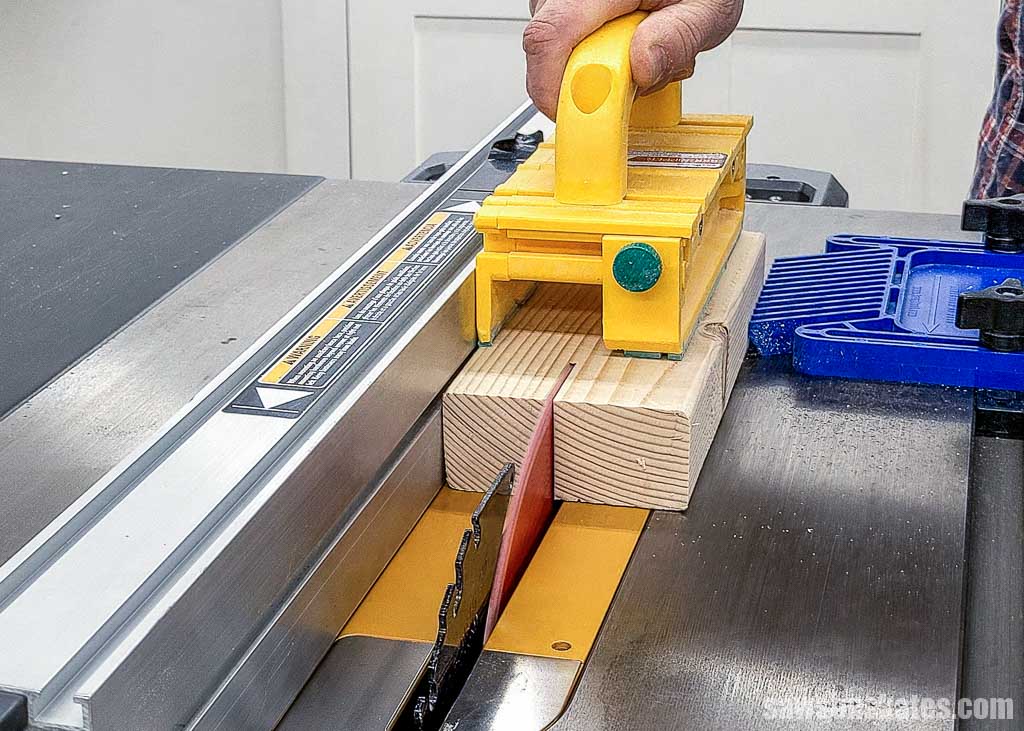
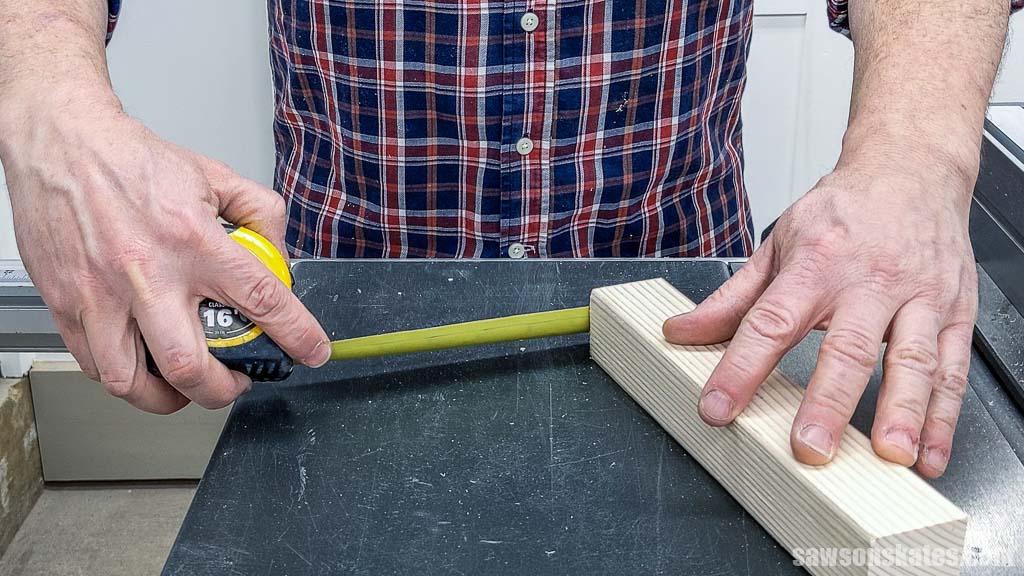
Step 1. Set the Rip Fence
With your table saw set up, it’s time to adjust the rip fence for the first cut.
Using a tape measure, set the fence to 1-½”.
Related: How to Use a Tape Measure (Tips for Success)
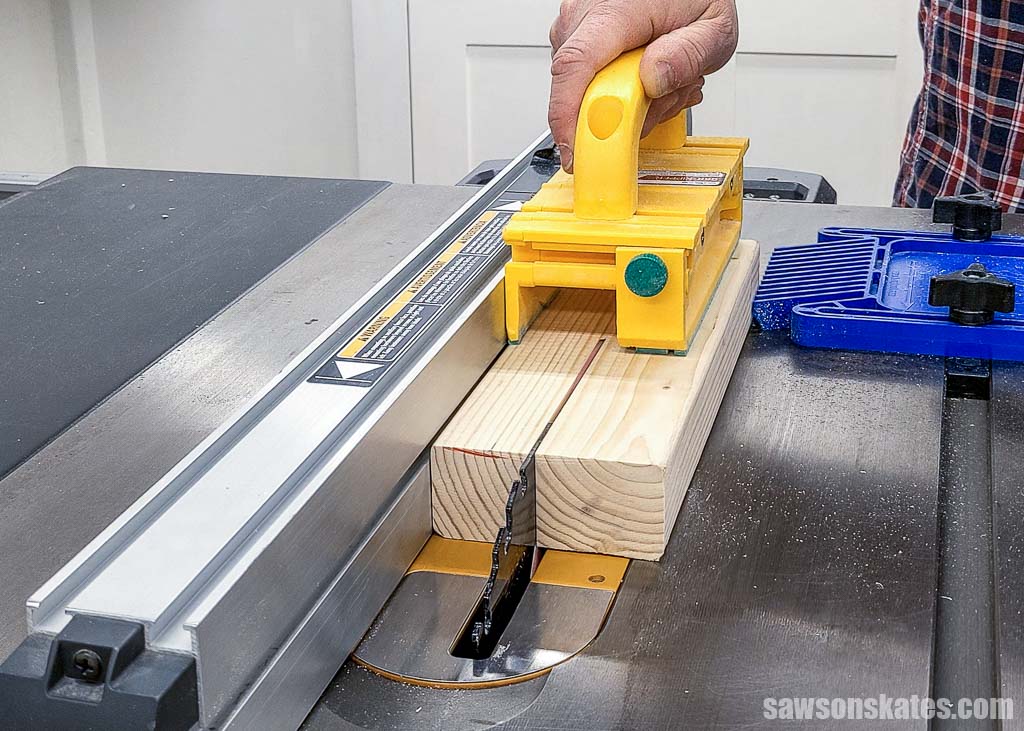
Step 2. Make the First Cut
Position the featherboard and make the first cut using a scrap 2×4 as a test piece and a Grr-Ripper.
Fine-Tuning the Rip Fence
After your initial cut, checking that you positioned the rip fence correctly is essential. Here’s how to make any necessary adjustments:
1. Measure the Workpiece
- If the workpiece is less than 1-½”, the fence is too close to the blade, so move it away.
- If the workpiece is more than 1-½”, the fence is too far from the blade, so move it closer.
2. Test Cuts:
- Continue making test cuts with scrap wood until you achieve a workpiece that measures 1-½”.
Once you’ve correctly adjusted the rip fence, cut your workpieces.
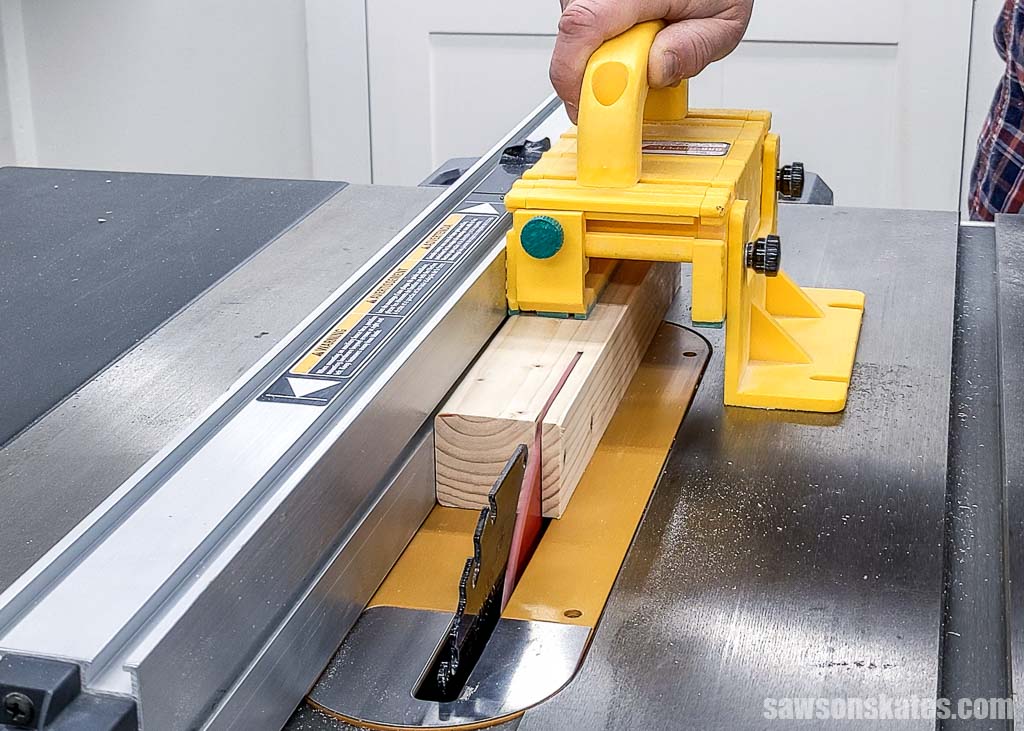
Step 3. Flip and Repeat
After making the first cut, flip the workpiece and cut the second workpiece.
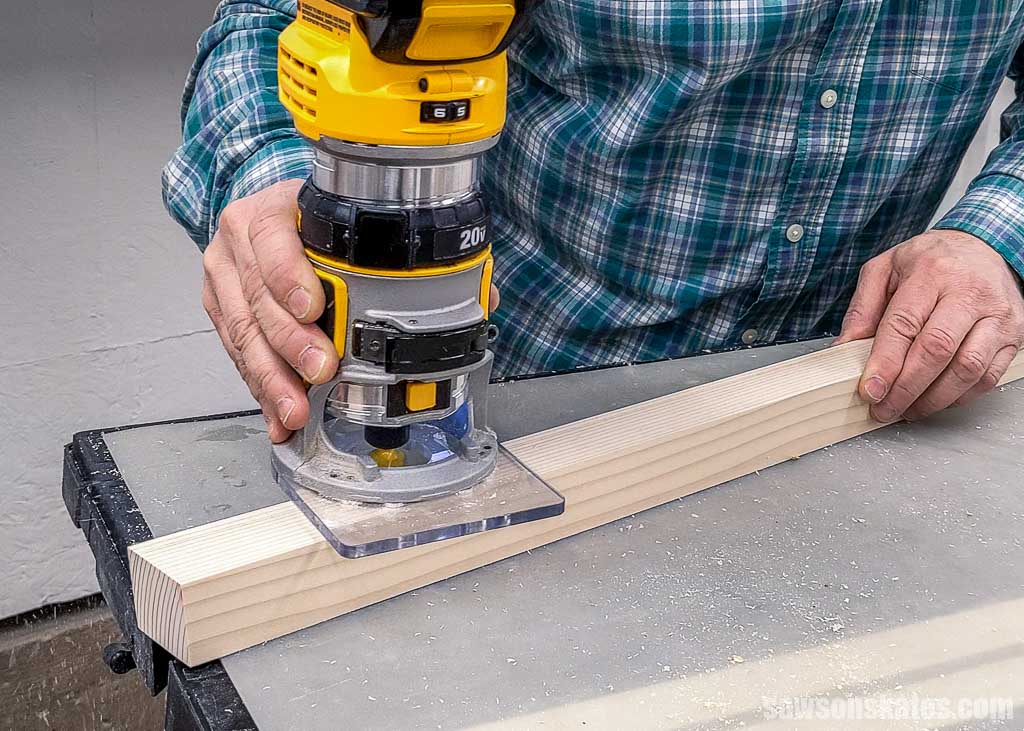
Step 4. Contour the Cut Edges
Remember, some edges of your workpiece are square, while others are rounded.
I match them using a router and a ⅛” roundover bit. It’s a quick, easy way to create a consistent, professional look. However, if you don’t have one, you can achieve a similar result with sandpaper.
Final Thoughts
Cutting a 2×4 lengthwise using a table saw is a handy skill for any DIYer. You can achieve clean, accurate cuts every time with the right setup and techniques.
Interested in woodworking but need help figuring out where to start? Join the FREE Saws on Skates® Beginner Woodworking VIP list and gain instant access to top-notch tool comparisons, tool tutorials, and free woodworking plans. Join for FREE now!
Recommended For You
Pin This For Later

Hi there – I’m Scott, a woodworking enthusiast and creator of Saws on Skates, a site I started in 2015 to share easy-to-follow tutorials, space-saving shop tips, and project inspiration for DIYers at any skill level. Learn more about my woodworking journey here.