
xTool P3 Review From a Woodworker: Is It Worth It?
My honest review of the xTool P3 80W CO2 laser after a few weeks in my small basement. The good, the frustrating, and whether it’s worth it.
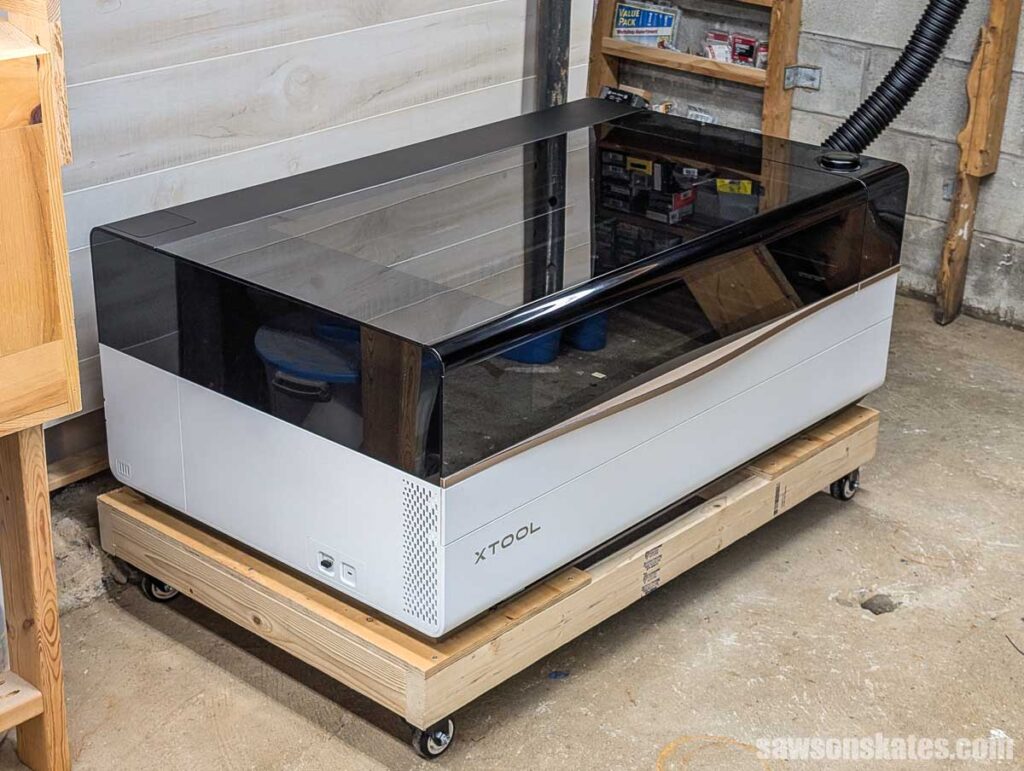
If you’ve spent any time watching woodworking or craft videos lately, you’ve probably seen a laser cutter turning out signs, ornaments, and custom pieces that look like they came from a shop ten times the size. And maybe you’ve wondered if one of these machines is worth it.
I wondered the same thing. So when xTool reached out and offered to send me their new P3 to review, I said yes, because I was curious whether it could live up to the hype.
I’ll get the disclosure out of the way right now. xTool sent me this machine at no cost. But they didn’t pay me to say nice things, and they didn’t get to read this before I published it. This is my honest take, the good, the frustrating, and the part where I nearly threw my back out getting it down my basement stairs!
I’ve had the P3 for a few weeks now. I’m not a laser expert. I’m a DIYer who usually builds projects with a miter saw and a pocket hole jig. So I’m going to walk you through what it’s been like working with it, from setting it up to my first cuts, and what I’m still figuring out. If you’re thinking about getting one, or you’re just curious what a laser cutter can do, here’s everything I’ve learned so far.
This article contains affiliate links. If you purchase from these links, I may earn a small commission at no additional cost to you. Visit my site policies for more information.
What is the P3?
The P3 is an 80W CO2 laser. In plain terms, it cuts and engraves wood (and many other materials) using a beam of light, no blades and no bits. You set up your design in the software, and the laser does the work.
Now, you might be wondering what the CO2 part means. There are two kinds of laser cutters. Diode lasers, which are the smaller, more affordable machines a lot of us start with, and CO2 lasers like the P3. A CO2 laser cuts thicker material, moves faster, and gives you cleaner edges. It also works with materials like acrylic, leather, and glass that a diode laser struggles with or can’t touch at all.
One quick point before it trips you up, because it tripped me up. The CO2 that makes the laser work is sealed inside the machine, and you never touch it. But the P3 also has a spot for a separate CO2 cylinder, and that one is for the built-in fire suppression system, not the laser. Two different jobs, same gas. I’ll get into the fire suppression later.
I think the number that might matter most to DIYers is the bed size. You get a 915 by 458 millimeter work area, which is roughly 36 by 18 inches. That’s big. To put it in perspective, my Ortur Laser Master 2 has a 400 by 430 millimeter bed, about 16 by 17 inches. The P3 gives you nearly twice the room to work. With a bed that size, you can lay down a full-size sign or a large panel.
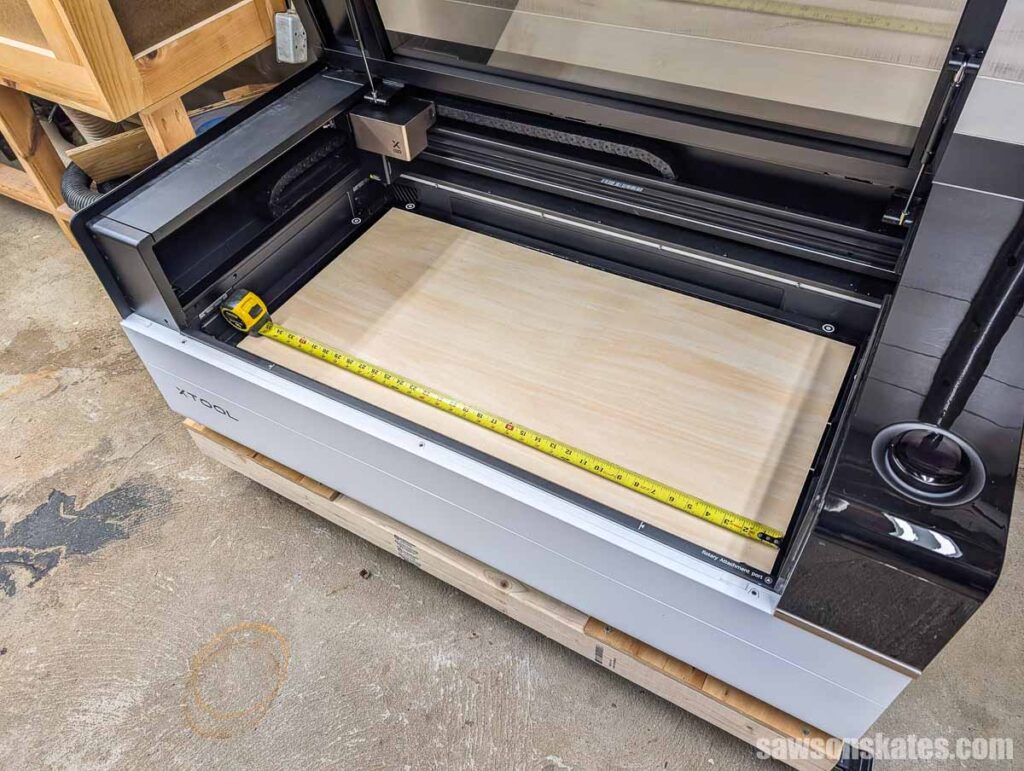
The 80 watts of power means it cuts through thicker material in a single pass. It engraves too, so you can burn a design into a surface instead of cutting all the way through.
I’ll get into the automation features later: the cameras, the material settings, and the software. For now, here’s the short version. The P3 is big and powerful. This isn’t a little hobby machine you sit on a shelf. That’s what makes it different, and it’s also why it won’t be right for everyone. I’ll come back to who it’s for once you’ve seen what it can do.
Delivery and Getting it in Place
Shipping took about a week from the time I accepted xTool’s offer.
If you’re thinking of getting a P3, do your research ahead of time. This thing is big and heavy. My house is small, my shop is small, and this thing is huge. Make sure it will fit through your door openings and that you have help to get it there.
The P3 arrives on a pallet. I got home from my part-time job, and there it was. It was about to rain, and no one was around. Fortunately, I had an extra pair of car skates, so I was able to shimmy it off the pallet onto the skates and wheel it over to my side garage door. It definitely would have been helpful to have an extra set of hands.
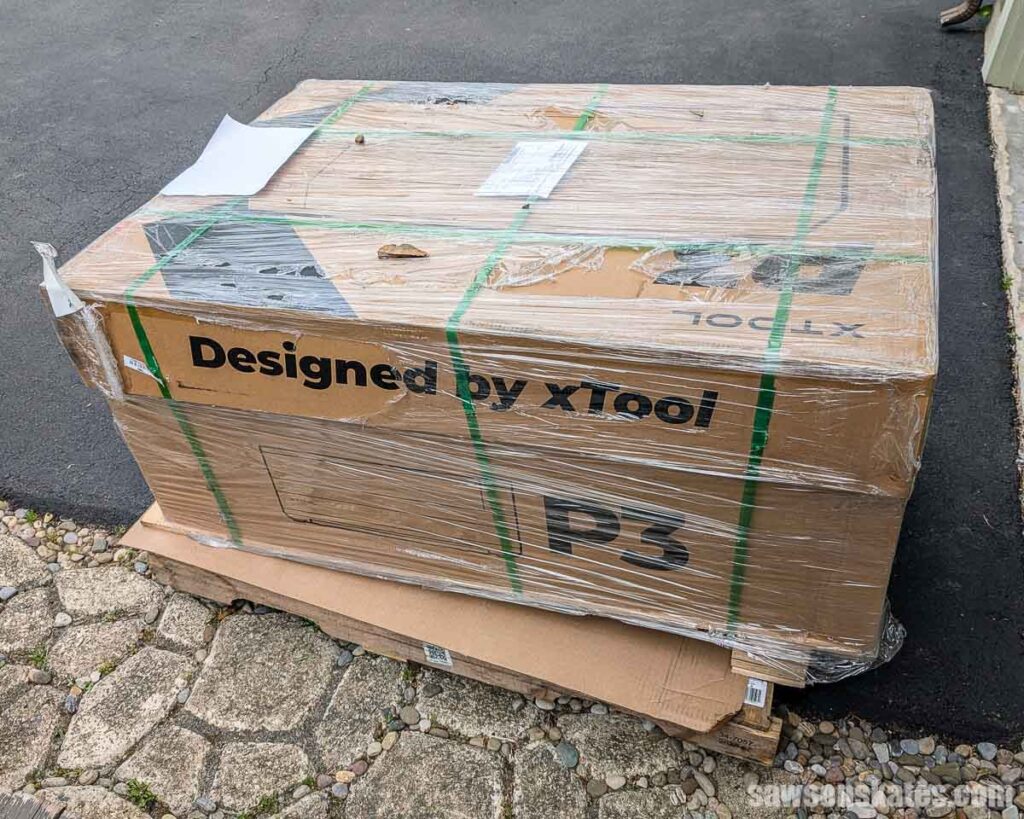
The only space I have available to use my P3 is in my basement. That meant getting it down a set of stairs, through a short door, turning a corner, climbing a step in a narrow corridor, and lifting it onto my utility cart.
This was, to say the very least, challenging. I probably should have recorded it, but it was 90 degrees and 1000% humidity, and I was sweating like a pig! And between the cramped quarters and my buddy Matt and me wrestling the machine, I’m not even sure where I would have placed a camera.
We removed all the packaging in the driveway because it wouldn’t have fit down the stairs otherwise. We got it to the bottom of the stairs, turned the corner, and got stuck trying to figure out how to get it up the one-foot step. Then it dawned on me that I had a hand truck. That made things a little easier. We were able to get it over the step, lay the hand truck (and the P3) on its side, and lift the P3 into position on my utility cart.
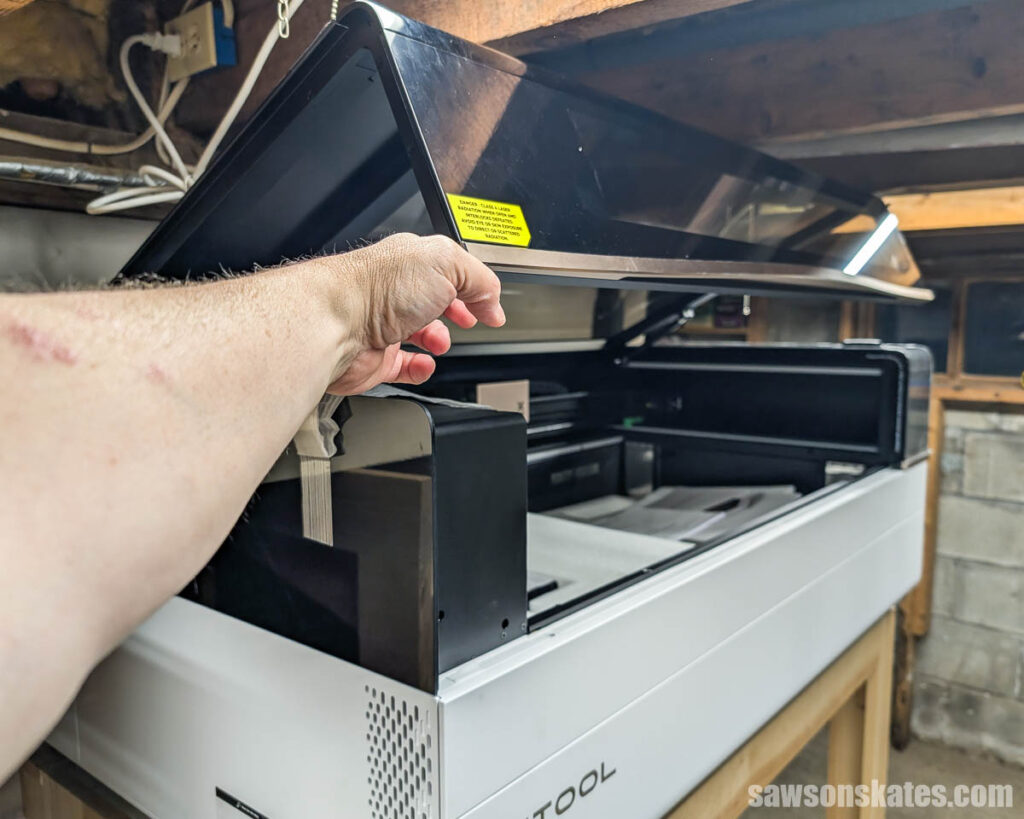
At that point, Matt said, “Are you going to be able to open it?” That’s when I realized I hadn’t measured the height of my ceilings, the height of the machine, or the height of my utility cart.
It opened, but barely. I’m not going to lie, it looks like it’s jammed into this space because it is. But hey, this is real life. This isn’t one of those staged YouTube craft rooms or studios. It’s my basement, and it might be pretty close to what yours looks like.
Setting it Up
Next, I began setting it up, which I think took about two hours. I’ll let you in on a behind-the-scenes secret. It always takes me twice as long to do anything for the site when I record it. I’ve got to check the lighting, set up the camera, record, and often reposition everything for the next shot. So yeah, your P3 might take less than two hours to set up.
I removed the contents from the inside and peeled off the protective plastic from the outside. I forgot to mention earlier, but this machine is well-packaged, from the shipping container to the machine itself. Everything says quality.
Then I followed the quick start guide, and the instructions are excellent. The one place I overcomplicated things was adding the antifreeze and water. I tried to measure it out, but you don’t need to. Just follow the gauge on the machine as you add your liquid.
The trickiest part of the setup for me was the software. I had a tough time getting it to run the calibration, which I believe is supposed to happen automatically. I’m pretty sure I know why it didn’t, and I’ll come back to it. Spoiler alert: It has nothing to do with the machine.
First, let me fast-forward to my first project. I put the material in, but the machine wouldn’t recognize it, which is also supposed to happen automatically. After some research, I learned the lid has to be all the way open to activate the camera that reads the material. And that’s when it clicked. Remember how the P3 barely opens in my cramped basement? That’s almost certainly why it wasn’t working. The problem wasn’t the machine. It was that I couldn’t raise the lid all the way.
Solving the Space Issue
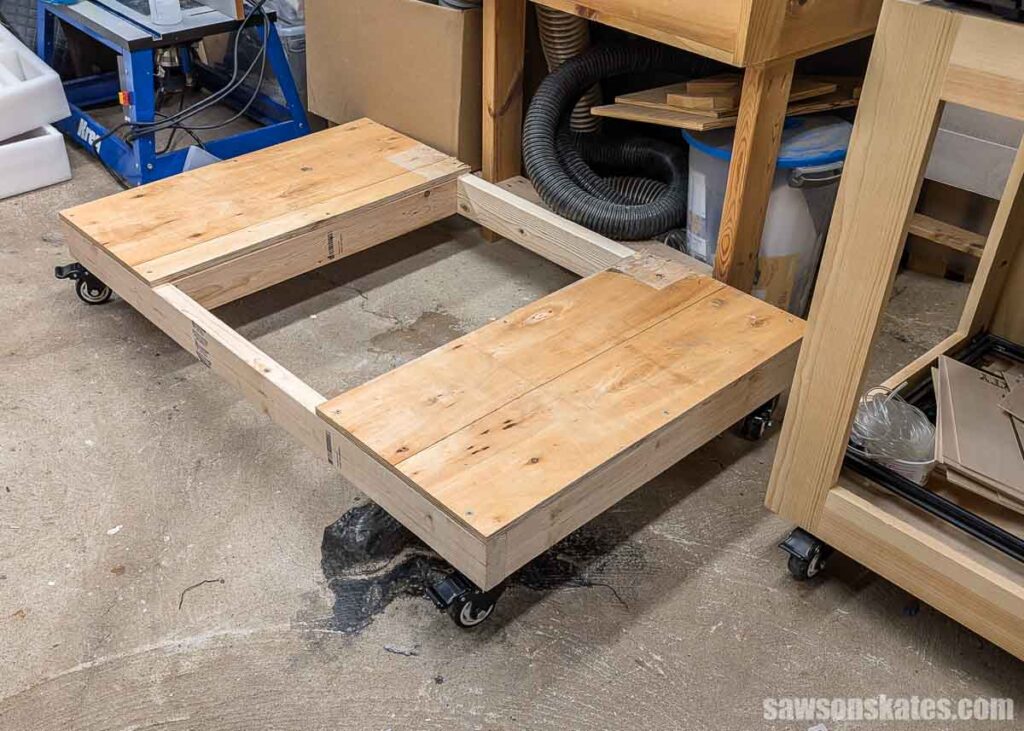
After some measurements, I determined that I basically needed to remove the cart and have the P3 sitting on a platform, pretty close to the floor. In my research, I also found that xTool’s P3 stand has an open area in the center, allowing heat to disperse, so I incorporated that into my design.
I grabbed some 2x4s from the big box store and made a simple frame. And I recycled the plywood that shipped between the pallet and the machine!
Then, Matt came back and helped me move it. This lower setup will actually work out better, because now I’ll be able to show the machine running.
Automation Does the Guesswork for You
With the P3 sitting lower, I was able to start using it.
If you’re coming from a basic diode laser like I am, this is where, as my former boss would say, “The rubber meets the road.”
I had to set everything manually with my Ortur: adjust the focus and run a test frame to be sure the design landed where I wanted on the material. It worked, but there was always a bit of guesswork.
The P3 does all of that for you. xTool calls it the Automatic Creation System.
Here’s how it works:
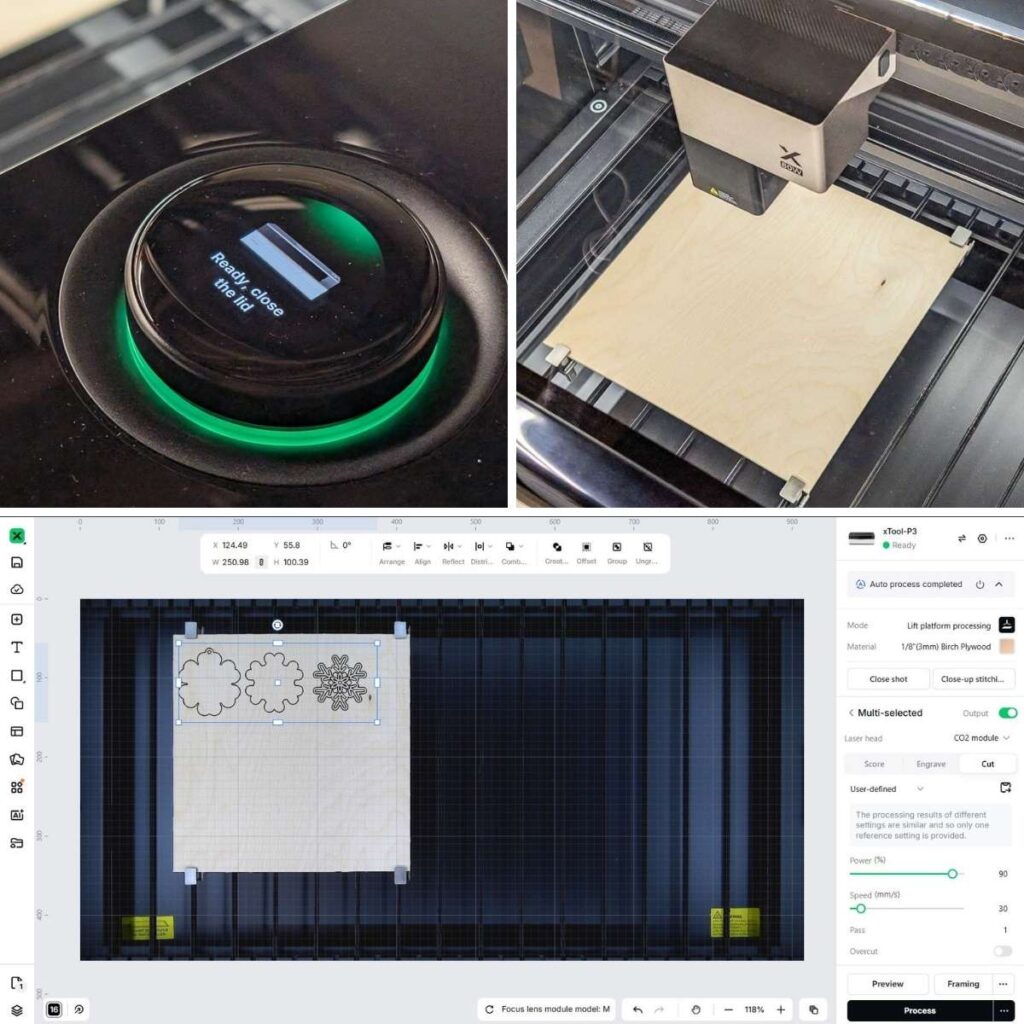
- You open the lid and set your material on the bed. The light in the top of the lid turns from red to green, indicating that the camera detected your material. The dial in the lower right corner also confirms it found your material and directs you to close the lid.
- Next, the machine:
- Measures the material thickness
- Adjusts the bed height
- And sets the focus
- It shows you a live picture on the screen so you can drag your design exactly where you want it on the material.
The first time I watched it size up my material and focus itself, I just kind of stood there in amazement!
First Test
I watched about a dozen videos before it arrived and saw it:
- Easily cutting through everything from acrylic to leather
- And engraving ceramic and even irregularly shaped surfaces like stone
But since I primarily work with wood, that’s what I’ll be cutting most often.
Related: I put together a full walkthrough on how I cut wood on the P3, from the material I use to running the job.
I chose a sample project within the software, a set of four Christmas ornaments. Since this was a test, I decided to try only one from the set.
By the way, one of the things I was thinking when xTool first reached out was, what am I going to make? Well, it turns out there are tons of projects included in the software that you can cut as-is or use as a jumping-off point for your own ideas.
The software is pretty intuitive. All I had to choose was the material I wanted to cut my ornament from, in this case 3mm plywood that I’d bought to use with my previous laser. I clicked “Process,” followed the prompts on the screen, and… it started working! I was shocked!
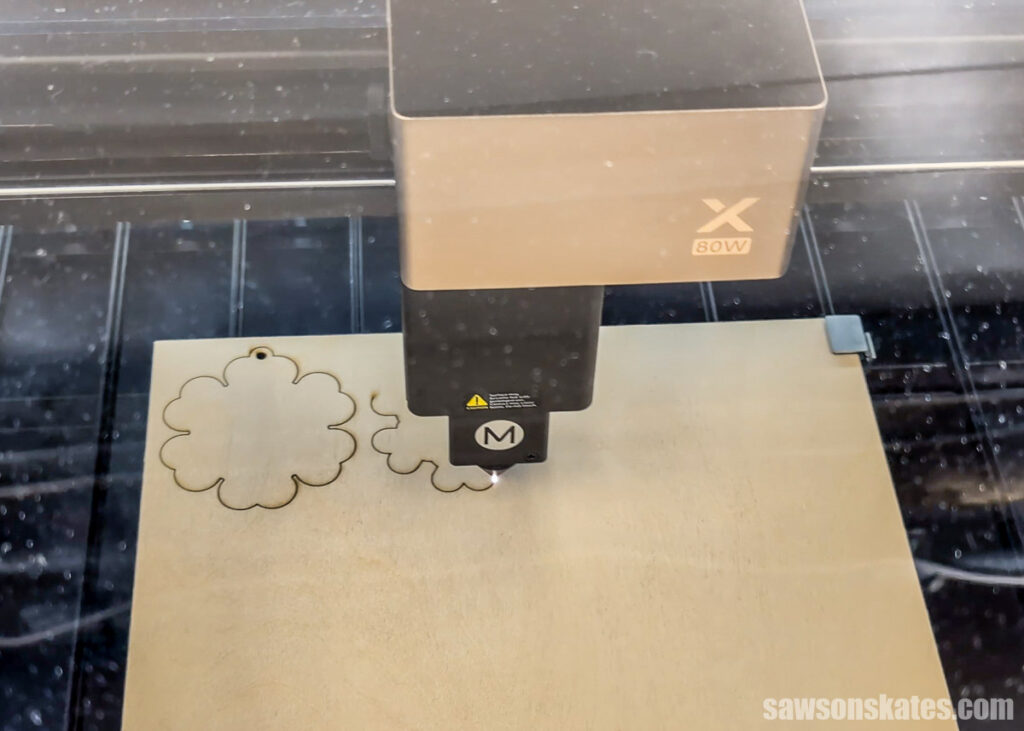
A minute later, I had an ornament. Seriously, it only took 60 seconds to cut. Now, I will say it didn’t cut all the way through in spots, but I think that was my fault.
I only clamped the material on one side, which let the other side pivot upward. From what I understand, it could also have been caused by inconsistent material thickness or the onboard air assist, which is a stream of air that blows away smoke and debris as it cuts, so you get a cleaner pass. And here’s the other thing. I chose basswood in the software, but my material was actually Baltic birch, which is harder. So let’s say this first test had some user errors and looked a bit charred.

On my second test, I clamped the plywood at all four corners, chose the correct material, and it cut through cleanly. This ornament is totally gift-worthy!
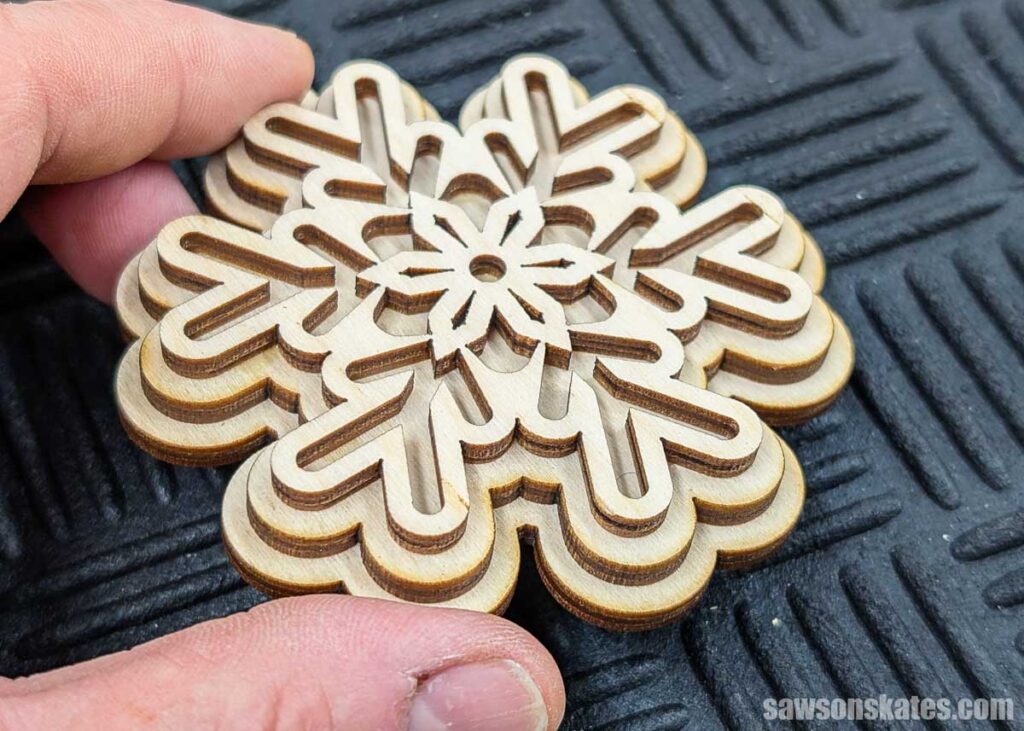
Now, I only tested one ornament at a time. Just think about how much material you could fit in here. You could probably batch out all the ornaments you’d need for a craft show in about 30 minutes!
Next up, I tested cutting ½ inch pine, which the P3 is supposed to handle in a single pass. One thing I’ll mention here is that there’s no setting for solid pine in the software, so I chose ½ inch pine plywood because I thought it was the closest match.
And here’s where I really appreciated the intuitiveness of the software. I didn’t realize the power and speed were set to the absolute lowest settings, and the software alerted me and asked if I really wanted to proceed, because at those settings it wasn’t going to cut anything.
I wasn’t sure what settings to use, so I asked AI, and it gave me a starting point for the power and speed.
Now, in hindsight, this is where I got ahead of myself. In my haste to start cutting, I skipped the step I should have done first: a material test. Most laser software, xTool Studio included, can run what’s called a test array.
It cuts a grid onto a scrap piece of your material, and every square in the grid uses a slightly different power and speed. You run it once, see which square came out cleanest, and use those settings for the real thing. It only takes a few minutes, and it takes all the guessing out of it. That’s the right way to dial in a new material, and it’s what I’ll do next time instead of eyeballing it.
I tried AI’s suggested settings, and it cut through ½ inch pine like butter! I will say it’s pretty scary, and there’s a real fire risk here (I was on standby with my fire extinguisher), and I’ll get into that later. I’ll definitely run a test array before I cut ½ inch pine again.
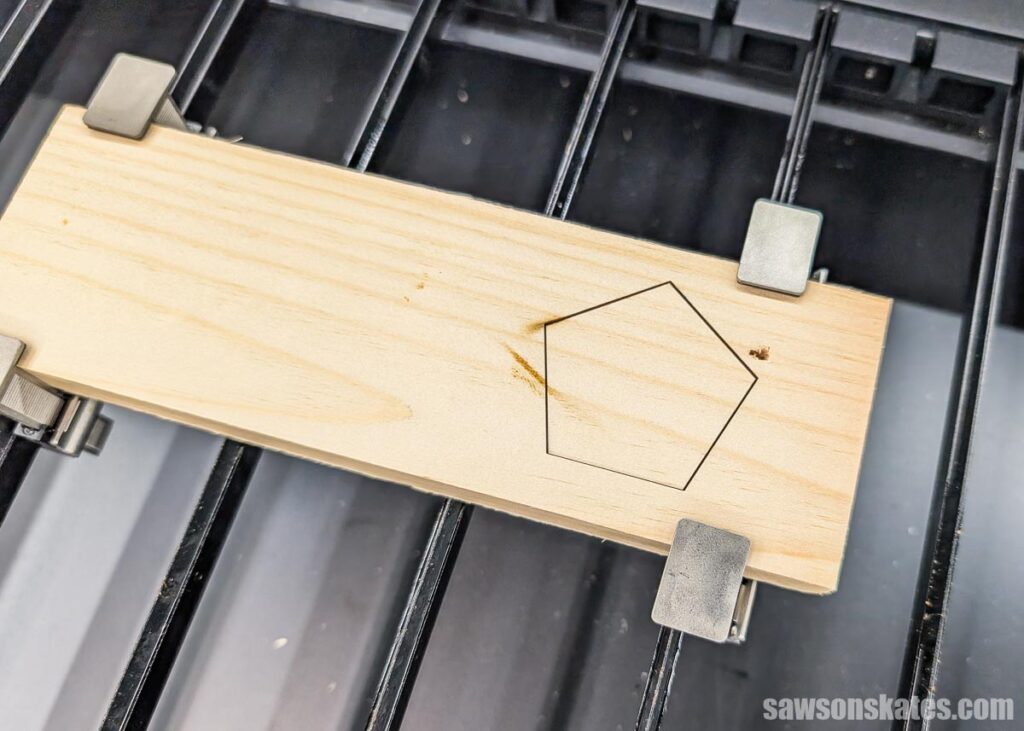
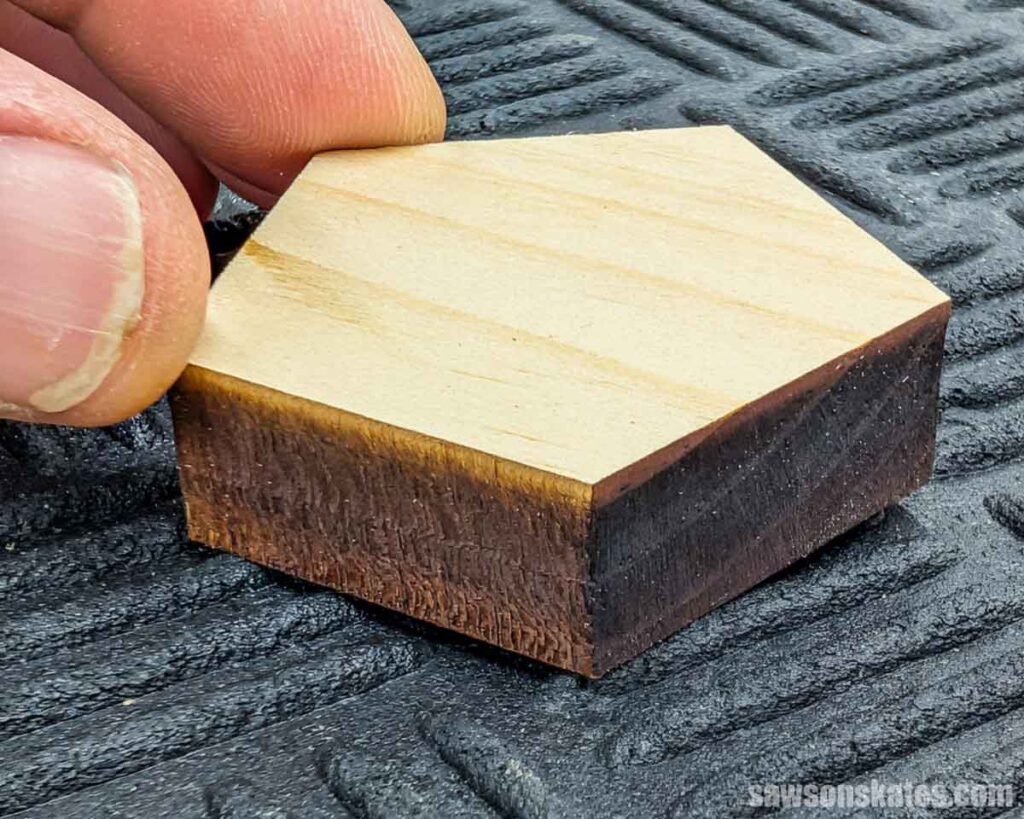
I also tested what will become my first real project with the P3, and it cut the piece from ½-inch pine in about three minutes, with perfectly smooth edges. I’m not going to show the finished project just yet because I don’t want to spoil the surprise.
But I can tell you it’s something I’d normally make on my scroll saw, and there’s no way I could cut it in three minutes, or even six. On top of that, I’d still have to sand the saw marks afterward. With the P3, there was nothing to sand. Just imagine how much time and effort you’d save batching pieces for a craft show or an Etsy shop.
There was always a lot of trial and error with my Ortur laser, but the P3 guides you through the process, which is great for folks like me who aren’t super tech-savvy. It walks you through each step, and it prompts you if something looks off. It’s really well thought out, and so far, with only a few tests under my belt, I’d say it’s almost foolproof.
You can also design in the software, which is easy to use. But I’m having a bit of a mental block, and it has nothing to do with the software. I’d like to do some layered designs, and my mind just isn’t clicking that way yet. Maybe I’ll start with a two-layer project and work my way up to something more intricate.
Cutting Thicker Materials
Something I noticed is that the cuts on thicker material, such as ½ inch pine, are angled. In other words, the cut is not perpendicular to the material’s face. However, the cuts on thinner material, like 3mm Baltic birch, are relatively square to the face.
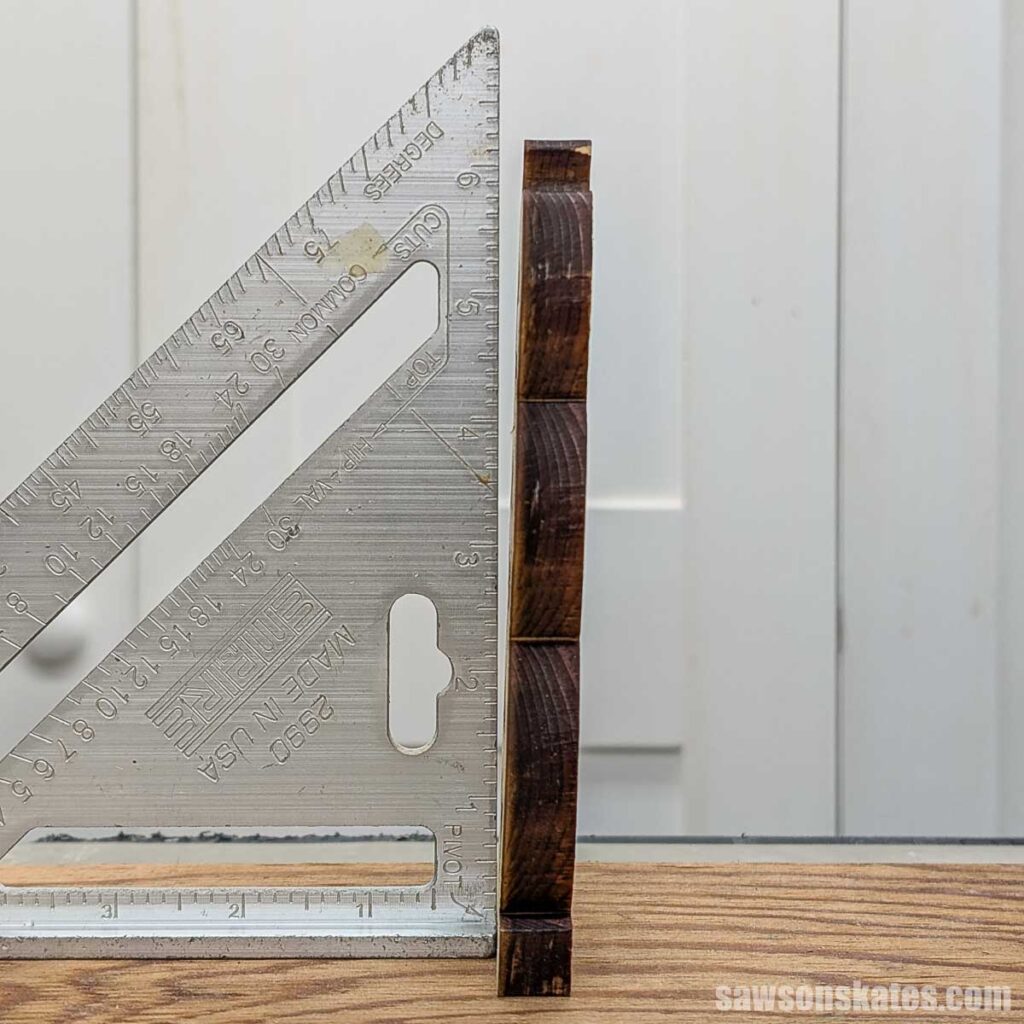
So I reached out to my contact at xTool. Here’s what she said: “Because the laser beam itself is conical and the optical path cannot be made absolutely perpendicular, a slight tilt in the cut surface is unavoidable. This effect becomes more pronounced in scenarios involving thicker materials and shorter focal lengths.”
She also sent me a troubleshooting guide; however, the angle I’m seeing appears to be within xTool’s recommended tolerances. And after doing some research on my own, I found this is normal for laser cutting in general, and it gets more noticeable as the material gets thicker. That said, I may follow the guide’s tips to see if it lessens the tilt.
For the projects I’m planning, like signs and decorations, the angle won’t be noticeable or affect how the piece works. But I wanted to mention it in case you’re planning projects with thicker material that need absolutely square edges.
Venting the Smoke
I think the biggest challenge I’ve had with the P3 was how to vent the smoke. Cutting wood produces a lot of it, and you don’t want it floating around your shop or breathing it in.
So if I had to find any fault with the P3, venting the smoke would be it. They provide a hose and an inline fan, and the quick start guide shows how to connect it all to the machine, but it doesn’t show how to actually get the smoke outside.
You can’t just put the hose out the window without sealing it; otherwise, the smoke will drift back in.
I’ve watched some videos with folks making DIY solutions by cutting a hole in cardboard or foam and running the hose through that. Or using a store-bought option like an adjustable window vent kit, the kind they make for portable air conditioners.
Fortunately, I have a window nearby. It was built by the previous owners (they were also DIYers), but it’s fixed in place. I can remove it, but the solutions I mentioned rely on the window moving up and down or sliding to hold things in place, and mine doesn’t do that.
There are a variety of window types out there, so I understand why they couldn’t provide a solution for all of them, but including some venting suggestions would be helpful.
I’ve ordered several batches of couplers and connectors, and I think I’ve landed on an interim fix. For now, I’m replacing my window with a piece of plywood and drilling a hole in it for a 4-inch dryer vent. The metal duct on the dryer vent stuck out too far into the room, so I had to cut it down. From there, I attached a 3-inch-to-4-inch silicone reducer coupler, then ran a 3-inch connector pipe from the coupler to the hose on the inline fan.
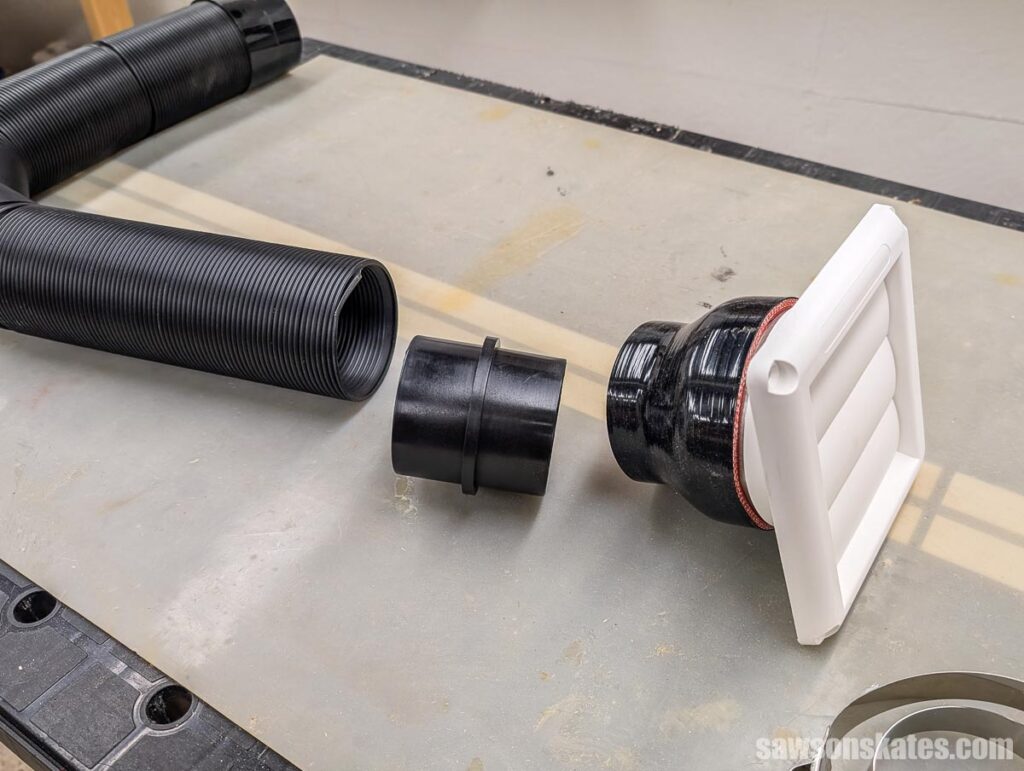
I’ve run a few tests, and this is by far the best setup I’ve had. I’ll keep monitoring it to see if there’s any way to improve it.
I should also mention that while the P3 itself is relatively quiet, the inline fan is, um, annoying. I’m sensitive to sound, and the fan’s high-pitched whine is borderline unbearable for me. I’ve actually started wearing the same hearing protection I use for my saws whenever the fan is running. A quieter fan will be one of my first upgrades.
If you’re thinking about getting a P3, or any laser cutter, definitely consider how and where you’re going to vent before you buy.
And with smoke comes fire, so this is a good time to talk about the P3’s fire suppression.
Fire Suppression
Here’s something I appreciate about the P3. It has a fire suppression system built right in. There’s a flame sensor that watches for flare-ups, and if it detects one, the machine can discharge CO2 to put it out.
Remember when I explained the difference between diode and CO2 lasers? The CO2 that makes the laser work is sealed inside the machine, and you never touch it. But the P3 also has a spot for a separate CO2 cylinder, and that one feeds the fire suppression system.
Here’s what to know before you buy. The fire suppression CO2 cylinder is not included. You have to buy one separately. When I found the empty spot for it, I thought something was missing from my shipment. It wasn’t. From what I’ve read, it’s because of shipping restrictions on hazardous items, and cylinders are considered hazmat.
The P3 runs without it. But if the machine detects a flame and there’s no cylinder installed, all it can do is beep at you. It can’t actually put the fire out. So to me, this isn’t optional. On a machine this powerful cutting wood, I want the suppression system able to do its job. So I’ll get a CO2 cylinder, but for now I’m on standby with my fire extinguisher.
A few things I learned:
- The cylinder is single-use. You have to replace it if it discharges.
- The machine weighs the cylinder and warns you when the gas is low.
You can buy the official cylinder from xTool, and a few resellers carry it as well.
None of this is a knock on the machine. The fire suppression is a great feature, and I’d rather have it than not.
My Honest Take
Before I get into this, you should know where I’m coming from. The P3 is probably the most technologically advanced thing I own. My house is from the 1800s (I don’t even have a doorbell!) And if you’ve been following me for a while, you know how simple I work in my shop. Pretty much every project I build is made with a miter saw and a pocket hole jig.
So I’m not a laser expert. I’m sharing what it’s like when a regular woodworker gets one of these in their basement.
What I love
- The bed size. More than twice the room of my Ortur, so I can cut full-size pieces in one pass instead of sectioning them.
- It holds your hand. The software walks you through each step and prompts you if something looks off. After all the trial and error with my Ortur, that’s a big deal for someone like me.
- The build quality. You can feel it from the packaging on. Everything says quality.
- The instructions are excellent. Setup took me about two hours, and most of that was filming.
- The built-in fire suppression is peace of mind.
- The ability to cut through ½ inch material in one pass and do it so quickly is incredible.
What I’d change
- The venting. This is my biggest gripe. They give you the hose and fan, but nothing on how to get the smoke out of your shop.
- The inline fan noise. The machine is quiet, but the fan’s high-pitched whine is rough enough that I wear hearing protection when it’s running. A quieter fan is on my upgrade list.
- Plan your space before it arrives. Getting it into my basement was the hardest part of this whole process, and I had to build a stand to make it fit.
Is It Worth It?
You know I don’t often do product reviews. The last one was in 2018. And I’ll be honest, I was completely prepared not to like this thing. I watched a handful of videos about the P3 and thought, this seems too good to be true.
Well, now that I’ve had it for a few weeks, what I’ve tested definitely lives up to what I saw in those videos. The build quality is there, and the automation and software are genuinely intuitive. And I still can’t believe it cut through ½ inch pine in a single pass like it was slicing through a sheet of paper. That completely changes how quickly I’ll be able to turn out projects.
I’m only a few weeks and a handful of test cuts in, and I haven’t tried all the materials it’s supposed to be able to cut. But my first impression? I’m thoroughly impressed. The P3 has my creative juices flowing like they haven’t in years. Remember earlier when I said I wasn’t sure what I was going to make with it? Well, I have a growing list of things I can’t wait to try.
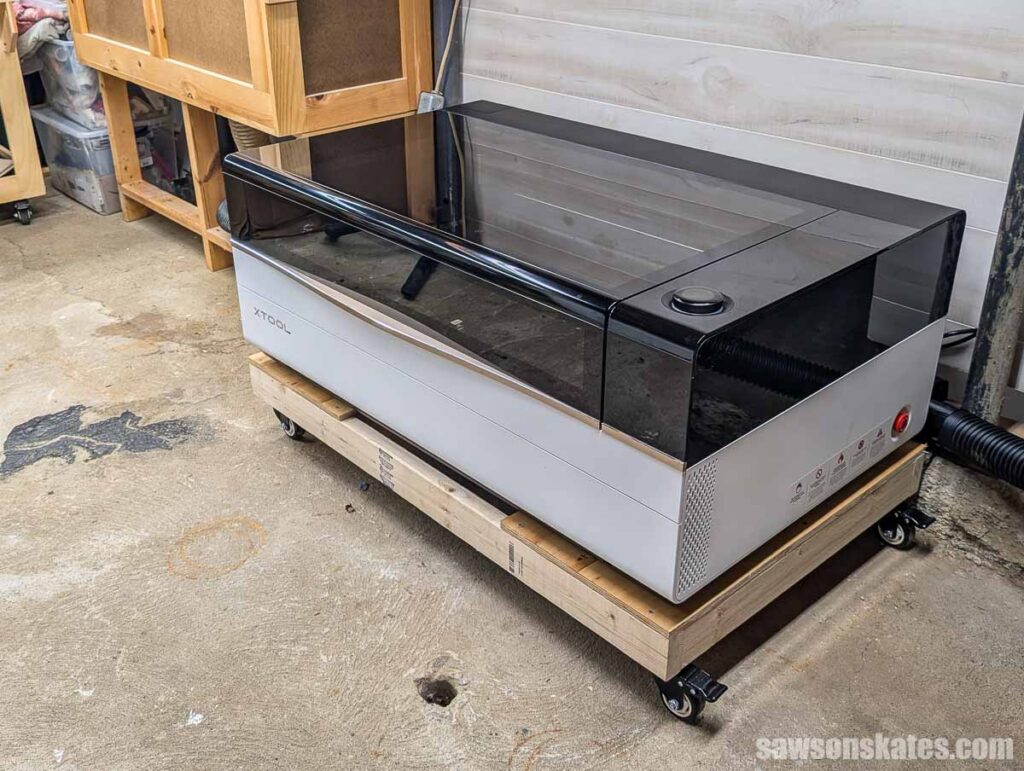
Now let’s talk about the elephant in the room. The P3 is $6,999 as I write this. Prices move around, and xTool runs sales and trade-up deals from time to time, so you may find it for less. Either way, it’s a serious investment, and I’m not going to pretend that it’s not.
So who is it for? I’d say it’s for the serious hobbyist who wants to turn their passion into a small business, or someone already in business who wants to grow. If you’re in either of those groups, or you’re seriously considering getting there, I think the math makes sense. You’re buying a machine that can batch out sellable pieces at a size most lasers can’t touch.
If you’re a weekend hobbyist who just wants to burn a name into a cutting board now and then, this isn’t your machine, and that’s okay. There are smaller, far less expensive lasers that will get the job done.
Where to Buy the P3
If you’ve read this far and you’re seriously considering one, you can find the P3 on xTool’s site here.
Total transparency. That’s an affiliate link. If you buy through it, xTool kicks a small commission back to me at no extra cost to you. I want to be upfront, because I’d rather tell you than have you wonder.
I’ll also say this. I don’t link to things I wouldn’t use myself, and you’ve just read a couple thousand words of me being honest about what I like and what still has me stumped. If this review helped you make up your mind either way, and you do decide to buy one, using this link is a real way to support the site and keep this kind of content coming.
And if the P3 isn’t for you, I hope the honest rundown saved you some money and a sore back getting it down the stairs.
Pin This For Later