How to Get a Charred Wood Finish (Without a Torch)
Learn how to get a Shou Sugi Ban finish without a torch! Instantly create a charred wood look with a paintbrush. It’s easy to do. No special tools required.
Shou Sugi Ban
Shou Sugi Ban is a Japanese technique that preserves wood by charring it with flames. The technique creates a rich, charcoal black look on wood. The thing is, Shou Sugi Ban is not the easiest technique for the average DIYer to do.
The good news is, there’s a simple way to get a charred wood finish without using a torch. All you need is a paintbrush and a charred wood accelerator! This is not a sponsored tutorial. I bought the charred wood accelerator at my local home improvement store. Today, I’ll show you how easy it is to get a charred wood look with just a paintbrush!
This tutorial contains affiliate links to supplies and tools. Purchases made using these links help support the Saws on Skates website and allows me to share more projects and tips with you. There is no cost to you for using these links. Visit my site policies for more information.
Before we get into how to do a charred wood finish without a torch, be sure to click the subscribe button at the bottom of this page to sign up for my FREE weekly newsletter loaded with helpful pocket hole tricks, space-saving workshop ideas, clever DIY tips and more!
Table of Contents
What is Shou Sugi Ban?
Shou Sugi Ban is a Japanese technique that preserves wood by charring it with flames. Charring makes the wood waterproof. This technique was typically used for exterior siding. More recently it has become a popular finish for interior projects like furniture and doors.
I was first introduced to Shou Sugi Ban on Season 2 of Ellen’s Design Challenge. Bradley used this wood-burning technique on his outdoor seating challenge.
Shou Sugi Ban Without a Torch
There are several ways DIYers can do a Shou Sugi Ban finish. We can use a propane torch or a heat gun. There are several drawbacks to using these tools. First, we need to buy the equipment. Second, we need a safe place to use these tools.
We should use a propane torch and heat gun outdoors. These tools cannot be used in our workshops. A little sawdust and one spark could mean a major disaster!
The good news is we can get the look of Shou Sugi Ban without using a torch. Recently I was walking through my local home improvement store and spotted the Varathane Charred Wood Accelerator.
I read the instructions. It could be used on any type of wood, and all you needed was a paintbrush to apply it. No torch. No heat. No flames. Needless to say, I had to give this technique a try!
What Kind of Wood Can You Use for a Charred Wood Finish?
The Varathane Charred Wood Accelerator can be used on any wood like pine, cedar, poplar, oak, maple, etc. As with any stain technique, each type of wood absorbs stain differently. This is also true for the wood accelerator. Each type of wood will absorb the accelerator differently. It’s a good idea to try it on a test piece before using it on your finished piece. This way, you can be sure you’re happy with the look.
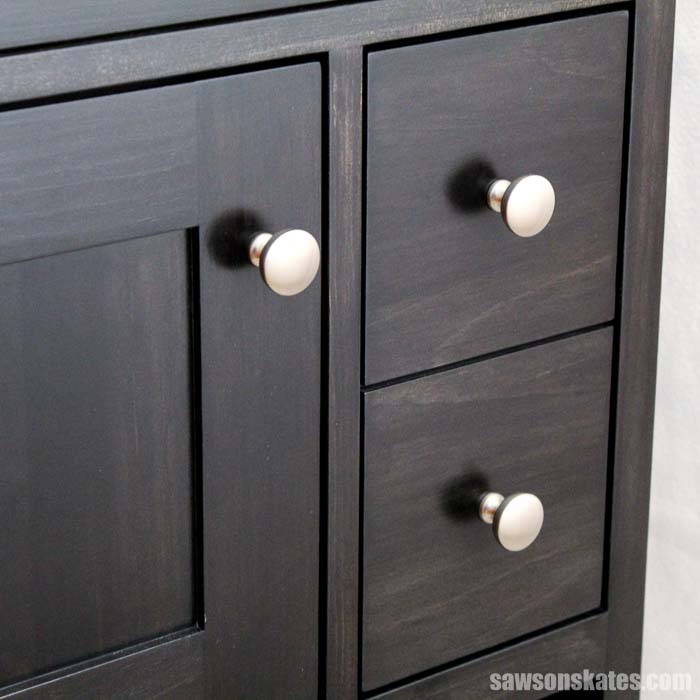
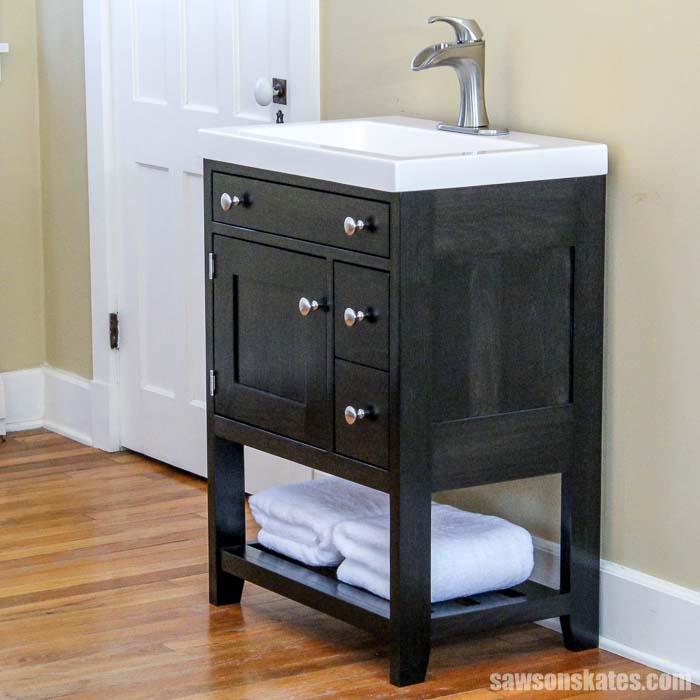
Many DIYers use pine to make their projects. Pine is inexpensive and readily available at home improvement stores. Pine is the wood I use to build many of my DIY projects, and it’s what I used to build this DIY vanity. All of the examples you’ll see in this tutorial are on pine.
Where to Use a Charred Wood Finish
- Indoor Projects
- On Pine, Poplar, Cedar, Oak, etc.
- Tables
- DIY Furniture Projects
- Cabinets
Charred Wood Video
Watch the quick video to see how I got a charred wood finish without a torch!
How to Use a Charred Wood Accelerator
Supplies
- Sandpaper
- Paintbrush
- Varathane Charred Wood Accelerator
- Drop Cloth
- Spray Lacquer
- Water-Based Polyurethane (optional)
Step 1. Prepare the Wood
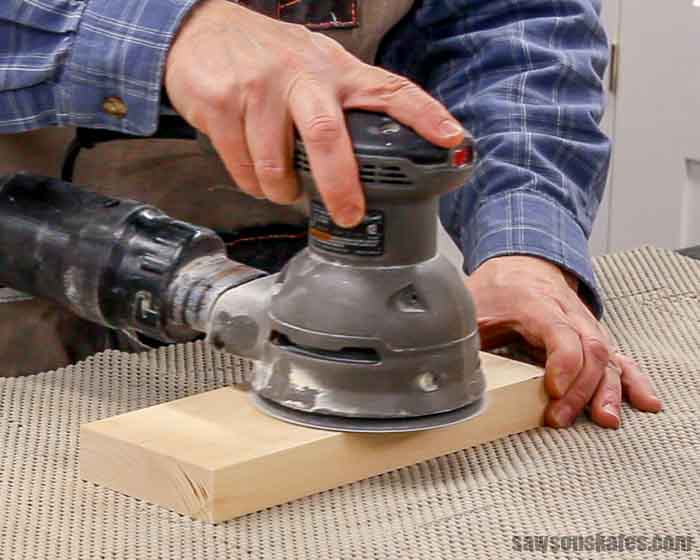
The instructions for the Charred Wood Accelerator recommend preparing the wood by sanding it with 100 grit sandpaper. In my opinion, this would make the surface of the wood a little too rough for a DIY furniture project
Related: 11 Secrets for Sanding Wood Projects Like a Pro
I usually do my final sanding with 120 grit or 150 grit sandpaper. So that’s what I did for this project. I first sanded with 100 grit sandpaper, then 120 grit, and finished with 150 grit sandpaper.
Related: What’s the Best Sander for Furniture? (Here’s the Answer)
I used my Shop Vac with a dusting attachment to remove the majority of the sanding dust. I removed the remaining dust with a tack cloth.
Related: What is a Tack Cloth? (+ What I Use Instead)
I forgot to photograph this step, so I’m using a sample board here.
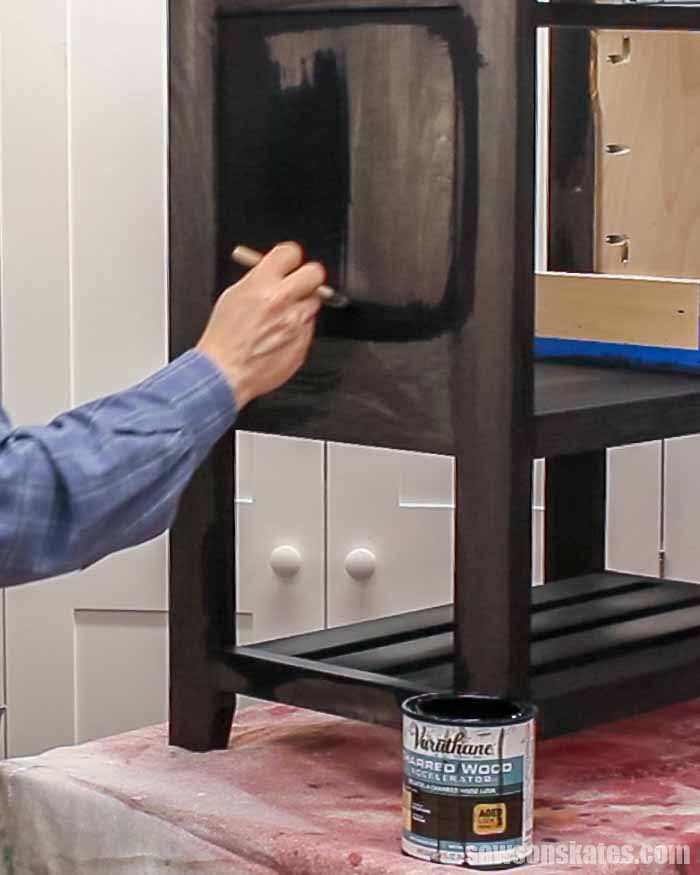
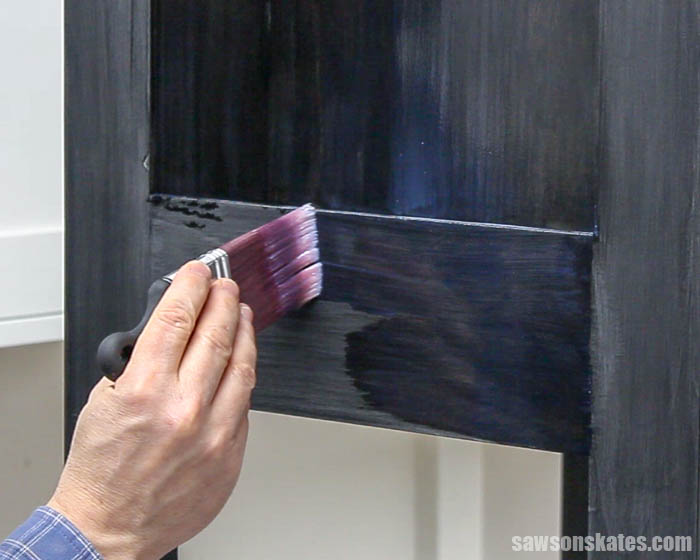
Step 2. Apply the Charred Wood Accelerator
The Charred Wood Accelerator is drippy, so be sure to use a drop cloth to protect the surrounding areas.
I used an inexpensive chip brush to apply the accelerator. The chip brush worked, but it splattered the accelerator, and it was difficult to control where I wanted to apply the product. Next time, I would use a better quality brush like this one to apply the accelerator.
I brushed the accelerator, so it entirely covered the surface of the wood. I brushed out any areas where the product pooled or puddled so that the surface had a smooth, uniform coat.
As the accelerator begins to dry, you may notice some areas appear lighter than others. The temptation is to apply more accelerator to those areas. Don’t do it! I did this in a few spots, and these areas dried much darker than the surrounding areas. I sanded these spots so they would blend into the surrounding areas.
NOTE: For a lighter effect, the directions suggest applying the accelerator and immediately wiping it off the project.

Step 3. Apply a Second Coat (Optional)
I let the Charred Wood Accelerator dry for 2 hours. The first coat looked good, but I wanted this project to be darker. I decided to apply a second coat. I lightly hand-sanded the piece with 150 grit sandpaper and removed the sanding dust with my Shop Vac and a tack cloth. Then I applied a second coat just like I did the first coat.
Step 4. Apply the Finish
See How to Seal a Charred Wood Finish below.
How to Seal a Charred Wood Finish
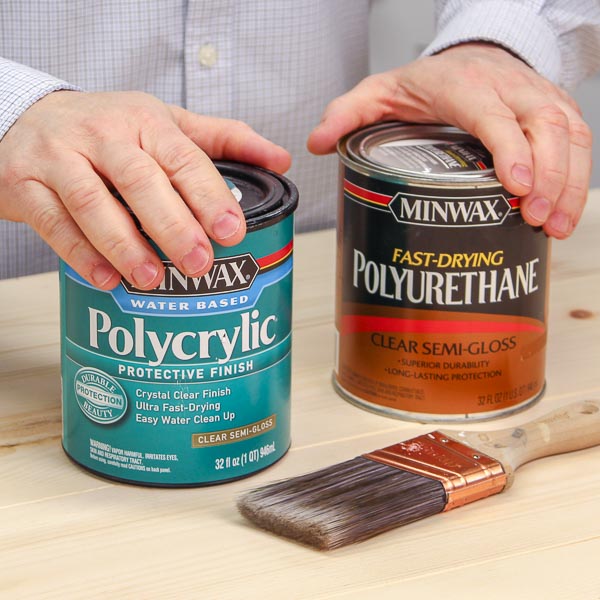
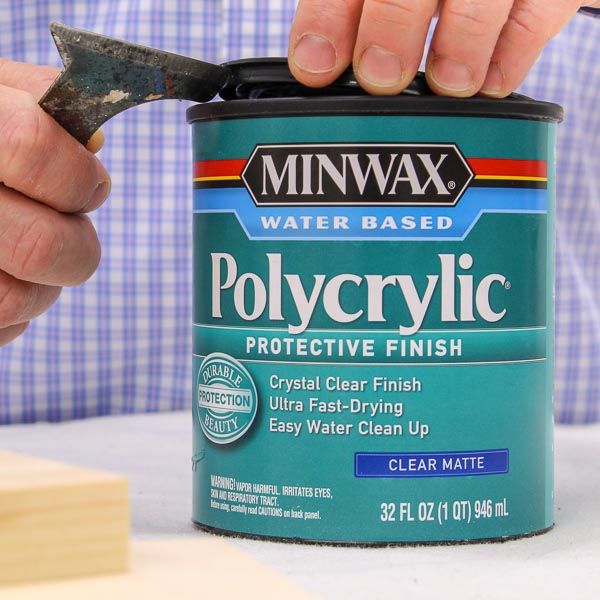
The instructions for the Charred Wood Accelerator recommend sealing the project by spraying it with a lacquer finish. The instructions warn that other finishes may react with the accelerator. I tried using shellac and Polycrylic on some test pieces. They both reacted with the accelerator and pulled the black color off the pieces. My recommendation is to follow the advice of the instructions and use a spray lacquer finish.
Related: Polycrylic vs Polyurethane: Are They The Same?
There are a few things to note about using a lacquer finish. First, this spray lacquer is extremely flammable. The vapor may cause flash fires. We need to work in a well-ventilated area away from heat, sparks, and flames. The instructions on the can even warn that electric motors could cause the vapors to ignite. Don’t mess around with this stuff! Be sure to follow all of the instructions.
Second, this spray lacquer is sensitive to solvents like acetone. Some nail polish removers contain acetone. This bathroom vanity might be exposed to nail polish remover, which could remove the lacquer finish.
Related: Mineral Spirits vs Acetone (Differences + Which to Use)
Lacquer finishes can also be sensitive to heat. This bathroom vanity might be exposed to hot hair dryers, curling irons, etc. This means a lacquer finish might not be the best choice for a bathroom vanity.
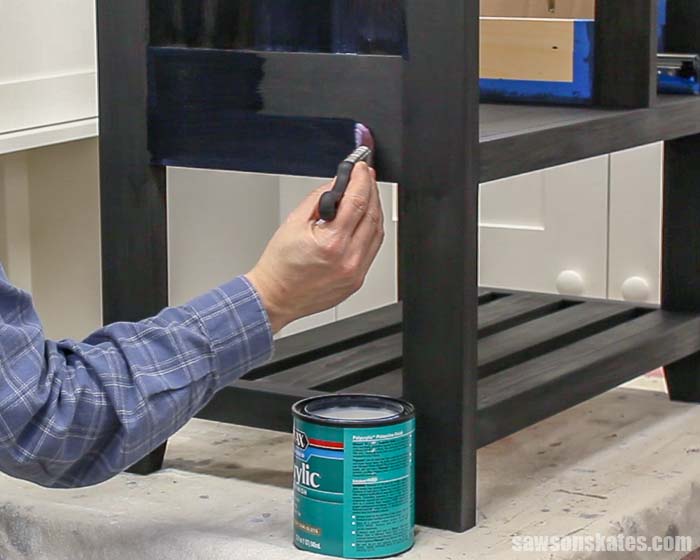
The accelerator instructions suggest that polyurethane can be used if the lacquer is applied first. I chose to apply a spray lacquer and topcoat it with polyurethane. Polyurethane is a durable finish, isn’t sensitive to solvents, and is relatively heat resistant. In other words, polyurethane is a better choice for the vanity.
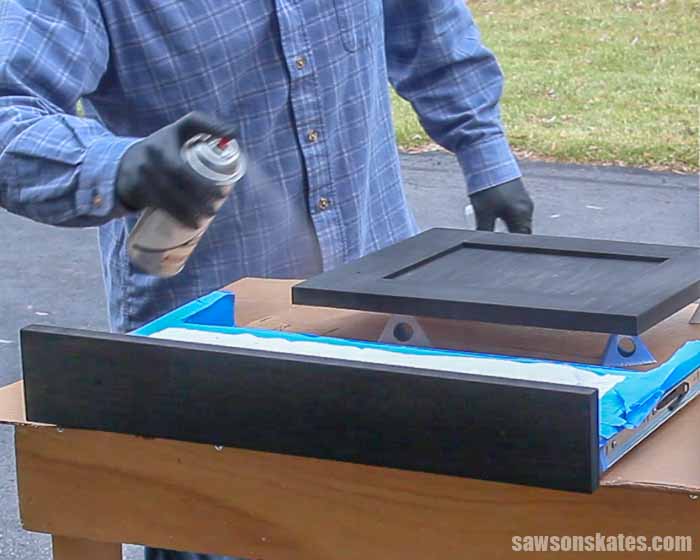
Step 1. Apply the Lacquer
First, I moved the vanity outside. I followed the instructions and shook the can for two minutes. Then I began spraying the lacquer on the charred wood finish. In a few spots, I applied too much lacquer and had some drips. It’s much better to apply several light coats rather than one heavy coat.
I only applied one coat, but next time I would apply two coats. I noticed some black color on my brush when I applied the polyurethane. This tells me some areas on the vanity were not fully covered with lacquer.
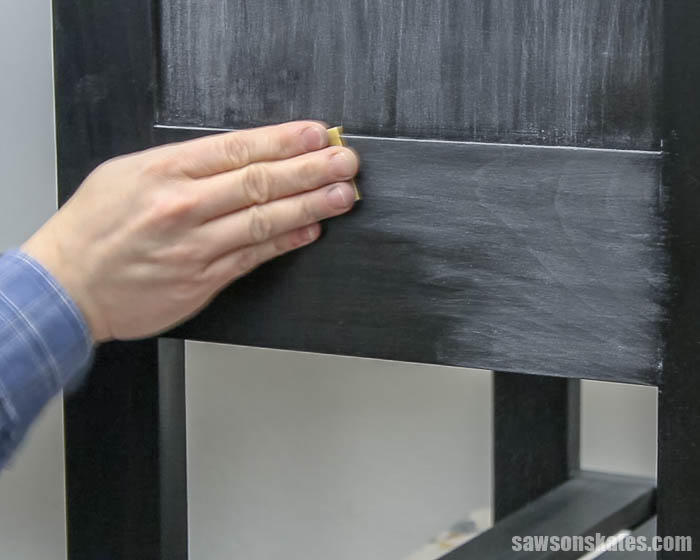
Step 2. Sand the Lacquer
I allowed the lacquer to dry for two hours and then moved the vanity back into my workshop. I lightly hand-sanded the piece with 150 grit sandpaper. Then I removed the majority of sanding dust with my Shop Vac. Next, I removed any remaining dust with a tack cloth.
Step 3. Apply the Polyurethane
I typically like to reorganize my shop, set up a spray shelter, and apply polyurethane with my paint sprayer. But that wasn’t an option this time.
Related: How to Spray Paint Indoors (Without Making a Mess)
I was assembling other projects in my workshop and wasn’t able to move them. For this project, I used a brush to apply a water-based polyurethane. Don’t worry if the first coat of polyurethane appears patchy.
Related: How to Spray Polyurethane
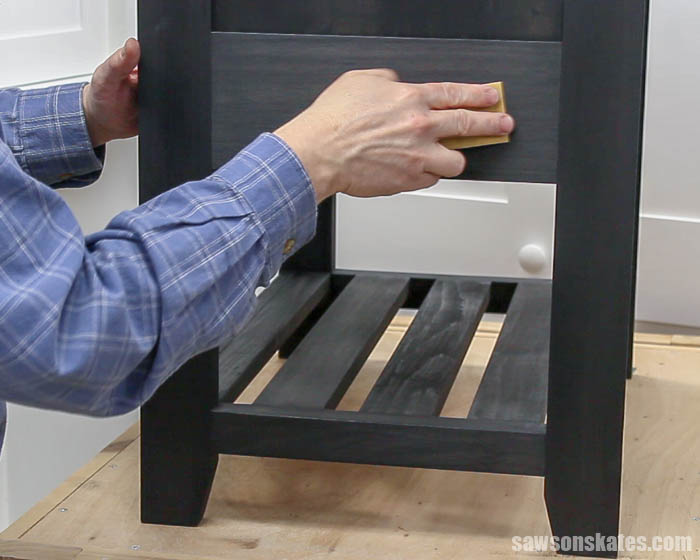
Step 4. Sand the Polyurethane
When the polyurethane was dry, I hand-sanded the piece with 220 grit sandpaper. It will look awful, but this step is necessary. Polyurethane doesn’t like to stick to itself, and we need to rough up the surface, so the next coat has something to bite into. I removed the majority of sanding dust with my Shop Vac. Next, I removed any remaining dust with a tack cloth.
Step 5. Apply a Second and Third Coat
I applied a second coat just like I did the first coat. I sanded with 220 grit sandpaper and removed the sanding dust with my Shop Vac and a tack cloth. Then, I applied the third and final coat.
Final Thoughts
There’s a simple way to get a charred wood finish without using a torch. All we need is a brush and the Vartathane Charred Wood Accelerator.
Thank you for stopping by. If you found this information helpful, would you please pin it to Pinterest? Other DIYers would appreciate it and I would too! Thank you – Scott
Recommended For You

Shop Now
Pin This For Later

Hi there – I’m Scott, a woodworking enthusiast and creator of Saws on Skates, a site I started in 2015 to share easy-to-follow tutorials, space-saving shop tips, and project inspiration for DIYers at any skill level. Learn more about my woodworking journey here.
Can you skip the Lacquer step all together? Or is this a key to getting the desired look as demonstrated in the videoi
Hi Gilbert – The directions recommend using lacquer. I tried a few other finishes and they each removed some of the color, so I would say you shouldn’t skip the lacquer.