DIY Farmhouse Table Top
DIY Farmhouse tables can crack if breadboard ends are attached with pocket screws. Get the same look and reduce the chance of cracks with this easy solution.
What Should I Build Next?
That's the question I help answer.
Every week, I send woodworking ideas to 17,000 DIYers who love building things.
You'd fit right in.
DIY Farmhouse Table
Over the years I’ve received a handful of messages from readers asking why their DIY farmhouse dining tables and DIY farmhouse coffee tables have cracked. Many times these tables have breadboard ends that were attached with pocket screws. Attaching breadboard ends with pocket screws can cause the wood table top to crack.
I worked with my friend Mike from Kreg Tool to develop a simple solution for DIYers to attach breadboard ends. OK, I’ll admit it. He did a lot of the heavy lifting on this design, but I did offer a suggestion or two! Today I’m sharing an easy method to build a farmhouse table top that reduces the chances of cracking the wood.
This tutorial contains affiliate links to supplies and tools. Purchases made using these links help support the Saws on Skates website and allows me to share more projects and tips with you. There is no cost to you for using these links. Visit my site policies for more information.
Before we get into how to make a DIY farmhouse table top, be sure to click the subscribe button at the bottom of this page to sign up for my FREE weekly newsletter loaded with helpful pocket hole tricks, space-saving workshop ideas, clever DIY tips and more!
Table of Contents
- Why Farmhouse Table Tops Crack
- The Solution for Farmhouse Table Tops
- Tips For Making Farmhouse Table Tops That Won’t Crack
- How to Use this Farmhouse Table Top Plan
- How to Make a Farmhouse Table Top
- How to Attach a Table Top
- Get the Free Printed Plan
Why Farmhouse Table Tops Crack
DIY farmhouse table plans are popular. And it’s easy to understand why. There’s something charming about family and friends gathering around a rustic style table to enjoy a home-cooked meal.
That is until you start noticing cracks in the table top. Many of these DIY farmhouse table plans have breadboard ends attached with pocket screws. Breadboard ends are narrow pieces of wood that run perpendicular to the boards of the table top.
Breadboards are an attractive design element, but they will cause the table top to crack when they’re attached with pocket screws.
To understand why a table top cracks we need to talk about wood movement, how breadboard ends were traditionally attached, and what happens when we attach them with pocket screws.
What is Wood Movement?
Wood moves with seasonal changes. It swells when it’s more humid and shrinks when it’s less humid. Wood moves the most across its width. We need to understand wood movement so that we can properly plan and build our DIY furniture projects.
When we look at a table top with breadboard ends we’ll notice the boards of the table top move in one direction while the breadboard moves in a different direction. The breadboard needs to be attached in a way that allows for the boards of the table top to move. The table top could crack if the breadboard restricts or prevents the boards of the table top from moving.
Related: Mistakes with Wood Can Cause Your DIY Furniture to Crack

What is the Traditional Way to Attach Breadboard Ends?
Breadboard ends were used as a way to add strength to table tops. They were also added to hide the end grain of the table and give the piece a finished look.
One traditional way to attach breadboard ends is with mortise and tenon joints. Holes are drilled for dowels through the breadboard and the tenon in the table top. The holes in the tenon are elongated side to side.
The dowel holds the breadboard against the table top, but the elongated holes allow the dowels to slide side to side as the wood expands and contracts. This is a dry joint. In other words, glue is not used on the tenon as this would prevent movement.

What Happens if You Attach Breadboard Ends With Pocket Screws?
When we attach breadboard ends with pocket screws it prevents the table top from moving with seasonal changes. Preventing or limiting wood movement can cause the table top to crack.
The Solution for Farmhouse Table Tops
I worked with my friend Mike from Kreg Tool to develop a simple solution for DIYers to attach breadboard ends. OK, I’ll admit it. He did a lot of the heavy lifting on this design, but I did offer a suggestion or two!
Here’s the solution. This breadboard support joins the table top to the breadboard ends AND allows the wood to move with seasonal changes.
Many farmhouse table tops are made with 2×6s. So this tutorial was made with that look in mind. The outside boards are 2×6s. The inside boards are 1×6s. 1×6s are thinner than 2×6s which allows a space for the breadboard support pieces.
Related: Beginner’s Guide to Wood Sizes
The breadboard ends have a recessed area that accepts the end of the support piece. The end of the support piece has oversized holes. Screws and washers attach the supports to the breadboard ends.
The screw is similar to the traditional method of attaching a breadboard with a dowel. In this case, the screw holds the breadboard against the table top, but the oversized holes allow the screw to slide side to side as the wood expands and contracts.
This is a dry joint. In other words, glue is not used on the support pieces as this would prevent movement.

Tips for Making Table Tops That Won’t Crack
There are a few other steps we can take that will help to prevent our table top from cracking.
First, we should allow the wood to acclimate before we start building. Let’s think about it this way. What would happen if we brought wood that was stored outside (where the humidity was high) into our workshop (where the humidity level was low) and we immediately started building?
The wood is going to move or shrink to adjust to the humidity level of our shop. This means the wood is moving while we’re building. And this means there’s a good chance the wood could crack.
The bottom line is we should let the wood acclimate before we start building. Allowing the wood to acclimate for a week is usually a good rule of thumb.
We also need to attach the top to the aprons or legs in a way that will allow for seasonal changes. See How to Attach a Table Top below for more information.
Back to Table of ContentsHow to Use This Farmhouse Table Top Plan
The plan below is for a method to build a farmhouse table top only. There are no legs or base included with this plan. The first step is to find a farmhouse table plan that you want to build and then use the method outlined below to build the table top.
Option #1: Your Existing Table Top is Made With 2×6s
This is the easiest option. Build the legs/base from the farmhouse table plans you’ve found. Then replace the table top using the plan below.
Many farmhouse table tops are made with 2×6s. So this tutorial was made with that look in mind. The outside boards are 2×6s. The inside boards are 1×6s. 1×6s are thinner than 2×6s which allows a space for the support pieces.
To replace the table top from your existing plan, you’ll simply adjust the length of the boards from this plan to match the length of the boards from your plan.
Option #2: Your Existing Table Top is Made with Boards Other than 2×6s
You can still use this method to build a top for your farmhouse table. Again, you’ll build the legs/base from the farmhouse table plans you’ve found. Then simply follow the plan below and replace the 2× material middle boards with thinner 1× material boards, add the support pieces, and make the breadboard ends.
Video: How to Make DIY Farmhouse Table Top
Watch the quick video to see how to make this farmhouse table top.
NOTE: If you’re using an ad blocker, the video will not display below.
DIY Farmhouse Table Top (Simple)
Printed Plan
- Click here to get the FREE plan (includes detailed instructions, measurements, and bonus tips)
Supplies
- Wood (per printed plan)
- 1-¼” Pocket Screws
- 1-¼” Wood Screws
- Washers
- Wood Glue
Tools
- Tape Measure
- Drill
- Kreg Jig
- Kreg Multi-Mark
- Miter Saw
- Jigsaw
- ⅜” Drill Bit
- Countersink Drill Bit Set
I wanted this solution to be easy for DIYers of any skill level and especially for beginners. This simple table top can be made with just a miter saw and a jigsaw.
Many farmhouse table tops are made 2×6s. 2×6s have round edges. A table saw is often used to rip off those round edges.
This plan uses a combination of 2×6s and 1×6s. 1×6s have square edges. If you have a table saw and want square edges for your project then you can rip off the round edges of the 2×6s.
Related: Beginner’s Guide to Table Saw Safety
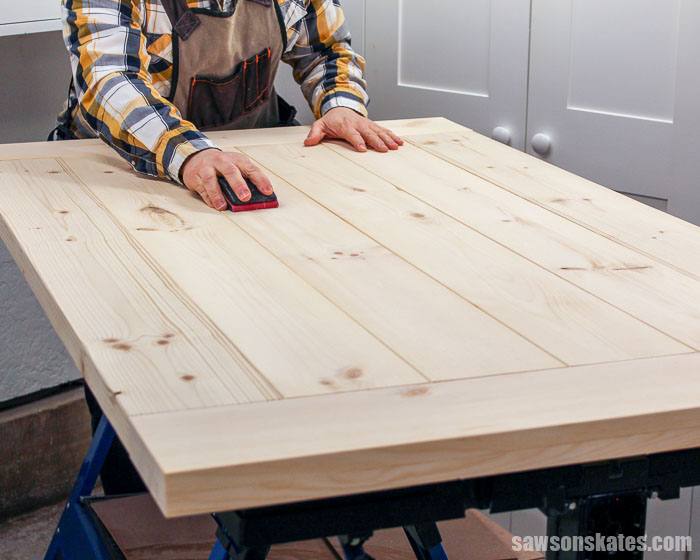
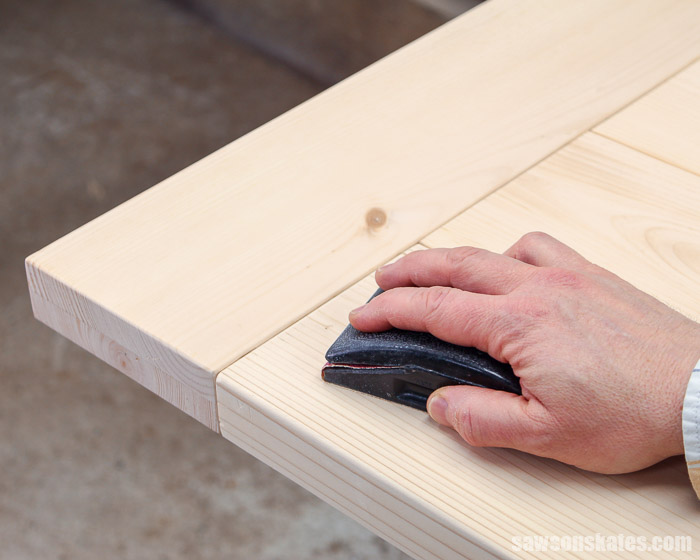
Again, I wanted this to be easy for all DIYers. I understand that many do-it-yourselfers don’t have or are not comfortable using a table saw. So I did not rip the edges off my 2×6s. Instead, I used sandpaper to gently round over the edges of the 1×6s to match the contour of the 2×6s.
The table top I made measures 33″ × 58″ but you can use this method and adjust the length of the boards to make a table top to fit your project.

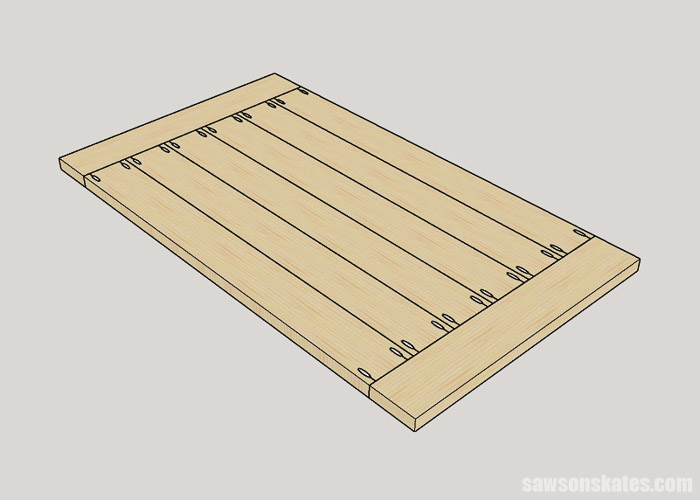
Step 1. Assemble the Table Top
Cut 2 pieces of wood to length for the sides. Cut 4 pieces of wood to length for the middle of the table top.
Related: How to Use a Tape Measure Correctly (Tips for Success)
Drill the pocket holes, apply glue and clamp. Attach using pocket screws.
Related: How to Join Different Thicknesses with Pocket Holes

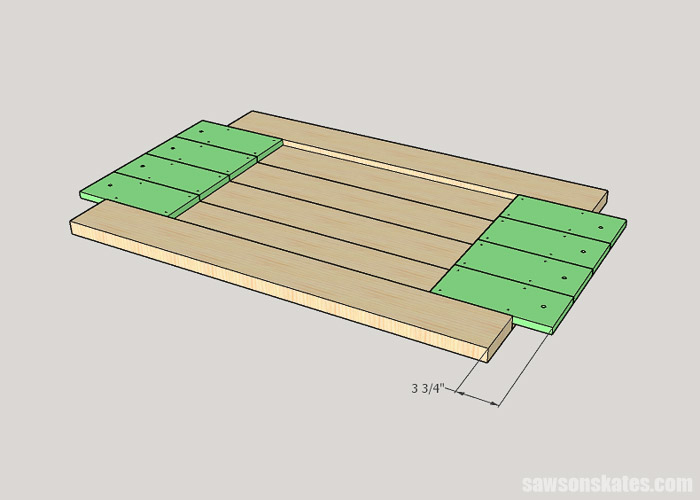
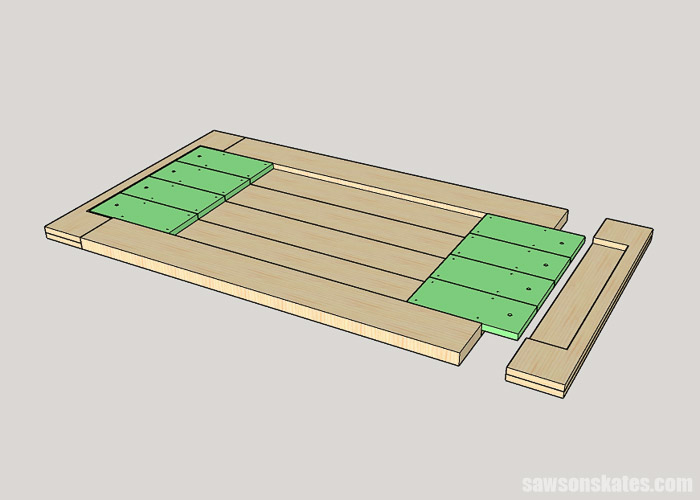
Step 2. Attach the Breadboard Supports
Cut 8 pieces of wood to length for the breadboard supports. Drill a hole to attach the support to the breadboard and drill countersink holes to attach the support to the table top.
Position the supports on the table top, clamp and attach using wood screws.
Step 3. Make the Breadboard Ends
Cut 4 pieces of wood to length for the breadboards. On 2 pieces use a jigsaw to remove an area for the breadboard support.
Apply glue to the two parts of the breadboard and clamp. Attach using wood screws. When the glue is dry sand the edges (or use a router) to match the edges of the 2×6s.
Step 4. Attach the Breadboard Ends
Position the breadboard on the supports and attach using wood screws and fender washers.
The center area of the breadboard is supported by the support pieces. But the ends of the breadboards are not supported. I added a small cleat to support each end of the breadboard. The location of this cleat may need to be adjusted depending on how your legs/base of your table attach to the table top.
Step 5. Attach the Table Top
See How to Attach a Table Top below.
Back to Table of ContentsDIY Farmhouse Table Top (Advanced)
The simple method uses two boards laminated together to make the breadboard ends. You can take a different approach if you have a router or router table. Instead, you could use one 2×6 and then use a router to remove the area that’s needed to accept the support pieces.
Back to Table of ContentsHow to Attach a Table Top
We also need to allow for wood movement when we attach our table top to the aprons or legs of our table. Pocket holes should not be used to attach a table top to the aprons of a table because they do not allow the wood to move.
The best way to attach a table top to aprons is with table top fasteners.
Related: How to Attach a Table Top
Back to Table of ContentsFinal Thoughts
DIY farmhouse table tops often crack. Many times these tables have breadboard ends that were attached with pocket screws. Attaching breadboard ends with pocket screws can cause the table top to crack. Use this simple method to build a sturdy table top that reduces the chances of cracking the wood.
Click here to get the free plan (including the detailed instructions and measurements) now!
Thank you for stopping by. If you enjoyed this tutorial, would you please take a moment and pin it to Pinterest? I’d really appreciate it!
Pin This For Later

Hi there – I’m Scott, a woodworking enthusiast and creator of Saws on Skates, a site I started in 2015 to share easy-to-follow tutorials, space-saving shop tips, and project inspiration for DIYers at any skill level. Learn more about my woodworking journey here.
Hi, just wanted to let you know
I’ve learned so much and appreciate the plans
You have. And I have already made a few items.
Thanks. Vivian
Hi Vivian – Thank you so much for your compliments! I’m glad you’re enjoying the plans!
This is so helpful!! Thank you!!!
Great info. Thanks for all the work on this project.