Wood DIY Earring Holder
Earrings a jumbled mess? Make this easy DIY earring holder! This wood picture frame-style stand is an attractive way to organize studs, hoops and more.

What Should I Build Next?
That's the question I help answer.
Every week, I send woodworking ideas to 17,000 DIYers who love building things.
You'd fit right in.
DIY Earring Holder
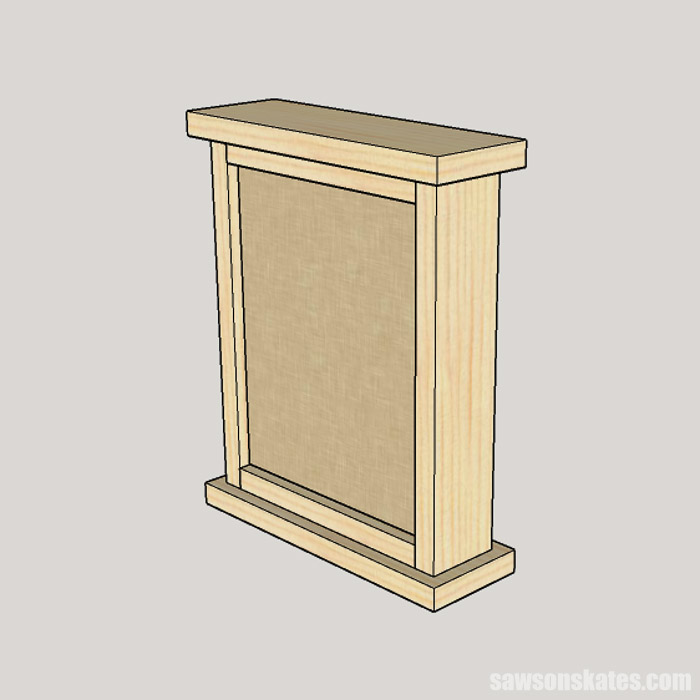
Can’t find a matching pair of earrings? Then make this easy wood DIY earring holder! This picture frame-style holder uses inexpensive burlap to display earrings.
The open weave of the burlap gives the earring stand a rustic feel and makes it easy to organize earrings of different shapes and sizes. It’s perfect for studs, hoops and more.
This is a simple project to make for yourself or to give as a handmade gift. It’s easy for anyone to build with just a few basic tools. Never built a project like this before? Don’t worry. I’ll walk you through it step by step. Let’s get started!
This tutorial contains affiliate links to supplies and tools. Purchases made using these links help support the Saws on Skates website and allows me to share more projects and tips with you. There is no cost to you for using these links. Visit my site policies for more information.
Before we get into how to make a DIY earring holder, be sure to click the subscribe button at the bottom of this page to sign up for my FREE weekly newsletter loaded with helpful pocket hole tricks, space-saving workshop ideas, clever DIY tips and more!
Table of Contents
- Where Can You Use This DIY Earring Holder?
- What Kind of Earrings Can You Organize With This DIY Earring Holder?
- What Skills Do You Need to Make This DIY Earring Holder?
- What Tools Do You Need to Build This DIY Earring Holder?
- What Kind of Wood Do You Need to Make an Earring Holder?
- Where Do You Get the Burlap?
- How Do You Finish the DIY Earring Holder?
- Customize This DIY Earring Holder
- Where to Buy an Earring Holder
- How to Make a DIY Earring Holder
- Get the Free Printed Plan
Where Can You Use This DIY Earring Holder?
This attractive DIY wood earring display was designed to be used on a dressing table, dresser, nightstand, shelf or in a closet, but you could also hang it on the wall.
Back to Table of ContentsWhat Kind of Earrings Can You Organize With This DIY Earring Holder?
This stand uses burlap to display pierced earrings. The open weave of the burlap makes it easy to organize earrings of different shapes and sizes. It’s perfect for studs, huggies, teardrops, dangles, chandelier earrings, and more.
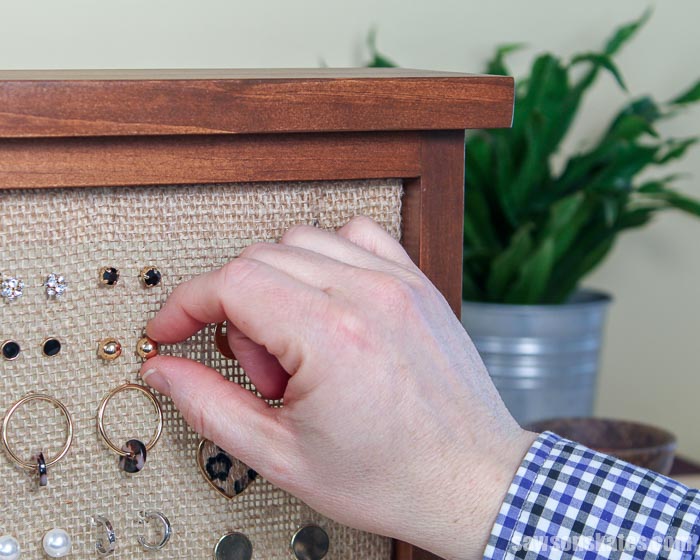
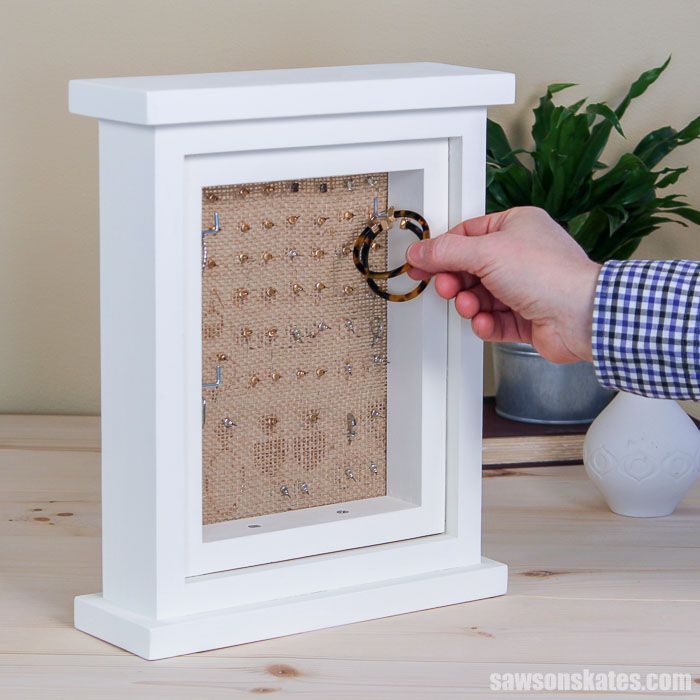
There are also hooks on the backside to organize hoop earrings, bracelets, and short necklaces.
What Skills Do You Need to Build This DIY Earring Holder?
This is an easy do it yourself project for DIYers of any skill level. It’s made with just a few basic tools which makes this a great project for beginners.
Related: 10 Must-Have Woodworking Tools for Beginners
Back to Table of ContentsWhat Tools Do You Need to Build This DIY Earring Holder?
We only need a few basic tools to build this wood earring stand. Tools like a miter saw, Kreg Jig and a drill. It’s handy to have an orbital sander, but you could use a sanding block to smooth the parts instead. It’s also helpful to have an assortment of bar clamps.
You may enjoy these helpful tool tutorials:
- How to Use a Kreg Jig
- Beginner’s Guide to Using a Power Drill
- 7 Miter Saw Tricks Every DIYer Should Know
What Kind of Wood Do You Need to Make an Earring Holder?
This earring display is an affordable project. It doesn’t require much wood. I was able to make mine with scrap wood that I had in my shop.
Related: 71 Scrap Wood Projects (Clever Ways to Reuse Old Wood)
I used common pine to build this stand. Pine is inexpensive and easy to work with. Pine can be purchased at your local home improvement store.
Related: Beginner’s Guide to Wood Sizes
Back to Table of ContentsWhere Do You Get the Burlap?
Burlap is inexpensive and can be purchased at craft stores like JoAnn Fabric (order it online and pick it up in the store), some Walmart stores, and online here. You’ll have extra so you may want to consider making a few holders as gifts.
Fabrics like burlap are purchased by the yard. I bought “half a yard” for this project. This gave me enough burlap to make about five or six earring stands.
Back to Table of ContentsHow Do You Finish the DIY Earring Holder?
I finished these wood earring displays in two different ways. The vertical or portrait earring holder was finished with two coats of this chalk-type paint.
Related: Beginner’s Guide to Spraying Chalk-Style Paint
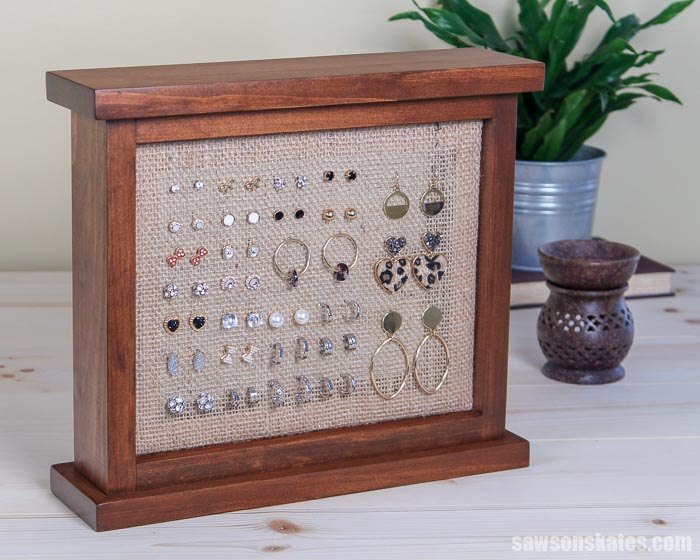
The horizontal or landscape earring holder was stained. I first applied one coat of coffee stain. Pine is difficult to stain and often looks blotchy. The coffee stain helps to reduce this blotchiness.
Related: How to Stain Wood With Coffee
Then I applied a coat of this wood stain. When the stain was dry I applied a coat of wax-free shellac and then three coats of this matte-finish Minwax Polycrylic.
Related: Polycrylic vs Polyurethane: Are They the Same?
Customize This DIY Earring Holder
There are several ways to customize this earring holder. Burlap is available in a variety of colors and even prints. I used a natural-colored burlap for this project. You could use a different color or print for your project.
You could swap out the burlap and instead use window screen mesh, chicken wire, hardware cloth, or decorative aluminum sheet.
Need more room to organize earrings? You could increase the length of the parts to make a larger display area.
Back to Table of ContentsWhere to Buy an Earring Holder
Store-bought earring holders are available if you don’t have the tools or time to make one. Here are a few options you can buy online and have sent to your home.
Back to Table of ContentsVideo: How to Make This DIY Earring Holder
Watch the quick video to learn how to make this easy DIY earring holder!
Easy Wood DIY Earring Holder
Printed Plan
- Get the FREE plan here (includes detailed instructions, measurements, and bonus tips).
Supplies
- Wood (per printed plan)
- 1-¼” Coarse-Thread Pocket Screws
- 1-¼” Fine-Thread Pocket Screws
- 1-¼” Wood Screws
- Wood Glue
- ⅜” Staples
- Hooks
- Burlap
- Chalk-Type Paint (I used this one)
- Coffee Wood Stain
- Early American Stain (I used this one)
- Wax-Free Shellac
- Matte-Finish Minwax Polycrylic
Tools
- Tape Measure
- Drill
- Kreg Jig
- Kreg Multi-Mark
- Miter Saw
- Staple Gun
- ¹/₁₆” Drill Bit
- Countersink Drill Bit Set
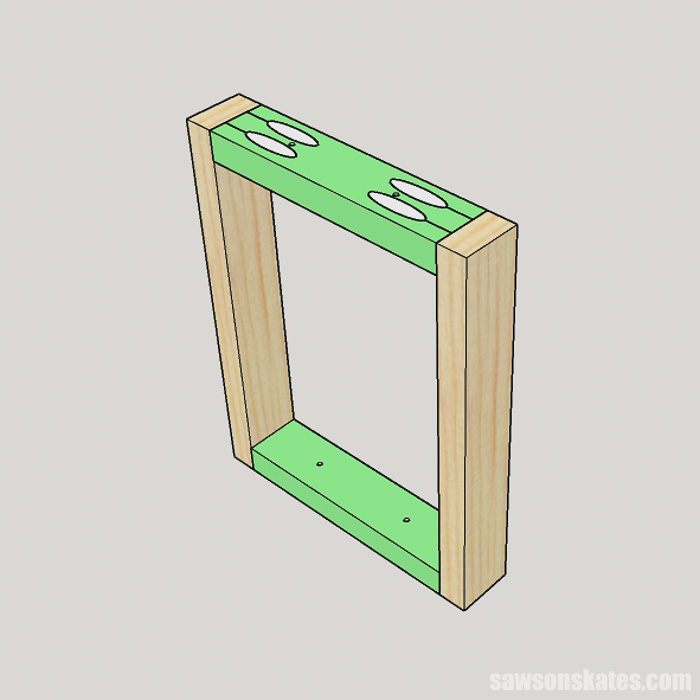
Step 1. Make the Inside Frame
Cut 2 pieces of wood to length for the sides. Next, predrill several holes. These holes will be used to install the hooks in Step 5.
Related: How to Cut Wood for Beginners
Cut 2 pieces of wood to length for the top and bottom and drill pocket holes in each end.
Related: How to Use a Kreg Jig
Next, drill countersink holes on the opposite side of the pocket holes. These holes will be used to attach the inside frame to the outside frame in Step 4.
Related: How to Use a Countersink Bit
Apply glue to the ends of the top and bottom and clamp to the sides. Attach using pocket screws.
Cut a piece of burlap and attach using a staple gun.
Step 2. Make the Outside Frame
Cut 2 pieces of wood to length for the sides. Cut 2 pieces of wood to length for the top and bottom, and drill pocket holes in each end. Drill countersink holes on the opposite side of the pocket holes. These holes will be used to attach the outside frame to the top and bottom frame in Step 3.
Apply glue to the ends of the top and bottom, clamp to the sides, and attach using pocket screws.
Step 3. Attach the Top and Bottom
Cut 2 pieces of wood to length for the top and bottom. Center the top and bottom on the outside frame, clamp, and attach using wood screws.
Step 4. Finish the DIY Earring Holder
I sanded all of the parts until they were smooth. First I used 100 grit, then 120 grit and finished sanding with 150 grit sandpaper.
Then I finished the wood earring displays in two different ways. The vertical or portrait earring holder was finished with two coats of this chalk-type paint.
Related: How to Spray Chalk-Type Paint
The horizontal or landscape earring holder was stained. I first applied one coat of coffee stain. Pine is difficult to stain and often looks blotchy. The coffee stain acts like a wood conditioner to help reduce blotchiness.
Related: What I Use Instead of Wood Conditioner
After the coffee stain was dry (about two hours) I lightly sanded with 220 grit sandpaper. I removed the sanding dust with a ShopVac and applied one coat of this stain.
When the stain was dry (about three hours) I applied a coat of wax-free shellac with an inexpensive chip brush.
Related: What You Need to Know About a Shellac Wood Finish
When the shellac was dry (about an hour) I lightly sanded with 220 grit sandpaper. I removed the sanding dust with a ShopVac and applied three coats of this matte-finish Minwax Polycrylic . I allowed each coat to dry for about two hours. I sanded with 220 grit sandpaper between each coat and removed the sanding dust with a ShopVac.
Related: Polycrylic vs Polyurethane: Are They The Same?
Step 5. Install the Inside Frame
Slide the inside frame into the outside frame and attach using wood screws. Screw the hooks into the holes that were predrilled in Step 1.
Final Thoughts
Are your earrings jumbled mess? Can’t find a matching pair? Then make this easy wood DIY earring holder! This picture frame-style holder uses inexpensive burlap to display earrings.
The open weave of the burlap gives this earring stand a rustic feel and makes it easy to organize earrings of different shapes and sizes. It’s perfect for studs, hoops and more.
This is a simple project to make for yourself or to give as a handmade gift. It’s easy for anyone to build with just a few basic tools.
Get the free plan (including the detailed instructions and measurements) now!
Thank you for stopping by. If you enjoyed this tutorial, would you please take a moment and pin it to Pinterest? I’d really appreciate it!
Shop Now
Pin This For Later

Hi there – I’m Scott, a woodworking enthusiast and creator of Saws on Skates, a site I started in 2015 to share easy-to-follow tutorials, space-saving shop tips, and project inspiration for DIYers at any skill level. Learn more about my woodworking journey here.
What are the hooks installed in Step 5 for? There was no reason given in the directions or tutorial as far ad I can determine. Thanks.
Hi Mike – There’s a note (and photo) about the hooks under the “What Kind of Earrings Can You Organize With This DIY Earring Holder?” section of the tutorial. The note says: “There are also hooks on the backside to organize hoop earrings, bracelets, and short necklaces.” Thank you – Scott
Well once again for the great plans. You have out done yourself this time. Happy holidays to you
Thank you, Kevin! I’m glad you enjoyed the plans.