How to Buy Wood (Top Tips for Choosing Woodworking Lumber)
Learn how to select the best wood for your woodworking projects! Discover insider tips about what to look for and where to buy top-quality lumber.
What Should I Build Next?
That's the question I help answer.
Every week, I send woodworking ideas to 17,000 DIYers who love building things.
You'd fit right in.
Woodworking requires time, patience, and the right materials. But with so many wood varieties, how do you know which is right for your project?
In this article, I’m sharing how to select the best lumber for your DIY projects, from recognizing the difference between hardwoods and softwoods to understanding their pros and cons. I’ll also give you tips on where to shop for wood and how to choose the straightest boards.
By following these guidelines, you can be confident you’re buying the right wood for your needs, ensuring you’ll get the best results possible.
Table of Contents
- What Type of Wood Should You Buy?
- What to Know About Wood Sizes
- Where to Buy Wood
- How to Choose Wood
- How to Get Wood Home
- How to Store Boards
- Allow the Wood to Acclimate
This article contains affiliate links. If you purchase from these links, I may earn a small commission at no additional cost to you. Visit my site policies for more information.
What Type of Wood Should You Buy?
When choosing wood, one of the most important considerations is what type best suits your project. You’ll want to think about how you’ll use the project and choose lumber that can withstand that type of wear and tear.
Questions you want to ask yourself while considering wood types include:
- Will your project be used indoors or outdoors?
- Is it furniture or cabinetry that needs to withstand heavy use or a decorative piece that will see less wear and tear?
- What type of finish and color do you want to achieve?
Once you know the answers to these questions, you can start looking into specific wood varieties. Here are some popular wood types:
Softwood vs Hardwood
Two terms you’ll see when researching wood types are “softwood” and “hardwood.” Each has its own unique properties and advantages, so it’s important to understand the difference.
What are Softwoods?
Softwoods are a type of lumber that comes from coniferous or cone-bearing trees, which have needles instead of leaves, such as pines, firs, and spruces.
They’re generally more lightweight and less dense, making them softer than hardwoods. For example, the common pine boards at your local home improvement store are easily dented. Pine is so soft that you can push your fingernail into it.
Softwoods are considered easy to work but are also less durable and often less resistant to moisture and decay. They are typically faster growing, making them easier to source and less expensive than hardwoods.
Here are some of the advantages of softwoods for woodworking:
- Easy to Work: Softwoods are easier to cut, plane, and sand than hardwoods, making them a good choice for beginners.
- Affordable and Widely Available: Softwoods are generally less expensive and more readily available than hardwoods, making them a good choice for projects where cost is a factor.
- Versatile: Softwoods can be used for various projects, from furniture to toys to home improvement projects.
Here are some of the disadvantages of softwoods for woodworking:
- Not as Durable: Softwoods are not as durable as hardwoods. They are more likely to dent, scratch, or become damaged with use.
- Not as Strong: Softwoods are not as strong as hardwoods, meaning they are less suitable for weight-bearing projects or will see a lot of wear and tear, such as flooring.
- Not as Rot-resistant: Many softwoods are not as rot-resistant, meaning they are more likely to decay if exposed to moisture.
Overall, softwoods are a good choice for woodworking projects that require ease of workability and affordability. However, they are not as durable or strong as hardwoods.
What are Hardwoods?
Hardwoods are dense, strong, and durable lumber from broadleaf or deciduous trees with leaves rather than needles, such as oak, maple, cherry, walnut, and mahogany.
Hardwoods are also more resistant to wear and tear, making them a good choice for woodworking projects such as furniture, flooring, and cabinets.
They are typically more expensive than softwoods but offer several advantages for woodworking.
- Durability and Strength: Hardwoods are extremely durable, making them an excellent choice for projects subjected to a lot of use.
- Aesthetics: Hardwoods come in a variety of colors and beautiful grain patterns, making them a good choice for projects where the wood’s appearance is important.
- Longevity: With proper care, hardwoods can last many years, making them a good investment for long-lasting projects.
Disadvantages of using hardwoods for woodworking:
- Cost: Hardwoods take longer to grow than softwoods, making them more challenging to source and typically more expensive.
- Workability: Hardwoods can be difficult to work with, especially for beginners. They require sharp tools and proper techniques to avoid splitting or chipping.
- Weight: Hardwoods are heavier than softwoods, making them difficult to transport.
Overall, hardwoods are a good choice for woodworking projects that require durability, strength, and beauty. However, they are also more expensive and can be more difficult to work.
If you are a beginner woodworker, I recommend starting with less expensive softwoods like pine. Mistakes are inevitable when you are learning, and softwoods are less expensive to replace than hardwoods. You can move on to hardwoods once you are comfortable with the woodworking basics.
Poplar is a good choice for a budget-friendly hardwood. It’s strong and easy to work with and takes paint well. However, it can be difficult to stain.
Check out these DIY cabinet doors I made using poplar.
Pine
As I mentioned earlier, pine is a softwood commonly used in woodworking. I enjoy using pine to build my projects; however, it has some pros and cons that you should be aware of:
Advantages of pine boards for woodworking:
- Widely available: Pine is available at most home improvement stores and lumber yards.
- Cost-effective: Pine is one of the most affordable woods, making it a great option for budget-minded woodworkers.
- Ease of working: Pine is easy to cut, sand, and shape, making it a good choice for beginners.
- Versatility: Pine can be used for various projects, from simple to complex.
Disadvantages of pine boards for woodworking:
- Not as durable: Pine is easily damaged by dents and scratches.
- Appearance: Depending on your project’s desired aesthetic, pine may not be as visually appealing as hardwoods, such as cherry, oak, or mahogany.
- Knots: Pine often has knots, which can make it difficult to work with and affect the appearance of your finished project.
Another drawback is pine can be difficult to stain, often becoming blotchy, with some areas darker while others remain pale. To avoid this, you can use a pre-stain wood conditioner before staining pine boards to ensure an even finish.
Related: What I Use Instead of Wood Conditioner

Pine boards are available as common, select, and pre-primed.
Common Boards are the least expensive type and have the most knots and defects, which can give projects a rustic look. It’s suitable when the appearance is not a major concern, such as shelving, boxes, and general construction.
I often use common pine to build my projects, taking care to choose the boards with the fewest knots and cutting carefully to avoid any large ones. This way, my projects look like they’re made from higher-quality select pine, but I only pay the price of common pine.
Select Pine Boards have fewer knots and defects than common pine but are more expensive. It’s a better choice for projects where the wood’s appearance is more important, such as furniture and bookcases.
Pre-primed Boards have been coated with a primer, saving you time and effort when building painted projects.
Primed pine can be a convenient option for some projects, but it’s important to be aware of the potential drawbacks.
I planned to paint the base of my mobile miter saw stand, so I thought using pre-primed lumber would save time and steps. However, I found that the primer was rough and bumpy in some areas, which required sanding. Additionally, the edges of the boards were finished differently. Some were square, while others were round, like 2×4s, which looked unprofessional when I joined them.
I also found that the primed pine was weaker than the common pine I usually buy, causing some pieces to split or break when screwed together.
From my experience, I think pre-primed might be best suited for trim work, such as doors and windows, rather than projects that require assembly. If you are considering using it for a project, I recommend you test it on a few joints before investing in enough for your whole project.
In short, pine is a versatile, easy-to-work wood, excellent for projects that don’t require high levels of durability. It’s also relatively affordable, making it a good choice for beginners and budget-minded woodworkers.
Construction Lumber
Construction or framing lumber is commonly used for building houses, such as walls. It’s usually sourced from softwoods like spruce and pine; however, you’ll also see douglas fir, which may cost a bit more.
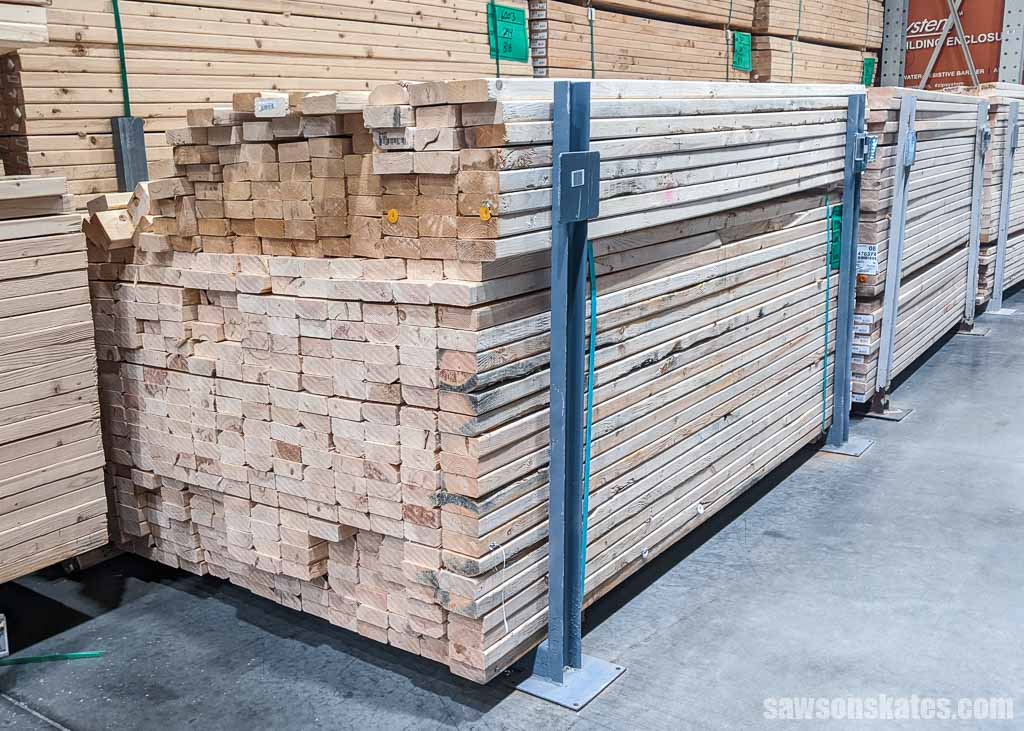
Framing lumber is typically sold in sizes such as 2×4, 2×6, and 2×8. It’s relatively affordable and easy to find, making it a popular for woodworking projects and DIY furniture builders.
Related: Beginner’s Guide to Wood Sizes
Here are some of the advantages of using construction lumber for woodworking:
- It is inexpensive.
- It is easy to find.
- It is available in standard sizes.
- It is strong and durable.
- It can be stained or painted to match any décor.
However, there are also some disadvantages to using construction lumber for woodworking:
- It is not as attractive as some other wood types.
- It may contain knots or other defects that can affect the appearance of the finished project.
- It’s not suited for making fine furniture.
When using construction lumber to build DIY furniture, one thing to keep in mind is that the boards have rounded edges. In my opinion, this can create a less-than-desirable look when the rounded edges are butted up against a cut or square edge. You can use a table saw to remove the rounded edges to achieve a cleaner look.
Related: 21 Table Saw Safety Rules (& Mistakes to Avoid)
If you don’t have a table saw or are uncomfortable using one, you can use a handheld router and roundover bit to give cut edges a matching rounded edge.
Overall, construction lumber is a great option for woodworking projects but can have drawbacks. It’s important to consider the look you’re going for and your budget before deciding whether or not it’s suitable for your project.
Furring Strips
Furring strips are narrow pieces of wood; usually 1×2s or 1×3s, mounted to a wall, ceiling, or other surface to create a level plane for attaching materials such as drywall, paneling, or siding.

Compared to common pine boards, the quality of furring strips is generally low. They are not as straight or smooth as common pine and typically have more knots, cracks, and other imperfections. They are usually best used for construction purposes, where they will be covered or hidden.
Pine boards, on the other hand, are made from higher-grade wood with fewer knots and other defects. They are also straighter and smoother than furring strips.
However, furring strips are less expensive than common pine boards. If you are looking for a budget-friendly option for a project where the wood’s appearance is not essential, furring strips may be a good choice.
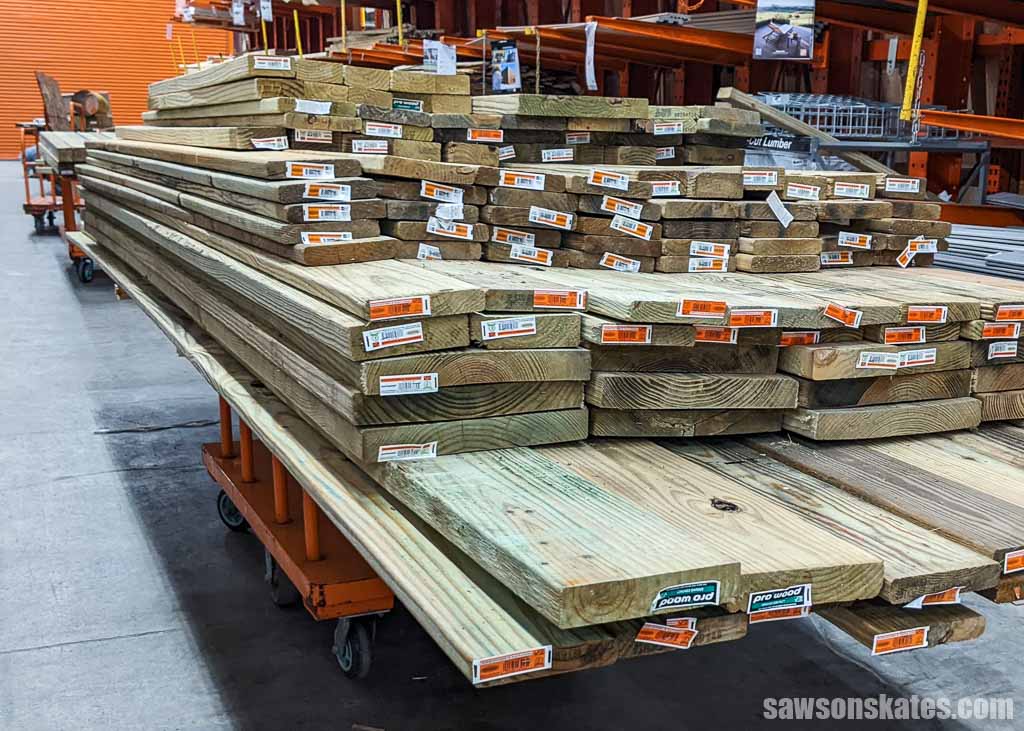
Pressure Treated
Pressure-treated lumber is wood, usually southern yellow pine (SYP), soaked with chemicals, making it resistant to decay and insects. It’s best suited for outdoor projects like decks, fences, and other outdoor structures.
Here are the advantages of using pressure-treated wood:
- Durability: Pressure-treated wood is durable and can withstand years of exposure to the elements.
- Resistance to rot and decay: The chemicals used to treat pressure-treated wood prevent it from rotting or decaying.
- Resistance to insects: The chemicals used to treat pressure-treated wood also repel insects, such as termites and carpenter ants.
- Cost-effective: Pressure-treated lumber is typically more affordable than other woods, such as cedar and redwood.
- Easy to work: Pressure-treated wood is easy to work with using standard woodworking tools.
Here are the disadvantages of using pressure-treated wood:
- Weight: Pressure-treated lumber is heavier than other types of wood, making it difficult to transport and work with.
- Appearance: The chemicals used to treat pressure-treated wood can discolor it and make it difficult to stain or paint.
- Toxicity: The chemicals used to treat pressure-treated lumber can be toxic, so wearing gloves and a mask is important when working with it.
Pressure-treated wood is a good choice for outdoor projects requiring durability and resistance to rot, decay, and insect damage, such as decks and fences.
Related: Why I Don’t Use Pressure Treated Wood for DIY Planter Boxes
Plywood
Plywood, sometimes called sheet goods, is made of thin wood sheets glued together with alternating grain direction, making it strong and stable and less likely to shrink or twist than solid wood.
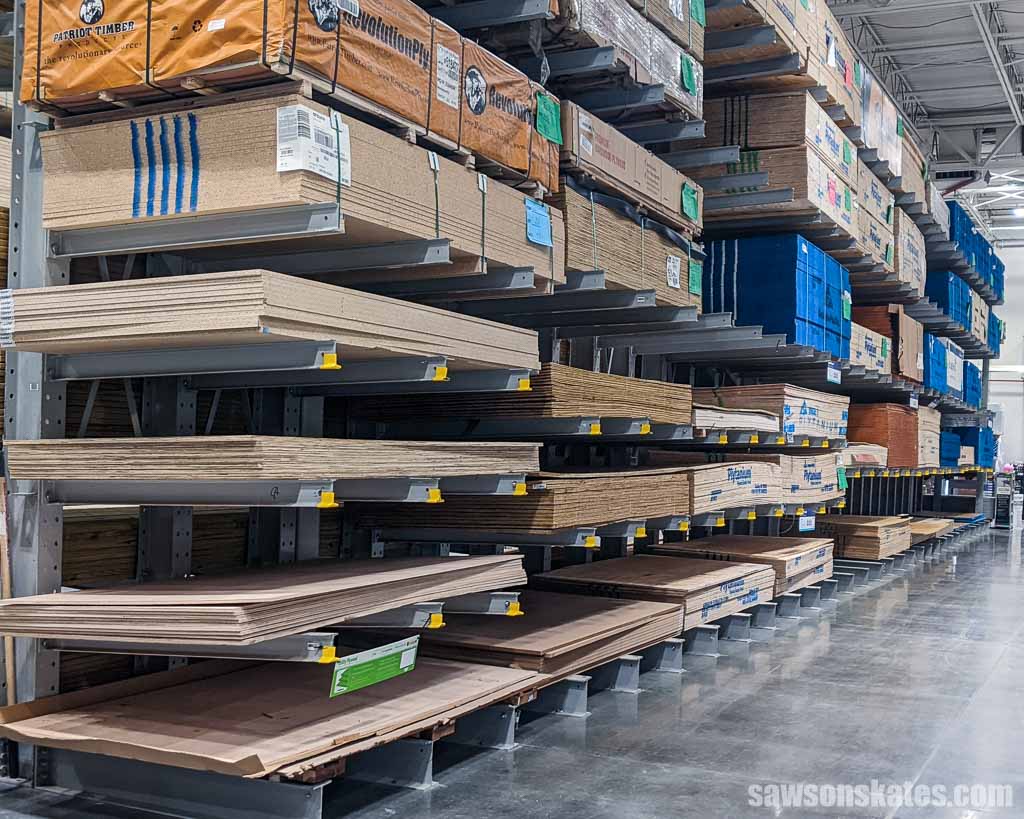
Plywood is available in thicknesses from ⅛” to ¾” and sheet sizes ranging from 4 feet by 8 feet to 2 feet by 4 feet, but you can cut in just about any size you need. It is also available in various grades, which affect the cost and quality of your finished piece.
Plywood has raw edges that you can cover with edge banding or leave exposed for an industrial look.
Consider using plywood when you need to build a project with large flat surfaces such as cabinets and shelving or built-ins like entertainment centers and closet organizers.
Advantages of using plywood for woodworking:
- Strong and stable: Plywood’s glued layers of alternating wood grain make it strong and stable, even in large panels.
- Versatility: Plywood is available in a range of thicknesses and grades, making it suitable for various woodworking projects.
- Cost-effective: Plywood is typically more affordable than gluing up a solid wood panel of the same size.
- Easy to work: Plywood is relatively easy to cut, saw, and drill.
Disadvantages of using plywood for woodworking:
- Appearance: Plywood may not have the same aesthetic appeal as solid wood. The visible edges of plywood have a layered appearance, and the grain pattern may not be consistent.
- Formaldehyde emissions: Some types of plywood contain formaldehyde, a volatile organic compound (VOC) that can be harmful to human health.
- Limited selection of species: Plywood is available in fewer wood species than solid wood, so you may be unable to find the exact type you want for your project.
Plywood is a good choice for large flat surfaces such as cabinets, shelves, and built-ins. It’s versatile, strong, stable, and relatively easy to work with, but its size can be challenging for woodworkers with small shops like mine.
I often have to break it down in my driveway before bringing it into my workshop, and even then, it can be difficult to maneuver. As a result, I rarely use plywood for my projects.
Related: My 12×13 Small Woodshop Layout
What to Know About Wood Sizes
One thing I’ve found confusing for beginners when buying wood is the difference between its nominal size and actual size.
Lumber is sold in nominal sizes, which are the wood’s dimensions before it is planed and surfaced. The actual size is slightly smaller than the nominal size because jointing and planing removes some of the material.
These differences can be surprising when you buy a 2×4 board and discover the actual dimension is 1-½” × 3-½”.
The most common wood sizes for woodworking are:
- Dimensional lumber: Dimensional lumber is typically sold in 8-foot lengths and has nominal dimensions such as 1×3, 1×4, 1×6, 2×4, and 2×6.
- Hardwood lumber: Hardwood lumber is typically sold in quarters, which are fractions of an inch. For example, a 4/4 piece of hardwood lumber is actually 1 inch thick. and has nominal dimensions of 4/4, 5/4, 6/4, 8/4, and 12/4.
- Plywood: Plywood is typically sold in 4×8 sheets and has nominal thicknesses of 1/8, 1/4, 1/2, and 3/4 inch.
For more information on wood sizes, please check out my article “Beginner’s Guide to Wood Sizes.”
Where to Buy Wood
You can buy lumber for your woodworking projects in a few different places. Here are a few of the most popular options:
Home Improvement Stores
Home improvement stores such as Home Depo, Menard’s, and Lowe’s typically have a wide selection of wood at relatively affordable prices. However, the quality may not be as good as what you would find at a lumberyard.
When buying lumber from a home improvement store, avoid ordering online and picking it up at the store because you can’t inspect it before you buy it, and you’ll likely end up with poor-quality wood. Instead, I recommend shopping in person and picking out your own wood.
I’ve seen many people in woodworking Facebook groups complain that the lumber at big box home improvement stores is poor quality, and I agree for the most part. However, if you are willing to put in a little effort (and a lot of patience), you can find some decent lumber at these stores.
The key is carefully inspecting each board and selecting the ones with the fewest defects. Don’t write off big box stores completely. Instead, shop in person, plan to spend some time, and pick out your own wood, allowing you to find the best quality boards.
Lumberyards
Lumberyards typically have a wider selection of wood species and grades than home improvement stores. They also have more knowledgeable staff who can help you choose the right wood for your project.
Online Retailers and Sawmills
Several online retailers sell wood, such as specialty hardwoods, which can be a convenient option if you’re unable to find the wood you need locally. However, it is important to read reviews of the retailer before you make a purchase.
Buying directly from sawmills can often be much cheaper than purchasing from traditional online retailers because sawmills cut their own lumber rather than acting as resellers. Some sawmills, such as CR Muterspaw and Bell Forest Products, offer competitive pricing. For example, purchasing 100 board feet (bf) of wood from a mill can be significantly less expensive than buying from a retailer like WoodworkersSource. However, keep in mind that some sawmills primarily sell rough-cut lumber, meaning you may need to mill it yourself, depending on what they offer.
Shipping is another factor to consider when purchasing from sawmills. Having lumber delivered to your home can be expensive, but you can often save money by picking it up at a local freight depot with a rental trailer.
Additionally, Facebook Marketplace and other local sources sometimes offer great prices on wood, though availability varies by location.
If you have access to a local hardwood dealer, you may find excellent deals without going through an online retailer. Some hardwood suppliers operate large warehouses where you can pick out your own boards, often at prices lower than traditional online retailers.
Free Wood
Sometimes, you can even find free wood for your projects. Craigslist and Facebook Marketplace are popular sites where you can search for free wood. This is a great option if you’re on a budget and don’t mind doing some work to clean up the wood before using it.
Related: 14 Ways to Score Free Wood (Build Even if You’re Broke!)
If you are a beginner woodworker, I recommend you start with wood from a home improvement store. This will give you a chance to experiment without breaking the bank. Once you have more experience, you can start buying wood from a lumberyard.
How to Choose Wood
After you’ve decided what type of wood you need for your project, the next thing to do is go shopping for the straightest boards available. You don’t want to buy wood that is wavy, twisted, or bent like a banana! Trying to make straight cuts with boards like this is a nightmare.
Always take the time to inspect each board thoroughly. For me, that means looking for the straightest boards without any splits and the least amount of imperfections.
It may take some digging, but you will find some. I have been known to go through an entire pile of lumber to find the right boards for a project.
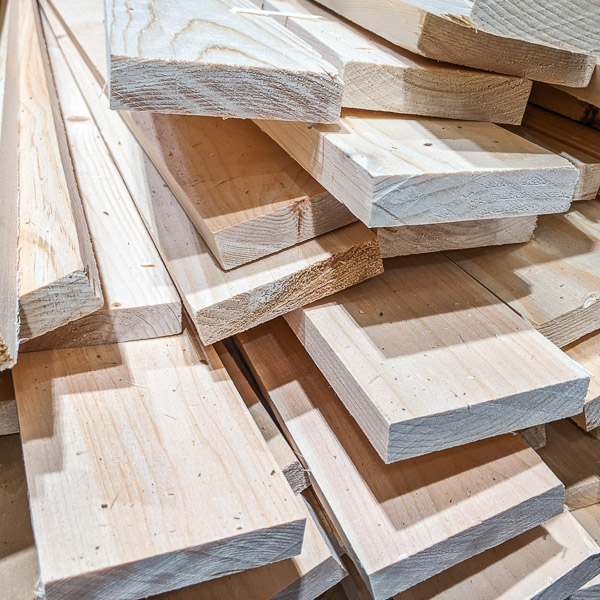
When choosing wood for a woodworking project, inspecting the wood carefully for imperfections is important. Some common flaws to avoid include:
- Warp: Warped wood is wood that has twisted or bowed out of shape.
- Cupping: Cupped wood is wood that has curved upwards along its width.
- Knots: Knots are spots in lumber wood where a branch has grown. Knots can weaken the wood or fall out, leaving a hole in your project.
- Splits: Splits are cracks in the wood. Splits can weaken the wood and can make it difficult to work with.
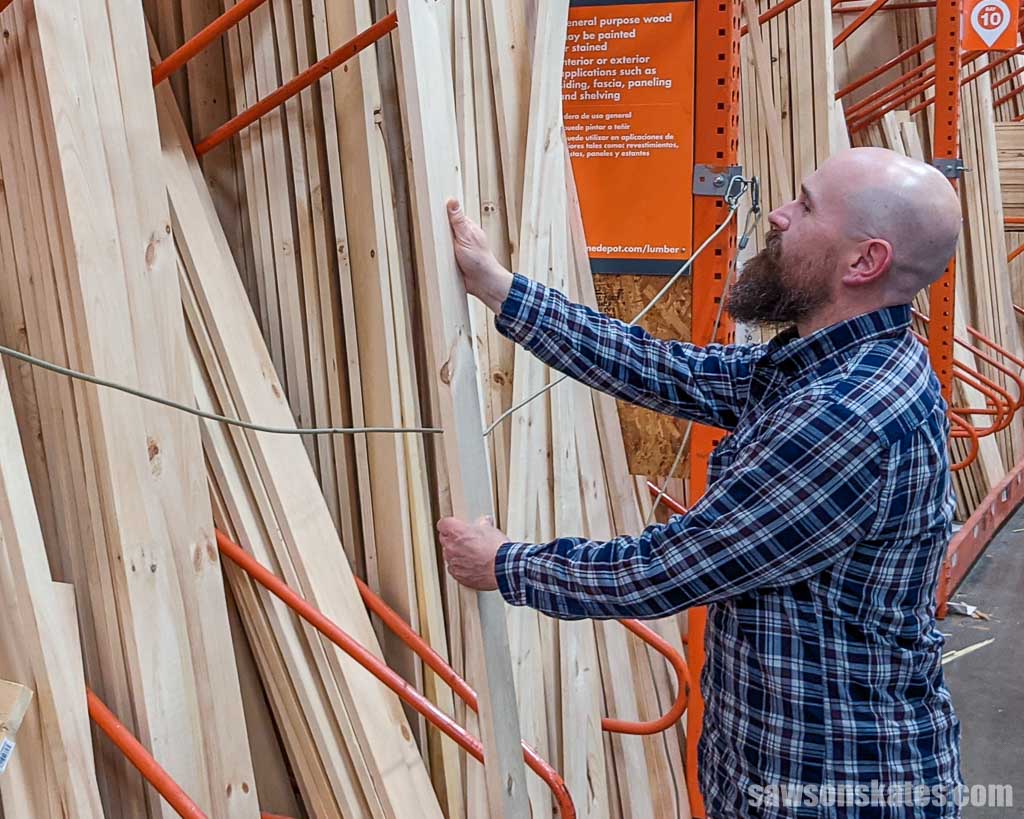
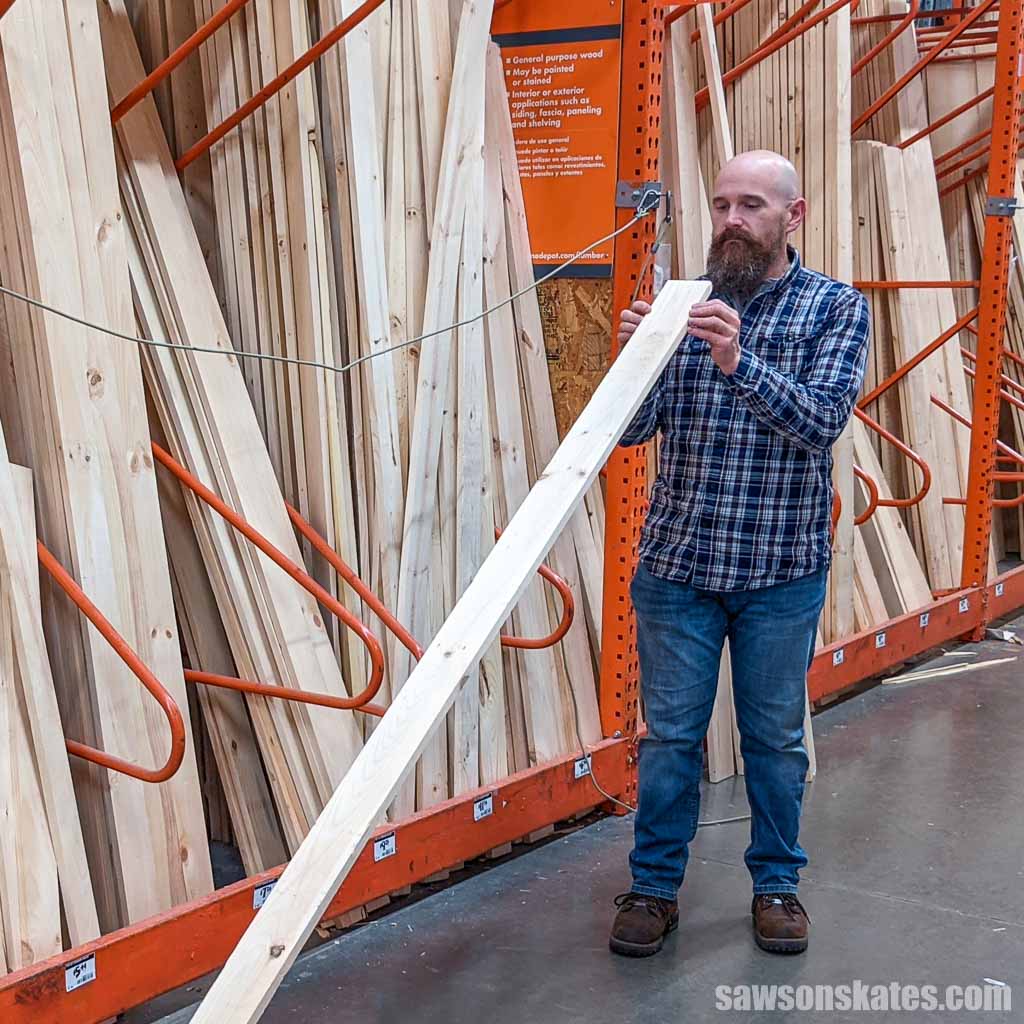
How to Check if a Board is Straight
Step 1. Hold the board up in front of your nose and look down the length of the face to see if it’s straight. If it looks good, go to the next step. If you see any noticeable bends or twists, set it aside and get another board.
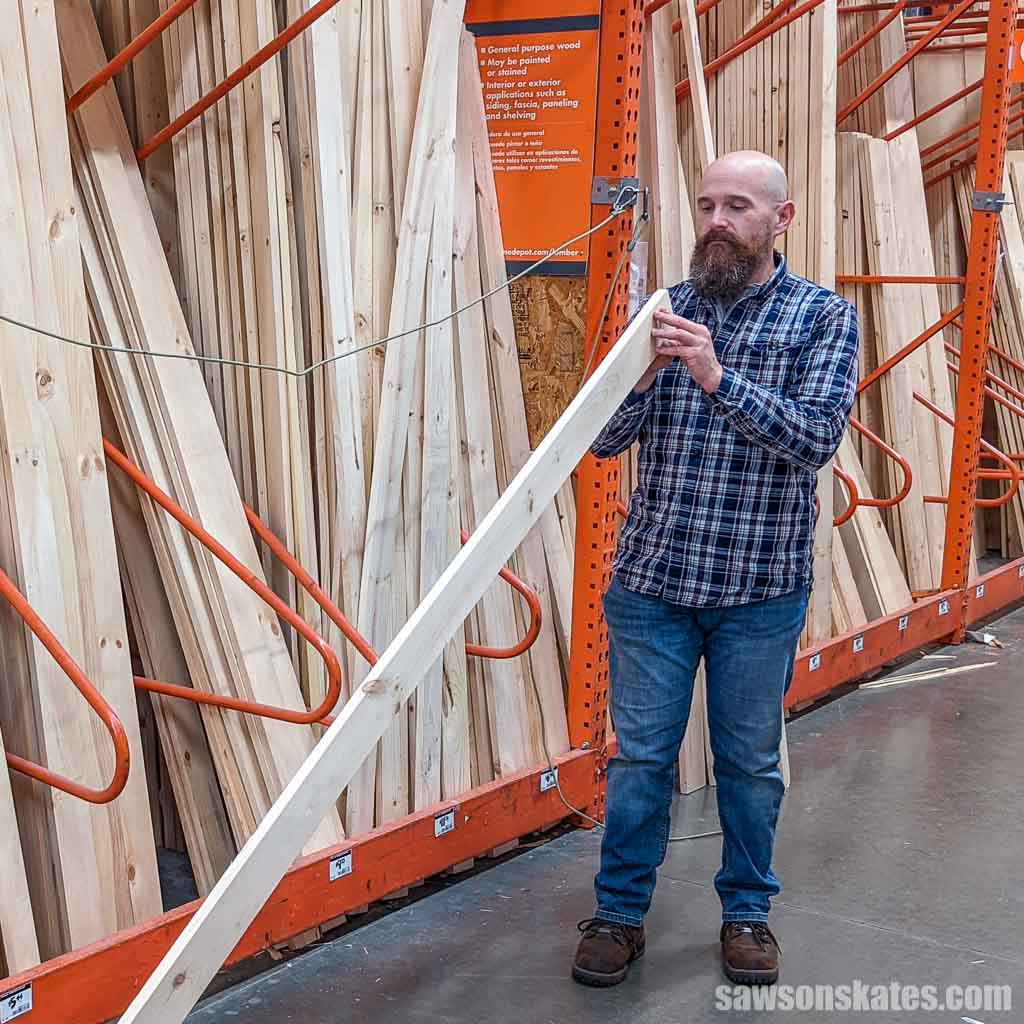
Step 2. Rotate the board a quarter turn and site down the edge. Continue rotating the board a quarter turn and siting down each face/edge until you’ve checked all four sides. If it looks straight, add it to your cart. If you see any noticeable bends or twists, set it aside and get another board.
Step 3. Examine the entire board for cracks, knots, and other flaws. Any boards that are split should be rejected.
Knots can add character and give your project a rustic feel, but they’re hard and difficult to cut and drill. Plus, they can shrink and fall out, leaving a hole in your project.
I usually look for the straightest boards with the fewest knots. I’ll often buy extra wood so that I can cut around any knots that are in a board.
How to Get Wood Home
Once you have selected your wood, you’ll need to figure out how to get it home. Here are a few tips:
Car or SUV
- If you have a car or SUV, fold down the seats. I’ve found many vehicles can fit 8-foot boards with the seats folded down.
- If you have a car with roof racks, you might be able to strap the wood to the roof. Be sure to use ratchet straps to secure the wood tightly. Also, keep in mind that many roof racks are only rated for 150 pounds, so don’t overload them.
- If your project requires plywood, you’ll likely need to have the home improvement center cut the sheet to a smaller size that will fit your vehicle.
Truck
- If you have a truck, you can fit much more wood than you could with a car or SUV. You may even be able to bring home full 4×8 sheets of plywood if your truck is large enough.
- Be sure to secure the wood with ratchet straps.
Friend or Neighbor
- If you have a friend or neighbor with a truck, see if they’d be up for helping you transport the wood home in exchange for buying them lunch.
Rent a Truck
- Many home improvement stores offer truck rentals, which is a good option if you’re buying a large quantity of wood.
Delivery
- Check with your store or lumberyard to see if they offer delivery. Most will charge a fee for this service, but it may be worth it if you are buying a large amount of wood.
How to Store Boards
The best way to ensure that your boards will remain straight and flat when you’re ready to use them is to store them correctly.
If you have the space, it’s best to store wood by stacking it horizontally. Stacked boards should be separated by 1x-inch strips of wood, known as stickers. Place the stickers at the end of each stack and roughly every 16 inches to prevent the boards from sagging.
Don’t store wood by leaning it against the wall because this can cause the boards to bow.
Allow the Wood to Acclimate
Wood moves with seasonal changes and changes in humidity, so you should allow the wood to acclimate to your shop before you begin building.
Related: Mistakes with Wood Can Cause Your DIY Furniture to Crack
Think about it this way. Let’s say you bought some wood stored outside at the lumberyard. It’s been raining, and the humidity was high.
Then, you bring the wood into your climate-controlled workshop with low humidity.
The wood will move or shrink to adjust to the humidity level of your shop. If you were to start building right away, the lumber would shrink while you’re building your project, and there’s a good chance your finished project could crack.
To ensure a successful project, giving the wood time to adjust to the environment where you’ll be working is essential. A week is usually a good amount of time to allow the wood to acclimate.
Final Thoughts
Choosing the right lumber for your project is essential to the success of your build. Remember to select the straight boards, inspect them for imperfections, store them correctly, and allow the wood to acclimate, and you’ll be ready to start your project!
Interested in woodworking but need help figuring out where to start? Join the FREE Saws on Skates® Beginner Woodworking VIP list and gain instant access to top-notch tool comparisons, tool tutorials, and free woodworking plans. Join for FREE now!
Recommended For You

Pin This For Later

Hi there – I’m Scott, a woodworking enthusiast and creator of Saws on Skates, a site I started in 2015 to share easy-to-follow tutorials, space-saving shop tips, and project inspiration for DIYers at any skill level. Learn more about my woodworking journey here.