4 Ways to Make Straight Cuts with a Circular Saw
Learn how to use your circular saw to make laser-accurate straight cuts! Here are four sure-fire ways to cut precise straight lines on boards and plywood!
Make Straight Cuts with a Circular Saw
We’ve all tried to make a straight cut with our circular saw. Despite our best efforts, the blade always wanders away from our pencil line. Then the blade binds up when we try to get the saw back on track. Now we just wasted time, money and plywood. Circular saws don’t have a good way to move in a straight line. I have the solution. Today I’m sharing four foolproof ways to cut straight lines with a circular saw.
Thank you to my friends at Kreg Tool for sending me several of the tools that I’ve included in this post. The tools were sent in exchange for my honest review. All thoughts and opinions are my own.
This post contains affiliate links to supplies or tools I used to complete this project. Purchases made using these links help support the Saws on Skates website and allow me to share more DIY projects. and DIY tips with you. There is no cost to you for using these links. Click here to visit my site policies.
Before we get into how to make straight cuts with a circular saw, be sure to click the subscribe button at the bottom of this page to sign up for my FREE weekly newsletter loaded with helpful pocket hole tricks, space-saving workshop ideas, clever DIY tips and more!
Table of Contents
What is a Circular Saw?
A circular saw is a hand-held tool with a rotating blade used for cutting wood.
Related: How to Change a Blade on a Circular Saw
Types of Circular Saw Cuts
The common types of cuts we’ll make with our circular saw are rip cuts, crosscuts, and miter cuts.
A rip cut is made with the grain of the wood or along the length of the board.
A crosscut is made across the grain of the wood or across the width of the board.
A miter cut is made diagonally across the grain of the wood or across the width of the board.
How Do You Cut Plywood Straight?
DIYers often want to know “how do you make straight cuts on plywood?” One way we can cut plywood is with a table saw.
There are a few things to consider when using a table saw to cut plywood. First, some DIYers are intimidated by using a table saw. Second, lifting a heavy piece of plywood onto a table saw can be tricky. Third, trying to cut a large sheet of plywood on a small table saw can be dangerous.
Related: Beginner’s Guide to Table Saw Safety
Another way we can cut a straight line on plywood is with a circular saw. But we’ve all tried to eyeball a straight cut with a circular saw and it never goes well. Circular saws don’t have a good way to move in a straight line. Despite our best efforts, the blade always wanders away from our pencil line. Then the blade binds up when we try to get the saw back on track. Now we just wasted time, money and plywood.
Our circular saw can’t make those straight cuts by itself. It’s going to need a little help from a fence or cutting guide.
How Do You Make a Straight Cut With a Circular Saw?
When we buy a circular saw it generally doesn’t include a fence. This typically means we need to use the saw freehand. A fence or cutting guide helps the saw make straight, accurate cuts.
Making a DIY cutting guide or buying a store-bought fence will help our circular saw make laser-accurate straight cuts every time.
4 Ways to Make Straight Cuts with a Circular Saw
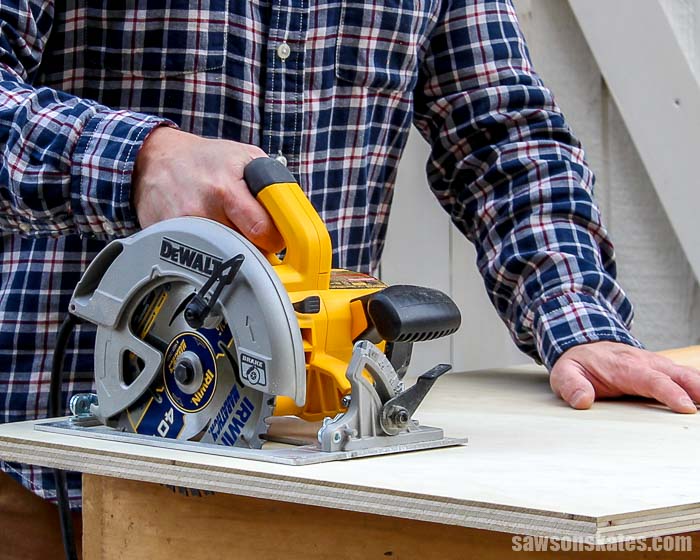
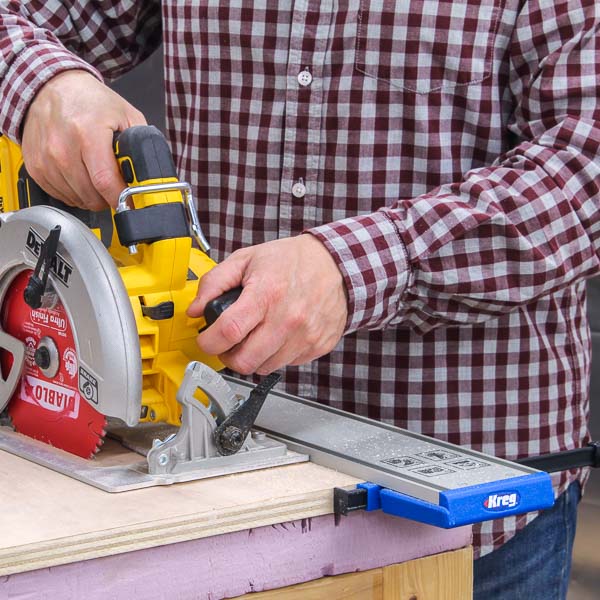
Speed Square
A speed square is one of the easiest ways to make short, straight cuts with a circular saw. And a speed square isn’t a one-trick pony. It can be used for many other shop chores. I also use my speed square to adjust my miter saw for accurate cuts.
How it Works
- Measure and mark the locations for the cut
- Position the blade on the mark and place the speed square against the base plate of the saw
- Push the base plate of the saw against the square and make the cut
Where to Use It
- Crosscuts and rip cuts that are shorter than the length of the speed square
- 45-degree miter cuts
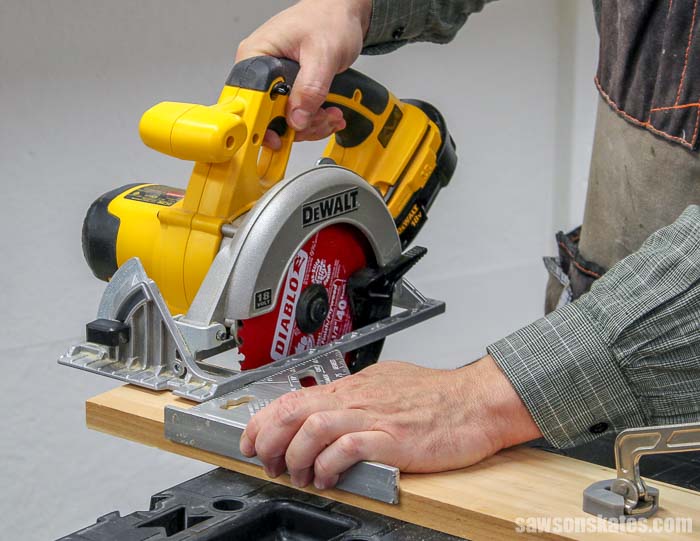
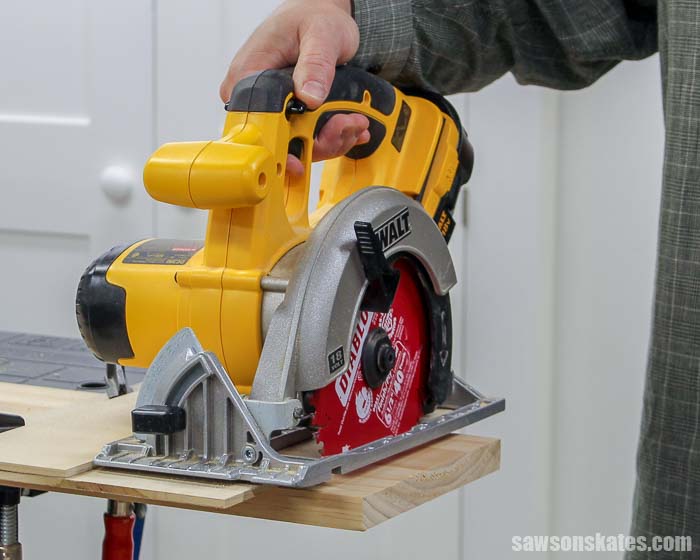
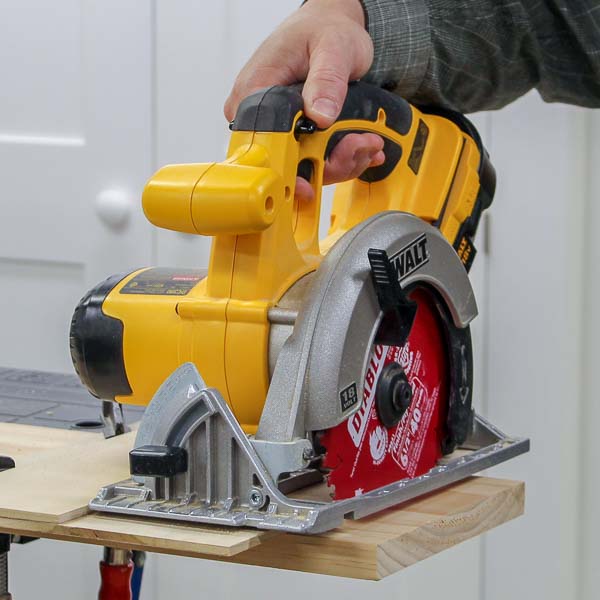
DIY Circular Saw Cutting Guide
A circular saw cutting guide or a crosscut jig helps us make precise crosscuts and miter cuts. It acts as a fence or cutting guide for our circular saw. The base plate of the saw rides against the fence of the jig. The fence forces the saw to make cuts exactly where we want them.
I made my cutting guide in about ten minutes with just two scrap pieces of 1/4″ plywood. You can also use MDF instead of plywood.
The larger piece of plywood acts as a base for the jig. It’s also a guide for the saw blade. The edge of the jig is placed exactly where we want to make our cut.
The narrow piece of plywood is glued to the larger piece. This narrow piece acts as a fence for the base plate of the saw.
I made my cutting guide about 12” long. You can also make the jig longer for longer cuts.
Related: How to Make a DIY Circular Saw Crosscut Jig
How it Works
- Measure and mark the locations for the cut
- Place the edge of the jig on the marks and clamp in position
- Position the base plate of the saw against the fence and make the cut
Where to Use It
- Crosscuts and any miter cuts
- Cuts are limited by the length of the cutting guide
Kreg Rip-Cut
The Kreg Rip-Cut is an easy way for us to cut straight lines with our circular saw. The universal Rip-Cut sled attaches to most popular circular saws. The Rip-Cut fence follows the straight edge of our workpiece which ensures an accurate cut every time. The fence is adjustable and can make cuts up to 24″ wide. We can set the fence once and then make repetitive rip cuts for our DIY projects.
How it Works
- Measure and mark the locations for the cut
- Adjust the fence so the blade will cut along the mark
- Use the handle of the Rip-Cut to push the fence against the workpiece and make the cut
Where to Use It
- Any length rip cuts up to 24” wide
- Repetitive cuts
- Breaking down sheets of plywood or MDF
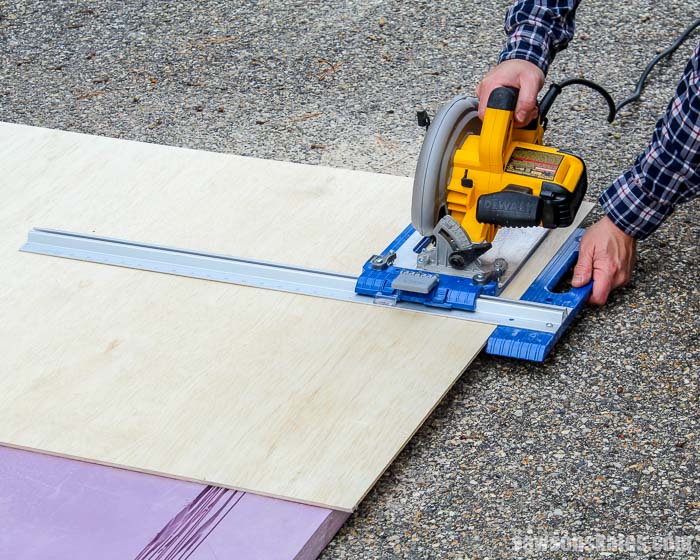
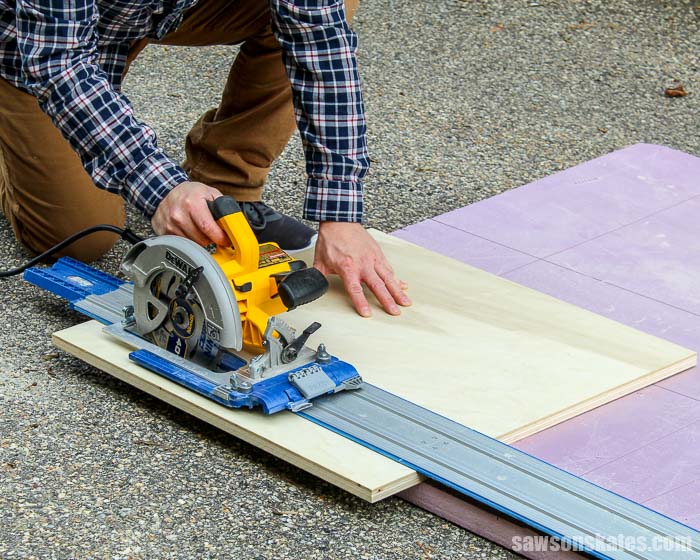
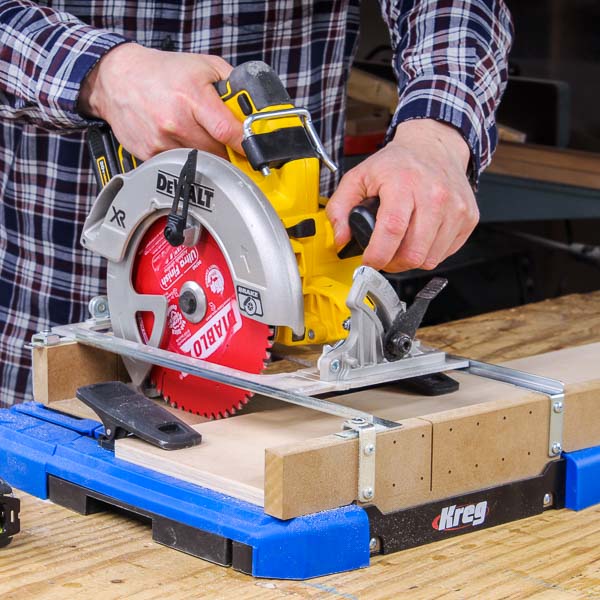
Kreg Accu-Cut
The Kreg Accu-Cut also allows us to cut straight lines with our circular saw. The Accu-Cut attaches most popular circular saws. It essentially turns our circular saw into a track saw.
Think of a track saw like a train track for our circular saw. The saw rides on a guide rail or track as it cuts. This allows us to make long, straight, accurate cuts.
The Accu-Cut is different from the Rip-Cut because it can be used to cut any width board or plywood. The Rip-Cut maxes out at 24”. The Accu-Cut can also make any angle cuts.
There are two versions of the Accu-Cut. The Accu-Cut makes cuts up to 50” long. The Accu-Cut XL makes cuts up to 100” long. An expansion pack for the Accu-Cut adds 50” so it can cut up to 100” long.
The Accu-Cut attaches to a circular saw in a similar way as the Rip-Cut. The bottom of the Accu-Cut has anti-slip guide strips that keeps it in place. This means the Accu-Cut doesn’t need to be clamped in position. The saw simply follows the track which allows it to make straight, accurate cuts every time.
How it works
- Measure and mark the locations for the cut
- Place the edge of the Accu-Cut on the marks
- Position the saw on the track and make the cut
Where to Use It
- Long straight crosscuts and rip cuts
- Any degree miter cuts
- Cuts up to 100” long
- Breaking down sheets of plywood or MDF
Tips for Cutting Straight with a Circular Saw
- Position the speed square, DIY circular saw cutting guide, or Kreg Accu-Cut so it covers the side of the workpiece you want to keep. This way the saw cuts on the waste side, and you won’t damage the piece you want to keep if the saw happens to wander away from the cut line.
- Make cuts on a piece of rigid foam board insulation
- The foam board makes a great work surface for cutting large sheets of plywood and MDF
- The foam board prevents the saw blade from accidentally cutting your workbench, or pavement/concrete when working on the ground
Final Thoughts
A circular saw can’t make a perfectly straight cut by itself. It needs a little help from a fence or cutting guide. There are four ways to make straight cuts with a circular saw. The four ways are with a speed square, DIY circular saw cutting guide, Kreg Rip-Cut or Kreg Accu-Cut.
Thank you for stopping by. If you enjoyed this tutorial, would you please take a moment and pin it to Pinterest? I’d really appreciate it!
Recommended For You
Pin This For Later

Hi there – I’m Scott, a woodworking enthusiast and creator of Saws on Skates, a site I started in 2015 to share easy-to-follow tutorials, space-saving shop tips, and project inspiration for DIYers at any skill level. Learn more about my woodworking journey here.
Good material,Organization and easy to follow and read and well explained. Pretty good job
Thank You ,
Frank.
Hi Frank – Thank you so much for the compliments. I really appreciate it!
Looks like a great way to get started before investing in something like a Festool TS 55 EQ Track Saw.
Should make a minimal first cut to remove the material’s factory edge – necessary yea or nea?
Any recommendation regarding circular saw blade when using the Kreg Accu Cut on two sided melamine?
Hi Norm – Thank you for stopping by. I checked with my friend Mike at Kreg Tool about your question. He told me there are blades specifically made for cutting two sided melamine. He said the blades “can get pricey but the quality makes it worth it if you’re working with it often.” Mike suggested looking for a blade (like this one) labeled specifically for melamine and you should be happy with the results.
Scott. Thanks so much. I’ll put that one on my Christmas List!
Does it matter which way the speed square is held against the board? It seems the way shown the square would tend to move away from the board, if it were against the back edge it would be pressed into the work
Hi Bill – You’re right and thank you for the reminder. I normally place the speed square on the same side where I start the cut so that it’s being pressed into the workpiece. My hand was covering the speed square when I had it in this position. It was difficult to see the difference between the base plate of the saw and the speed square. I flipped it to the opposite side so you could see how it fits on the workpiece. I’ve added a note above the pic that for best results it should be placed so that speed square is being pressed into the workpiece.
Curious about the workbench you have in the 2nd 2 pictures (speed square & cutting guide). Is it portable, would you recommend it, and what’s the make a model? Thanks!
Hi Bill – That is the Kreg Mobile Project Center. It is portable and I would recommend it. I use two of them as my workbench in my shop. You can see it here.