DIY Primitive-Style Step-Back Hutch
Build a primitive-style step-back hutch inspired by one I found on a road trip. It’s a practical storage piece with a touch of old-school charm.
What Should I Build Next?
That's the question I help answer.
Every week, I send woodworking ideas to 17,000 DIYers who love building things.
You'd fit right in.
The other day, my friend Karen and I took a little road trip. She wanted to pick up some locally grown spices, and I wanted to check out a craft co-op that sells handmade goods from local makers. (I’ve been kicking around the idea of selling a few of my projects, so I figured it would be good research.)
On the way, we stopped at a place that grows its own veggies, has a deli with homemade desserts, and offers locally produced gifts, such as soaps and other treats.
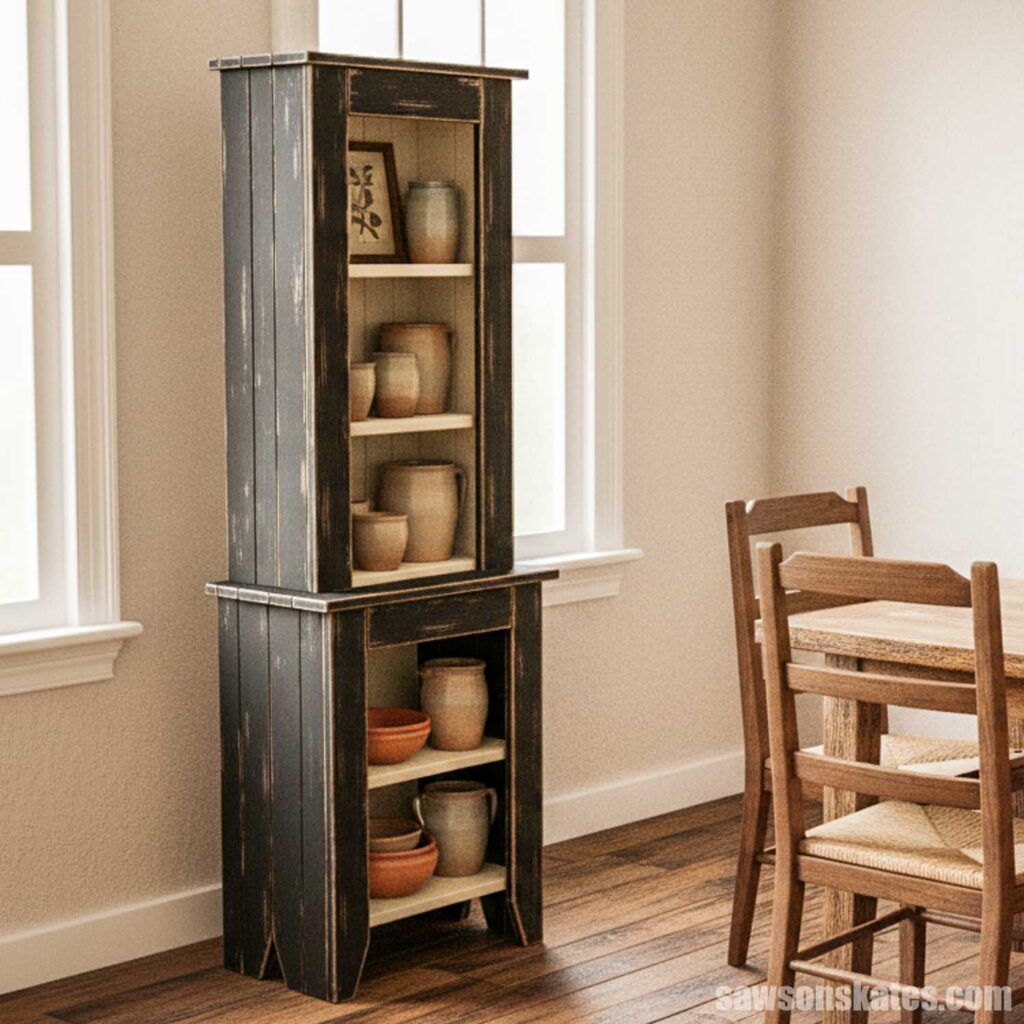
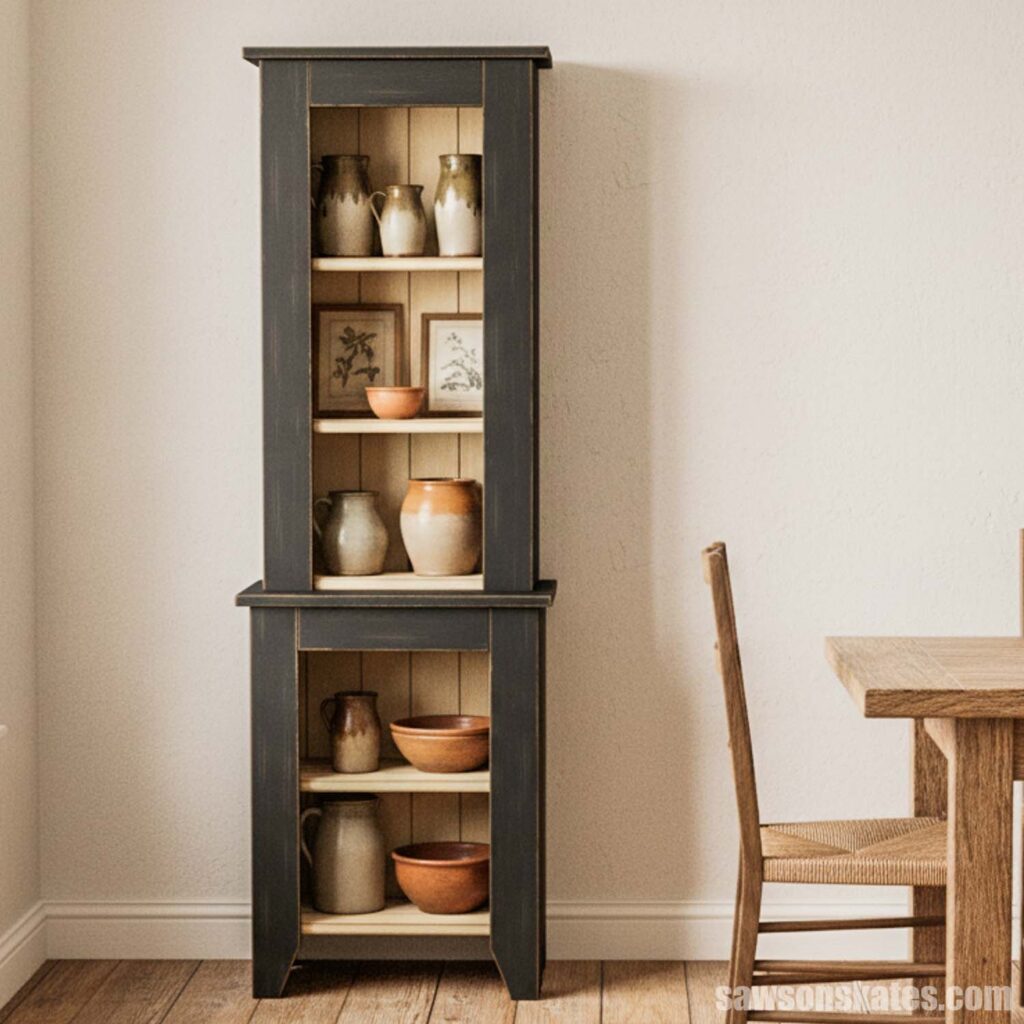
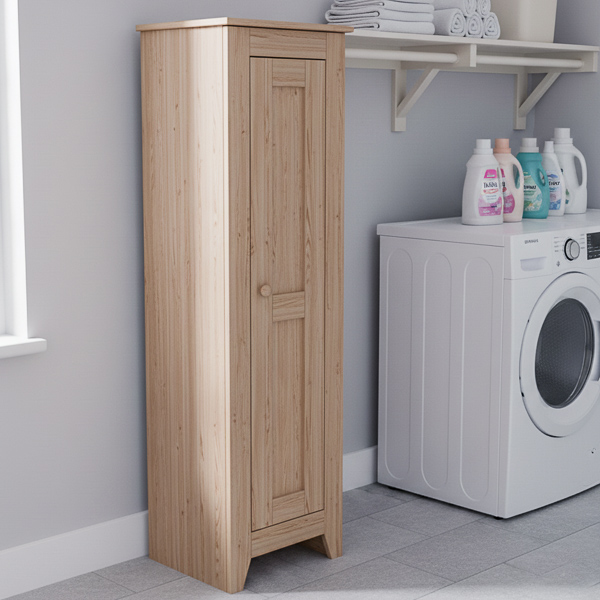
NOTE: I designed this cabinet in SketchUp to lay out the dimensions and construction details, then used AI to create a “finished” image so you can see what the project could look like once built.
The Cupboard That Stole the Show
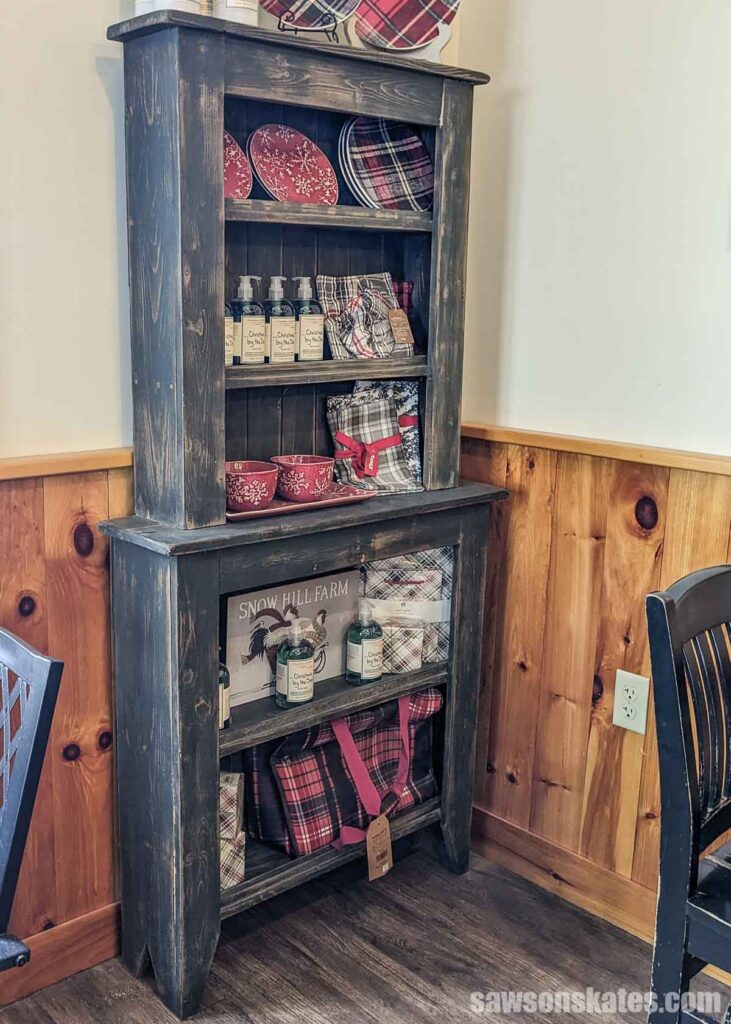
In the deli’s seating area, I noticed this handmade step-back hutch, and it was love at first sight.
A step-back hutch or cupboard is a two-part cabinet where the top section is set slightly back from the bottom. It was a common piece in older homes: part display, part storage. It’s a practical piece with lots of rustic character.
It had the perfect vintage vibe and a beautifully weathered paint finish. I had no idea where I’d put something that large (it was way too big to fit in my house), but I snapped a pic anyway.
From Oversized to Just Right
That evening, back at home, the hutch was still on my mind. In the corner of my dining room, I had a leaning shelf. It fits the space well (of course it did; I designed it for that exact spot, lol), but the style always felt a bit too modern for my 1800s home.
So here’s what I did: I scaled down the large piece to fit my space. I kept the face frame boards the same width as the original, which I think adds to the cupboard’s primitive, whimsical feel. That’s actually one of my favorite things to do: take a large piece and shrink it down. For some reason, the scaled-down versions have a quirky charm that I love.
That Old-Timey Charm
I think part of what I loved about the original hutch is that it looked a little mismatched, like two pieces that had been married into one. Back in the day, that kind of thing happened all the time; people repurposed what they had rather than toss things out. It gave furniture so much more personality.
A Few Ways to Make It Your Own
What’s cool about this hutch is there are lots of ways you could tweak the design to fit your space or style:
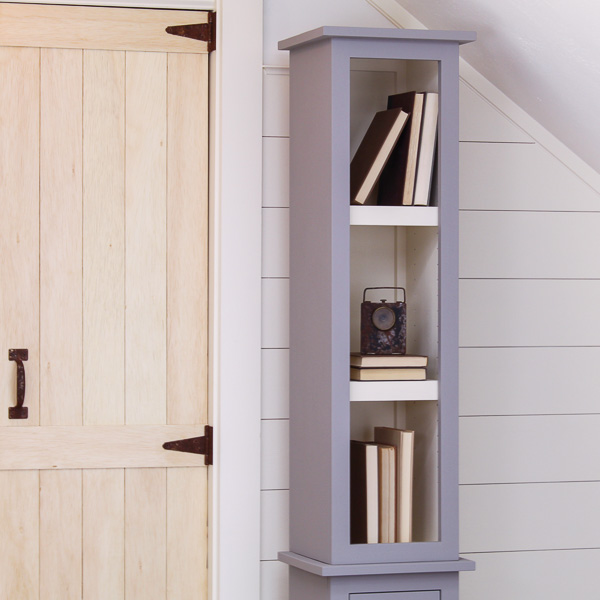
- Skip the top: Just build the bottom section, and you’ve got yourself a great little primitive-style bookcase.
- Add doors: Want to hide what’s inside? Adding doors to the bottom or top and bottom would do the trick.
- Make the shelves adjustable: I used fixed shelves in mine, but you could make them adjustable for more flexible storage.
- Prefer a more updated look? Use narrower boards for the face frame, add some molding beneath the top, or use a router to shape the shelf edges with a decorative profile.
That Perfect Weathered Look
I loved the weathered finish of the original, so I went for a similar look. I painted the outside black to coordinate with a 1940s sideboard I have (someone had already painted it black). For the inside, I started with black, then layered off-white and lightly distressed it. I think leaving it black would’ve made the inside too dark. The white helps lighten it up and makes whatever you put on the shelves really stand out.
I used AI to create a “finished” photo to help you see what the project could look like once built.
Before You Begin
Just a heads-up, most of this project (aside from the back and the face frames) is made from narrow boards that I glued together to make wider panels. You can use plywood, but I think the glued-up panels give it that old-school, handmade look, while plywood has a more mass-produced feel.
Never made panels before or need a refresher? No worries. I’ve got a super simple, text-based class that shows exactly how I do it; no fancy tools required. You can check it out here.
About Sketch & Specs:
This project is part of my Sketch & Specs series, which includes:
✔️ Exploded view diagrams
✔️ Cut list
✔️ Cutting diagrams
NOTE: This isn’t a step-by-step tutorial. It’s designed for DIYers who prefer visuals and specs to guide them.
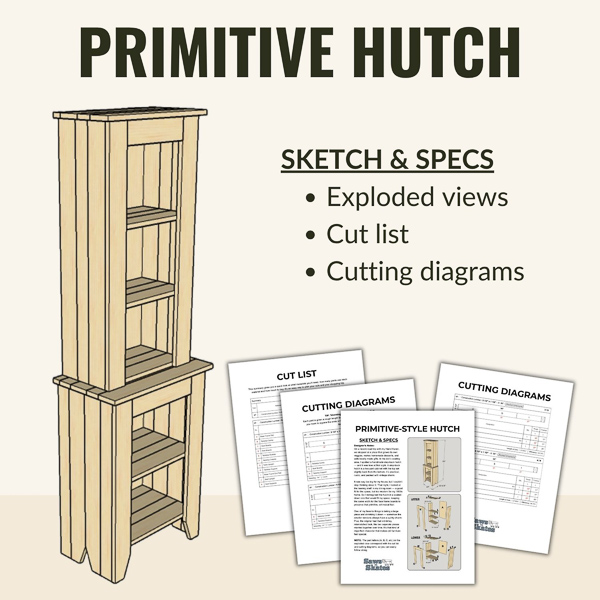
Includes:
- Exploded views
- Cut list
- Cutting diagrams
Final Thoughts
With just a few tools and some glued-up panels, this primitive-style step-back hutch is an easy project that adds rustic charm and practical storage to any space. Customize the finish, add doors, or adjustable shelves to make it your own; it’s a piece you’ll enjoy for years to come.
Recommended For You
Pin This For Later

Hi there – I’m Scott, a woodworking enthusiast and creator of Saws on Skates, a site I started in 2015 to share easy-to-follow tutorials, space-saving shop tips, and project inspiration for DIYers at any skill level. Learn more about my woodworking journey here.