Rustic DIY Chimney Cabinet
Need more storage? Build this DIY chimney cabinet! The mix of open and closed storage makes this tall, narrow bookshelf a great solution for any space.
What Should I Build Next?
That's the question I help answer.
Every week, I send woodworking ideas to 17,000 DIYers who love building things.
You'd fit right in.
DIY Chimney Cabinet
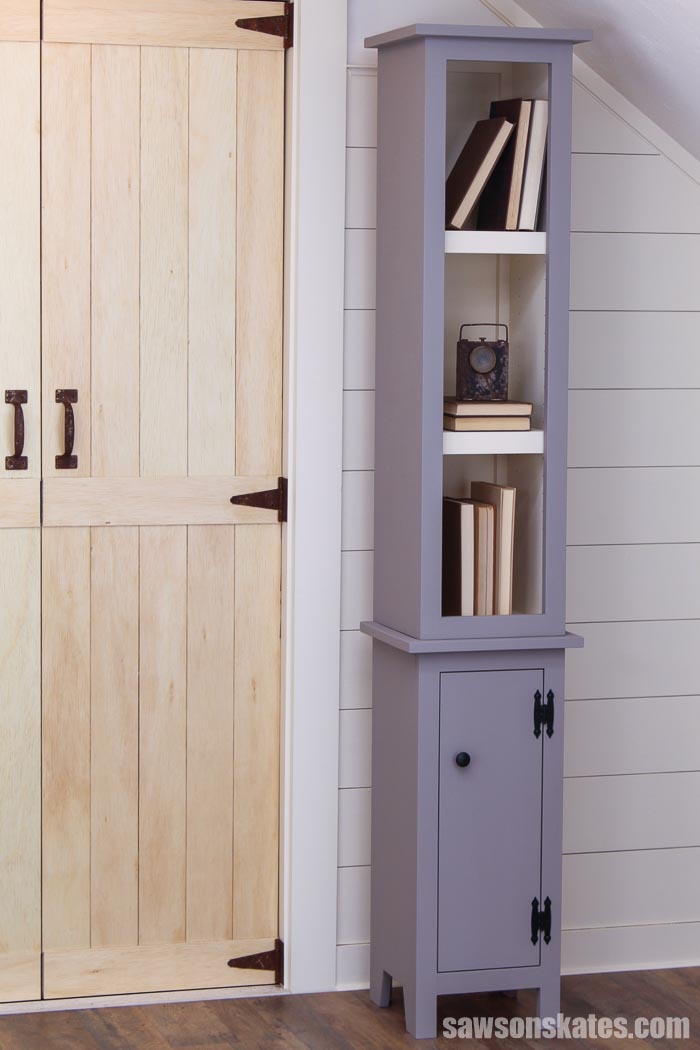
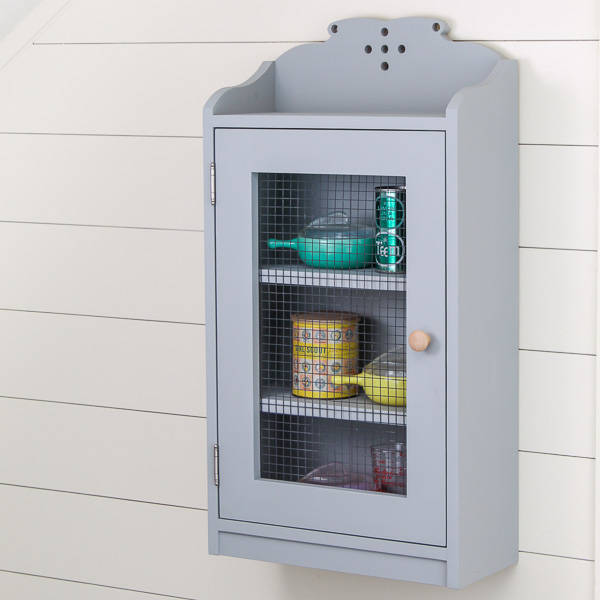
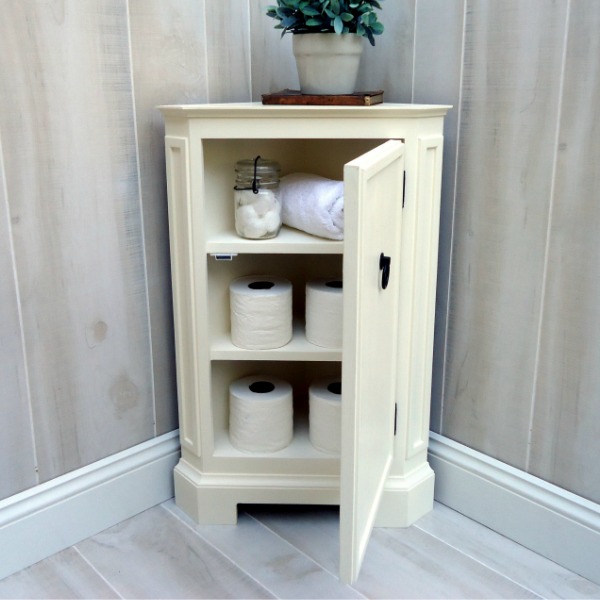
This tall, narrow DIY chimney cabinet is a great solution for any area that is begging for a little extra storage. It’s perfect for a living room, dining room, bathroom, or kitchen. The small size and simple, rustic style of this cupboard complements nearly any decor.
The lower portion of the cabinet features an enclosed storage area with a door and two adjustable shelves. It’s a great place to hide books, magazines, and more.
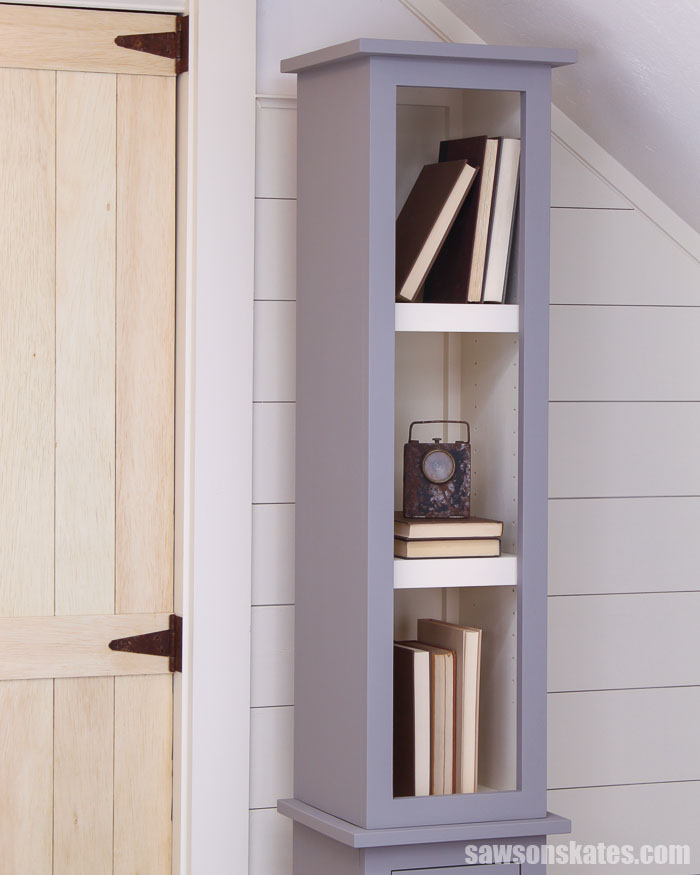
The upper portion of the cabinet features an open bookshelf area with two adjustable shelves. It’s a great place to display books, plants, home decor pieces, and more.
Get the plans and build one today.
This tutorial contains affiliate links to supplies and tools. Purchases made using these links help support the Saws on Skates website and allows me to share more projects and tips with you. There is no cost to you for using these links. Visit my site policies for more information.
Table of Contents
What is a Chimney Cabinet?
A chimney cabinet is a tall, narrow cupboard originally designed to fit in the small, unused space next to a fireplace. This DIY version can be used in almost any room to add storage and display home decor pieces.
Chimney cabinets are a simple box design and typically come in several variations:
- Open bookshelf design
- Enclosed by a single door
- Enclosed by a door at the bottom and open bookshelf at the top
- Enclosed by two doors – one at the bottom and one at the top
This DIY chimney cabinet was inspired by this rustic-style DIY end table. A simple bookshelf was added to the top of the end table to create this slender cupboard.
What Tools Do You Need?
This rustic chimney cupboard is an easy weekend project that can be made using basic woodworking skills and just a few common woodworking tools.
We only need four common tools to build this project. Tools like a miter saw, pocket hole jig, a drill, and a jig saw.
Related: 7 Miter Saw Tricks Every DIYer Should Know
We can use any pocket hole jig to drill the pocket holes. The inexpensive, user-friendly Kreg Jig 320 is a great choice to drill the pocket holes for this project
Related: How to Use a Kreg Jig 320
The jig saw will be used to cut the leg area at the bottom of the cabinet. It can also be used to cut the panels for the back of the cabinet.
I used a table saw to cut the back panels for my project, but these cuts can be made with a jig saw or a circular saw instead.
Related: 4 Ways to Make Straight Cuts with a Circular Saw
I used a shelf pin jig to add adjustable shelves to this project. If you don’t have a shelf pin jig, you can build this cabinet with fixed shelves instead.
Related: How to Use a Shelf Pin Jig
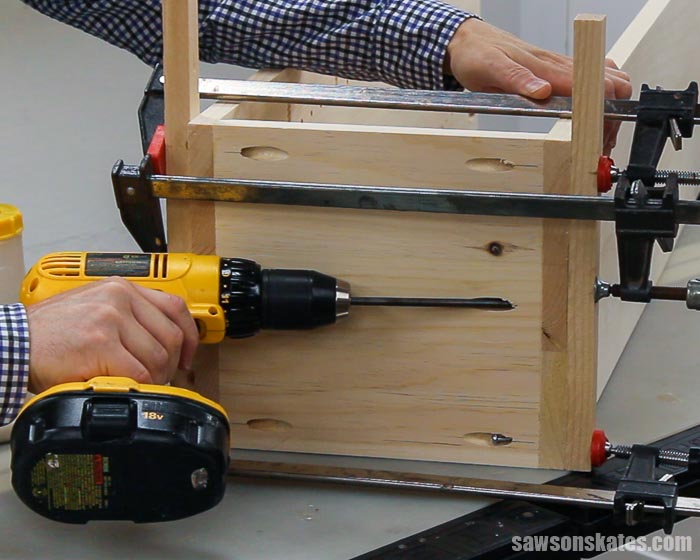
It’s also important to have a right angle drill attachment. Some of the pocket hole locations on the base of the cabinet are almost impossible to reach with a traditional driver.
A right angle drill attachment is the perfect tool to drill in a tight spot or to drive screws in hard-to-reach places.
Related: Why You Need a Right Angle Drill Attachment
What Wood Should I Use?
This cupboard can be made with just about any type of wood. I used common pine to build mine. Pine is inexpensive and easy to work with. I purchased the pine 1×2s, 1×3s, and 1×4s at my local home improvement store. I also used a small piece of ⅛” hardboard for the back of the cabinet.
Related: Beginner’s Guide to Wood Sizes
How Do You Make Adjustable Shelves?
I used my Kreg Shelf Pin Jig to drill shelf pin holes in the sides of the cabinet. Then, shelf pins are installed in the holes to support the shelves.
The jig is simple to use. Clamp the jig to the board and drill through the guides in the jig. It’s just that easy.
Related: How to Use a Shelf Pin Jig

Customize Your Cabinet
There are a few easy ways to customize your cabinet.
Add a Second Door
This chimney cupboard was designed with a door at the bottom and an open bookshelf at the top. You could add more enclosed storage by making a matching door for the bookshelf area.
You could give this cabinet some additional dimension by swapping out the flat panel doors for Shaker-style doors.
Related: How to Build DIY Shaker Cabinet Doors
Add Decorative Details
You could give this cabinet even more dimension by adding some decorative details. A variety of router bits could be used to add details to the top of the base and bookshelf area and the fronts of the bookshelves.
Related: How to Use a Router Table for Beginners

How Do You Finish the Cabinet?
This chimney cabinet could be finished in a variety of ways. It could be left natural, painted, stained, or a combination of paint and stain.
Here’s how I finished my project:
Base Interior: For the base, I left the inside of the cabinet natural.
Bookshelf Interior: For the bookshelf, I filled the pocket holes with Ready Patch, applied a coat of primer, and two coats of Rust-Oleum Chalk-Type Paint “Chiffon Cream”.
Chimney Cabinet Exterior: For the exterior of the chimney cabinet, I applied a coat of primer, and two coats of Behr “River Pebble”.
Back to Table of ContentsWhere to Use This Chimney Cupboard
- Living Room
- Dining Room
- Bathroom
- Kitchen
DIY Chimney Cupboard
Printed Plan
- Get the PDF plan here (includes detailed instructions, measurements, and bonus tips).
Supplies
- Wood (per printed plan)
- 1-¼” Coarse-Thread Pocket Screws
- 1-¼” Fine-Thread Pocket Screws
- ½” Pin Nails or Brad Nails
- Wood Glue
- ½” Pin Nails or Brad Nails
- Knob (I used this one)
- Hinges (I used these)
- Magnetic Catch
- Shelf Pins (I used these)
Tools
- Tape Measure
- Drill
- Kreg Jig
- Kreg Multi-Mark
- Miter Saw
- Jigsaw
- (Optional) Table Saw or Circular Saw
- Shelf Pin Jig
- Hammer or Nail Gun
- Right Angle Drill Attachment
- Countersink Drill Bit Set
Step 1. Build the Base
This DIY end table serves as the base for the chimney cupboard.
The printed chimney cabinet plan includes both the plan for the base and the upper bookshelf cabinet.
Step 2. Make the Sides
Cut 6 pieces of wood to length for the sides. Apply glue and clamp to form 2 side panels. When the glue is dry, drill pocket holes in each side panel. The pocket holes will connect the sides to the face frames and the top.

Use a Kreg Shelf Pin Jig to drill holes for the adjustable shelves in the sides. To help position the shelf pin jig, I clamped a piece of scrap wood to the bottom of the side panel. Then, I positioned the jig on the scrap wood, clamped the jig to the side and drilled the shelf pin holes.
Related: How to Make Adjustable Shelves with a Shelf Pin Jig
OPTIONAL: You could make fixed shelves instead of adjustable shelves. To use fixed shelves instead of adjustable shelves, make additional bottom panels (see Step 2) to use as shelves. Position at the height you want the shelves in the cabinet and attach using pocket screws.
Step 3. Attach the Bottom
Cut 3 pieces of wood to length for the bottom. Apply glue to the edges and clamp to form a panel. When the glue is dry, drill pocket holes in each side.
Apply glue to the edges of the bottom, clamp to the sides, and attach using pocket screws.
Step 4. Attach the Face Frames
Cut 4 pieces of wood to length for the stiles. Cut 4 pieces of wood to length for the rails and drill pocket holes in each end.
Apply glue to the rails, clamp to the stiles, and attach using fine-thread pocket screws.
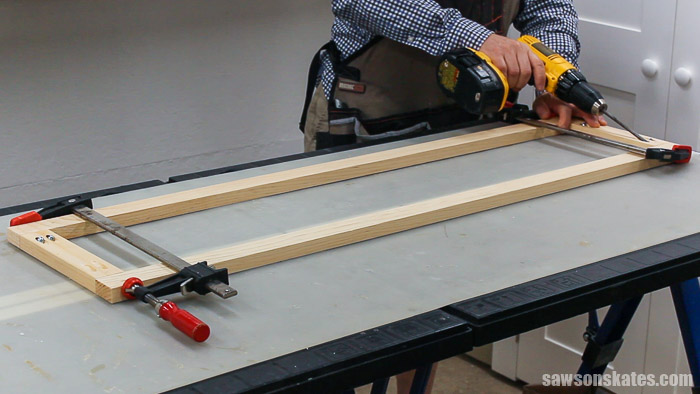
Next, apply glue to the edges of the side panels, position the frame on the case, and clamp.
Attach using pocket screws. Repeat for the second frame.
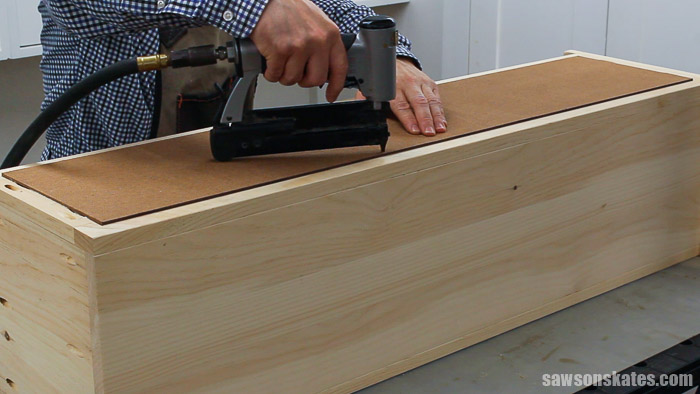
Step 5. Attach the Back
Cut 1 piece of hardboard to size for the back. I used my table saw to cut this piece, but you could also use a circular saw or a jig saw.
Related:
I positioned the back on the case, traced around the edge with a pencil and then removed the back. Next, I applied glue within the pencil lines and placed the back in position.
I used my pin nailer and ½” pin nails to hold the back in place, but you could also attach the back without nails. Just clamp the back to the case and allow the glue to dry.
Related: Pin Nailer vs Brad Nailer: Differences & Which to Use
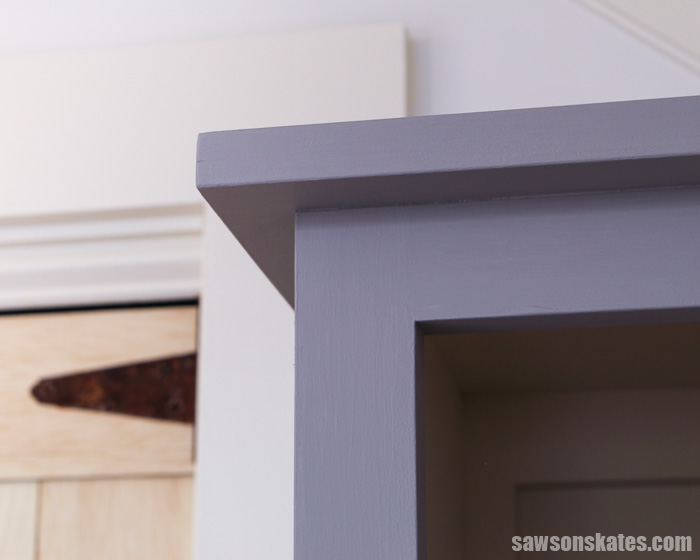
Step 6. Attach the Top
Cut 4 pieces of wood to length for the top. Apply glue to the edges, and clamp to form a panel.
When the glue is dry, position the top on the case, and attach using pocket screws.
Step 7. Make the Shelves
Cut 16 pieces of wood to length for the shelves.
Apply glue and clamp to form a shelf. Repeat for the remaining shelves.
Step 8. Attach the Bookshelf to the Base
Center the bookshelf from side to side on the base and flush with the back.
Attach using 1-¼” wood screws through the countersink holes in the top of the base.
Step 9. Finish the Chimney Cabinet
This chimney cabinet could be finished in a variety of ways. It could be left natural, painted, stained, or a combination of paint and stain.
Here’s how I finished my project:
Base Interior: For the base, I left the inside of the cabinet natural.
Bookshelf Interior: For the bookshelf, I filled the pocket holes with Ready Patch, applied a coat of primer, and two coats of Rust-Oleum Chalk-Type Paint “Chiffon Cream”
Chimney Cabinet Exterior: For the exterior of the chimney cabinet, I applied a coat of primer, and two coats of Behr “River Pebble”.
Step 10. Attach the Cabinet to the Wall
This chimney cabinet has a small footprint which means it might become unstable if it were pushed, pulled or bumped into.
It’s recommended to attach the cabinet to the wall using a corner braces. The braces should be attached to the top of the cabinet and either to a stud in the wall or using wall anchors.
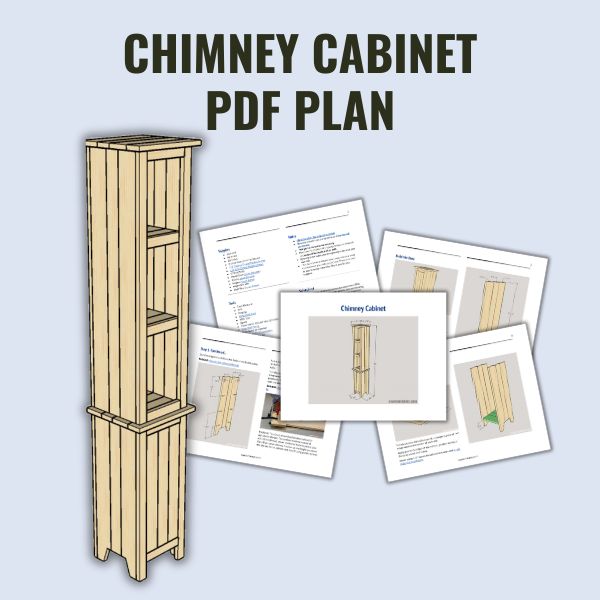
Includes:
- List of tools and materials
- Complete measurements (in inches)
- Easy-to-follow instructions
- Step-by-step photos
- Detailed diagrams
Final Thoughts
This tall, narrow DIY chimney cabinet is a great solution for any area that is begging for a little extra storage. It’s perfect for a living room, bathroom, or kitchen. The small size and simple, rustic style of this cupboard complements nearly any decor.
Get the PDF plan (including the detailed instructions and measurements) now!
Thank you for stopping by. If you enjoyed this tutorial, would you please take a moment and pin it to Pinterest? I’d really appreciate it!
Recommended For You

Pin This For Later

Hi there – I’m Scott, a woodworking enthusiast and creator of Saws on Skates, a site I started in 2015 to share easy-to-follow tutorials, space-saving shop tips, and project inspiration for DIYers at any skill level. Learn more about my woodworking journey here.