End Grain Soaked Up Water? Here’s How to Fix the Stain
Water wicked into your project’s end grain and left a stain? Here’s a simple trick I used to fix it. No harsh chemicals required!
Water + End Grain = Trouble
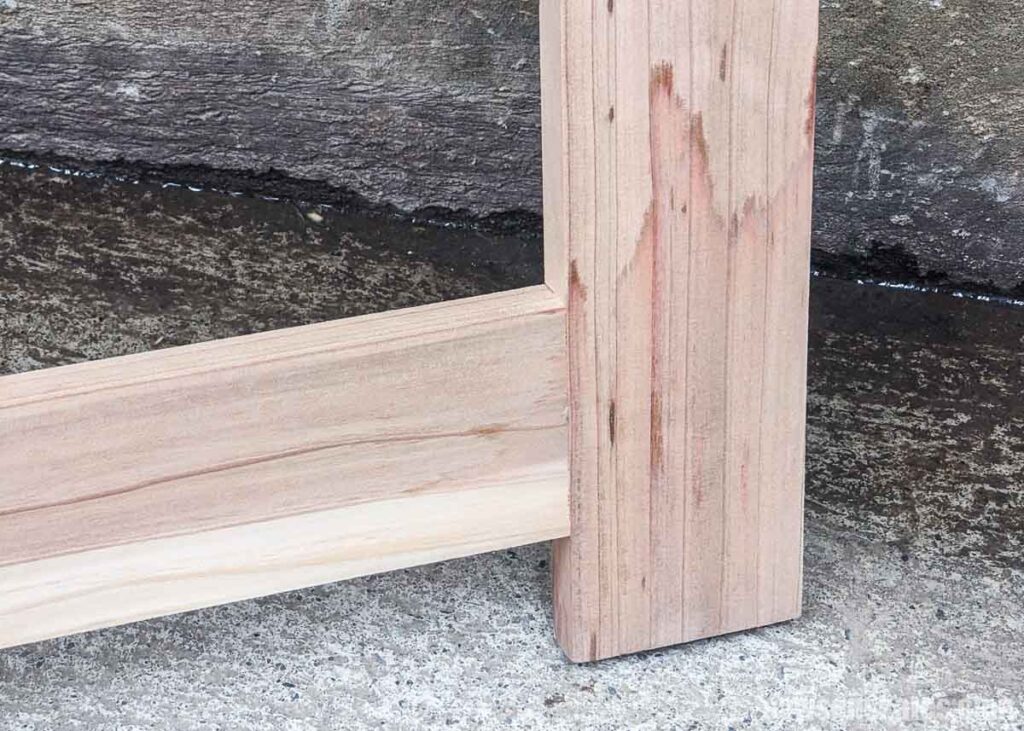
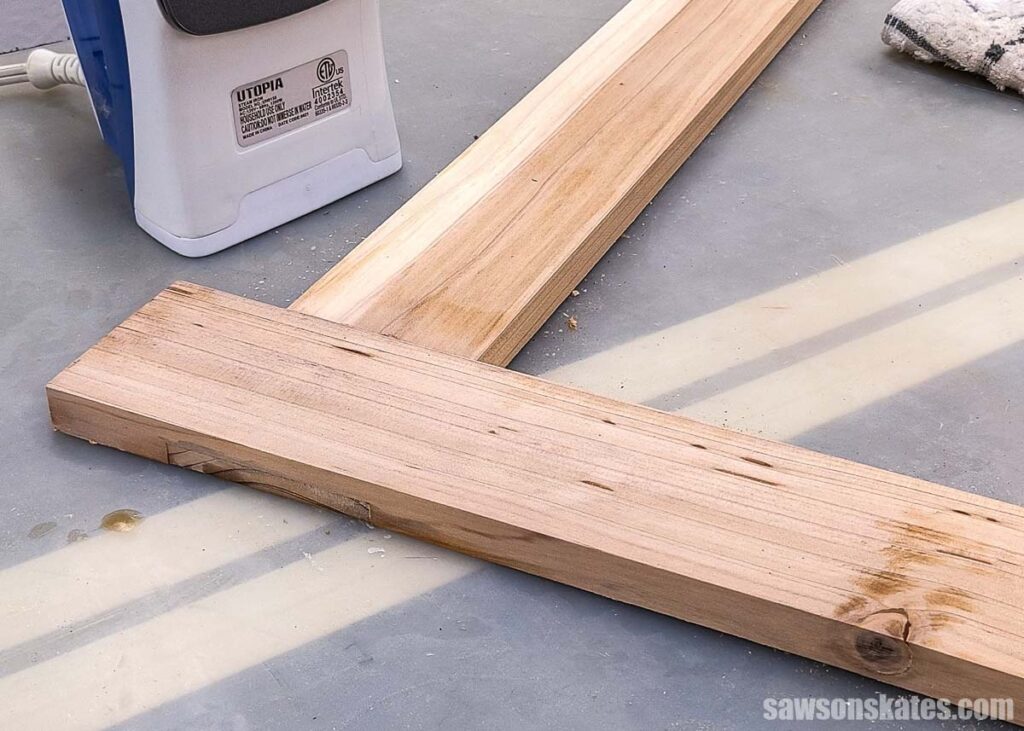
I had the legs for a new project leaning against my table saw. It rained overnight, my shop floor got wet, and water wicked up into the end grain, leaving behind a dark, blotchy stain.
I didn’t have time to mess around. This was a project voted on by my readers, and I had promised the plans to early supporters in about twelve days. In other words, I needed clean, presentable parts. No time for lousy-looking boards, especially after I spent hours making the half-lap joints!
This article contains affiliate links. If you purchase from these links, I may earn a small commission at no additional cost to you. Visit my site policies for more information.
First Step: Dry It Out
As soon as I noticed the problem, I pulled the parts out of the water and set them up in front of a fan. A few hours later, the wood was dry to the touch, but the stain was still very noticeable.
Research Time: Oxalic Acid?
My first instinct was to hit the internet. Some sources recommended oxalic acid, a powdered wood bleach that’s great at removing stains from bare wood. It works by breaking down the stain chemically, and it’s commonly used in furniture restoration.
The process is pretty straightforward:
- Mix the oxalic acid powder with warm water.
- Brush it onto the stained area.
- Rinse it off, and repeat if needed.
- Neutralize with a baking soda and water solution.
Sounds effective, right? However, I didn’t have oxalic acid on hand and remember, I was on a deadline. And more importantly, I prefer to start with the least aggressive option before going all-in with something that might be irreversible.
A Tip from My Aunt
Next, I texted my aunt, who used to refinish furniture for a living. She suggested using:
- A hot iron and a damp cloth or a blow dryer to heat the stain.
- Followed by sanding.
Since I had an iron and a cloth on hand, I gave it a shot. And on the scale of “least to most aggressive,” this method felt like a pretty safe place to start.
How I Tackled the Stain
Before I dive into the steps, I should mention I tested this on the worst-looking leg before I decided I would share this as an article, so those photos aren’t the best, but I will include them at the end of this post so you can see the result.
Here’s what I did:
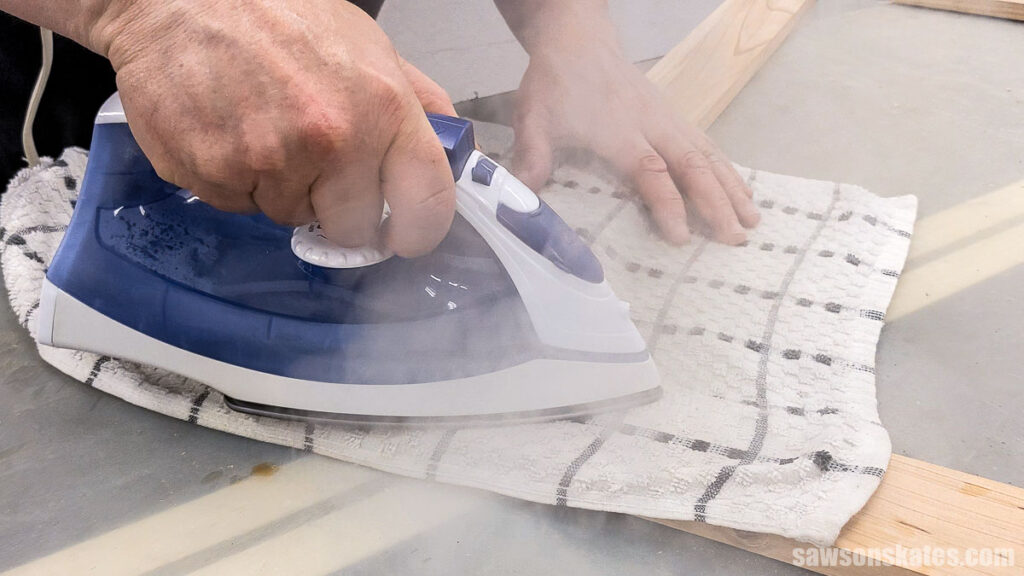
I set the iron to the highest setting (I believe this was “cotton”). No water in the tank, just dry heat.
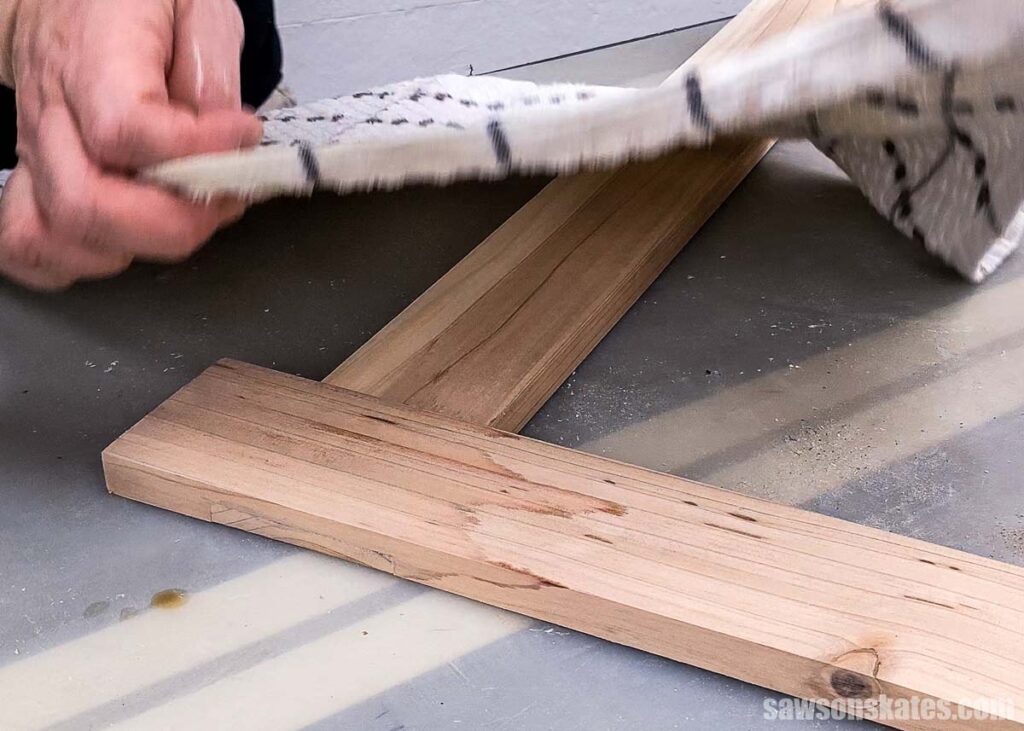
I dampened an old towel with water and wrung it out well. (I recommend using something you don’t care about in case it gets stained.)
I placed the towel over the stain.
I pressed the hot iron onto the towel, moving it back and forth. Watch out; the steam can burn you.
I repeated the process several times, rewetting the towel if it dried out.
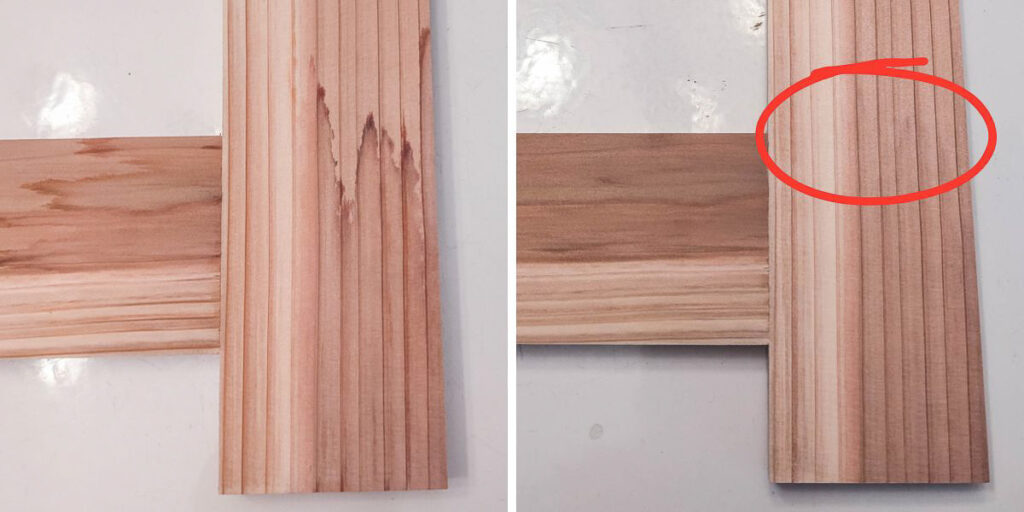
The Result? Way Better Than I Expected
It worked! The stain is almost completely gone. I’m pretty sure if I didn’t point it out, you wouldn’t even know it had ever been there.
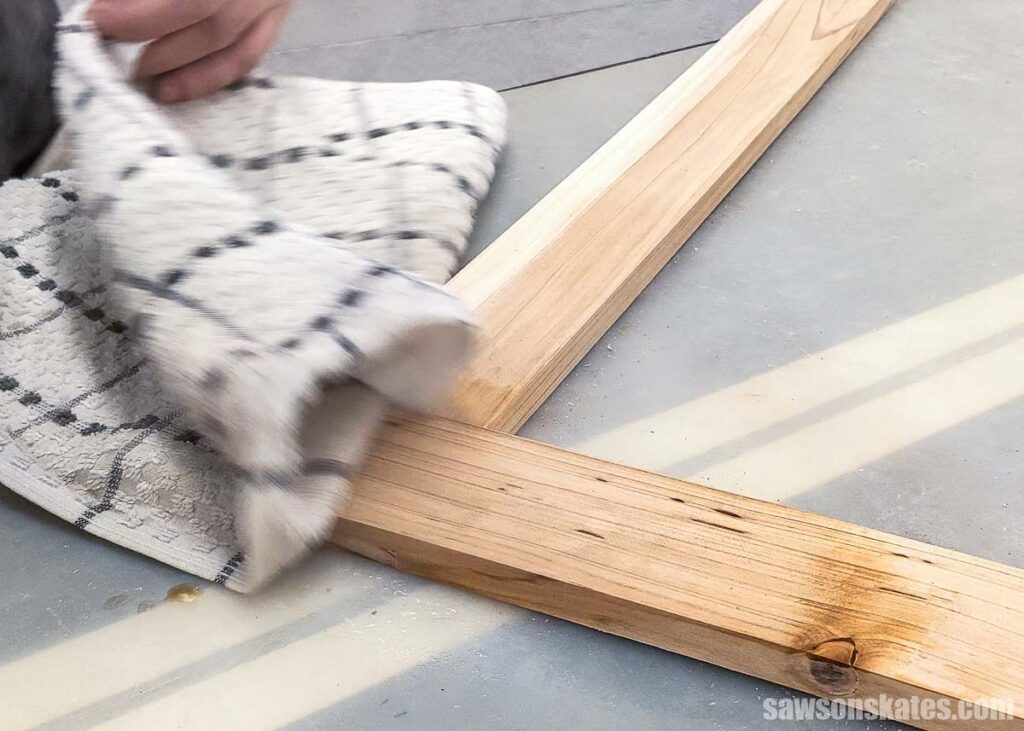
The only thing I’ll need to do now is lightly sand the area because the steam raised the grain.
Raised grain happens when moisture causes some of the wood fibers to swell and stand up, leaving the surface feeling slightly fuzzy or rough. A quick pass with my orbital sander will smooth it right out.
Related: How to Sand DIY Wood Furniture (Faster, Easier & Better Results)
Here’s the worst-looking stain, the one I tested this technique on first. As I mentioned earlier, these photos aren’t the best. I took them on my kitchen table so I could text them to my aunt. The other photos in this post were taken in my shop, where the lighting is better.
A Few Things to Keep in Mind
Before you break out the iron, there are two important things to know.
1. This Worked Well on Unfinished Wood
My project parts were raw wood (no stain or sealer). If you’re dealing with a water stain on a finished surface (such as one that’s already been stained, sealed, or painted), this method may not work as well. The finish might act as a barrier, so the heat and moisture from the cloth may not penetrate the stain as effectively.
2. Act Fast for the Best Results
My stain was relatively fresh. I pulled the parts out of the water, set them up in front of a fan, and hit the spots with the iron that same day. A few days later, while I was assembling the project, I noticed I had missed a stain on the side of one of the legs. That stain had been sitting for about four days. I tried the same iron-and-cloth method, and while it reduced the stain, it didn’t completely remove it. It’s still noticeable.
So yeah, time is of the essence, as they say. The sooner you act, the better your results will likely be.
How to Prevent This From Happening Again
Since this is an outdoor project, I know these legs are going to come into contact with water again; it’s pretty much unavoidable. And when that happens, the end grain will try to soak it up like a sponge all over again.
The best way to prevent that? Seal the end grain. Actually, it’s a good idea to seal the entire piece if you want it to last.
Now, I should mention this wood is cedar, which is naturally rot-resistant. So, technically, you don’t have to seal it. If you leave it unfinished, it’ll weather over time and turn that silvery gray color. Some people love that look. So, if that’s your thing, feel free to let nature take its course.
But if you want to:
- Preserve the cedar’s warm color
- Keep water from wicking up into the end grain
- Help your project look better for longer
Then, I recommend applying a durable outdoor top coat, like spar urethane. It’s made to withstand sun, rain, and temperature swings; all the things that can do a number on your outdoor furniture.
If you’re wondering about the difference between spar urethane and polyurethane, I have a full breakdown right here: Spar Urethane vs Polyurethane: Differences + Which to Use
Final Thoughts
If you ever run into a similar situation: wet shop floor, water-wicked end grain, ugly stain, this iron-and-towel trick is worth a try. It’s quick, easy, and doesn’t require any special supplies. And in a pinch (especially when you’re on a deadline), that’s exactly what you need.
Let me know if you’ve tried this method or if you’ve had luck with oxalic acid or any other fixes. I’d love to hear what’s worked for you.


Hi there – I’m Scott, a woodworking enthusiast and creator of Saws on Skates, a site I started in 2015 to share easy-to-follow tutorials, space-saving shop tips, and project inspiration for DIYers at any skill level. Learn more about my woodworking journey here.