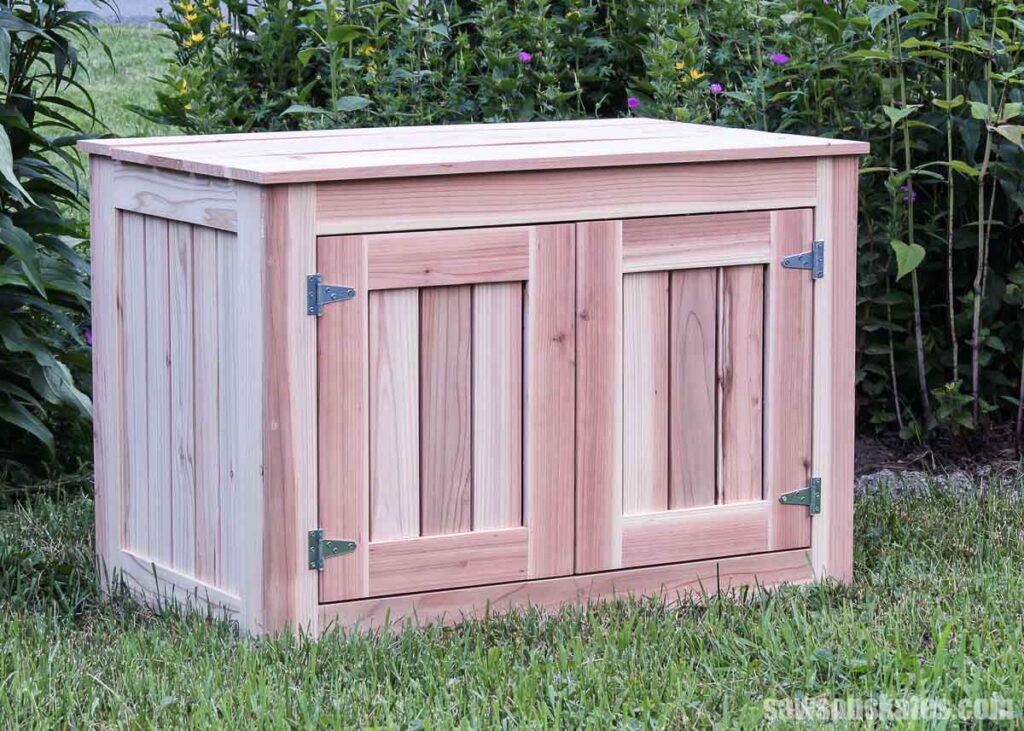
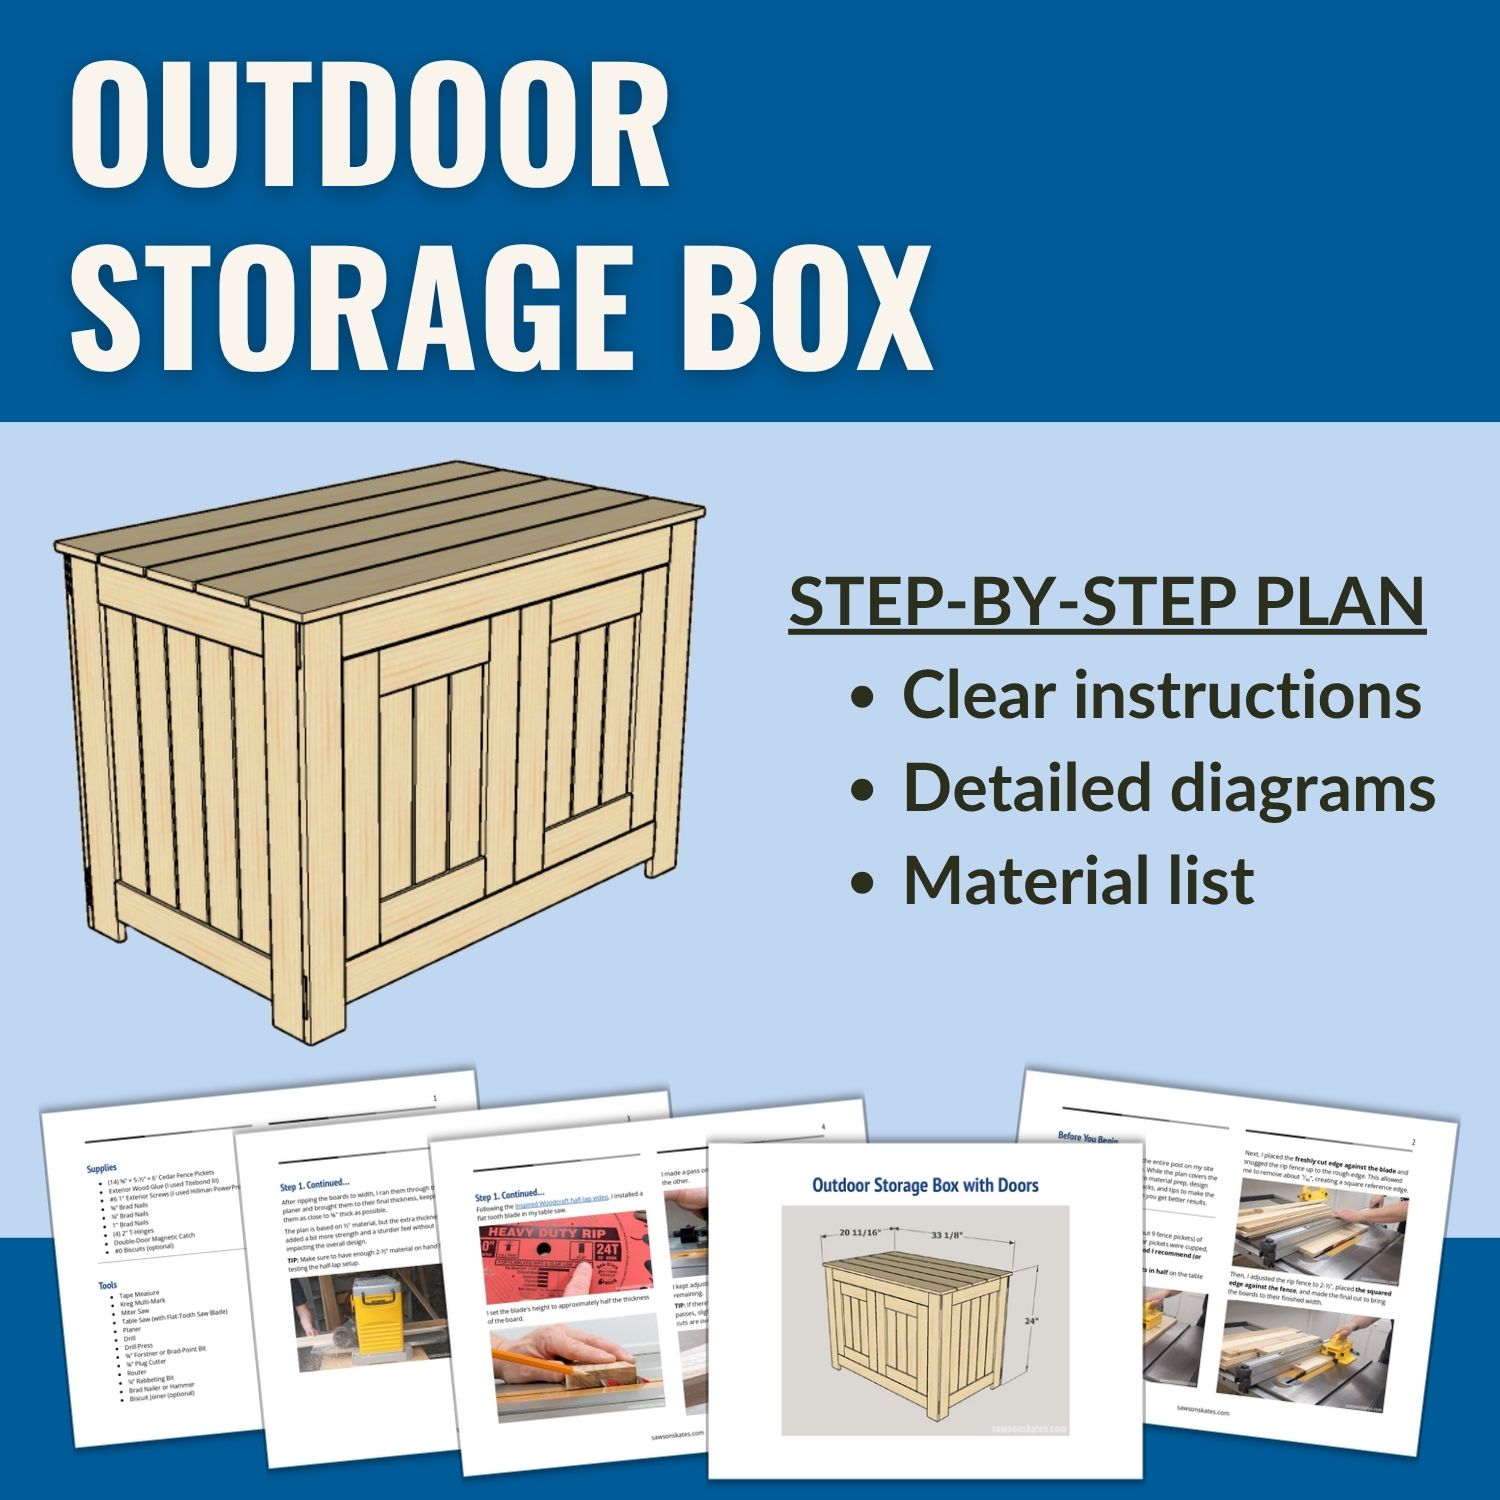
DIY Outdoor Storage Box with Doors
Build this versatile outdoor storage box perfect for stashing kids’ gear and hiding packages, with front-opening doors for easy access.
What Should I Build Next?
That's the question I help answer.
Every week, I send woodworking ideas to 17,000 DIYers who love building things.
You'd fit right in.
A few weeks ago, I asked Saws on Skates readers to help me choose my next woodworking project, and wow, you showed up! With nearly 40% of the votes, the winner was clear: you wanted me to build an outdoor storage box, perfect for organizing gear on the deck or keeping your delivery packages out of sight and out of the weather.
This article contains affiliate links. If you purchase from these links, I may earn a small commission at no additional cost to you. Visit my site policies for more information.
Rethinking the Traditional Design
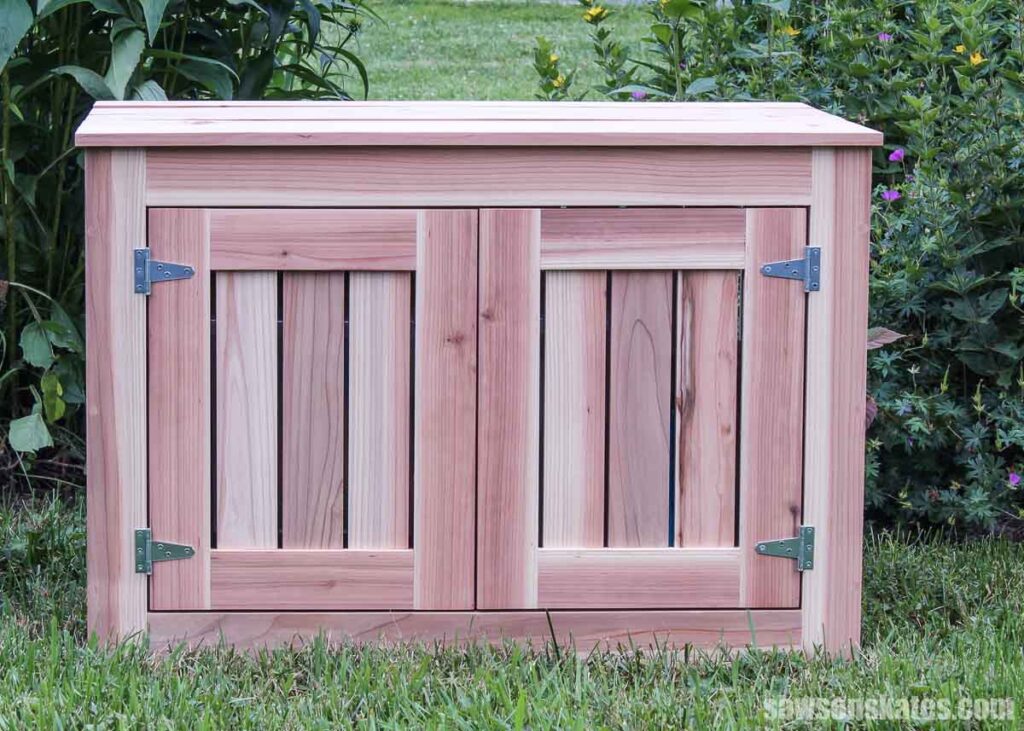
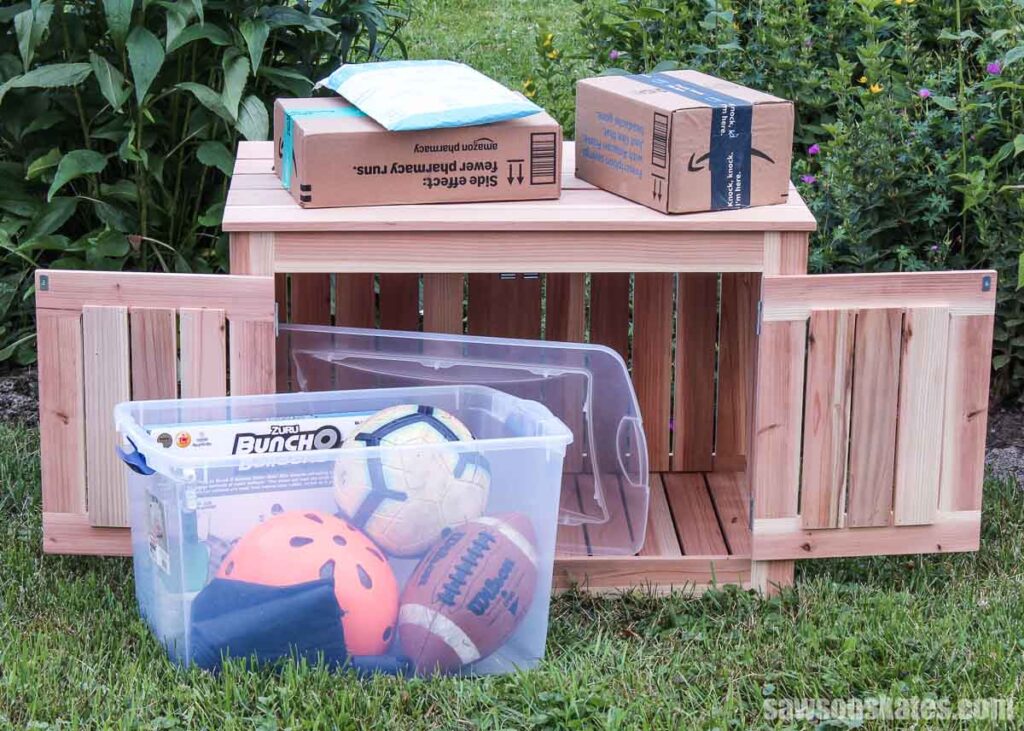
Once the project was chosen, it was time to bring it to life. Most versions I found open from the top, but that’s not ideal if there’s a plant, lantern, or even just a coffee cup sitting on it. So, I designed mine with two front-opening doors for easier access. Inside, it’s roomy enough to hold a storage tote, keeping packages and gear safe and dry.

Budget-Friendly Cedar with a Catch
For the build, I chose inexpensive cedar pickets, the kind you’ll find near the fencing section at most home improvement stores. They’re about ⅝” thick and 6 feet long. Affordable? Yes. However, they come rough-sawn, meaning the surface is fuzzy and uneven, unlike the smooth 1x boards you might be used to.
Prepping the Pickets: Lessons Learned
To get them ready for building, I ran the pickets through my planer. That’s when I learned something I’d do differently next time.
Related: Jointer vs Planer (Differences & Which to Buy First)
While the boards looked good (great color and grain pattern), they were slightly cupped (curved across the width like a smile or frown). I ran them through the planer with the cups facing up, which caused the planer to remove more material from the center than from the edges. Once I ripped the boards to width, they ended up more wedge-shaped than rectangular.
What I’d do differently: Rip the boards to width before planing. That would’ve flattened the cup and left me with squarer boards.
Thickness Matters
These cedar pickets also vary wildly in thickness, with some a little over ⅝” and others well under. When picking through the pile, I looked for the straightest boards with the fewest knots and selected the thickest ones so I’d have more material to work with after planing. I designed the plan for ½” material, but most of my boards ended up just about ⅝” thick.
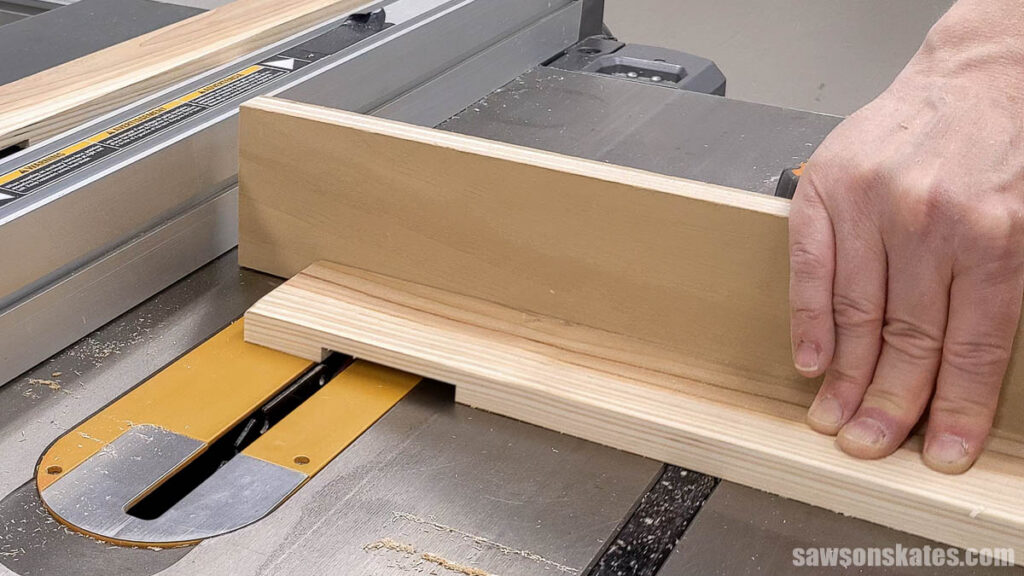
Rethinking Half Laps (and My Dado Stack)
I planned to join the frame with half laps for added strength and was going to use a dado stack on my table saw. But the one I had was a cheap set from nearly 30 years ago, and it never produced good results, so I wanted to upgrade.
While researching, I stumbled on a video by Inspire Woodcraft that showed how to make half laps using a flat-tooth saw blade instead of a dado stack. That caught my attention for a few reasons:
- Dado stacks are pricey
- Some table saws don’t support them
- Some countries don’t allow them
- I’d need to buy or make a throat plate
All this to say, I went with the flat-tooth blade (I used this one) to make the project more approachable. I also followed the Inspire Woodcraft tutorial, which turned out to be way easier than the method I originally planned.
TIP: Be sure to square your miter gauge before you start.
Flat Tooth Blade: Pros and Cons
One downside of the flat tooth blade is that it only removes about ⅛” at a time. So, compared to a dado stack, it takes longer, especially when making lots of half-laps.
You can use a regular blade, but most have angled teeth that leave ridges on the flat part of the half-lap joint, known as the cheek. You’d need to go back and clean those up with a chisel. It works; it just takes more time.
Can You Use a Miter Saw?
If you have a sliding miter saw with a depth stop, you can also use it to make half-laps. Just set the stop and nibble away the material. I haven’t tested it yet, but it’s on my list. However, for this project, you’d still need a table saw to rip your boards to width.
Related: Single vs Double Bevel Miter Saw (Which to Buy & Why)
Tackling a Bit Too Much Flex
After assembling the outdoor storage box, I noticed that a few of the top boards had more flex than I’d like. Not a huge deal, but enough that I started brainstorming solutions.
Option 1: Add a Brace Inside
One option is to add a brace (or two) inside the box, running front to back. You could cut a dado into the front and back rails with a router, then glue a board in place. This would support the span and reduce the flex.
Option 2: Change the Direction of the Boards
Another idea I considered was running the top boards front to back instead of side to side, as I did on the bottom. This would shorten the span and reduce flex, but there’s a trade-off: it would leave exposed end grain visible from the front, which I don’t think is the most attractive look.
Option 3: Use Thicker Boards
Probably the best fix is to use thicker boards for the top. They’d naturally flex less, and their visual weight would give the box a more finished, capped-off look. You may still need a brace, but likely only one instead of two.
Attaching the Top: A Bit of a Puzzle
I ran into another challenge when it was time to attach the top boards. I screwed them into the middle of the side rails with no problem, but the ends, where the half laps join, left me scratching my head.
I didn’t want to drive screws into a glue joint and risk splitting it apart.
In the end, I went with expansion brackets, the kind typically used to attach a table top to the aprons.
Other ideas I considered:
- Attaching a cleat inside the side rails and screwing the top boards to the cleat
- Drilling pocket holes through the half-lap joint and attaching the end boards that way
Honestly? I think installing a cleat is the better option, but it feels like a bit of an afterthought, so I’m still considering other alternatives.
Hardware Choices (a Work in Progress)
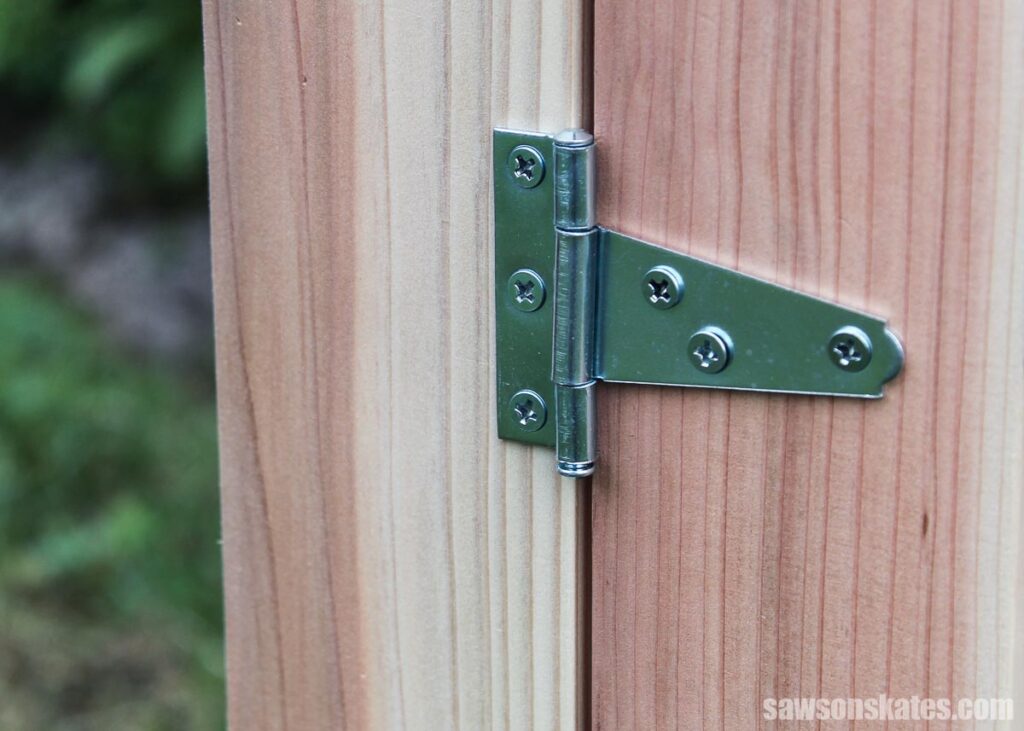
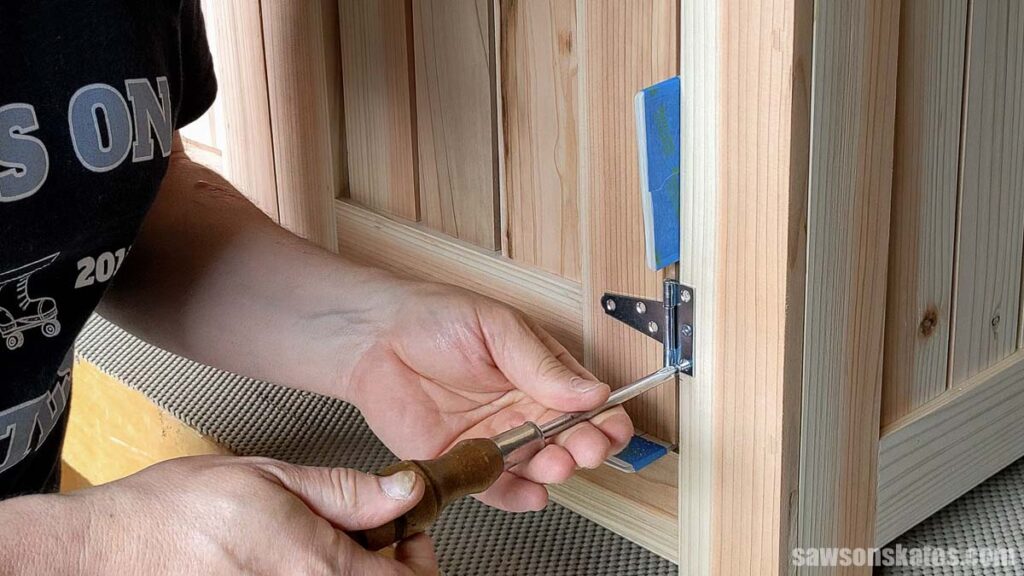
For the doors, I used silver 2-inch T-hinges. My original plan was to use black ones, and I even ordered some online, but the hinges and screws didn’t match. The hinges had a satin finish, and the screws were flat black. The mismatch just looked off.
Still Deciding on Handles
As of now, I haven’t added handles (so yes, I’ve been grabbing the stiles to open the doors, lol). I’m considering:
- Basic knobs
- Or drilling a finger hole with a Forstner bit for a clean, modern look
I also added a magnetic catch to the top of the doors, which helps keep them closed and prevents them from swinging inward into the box.
How to Make an Outdoor Storage Box with Doors
Printed Plan
Get the PDF plan here (includes detailed instructions, measurements, and bonus tips)
Materials
- Wood (per the printed plan)
- Exterior Wood Glue (I used Titebond III)
- #6 1″ Exterior Screws (I used Hillman PowerPro)
- ⅝” Brad Nails
- ¾” Brad Nails
- 1″ Brad Nails
- (4) 2″ T-Hinges
- Double-Door Magnetic Catch
- #0 Biscuits (optional)
Tools
- Tape Measure
- Kreg Multi-Mark
- Miter Saw
- Table Saw (with Flat-Tooth Saw Blade)
- Planer
- Drill
- Drill Press
- ⅜” Forstner or Brad-Point Bit
- ⅜” Plug Cutter
- Router
- ¼” Rabbeting Bit
- Brad Nailer or Hammer
- Biscuit Joiner (optional)
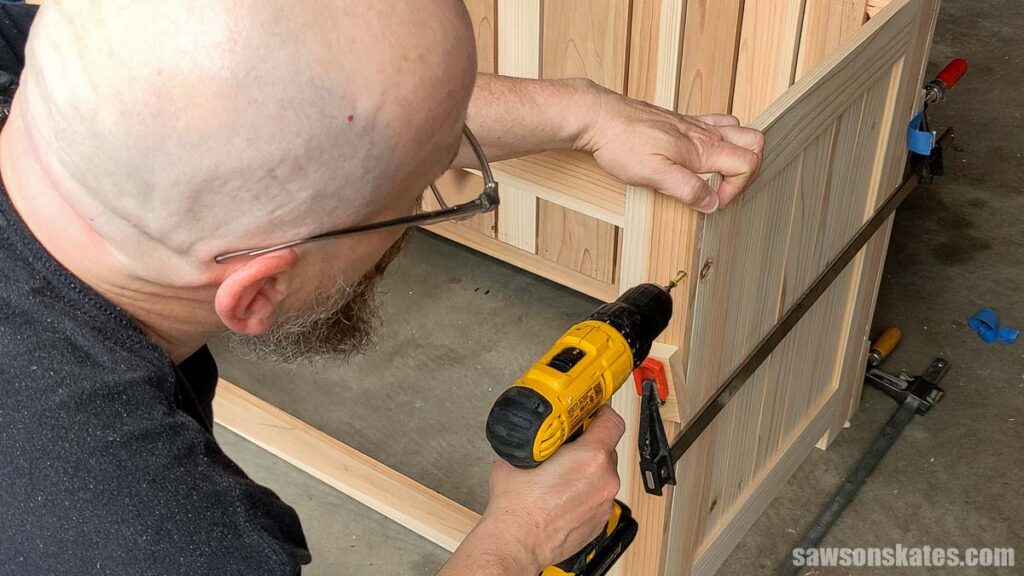
Make the Sides
To get started, I prepped the boards and cut all the parts for the side frames. I made the half-lap joints using my table saw and this flat tooth blade.
Related: 21 Table Saw Safety Rules (& Mistakes to Avoid)
Then, I glued and clamped the assembly.
Make the Front and Back
The process for building the front and back is basically the same as the sides, cut your rails and stiles, make the half-laps, and glue everything up.
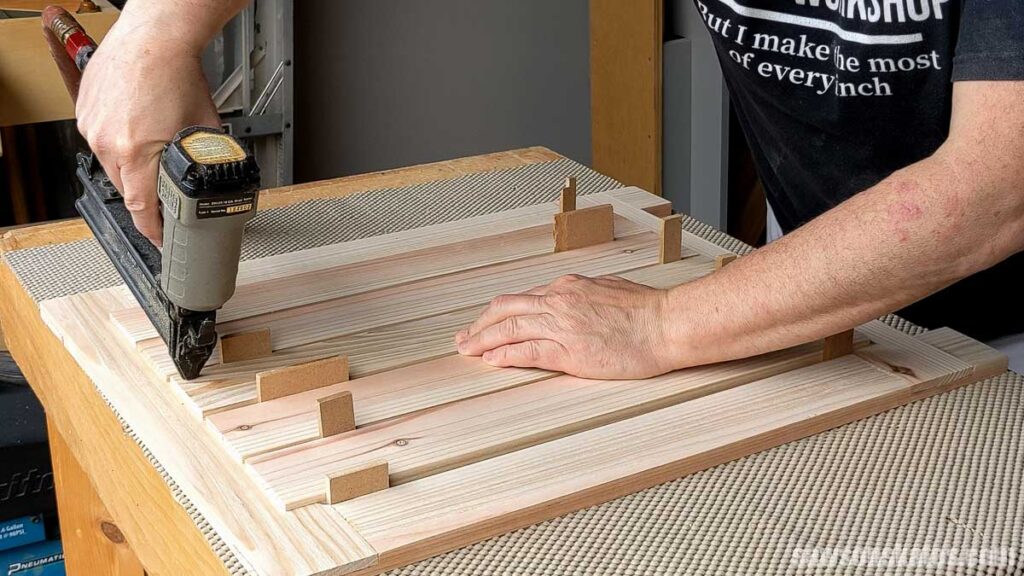
Install the Slats
The slats sit inside the frame with a notch that fits over the top and bottom rails. I cut rabbets using a router to account for any variation in the interior height of the opening.
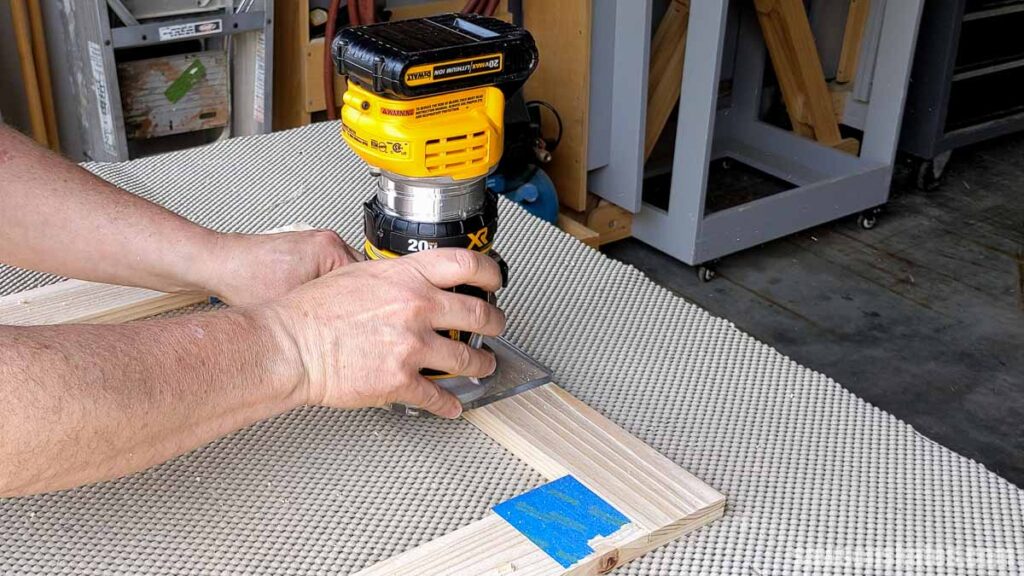
I attached them with brad nails and spacers to keep the gaps consistent.
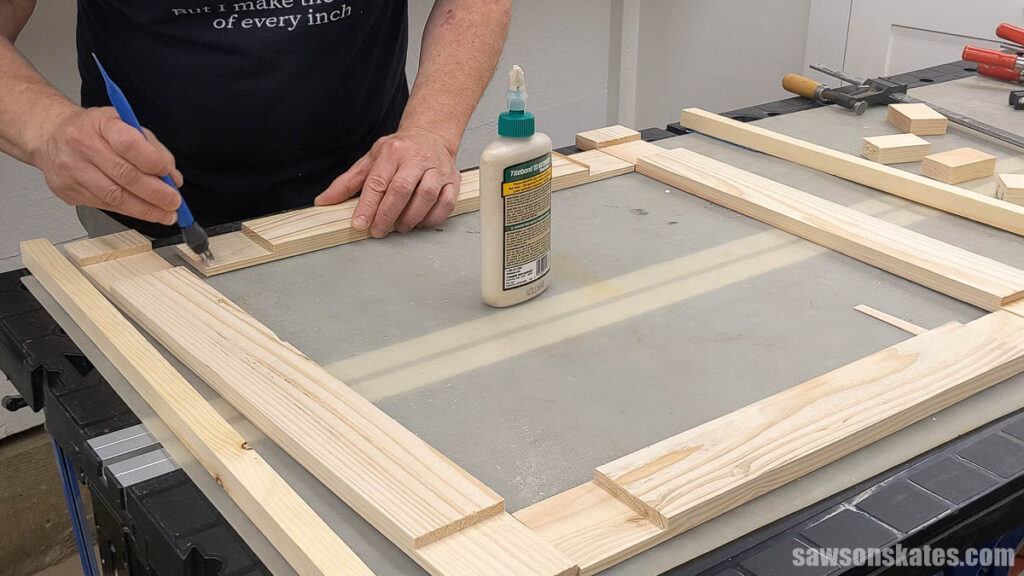
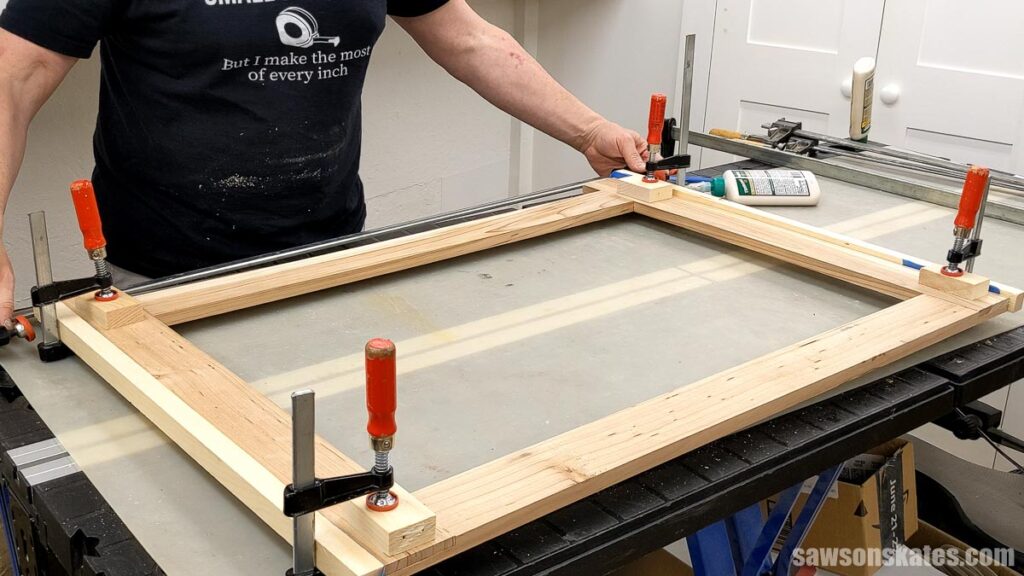
Assemble the Box
I joined the front, back, and sides with screws, then covered the screw holes with plugs for a clean look. I also added biscuits to help line things up during glue-up. Biscuits are totally optional, but help keep things aligned.
TIP: Need a handy spot to store your biscuit joiner? I built a compact French cleat holder that keeps mine off the bench but always within reach. You can grab the plan here.
Before assembly, I attached cleats inside the frame to support the bottom slats later.
I measured diagonally from corner to corner to ensure the box was square.
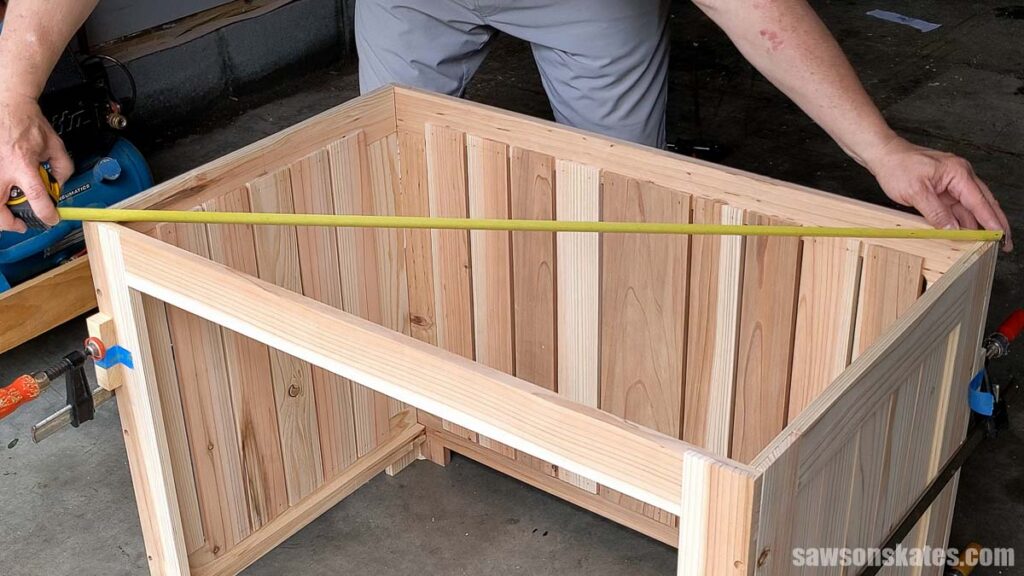
Then, I joined it with exterior wood screws.
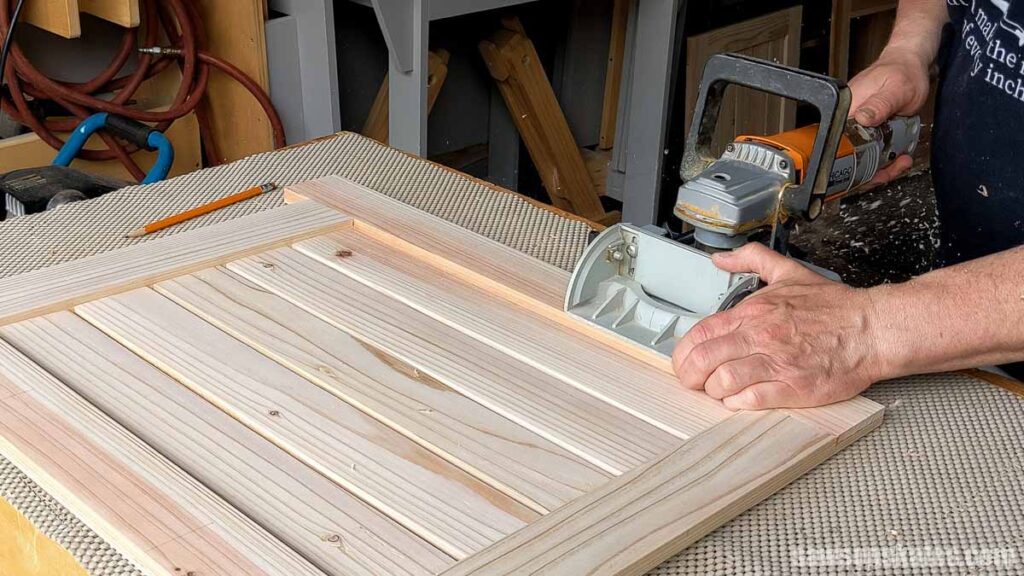
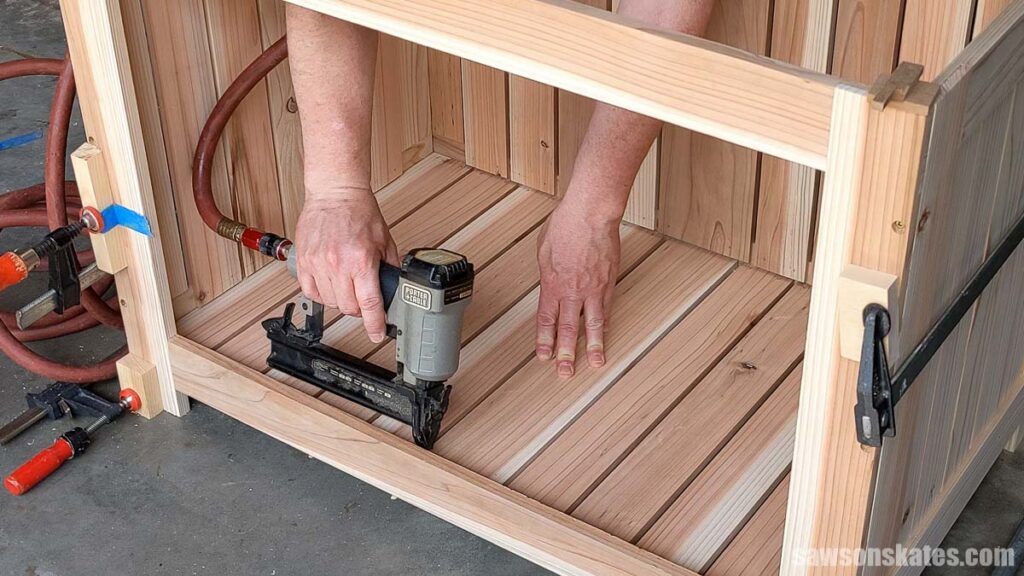
Install the Bottom Slats
Once the box was assembled, I installed the bottom slats. Starting from the outside and working in, I used spacers to keep the gaps even and brad nails to hold everything in place. For the last slat in the center, I measured the remaining space and ripped it to fit.
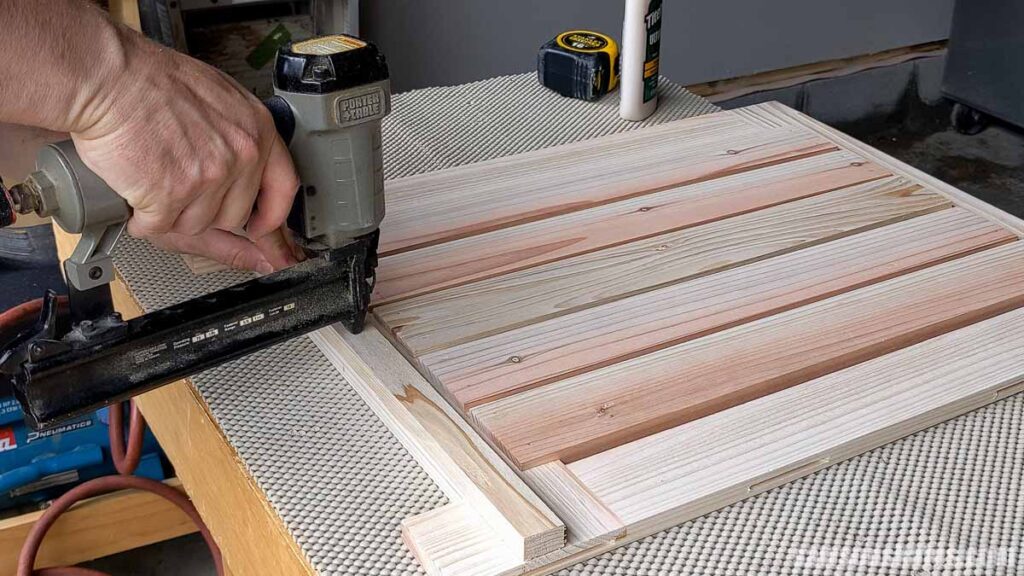
Attach the Top
To attach the top boards, I spaced them evenly, working from the center out, screwing them to the side rails.
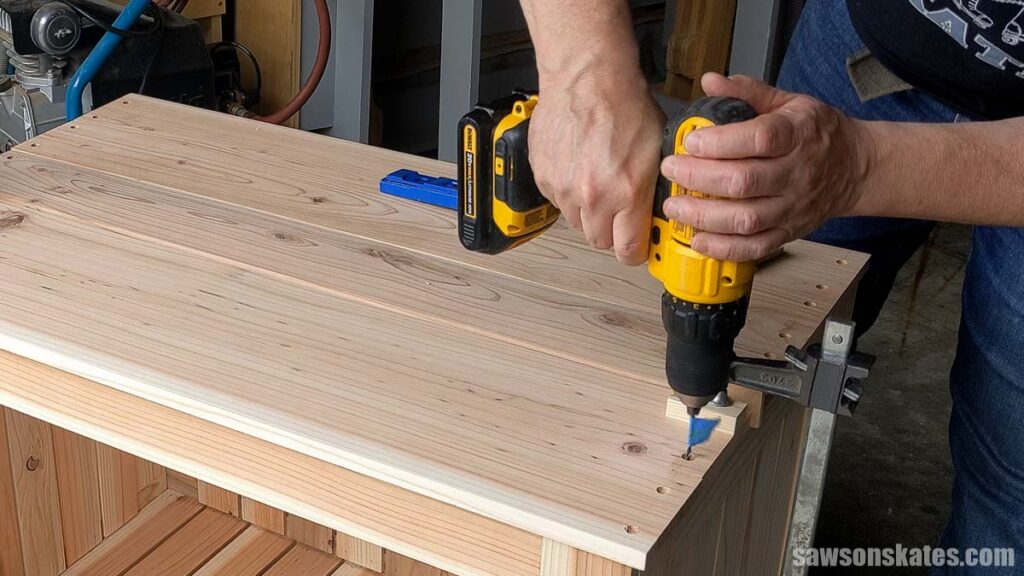
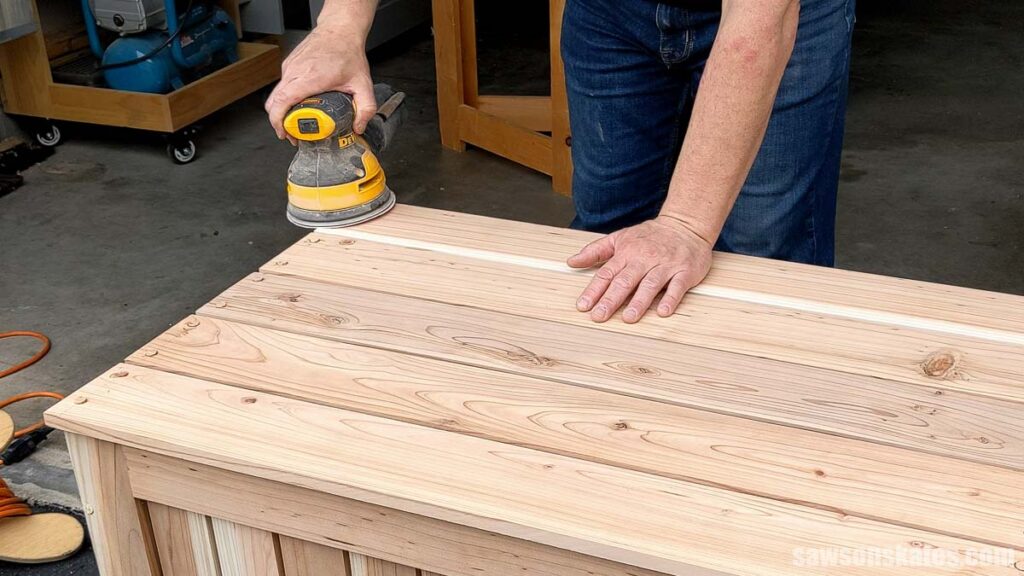
For a polished look, fill the holes with plugs, matching the grain and color to the surrounding wood.
Make and Install the Doors
The doors are built just like the other frames, with slats added using the same notch method. I used playing cards as spacers to get even gaps and attached the doors with T-hinges. A magnetic catch keeps them closed.
Includes:
- List of tools and materials
- Complete measurements (in inches)
- Easy-to-follow instructions
- Step-by-step photos
- Detailed diagrams
Final Thoughts
This outdoor storage box came together with a mix of planning and on-the-fly problem-solving. I designed it to be practical and functional, providing a place to store kids’ gear, hide delivery packages, or stash deck cushions. The front-opening doors make it easy to access, and the clean design helps it blend in like a piece of furniture.
Don’t wait. Get your PDF plan (including the detailed instructions and measurements) now!
Thank you for stopping by. If you enjoyed this tutorial, would you please take a moment and pin it to Pinterest? I’d really appreciate it!
Recommended For You
Pin This For Later

Hi there – I’m Scott, a woodworking enthusiast and creator of Saws on Skates, a site I started in 2015 to share easy-to-follow tutorials, space-saving shop tips, and project inspiration for DIYers at any skill level. Learn more about my woodworking journey here.