DIY Tabletop Circular Saw Storage Holder
Get your workshop organized with this DIY circular saw storage holder. Make one with a few pieces of scrap wood and these step-by-step plans.
What Should I Build Next?
That's the question I help answer.
Every week, I send woodworking ideas to 17,000 DIYers who love building things.
You'd fit right in.
DIY Circular Saw Storage Holder
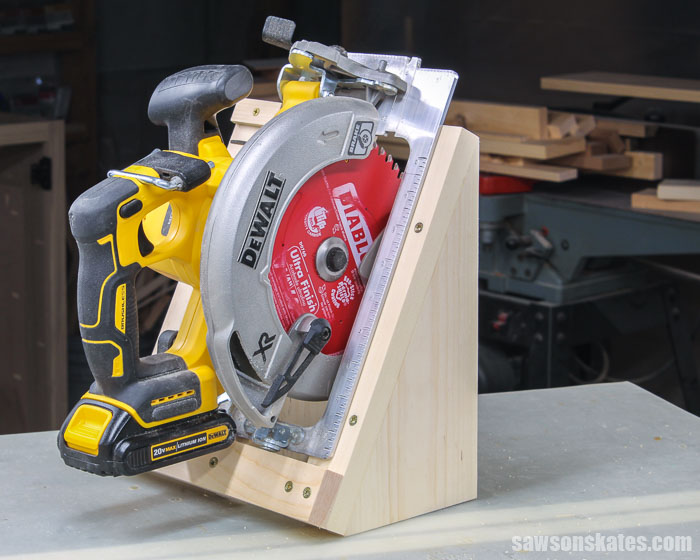
Circular saws can be difficult to store when not in use. They usually rest on their sides which wastes a lot of space. Not only does it waste space, but it can make your workshop feel disorganized.
Tame your circular saw with this easy-to-make DIY storage holder. It’s the perfect way to organize both corded and cordless saws.
This storage rack is made with a few simple cuts, a few common woodworking tools, and a few pieces of scrap wood.
The plan includes all of the measurements and detailed step-by-step instructions. Get the plan now and build one today.
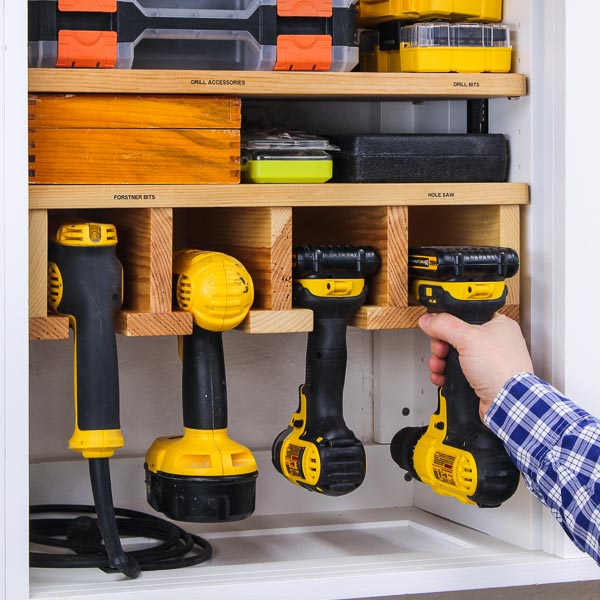
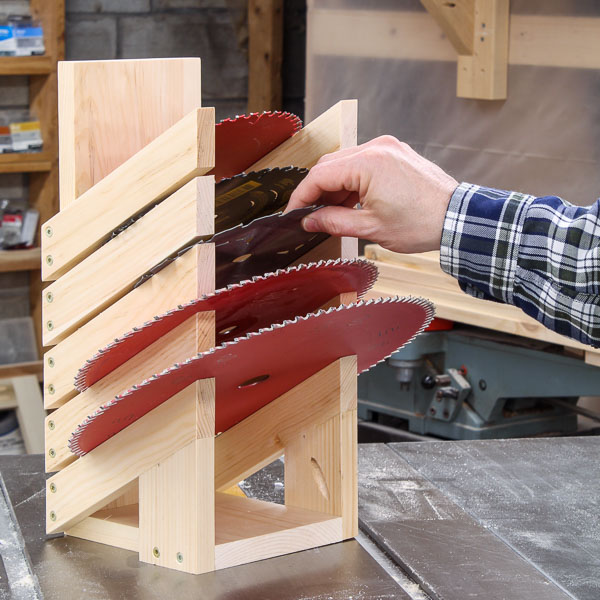
You may also enjoy this DIY drill holder, DIY saw blade storage rack, and this DIY sander organizer.
This tutorial contains affiliate links to supplies and tools. Purchases made using these links help support the Saws on Skates website and allows me to share more projects and tips with you. There is no cost to you for using these links. Visit my site policies for more information.
Table of Contents
Inspiration for This Project
For years, my tools were scattered across my small workshop. I was constantly moving them from one flat surface to another.
Related: My 12×13 Small Woodshop Layout
Then, I installed these DIY tool storage cabinets. These space-saving cabinets nearly tripled the storage space in my shop. It felt great to finally have a permanent home for my tools.
Related: 9 Clever Ways to Make Your Small Workshop Feel Bigger
But my workshop was still not as organized as I hoped. One of the problems was my circular saw.
Let’s face it. Circular saws can be difficult to store. The blade sticks out from the base plate, which means they are usually resting on their sides.
It wasn’t convenient to store my circular saw the storage cabinets. Plus, it took up a lot of space when I did store it in the cabinet. So I was still moving my circular saw from my workbench to my table saw, to any other flat surface that I could find.
So I decided to do something about it. I designed this simple tabletop storage holder to give my circular saw a permanent home inside the cabinets. It’s easy to make with a few pieces of scrap wood.
What Circular Saw Does This Holder Fit?
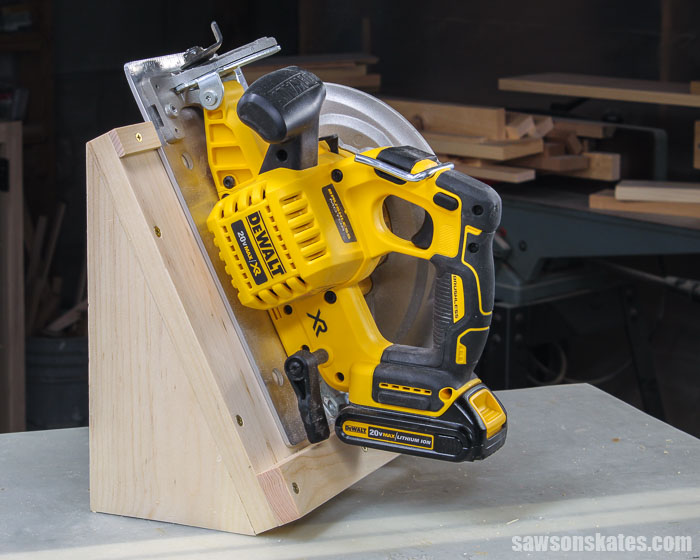
I made this holder for my 7-¼” DeWalt cordless circular saw, but you may need to adjust the measurements to fit your saw. The angle might be too steep for some circular saws, which could cause them to tip out of the holder. If you’re concerned about that, check out Step 6 of the plan below for an option to hold saws more securely.
To address the tipping issue, I recently built a new French cleat circular saw rack with a slightly lower angle, which improves stability and helps keep the saw in place.
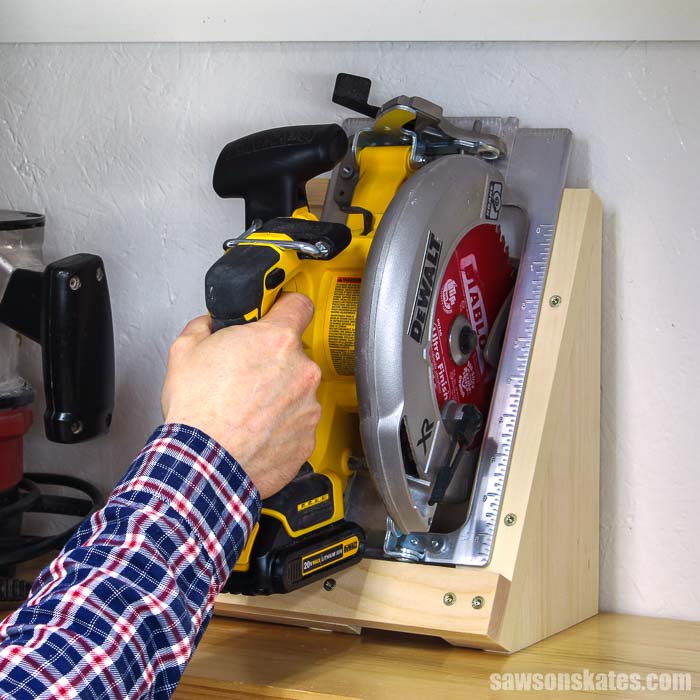
Where Do You Store the Holder?
I designed this holder to fit in a compact space, specifically inside my DIY tool storage cabinets. These cabinets are narrower than traditional ones, so I wanted something that would maximize storage without taking up too much room.
Recently, I installed a French cleat wall in my garage and built a circular saw storage rack to keep my corded saw easily accessible. Adding a French Cleat wall is a great option if you’re looking for a space-saving tool storage solution.
Related: How to Make a DIY French Cleat Circular Saw Rack
What Tools Do You Need to Make a Circular Saw Holder?
This circular saw rack is a quick afternoon project. It can be made using basic woodworking skills and just a few common woodworking tools.
Tools like a miter saw, pocket hole jig, and a drill. We’ll also need a circular saw to make a few of the cuts.
Miter Saw
I used a miter saw to cut nearly all of the parts to length for this project.
Related: 7 Miter Saw Tricks Every DIYer Should Know
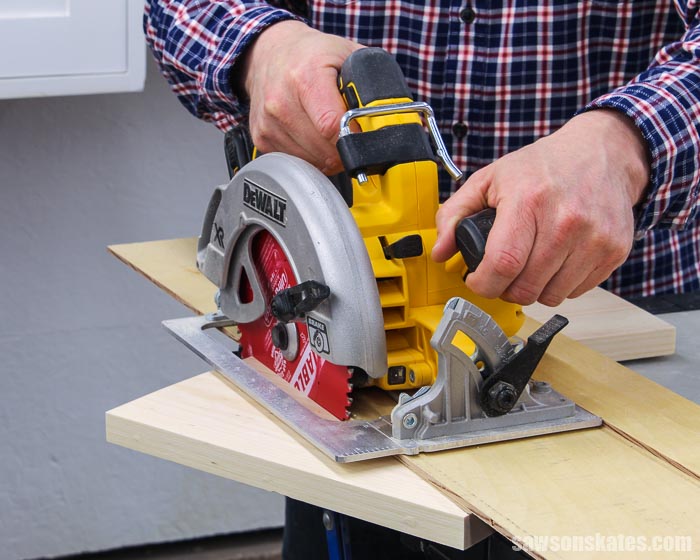
Circular Saw
I used a circular saw and a DIY circular saw crosscut jig to cut the angled sides for this project.
Related: How to Make a DIY Circular Saw Crosscut Jig
Pocket Hole Jig
You can use any pocket hole jig to drill the pocket holes for this project. I used the Kreg Jig 720PRO to drill the pocket holes for my drill holder. The inexpensive, user-friendly Kreg Jig 320 is also a great choice for drilling pocket holes.
Related: 9 Pocket Hole Mistakes You Don’t Want to Make
What Wood Should You Use?
This storage holder can be made with just about any type of wood. This project doesn’t require much wood so it’s a great way to use up some scrap wood.
Related: How to Decide What Scrap Wood to Keep
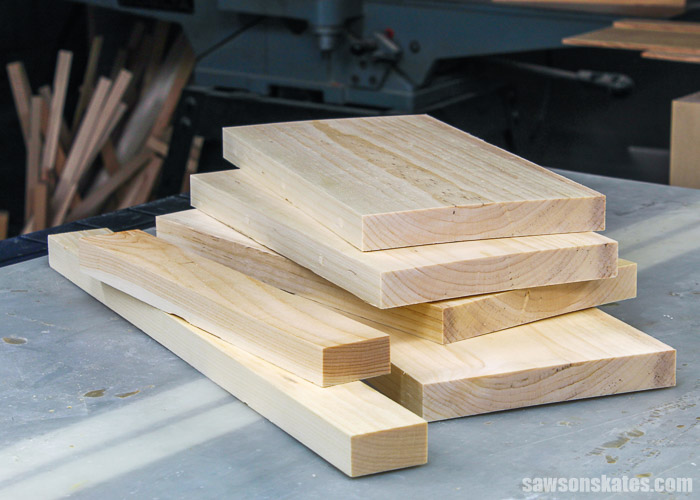
Many times I use common pine to build my projects. Pine is relatively inexpensive and easy to work with.
I had some scrap pieces of pine 1×2s and 1×6s, so I used those to make my holder. You could also use scrap pieces of plywood to make this project.
Related: Beginner’s Guide to Wood Sizes
How Do You Finish the Storage Holder?
This circular saw holder could be finished in a variety of ways. It could be left natural, painted, etc.
I used shellac to finish the shelves of my tool storage cabinets and this DIY drill holder, so I want to use shellac on this project too.
I haven’t applied the shellac yet, but when I do, I’ll apply three coats.
Related: What You Need to Know About a Shellac Wood Finish
How to Make a DIY Tabletop Circular Saw Storage Holder
Printed Plan
- Click here to get your PDF plan (includes detailed instructions, measurements, and bonus tips)
Supplies
- Wood (per printed plan)
- 1-¼” Pocket Screws
- 1-¼” Wood Screws
- Wood Glue
- Double-Sided Tape
Tools
- Tape Measure
- Drill
- Kreg Jig
- Kreg Multi-Mark
- Miter Saw
- Circular Saw
- DIY Crosscut Jig
- Countersink Drill Bit Set
Step 1. Make the Sides
Cut three pieces of wood to length for the sides.
On one end, measure in and make a mark. Use a pencil to connect the mark to the corner.
I used a circular saw and a DIY crosscut jig to cut the side. There isn’t enough material on this board to clamp the crosscut jig, so I applied double-sided tape to the area of the board that will become the side. In other words, I applied the tape to the piece that I am keeping.
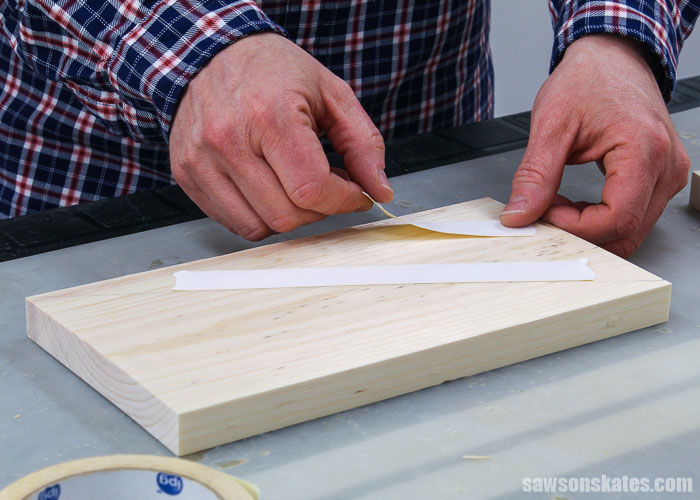
Then, I removed the backing from the tape, positioned the jig on the line, and pressed the jig into the tape.
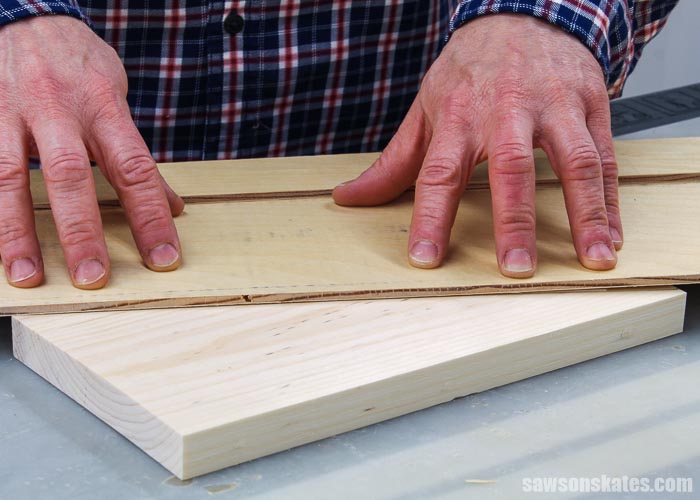
I made the cut with the circular saw and repeated this step for the remaining side pieces.
Step 2. Assemble the Left Side
Cut one piece of wood to length for the left face. Then use the diagram in the printed plan to lay out the locations for countersink holes.
Use an awl to make a starting point for the drill bit.
Related: What is an Awl?
Then use a countersink drill bit to drill countersink holes at each mark.
Related: How to Use a Countersink Bit
It was difficult to clamp the angled sides to the face. Instead, I clamped a piece of scrap wood on the inside of the side, applied glue, and clamped the scrap wood to the face. Attach using 1-¼” wood screws.
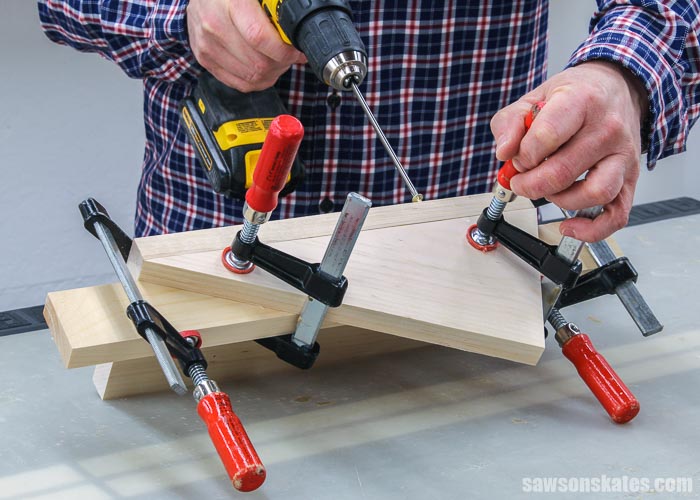
For the side that faces the blade, I clamped a piece of scrap wood on the outside of the side, applied glue, and clamped the scrap wood to the face. Attach using 1-¼” wood screws.
Step 3. Assemble the Right Side
Cut one piece of wood to length for the right face. Then use the diagram in the printed plan to lay out the locations for countersink holes.
Use an awl to make a starting point for the drill bit.
Then use a countersink drill bit to drill countersink holes at each mark.
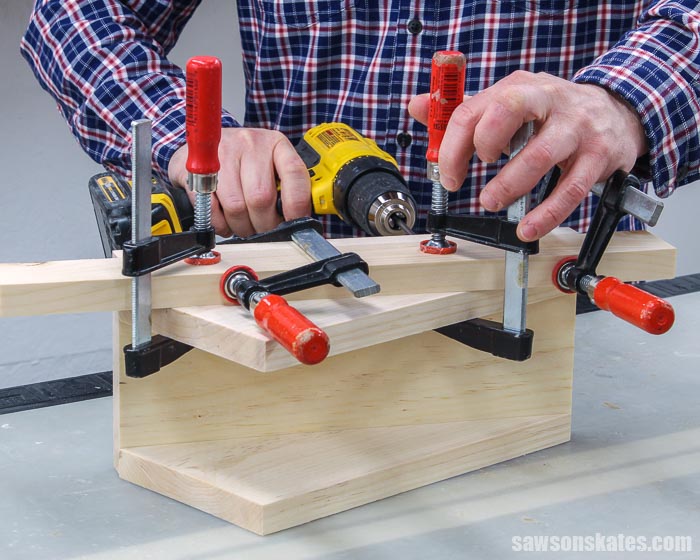
It was difficult to clamp the angled side to the face. So again, I clamped a piece of scrap wood on the inside of the side, applied glue, and clamped the scrap wood to the face. Attach using 1-¼” wood screws.
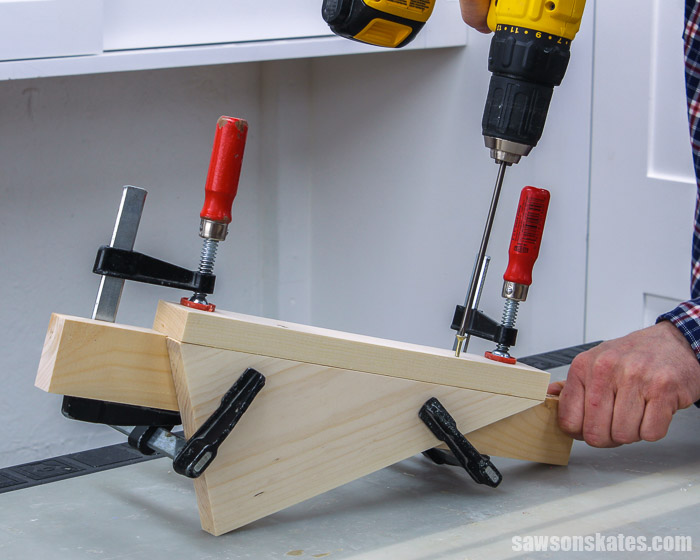
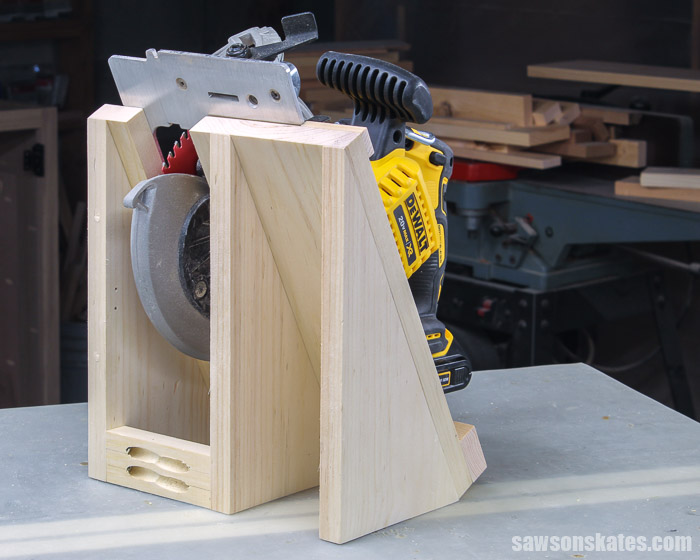
Step 4. Attach the Stretcher
Cut one piece of wood to length for the stretcher and drill pocket holes in each end.
Related: How to Use a Kreg Jig
Apply glue to the ends, position on the back, and clamp. Attach using 1-¼” pocket screws.

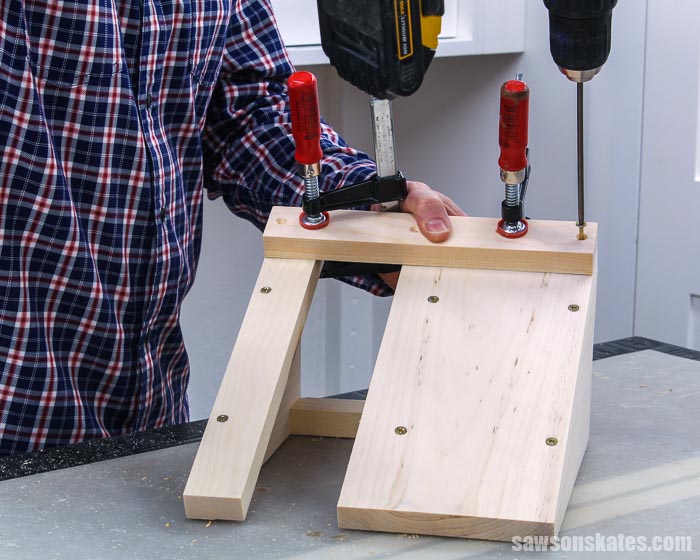
Step 5. Attach the Cleat
Cut one piece of wood to length for the cleat. Use the diagram in the printed plan to lay out the locations for countersink holes.
Use an awl to make a starting point for the drill bit.
Then use a countersink drill bit to drill countersink holes at each mark.
Position the cleat and clamp. Attach using 1-¼” wood screws.
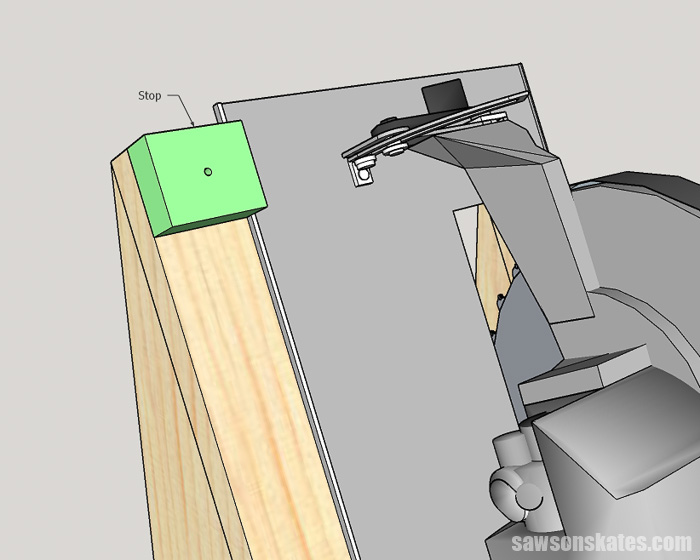
Step 6. Optional Items
The bolt that allows the base plate of my circular saw to bevel was hitting the cleat. This was preventing the saw from resting straight up and down.
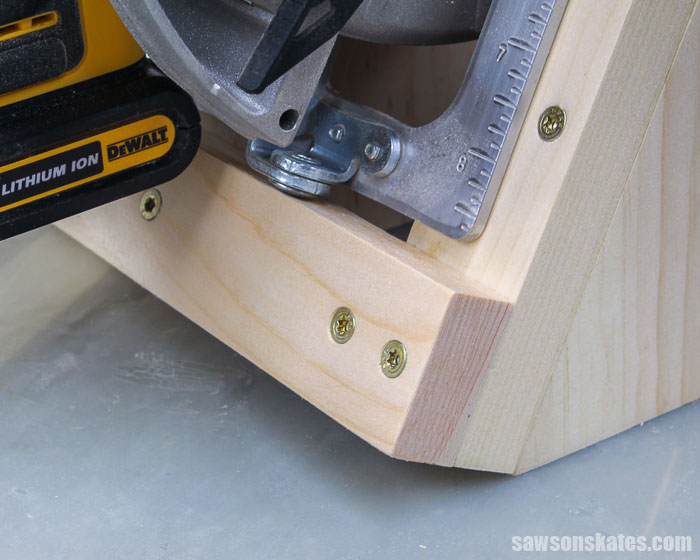
I added a simple piece of scrap wood as a stop. I drilled a countersink hole in the center and attached it to the holder with a wood screw.
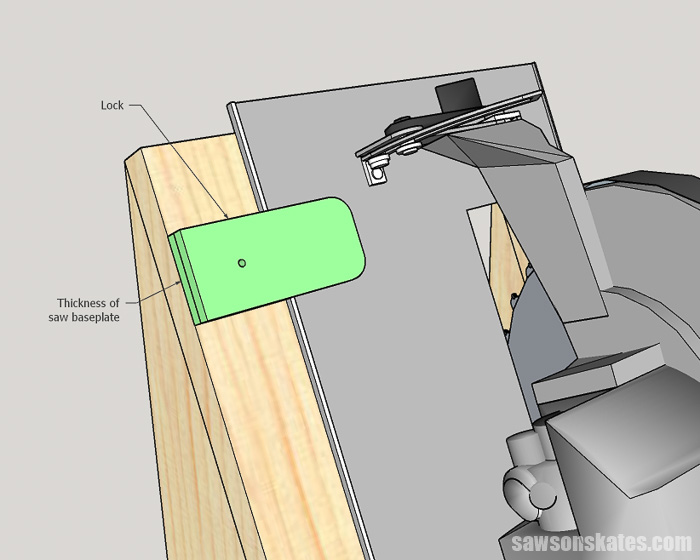
The angle of this holder might be too steep for some circular saws which could cause the saw to tip out of the holder. In this case, you can add a simple lock using scrap wood.
The bottom layer of the lock should be a little thicker than the thickness of the base plate. The lock can be just about any thickness.
Predrill a hole through both pieces of the lock and attach to the holder using a wood screw. The screw should be snug but allow the lock to rotate.
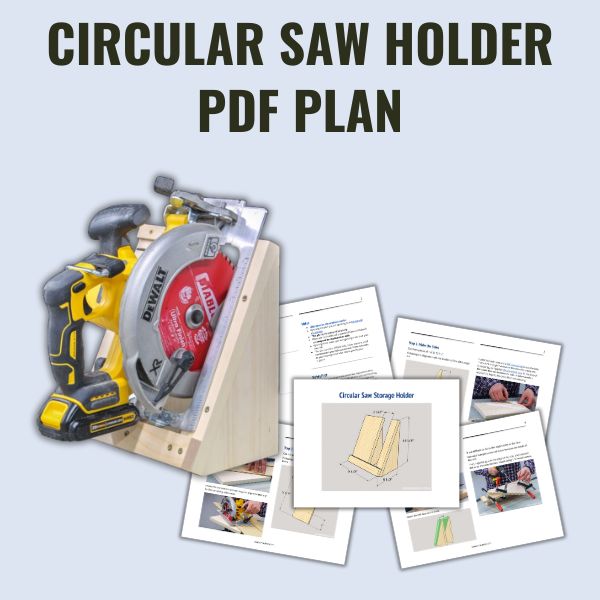
Includes:
- List of tools and materials
- Complete measurements (in inches)
- Easy-to-follow instructions
- Step-by-step photos
- Detailed diagrams
Final Thoughts
Tame your circular saw with this easy-to-make DIY storage holder. It’s the perfect way to organize both corded and cordless saws. Make one with a few simple cuts, a few common woodworking tools, and a few pieces of scrap wood.
Click here to get the PDF plan (including the detailed instructions and measurements) now!
Thank you for stopping by. If you enjoyed this tutorial, would you please take a moment and pin it to Pinterest? I’d really appreciate it!
Recommended For You

Pin This For Later

Hi there – I’m Scott, a woodworking enthusiast and creator of Saws on Skates, a site I started in 2015 to share easy-to-follow tutorials, space-saving shop tips, and project inspiration for DIYers at any skill level. Learn more about my woodworking journey here.
Great idea, All your plans & I starting make a few. Keep up the good work
Thank you, Glenn. Glad you like it.
You are absolutely correct. The circular saw is just sitting on the corner of the workbench looking awful and awkward. This is just what I needed. Thank you.
You’re welcome, Klaus!
Very neat and tidy I love it!! I will start building one very soon.
Glad you like it, Alfred!