How to Use Your Impact Driver Like a Pro
An impact driver is a powerful tool, but it’s not right for every job. In this easy-to-understand tutorial, I’ll break down when and how to use one.
Having the right tool for the job is invaluable. An impact driver delivers a lot of power in a small package, but it may be a little too powerful for some jobs.
In this straightforward guide, I’ll answer all of your questions, including what an impact driver is, when you should and shouldn’t use one, and how to use an impact driver.
Table of Contents
What is an Impact Driver?
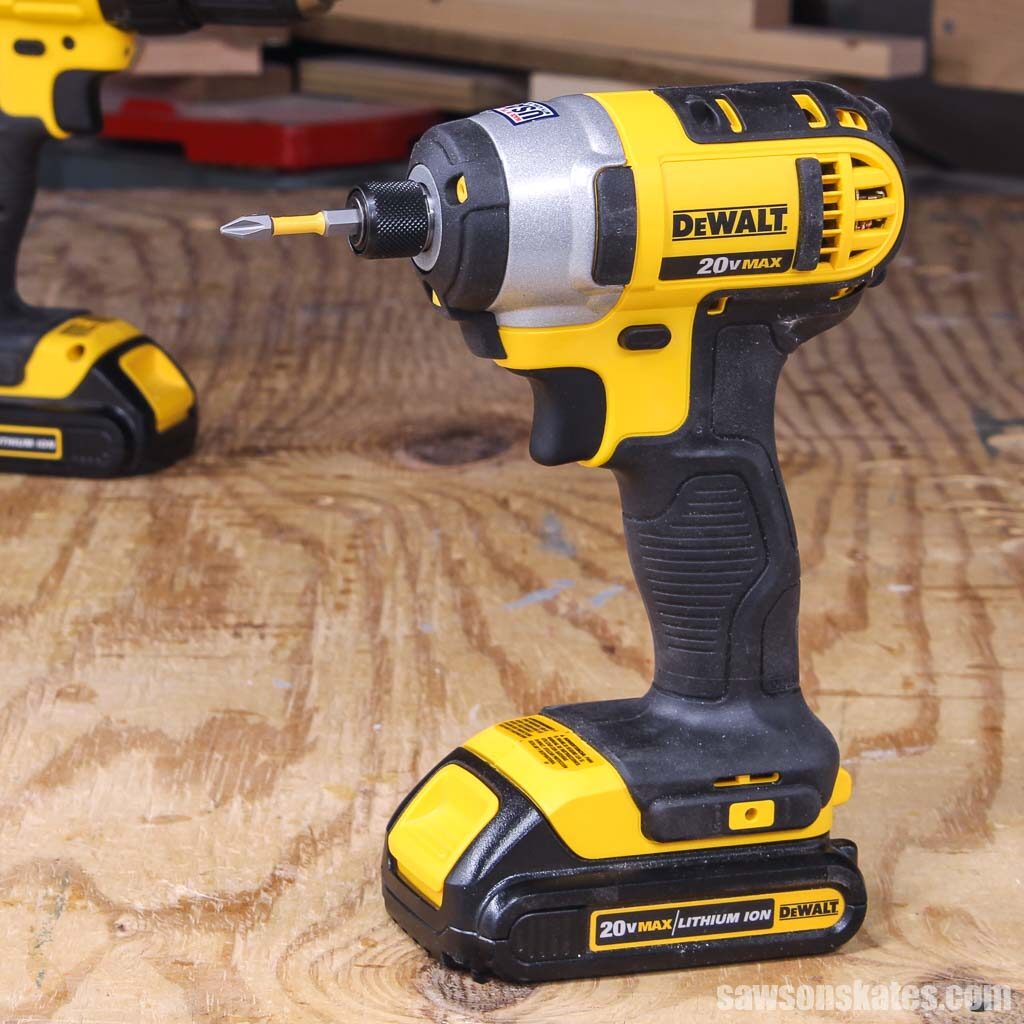
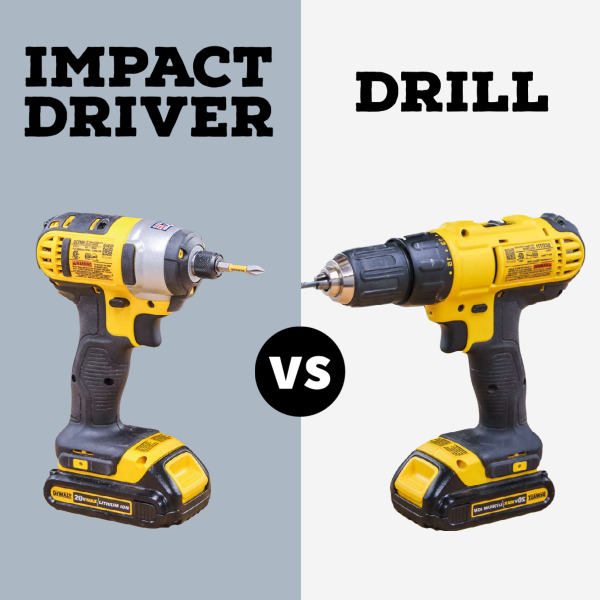
An impact driver, sometimes called an impact drill, is a handheld power tool that looks similar to a power drill. What sets it apart is an impact driver has more torque, is smaller in size, and weighs less than a traditional drill.
Impact drivers are not the best tool for every home improvement project. An impact driver’s high torque is ideal for performing one job really well: driving screws incredibly fast.
Related: Impact Driver vs Drill: Which to Use & Why
High-Torque
An impact driver is a high-torque tool. In a nutshell, torque is the amount of twisting force.
Impact drivers can produce two to three times more rotational force than drills, and they do so in quick bursts.
When the impact driver encounters some resistance, it begins to deliver those bursts or impacts.
An impact driver’s high torque is ideal for driving (or removing) large or long fasteners like screws and bolts.
This impact motion also helps bits from slipping out of the grooves of the screw head. This means bits are less likely to spin out of the screw or strip out screw heads.
Settings
Impact drivers seldom have speed settings or a clutch with torque adjustments. Because impact drivers lack any settings, they are generally compact, lightweight tools that can fit into tight spots and hard-to-reach places.
What is a clutch?
Many drills are equipped with a slip clutch. When the drill encounters a certain amount of resistance, the slip clutch disengages, preventing the fastener from being driven too deeply into the workpiece or stripping the screw.
Chuck
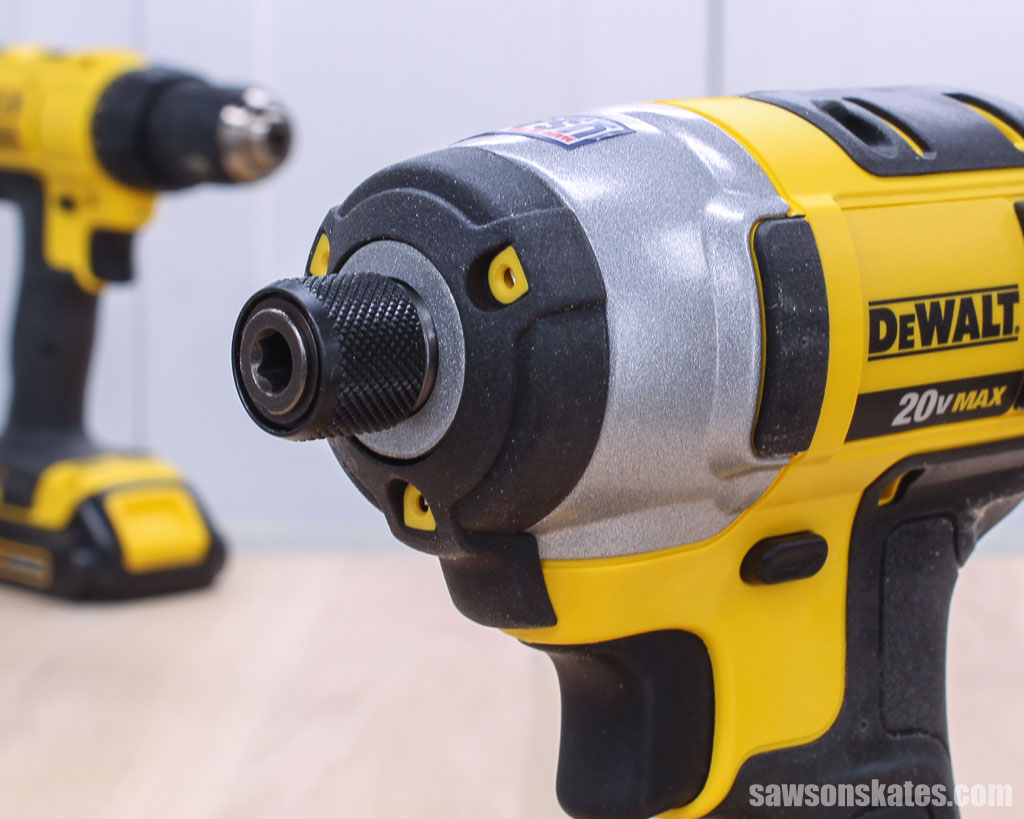
The chuck of an impact driver does not have adjustable jaws like a drill. Instead, impact drivers have a collet. A collet is a band or sleeve that surrounds the bit to keep it in place. Impact drivers only accept ¼” hex bits.
What Can You Do With an Impact Driver?
Impact drivers are ideal for big jobs, like building a deck when you need more torque to drive long screws or carriage bolts.
Because the high torque is frequently too powerful for delicate tasks, an impact driver isn’t often needed for building DIY furniture projects. For those jobs, you’ll want a screwdriver or a drill.
An impact driver is not meant for driving fasteners into hard materials like brick or concrete. For those jobs, you’ll need a hammer drill instead.
Back to Table of Contents3 Tips for Using an Impact Driver
1. Impact Drivers Require Special Bits
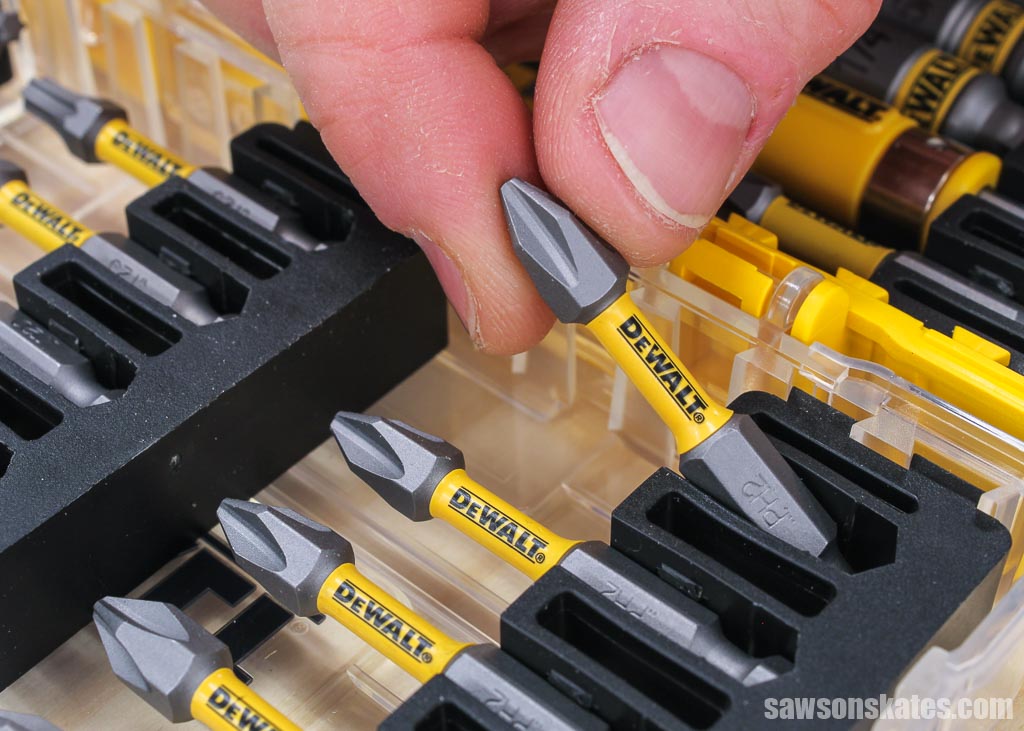
There are a few things to keep in mind when choosing a bit for your impact driver. First, impact drivers have a collet that only accepts ¼” hex bits.
Second, and most importantly, you must use “impact-rated” bits. These bits are made to handle the tremendous torque of an impact driver. The high torque of an impact driver might snap a bit that is not impact-rated.
Impact-rated bits are easy to identify from other bits because they’re usually thinner in the middle and encased in plastic.
2. Don’t Over Tighten
Impact drivers operate at lightning speed and generally don’t have speed or torque settings. It’s all too easy to over-tighten screws or drive them too deeply, making impact drivers too powerful for precision work.
For projects that require a delicate touch, use a drill or screwdriver instead.
3. Impact Drivers are Not Meant for Drilling
The high torque of an impact driver is meant for driving (or removing) large or long fasteners, not for drilling holes.
However, if you have the correct hex-shank bit, you can drill a hole up to a ¼” in light-gauge steel or softwood.
If you want a hole larger than ¼” in a material that is more substantial or denser than softwood or light-gauge steel, you’ll need an impact driver bit. The extra torque of the driver will break a bit that is not impact-rated.
Pocket Hole Joinery
In my opinion, it’s not a good idea to use an impact driver for pocket hole joinery.
When drilling pocket holes, the impacts from an impact driver can loosen the drill bit stop collar. The bit will drill the pocket holes too deeply if the stop collar becomes loose.
When driving pocket hole screws, the impacts from an impact driver can strip out the pocket hole or, worse yet, split the wood.
Related: 9 Pocket Hole Mistakes You Don’t Want to Make
Back to Table of ContentsParts of an Impact Driver
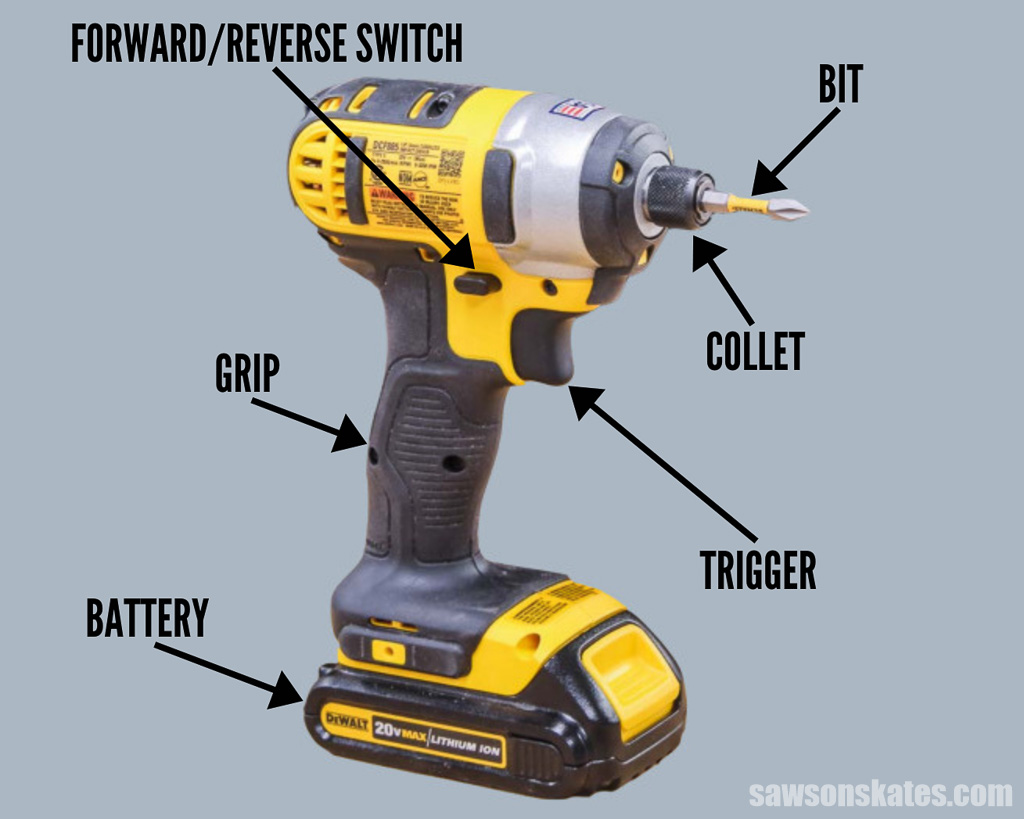
Grip
The handle or grip is the part that you hold onto while using the impact driver. It’s usually made from hard plastic or rubber and has several grooves or indentations to help provide a good grip.
Trigger
The trigger is the part of the impact driver that you press to start the motor and turn the bit.
Many impact drivers have a variable speed trigger. A variable speed trigger is used to control the speed by starting at low speeds and gradually increasing the speed.
Collet
A collet is a ring or sleeve that fits around the bit and keeps it in place. Impact drivers can only use ¼” hex bits.
Bit
Bits are the metal tips that fit into the collet of an impact driver. They come in various of shapes and sizes, depending on what you will be using them for. It’s important to only use impact-rated bits with an impact driver.
Forward/Reverse Switch
The forward/reverse switch is used to change the direction of the bit.
The forward direction rotates the bit clockwise, which is used for driving fasteners. The reverse direction rotates the bit counterclockwise, which is used for removing screws.
Battery
The battery allows you to use the impact driver without connecting to an electrical outlet. This is especially handy if you need to work in a location where there is no power outlet available.
LED Light
Many impact drivers today come with an LED light which can be helpful when you are working in a dark or confined space.
Back to Table of ContentsImpact Driver Safety
- Always read and follow any safety instructions that come with your tools.
- When working with power tools, use safety glasses, ear muffs (impact drivers are loud), and a respirator or dust mask to protect your eyes, ears, and lungs.
- Avoid driving screws into areas where there may be hidden wiring.
- Rechargeable battery packs can be dangerous. Follow the manufacturer’s instructions carefully when handling batteries.
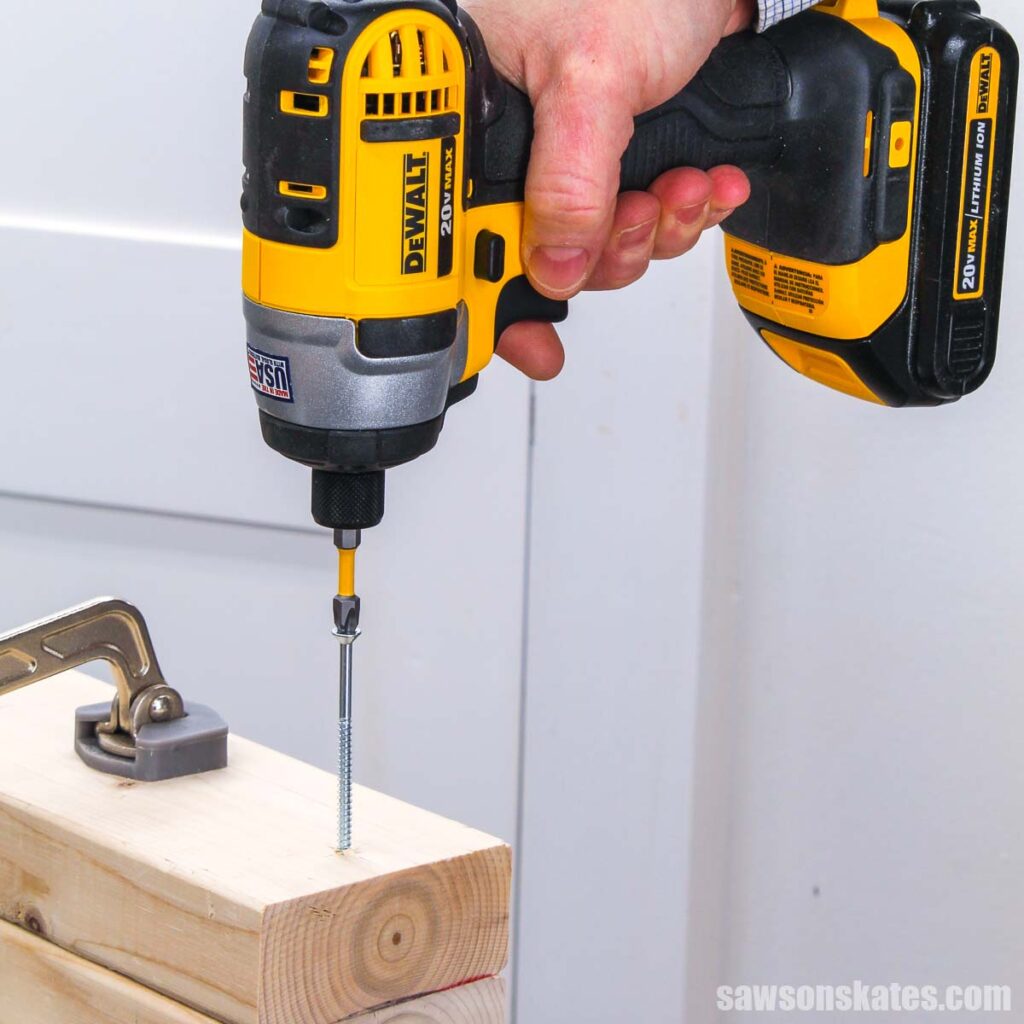
How to Use an Impact Driver to Drive Screws
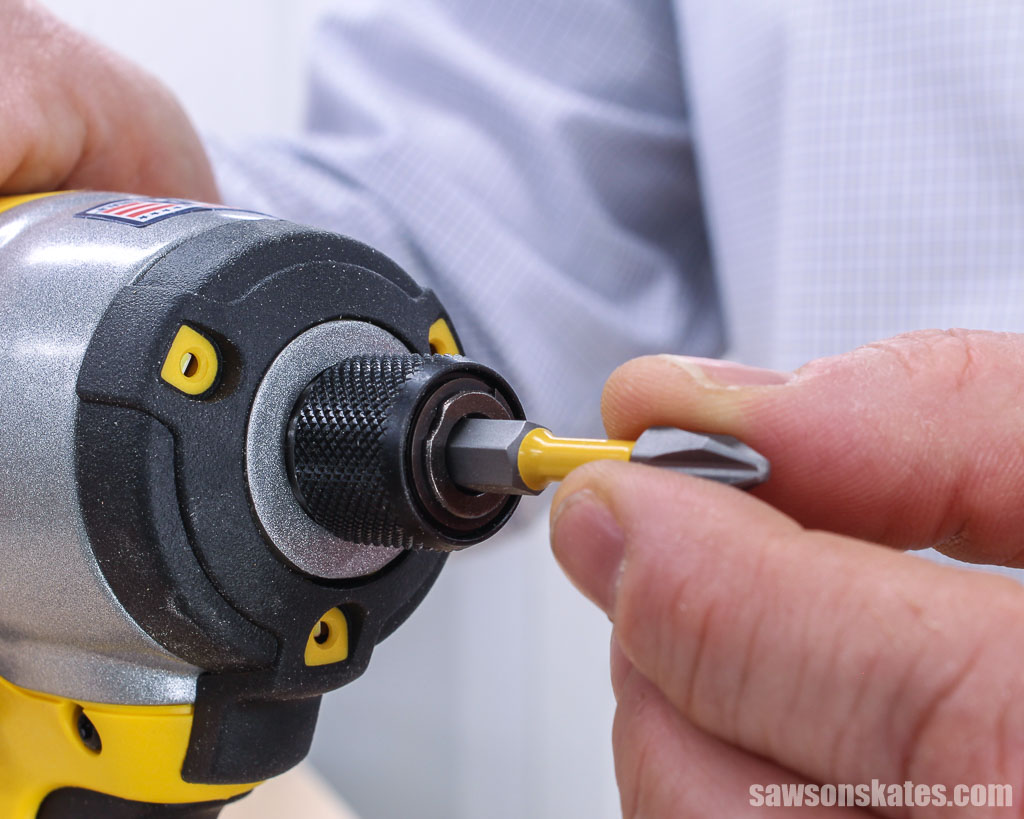
Step 1. Choose the Bit
Choose the correct bit for your fastener, such as phillips, square, star, etc.
⚠️ IMPORTANT: Be sure to use impact-rated bits with an impact driver.
Insert the bit by pulling the collet forward, slide it into position, then release the collet. I always tug on the bit to be sure it’s properly seated.
Step 2. Select the Direction
Set the direction switch to forward. An arrow pointing towards the drill’s chuck is usually used to indicate the forward direction.
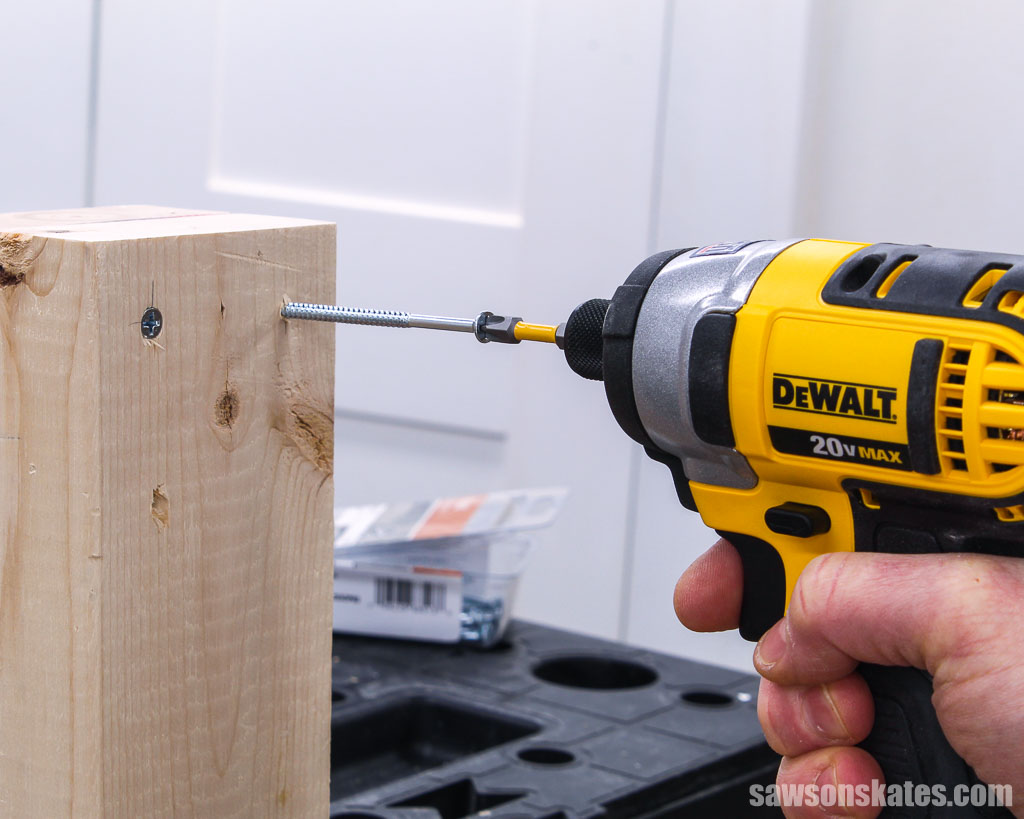
Step 3. Drive the Screw
Position the bit into the fastener and slowly squeeze the switch trigger.
📝 TIP: Starting slowly will give you more control.
You will begin to feel impacts when the driver meets some resistance.
Let go of the trigger when the head of the screw is flush with the surface.
Step 4. Remove the Bit
To remove the bit, grasp the collet and pull forward.
Here’s a short video that demonstrates the basics of using an impact driver.
How to Use an Impact Driver to Remove Screws
Step 1. Choose the Bit
Removing screws is the reverse of driving screws with an impact driver. To begin, choose the appropriate bit for your fastener.
⚠️ IMPORTANT: To prevent injury, make sure to use bits that are impact-rated.
Insert the bit by moving the collet forward, then sliding it into place, and releasing the collet. I always pull on the bit to be sure it’s firmly seated in the collet.
Step 2. Select the Direction
Set the direction switch to reverse. The reverse direction is often marked with an arrow pointing away from the chuck.
Step 3. Drive the Screw
Insert the bit into the fastener and gradually squeeze the switch trigger.
When the driver encounters some resistance, you’ll begin to feel the impacts.
When the screw has been removed from the material, release the trigger.
Step 4. Remove the Bit
To remove the bit, grasp the collet, pull forward, and remove the bit.
Back to Table of ContentsFrequently Asked Questions
When should you not use an impact driver?
Impact drivers should not be used for jobs that require precision because they operate quickly, and it’s too easy to over-tighten fasteners or drive them too deeply.
If you’re working on a project that requires precision or a delicate touch, use a drill or screwdriver instead.
What bits do you use with an impact driver?
You need to use “impact-rated” bits with an impact driver. These bits are designed to handle the enormous torque of an impact driver. An impact drill’s high torque might break a bit that isn’t impact-rated.

Final Thoughts
I hope this article has clarified what an impact driver is, when you should and shouldn’t use one, and how to maximize your impact driver’s performance.
Thank you for stopping by. If you enjoyed this tutorial, would you please take a moment and pin it to Pinterest? I’d really appreciate it!
Recommended For You

Pin This For Later

Hi there – I’m Scott, a woodworking enthusiast and creator of Saws on Skates, a site I started in 2015 to share easy-to-follow tutorials, space-saving shop tips, and project inspiration for DIYers at any skill level. Learn more about my woodworking journey here.