DIY Outdoor Wall-Mount Planter
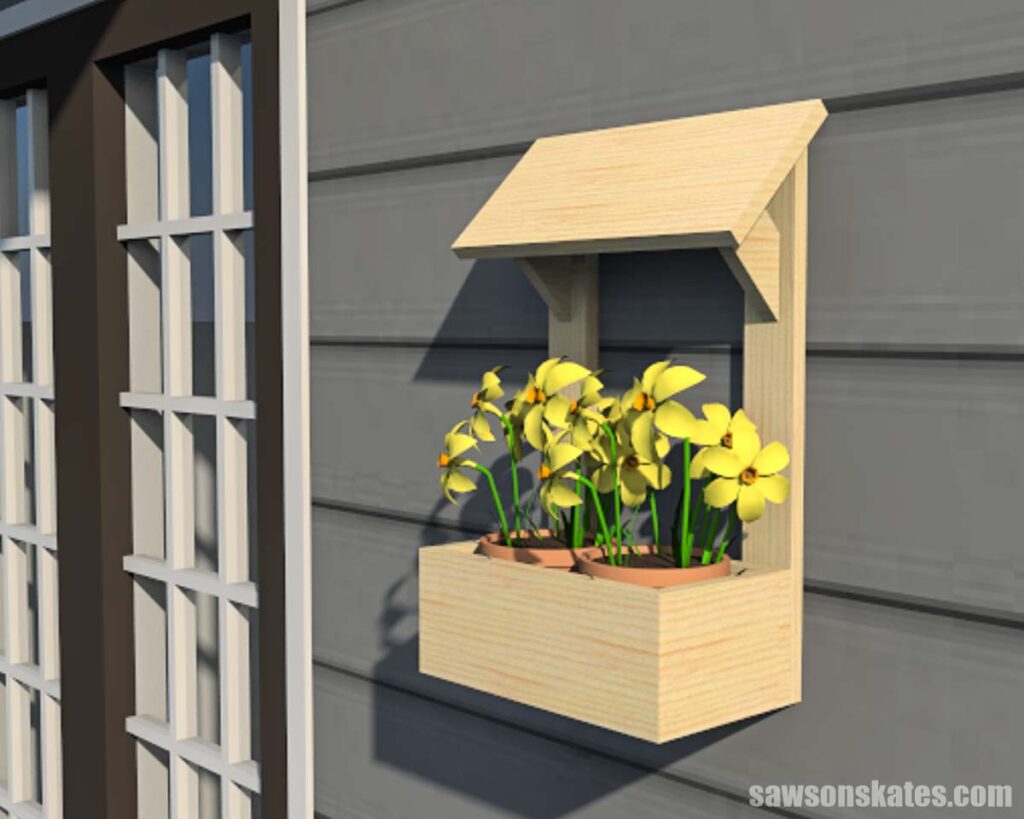
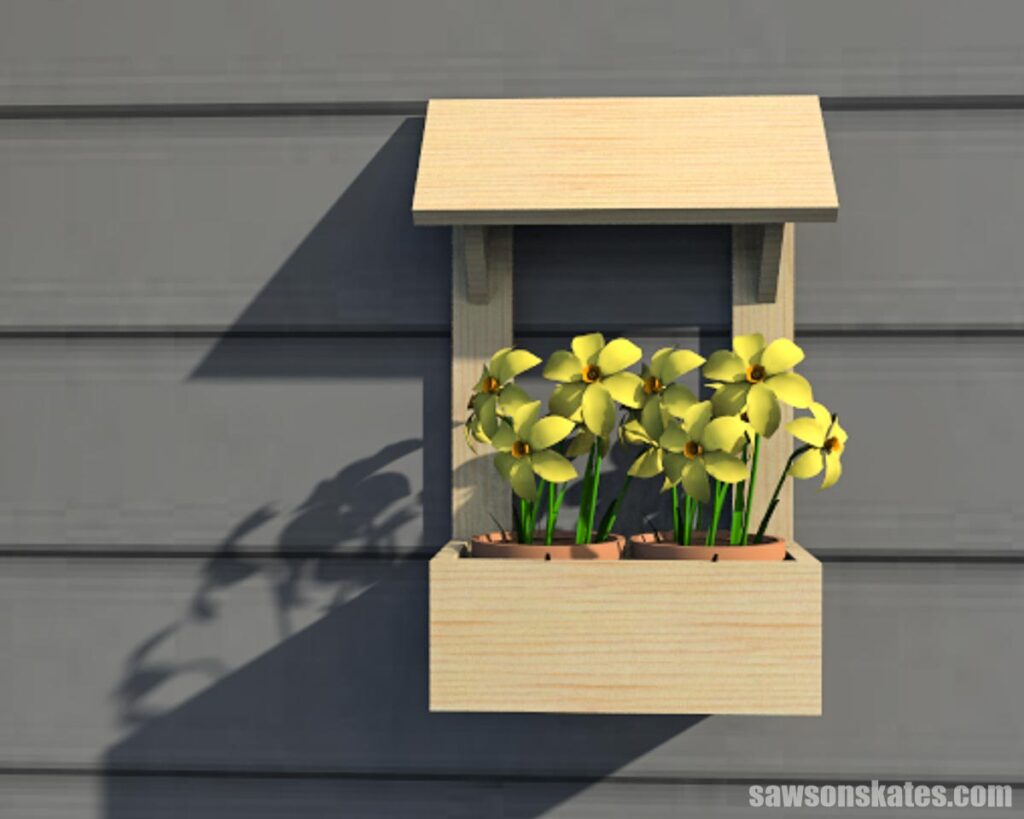
CUTE! This easy-to-make DIY wall-mounted planter looks like a tiny window with a window box and awning! It’s perfect for growing flowers, herbs, and more.
What Should I Build Next?
That's the question I help answer.
Every week, I send woodworking ideas to 17,000 DIYers who love building things.
You'd fit right in.
Want a unique way to add some extra greenery to your backyard or patio? Why not build a wall-mounted planter shaped like an adorable little window! Up top, there’s an awning, and below is a window box that holds two 6-inch pots.
Use it outdoors to grow flowers and herbs, or use it indoors to grow succulents and houseplants. It’s a fantastic way to show off your green thumb, no matter how you use it!
This project is easy to do using basic tools and materials and can be completed in just a few hours. Keep reading for step-by-step instructions and tips on how to get the job done right.
Table of Contents
- What Tools Do You Need?
- What Wood Should You Use?
- Customize Your Wall-Mounted Planter
- How Do You Finish the Planter?
- How to Make a DIY Outdoor Wall-Mounted Planter
- Get the Free Plan
This article contains affiliate links. If you purchase from these links, I may earn a small commission at no additional cost to you. Visit my site policies for more information.
Inspiration for This DIY Outdoor Wall-Mount Planter
The idea for this wall-mounted planter was inspired by a photograph I came across online. I’m not sure where I saw it because it was at least several years ago when I spotted it. You see, I actually built this planter a while back but never shared the plans with you.
Why didn’t I share the plans? Well, have you ever built a project, but it didn’t turn out as expected? That’s what happened with this planter.
The planter was adorable when I finished building it. But instead of stopping there, I painted it, and I thought it looked awful. Then I painted it a second time, and it looked even worse! So I changed the color for the third time, and it finally looked a little better.
Next, I tried to photograph it. But the flowers looked like they were on their last legs, and there was a rickety fence in the background of every photo. I got so frustrated with the whole project that I decided to call it quits.
I was looking through my plans recently, and I came across the planter. Then I had an idea. I could share it with you using the step-by-step build photos and what it would look like finished with renderings, as I did for this wine rack and this coat rack.
So let’s get started and add a touch of whimsy to your outdoor spaces!
What Tools Do You Need to Make an Outdoor Planter?
Looking for an easy and fun afternoon project? This wood wall planter is simple to make using just a few basic tools such as a miter saw, pocket hole jig, and a drill.
Miter Saw
For this project, I used a miter saw to cut all of the parts to the proper length.
Related: 7 Miter Saw Tricks Every DIYer Should Know
Pocket Hole Jig
This project was built using my Kreg Pocket Hole Jig, but you may use any pocket hole jig you have.
Related: Which Kreg Pocket Hole Jig Should You Buy?
Drill
You’ll need a drill to make the pocket holes and drive the pocket hole screws that connect the parts together.
Related: Impact Driver vs Drill: What’s the Difference?
Some of the pocket hole locations on this project may be tough to access with a standard driver. A right angle drill attachment is an ideal tool for drilling in a tight space or driving screws into difficult-to-reach places.
Related: How to Screw in Hard-to-Reach Places
What Wood Should You Use?
My wall planter was built almost entirely with scrap wood. I used pieces of 1×3, 1×4, and 1×6 pine. Pine is a decent choice for an indoor planter, but it’s not the best choice for an outdoor project because it’s not rot-resistant.
Related: Beginner’s Guide to Wood Sizes
A better choice for an outdoor planter is cedar. Cedar is naturally rot-resistant. I used cedar to build this DIY bird feeder.
There are two reasons I chose to use pine for this project instead of cedar.
First, I build nearly all of my projects with pine. This means I always have lots of pine wood scraps in my workshop. This project was a fantastic way to use up some of those scraps.
Related: How to Decide What Scrap Wood to Keep
Second, cedar causes allergies in some people. I am one of them. Even when I use a face mask, the cedar sawdust sneaks into my nasal passages and makes me congested. That’s why I usually avoid using cedar for my projects.
Customize Your Wall-Mounted Planter
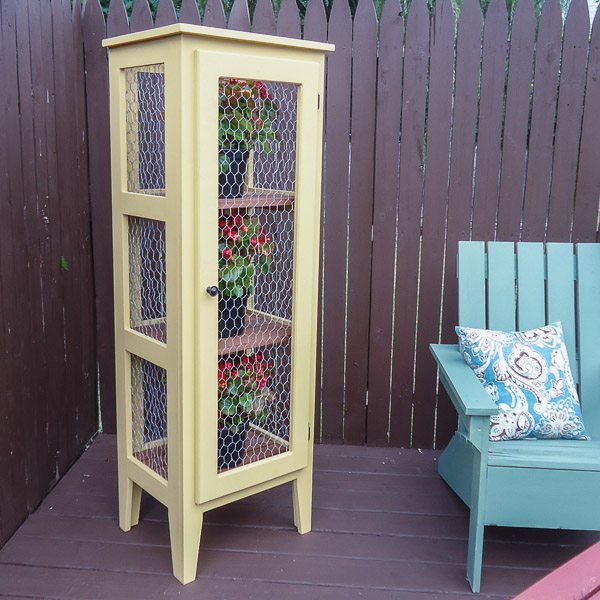
There are several ways you can customize this planter. You could add wire mesh to the window opening. Chicken wire or hardware cloth would make this cute project even cuter!
You could easily turn this wall planter into an address number wall planter by attaching your house numbers to the front of the window box. How simple is that?!

How Do You Finish the DIY Outdoor Planter?
This DIY wall planter may be finished in a variety of ways. You could leave it natural, paint, stain it, or a combination of the two.
If you plan to use this planter outdoors, be sure to choose an exterior paint or finish like spar urethane that will withstand the elements.
Related: Spar Urethane vs Polyurethane: Differences + Which to Use
How Do You Hang the Planter on the Wall?
This planter will be heavy when it’s loaded with plants, so it must be securely attached to the wall.
Attach the Planter to a Wall Stud
First, locate the studs in the wall with a stud finder. Next, place the planter over the studs and make sure it’s level using a level. Then, drill countersink holes into the back of the planter into the wall. Attach the planter to the wall with 2-½” exterior wood screws.
Related: How to Use a Countersink Drill Bit
French Cleat
A simple method to attach the planter to the wall is to make a french cleat.
Related: How to Make a French Cleat (2 Easy Ways)
How to Make a DIY Outdoor Wall-Mount Planter
Printed Plan
Get the FREE plan here (includes detailed instructions, measurements, and bonus tips)
Materials
- Wood (per the printed plan)
- 1-¼” Blue-Kote Exterior Pocket Hole Screws
- Exterior Wood Glue
Tools
- Tape Measure
- Drill
- Kreg Jig
- Kreg Multi-Mark
- Miter Saw
- Countersink Drill Bit Set
- Right Angle Drill Attachment
Step 1. Make the Planter Box
Cut two pieces of wood to length for the sides, and drill pocket holes in each end.
Related: How to Use a Pocket Hole Jig
Cut two pieces of wood to length for the front and back.
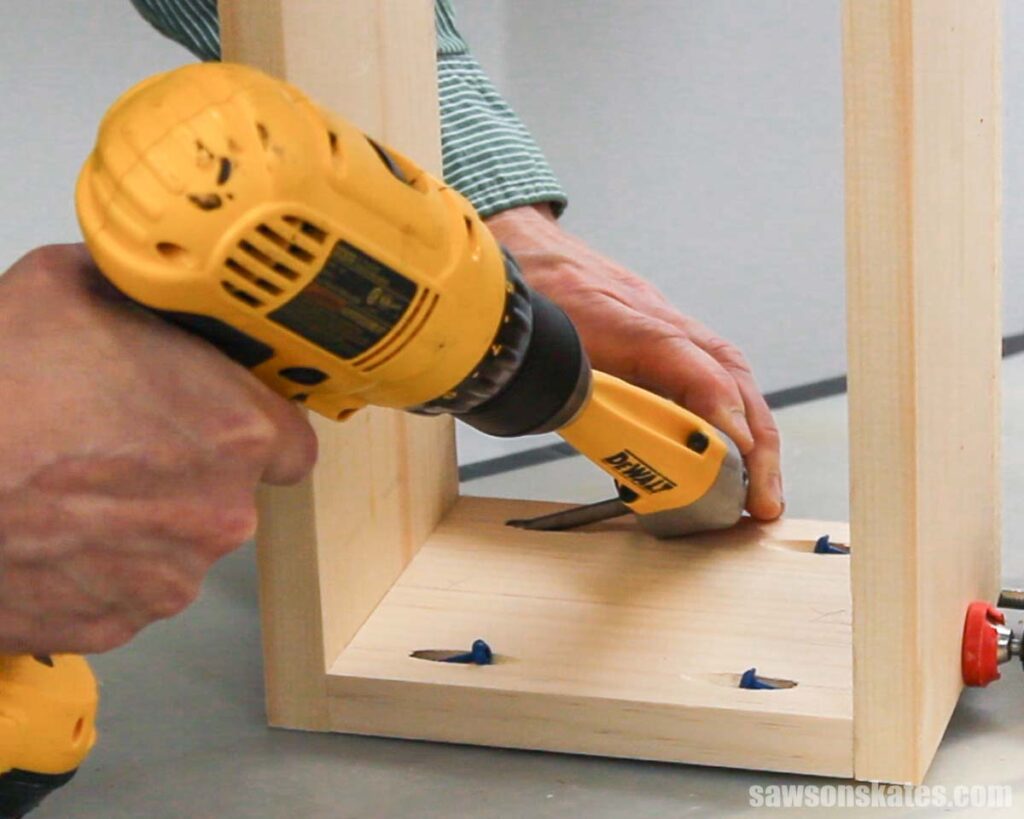
Apply glue to the sides, clamp to the front and back, and attach using 1-¼” pocket screws.
You will need to use a right angle drill attachment to reach the pocket screws.
Related: How to Screw in Hard-to-Reach Places
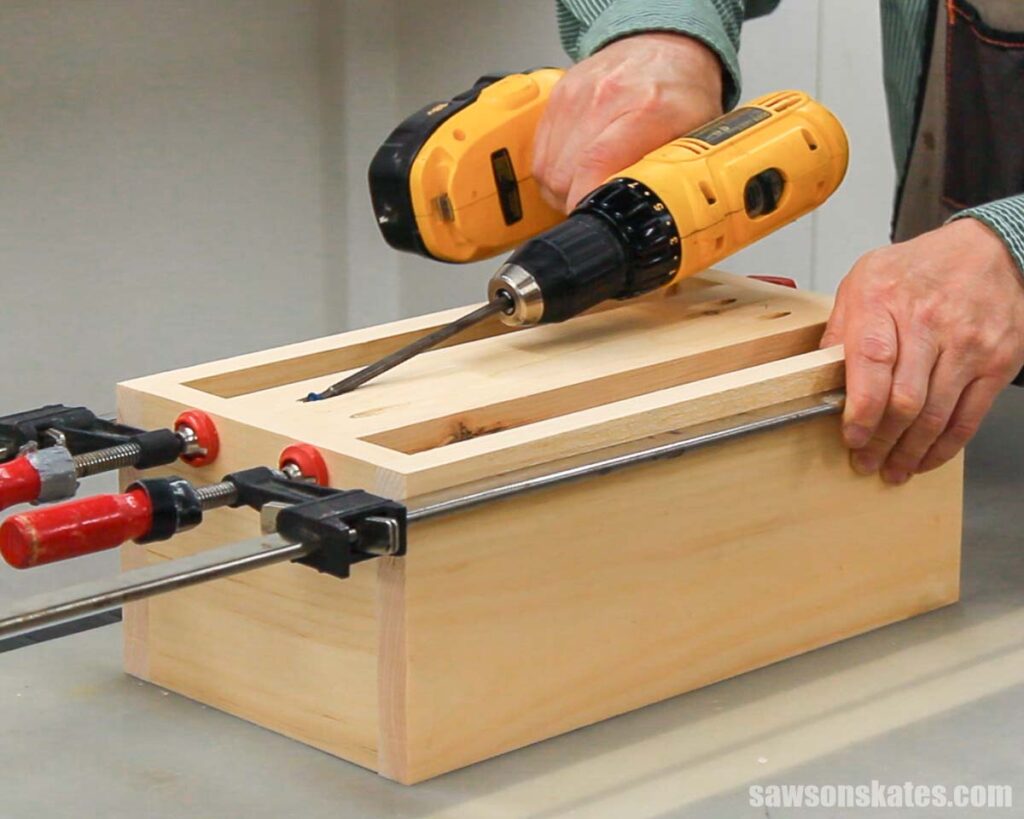
Cut one piece of wood to length for the bottom, and test fit in the opening. Adjust the length of the bottom if necessary and drill pocket holes in each end.
Center the bottom from side to side, and attach using 1-¼” pocket screws.
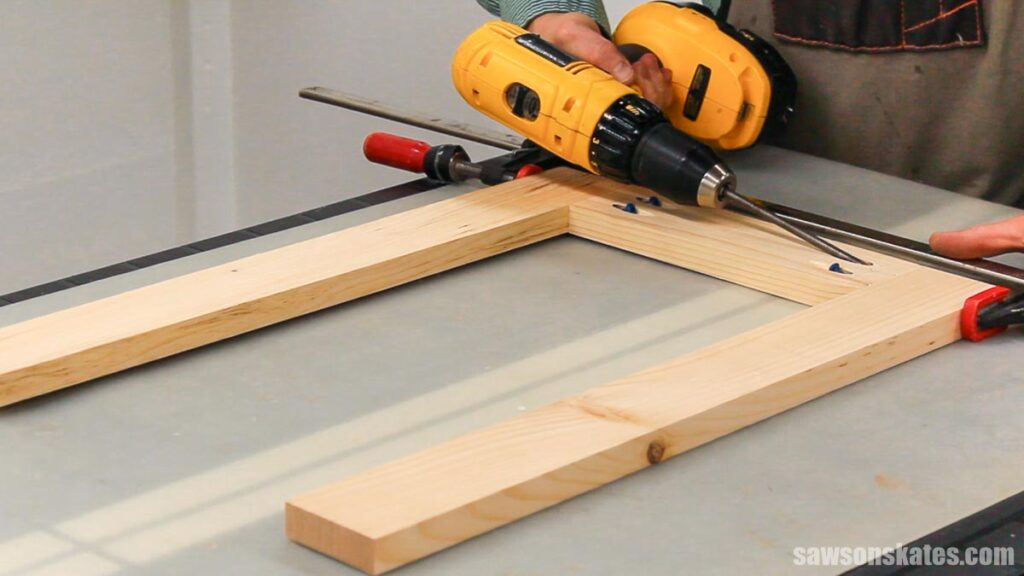
Step 2. Make the Window Frame
Cut one piece of wood to length for the top, and drill pocket holes in each end.
Cut two pieces of wood to length for the sides.
Apply glue to the top, clamp to the sides, and attach using 1-¼” pocket screws.
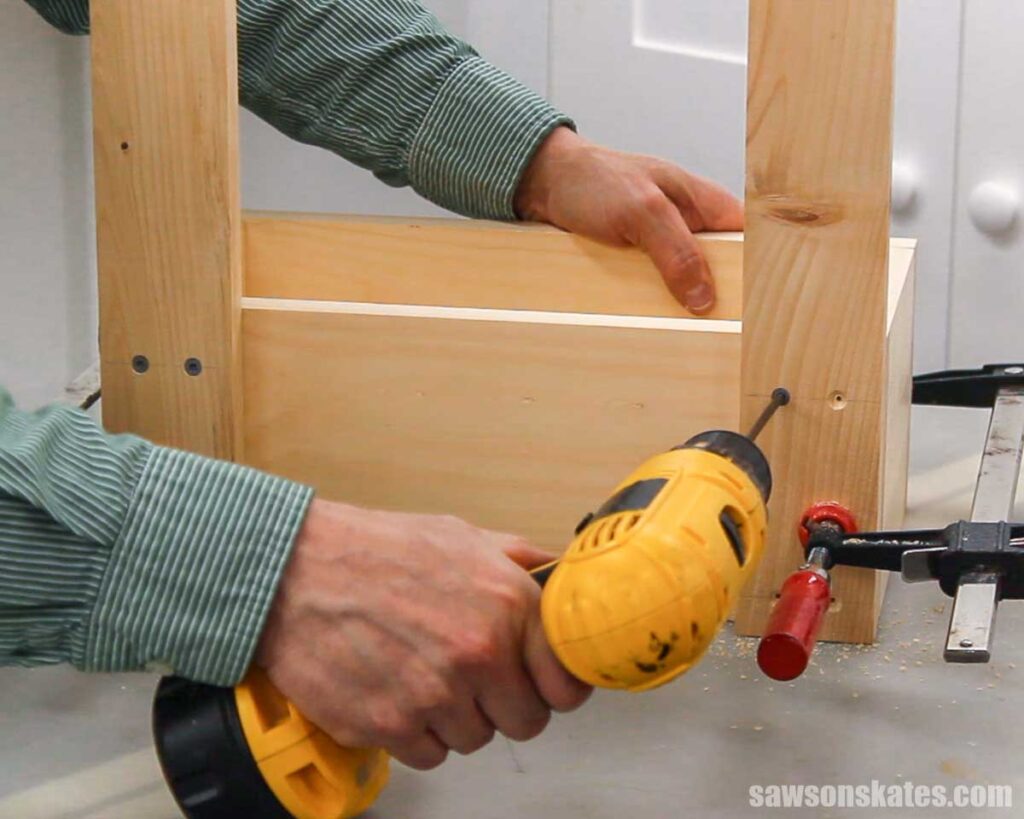
Step 3. Attach the Window Frame
Clamp the window frame to the window box and use the diagram in the printed plan to drill countersink holes in each side of the frame.
Related: How to Use a Countersink Bit
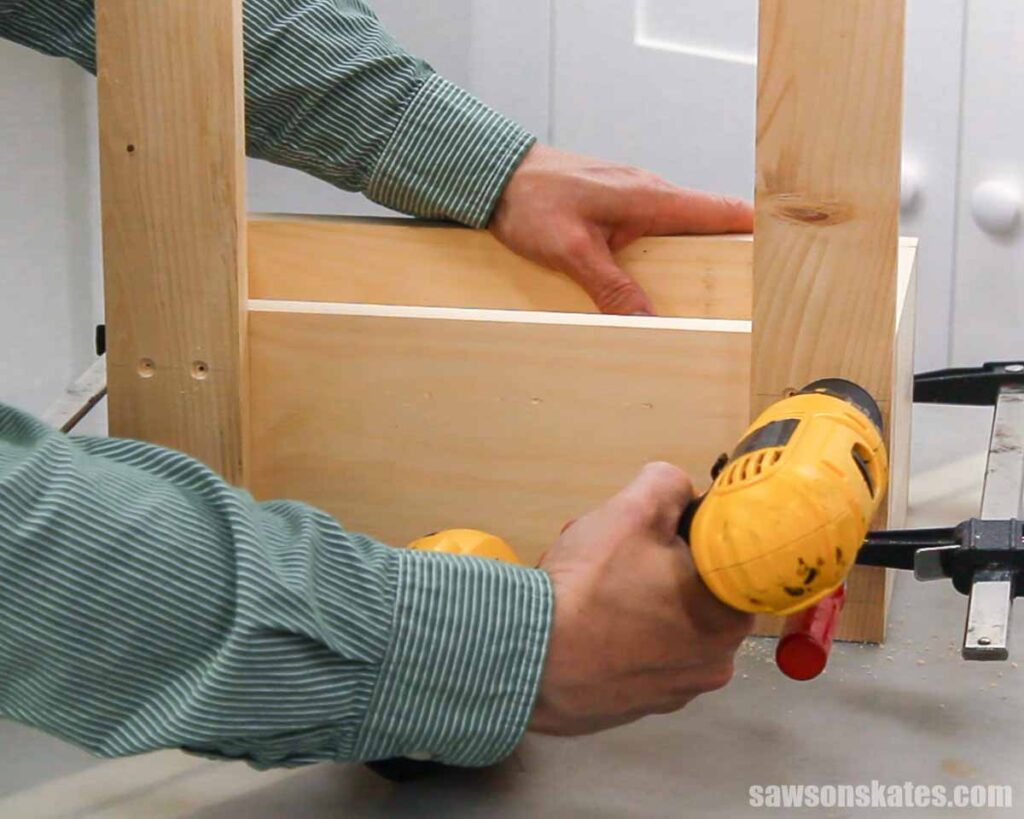
Attach using 1-¼” wood screws.
Step 4. Attach the Brackets
Cut two pieces of wood to length with a 45-degree angle on one end. Drill pocket holes in each end.
💡 TIP: Be sure to make a right and a left. This way, the pocket holes will face the inside of the planter.
Related: How to Use Pocket Holes on Miter Joints
Cut three pieces of wood to length for the awning. Apply glue to the edge, and clamp until the glue is dry.
Use the diagram in the printed plan to position the brackets on the awning and attach using 1-¼” pocket screws.
Step 5. Attach the Awning
Use the diagram in the printed plan to position the awning assembly on the window frame and attach using 1-¼” pocket screws.
Step 6. Finish the Planter
See How Do You Finish the DIY Outdoor Planter and How Do You Hang the Planter on the Wall for more information.
Final Thoughts
This wall-mounted planter shaped like a little window is a unique way to add some extra greenery to your backyard or patio!
Get the free plan (including the detailed instructions and measurements) now!
Thank you for stopping by. If you enjoyed this tutorial, would you please take a moment and pin it to Pinterest? I’d really appreciate it!
Recommended For You

Pin This For Later

Hi there – I’m Scott, a woodworking enthusiast and creator of Saws on Skates, a site I started in 2015 to share easy-to-follow tutorials, space-saving shop tips, and project inspiration for DIYers at any skill level. Learn more about my woodworking journey here.