Simple DIY Side Table
So easy! Build this simple wooden DIY side table with just 3 tools. The casual style and small size is perfect for nearly any room. Get the free plans now!
What Should I Build Next?
That's the question I help answer.
Every week, I send woodworking ideas to 17,000 DIYers who love building things.
You'd fit right in.
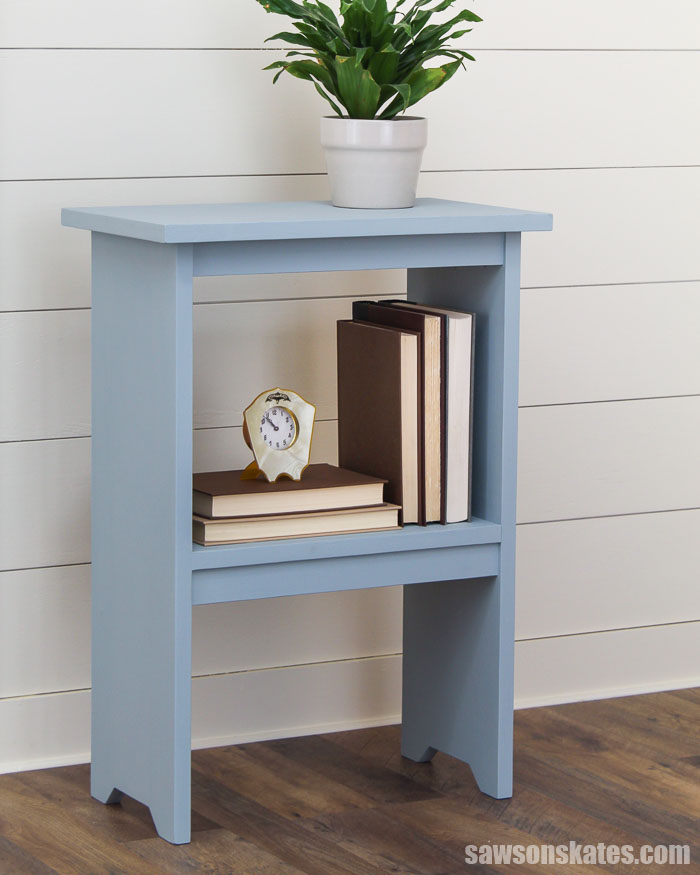
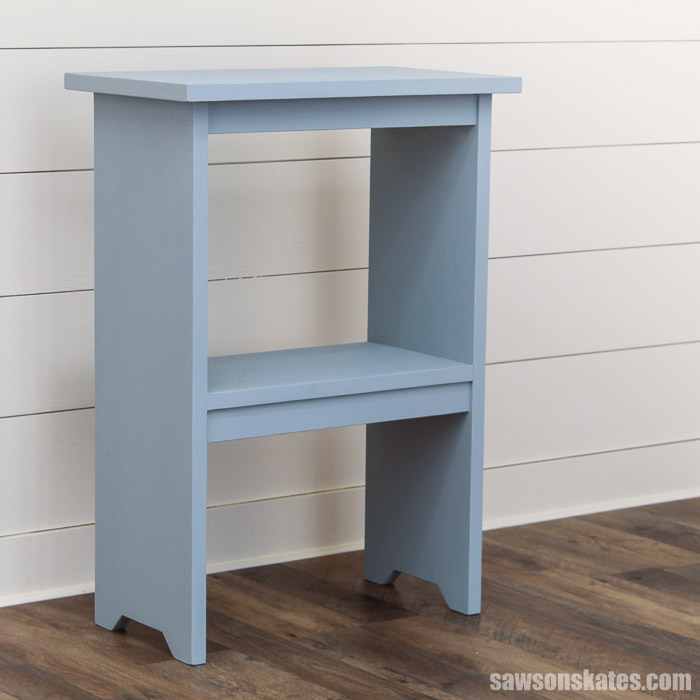
DIY Side Table
This simple wooden DIY side table is an easy afternoon do-it-yourself project.
It’s made with a few straight cuts and just a few basic tools.
The casual style and small size make this table a smart choice for any place that needs a little extra storage.
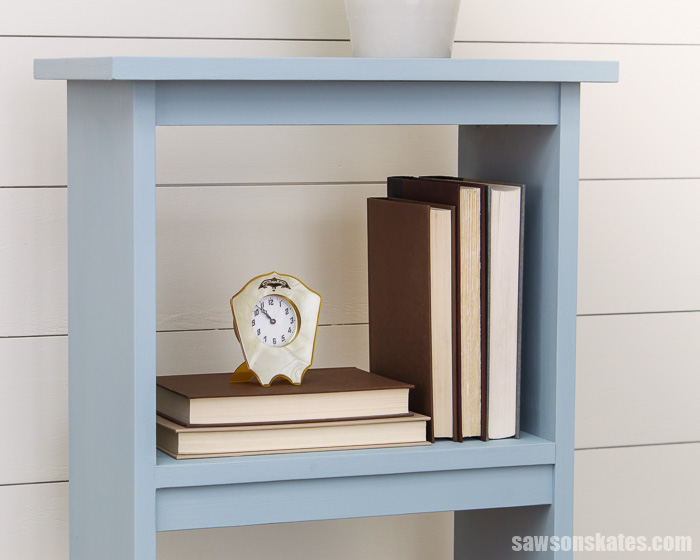
The tabletop is great for a lamp. The storage shelf is a great way to display plants or organize books, remotes, and more.
It’s perfect for a bedroom, living room, family room, or even outdoors.
Get the free, goof-proof plans and build one (or two) today!
This tutorial contains affiliate links to supplies and tools. Purchases made using these links help support the Saws on Skates website and allows me to share more projects and tips with you. There is no cost to you for using these links. Visit my site policies for more information.
Before we get into how to make a DIY side table, be sure to click the subscribe button at the bottom of this page to sign up for my FREE weekly newsletter loaded with helpful pocket hole tricks, space-saving workshop ideas, clever DIY tips and more!
Table of Contents
- How Do You Make a Simple Wooden Side Table?
- What Kind of Wood Do You Need?
- How Do You Attach the Top?
- How Do You Finish the Side Table?
- How to Use This Side Table
- How to Make a DIY Side Table
- Get the Free Printed Plan
How Do You Make a Simple Wooden Side Table?
This DIY side table is an easy-to-make project for DIYers of any skill level.
The table can be made in an afternoon using simple woodworking skills, and just a few basic tools. That makes this a great project for beginners.
Related: 10 Must-Have Woodworking Tools for Beginners
We only need three basic tools to build this project. Tools like a miter saw, pocket hole jig, and a drill.
Related: 7 Miter Saw Tricks Every DIYer Should Know
We can use any pocket hole jig to drill the pocket holes. The inexpensive, user-friendly Kreg Jig 320 would be a great choice to drill the pocket holes for this project.
Related: How to Use a Kreg Jig 320
What Kind of Wood Do You Need?
This easy-to-make side table can be made with just about any type of wood. I used common pine to build mine. Pine is inexpensive and easy to work with. I purchased the pine 1×2s, 1×3s, 1×4s at my local home improvement store.
Related: Beginner’s Guide to Wood Sizes
How Do You Attach the Top?
Many times we’ll want to attach a table top to a base with table top fasteners.
The table top fasteners allow for wood movement caused by seasonal changes. If we don’t allow for wood movement the table top could crack.
In many cases, I recommend not to use pocket screws to attach a table top. Instead, I recommend attaching a table top with table top fasteners which allow for wood movement.
Related: How to Attach a Table Top to a Base (The Right Way)
This project is an exception.
The reason is, the wood grain of the table top and the side panels are oriented in the same direction.
Wood expands the most across its width.
The table top and side panels will expand across their width or from front to back of this piece. There are no fasteners or cross members that will prevent this movement. This should reduce the chances of the wood cracking or splitting.
Related: Mistakes with Wood Can Cause Your DIY Furniture to Crack
Back to Table of ContentsHow Do You Finish the DIY Side Table?
This DIY side table could be finished in a variety of ways. It could be left natural, painted, stained, or a combination of paint and stain.
I planned to paint my table, but I wanted to try a different color for this project.
I like using the Behr color samples from Home Depot. The samples are a great way to try out a new color. They’re inexpensive, and the sample size is the perfect amount of paint for small projects like this one.
For some color inspiration, I Googled “Behr Farmhouse Colors”. I found this How to Get Fixer Upper Paint Colors from Home Depot tutorial by Joyful Derivatives.
I liked all of the paint colors, but I chose “Frozen Pond” for this project.
Stay tuned. I’ll probably be trying out more of these “Fixer Upper” colors on upcoming projects!
Back to Table of ContentsHow to Use This Side Table
- In a bedroom as a nightstand
- In a living room or family room as an end table
- Under a window
- Outdoors on a patio or deck
- Add a lamp for extra lighting
- Display plants
- Organize books, remotes and more
Simple DIY Side Table
Printed Plan
- Get the FREE plan here (includes detailed instructions, measurements, and bonus tips).
Supplies
Tools
- Tape Measure
- Drill
- Kreg Jig
- Miter Saw
Step 1. Make the Sides
Cut 4 pieces of wood to length for the outer sections of the sides and cut a 45-degree angle on one end.
Cut 2 pieces of wood to length for the inner section of the sides.
Apply glue to the edges and clamp to form two panels.
When the glue was dry, I drilled pocket holes at the top of each side panel. These pocket holes will be used to attach the sides to the top.
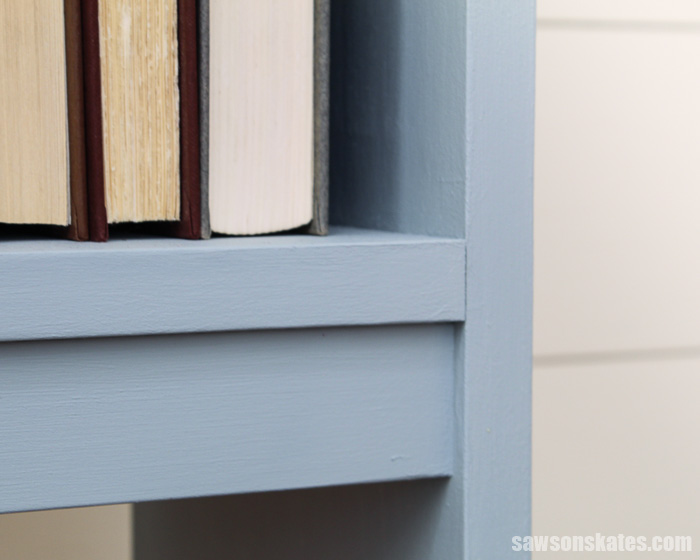
Step 2. Attach the Shelf
Cut 3 pieces of wood to length for the shelf. Apply glue to the edges and clamp.
When the glue was dry, I drilled pocket holes in each end of the shelf.
I positioned the shelf, clamped it to the side panels and attached using pocket screws.
Step 3. Attach the Rails
Cut 4 pieces of wood to length for the rails and drill pocket holes in each end.
Position the rails at the top of the sides, and below the shelf. Attach using pocket screws.
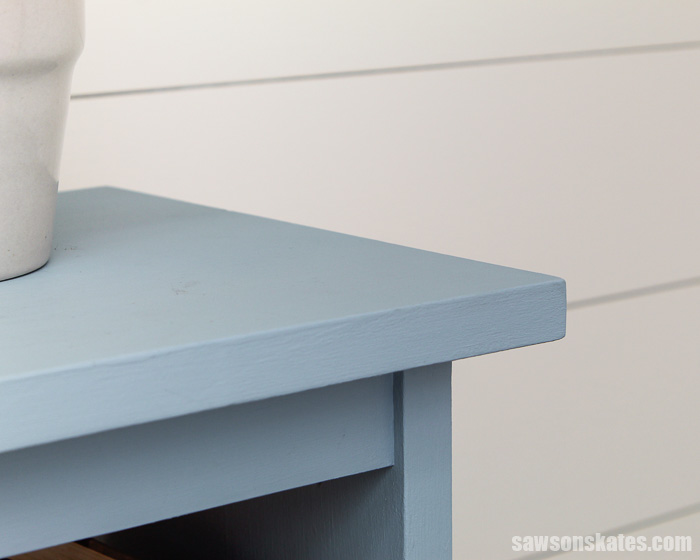
Step 4. Attach the Top
Cut 3 pieces of wood to length for the top. Apply glue to the edges, and clamp.
When the glue was dry, I centered the top on the sides, clamped, and attached using pocket screws.
Step 5. Finish the Side Table
This DIY side table could be finished in a variety of ways. It could be left natural, painted, stained, or a combination of paint and stain.
I painted my table with two coats of Behr “Frozen Pond”.
Final Thoughts
This simple wooden DIY side table is an easy afternoon do-it-yourself project.
It’s made with a few straight cuts and just a few basic tools.
The casual style and small size make this table a smart choice for any place that needs a little extra storage.
Get the free plan (including the detailed instructions and measurements) now!
Thank you for stopping by. If you enjoyed this tutorial, would you please take a moment and pin it to Pinterest? I’d really appreciate it!
Recommended For You
Pin This For Later

Hi there – I’m Scott, a woodworking enthusiast and creator of Saws on Skates, a site I started in 2015 to share easy-to-follow tutorials, space-saving shop tips, and project inspiration for DIYers at any skill level. Learn more about my woodworking journey here.