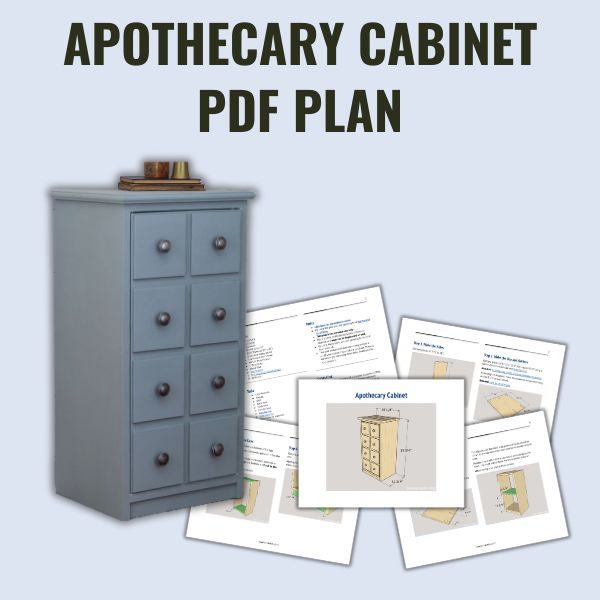
DIY Apothecary Cabinet
This DIY apothecary cabinet is a stylish way to add storage to any room. The faux drawers hide books, remotes, and more. It’s easy to make with these plans.
What Should I Build Next?
That's the question I help answer.
Every week, I send woodworking ideas to 17,000 DIYers who love building things.
You'd fit right in.
DIY Apothecary Cabinet
Add storage to nearly any room with this DIY apothecary cabinet.
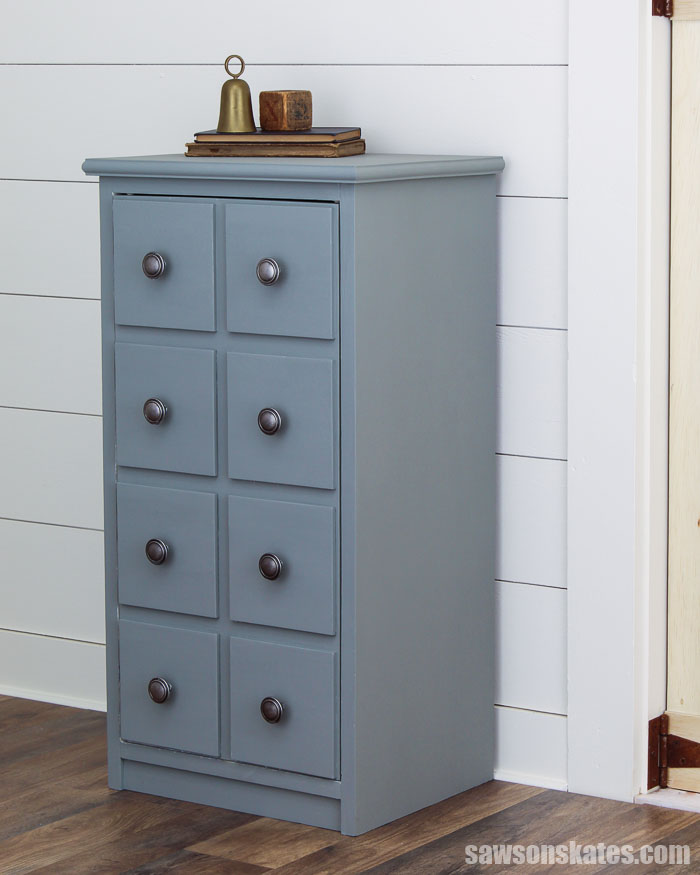
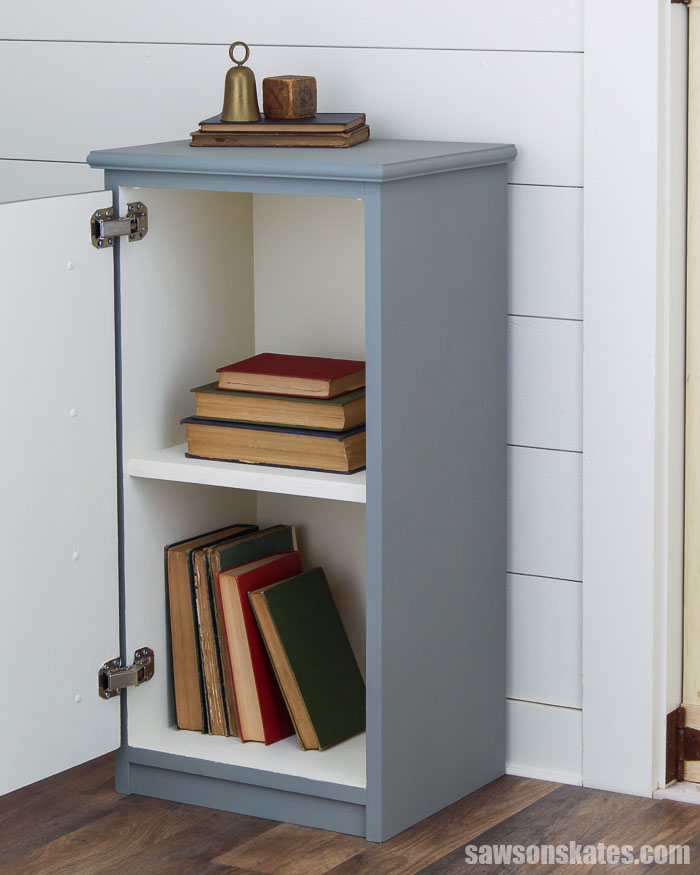
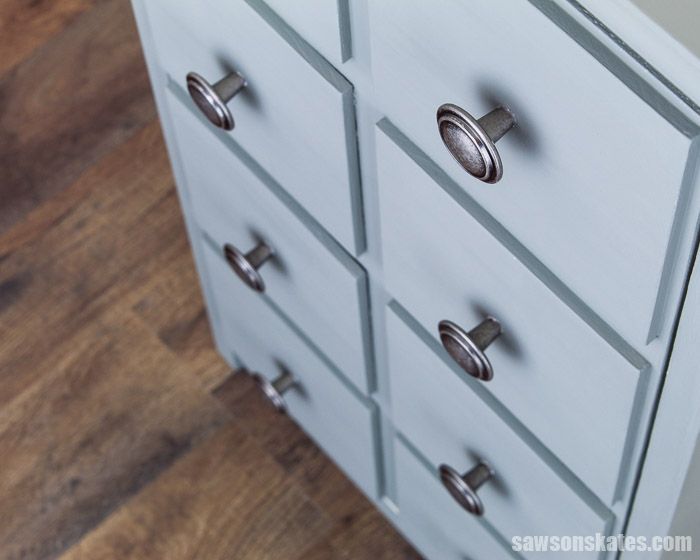
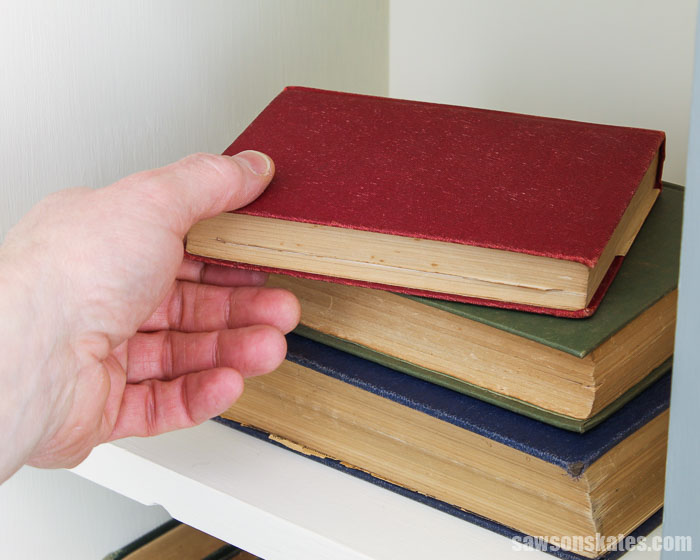
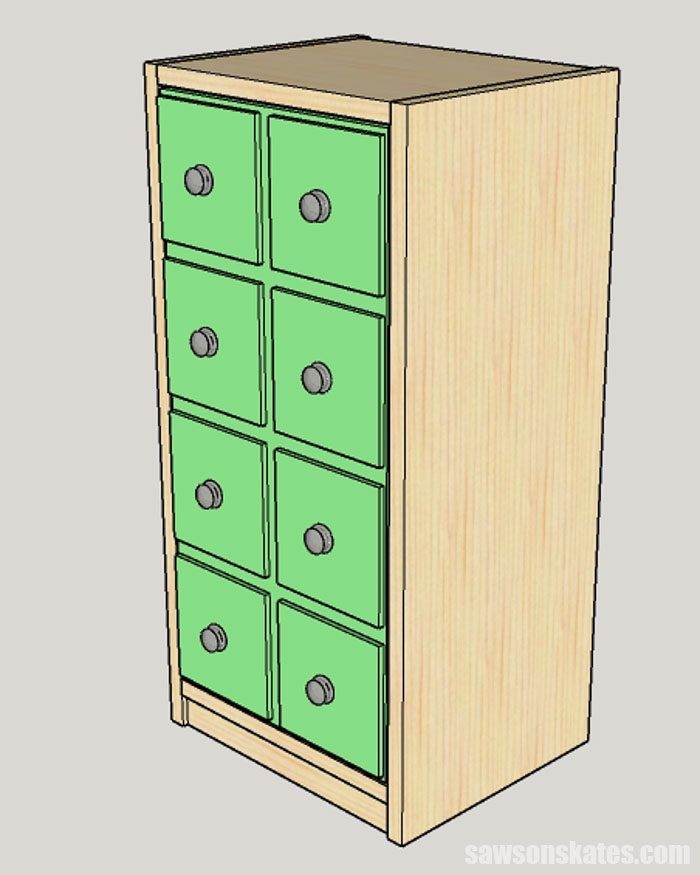
This apothecary-style cabinet has eight faux drawers that are attached to a wooden door. Behind the door is an enclosed storage area that can be used to organize books, magazines, remotes, and more.
On top of the cabinet, there’s space for a lamp, to set a drink, or rest your phone.
This small cabinet is the perfect size to use as an end table next to a couch or chair, as a nightstand in the bedroom, or as extra storage in the bathroom.
Get the step-by-step plans and build one today.
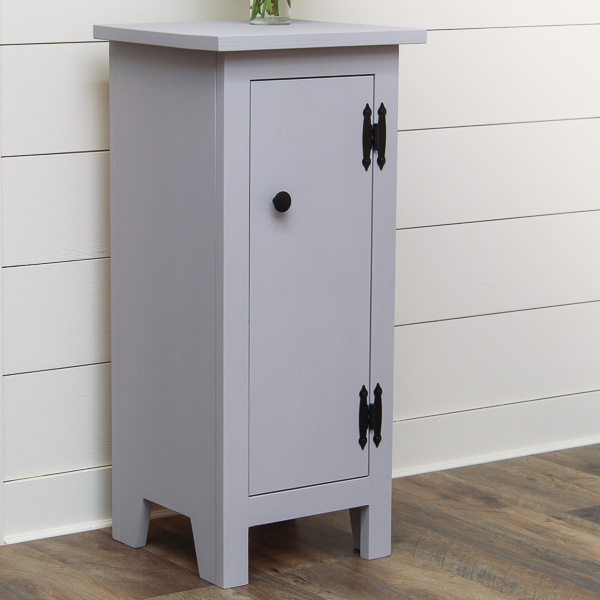
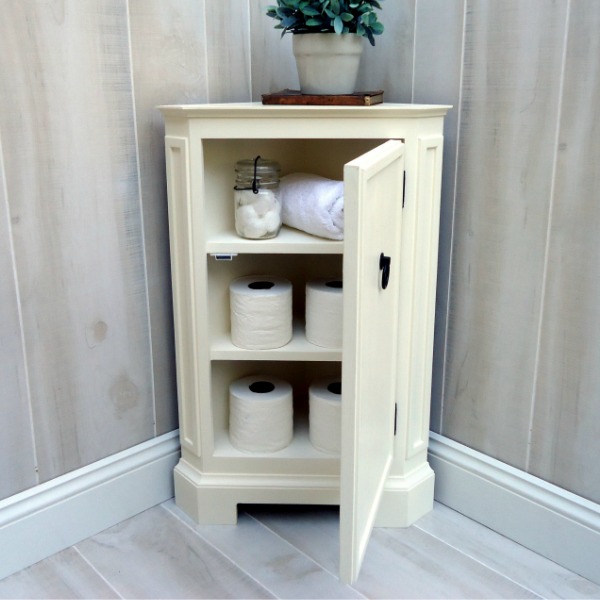
You may also enjoy this DIY window cabinet, DIY end table, and DIY corner cabinet.
Originally published March 1, 2015, updated February 9, 2021
This tutorial contains affiliate links to supplies and tools. Purchases made using these links help support the Saws on Skates website and allows me to share more projects and tips with you. There is no cost to you for using these links. Visit my site policies for more information.
Table of Contents
- Inspiration for This Project
- What Tools Do You Need to Make an Apothecary Cabinet?
- What Wood Should You Use?
- How Do You Make Adjustable Shelves?
- How Do You Finish the Apothecary Cabinet?
- DIY Apothecary Cabinet Tutorial
- Get the PDF Plan
Inspiration for This Project
This project was inspired by a need for some storage next to my couch. I wanted a place for a lamp, to set a drink, store a TV remote, and to organize my woodworking magazines.
I combined my need for storage with the look of an antique apothecary cabinet.
This apothecary-style cabinet has eight faux drawers that are attached to a single wooden door. The faux drawers add a little dimension to this somewhat simple piece.
Behind the door is an enclosed storage area. The storage area can be used to organize books, magazines, remotes, and more.
What Tools Do You Need to Make an Apothecary Cabinet?
This wood apothecary cabinet may look complicated but it’s as easy as making a simple box. It’s a weekend project that can be made using basic woodworking skills and just a few common woodworking tools.
Tools like a miter saw, pocket hole jig, and a drill. We’ll also need an additional saw to cut the door and the back of the cabinet. There are two optional tools like a router and a shelf pin jig that can be used to customize this apothecary cabinet.
Miter Saw
I used a sliding miter saw to cut many of the parts for this project. A sliding miter saw has a larger cutting capacity than a compound miter saw. The maximum cutting capacity for a compound miter saw is usually about 5 to 6 inches. The sides of this project measure 11-¼” which is larger than the cutting capacity of a compound miter saw.
Related: 7 Miter Saw Tricks Every DIYer Should Know
If you don’t have a sliding miter saw, you could cut the sides with a circular saw and a crosscut jig, a circular saw and a large speed square, or a table saw and a crosscut sled.
Related: How to Make a DIY Circular Saw Crosscut Jig
Pocket Hole Jig
We can use any pocket hole jig to drill the pocket holes. The user-friendly Kreg Jig 320 is an inexpensive choice to drill the pocket holes for this project.
Related: How to Use a Kreg Jig
Drill
The drill was used to drill the pocket holes and to drive the screws that join the parts together.
Related: How to Put a Drill Bit in a Drill
Additional Saw
We’ll need an additional saw to cut the plywood for the door and the back of the cabinet. I used a table saw to cut these parts. If you are not comfortable using a table saw, you could use a circular saw instead.
A circular saw and a Kreg Rip-Cut or Kreg Accu-Cut could be used to rip the parts to width. Then a circular saw and a crosscut jig or Kreg Accu-Cut could be used to cut the parts to length.
Related: 4 Ways to Make Straight Cuts with a Circular Saw
Optional Tools
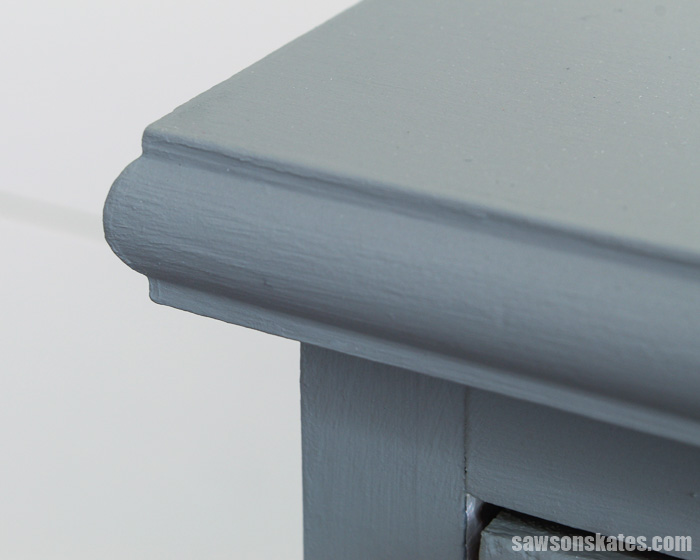
I used a router to add a decorative detail to the top edge of the cabinet. You can leave the edges square if you don’t have a router.
Related: How to Use a Router Table for Beginners
Another optional tool is a shelf pin jig. A shelf pin jig can be used to drill shelf pin holes to add adjustable shelves. I built this cabinet years ago and I didn’t have a shelf pin jig at that time.
If I were to make this cabinet now, I would build it with adjustable shelves. If you don’t have a shelf pin jig, you can build this cabinet with a fixed shelf like I did.
Related: How to Use a Shelf Pin Jig
What Wood Should You Use?
This apothecary cabinet can be made with just about any type of wood. I used common pine, scrap pieces of ½” plywood, and ¼” hobby boards to build mine.
Pine is inexpensive and easy to work with. I purchased the pine 1×2s, 1×3s, 1×4s, and 1×12s at my local home improvement store.
Related: Beginner’s Guide to Wood Sizes
A friend gave me several scrap pieces of ½” plywood. I used those pieces to make the door and the back of the cabinet.
Related: How to Decide What Scrap Wood to Keep
The ¼” hobby boards were used to make the faux drawers. Hobby boards are short boards available in thinner thicknesses like ¼” and ½”. The hobby boards are located below the hardwoods at my local Lowe’s store.
You might be able to use ¼” plywood instead of hobby boards to make the faux drawers. But keep in mind that you will be able to see the plies of the plywood if you plan to stain your project.
How Do You Make Adjustable Shelves?
I didn’t have a shelf pin jig when I built this cabinet a few years ago. If I did, I would have used it to drill shelf pin holes in the sides of the cabinet. Shelf pins are then inserted into the holes to support the shelves.
I used the jig to make adjustable shelves for this display cabinet, chimney cabinet, end table, and spice cabinet.
The jig is simple to use. Clamp the jig to the board and drill through the guides in the jig. It’s just that easy.
Related: How to Use a Shelf Pin Jig
How Do You Finish the Apothecary Cabinet?
This apothecary cabinet could be finished in a variety of ways. It could be left natural, painted, stained, or a combination of paint and stain.
For my cabinet, I applied several coats of shellac-based primer to prevent any knots from bleeding through the paint.
Related: How to Prevent Knots Bleeding Through Paint
Then, on the inside I applied two coats of this chalk-type paint. On the outside, I applied two coats of a Behr color called “Incognito”. It’s the same color that I used on this DIY tilting wood frame.
DIY Apothecary Cabinet
Printed Plan
- Click here to get the PDF plan (includes detailed instructions, measurements, and bonus tips)
Supplies
- Wood (per printed plan)
- 1-¼” Pocket Screws
- #8 1-¼” Wood Screws
- 1″ Brad Nails
- Wood Glue
- M6 Washers
- 2 Concealed Cabinet Hinges”
- 8 Knobs
Tools
- Tape Measure
- Drill
- Kreg Jig
- Miter Saw
- Table Saw
- Circular Saw
- Kreg Rip-Cut or Kreg Accu-Cut
- Brad Nailer or Hammer
- ⅛” Drill Bit
- ¼” Drill Bit
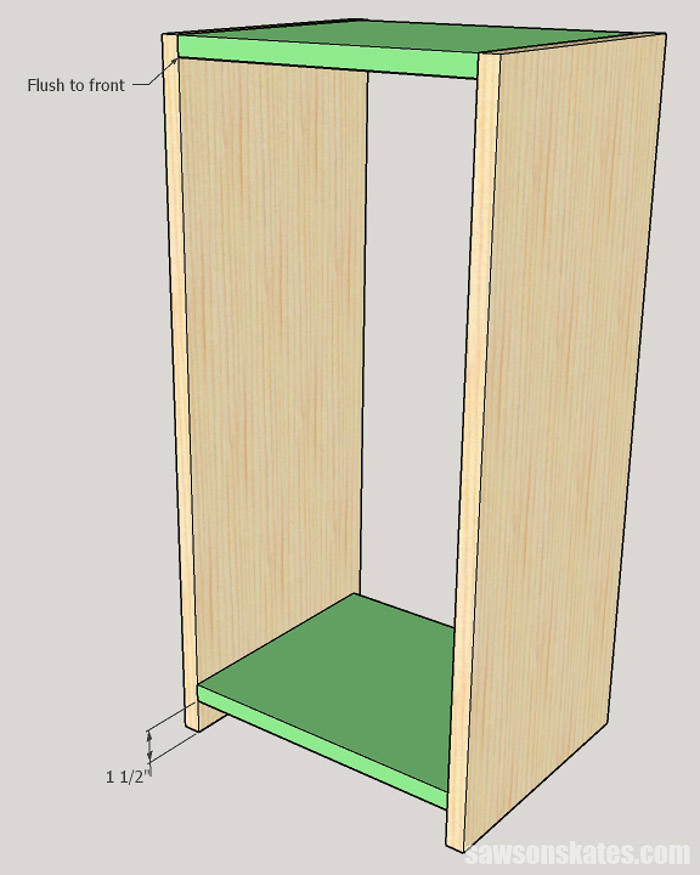
Step 1. Make the Sides
Cut two pieces of wood to length for the sides.
Step 2. Make the Top and Bottom
Cut two pieces of wood to length for the top and bottom. Use the diagram in the printed plan to drill pocket holes in each end.
Related: How to Use a Pocket Hole Jig
Step 3. Assemble the Case
The bottom sets up 1-½” from the bottom of the legs.
To help position the bottom, I clamped a piece of 1×2 to the bottom of each side.
Apply glue to the ends of the top and bottom, position on the sides, and clamp. The top and bottom are flush to the front of the sides.
Attach using 1-¼” pocket screws.
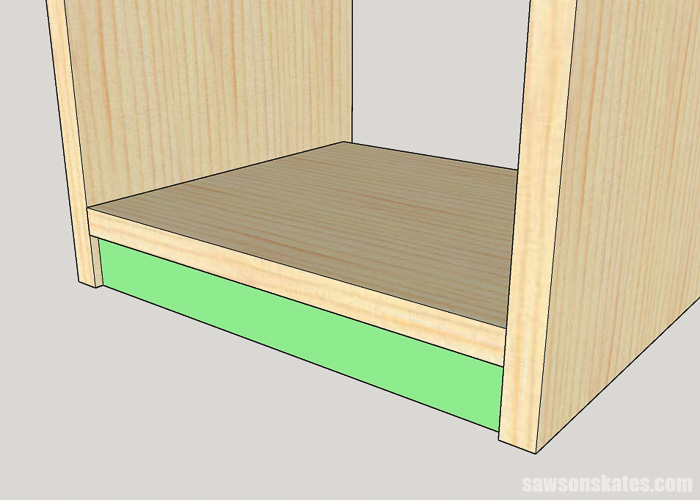
Step 4. Attach the Bottom Rail
Cut one piece of wood to length for the bottom rail and drill pocket holes in each end.
Apply glue, position the rail in a ¼” from the front of the sides, and clamp. Attach using 1-¼” pocket screws.
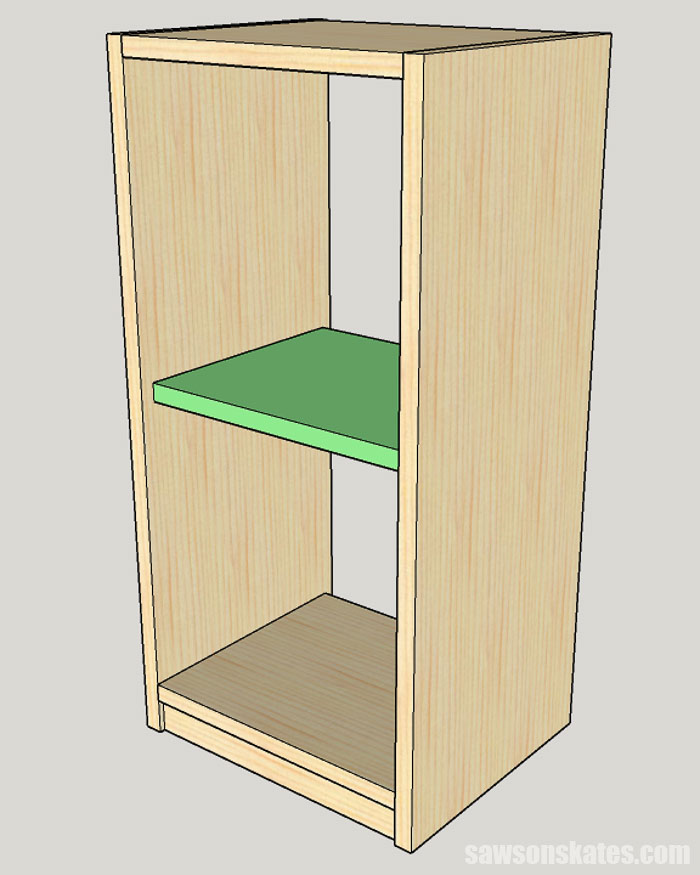
Step 5. Attach the Shelf
Cut one piece of wood to length for the shelf, then rip to width using a table saw or circular saw and Kreg Rip-Cut. Then use the diagram in the printed plan to drill pocket holes in each end.
🔄 OPTIONAL: Use a shelf pin jig to make adjustable shelves. Cut the shelf at least an ⅛” shorter to allow for clearance on either side of the shelf.
Related: How to Make Adjustable Shelves
To help position the shelf, I cut pieces of scrap wood to length. The scrap wood was clamped to the inside of each side.
Position the shelf on the scrap wood, and clamp to the sides. Attach using 1-¼” pocket screws.
Step 6. Make the Door
📝 NOTE: The door needs about an ⅛” of clearance on each side. Adjust the measurements of the door if necessary.
Cut one piece of ½” plywood to size for the door.
Cut eight pieces of hobby board to length. Mark the location for hole in the center of each drawer by drawing a line diagonally from one corner to the other. Use an awl to make a starting point for the drill at the intersection of each mark.
Related: What is an Awl? (+ How to Use It)
Use an ⅛” drill bit to make a hole at each mark.
Related: How to Put a Drill Bit in a Drill.
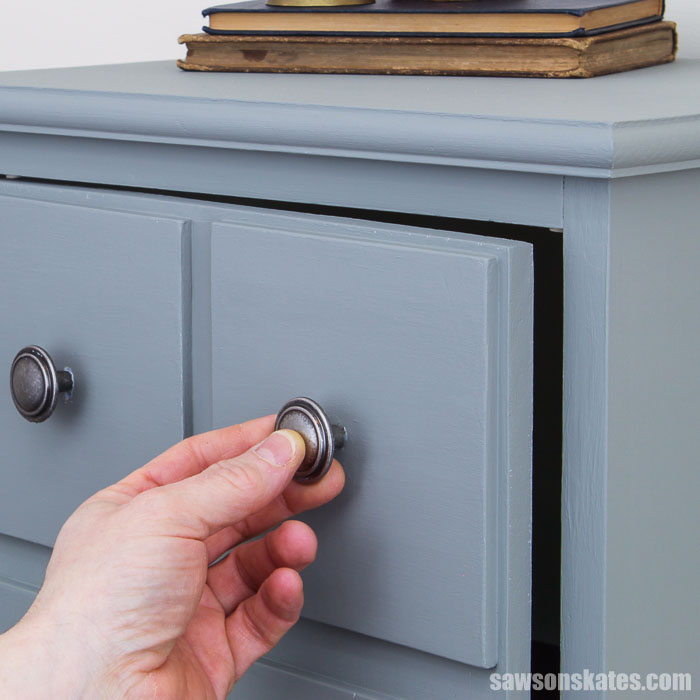
Use the diagram in the printed plan to position the drawers on the door. Then, use the holes in the drawers to drill a hole in the door. I attached the faux drawers with the knobs.
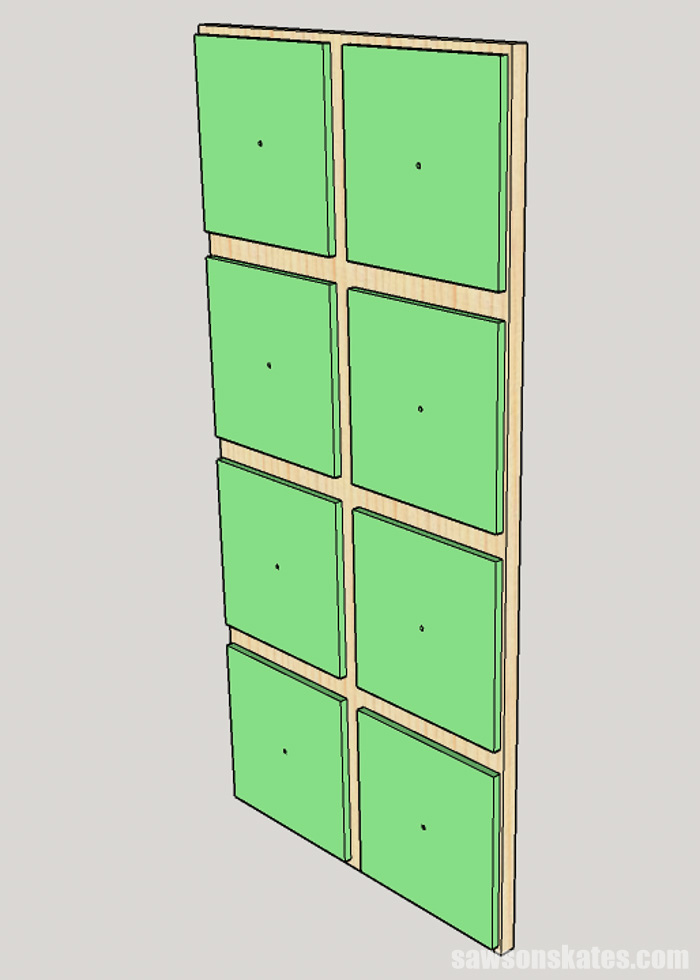
I did not use any other fasteners or glue to attach the drawers. I did not use glue because I was concerned the faux drawers may split with seasonal changes.
I originally stained this cabinet. I did not use any fasteners because I was concerned they would be visible on the finished piece. If you’re planning to paint your project, you may want to tack the corners of the faux drawers in place with pin nails, and hide the nails with filler. The nails will prevent the drawers from moving and the filler will hide the nails.
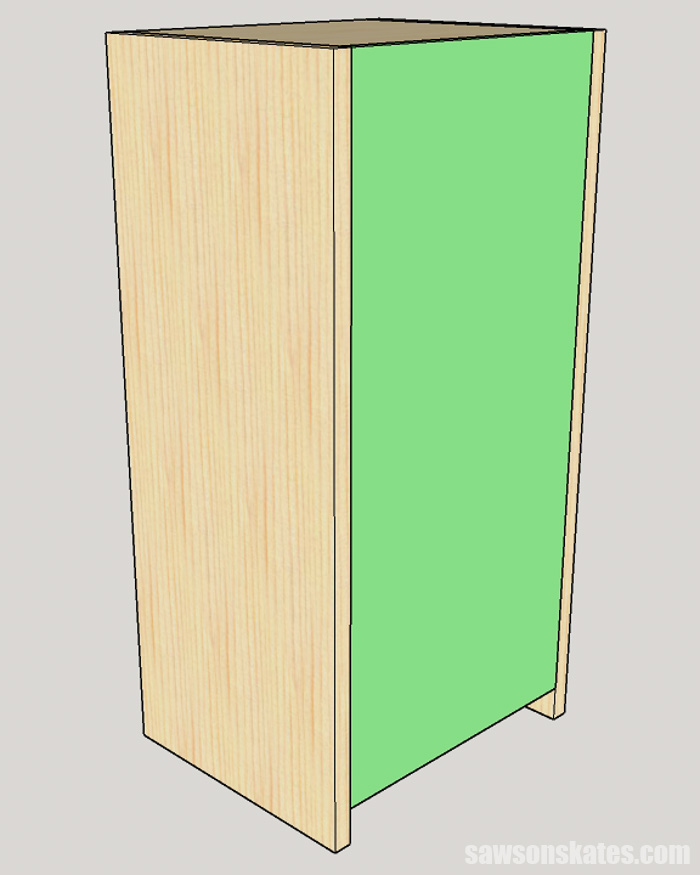
Step 7. Install the Door
I used playing cards to center the door in the opening.
From inside the cabinet, I positioned the concealed cabinet hinges about an 1″ from the top and bottom of the cabinet and attached using the screws included with the hinges.
Step 8. Attach the Back
Cut one piece of plywood to size for the back.
Apply glue to the top and bottom and position the back. Attach using 1″ brad nails.
Related: Brad Nailer vs Finish Nailer: Are They the Same?
Step 9. Attach the Top
Cut four pieces of wood to length for the top. Apply glue to the edges and clamp.
While the glue is drying, use the diagram to mark the locations for holes that will attach the top to the case.
Use a ¼” drill bit to drill a hole at each mark. These oversized holes will allow the top to move with seasonal changes.
When the glue is dry, position the top on the case. Attach using M6 washers and 1-¼” wood screws.
Step 10. Finish the Apothecary Cabinet
See How to Finish for more information
Includes:
- List of tools and materials
- Complete measurements (in inches)
- Easy-to-follow instructions
- Detailed diagrams
Final Thoughts
This apothecary-style cabinet with eight faux drawers is a stylish way to add storage to any room. The enclosed storage area can be used to organize books, magazines, remotes, and more.
Click here to get the PDF plan (including the detailed instructions and measurements) now!
Thank you for stopping by. If you enjoyed this tutorial, would you please take a moment and pin it to Pinterest? I’d really appreciate it!
Recommended For You

Pin This For Later

Hi there – I’m Scott, a woodworking enthusiast and creator of Saws on Skates, a site I started in 2015 to share easy-to-follow tutorials, space-saving shop tips, and project inspiration for DIYers at any skill level. Learn more about my woodworking journey here.
Keep up the good help information . Dave from Arizona 👍
Thank you, Dave! I’m glad you like the plan.