DIY Cabinet Organizer Shelf
Add extra storage and get organized now with this DIY cabinet organizer shelf! It’s a cheap and easy project that can be made with scrap wood and a few basic tools.
What Should I Build Next?
That's the question I help answer.
Every week, I send woodworking ideas to 17,000 DIYers who love building things.
You'd fit right in.
DIY Cabinet Organizer Shelf
Are your kitchen cabinets disorganized? Is it difficult to find what you need? Are you running out of space? Make this DIY cabinet organizer shelf!
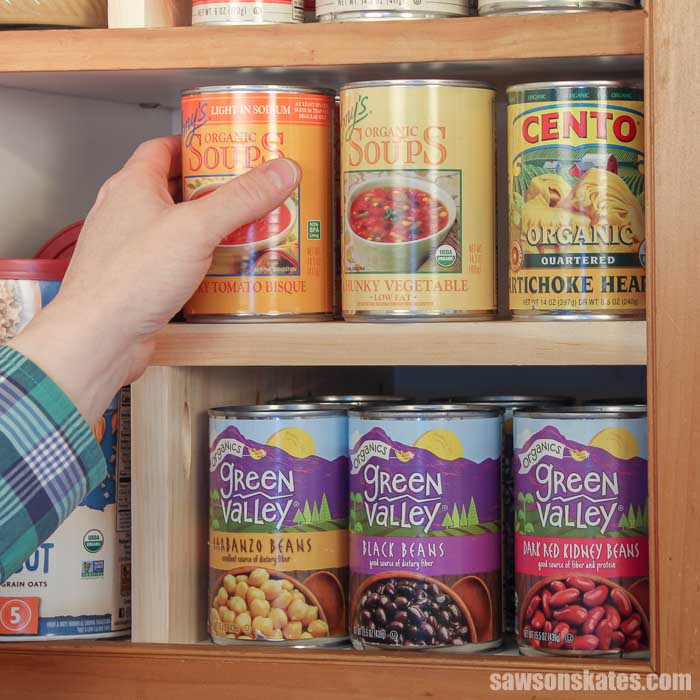
This wooden shelf is a simple way to add extra storage to kitchen cabinets. It’s perfect for organizing canned goods, boxes of pasta, cups, plates, cereal bowls, and more.
I made a few of them and practically doubled the storage space in my cabinets!
Best of all, this is a cheap and easy project. I made mine with scrap wood, a few simple cuts, and a couple of screws. In just a few minutes, I had made a handful of shelves. I think it took me longer to remove the stuff from my cabinets than it did to make the shelves.
This tutorial contains affiliate links to supplies and tools. Purchases made using these links help support the Saws on Skates website and allows me to share more projects and tips with you. There is no cost to you for using these links. Visit my site policies for more information.
Before we get into how to make a DIY cabinet organizer shelf, be sure to click the subscribe button at the bottom of this page to sign up for my FREE weekly newsletter loaded with helpful pocket hole tricks, space-saving workshop ideas, clever DIY tips and more!
Table of Contents
- What Can You Organize With This DIY Cabinet Organizer Shelf?
- Where Can You Use This DIY Cabinet Organizer Shelf?
- What Skills Do You Need to Build This DIY Cabinet Organizer Shelf?
- What Tools Do You Need to Build This DIY Cabinet Organizer Shelf?
- What Kind of Wood Do You Need to Make This DIY Cabinet Organizer Shelf?
- How Do You Finish This DIY Cabinet Organizer Shelf?
- Customize This DIY Cabinet Organizer Shelf?
- How to Make This Cabinet Organizer Shelf
- Get the Free Printed Plan
What Can You Organize With This DIY Cabinet Organizer Shelf?
This cabinet organizer shelf or shelf insert is perfect for organizing canned goods, boxes of pasta, cups, plates, cereal bowls, and more.
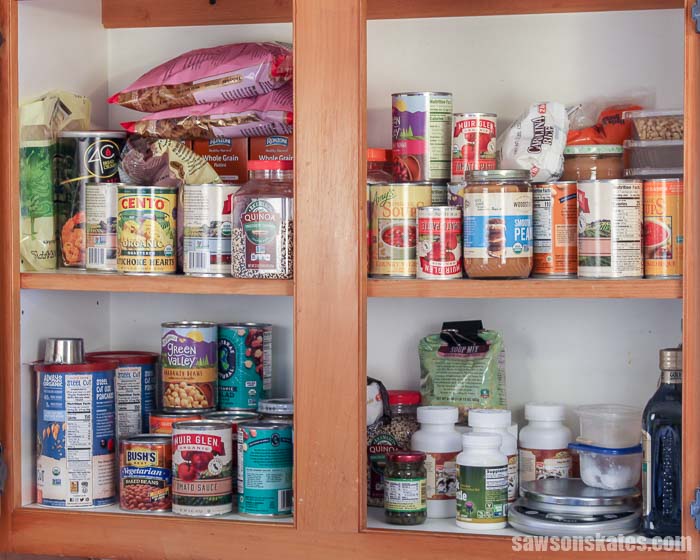
My kitchen cabinets were disorganized before I made these shelves. Bags of pasta were piled on top of canned goods. It was difficult to find what I wanted, and the piles would fall over when I searched for what I needed.
Where Can You Use This DIY Cabinet Organizer Shelf?
- Kitchen Cabinets
- Kitchen Pantry
- Bathroom Vanity
- Closet
- Linen Closet
What Skills Do You Need to Build This DIY Cabinet Organizer Shelf?
This is an easy do it yourself project for DIYers of any skill level, but I think it’s the perfect project for beginners. It only requires a few, straight cuts, and the cuts don’t need to be precise.
Back to Table of ContentsWhat Tools Do You Need to Build This DIY Cabinet Organizer Shelf?
You only need three basic tools to build this simple project. Tools like a miter saw, Kreg Jig, and a drill.
The parts can be cut with a miter saw or an inexpensive miter box.
You can use any Kreg Jig to drill the pocket holes. I used the inexpensive, user-friendly Kreg Jig 320 to drill the pocket holes for my shelf inserts.
Related: How to Use a Kreg Jig 320
It’s also helpful to have an assortment of bar clamps but you can make this project without them.
What Kind of Wood Do You Need to Make This DIY Cabinet Organizer Shelf?
I used pieces of 1×6 pine scrap wood to make these DIY cabinet shelves.
This is the perfect project for using those less than perfect pieces of scrap wood. Why? Because your canned goods won’t care if the pieces of wood are a little twisted or have too many knots.
Related: Beginner’s Guide to Wood Sizes

You could also make these shelves with woods like cherry, oak, maple, etc. to match the wood of your cabinets.
These shelves can also be made with plywood or pallet wood.
Related: Building with Pallets Has Pros and Cons
Back to Table of ContentsHow Do You Finish This DIY Cabinet Organizer Shelf?
The shelf inserts can be painted, stained or left natural.
I left my shelves natural, but I think it would be best to apply a finish.
Applying a finish would add a layer of protection for the wood and make it easier to clean up any spills, etc.
A couple of coats of shellac or polyurethane would be a great way to protect the shelves.
Related: Polycrylic vs Polyurethane: Are They The Same?
Back to Table of ContentsCustomize This DIY Cabinet Organizer Shelf
The free printable plan shows how to make shelves that fit 2 cans, 3 cans, 4 cans, and 5 cans, but you can make the shelves as long or as short as you need.
There are several other ways to customize the shelves:
- Stack a 3 can shelf on top of a 5 can shelf, etc.
- Make the shelves taller or shorter by adjusting the length of the sides
- Connect multiple shelves together with pocket screws
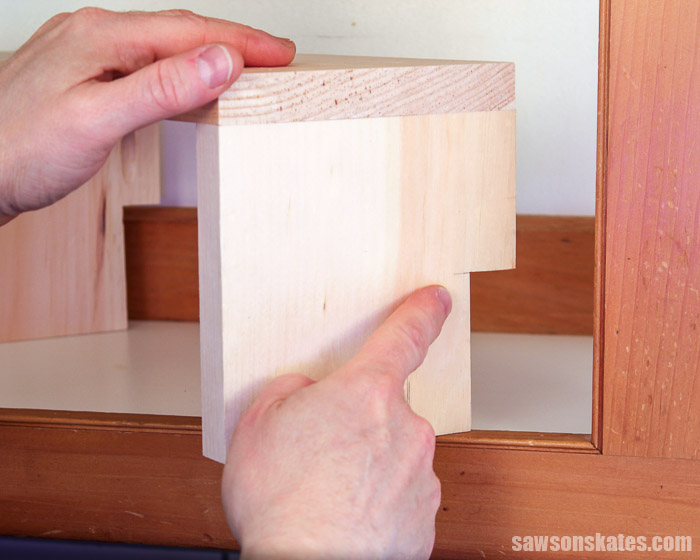
I needed to customize the shelf for the bottom of my cabinet. My cabinet has a cleat at the bottom that’s used to attach the cabinet to the wall.
This cleat prevented the shelf from sitting flush against the back of the cabinet. I used a jigsaw to cut a notch to fit around the cleat.
DIY Cabinet Organizer Shelf
Printed Plan
- Get the FREE plan here (includes detailed instructions, measurements, and bonus tips).
Supplies
- Wood (per printed plan)
- 1-¼” Pocket Screws
- Wood Glue (optional)
Tools
- Tape Measure
- Drill
- Kreg Jig
- Miter Saw
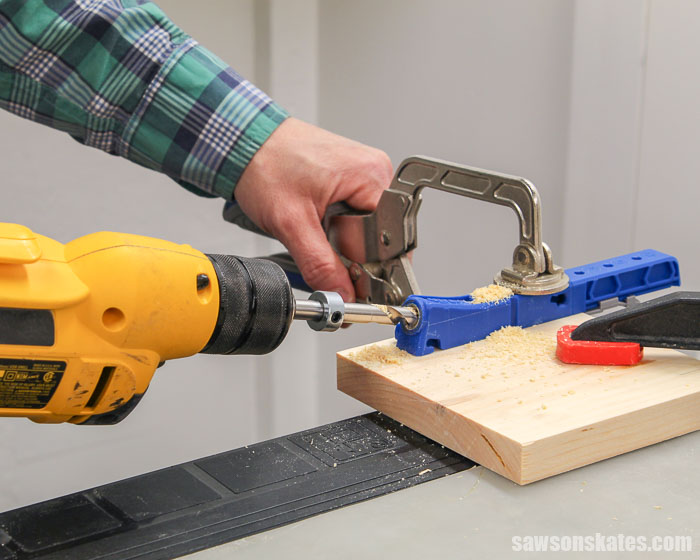
Step 1. Make the Sides
Cut two pieces of wood to length for the sides, and drill pocket holes in one end.
Related: How to Use a Kreg Jig
Step 2. Cut the Shelf
Cut one piece of wood to length for the shelf. The length will depend on how many cans you want to store on the shelf.
The free printable plan shows how to make shelves that fit 2 cans, 3 cans, 4 cans, and 5 cans, but you can make the shelves as long or as short as you need.
Related: How to Cut Wood for Beginners
Step 3. Assemble the Shelf
Apply glue (optional) to the sides, clamp to the shelf, and attach using pocket screws.
Step 4. Finish the DIY Cabinet Organizer Shelf
The organizer shelves can be painted, stained or left natural.
Back to Table of ContentsFinal Thoughts
Are your kitchen cabinets disorganized? Is it difficult to find what you need? Are you running out of space? Make this DIY cabinet organizer shelf!
Get the free plan (including the detailed instructions and measurements) now!
Thank you for stopping by. If you enjoyed this tutorial, would you please take a moment and pin it to Pinterest? I’d really appreciate it!
Recommended For You
Pin This For Later

Hi there – I’m Scott, a woodworking enthusiast and creator of Saws on Skates, a site I started in 2015 to share easy-to-follow tutorials, space-saving shop tips, and project inspiration for DIYers at any skill level. Learn more about my woodworking journey here.