Easy DIY Kids Table and Chair Set
Looking for a simple project to make for the little ones? This easy DIY kids’ table and chairs is the perfect weekend project. Add fun to their playtime with a set you can build with a few basic supplies. Grab your tools and get ready to create a pint-sized masterpiece!
What Should I Build Next?
That's the question I help answer.
Every week, I send woodworking ideas to 17,000 DIYers who love building things.
You'd fit right in.
Navigation
This article contains affiliate links. If you purchase from these links, I may earn a small commission at no additional cost to you. Visit my site policies for more information.
My favorite thrift store never disappoints. I recently found a slightly worn handmade kids’ table and chair set. The table was covered in dust and 1980s contact paper, and the chairs were painted to match. It looked pretty rough, and my friend even made a “sour face” while I was checking it out.
But I saw potential. Despite its condition, there was something charming about it, and I knew I could use the dimensions to design my own version.
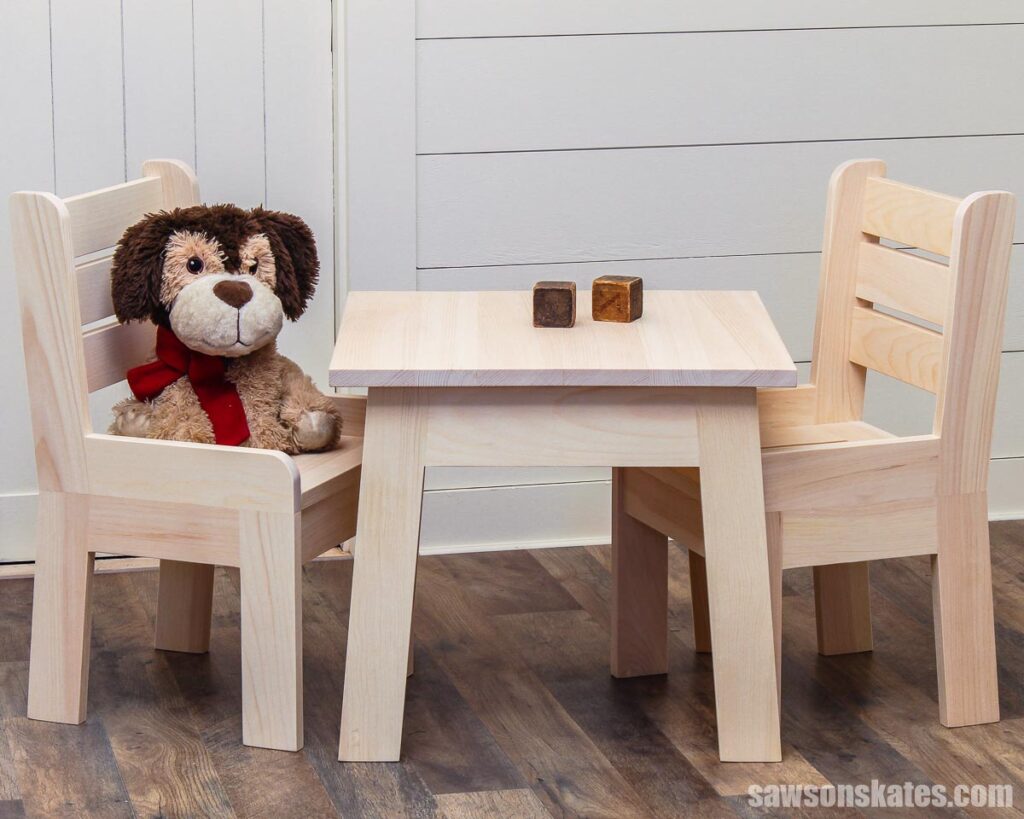
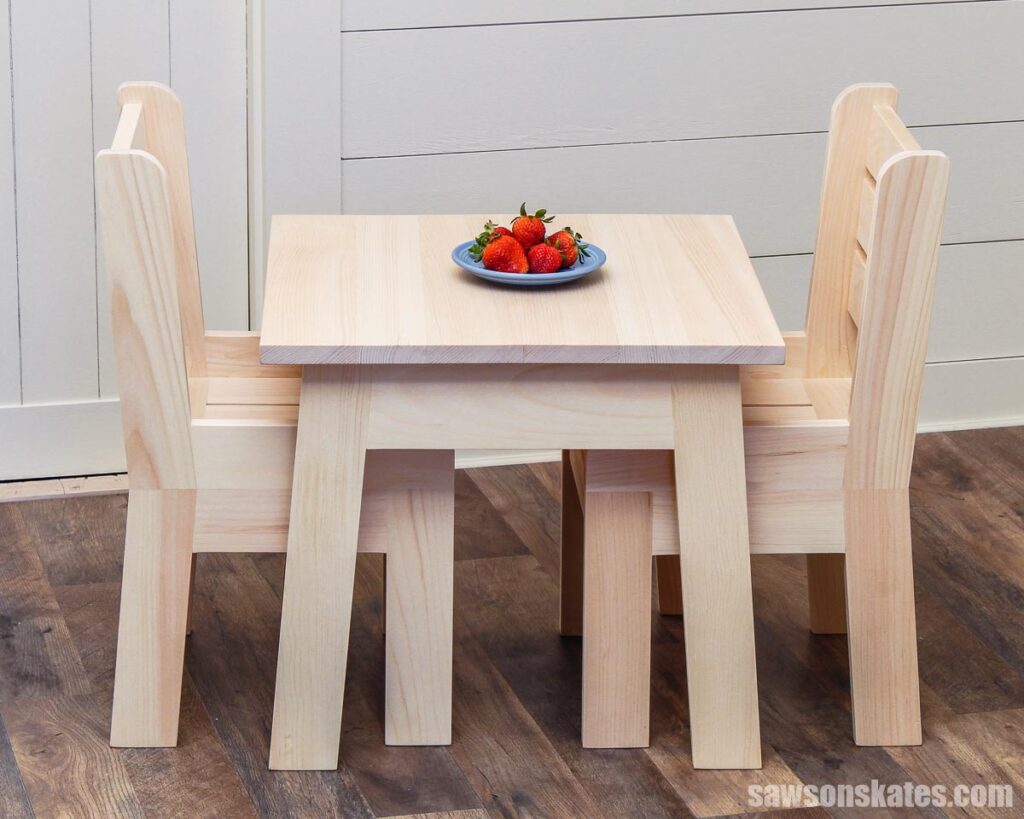
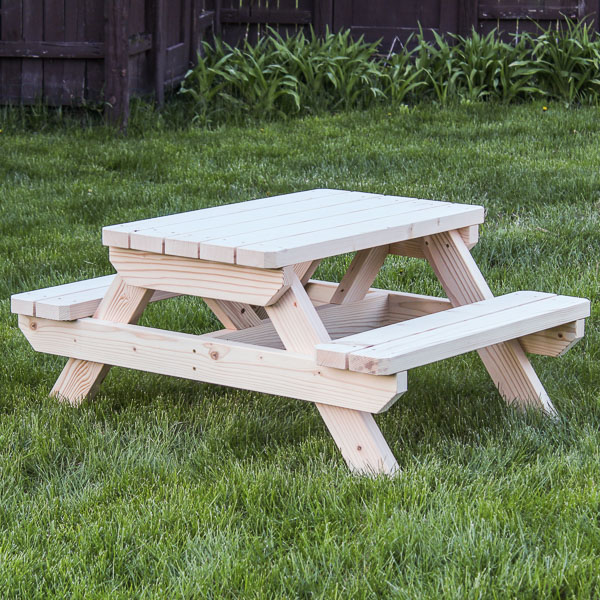
Here’s what I came up with: a cute, pint-sized table and chair set, perfect for toddlers to enjoy arts and crafts, puzzles and games, or snack time.
I haven’t chosen a finish yet because I was excited to share this plan with you, and applying one would’ve taken a little extra time. I’m also torn between painting it or keeping it natural. If I paint it, I’m leaning towards a dark antique red.
But I think it looks adorable the way it is, and I really love the grain pattern on the table top. So, if I keep it natural, I’m thinking of using either a matte or satin water-based polyurethane. What about you? How would you finish it?
How to Make a DIY Kids Table and Chair Set
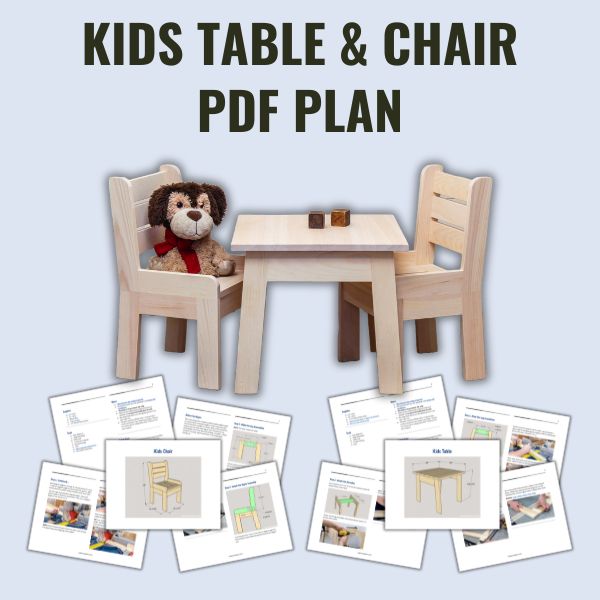
Printed Plan
Get the PDF plan here (includes detailed instructions, measurements, and bonus tips)
Materials
- Wood (per the printed plan)
- Wood Glue
- Thin CA Glue
- 1-¼” Pocket Hole Screws
- Expansion Brackets or Figure 8 Fasteners
- 8 x ½” Truss Head Screws
Tools
- Tape Measure
- Kreg Multi-Mark
- Miter Saw
- Table Saw
- Scroll Saw or Jigsaw
- Pocket Hole Jig
- Drill
- Right-Angle Drill Attachment
- Disc Sander (optional)
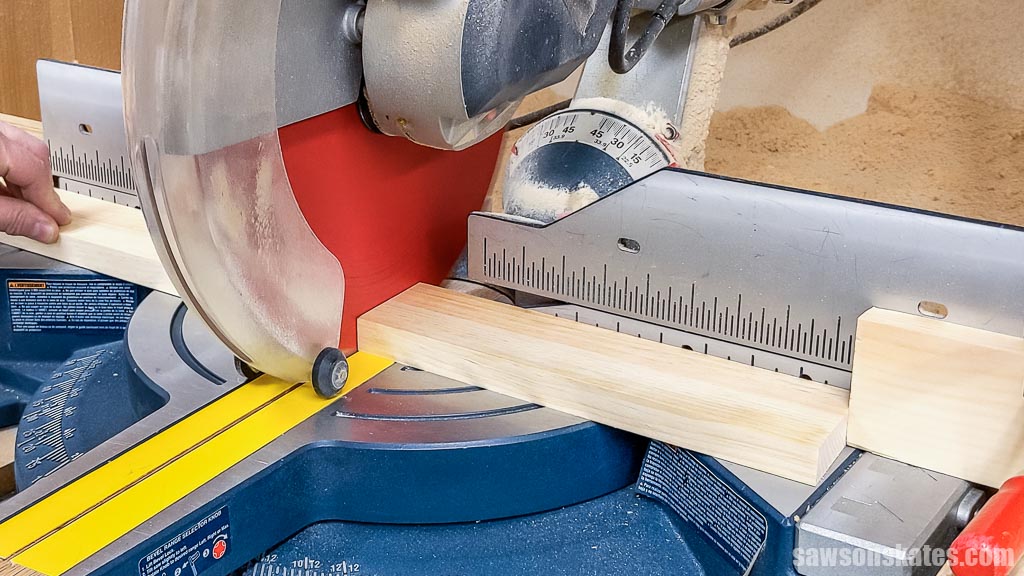
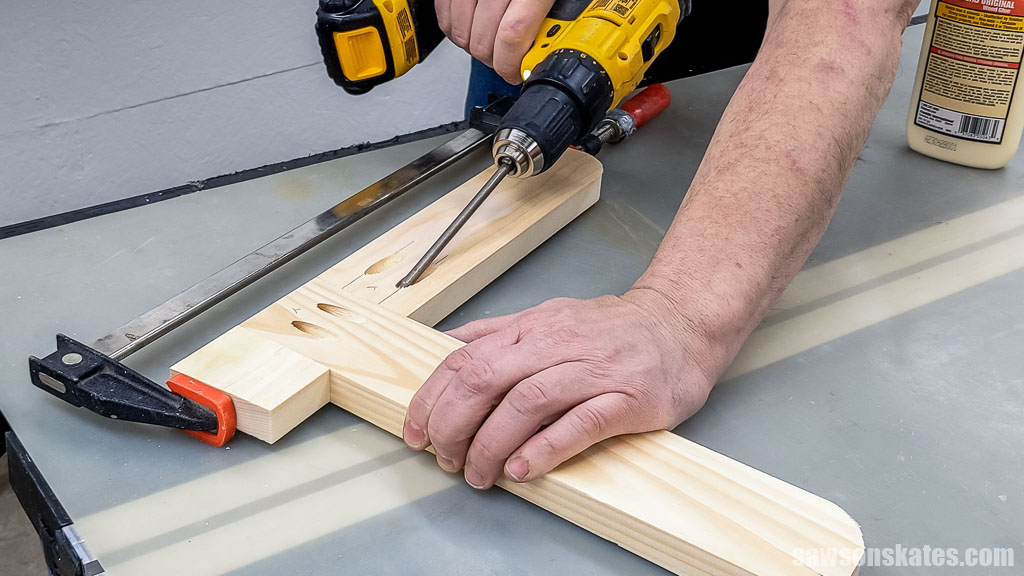
Assembling the Legs
Let’s talk about those rear legs. They’ve got parallel angles. Here’s the easiest way I’ve found to cut them. First, cut an angle on one end of the board. Don’t take the workpiece off the miter saw just yet, keeping it in place makes sure you don’t flip it by accident. With the board still on the saw, measure your cut, slide it forward, and make the second angled cut. Then repeat for the second leg, and you’re good to go.
Clamping that angled back leg can be tricky, so to make things easier, I used a scrap piece with the same angle to help keep it in place.
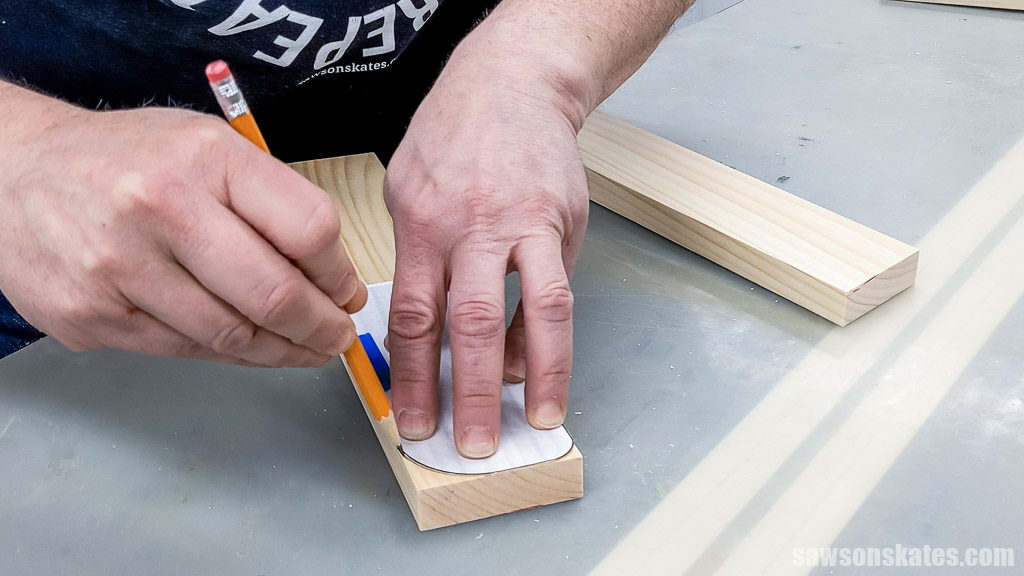
Making the Curves
The upper assemblies have these gentle curves at the front and top. My printed plan comes with two templates that take all the guesswork out of laying them out.
To transfer the pattern, you could use carbon paper between the template and the wood and trace the lines with a pen or pencil.
But I like to attach my templates onto a manila folder with a little spray adhesive for more accurate and easier tracing. This works well because the folder’s edge gives me an edge to follow with my pencil.
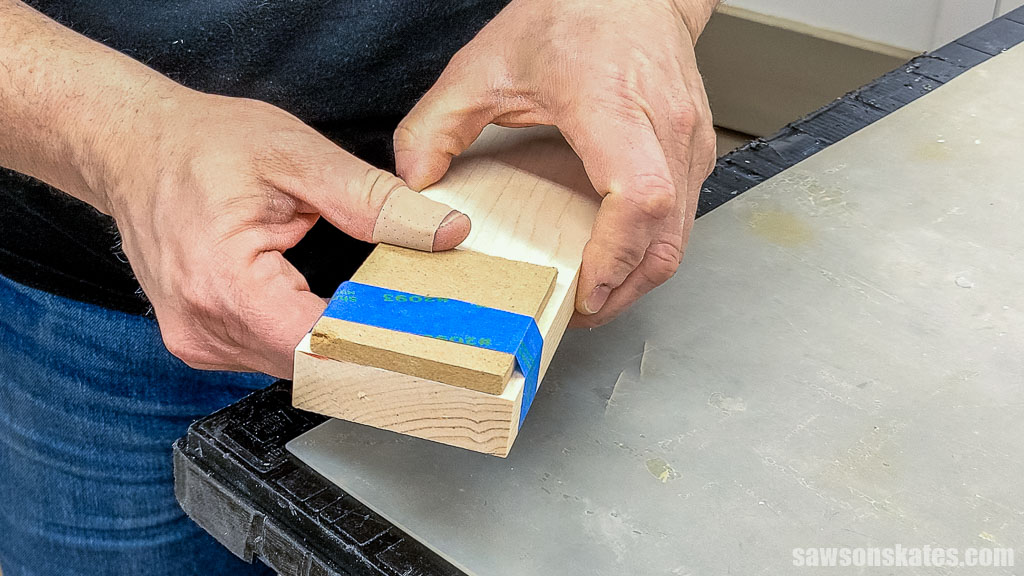
I cut the shape with a scroll saw, but a jigsaw works just fine if you don’t have one. Now, here’s my secret to perfect curves: I cut just outside the pencil line, then sand it down to remove the saw marks and smooth out the shape.
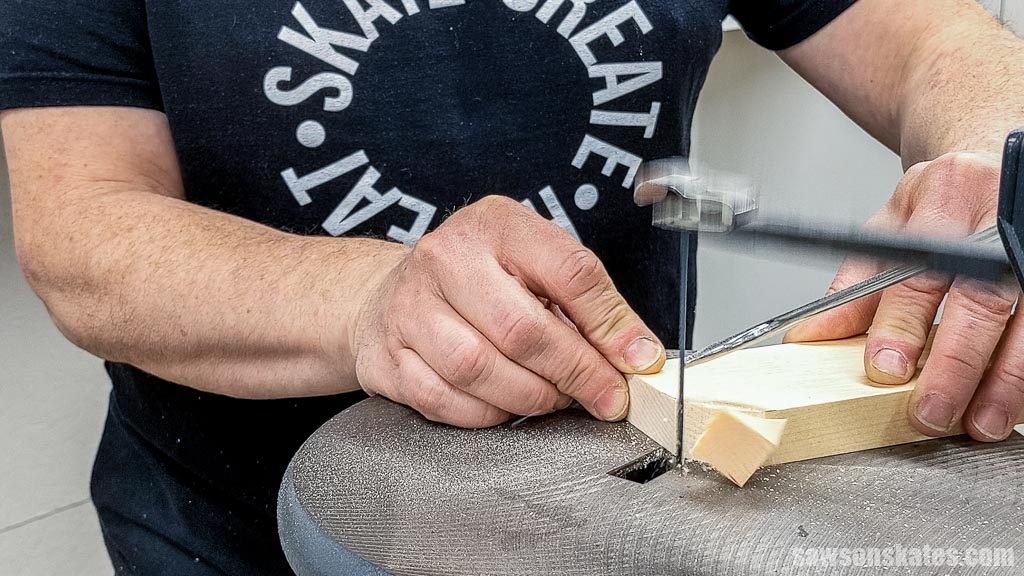
To refine the shape, I used a disc sander, but sandpaper works too.
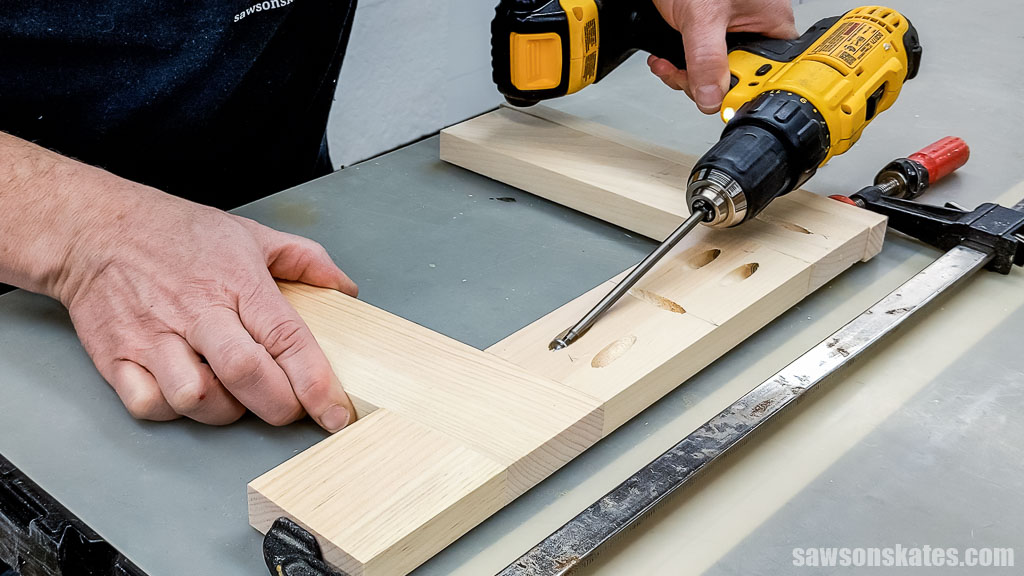
Joining the Upper Assembly
I used that same scrap piece with the angle that I used earlier to help keep the seat back in place.
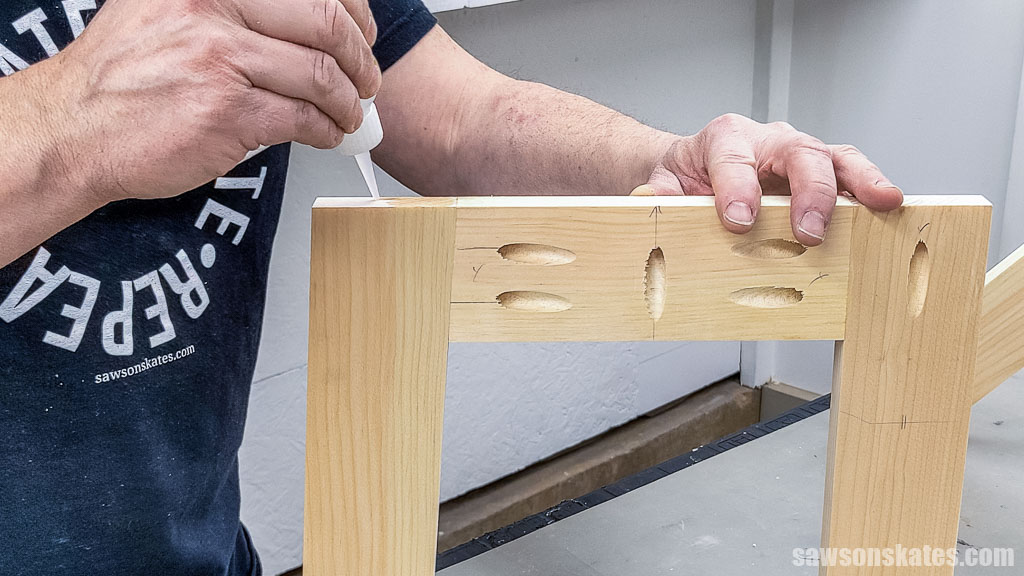
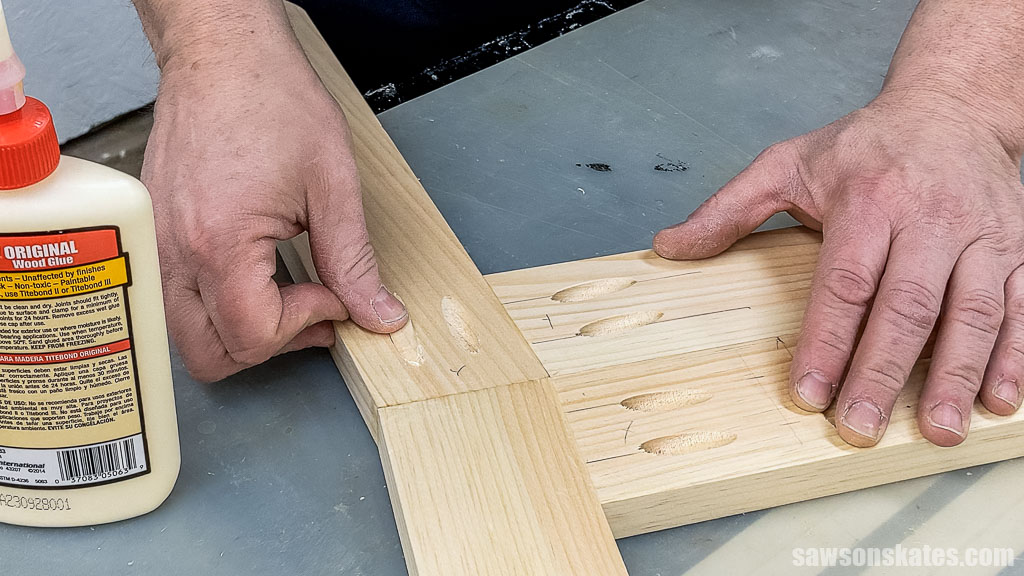
Attaching the Top and Bottom Assemblies
Driving screws and gluing into end grain isn’t my favorite method for joinery. End grain is like a bunch of drinking straws, there’s not much for the screws to grab onto, and glue tends to soak in instead of staying on the surface, which can weaken the bond.
To help the glue stick better, I used CA glue on the end grain of the upper and lower assemblies. CA glue, or cyanoacrylate, better known as super glue, is a fast-drying adhesive perfect for this kind of thing because it seals the surface and helps create a stronger bond.
Related: What is CA Glue? (Pros, Cons & Common Uses)
Hiding the Pocket Holes
Since the pocket holes on the upper assemblies would be visible in the finished piece, I filled them with pocket hole plugs for a cleaner look. Once the glue dried, I sanded them flush with my orbital sander.
Related: How to Make Pocket Hole Plugs
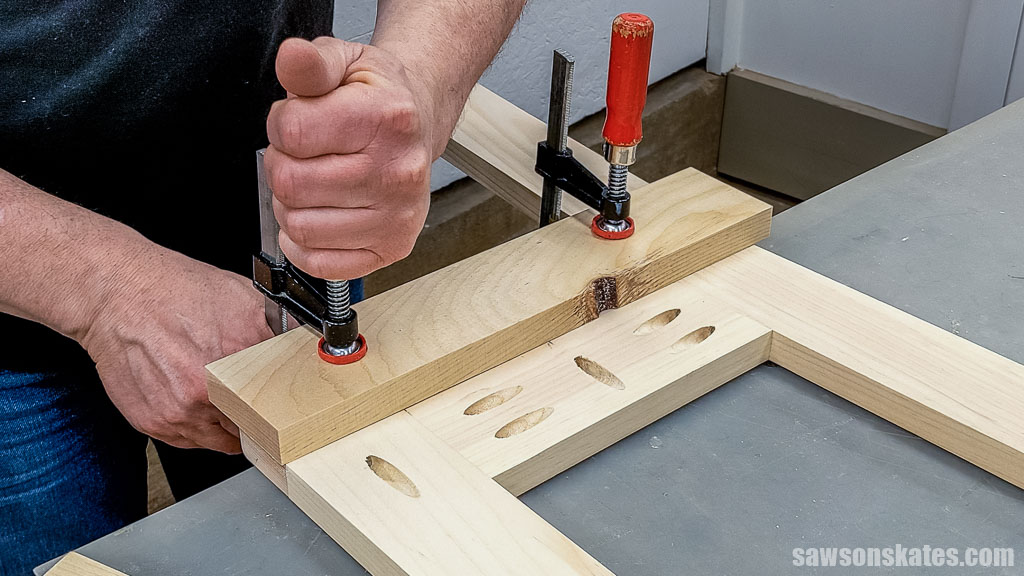
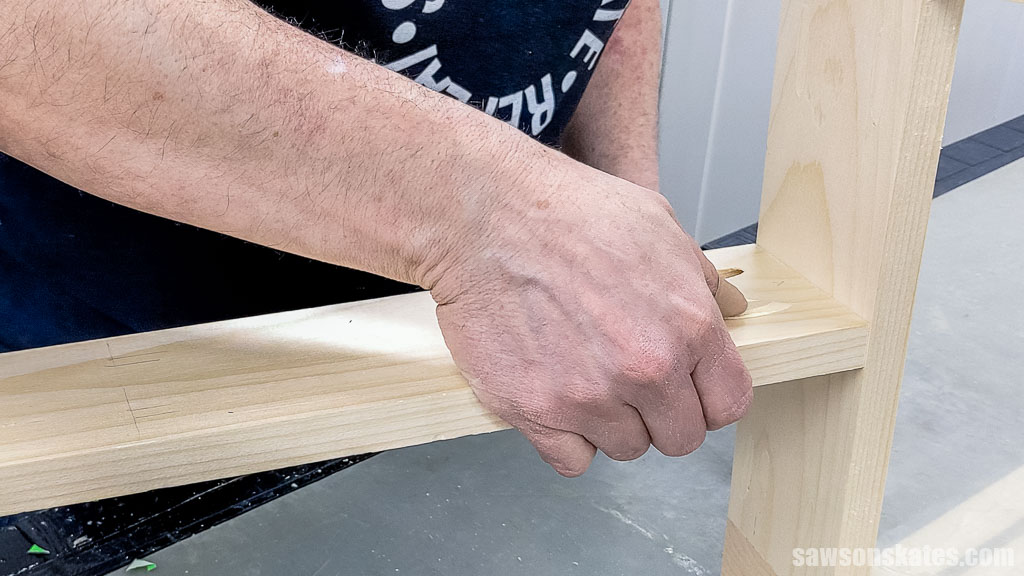
Attaching the Aprons
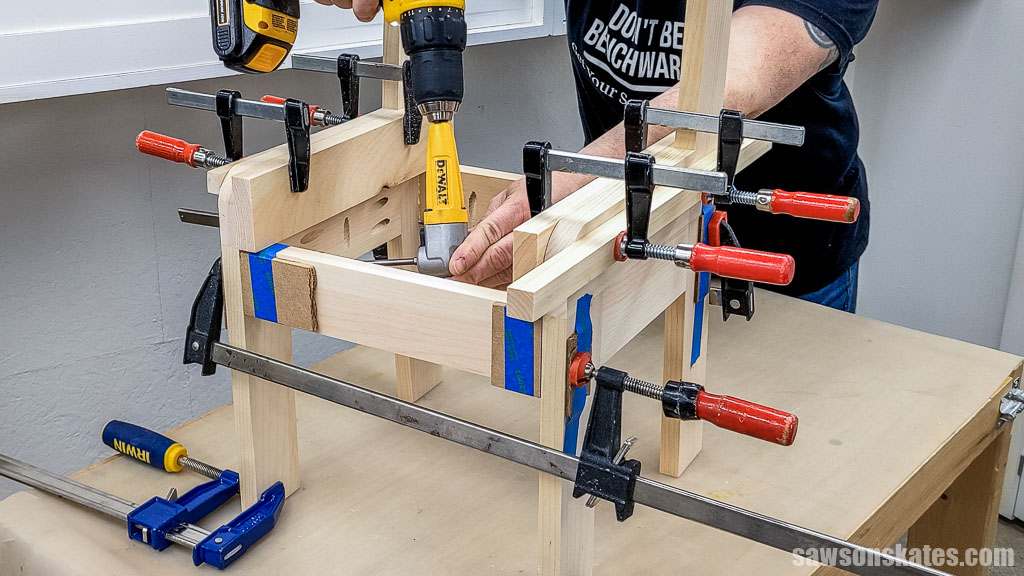
The top of the aprons sits where the upper and lower assemblies meet. To make sure everything lined up, I clamped a scrap piece of wood right at the intersection.
The aprons set in from the faces of the legs. To make positioning them easier, I attached some scrap MDF to each end with painter’s tape.
Since space was tight inside, I used a right-angle driver to attach them with pocket hole screws.
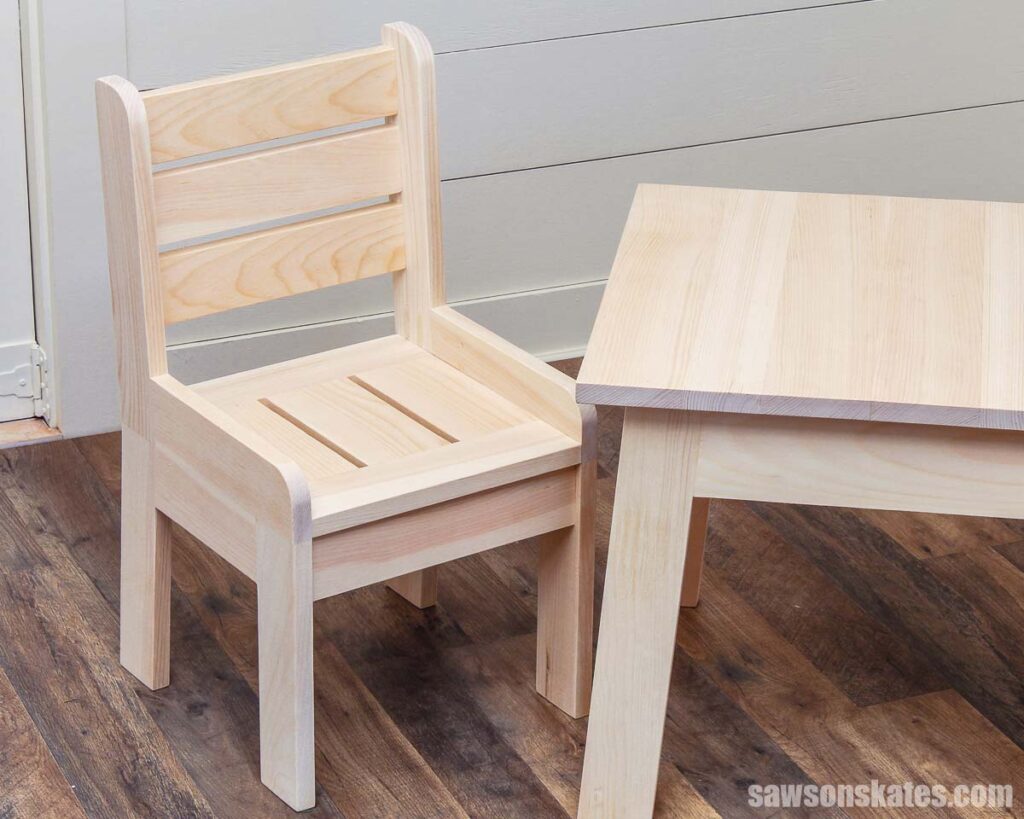
Installing the Seat
When I tested the chair after it was finished, I noticed my fingers would naturally slip into the pocket holes in the stretcher when I grabbed underneath. That could be a safety issue for kids since it might lead to splinters or pinched fingers.
At the very least, I’d recommend smoothing the holes with sandpaper or a Dremel. Or, you could fill them with pocket hole plugs and sand them flush for a cleaner finish.
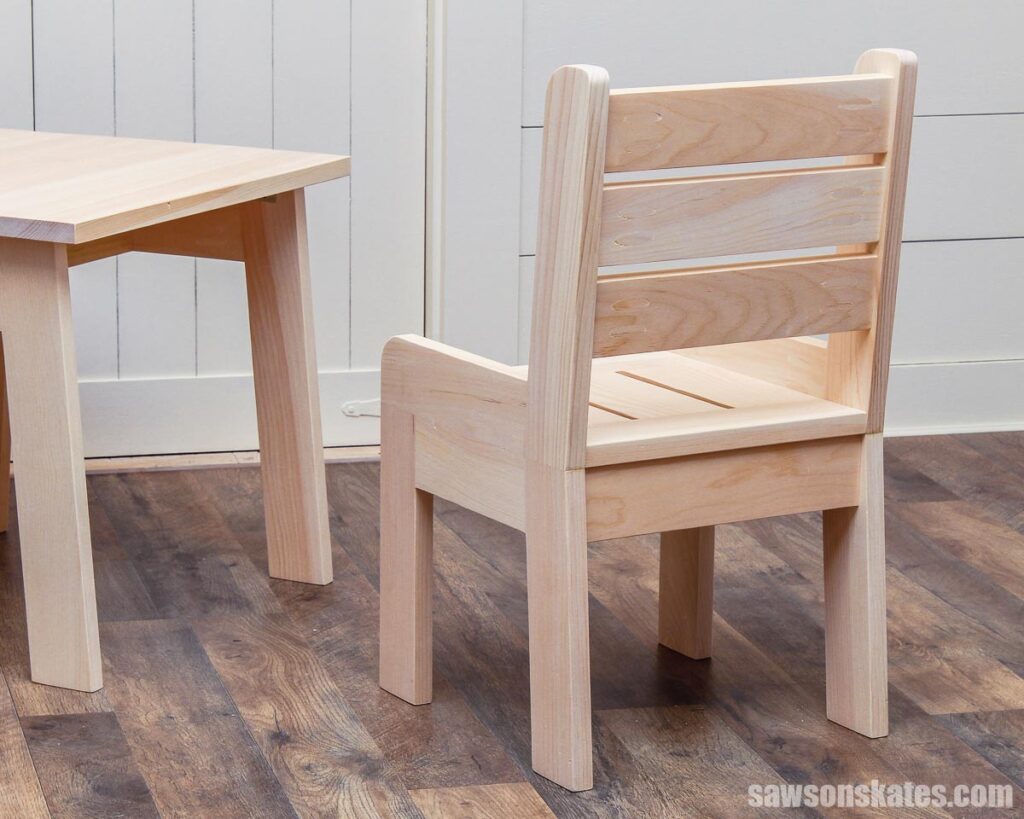
Attaching the Back Rails
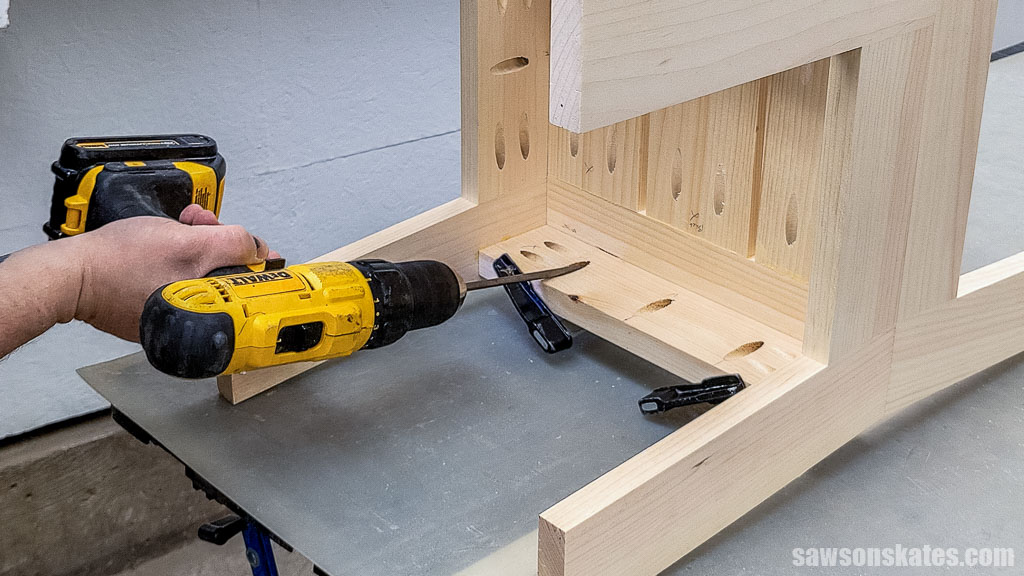
To help position the bottom rail, I cut two pieces of scrap wood with an angle on one end. I placed one on each side of the seat and clamped them in place.
The rails set in from the back. To make sure everything’s lined up, I attached some scrap MDF to each end with painter’s tape.
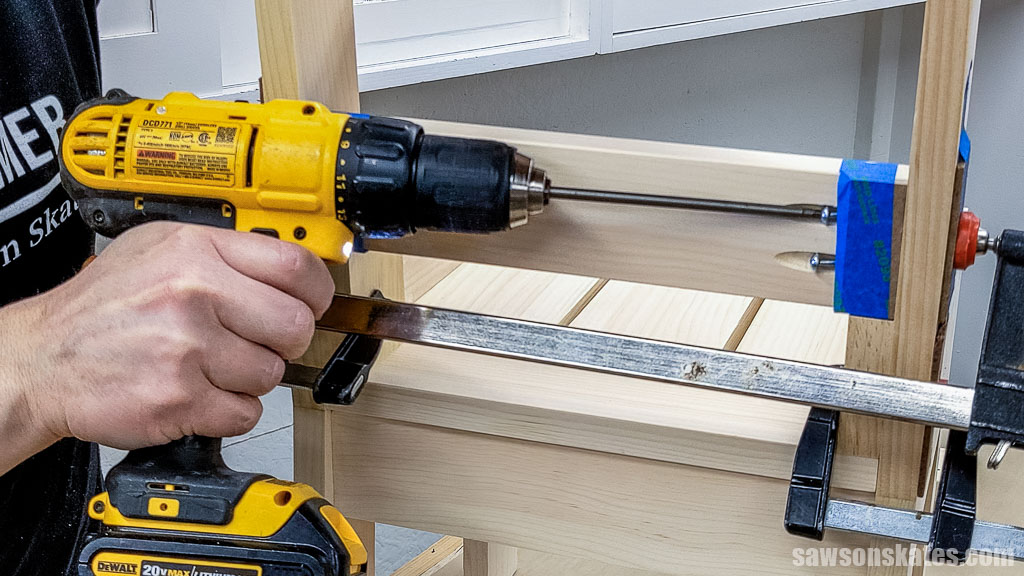
For spacing between the rails, I used more scrap MDF and repeated the process for the middle and upper rails.
Since the pocket holes on the rails would be visible in the finished piece, I filled them with pocket hole plugs for a cleaner look. Once the glue dried, I sanded them flush.
Making the Table Legs
Now, let’s move on to the table. I made the legs just like I did with the chair legs, cutting parallel angles and using the angled scrap pieces to clamp everything together.
Since these pocket holes would be visible in the finished piece, too, I filled them with plugs and sanded them flush once the glue dried.
Making the Table Top
To make the table top, I started by cutting a few boards to length using my miter saw and squaring their edges on the table saw.
Related: How I Square Edges Without a Jointer (for Panels and Table Tops)
Once the edges were squared, I glued up the panel for the table top.
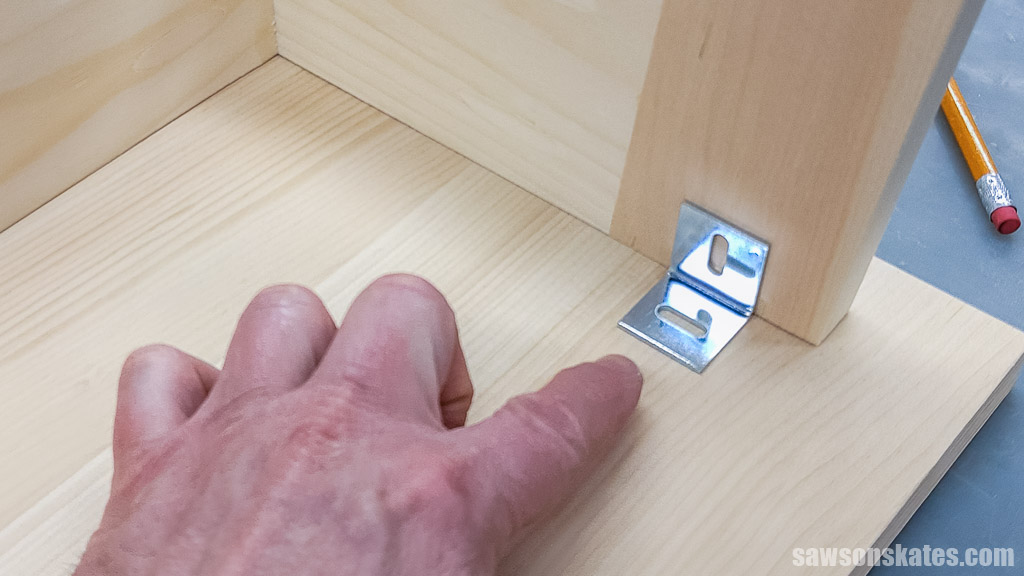
Attaching the Top to the Legs
The table will expand and contract with changes in temperature and humidity, so it needs to be attached in a way that lets it move freely.
One way to do this is with expansion brackets.
Related: How to Attach a Table Top to a Base (The Right Way)
The top will expand and contract most across its width, so you want to position the elongated holes in that direction to allow for movement.
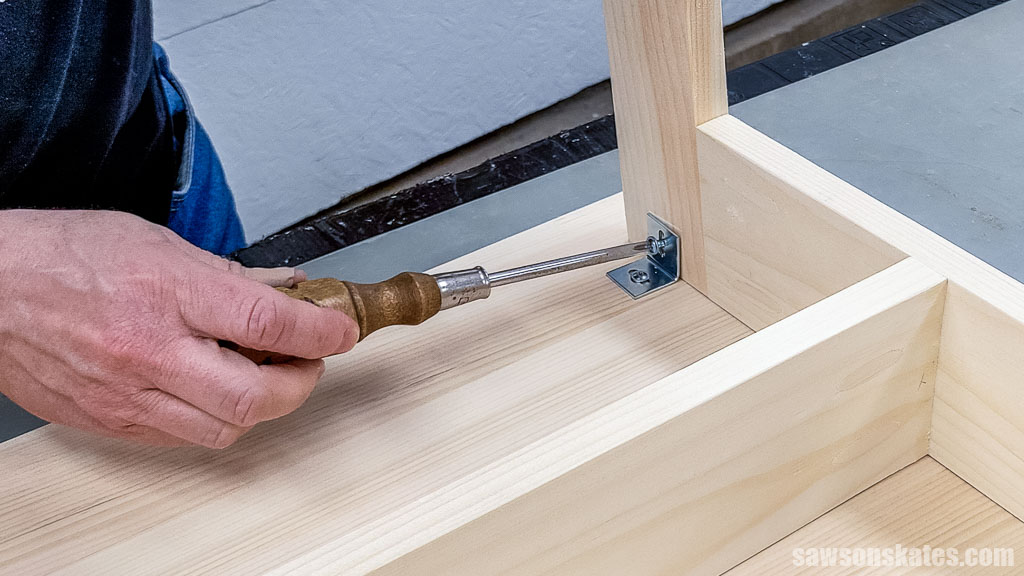
I made a pilot hole using a drill bit and a piece of painter’s tape as a depth stop.
Related: How to Drill Pilot Holes (Why, When & Correct Size)
Just a heads-up, the leg screws can be pretty tight, but you want the screws for the table top snug, not too tight, so that it can move with the seasonal changes.
NOTE: After installing the brackets, I started to wonder if the edges could pose a scratching hazard for kids. To help avoid any injuries, you can recess the brackets into the wood using a chisel or skip them altogether and use figure 8 fasteners instead.
Video
Watch now, and I’ll show you step-by-step how I made the kids table and chairs.
Includes:
- List of tools and materials
- Complete measurements (in inches)
- Easy-to-follow instructions
- Step-by-step photos
- Detailed diagrams
Final Thoughts
With just a few basic tools and supplies, making a kids’ table and chair set is a rewarding project that your little ones will enjoy for years, whether you choose to go bold with paint or keep it natural.
Don’t wait. Get your PDF plan (including the detailed instructions and measurements) now!
Thank you for stopping by. If you enjoyed this tutorial, would you please take a moment and pin it to Pinterest? I’d really appreciate it!
Recommended For You
Pin This For Later

Hi there – I’m Scott, a woodworking enthusiast and creator of Saws on Skates, a site I started in 2015 to share easy-to-follow tutorials, space-saving shop tips, and project inspiration for DIYers at any skill level. Learn more about my woodworking journey here.