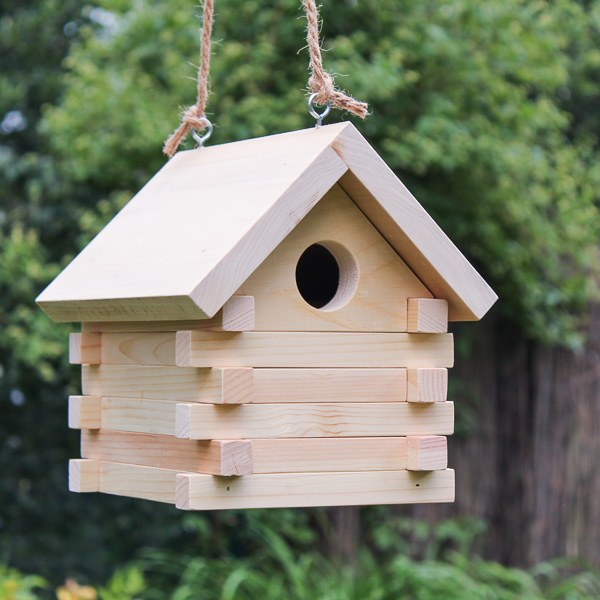
DIY Log Cabin Bird Feeder
Upcycle scrap wood into a rustic log cabin bird feeder for your feathered friends. Easy step-by-step tutorial included.
What Should I Build Next?
That's the question I help answer.
Every week, I send woodworking ideas to 17,000 DIYers who love building things.
You'd fit right in.
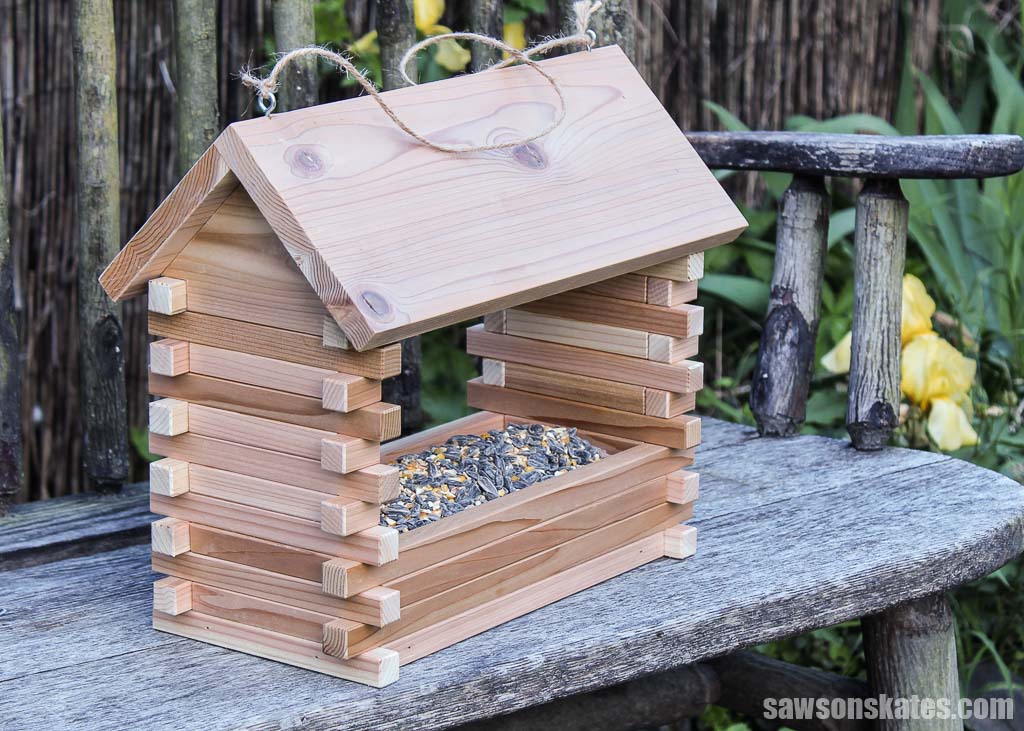
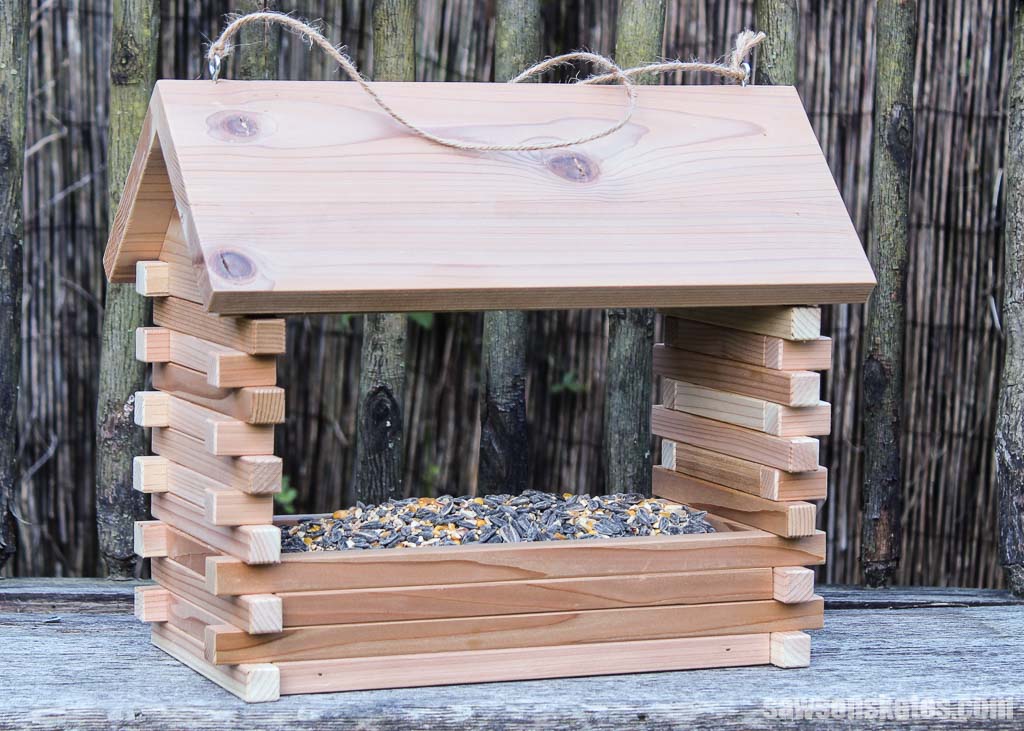
Calling all bird lovers and woodworking enthusiasts. In this easy-to-follow guide, I’ll show you how to turn leftover lumber into a charming log cabin bird feeder, a delightful spot for your feathered neighbors to enjoy a snack. So grab your tools and scrap wood, and let’s get building!
Table of Contents
This article contains affiliate links. If you purchase from these links, I may earn a small commission at no additional cost to you. Visit my site policies for more information.
What Wood Should You Use?
A while back, I bought some 1×4 cedar boards. They weren’t perfect, but I figured I could make them work with some careful cutting. However, once I started, I realized they had more defects than I initially thought. In the end, I decided to save them for another project and wait to find better-quality lumber for my original idea.
Related: Beginner’s Guide to Wood Sizes
Fast forward to building this log cabin bird feeder, and those cedar boards came to mind. While they were a little rough, they were perfect for this project:
- Cedar is naturally rot-resistant, which is ideal for anything outdoors.
- The imperfections added to the bird feeder’s rustic look.
What Tools Do You Need?
I used four tools to make my bird feeder:
- Table Saw
- Miter Saw
- Scroll Saw
- Brad Nailer
Optional: I also used my trim router and a roundover bit to give the wood a log-like appearance. You can achieve a similar look with sandpaper, but it will take a little longer.
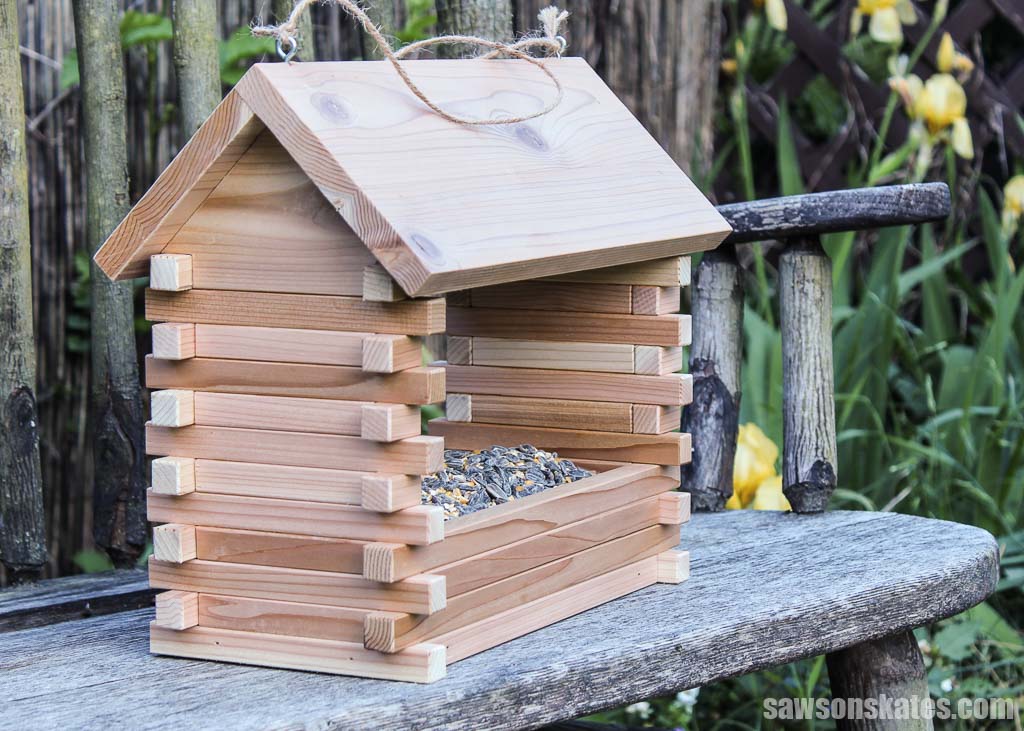
How to Make a Log Cabin Bird Feeder
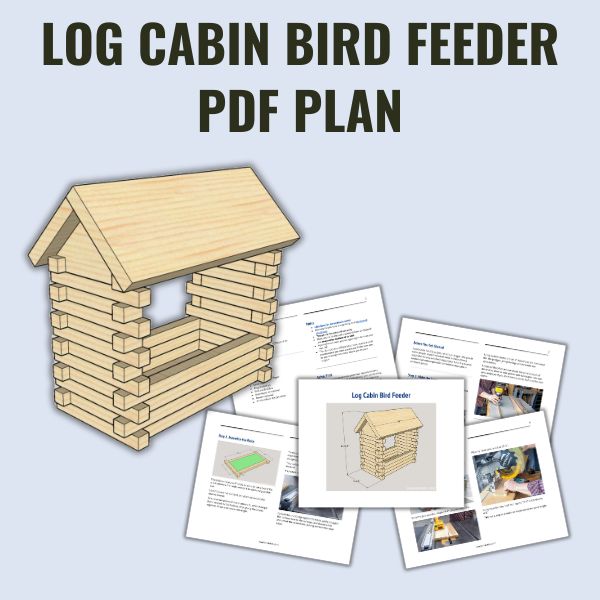
Printed Plan
Get the PDF plan here (includes detailed instructions, measurements, and bonus tips)
Materials
- Wood (per the printed plan)
- Exterior Wood Glue (I used this one)
- 1-¼” Brad Nails
- ½” Screw Eyes
- Jute Twine
Tools
- Tape Measure
- Miter Saw
- Table Saw and Grr-Ripper
- Scroll Saw
- Kreg Multi-Mark
- Drill and Drill Bits
- Brad Nailer or Hammer
- Router (optional)
- ⅛” Roundover Bit (optional)
Before You Begin
I made this project with cedar, which can trigger allergies in some people, myself included. While I always wear a respirator for any woodworking project, I also try to work outdoors whenever possible to minimize exposure in enclosed spaces.
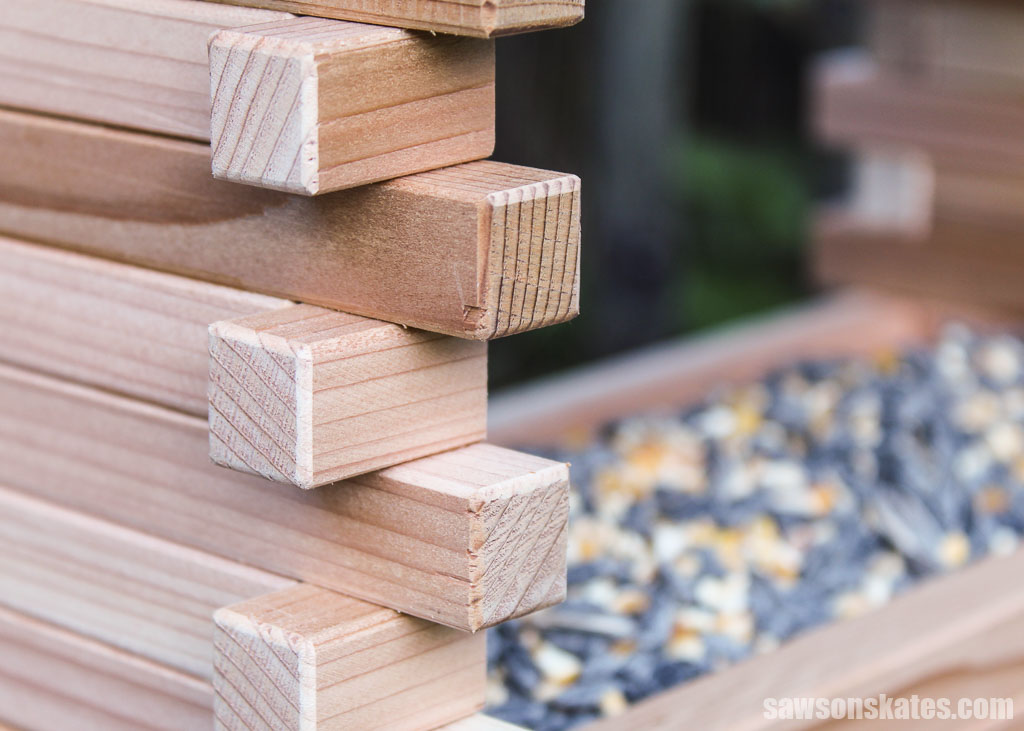
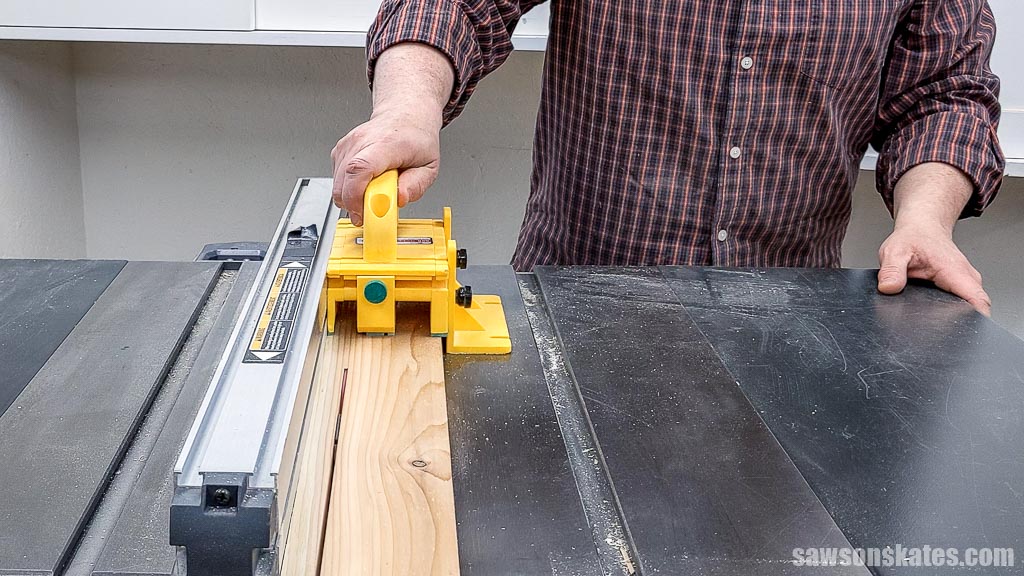
Step 1. Make the Logs
To build the bird feeder’s walls, I needed “logs.” To make them, I set my table saw and used a push block to rip them to width.
Related: 21 Table Saw Safety Rules (& Mistakes to Avoid)
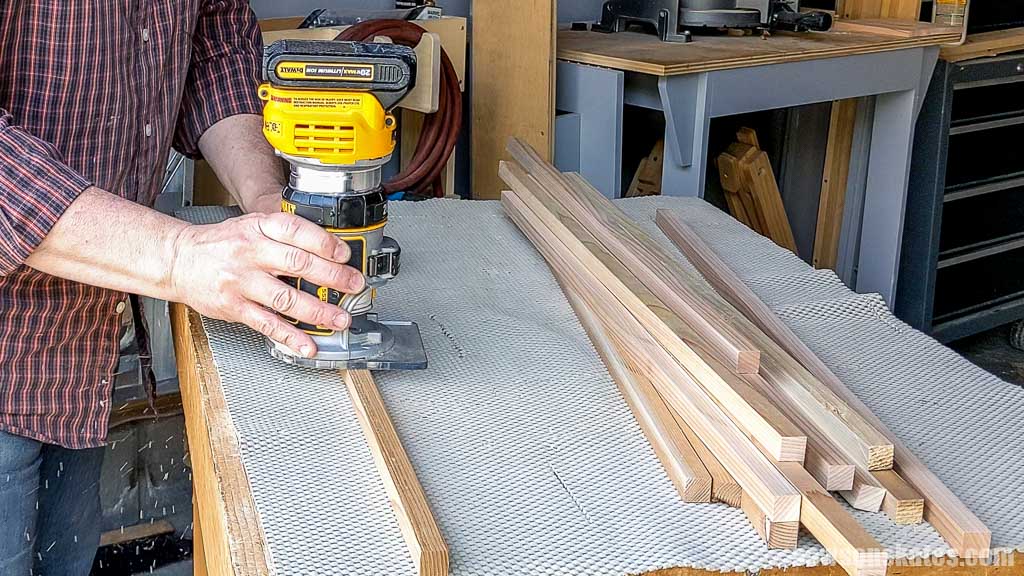
Using my trim router and a roundover bit, I removed the sharp edges, giving the logs a more cabin-like appearance.
I adjusted the bit to remove about the same amount of material as three or four passes with sandpaper. You can use sandpaper if you don’t have a router, but it will be a bit slower.
Step 2. Assemble the Walls
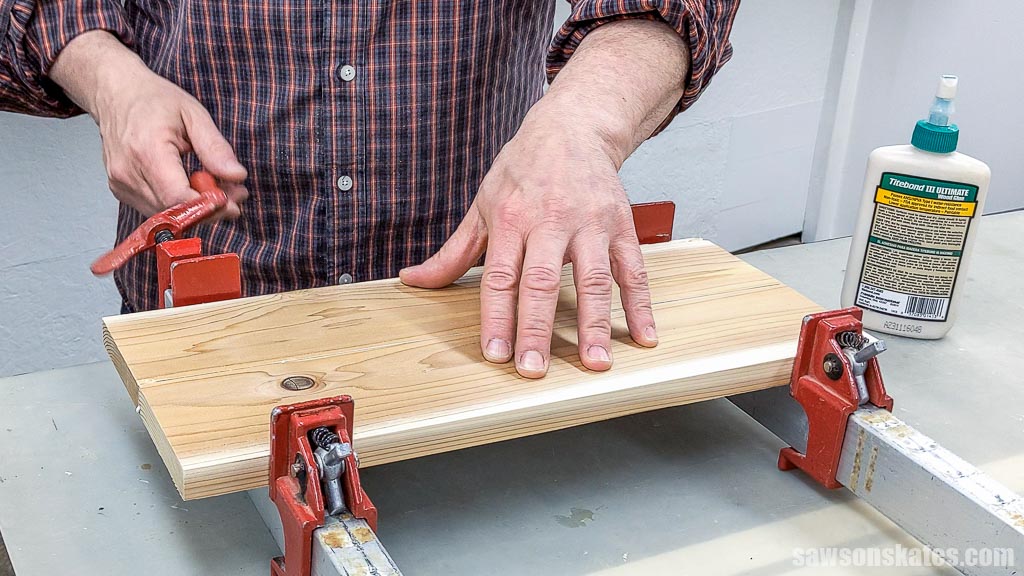
For the bottom, you can use one solid board, and rip it to width using a table saw. I didn’t have one wide enough, so I glued up two smaller boards instead.
First, I cut two pieces of wood longer than I needed for the bottom. After gluing the boards together, I’ll cut it to the correct length.
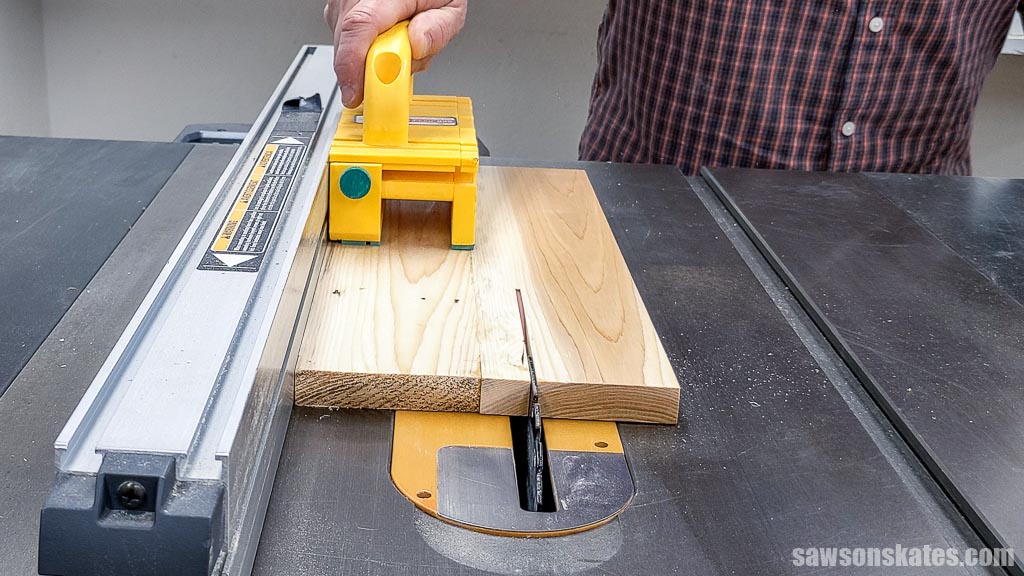
To ensure a strong glue joint, I started by removing one edge from the boards. I placed the board next to the blade and gently snugged the rip fence next to it.
This method allowed me to shave off a thin amount of material. I repeated this step for the other board.

I placed the uncut edge against the blade, gently snugged the rip fence next to the cut edge, and shaved a thin amount off the second side, leaving me with two clean edges.
To ensure the feeder could withstand the elements, I applied an exterior waterproof glue to one edge.
To help spread the glue, I placed it next to the other board and moved it back and forth.
I twisted the clamps until they were just snug.
Once the glue was dry, I ripped it width using my table saw and cut it to length with my miter saw.
Using my miter saw, I cut some logs to length.
TIP: I set a stop so I could cut the pieces to the same length.
With my trim router and roundover bit, I matched the ends to the edges’ rounded profile.
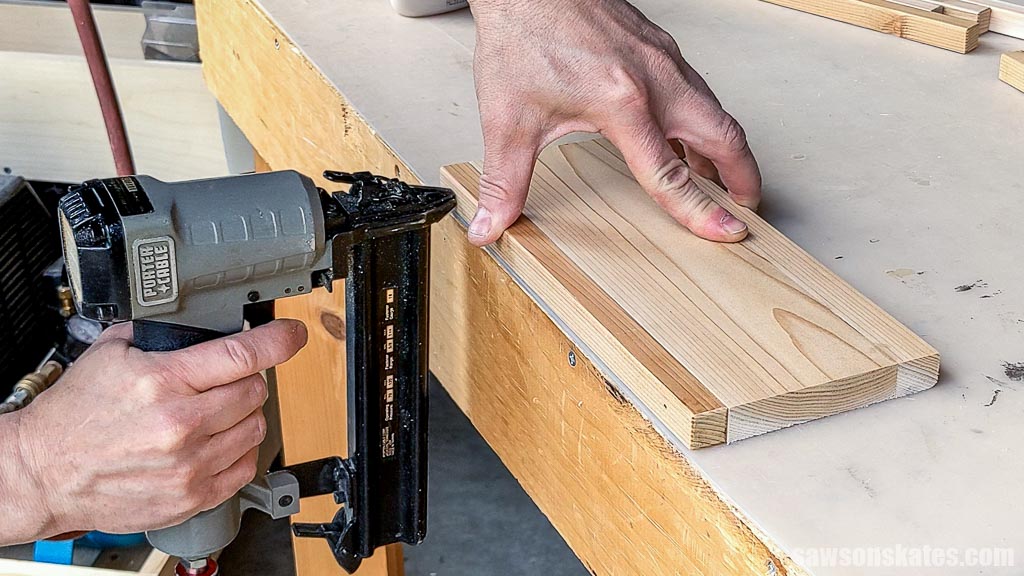
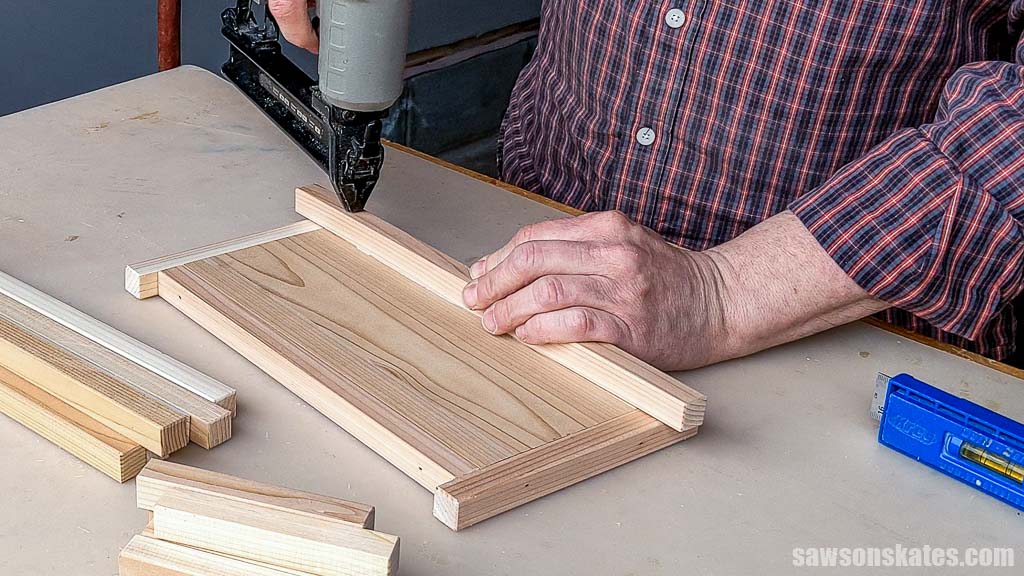
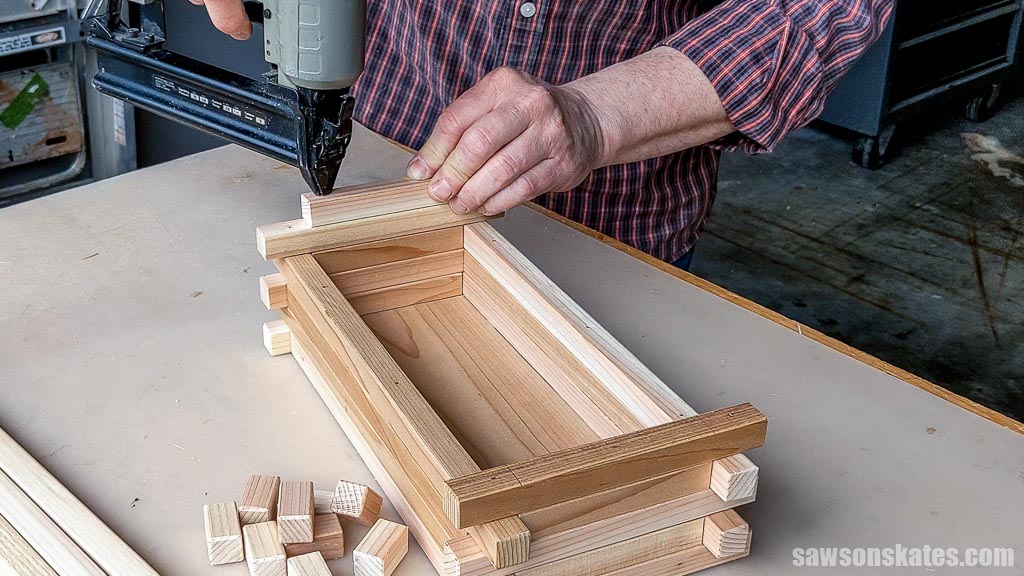
I applied glue to the edge of the bottom, placed a long log on it, and attached it using brad nails. I repeated this step for the other side.
TIP: Brad nails can sometimes curve rather than go straight if they hit a hard obstruction like a knot, so you want to make sure your hands are far enough away if that should happen. In other words, I should’ve moved my hand farther away.
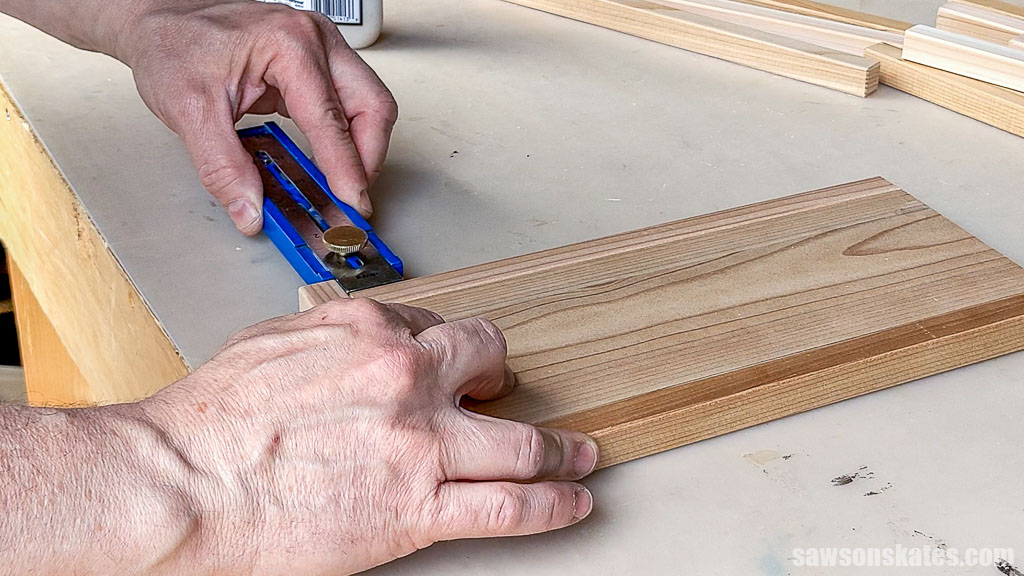
I applied glue to the end of the bottom and centered a short log using my Kreg Multi-Mark.
I attached it using brad nails and repeated this step for the other end.
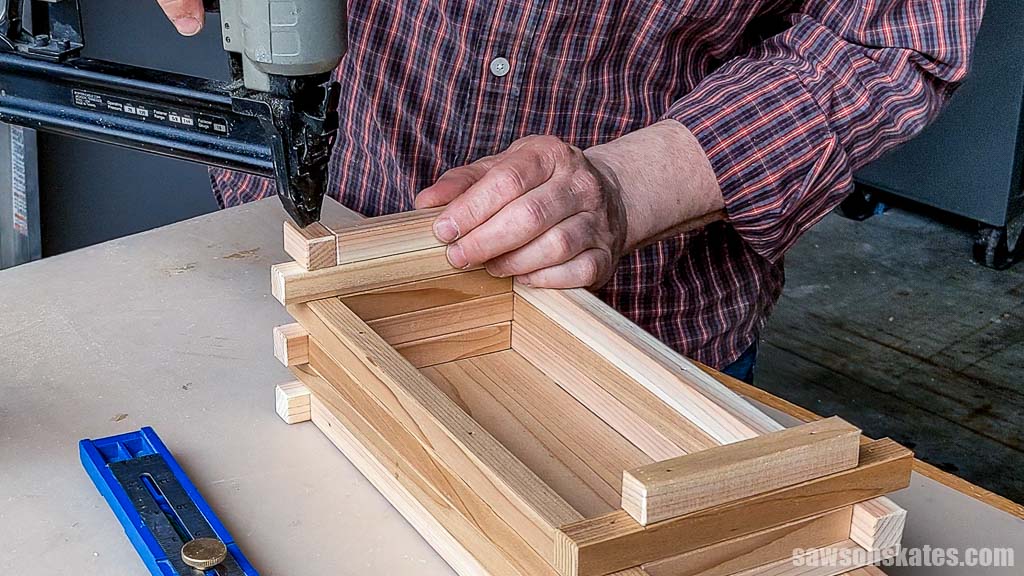
For the second layer, using my miter saw, I cut more logs to length.
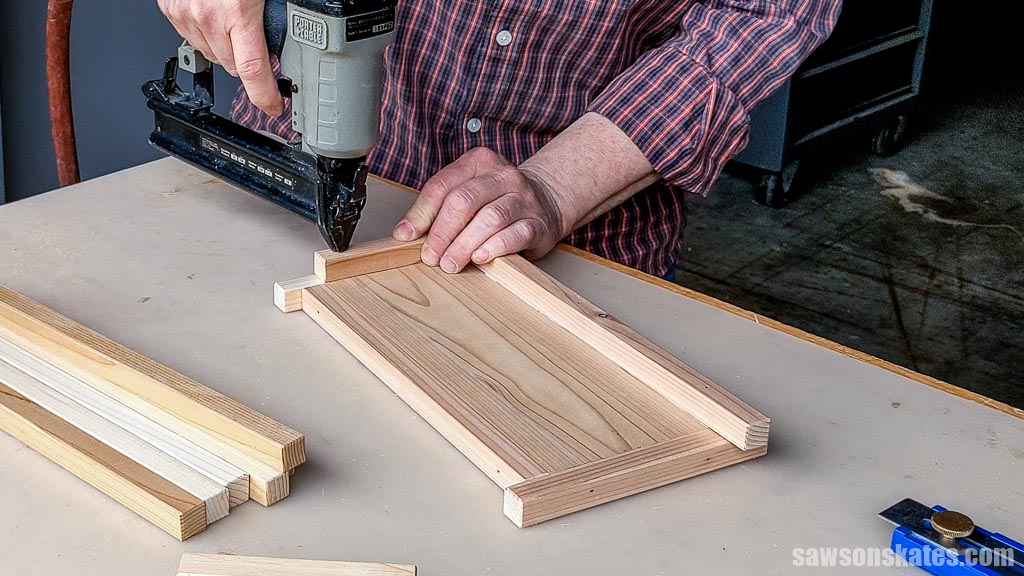
I applied glue to the long edge and centered a log using my Kreg Multi-Mark.
I attached it using brad nails.
I applied glue to the short edge, positioned a short log, and attached it using brad nails.
I repeated this step for the remaining sides, and repeated these steps for two more layers.
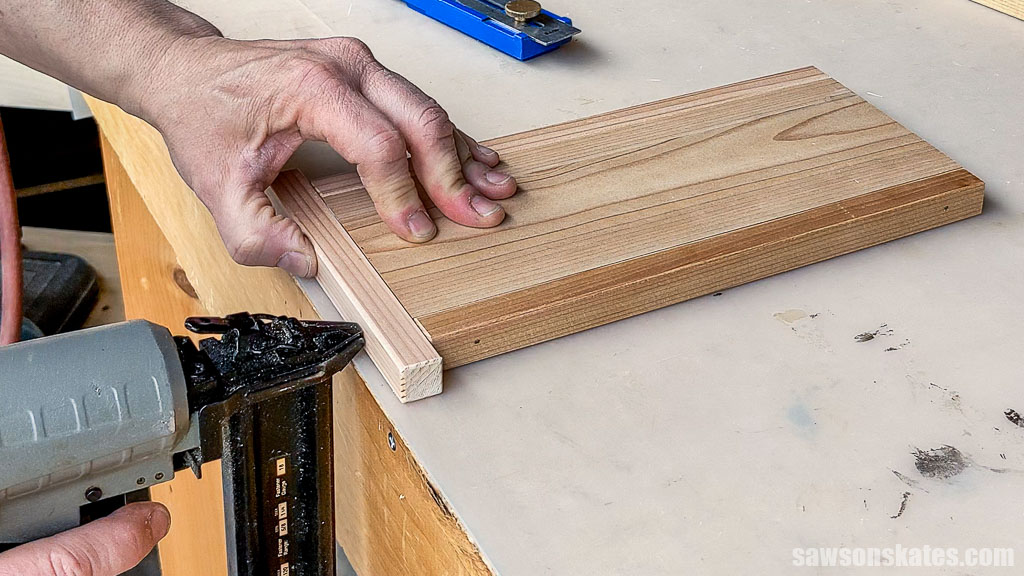
For the fifth layer, I attached a log to each end using brad nails.
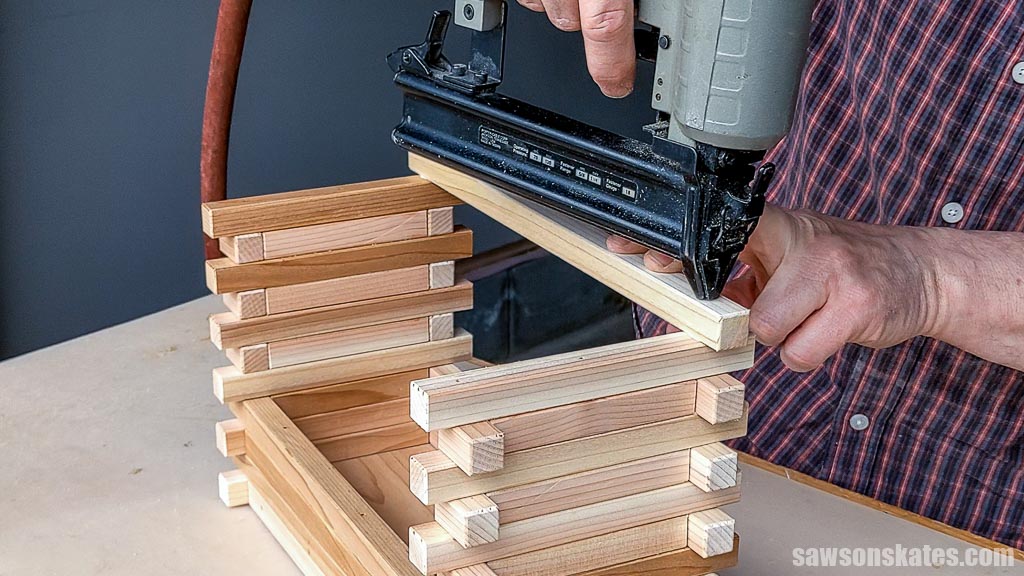
For layers six through eleven, I cut 16 short logs to length.
On the short edge, I made pencil marks and applied glue between them.
I positioned a log on the short end.
I attached it using brad nails.
I applied glue to each side, positioned a short log, and attached it with brad nails.
I repeated these steps for five more layers.
For the final layer, I applied a dab of glue to each end, positioned a log, and attached it using brad nails.
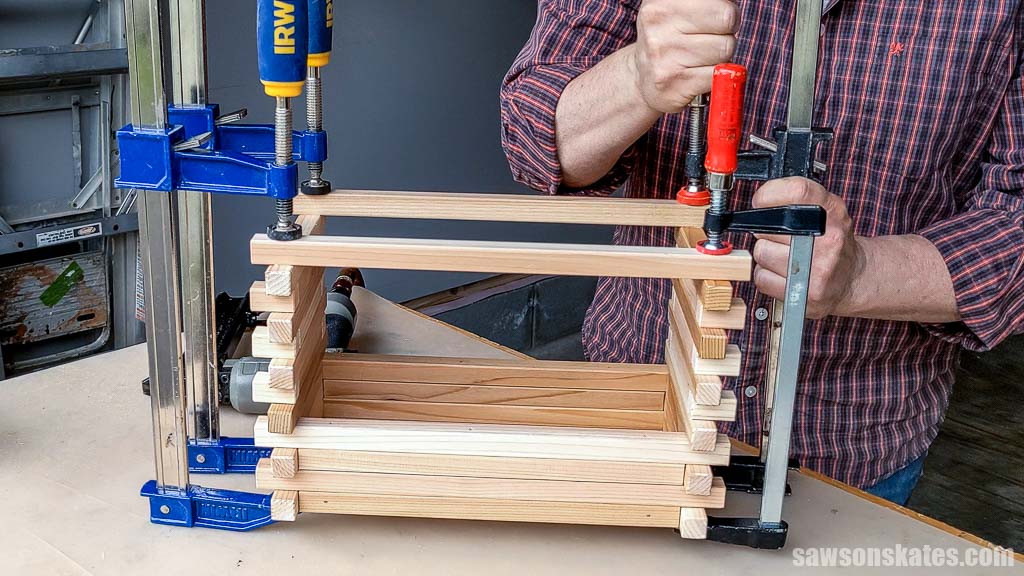
To ensure a strong connection, I clamped the assembly and allowed it to dry while I moved on to the next step.
Step 3. Attach the Gables
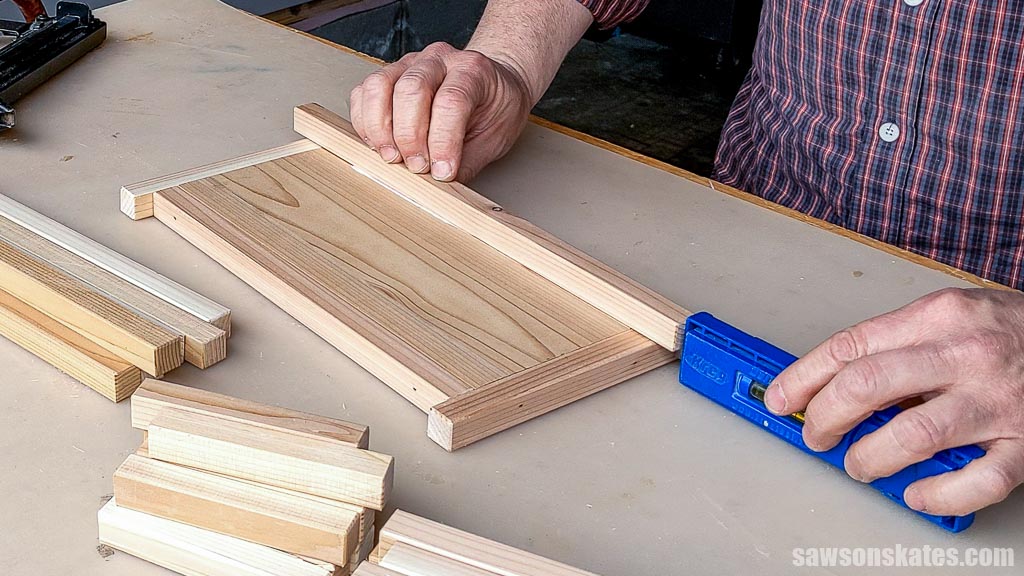
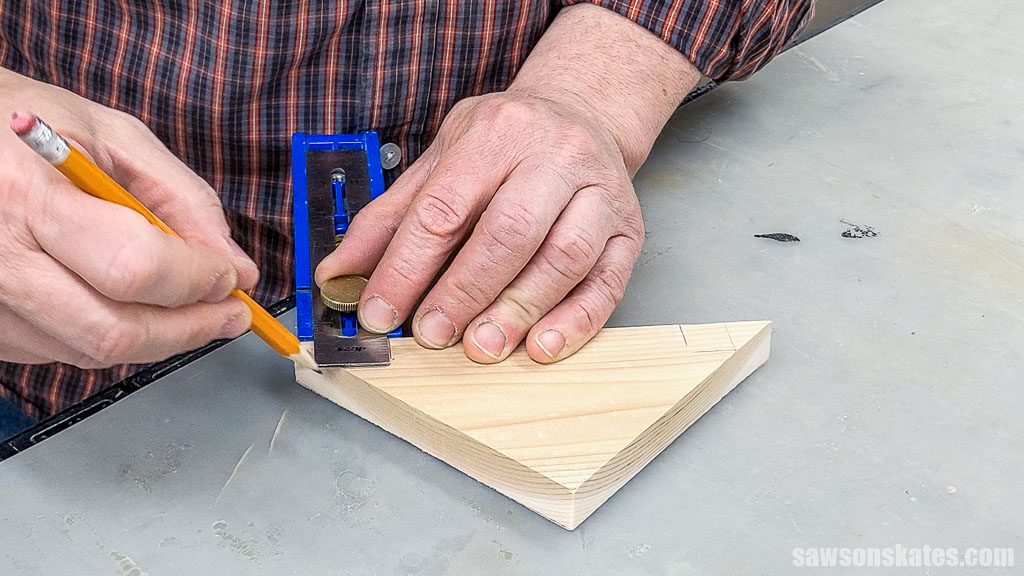
I adjusted my miter saw to 45 degrees and cut an angle on one end of a board.
After flipping the workpiece toward me, I positioned the blade at the gable’s peak, and made the second cut.
I repeated these steps for the second gable.
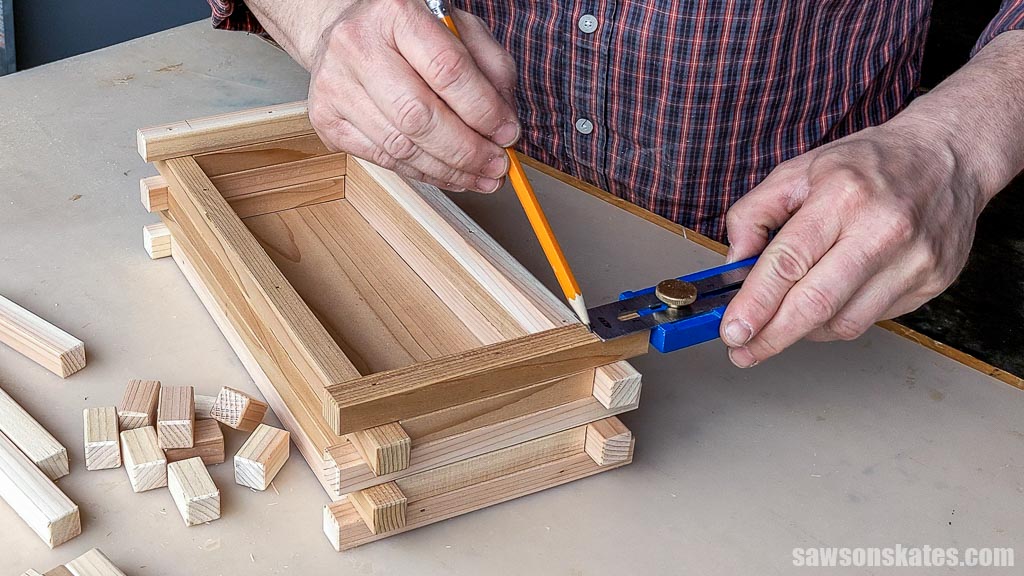
For an exact fit, I centered the gable on the side.
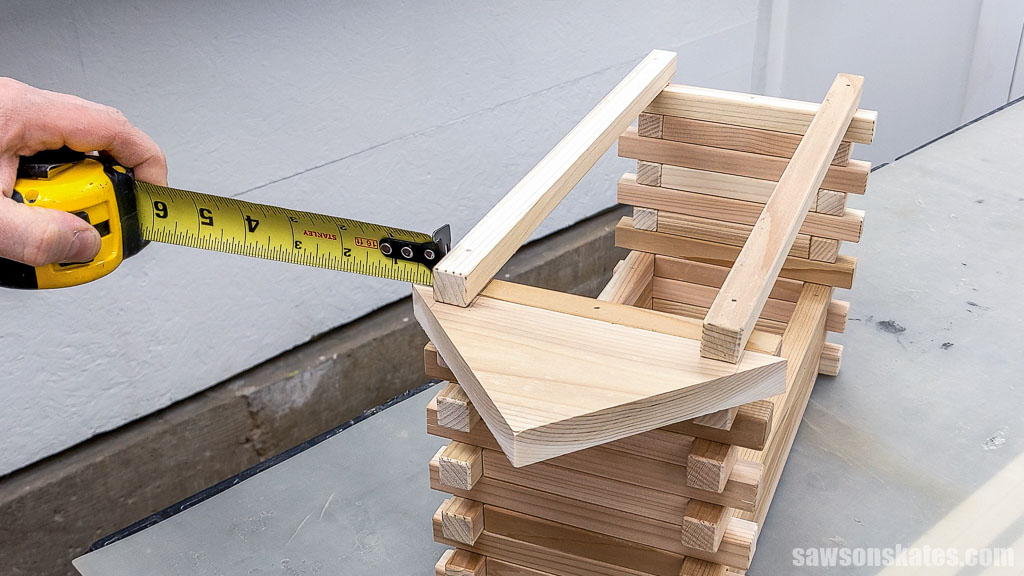
With a pencil, I made reference marks on each side of the logs.
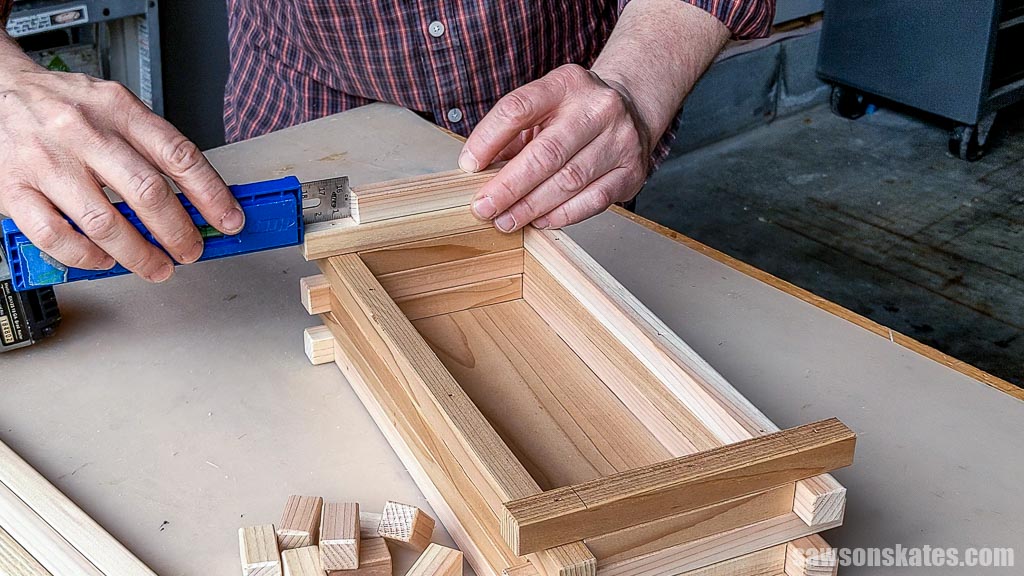
I set my Kreg Multi-Mark to the logs’ height.
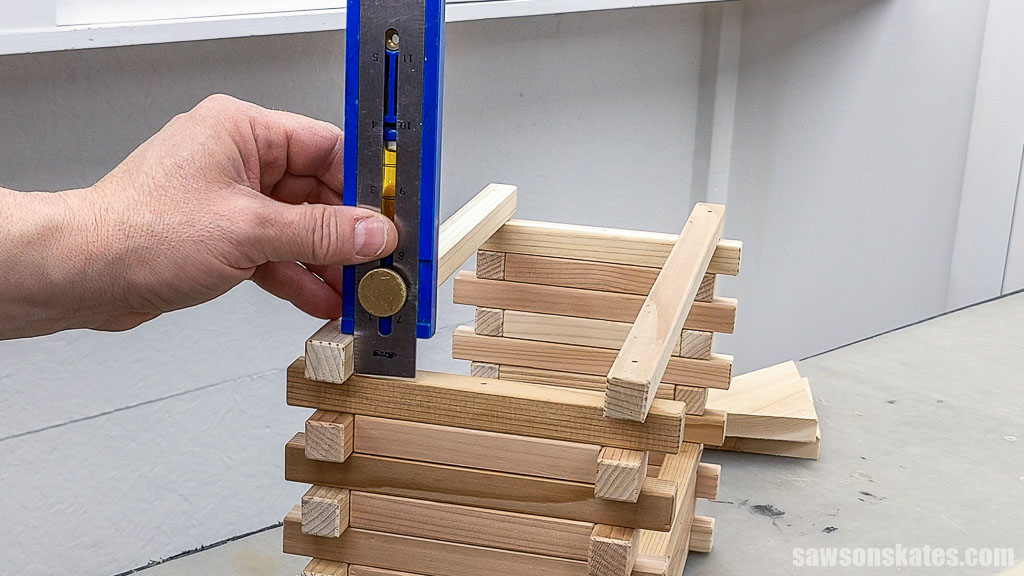
Using my Multi-Mark, I transferred the height to each side of the gable.
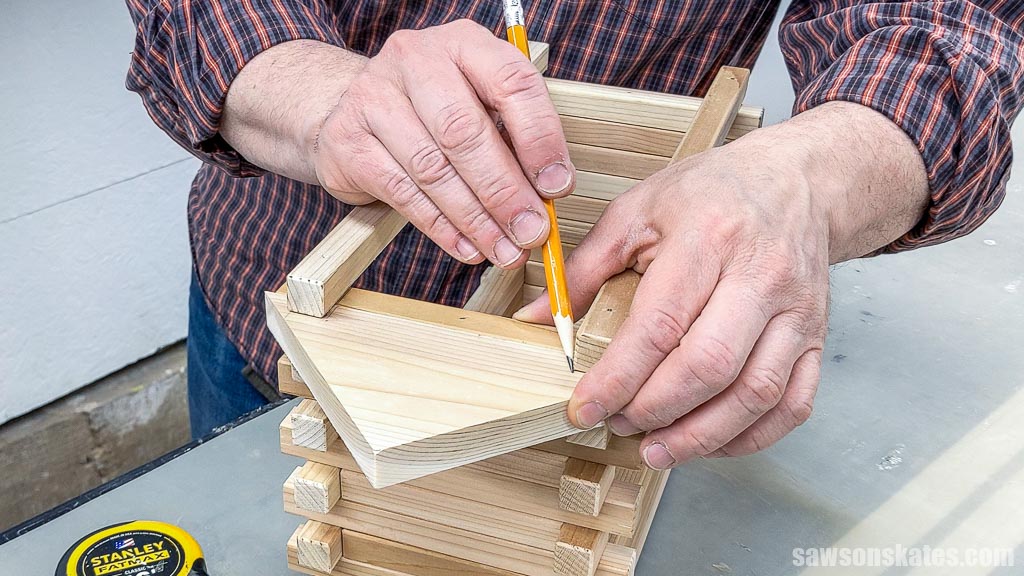
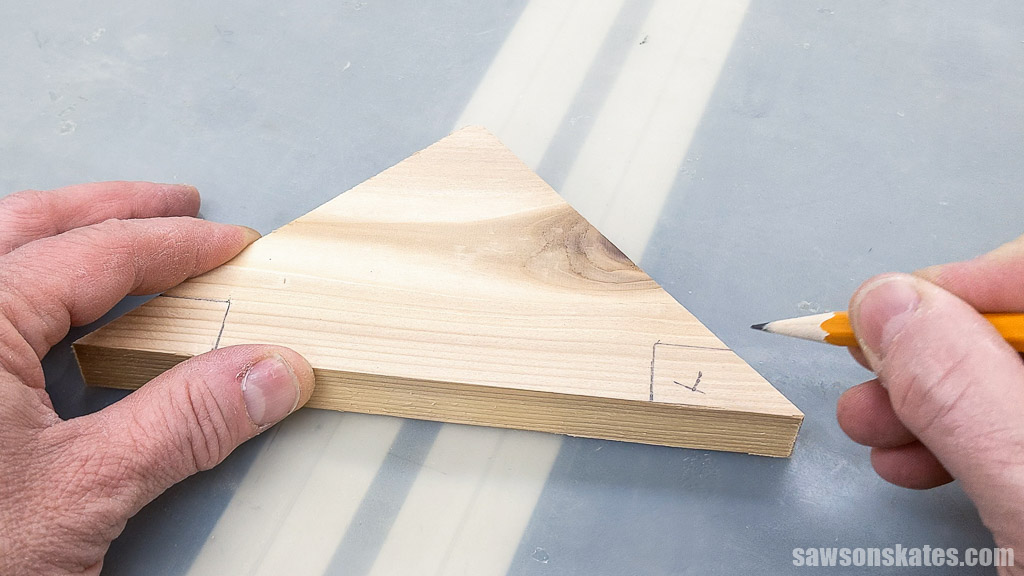
With an “x,” I marked the area I wanted to remove.
I repeated these steps for the second gable on the other end.
TIP: To avoid confusion, I labeled the walls and gables “A” and “B” to ensure proper placement.
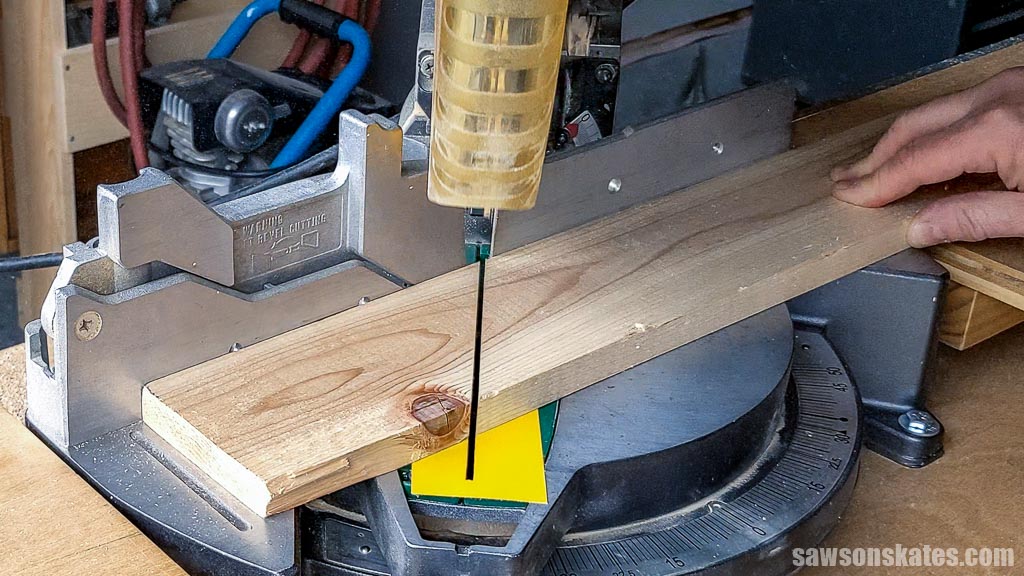
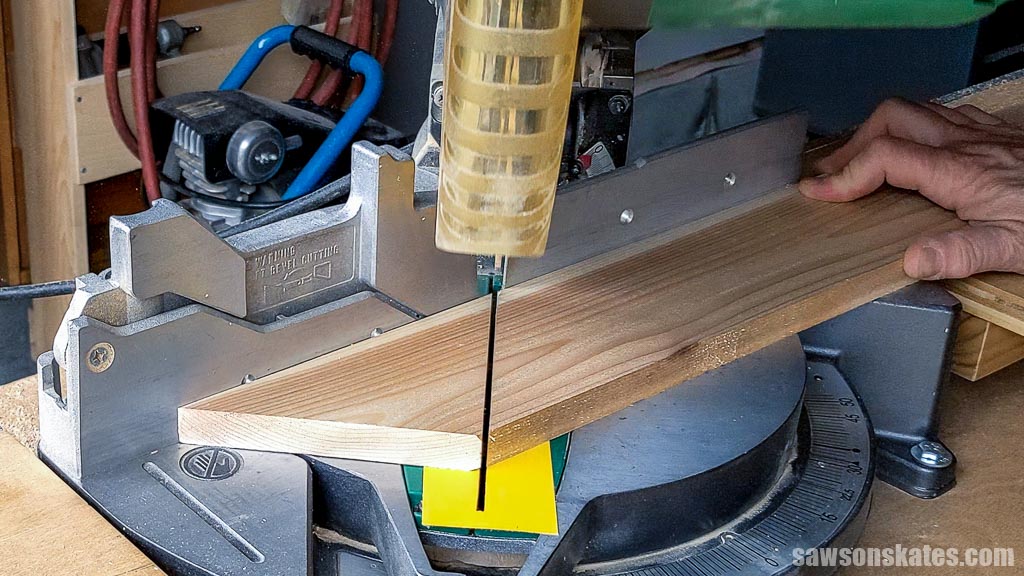
Using my scroll saw, I removed the waste area from the gable.

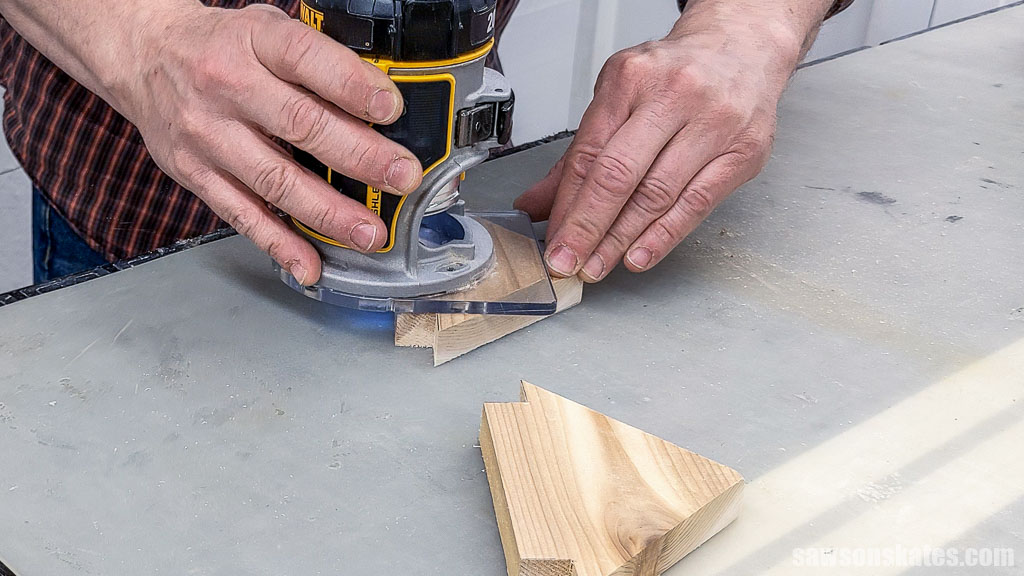
With my trim router and a roundover bit, I matched the gables’ bottom edge to the logs’ rounded profile.
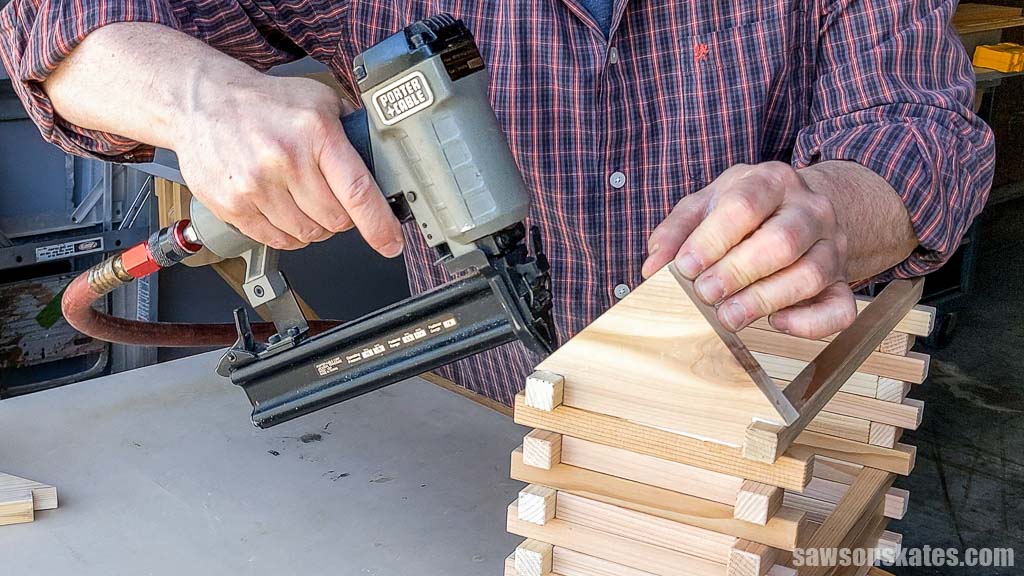
I applied glue to the end, positioned the gable, and attached it using brad nails.
Step 4. Attach the Roof
You can make the roof sections from solid boards, but I didn’t have any wide enough, so I followed the same method I used to make the bottom, gluing two smaller boards together and then ripping to width using my table saw.

At the miter saw, I cut two roof sections to length.
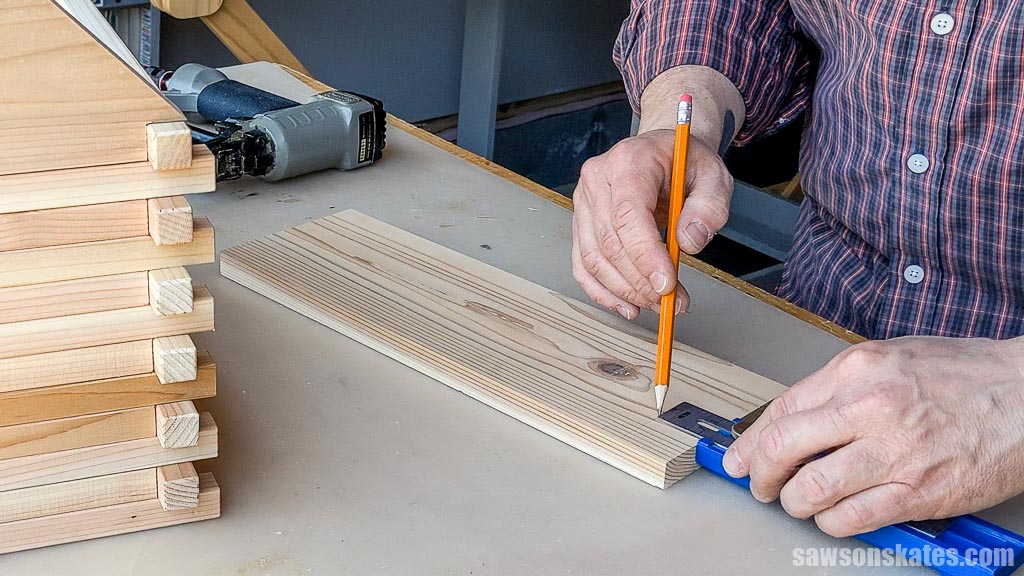
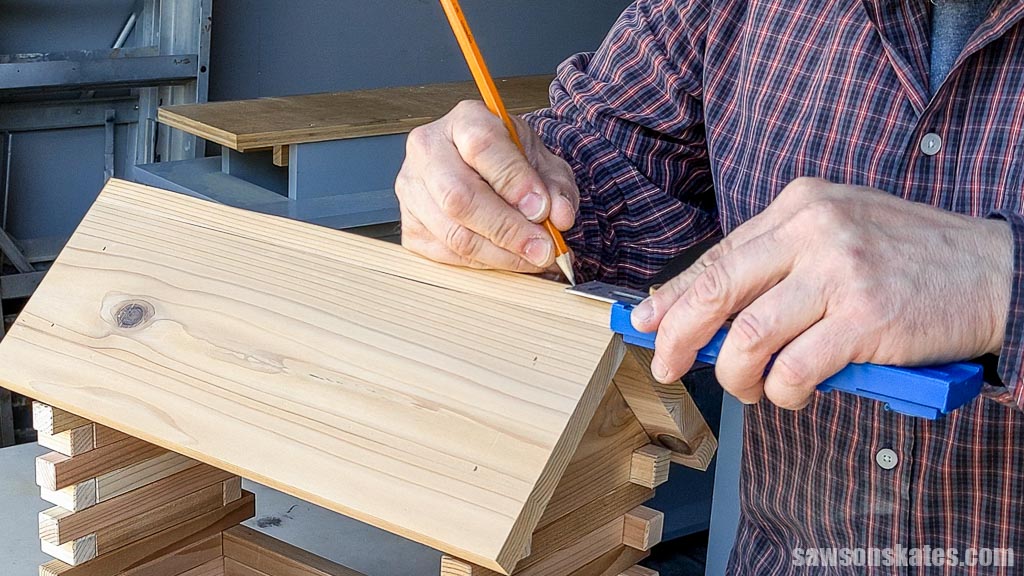
To help position the brad nails, I adjusted my Multi-Mark and made a light pencil line on each end.
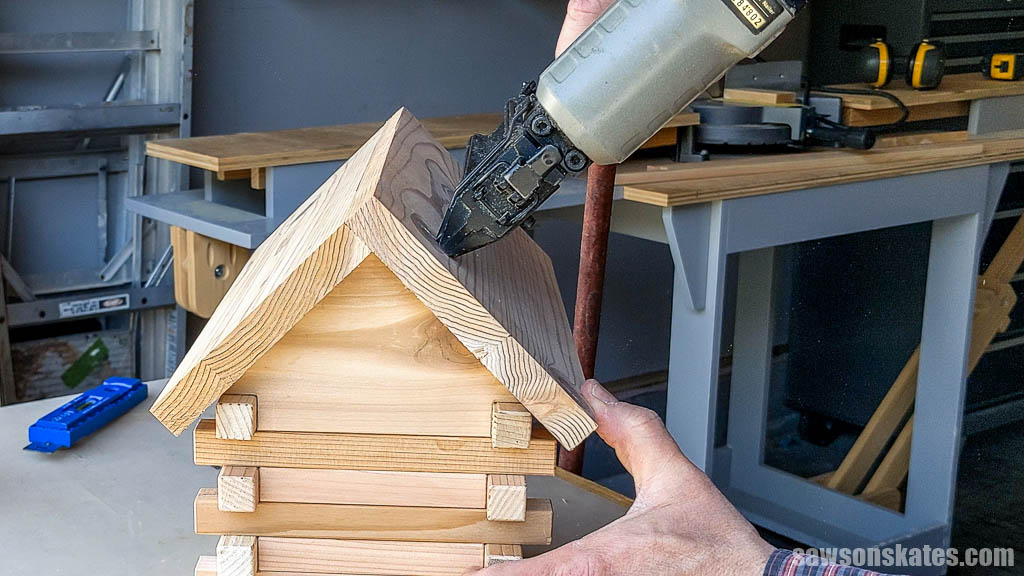
I applied glue to the gable, centered the narrow roof section from side to side, and attached it using brad nails.
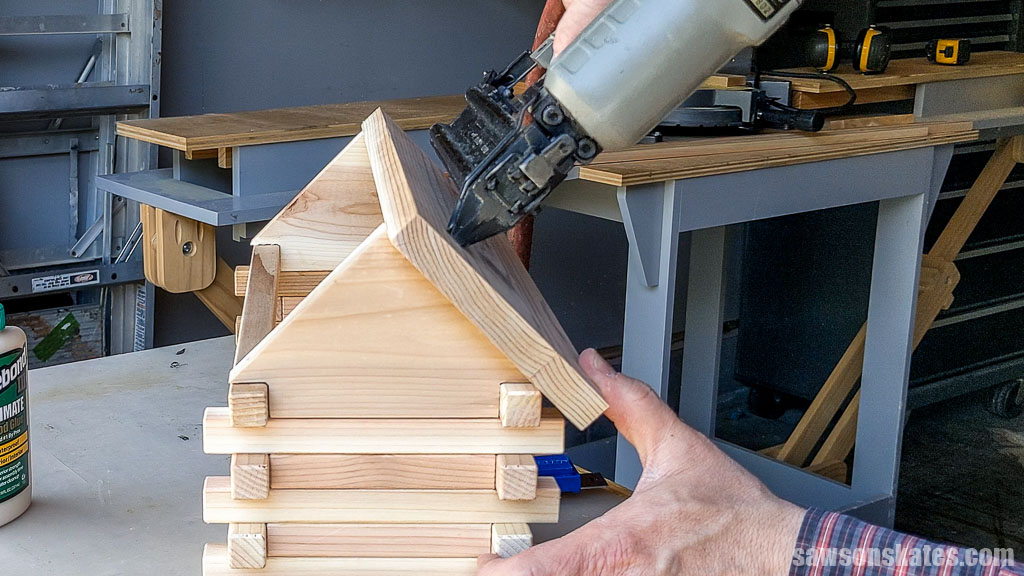
I repeated this step to attach the wider roof section.
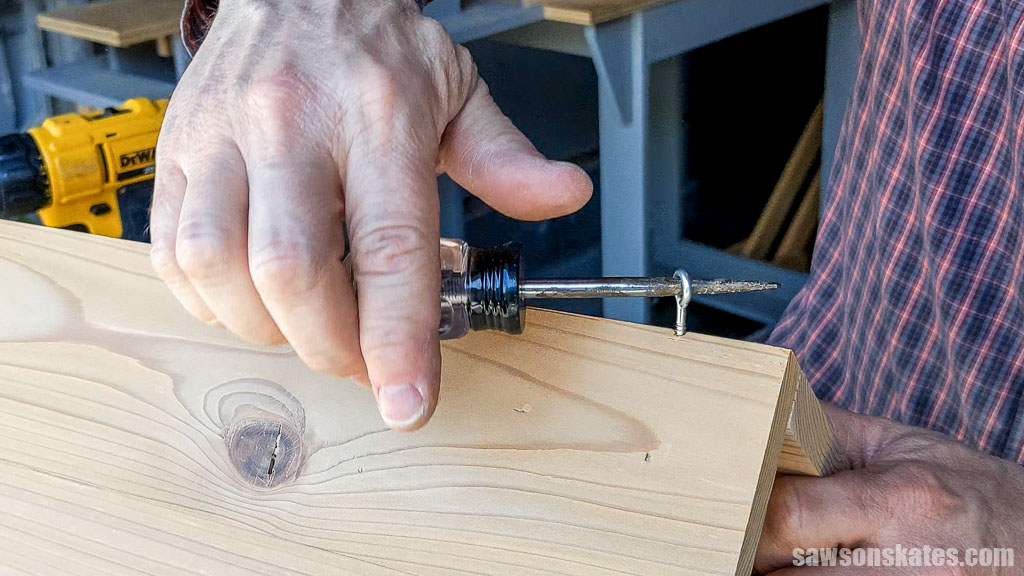
Step 5. Attach the Hanger
To attach the hanger, I measured in from each edge.
Using the side of my awl, I made a flat spot at each mark.
Related: What is an Awl? (& How to Use It)
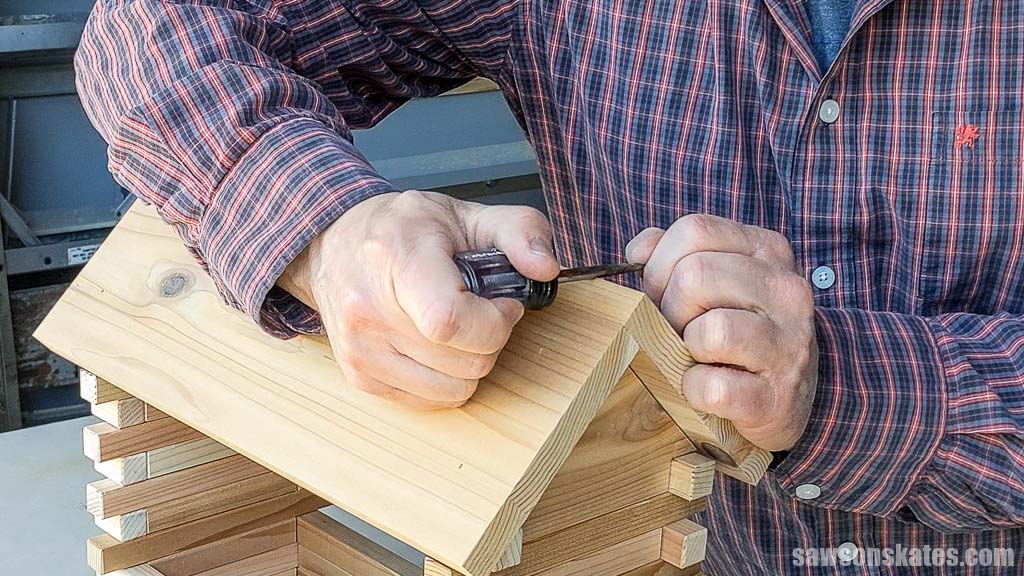
In the flat spot, I used my awl to make a starting point for a drill bit.
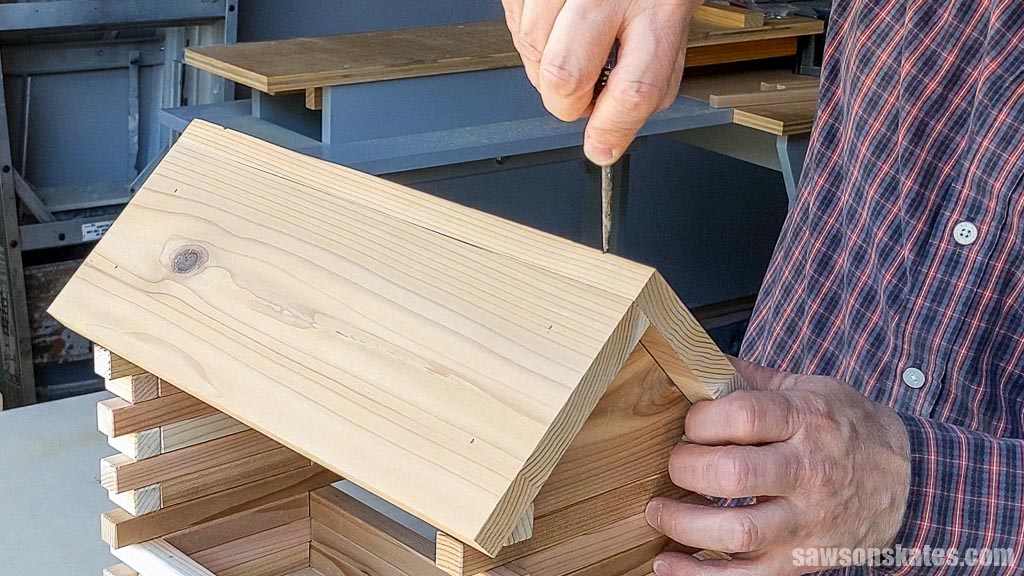
Using a drill bit to make pilot holes for the screw eyes.
Related: How to Drill Pilot Holes (Why, When & Correct Size)
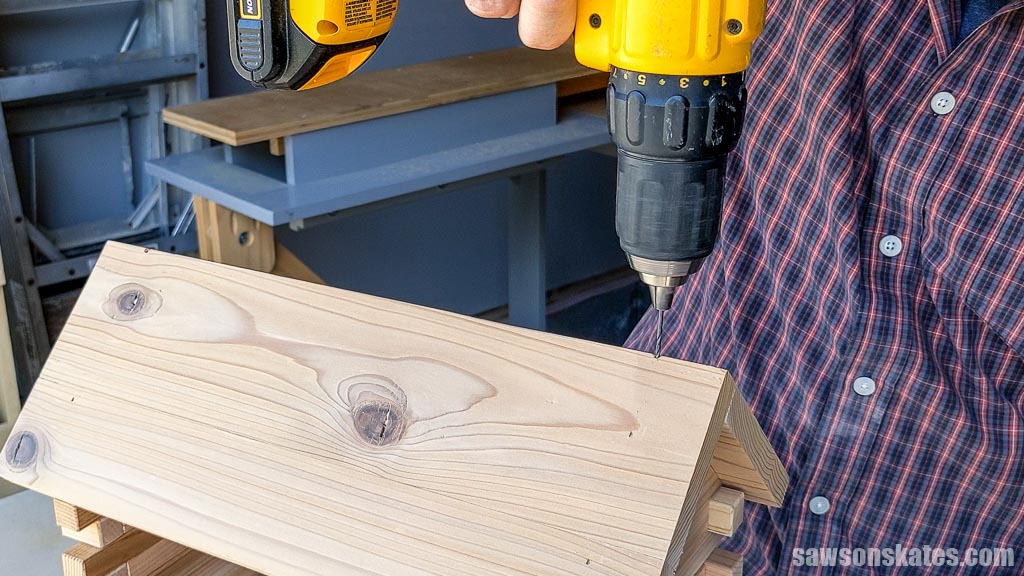
Then, I drove a screw eye into each hole.
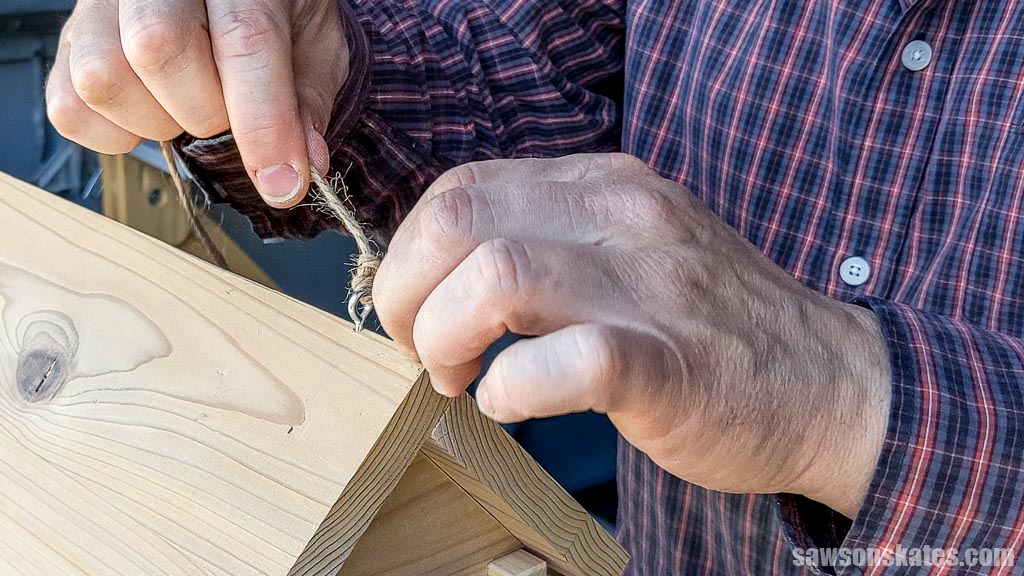
I cut a piece of jute twine to length and tied it to the screw eyes.
That’s it. Your bird snack shack is ready for business!
Includes:
- List of tools and materials
- Complete measurements (in inches)
- Easy-to-follow instructions
- Step-by-step photos
- Detailed diagrams
or get the best value:
Video
Watch now, and I’ll show you step-by-step how to make a DIY log cabin bird feeder.
Final Thoughts
With some leftover wood, you can make a charming log cabin bird feeder that’s sure to become a favorite hangout for your feathered friends.
Don’t wait. Get your PDF plan (including the detailed instructions and measurements) now!
Thank you for stopping by. If you enjoyed this tutorial, would you please take a moment and pin it to Pinterest? I’d really appreciate it!
Recommended For You
Pin This For Later

Hi there – I’m Scott, a woodworking enthusiast and creator of Saws on Skates, a site I started in 2015 to share easy-to-follow tutorials, space-saving shop tips, and project inspiration for DIYers at any skill level. Learn more about my woodworking journey here.
Love the log feeder. What a great gift this would be to give to my bnrother.
Thank you