DIY Photo Hanger
This DIY photo hanger is a clever way to display pictures without using frames. It’s easy to make with one piece of scrap wood and one simple straight cut.
What Should I Build Next?
That's the question I help answer.
Every week, I send woodworking ideas to 17,000 DIYers who love building things.
You'd fit right in.
DIY Photo Hanger
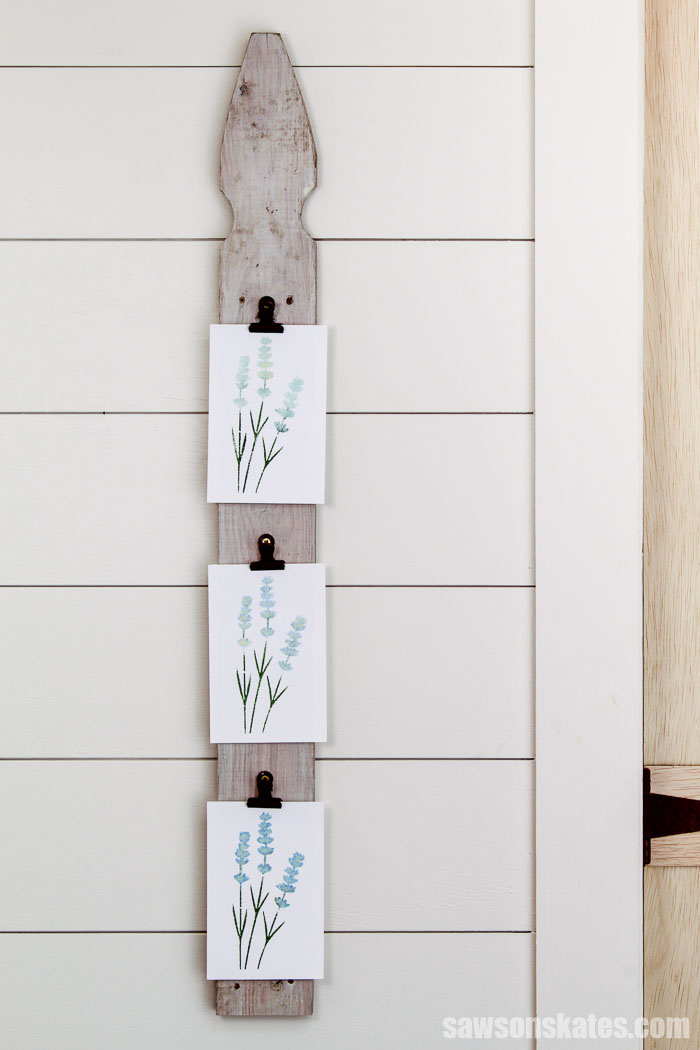
Looking for a unique way to display photos without using frames? This DIY photo hanger is the solution.
It’s the perfect way to display pictures, artwork (your kids or your own), postcards, and more. Do you like to update your decor often? The attractive metal clips make it easy to swap out photos.
This is a great project for beginners. It can be made in about 30 minutes with one piece of scrap wood and just one straight cut.
This project also makes a quick and inexpensive gift for anyone. It’s a thoughtful present for family, friends, neighbors, and coworkers.
Get the free plan and make one (or a handful) today!
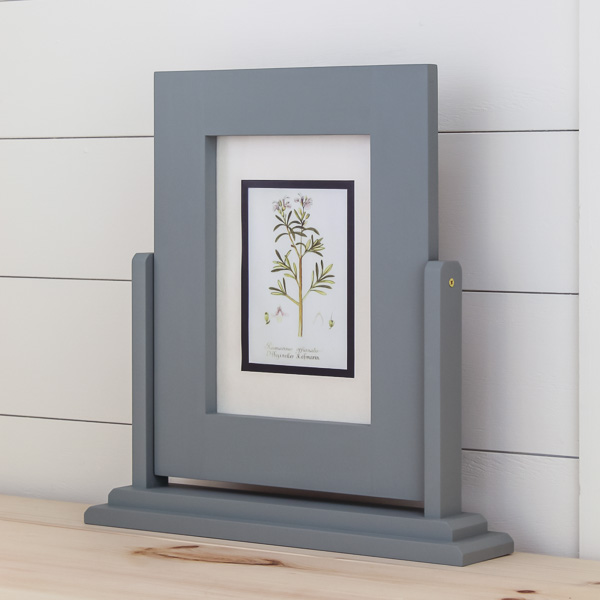
You may also enjoy this DIY picture frame that is made without complicated miter cuts.
This tutorial contains affiliate links to supplies and tools. Purchases made using these links help support the Saws on Skates website and allows me to share more projects and tips with you. There is no cost to you for using these links. Visit my site policies for more information.
Before we get into how to make a DIY photo hanger, be sure to click the subscribe button at the bottom of this page to sign up for my FREE weekly newsletter loaded with helpful pocket hole tricks, space-saving workshop ideas, clever DIY tips and more!
Table of Contents
- Inspiration for This Project
- What Tools Do You Need to Make a Photo Hanger?
- What Kind of Wood Should You Use?
- How Do You Finish the Photo Hanger?
- How Do You Hang it on the Wall?
- Customize Your Photo Hanger
- DIY Photo Hanger Tutorial
- Get the Free Printed Plan
Inspiration for This Project
I recently went with a friend to a few yard sales. He was looking for some inexpensive items to put the finishing touches on his two vacation rentals.
While I was poking around one of the sales, I found this long, dusty piece of wood with four hinge clips attached to it. I wasn’t sure exactly what it was, but I thought it would be a great way to display photos.
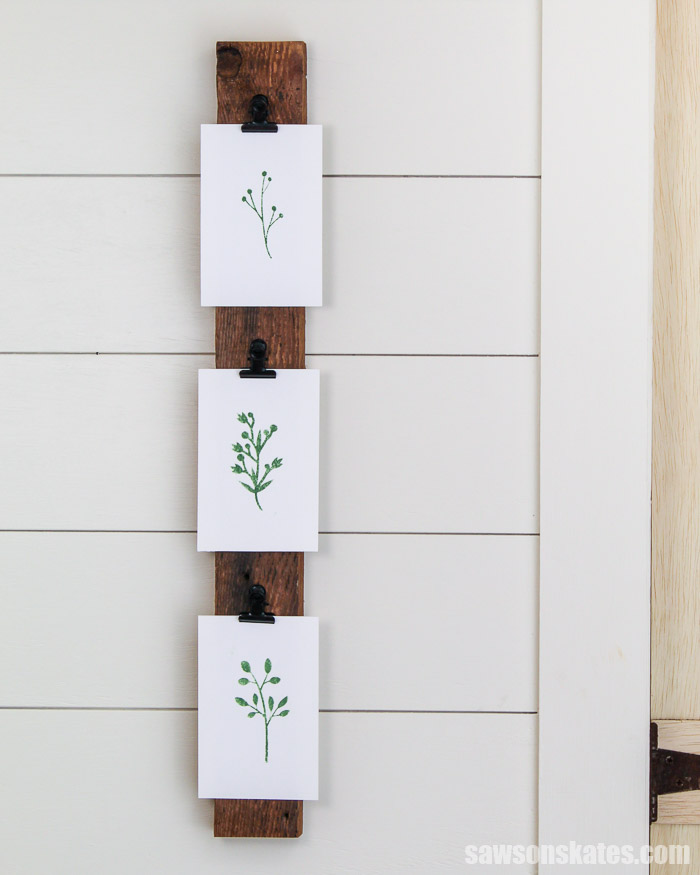
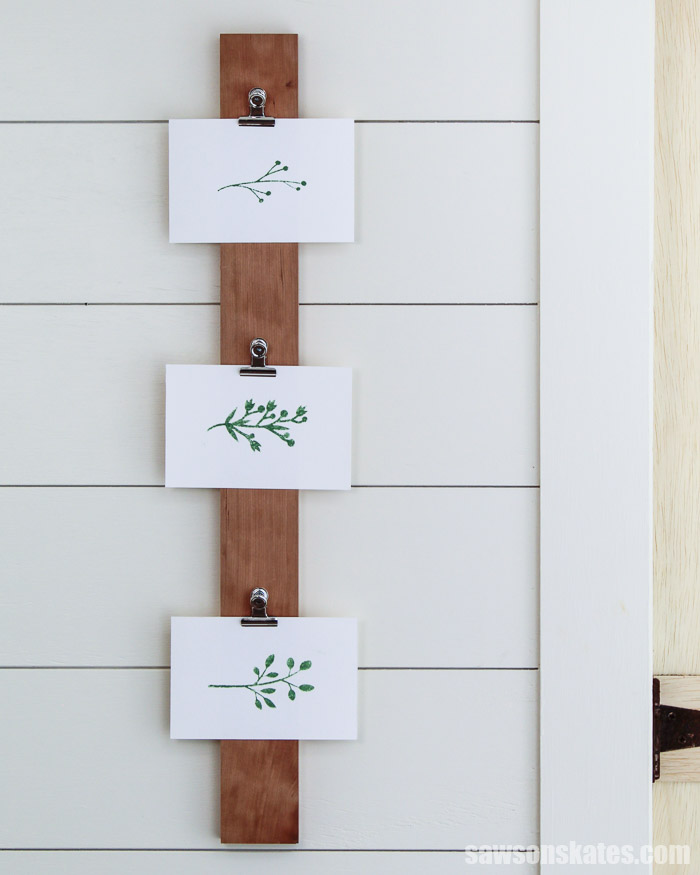
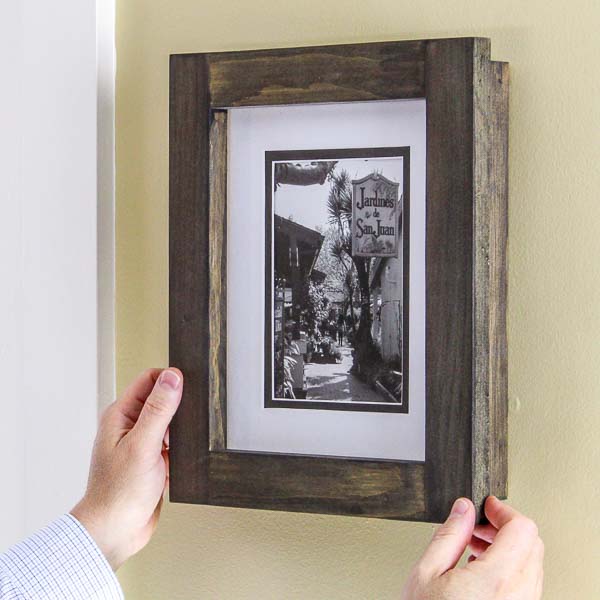
That dusty piece of wood was the inspiration for this DIY photo hanger. It’s a simple project made with one piece of scrap wood with three hinge clips.
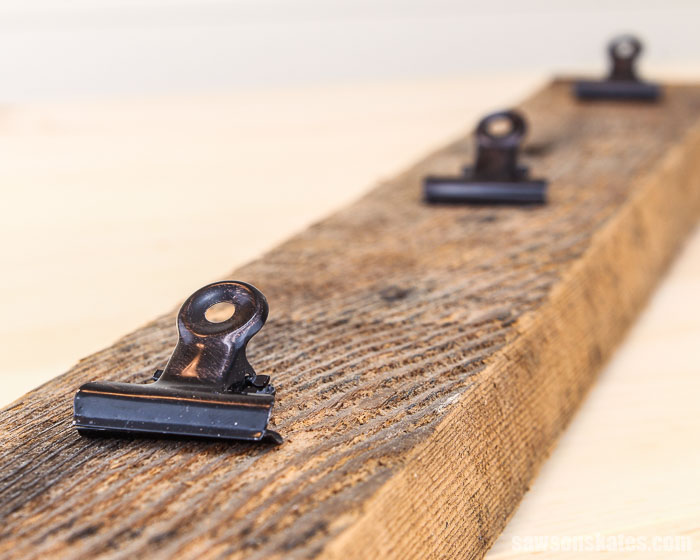
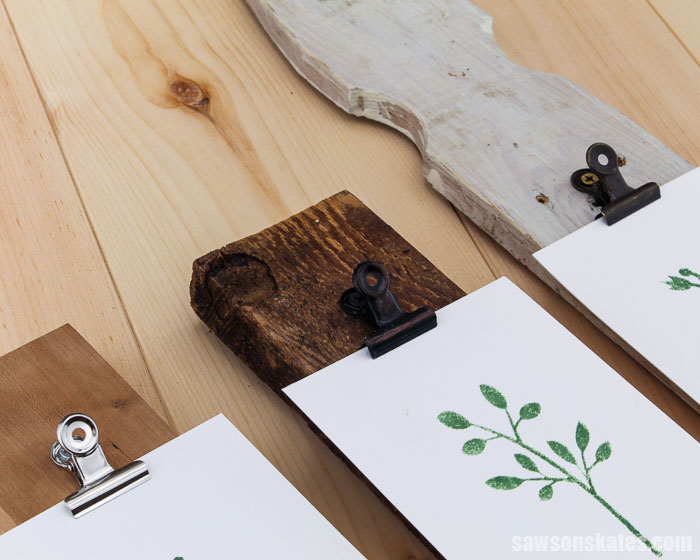
I used three types of scrap wood to make my photo hangers. A piece of cherry wood, a piece of barn wood, and an old fence picket.
Photos can be hung either vertically or horizontally. It’s a great way to showcase pictures, artwork (your kids or your own), postcards, and more.
Back to Table of ContentsWhat Tools Do You Need to Make a Photo Hanger?
This photo hanger is a quick project that can be made using basic woodworking skills and just a few common woodworking tools.
Related: 10 Must-Have Woodworking Tools for Beginners
We only need a few common tools to build this project. Tools like a miter saw and a drill.
I used a miter saw to cut the scrap wood for my project but you could also use an inexpensive miter box instead.
Related: 7 Miter Saw Tricks Every DIYer Should Know
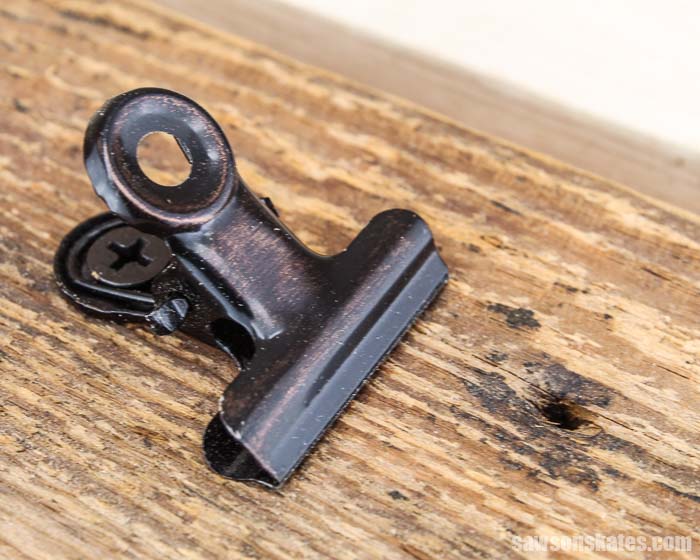
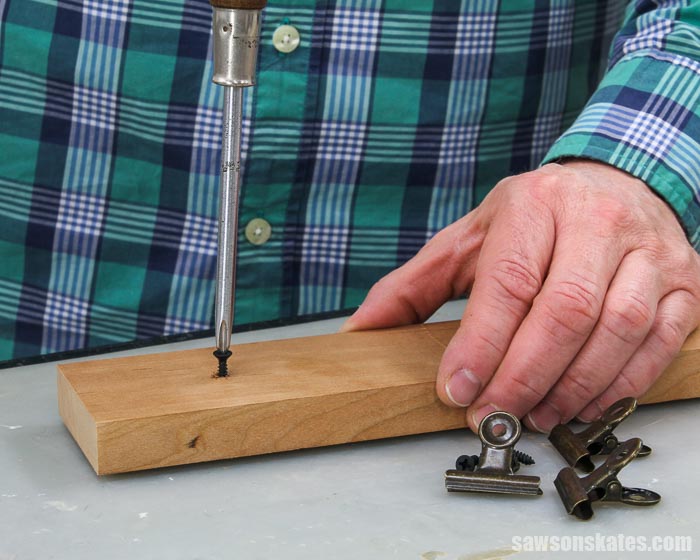
I used the drill to make pilot holes for the screws that attach the hinge clips to the scrap wood. Drilling pilot holes makes it easier to drive the screws.
We’ll also need some hinge clips. I bought two different kinds. These oil rubbed bronze hinge clips that came with screws and these silver/multicolor hinge clips that didn’t include screws. I attached the silver clips with ½” #6 wood screws that I had in my workshop.
What Kind of Wood Should You Use?
This photo hanger can be made with just about any type of wood. This project doesn’t require much wood so it’s a great way to use up some scrap wood.
Related: How to Decide What Scrap Wood to Keep
This project is also a great way to get creative. For my photo hangers, I used a scrap piece of cherry wood, a piece of barn wood, and an old fence picket.
Related: Where to Buy Barn Wood
How Do You Finish the Photo Hanger?
This wooden photo hanger could be finished in a variety of ways. It could be left natural, painted, or stained.
I thought the barn wood and fence picket were attractive as they were, so I decided not to apply any paint, stain, or top coat.
I considered applying this natural polyurethane to the cherry wood hanger, but I liked the look of the raw cherry wood, so I decided against applying a finish.
Related: Why I Switched to This Polyurethane Alternative
How Do You Hang it on the Wall?
This inspiration piece for this project used a piece of twine as a hanger. I wanted a more tailored look for my project, so I attached a simple saw tooth picture hanger on the back.
You could use a piece of twine or a picture hanger like I did.
Back to Table of ContentsCustomize Your Photo Hanger
This photo hanger was designed to display three 4×6 photos. You could make the hanger longer to display 5×7 or 8×10 photos.
Back to Table of ContentsDIY Photo Hanger
Printed Plan
- Click here to get the FREE plan (includes detailed instructions, measurements, and bonus tips)
Supplies
- Wood (per printed plan)
- Hinge Clips (Oil Rubbed Bronze Hinge Clips or Silver/Multicolor)
- ½” #6 Screws (if the hinge clips don’t include screws)
- Saw Tooth Picture Hanger
- ⅜” Clear Bumpers
Tools
- Tape Measure
- Drill
- Kreg Multi-Mark
- Miter Saw (or Miter Box)
- Screwdriver
- Awl
- Drill Bit
- Hammer
- Needle Nose Pliers
Step 1. Make the Back
Cut 1 piece of wood to length (measurements are included in the printed plan).

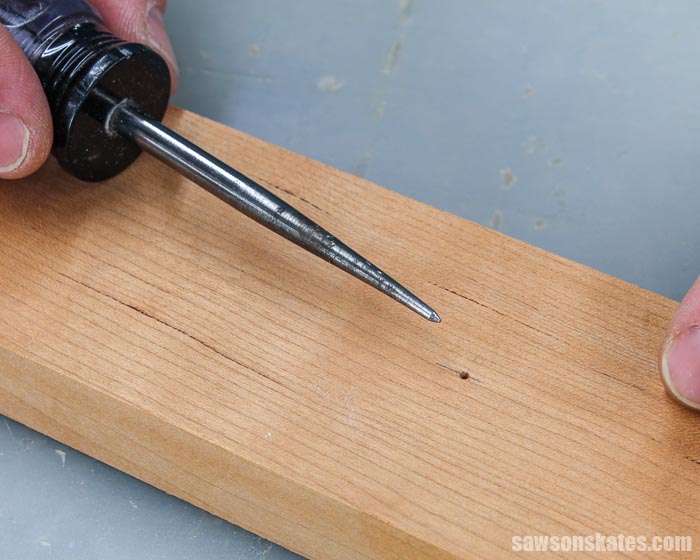
Use the diagram in the printed plan to layout the locations for the hinge clips.

At each mark, use an awl to make a starting point for the drill bit.
Related: What is an Awl? (+ How to Use It)
I used a drill and a small drill bit to make pilot holes for the screws. The pilot holes will make it easier to drive the screws into the wood.
Related: Impact Driver vs Drill: What’s the Difference?
On the backside, mark “top”. This will be important for the next step.
Step 2. Attach the Hanger
I attached the saw tooth picture hanger before I attached the hinge clips because the board wouldn’t lay flat on my workbench if I attached the clips first.
Attach the picture hanger on the backside (where you marked “top”).
I used an awl to mark the location of the picture hanger holes on the wood. The hanger was attached with the nails included with the hanger.
TIP: Needle nose pliers are a great way to hold these small nails in place.
The saw tooth picture hanger will make the photo hanger sit at an angle to the wall. To make the photo hanger flush with the wall, I attached two clear bumpers.
The bumpers will push the bottom of the photo hanger away from the wall about the same distance as the saw tooth picture hanger.

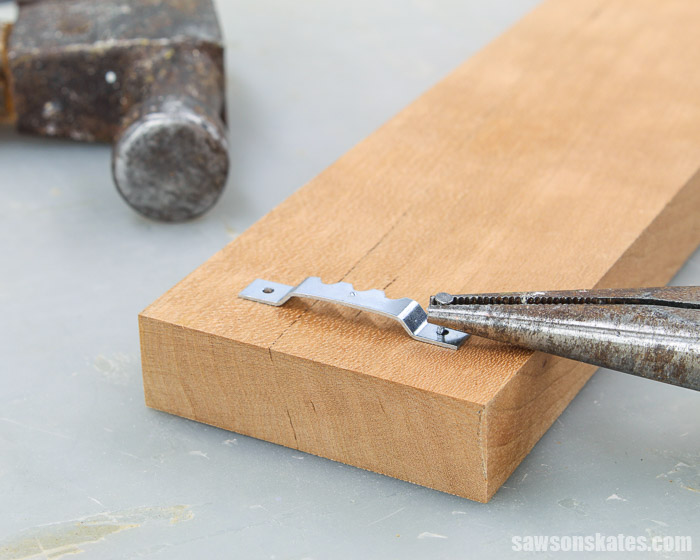
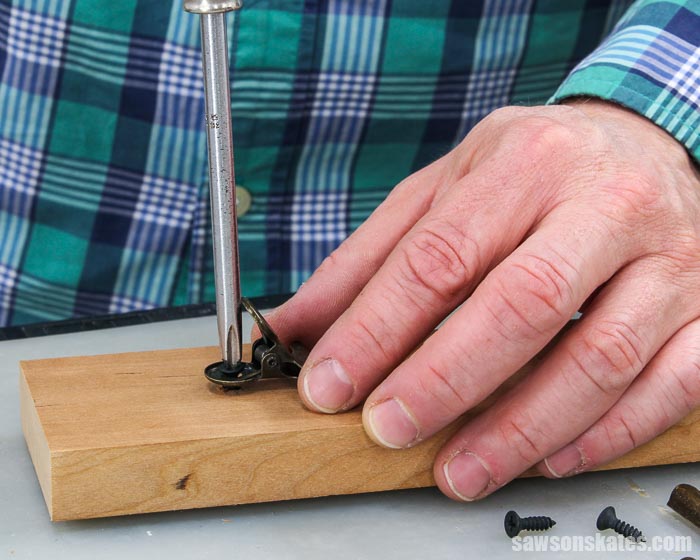
Step 3. Attach the Hinge Clips
Next, I drove the screw into the holes and removed the screws. Driving the screws into the holes once will make it easier to drive the screws with the hinge clips.
Then, the hinge clips were attached with screws.
Step 4. Finish the Photo Hanger
See How Do You Finish the Photo Hanger? for more information
Final Thoughts
This DIY photo hanger is the perfect way to display pictures, artwork, postcards, and more without using frames.
This is a great project for beginners. It can be made in about 30 minutes with one piece of scrap wood and just one straight cut.
This project also makes a quick and inexpensive gift for anyone.
Click here to get the free plan (including the detailed instructions and measurements) now!
Thank you for stopping by. If you enjoyed this tutorial, would you please take a moment and pin it to Pinterest? I’d really appreciate it!
Recommended For You
Pin This For Later

Hi there – I’m Scott, a woodworking enthusiast and creator of Saws on Skates, a site I started in 2015 to share easy-to-follow tutorials, space-saving shop tips, and project inspiration for DIYers at any skill level. Learn more about my woodworking journey here.
I’m loving your free plans. Can’t wait to make these frames. Thank you