DIY Stocking Holder Stand
Looking for a unique way to hang your Christmas stockings? This simple, attractive DIY stocking holder stand is easy to make and folds flat for storage.
What Should I Build Next?
That's the question I help answer.
Every week, I send woodworking ideas to 17,000 DIYers who love building things.
You'd fit right in.
DIY Christmas Stocking Holder Stand
Christmas stockings are a festive holiday tradition, but not all homes have a place to hang stockings like a mantel or stair railing.
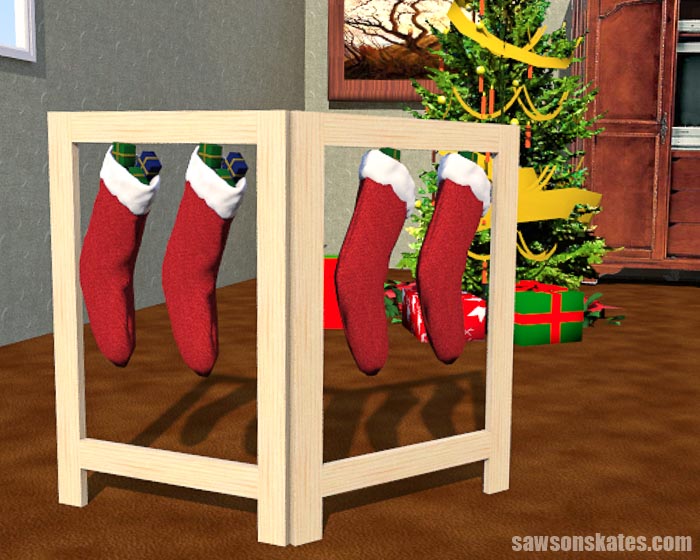
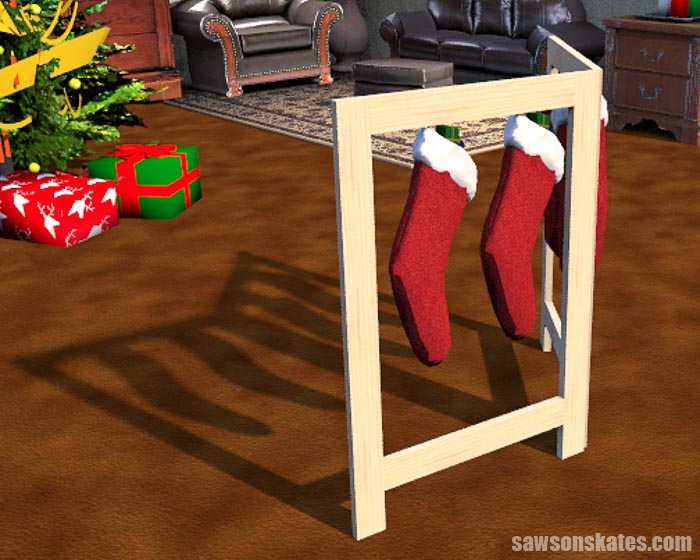
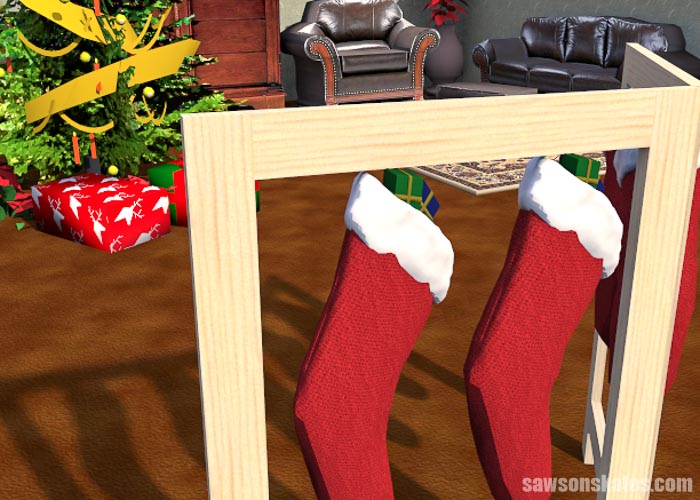
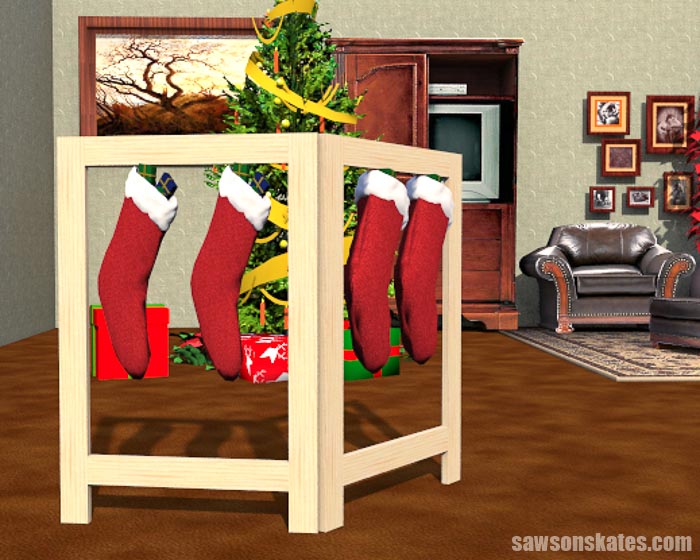
Here’s a great idea for making a DIY Christmas stocking holder stand. This unique stand is an attractive place to hang stockings for Christmas. Then when the holidays are over, the holder folds flat to take up less space during the rest of the year.
The stand features two panels with space to hang four stockings. The design is easy to customize if you need to hang more stockings by adjusting the length of the panel or adding a panel.
This beginner-friendly project is easy to make with a few pieces of wood and a couple of common woodworking tools.
The free step-by-step plan includes all of the measurements, easy-to-follow instructions, and detailed diagrams.
This tutorial contains affiliate links to supplies and tools. Purchases made using these links help support the Saws on Skates website and allows me to share more projects and tips with you. There is no cost to you for using these links. Visit my site policies for more information.
Table of Contents
- Inspiration for this Stocking Holder Stand Plan
- What Tools Do You Need to Make a Stocking Rack Stand?
- What Wood Should You Use?
- Customize the Stocking Holder Stand Plan
- How Do You Finish the Stocking Hanger Stand?
- How to Make a Stocking Holder Stand Tutorial
- Get the Free Printed Plan
Inspiration for this Stocking Holder Stand Plan
The other day I was folding this DIY dog gate, and I thought, “Hey, this would make a great stocking holder stand!” It would be easy to set up, and then it would fold flat for storage when not in use.
I thought it would be an excellent solution for anyone who doesn’t have a place to hang stockings. It would be perfect for:
- Homes without a fireplace or stair railing
- Apartments
- Office or business Christmas parties
- Assisted living or nursing home
It would also be great for anyone without a lot of storage space. You could store it just about anywhere:
- In the back of a closet
- Under a bed
- Behind a piece of furniture
I didn’t build this project, so I’m sharing what the finished stocking holder stand may look like using renderings and a living room scene that I sourced from the SketchUp 3D Warehouse.
What Tools Do You Need to Make a Stocking Rack Stand?
This easy-to-build Christmas stocking holder stand is a simple, beginner-friendly project that you can build in an afternoon using basic woodworking skills and just a few common woodworking tools.
Tools like a miter saw, pocket hole jig, and a drill.
Miter Saw
You can use a miter saw to cut all of the parts to length for this project.
Related: 7 Miter Saw Tricks Every DIYer Should Know
Pocket Hole Jig
You can use any pocket hole jig to drill the pocket holes for this project.
Related: Which Kreg Pocket Hole Jig Should You Buy?
Drill
You’ll need a drill to make the pocket holes for this project. You will also use the drill to drive the pocket hole screws that join the parts together.
Related: Impact Driver vs Drill: What’s the Difference?
What Wood Should You Use?
I designed this project so that you could make it with 1×3 pine boards. Pine boards are relatively inexpensive. You can purchase these boards from your local hardware store or home improvement store. You could also make this project with hardwood like oak.
Related: Beginner’s Guide to Wood Sizes
Customize the Stocking Holder Stand Plan
This stocking holder stand features two panels with space to hang four stockings. There are several ways to customize this project if you need to hang more stockings.
- Build two stands
- Add a panel
- Adjust the length of the panels
How Do You Finish the Stocking Hanger Stand?
This folding stocking hanger stand could be finished in a variety of ways. It could be left natural, painted, or stained.
How to Make a Christmas Stocking Holder Stand
Printed Plan
- Get the FREE plan here (includes detailed instructions, measurements, and bonus tips).
Supplies
- Wood (per the printed plan)
- 1-¼” Pocket Screws
- Wood Glue
- (2) Hinges 2″ x 1-⅜”
- Cup Hooks
Tools
- Tape Measure
- Drill
- Kreg Jig
- Miter Saw
- Awl
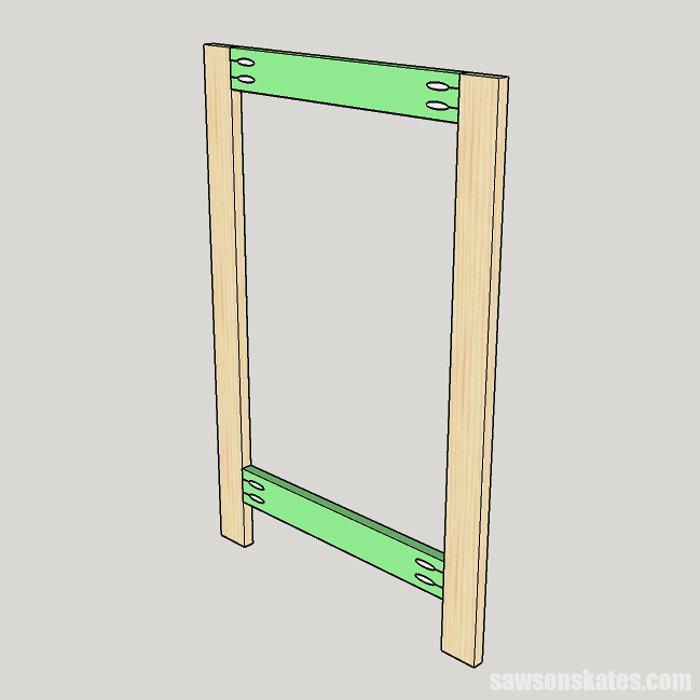
Step 1. Make the Leg Assemblies
Cut four pieces of wood to length for the legs. Cut four pieces of wood to length for the rails and drill pocket holes in each end.
Related: How to Use a Kreg Pocket Hole Jig
To help position the bottom rail, cut two pieces of scrap wood to length and clamp to the bottom of each leg.
Apply wood glue to the ends of the rails, position on the legs, and clamp. Attach using 1-¼” pocket hole screws.
Repeat for the other leg assembly.
🔄 OPTIONAL: You can give the legs a more finished look by filling these pocket holes with store-bought pocket hole plugs or making your own plugs.
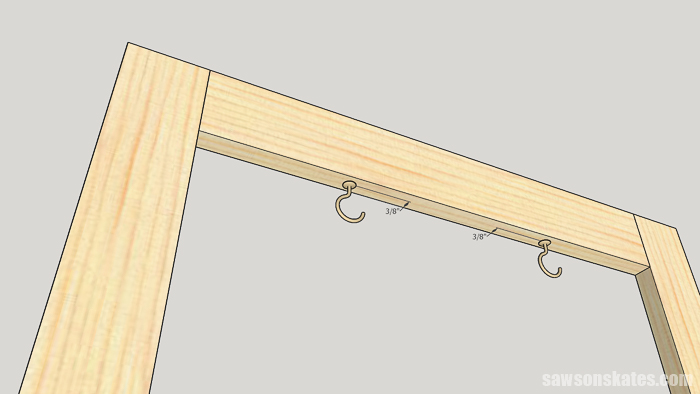
Step 2. Attach the Hooks
Use the diagram in the printed plan to mark the location for the cup hooks on the underside of the top rail.
Use an awl to make a starting point for the cup hooks.
Related: What is an Awl (+ How to Use It)
Screw the hooks into each location.
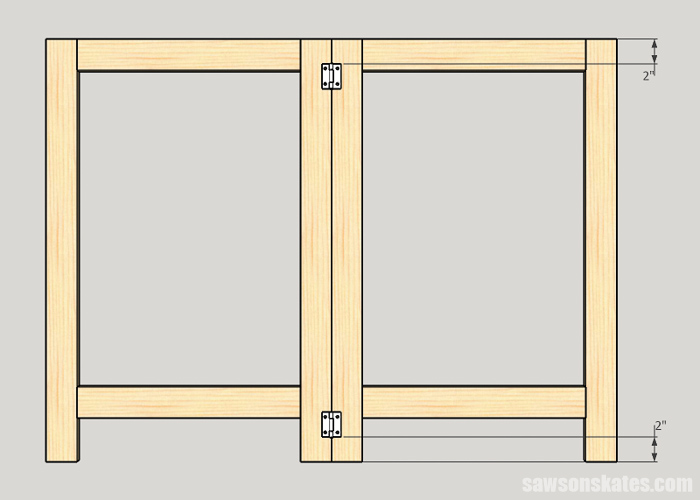
Step 3. Attach the Hinges
Use the diagram to position the hinges on the leg assemblies. Then use the screws included with the hinges to attach them to the leg assemblies.
Step 4. Finish the DIY Stocking Holder Stand
This stocking holder stand could be left natural, painted, or stained.
Final Thoughts
This DIY stocking holder stand is a unique way to hang stockings for Christmas. It’s easy to set up, and then folds flat for storage when the holidays are over.
Get the free plan (including the detailed instructions and measurements) now!
Thank you for stopping by. If you enjoyed this tutorial, would you please take a moment and pin it to Pinterest? I’d really appreciate it!
Pin This For Later

Hi there – I’m Scott, a woodworking enthusiast and creator of Saws on Skates, a site I started in 2015 to share easy-to-follow tutorials, space-saving shop tips, and project inspiration for DIYers at any skill level. Learn more about my woodworking journey here.
And the rest of the time I could hang quilts on it. HAHA