DIY Wall-Mounted Clamp Rack (Easy & Customizable)
Take control of your clamp chaos. This DIY wall-mounted rack keeps your clamps organized and within reach. Easy build, epic shop organization.
What Should I Build Next?
That's the question I help answer.
Every week, I send woodworking ideas to 17,000 DIYers who love building things.
You'd fit right in.
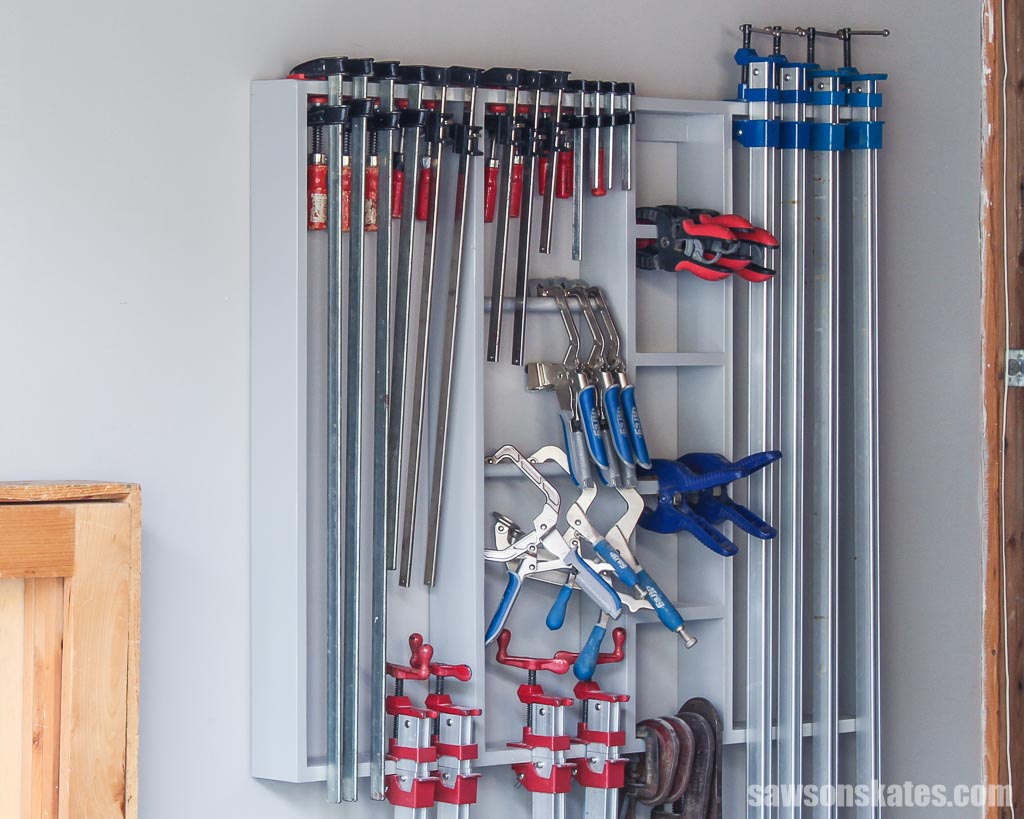
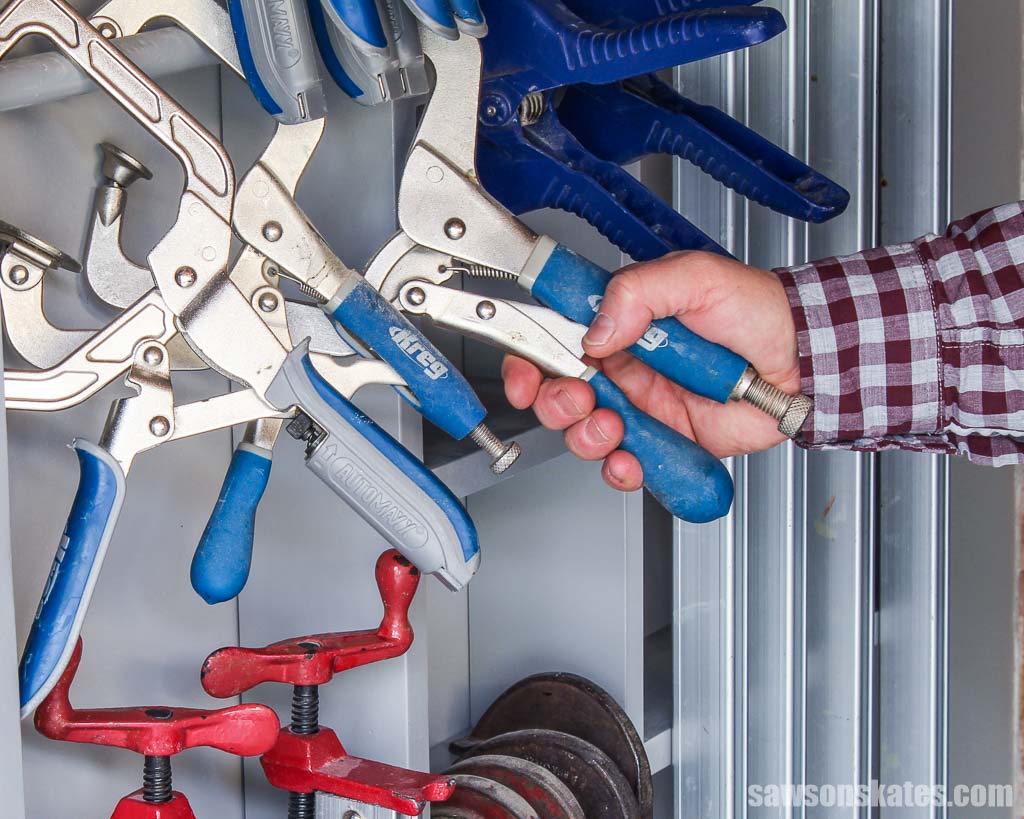
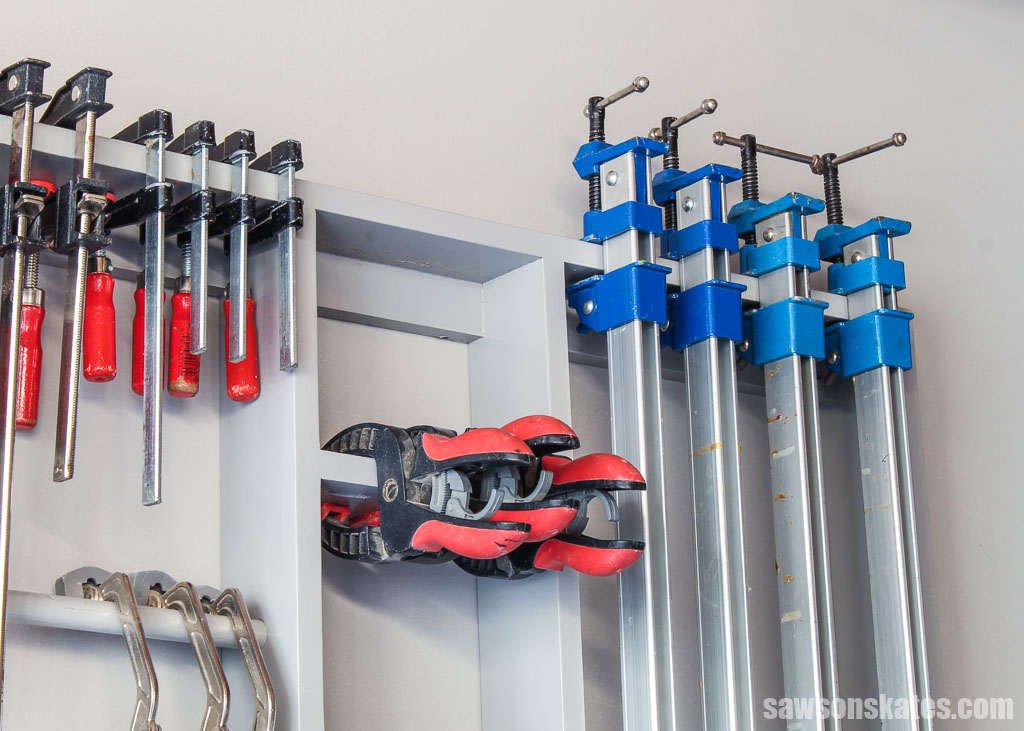
Tired of wasting time searching for a misplaced bar clamp or digging through a pile for a spring clamp? Looking for a way to organize your ever-growing collection?
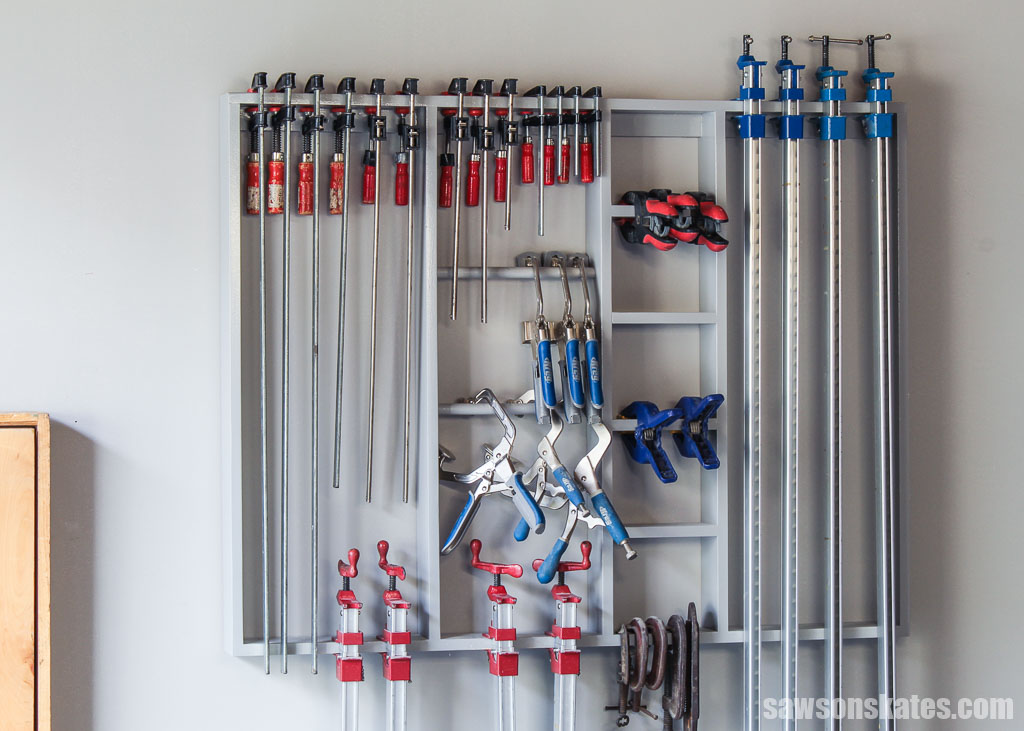
Put an end to your clamp-searching frustration with this easy-to-make DIY clamp rack. This handy wall-mounted organizer boasts shelves and rails to keep your bar clamps, quick clamps, C clamps, and spring clamps neatly organized and within easy reach. Make yours today with this step-by-step plan.
Table of Contents
- What Wood Should You Use?
- What Tools Do You Need?
- How to Make a DIY Wall-Mounted Clamp Rack
- Get the PDF Plan
This article contains affiliate links. If you purchase from these links, I may earn a small commission at no additional cost to you. Visit my site policies for more information.
Inspiration for this Wall-Mounted Clamp Rack
Long before Saws on Skates® became a reality, I searched for the perfect clamp rack, but many plans I found were too big for my small shop. Then, while browsing Wood Magazine, I stumbled on a design that sparked my creativity.
With a few tweaks to suit my shop’s size and storage needs, I built this compact clamp rack that’s become a lifesaver. This handy organizer features shelves and rails, keeping my clamp collection organized and easily accessible.
What Wood Should You Use?
I chose common pine boards for my clamp rack because they’re relatively affordable and easy to handle in my small workshop.
Related: How to Buy Wood (Top Tips for Choosing Woodworking Lumber)
What Tools Do You Need?
This wall-mounted clamp rack only requires three basic tools: a drill, pocket hole jig, and miter saw, making it a simple project for almost any do-it-yourselfer.
A right angle drill attachment will also be helpful. Some of the pocket holes can be hard to reach with a traditional driver.
Customize Your Clamp Storage Rack
You can adjust this clamp rack’s size and layout to fit your needs by making it taller or shorter, wider or narrower, and even adding or removing sections entirely.
As I mentioned earlier, I built this many years ago, and since then, I’ve discovered I don’t use the four shelves on the right side often. If I were building it today, I would make it narrower by removing that section.
I took my clamp rack to the next level by filling the pocket holes with plugs, priming, and painting it, giving it a polished, store-bought look. But don’t hesitate to keep yours natural if you prefer.
Related: How to Make Pocket Hole Plugs (Step-by-Step Guide)
How to Make a DIY Wall-Mounted Clamp Rack
Printed Plan
Get the PDF plan here (includes detailed instructions, measurements, and bonus tips)
Materials
- Wood (per the printed plan)
- Wood Glue
- 1-¼” Pocket Hole Screws
Tools
- Tape Measure
- Miter Saw
- Drill
- Pocket Hole Jig
- Right Angle Drill Attachment
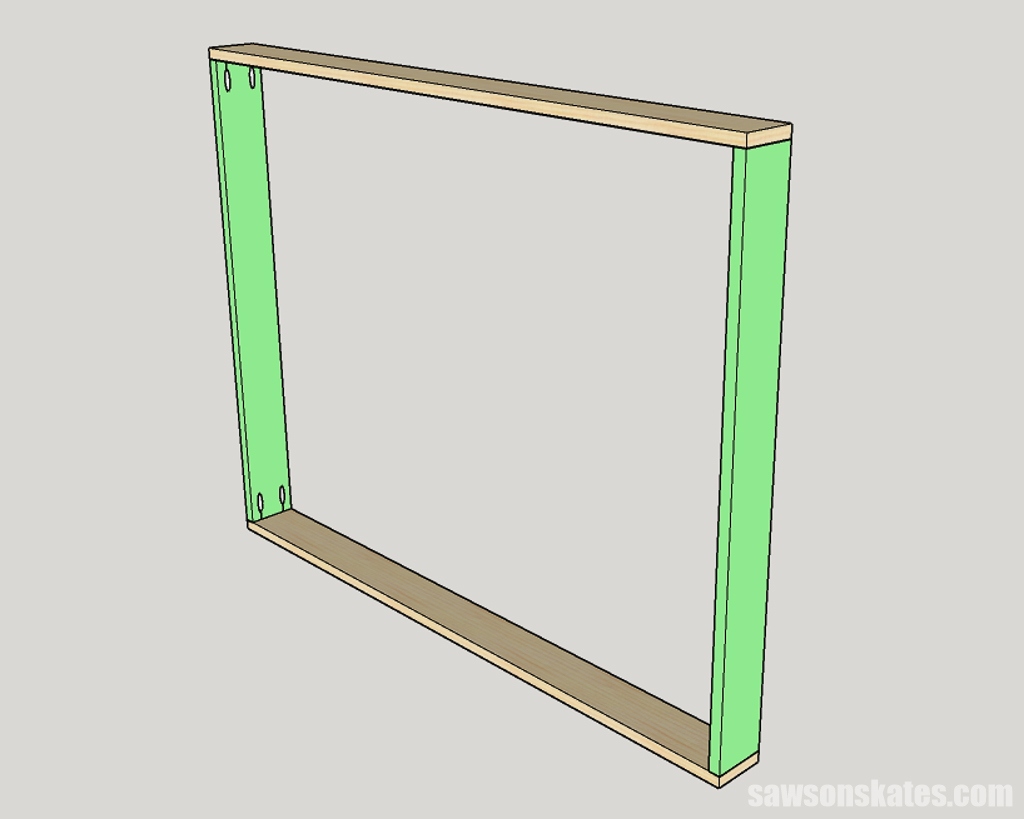
Step 1. Assemble the Frame
Cut two pieces of wood to length for the top and bottom. Cut five pieces of wood to length for the sides and dividers and drill pocket holes in each end.
Related: How to Use a Pocket Hole Jig (Beginner Pitfalls to Avoid)
Apply glue to the ends of the sides, position on the top and bottom and clamp. Attach using 1-¼” pocket hole screws.
I recommend cutting several pieces of scrap wood to length to help position the dividers.
Position the dividers with the scrap wood in between and clamp to the top and bottom. Attach using 1-¼” pocket hole screws.
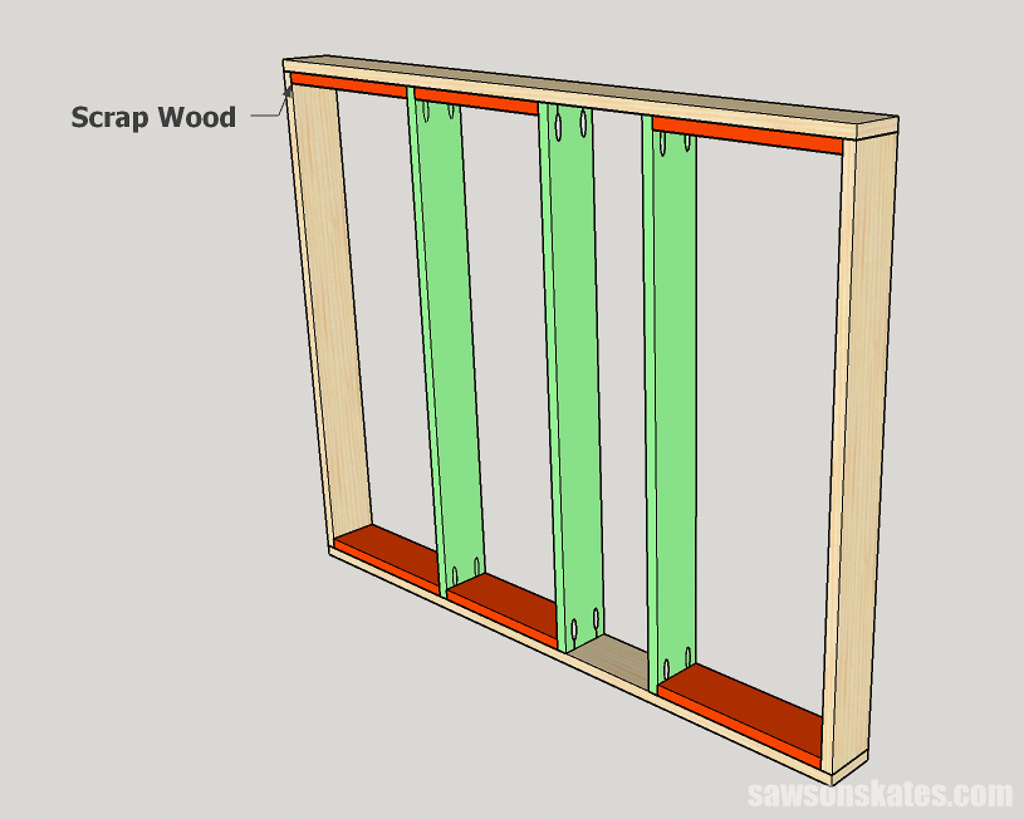
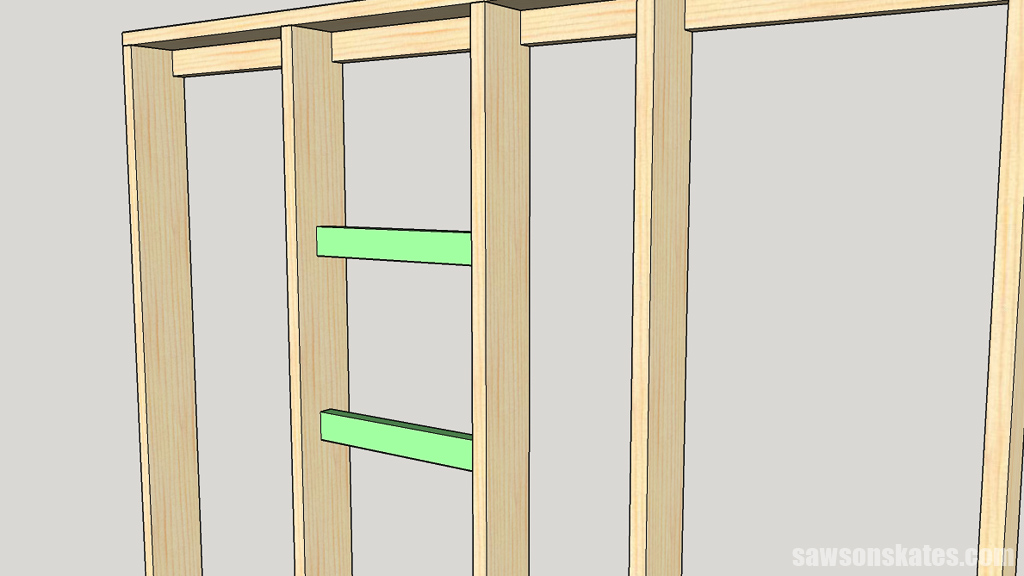
I cut four pieces of wood to length for the braces. Then, I drilled two pocket holes in each edge, approximately 1″ from the ends.
Apply glue to the top of each brace, clamp to the frame, and attach using 1-¼” pocket hole screws.
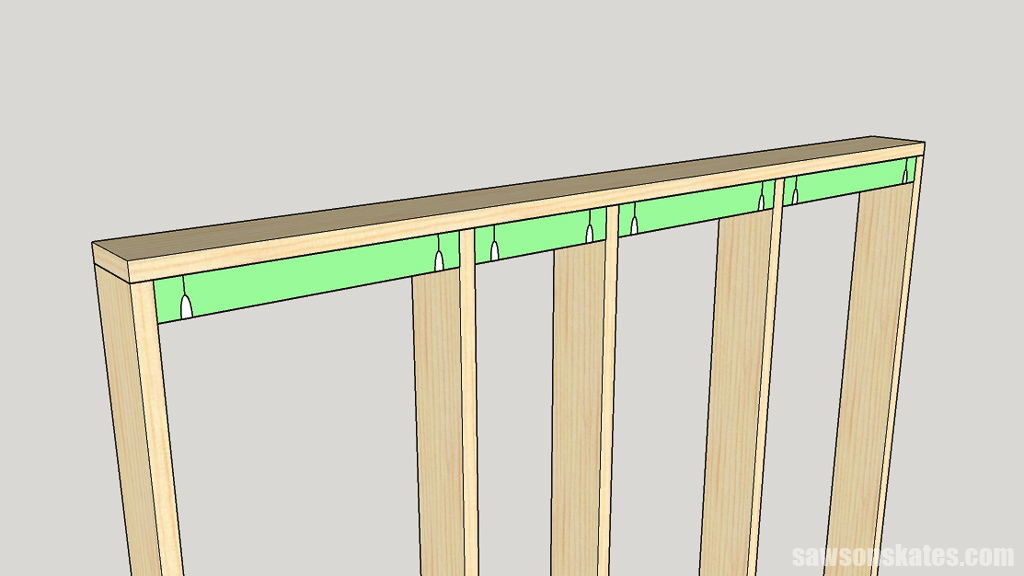
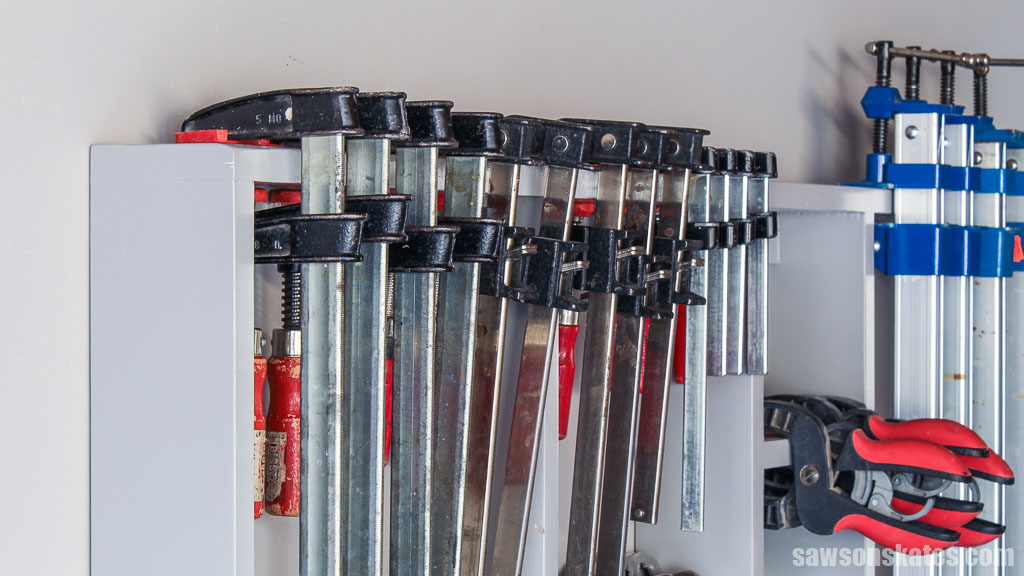
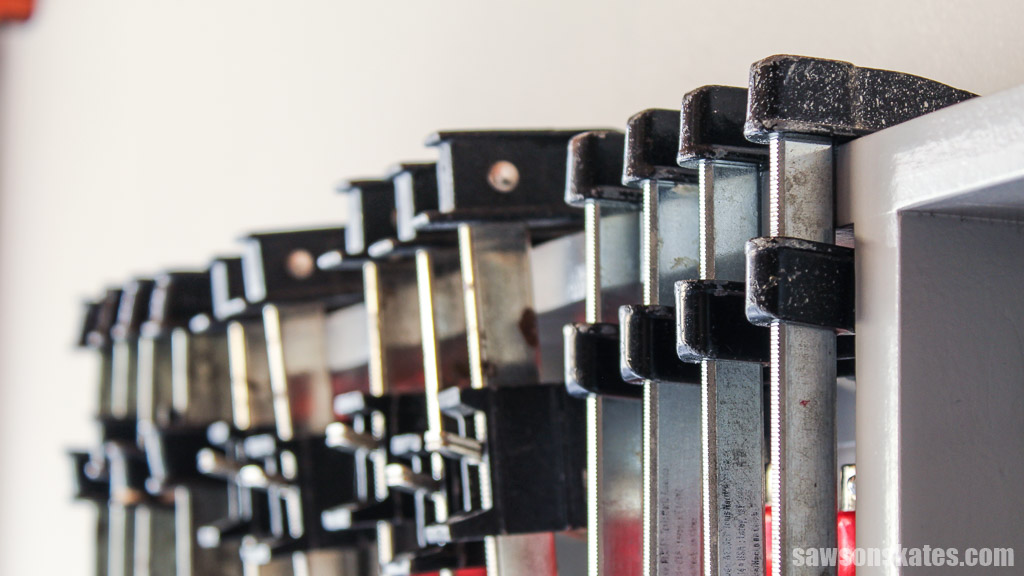
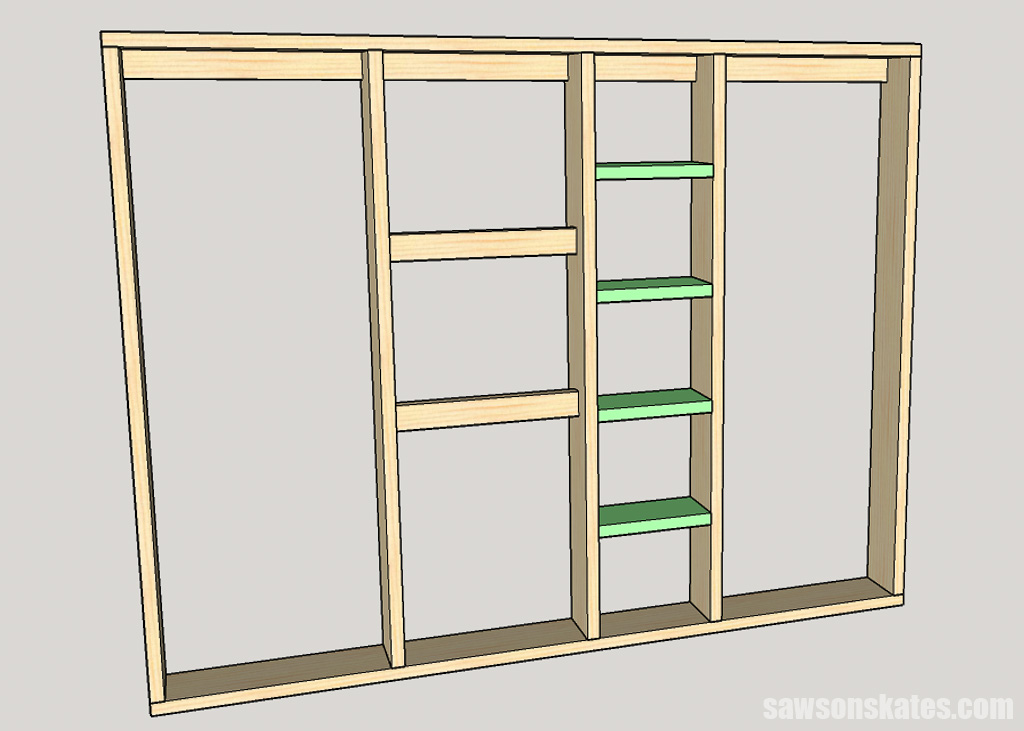
Step 2. Attach the Rails
Cut two pieces of wood to length for the rails and drill two pocket holes in each end.
Use the diagram in the printed plan to position the rails with the pocket holes facing toward the back and clamp to the dividers. Attach using 1-¼” pocket hole screws.
Step 3. Attach the Shelves
Cut four pieces of wood to length for the shelves and drill pocket holes in each end.
As you did for the dividers, you can cut scrap wood to length to help position the shelves.
Position the shelves, clamp to the dividers, and attach using 1-¼” pocket hole screws.
TIP: I recommend using a right angle drill attachment to drive the pocket hole screws, as the area between the dividers is narrow.
That’s it! Now, your rack is ready to organize your clamps.
I recommend drilling holes through the braces (making sure to avoid the pocket hole screws) and attaching the rack to the wall studs using 3” screws.

Includes:
- List of tools and materials
- Complete measurements (in inches)
- Easy-to-follow instructions
- Step-by-step photos
- Detailed diagrams
Final Thoughts
With a few simple cuts and some screws, your days of frantic clamp-searching will be over. This versatile rack keeps them organized, accessible, and ready to tackle any project.
Don’t wait. Get your PDF plan (including the detailed instructions and measurements) now!
Thank you for stopping by. If you enjoyed this tutorial, would you please take a moment and pin it to Pinterest? I’d really appreciate it!
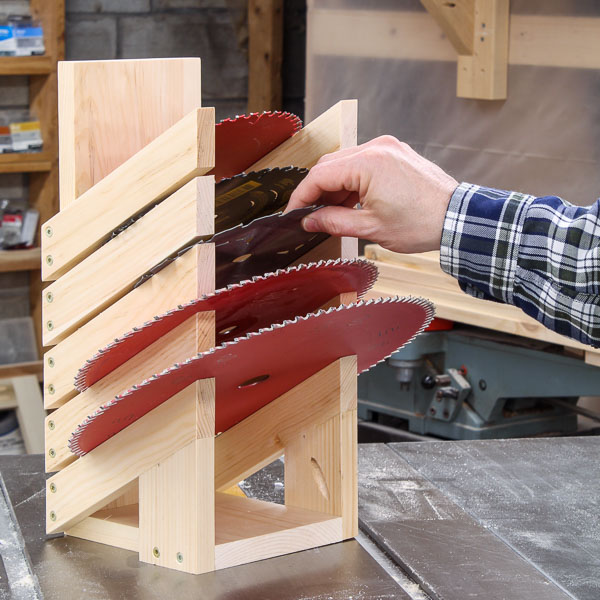
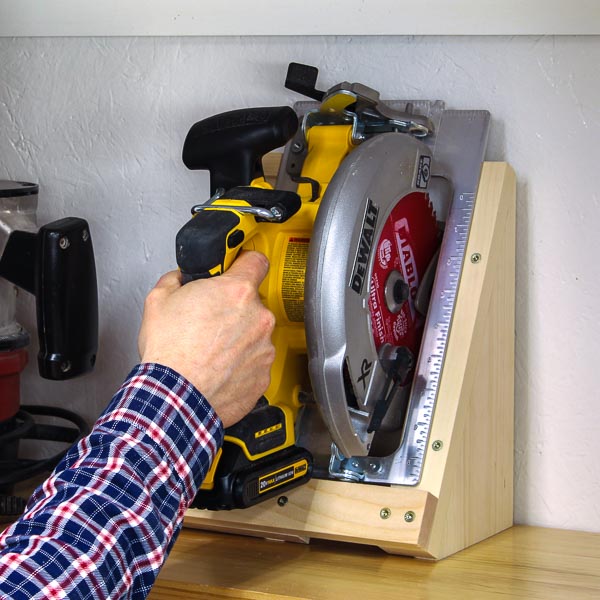
Recommended For You
Pin This For Later

Hi there – I’m Scott, a woodworking enthusiast and creator of Saws on Skates, a site I started in 2015 to share easy-to-follow tutorials, space-saving shop tips, and project inspiration for DIYers at any skill level. Learn more about my woodworking journey here.