Why Can’t I Make Accurate Cuts? (& How to Fix It!)
Do you struggle to make accurate saw cuts, always ending up with crooked lines or pieces that are too short? Your frustration ends here!
I follow several beginner Facebook woodworking groups, and one of the questions members frequently ask is, “Why can’t I make accurate cuts?”
A variety of factors can cause inaccurate cuts, but there are several things you can do to improve your accuracy.
As a DIYer working with wood for over 20 years, I’ll walk you through how to measure, mark, and cut precisely. Say goodbye to wasted materials and hello to perfect cuts every time!
Table of Contents
- What are the Common Causes of Inaccurate Cuts?
- Adjust Your Saw
- How to Make Accurate Cuts
This article contains affiliate links. If you purchase from these links, I may earn a small commission at no additional cost to you. Visit my site policies for more information.
What are the Common Causes of Inaccurate Cuts?
Understanding the common causes of inaccurate cuts and taking steps to prevent them can significantly improve your precision.
Here are some of the most common causes of inaccurate cuts:
- Saw improperly adjusted. If your saw’s blade or fence is not correctly aligned, it can result in inaccurate cuts.
- Improper marking technique. Before making any cuts, carefully measure and mark your material. Use a quality tape measure and a sharp pencil to ensure that your measurements are accurate and your marks are visible.
- Not accounting for kerf. Kerf is the width of the material removed by the saw blade. When positioning your blade, be sure to account for the kerf so that you don’t end up with workpieces that are too short.
A bent saw blade wobbles as it spins which can also cause your cuts to be inaccurate. If you suspect that your saw blade is bent, here are a few things to check:
- With the saw unplugged, spin the blade by hand and look for any wobbling.
- Place the blade on a flat surface and look for any gaps between it and the surface.
If you find that your blade is bent, it’s best to replace it.
Related: How to Change a Miter Saw Blade
Adjust Your Saw
One of the most important things you can do to ensure accurate cuts is properly adjusting your saw.
Adjusting Your Miter Saw
A properly adjusted miter saw is essential for making accurate cuts. By taking the time to calibrate your saw, you can ensure your cuts are precise.
There are a few key miter saw adjustments that you should check regularly:
- Blade alignment. The blade should be perpendicular to the saw table.
- Fence alignment. The fence should be square to the saw blade.
- Miter angle. The miter angle is the angle at which the saw blade cuts across the wood grain.
For more detailed instructions on adjusting your miter saw, please see my article “How to Adjust a Miter Saw for Accurate Cuts.”
Adjusting Your Table Saw
Before you start making any cuts with your table saw, it is important to ensure that it’s correctly adjusted so that your cuts are accurate and consistent.
Here are some of the most important table saw adjustments to check:
- Blade alignment. The blade should be aligned perpendicular to the saw table and parallel to the miter gauge slot.
- Fence alignment. The fence should be parallel to the saw blade.
- Miter gauge alignment. The miter gauge should be aligned with the saw blade.
For more detailed instructions on adjusting your table saw, please see my article “How to Adjust a Table Saw for Accurate Cuts“.
How to Make Accurate Cuts
Now that you’ve adjusted your saw, it’s time to make some accurate cuts! I’m going to focus on cutting a board to length with a miter saw, but you can use many of these techniques when cutting with almost any saw.
Safety First
Safely using power tools is the key to your success. Be sure you follow all of the manufacturer’s instructions for your tools, and always use protective gear for your eyes, ears, and lungs.
Step 1. Square the End
Most boards from the home improvement store have ends that are not square, meaning the board’s end is not perpendicular to its sides. If you place a speed square on it, you will see that the gap between the square and the board is not consistent.
Related: How to Buy Wood (Top Tips for Choosing Woodworking Lumber)
If you use a board with an end that’s not square, your cuts will be inaccurate, and your project will not fit together correctly.
To avoid this problem, it’s important to square your boards before cutting them to length.
To square a board, simply make a cut across it’s end. You don’t need to remove much material; just trim it enough to make it perpendicular to the board’s edge.
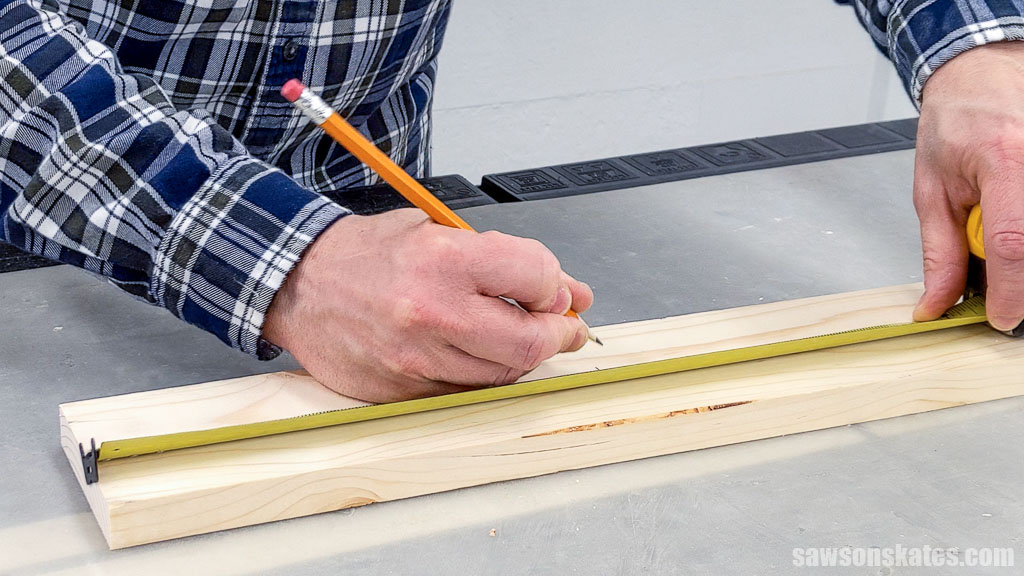
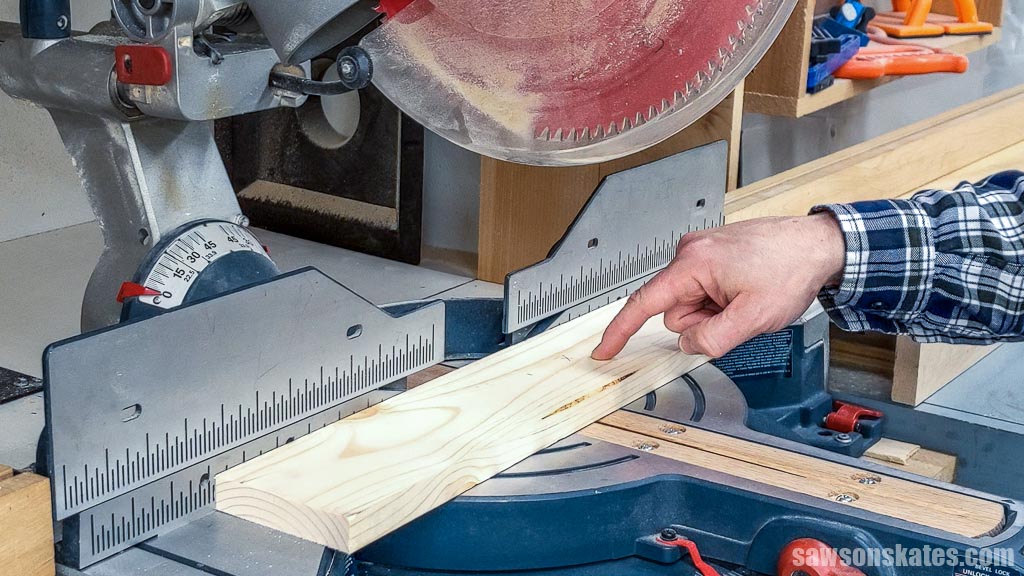
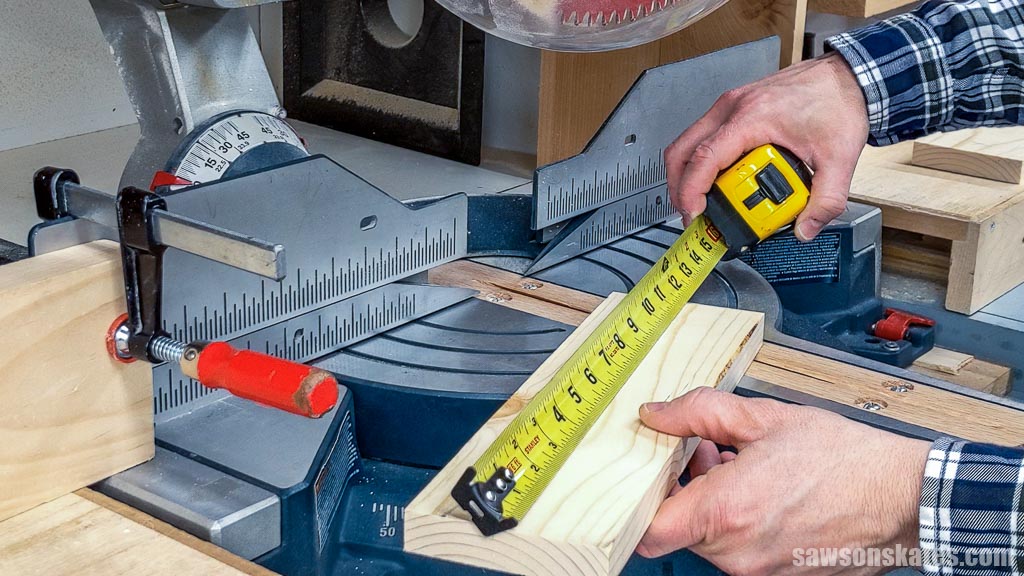
Step 2. Measure and Mark the Workpiece
Once you’ve squared the board, it’s time to measure and mark your workpiece.
Place your tape measure on the board’s squared end, extending it to the length you need, making sure it’s flat against the wood and perpendicular to the edge.
Related: How to Use a Tape Measure Correctly (Tips for Success)
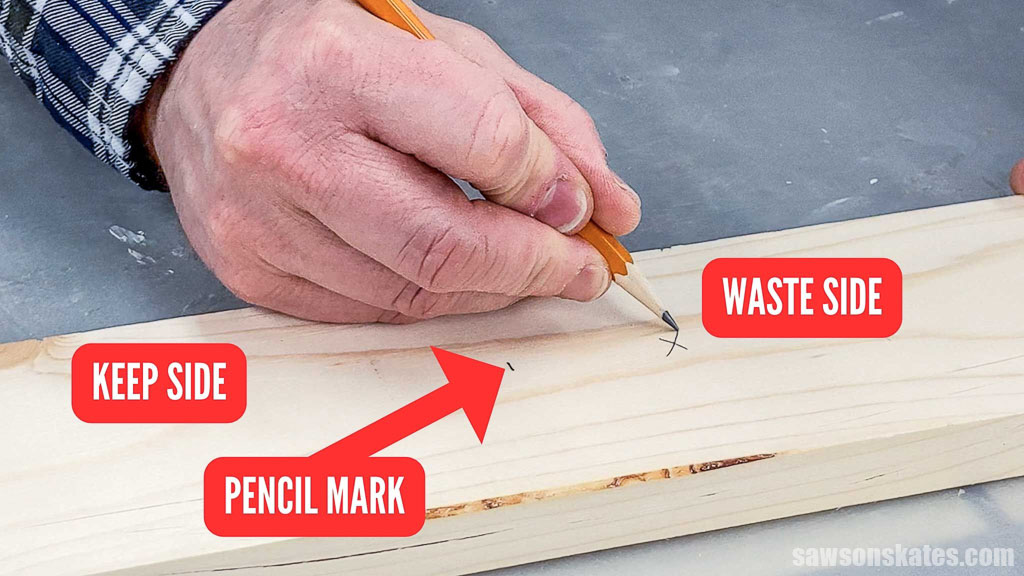
Mark your desired measurement on the board using a sharp pencil.
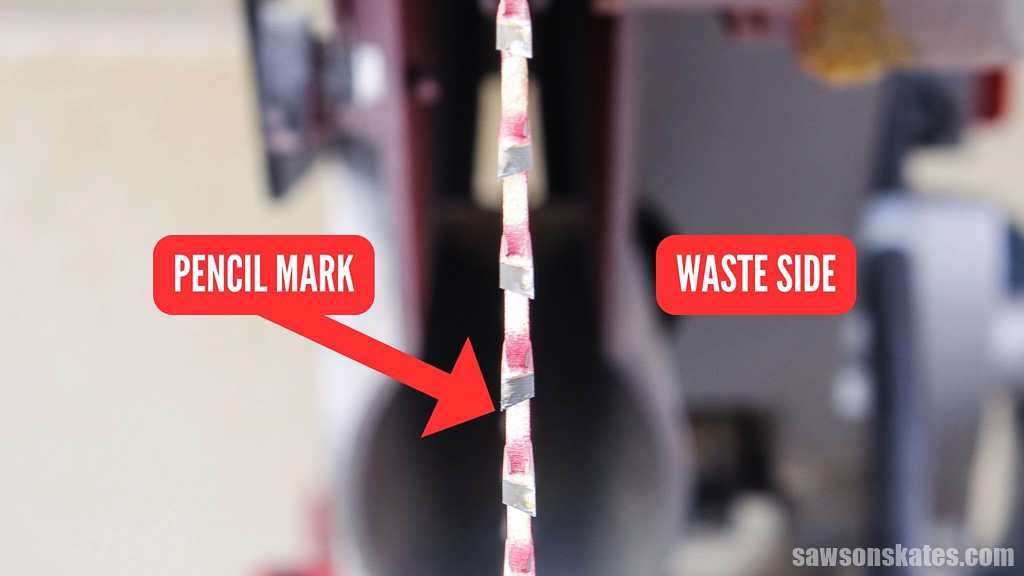
Next, mark an “X” on the “waste side,” the side of the board you will not use.
Marking the board’s waste side is a visual reminder to cut on that side, preventing you from cutting on the side you want to keep, resulting in a workpiece that’s too short.
Step 3. Leave the Line
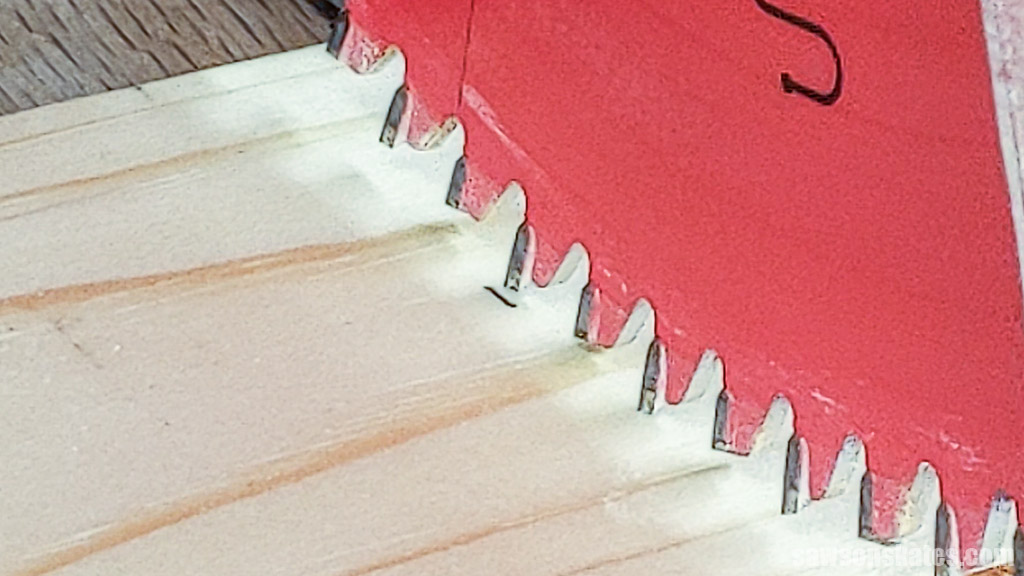
In a timber framing class I attended years ago, the instructor emphasized the importance of “leaving the line,” cutting just outside your pencil mark rather than directly on it.
Related: 16 Beginner Woodworking Classes (Online + In-Person)
All saw blades have a specific width or kerf. When you cut on the line, the blade removes it and the kerf’s width, resulting in a workpiece that’s too short.
By leaving the line, you ensure that the cut is at least as long as you intended. If the board needs to be a little shorter, you can always “sneak up” on your mark by making several small, precise cuts until you reach the desired length.
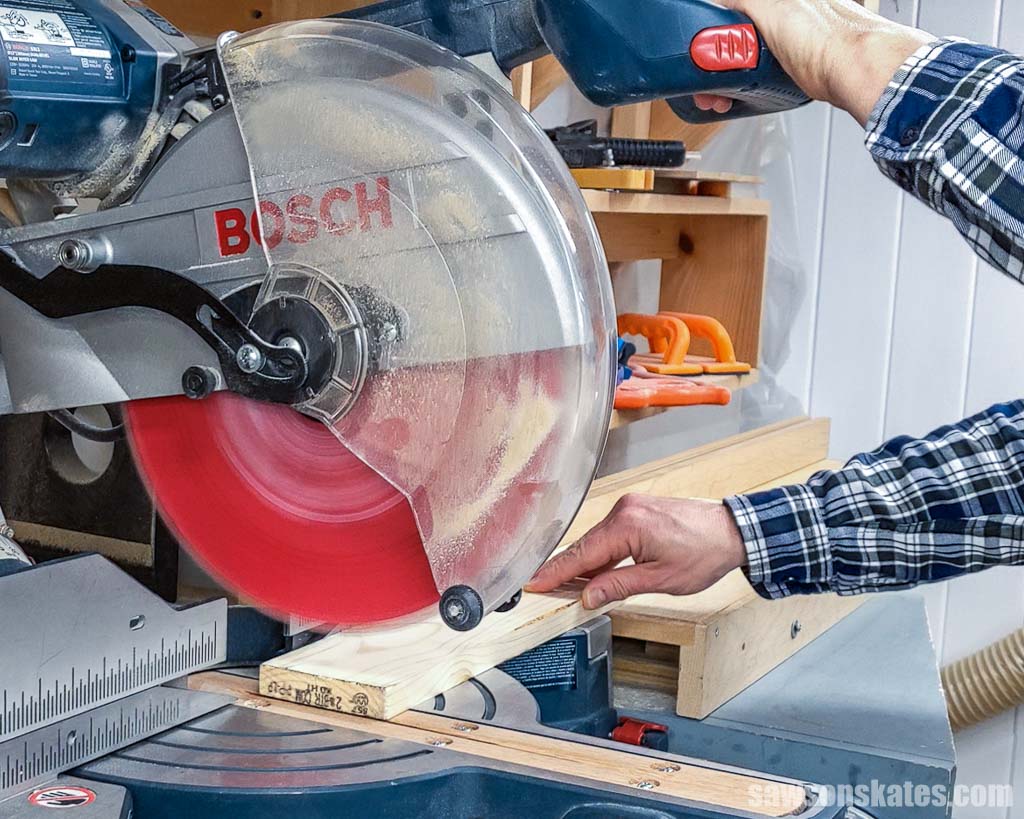
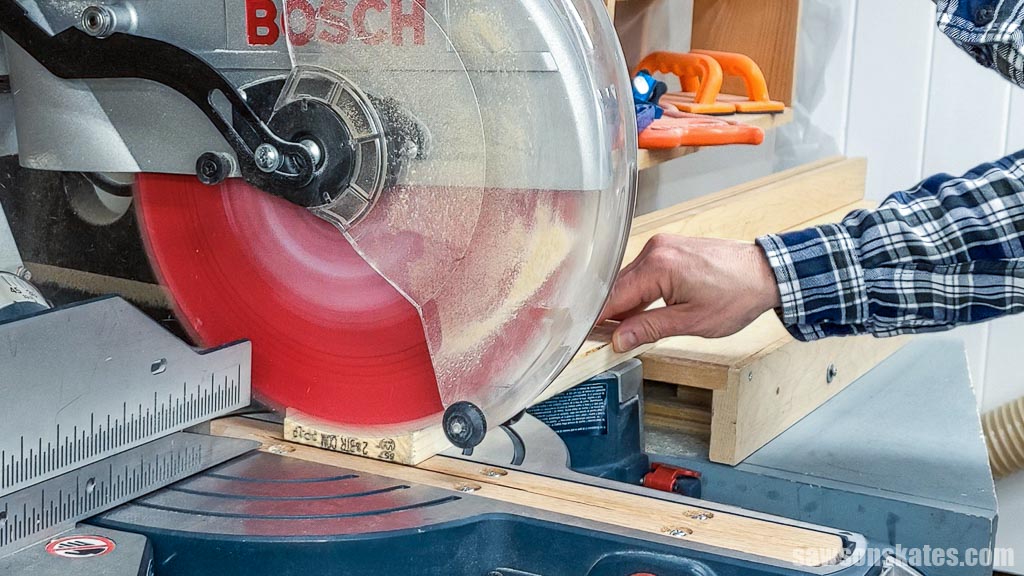
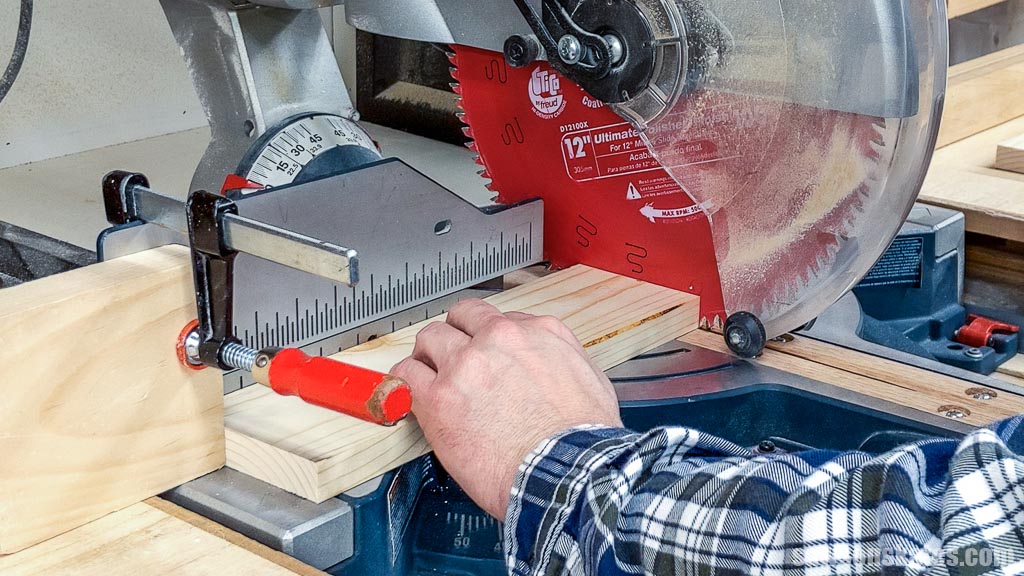
Position the workpiece so the saw blade will cut on the side where you marked an “X,” the waste side.
Next, look at the saw blade. You’ll notice that the teeth alternate from side to side.
If the waste side is on the left, position the right-pointing teeth next to the pencil mark, ensuring it will still be visible after you make the cut.
If the waste side is on the right, position the left-pointing teeth next to the pencil line.
IMPORTANT: Make sure the saw is unplugged when moving the blade!
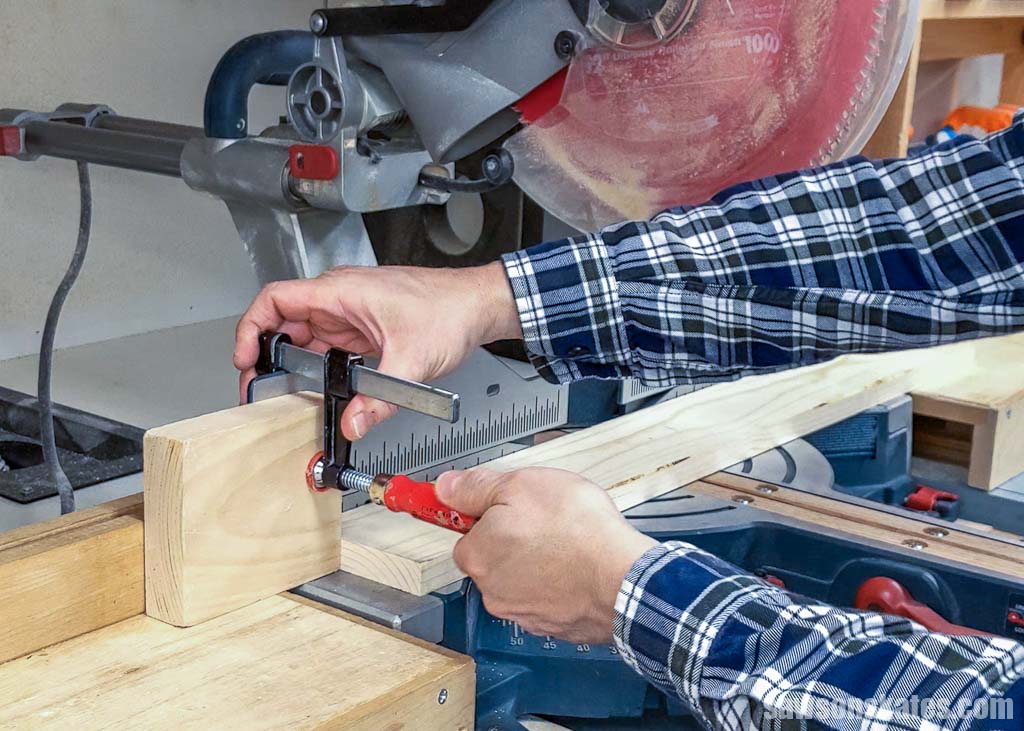
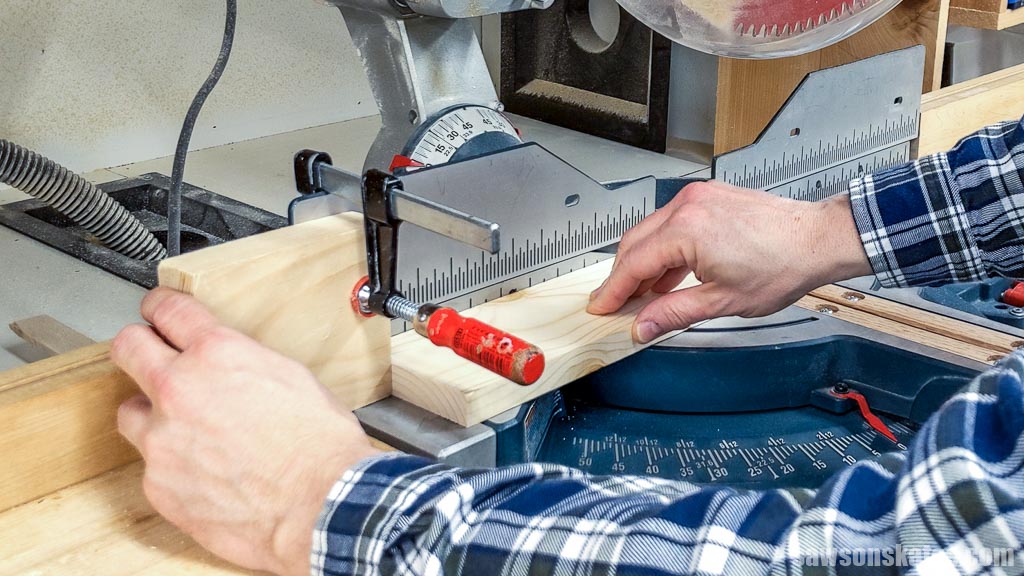
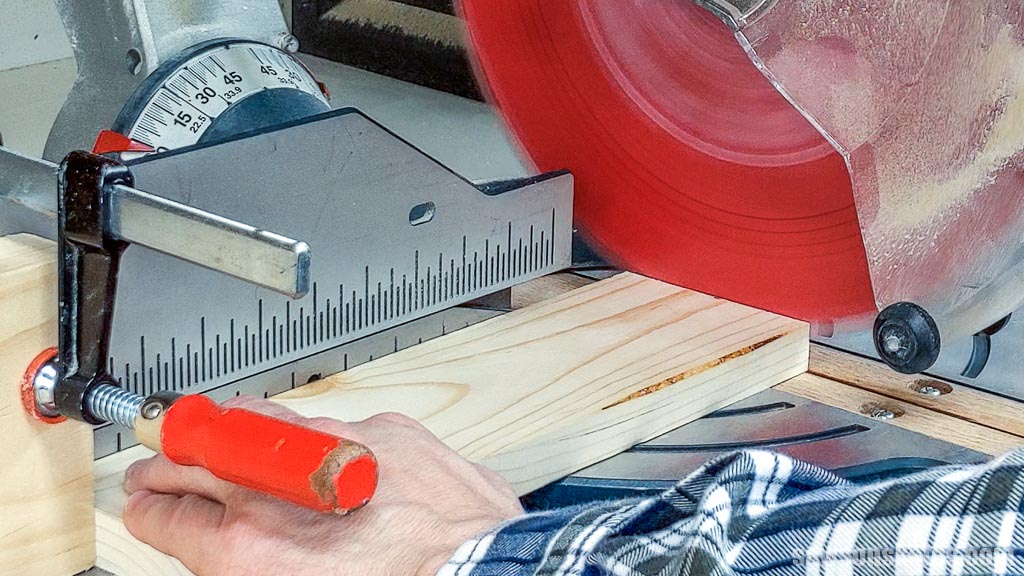
If you’re making repetitive cuts for your project, you can set a stop, limiting the distance you can feed a workpiece into the saw, ensuring you cut all the parts to the same length. However, if you are only cutting one piece, you do not need to set a stop.
To set a stop:
- Measure the length of your first workpiece.
- Position the workpiece in the saw.
- Position the stop at the end of the workpiece and clamp it in place.
- Cut, check the length and adjust the stop if necessary.
To cut the remaining workpieces:
- Position the workpiece against the stop.
- Make the cut.
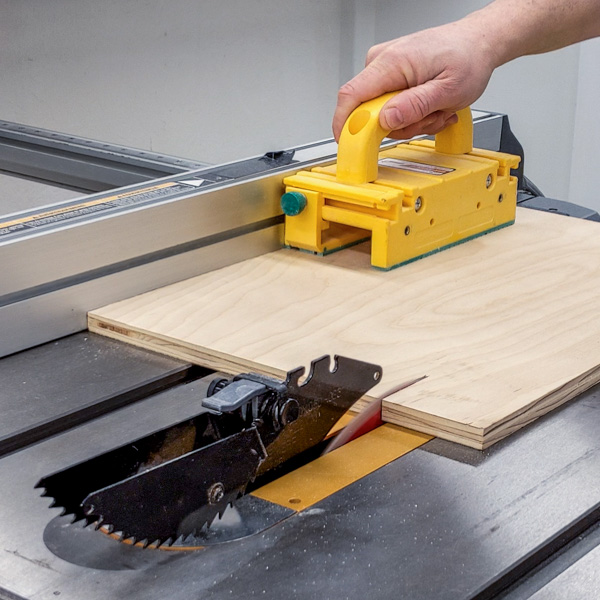
Please keep in mind that I’m focusing on a miter saw. You may find these safety tips helpful if you are using a table saw.
Safety first! Wear your PPE and keep your hands away from the saw blade.
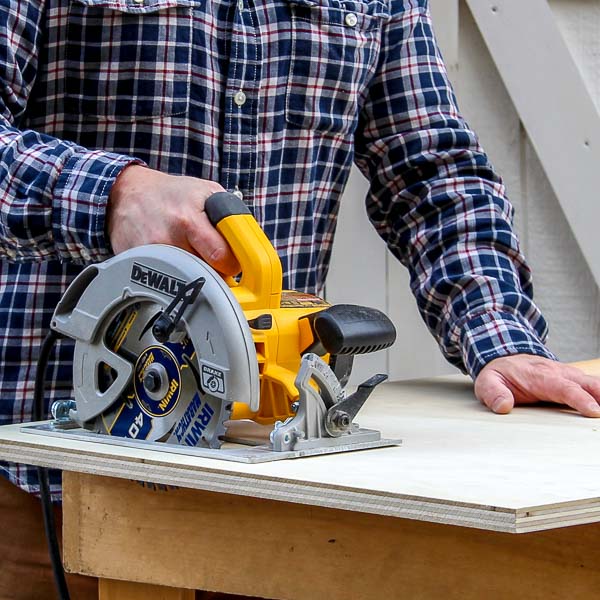
To make a cut:
- Firmly push the workpiece down and against the fence.
- Start the saw and lower it into the workpiece, continuing to press it firmly against the fence throughout the cut.
- Do not raise the saw until the blade has completely stopped. Raising the saw while the blade is still spinning can cause the blade to cut a small amount of wood, which can change the length of your workpiece.

Measure the workpiece. If it’s you’re desired length, you’re done. If the workpiece is too long, proceed to step 4.
Step 4. Use the Saw Blade to Make Accurate Cuts
If your workpiece is too long, you can gradually trim it down or “sneak up” to your desired measurement by making a series of narrow cuts with the blade, removing only fractions of an inch at a time.
Turn off the saw and lower the blade completely into the table.
Gently slide the workpiece until it touches the side of the blade.
Keep the workpiece in place and raise the blade.
Reposition the stop (if you are using one) so that it’s touching the end of the workpiece.
Lower the blade (with the saw still turned off), and you’ll notice the teeth barely touching the end of the workpiece.
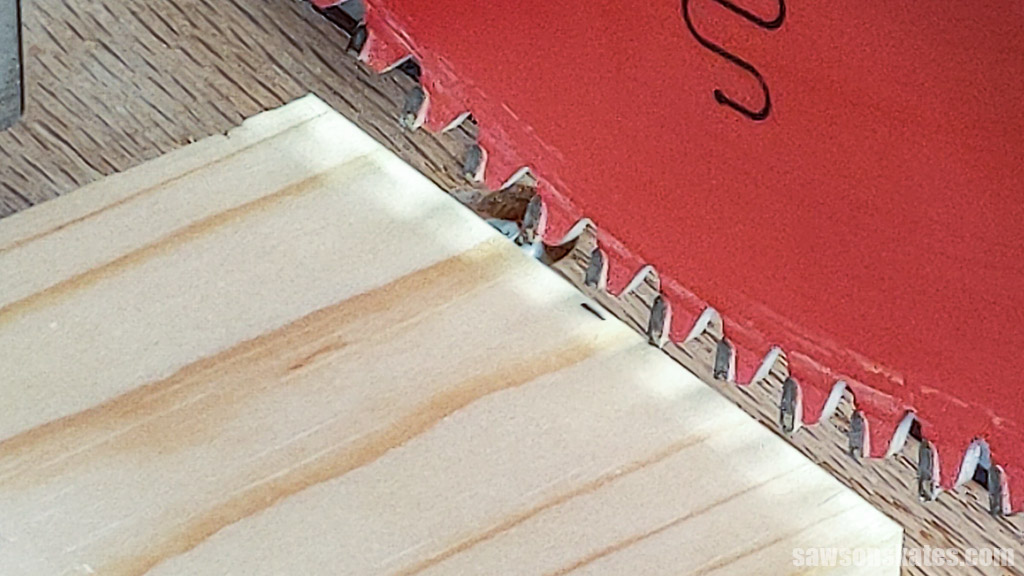
Raise the blade again, start the saw, and lower the blade to make the cut, removing only a small amount of material from the end of the workpiece.
Measure the workpiece again. If it’s now your desired length, then you’re finished. If it is still too long, repeat this process until it is the desired length.
It may take several small cuts to remove the desired amount of material, but this technique allows you to gradually trim the workpiece to the exact length you need.
Final Thoughts
Accurately measuring, marking, and cutting wood is crucial for any woodworking project. By following these steps, you can ensure that your workpieces are the correct length and fit together perfectly.
Interested in woodworking but need help figuring out where to start? Join the FREE Saws on Skates® Beginner Woodworking VIP list and gain instant access to top-notch tool comparisons, tool tutorials, and free woodworking plans. Join for FREE now!
Recommended For You
Pin This For Later

Hi there – I’m Scott, a woodworking enthusiast and creator of Saws on Skates, a site I started in 2015 to share easy-to-follow tutorials, space-saving shop tips, and project inspiration for DIYers at any skill level. Learn more about my woodworking journey here.
Great article. Very thorough and detailed. I suspect my mitre needs calibration.