How to Make a DIY Wood Sign with Stencils
Learn how to make wooden signs and paint them with stencils! This DIY project is easy for beginners because it only requires a few simple tools.
A DIY sign is a simple project for beginners to make. The base of this sign was made using scrap wood, but you can use just about any kind of wood to make your sign. And don’t worry if you can’t paint freehand. I’ll share two techniques that will easily allow you to add visual interest to your sign.
For your convenience, this post contains affiliate links to supplies or tools I used to complete this project. Purchases made using these links help support the Saws on Skates website and allow me to share more DIY projects. and DIY tips with you. There is no cost to you for using these links. Click here to visit my site policies.
Thank you to Stencil Revolution for providing the stencil for this project!
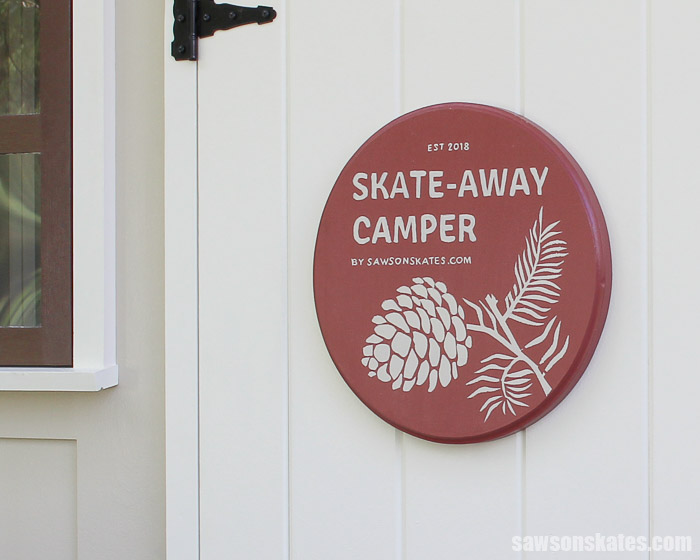
For the past few months I’ve been building my Skate-Away Camper, a tiny house inspired DIY truck camper. The project was nearly complete and ready for its first camping trip, but it needed one final touch.
The entryway door looked empty like it was missing something. Maybe a wreath would complete the tiny house look? The trouble was a wreath would fly off the door while traveling at 65 MPH! I was also trying to think of a subtle way to post some info on the door so interested drivers and campers could learn more about the Skate-Away Camper.
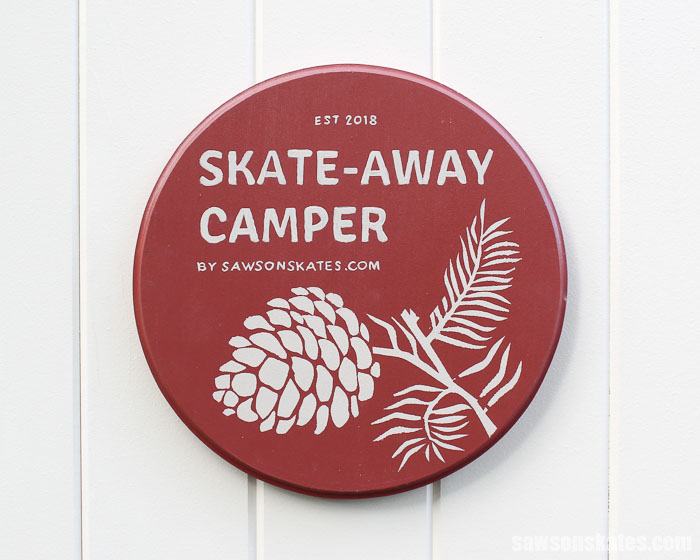
The door didn’t need a wreath. What it needed was a sign. Today I’m sharing how I made this super simple sign and how you can easily make your own DIY sign too.
This sign was made for my specific needs, but you can easily customize your DIY sign for your decor needs. Your sign may say “welcome”, “Autumn”, “The Doyle’s” or something else.
Oh, would you like to see a sneak peek of the camper? Skate over to the How to Spray Paint Doors post for a little sneak of the Skate-Away Camper!
DIY Sign Inspiration
My sign was going to be attached to the door of my camper, so I wanted it to have woodsy, cabin-like feel. I considered several designs, but what inspired this project were those round markers posted on hiking trails. Look around. You can find inspiration just about anywhere!
Make a Sign From Scrap Wood
Next, I needed to figure out how I would make the base of the sign. I had some odd-sized scrap wood leftover from building the window screens for the Skate-Away Camper. The scrap wood measured 1-3/8” which is a little narrower than I would typically use when building my DIY furniture projects.
My idea was to cut the scrap wood to length and glue the pieces to form a large panel. Then the round sign could be cut from the panel using a jigsaw. It would be a great way to use up some scraps hanging around my small workshop. Plus using scrap wood would make the cost of the base FREE!
Do you struggle with scrap wood? Not sure what to keep or what to toss? Need some ideas about where to store your scrap wood and clever project ideas for using scrap wood? Then please skate over to How to Decide What Scrap Wood to Keep!
More Wood Options
I used scrap wood to make the base of my sign, but you could build the base of your DIY sign with any wood you choose. You could use new wood, barn wood, pallet wood, etc. You could also use just about any species of wood like pine, oak, cherry, mahogany, etc.
Add Style with Stencils
To give my sign that woodsy, cabin-like feel I thought it should feature an image from nature. A tree, a leaf, a mountain, something that said “outdoors”.
I remembered Stencil Revolution had sent me a handful of outdoor-themed stencils. I looked through my stencil stash and found just the right one. This pine cone stencil would be the perfect addition to my project.
Stencils are a simple way to decorate signs. Freehand painting is not my thing, but I can easily paint with a stencil. A stencil is another opportunity for you to customize your DIY sign to your decor needs.
Fake the Freehand Look
The last thing I wanted for my DIY sign was a subtle way to post some info on the door so interested drivers and campers could learn more about the Skate-Away Camper.
I’m awful at painting freehand, but I have an easy trick to fake the look of freehand painting. It’s a technique I used on the DIY Vintage Camper Napkin Holder, the DIY Flower Power Bus Planter, and the DIY Wooden Tiki Mask Planter.
All I had to do was use my computer to print the text I wanted to appear on my project, temporarily attach it with some painter’s tape and use a ballpoint pen to trace the letters. Tracing the letters leaves a faint line or depression in the surface of the wood. Then I just paint within those lines. So easy!
The best part is you can use this technique to put just about anything on your DIY sign. Your sign may say “welcome”, “Autumn”, include a family name or something else.
How to Make a Sign
Supplies
Wood glue
Stencil
Stipple brush
Artist brushes
Painter’s tape
Ballpoint pen
Primer
Paint
Note: You’ll also need some wood to make the base of your sign. The amount of wood you’ll need will depend on the desired size of your sign. I needed about 140” of 1-3/8” wide scrap wood to make my 12-1/2” round sign.
Tools
Stanley FatMax Tape Measure
Miter Saw
Bar clamps
Random orbit sander or sanding block and sandpaper
Compass
Jigsaw
Stationary disc sander (optional)
Router and cove bit (optional)
Step 1. Make the Base. First, I cut 10 pieces of 1-3/8” wide scrap wood to 13-3/4”. Then, I applied glue to the pieces and clamped together to form a single, square panel. When the glue was dry I sanded the panel with my random orbit sander and an 80 grit sanding disc.
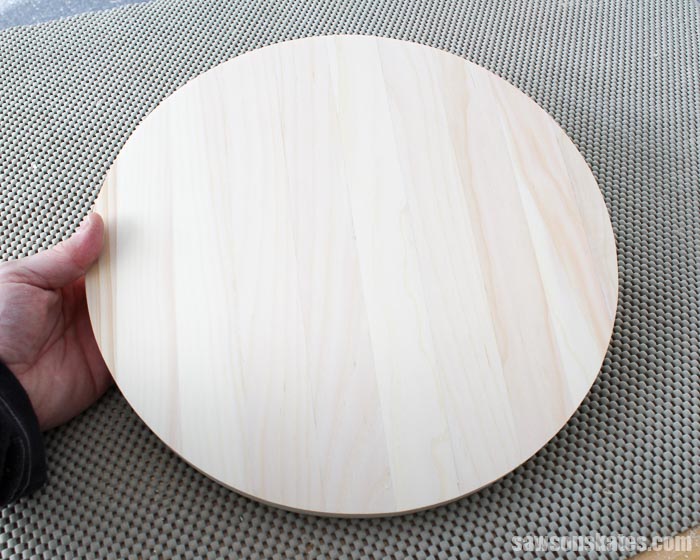
Step 2. Cut out the Round Base. I located the center of the panel by placing a straight edge from corner to corner and making a mark in the center. I wanted my sign to be about 12-1/2” in diameter so I set a compass to 6-1/4”, placed the compass on the center mark and drew a circle.
Then I used a jigsaw to cut out the circle making sure to leave the pencil line. To smooth the edges I used a stationary disc sander to sand to the line. This step could also be done by hand with a sanding block and sandpaper or random orbit sander.
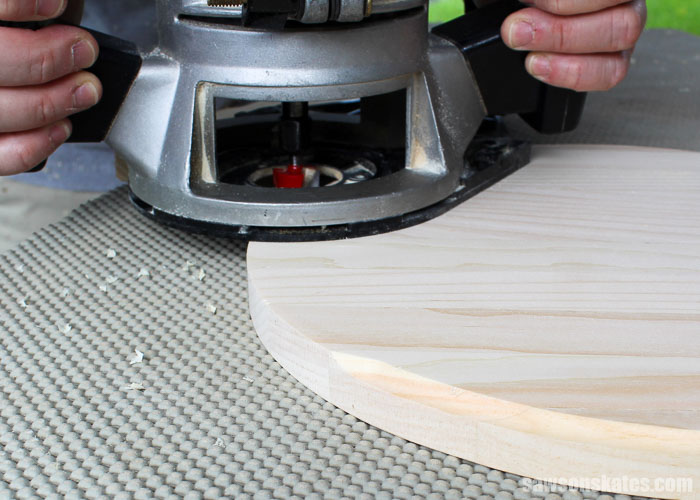
Then I installed a cove bit in my router and routed a decorative edge on the base.
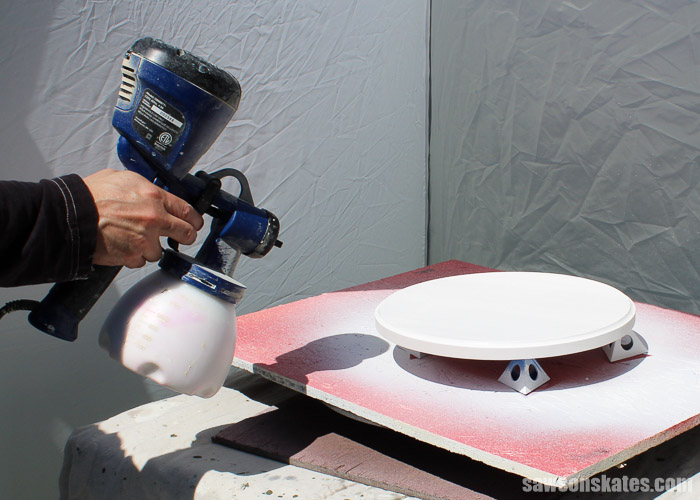
Step 3. Prime and Paint the Base. I already had my HomeRight Super Finish Max paint sprayer out to prime another project so I also used it to prime the base. Once the primer was dry I used a brush to paint the base with a Sherwin Williams color called Toile Red.
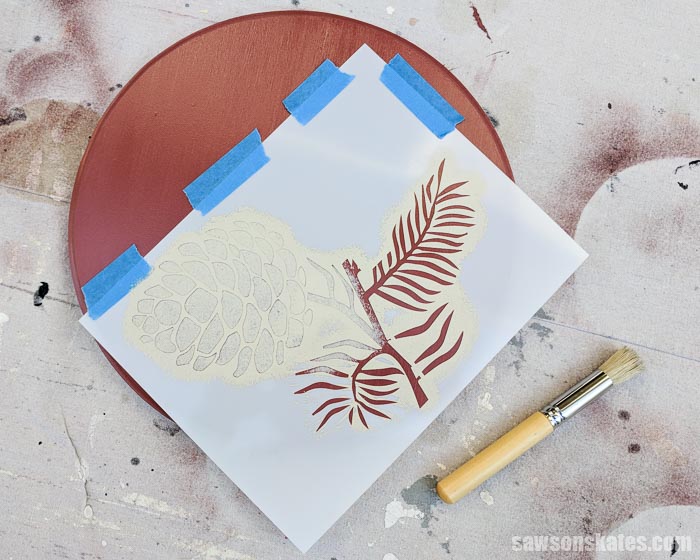
Step 4. Paint the Stencil. After the paint was dry I positioned the stencil provided by Stencil Revolution and held it in place with some painter’s tape.
I loaded a stipple brush with a Sherwin Williams color called Downing Sand and removed the excess paint from the brush on a paper towel. If there is too much paint on the brush the excess paint could be forced underneath the stencil and we don’t that. I used an up and down pouncing motion to completely fill in the areas of the stencil.
Step 5. Fake the Look of Freehand Painted Text. I also wanted to add some text to my sign, but I’m not good at painting freehand. So here’s the simple trick I used to get the freehand painted look.
First, I used my computer to print some text and then cut it out with a pair of scissors. I positioned the text where I wanted it on the sign and held it in place with some painter’s tape.
I traced the outline of the text onto the sign with a ballpoint pen. This is the first step to getting the freehand look. The pen makes a slight depression into the wood. Now all I had to do is paint within the lines left behind by the pen. After the first coat of paint on the letters was dry I applied a second coat and touched up any light spots.
Step 6. Hang the Sign. The way I needed to hang my sign is probably a little different than the way you’ll hang your sign. My sign was going to be mounted to the door of my DIY truck camper and needed to withstand traveling at 65 MPH. I drilled countersink holes on the back of the door. Then I held the sign in place and attached using 1-1/4” screws. You’ll most likely want to use picture frame hangers for your DIY sign.
Final Thoughts
A DIY wood sign is a simple project for beginners to make. The base of this sign was made using scrap wood, but you can use just about any kind of wood to make your sign. And don’t worry if you can’t paint freehand. You can use a stencil to add visual interest or use a ballpoint pen to fake the look of freehand painting.

Hi there – I’m Scott, a woodworking enthusiast and creator of Saws on Skates, a site I started in 2015 to share easy-to-follow tutorials, space-saving shop tips, and project inspiration for DIYers at any skill level. Learn more about my woodworking journey here.
Thanks, Scott . . . good job!
Thank you for stopping by, George! I’m glad you enjoyed it!