7 Ways to Prevent Orange Peel Texture When Using a Paint Sprayer
Bumpy paint or paint that looks like an orange peel can happen when using a sprayer. Here are 7 easy ways to avoid this texture on your painted DIY projects.
Sometimes an orange peel texture can form when spraying paint with a paint sprayer. The good news is your sprayer is working properly and the better news is there are easy ways to prevent this unwanted texture from forming on the surface of your painted projects.
Table of Contents
- Before You Begin
- What is Orange Peel?
- 7 Ways to Prevent Orange Peel Texture When Using a Paint Sprayer
This article contains affiliate links. If you purchase from these links, I may earn a small commission at no additional cost to you. Visit my site policies for more information.
Before You Begin
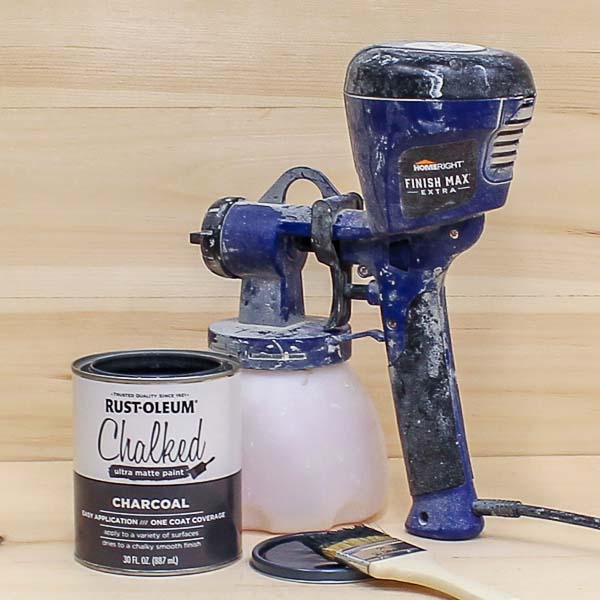
I love my HomeRight Super Finish Max paint sprayer. It’s easy to use, easy to clean and it’s a HUGE timesaver. I’ve used the sprayer to paint doors, my DIY outdoor coffee table, DIY ladder chair, the base for my workbench and more. I’ve even used it to spray polyurethane on my DIY wall-mounted wine bar.
And while I love my paint sprayer, every once in a while, the surface of my painted projects ends up with a bumpy, orange-peel texture. I’ve reached out to my friends Makayla and Laura at HomeRight, asking why this sometimes happens. Makayla reassured me, “If you think your sprayer isn’t working, don’t worry because it is!”
Makayla went on to say, “Usually, it’s always a simple fix/adjustment that’s needed.” Makayla and Laura shared seven tips with me for preventing orange peel when using a paint sprayer, and I learned I was making nearly every mistake possible! Today, I’m sharing with you the tips I learned to prevent bumpy paint and get a smooth-as-glass finish on your painted projects.
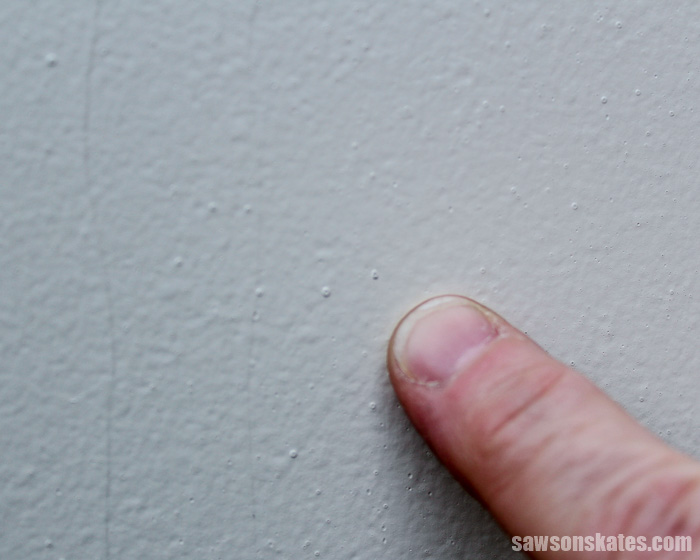
What is Orange Peel?
Orange peel is that bumpy look that paint sometimes gets when it’s sprayed. The surface of the paint project looks similar to the surface of an orange. Sometimes you might want the orange peel look for walls or ceilings, but chances are you’re using a paint sprayer because you want a smooth as glass factory-like finish on your cabinets or furniture projects.
Quick Tips to Avoid Orange Peel
- Strain the paint to remove air bubbles.
- Thin the paint to create a finer finish.
- Don’t shake your paint. Use a stir stick instead.
- Don’t store or spray paint in high humidity/weather.
- Don’t output too much paint.
- Thoroughly clean your sprayer.
- Be sure your paint is completely dry before applying additional coats.
7 Ways to Prevent Orange Peel Texture When Using a Paint Sprayer
Makayla at HomeRight tells me, “There are several factors that could be causing the orange peel texture and most of them have to do with your paint.” Let’s look at those factors and how to avoid the orange peel texture when spraying your next project.
1. Strain Your Paint
The first thing Makayla recommends to prevent the orange peel texture is to strain your paint. Straining your paint may seem like an extra, unnecessary step but she says properly straining paint before spraying helps to “remove all air bubbles.”
How do you strain paint? I strain my paint with a cone style paint strainer.
💡 TIP: I reinforce the joint of the cone strainer with painter’s tape. Sometimes the weight of the paint causes this joint to split and then you’re cleaning up spilled paint instead of straining it.
The other thing I recommend to use is a strainer stand. I place the paint strainer (reinforced with painter’s tape) in the stand and position over the container of my HomeRight Super Finish Max paint sprayer. Don’t try to hold the strainer in your hand. You’ll end up with paint all over your hand and everywhere else too!
Related: How to Strain Paint (3 Easy Ways)

2. Thin Your Paint
The second trick for preventing orange peel is to thin your paint. Makayla says thinning your paint helps to “create a finer finish” which can prevent that unwanted orange peel texture.
Paint sprayers typically require paint to be thinned or mixed. The paint needs to be thinned so it will easily flow through the sprayer and the sprayer will work properly.
Refer to your owner’s manual for specific instructions on thinning paint for your sprayer. Different sprayers have different requirements, and using the wrong thinning ratio or thinning paint that shouldn’t be thinned might damage your sprayer and result in poor paint application.
3. Stir Instead of Shake
I’ve done it, and you’ve probably done it too. Instead of grabbing a stir stick, I’ve picked up my paint can and given it a good shake. Don’t shake the paint can! Open the can and use a stir stick to stir the paint. Makayla says, “Shaking can create unwanted air bubbles, which can cause the orange peel texture.”
But what if you just had a can of paint mixed at your local paint store? Straining the paint should remove all of the air bubbles. But to be safe, you could wait an hour or so after having your paint mixed to let the bubbles settle and then strain your paint.
4. Avoid High Humidity
I don’t know about you, but I’m not a fan of heat and humidity, and your paint isn’t either. Makayla recommends against storing and spraying paint in high humidity or high-temperature weather. She says it “can affect how the paint dries and how it’s sprayed.”
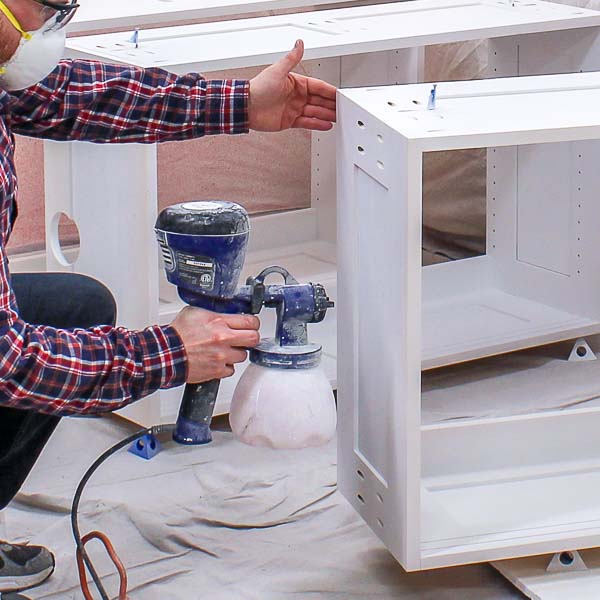
5. Avoid Spraying Too Much Paint
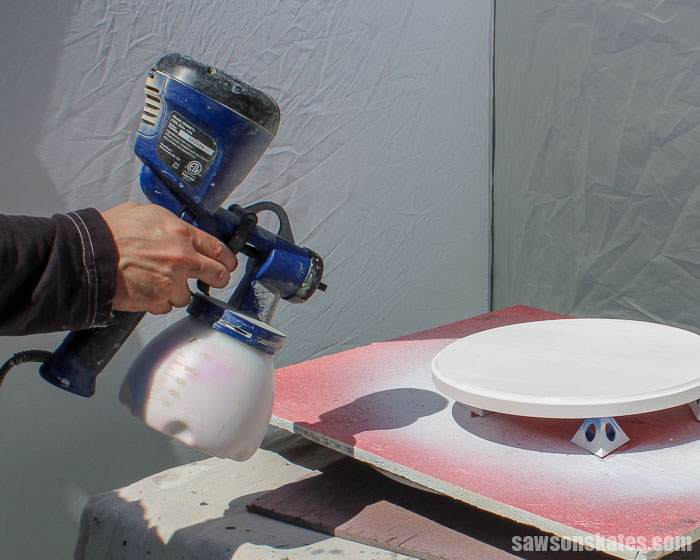
Spraying the “right” amount of paint is critical. Spraying too much paint can produce an orange peel texture on the surface of your projects. Makayla recommends adjusting the “volume control knob to make sure you aren’t outputting too much paint.”
The instructions for my HomeRight Super Finish Max paint sprayer recommends overlapping each stroke or pass by a third. So you want just enough paint to flow through the sprayer to coat the piece AND be able to overlap each stroke or pass by a third without spraying too much which could cause orange peel.
How do you know if you’re applying too much paint? The paint will splatter when it hits your project’s surface. You don’t want paint flowing out of your sprayer like water gushing out of a fire hydrant!
What you want is a spray pattern that looks like a mist. The paint output of your sprayer should look similar to the spray pattern you would see when you use a can of spray paint. It’s always better to apply several thin coats of paint than one heavy coat.
The output amount is easy to adjust using the volume control knob. The volume control knob controls the amount of paint allowed to flow through the sprayer. Rotate the volume control knob towards the “+” to allow more product to flow and rotate towards the “-” to reduce the amount of product flowing through the sprayer.

6. Thoroughly Clean Your Sprayer
It’s important to thoroughly clean your sprayer after you finish painting your project. It’s also important to do a quick inspection of the parts before you start spraying your next project. When setting up your sprayer be sure your nozzles and tips are completely free of any dried paint.
Laura at HomeRight says “If there is dried paint behind the nozzles or around the tip, it might affect the spray pattern” and cause an orange peel texture. Worse yet those clumps of dried paint or drips of paint could fall onto the surface of your project.
Laura experienced this recently and found a clump of dried paint behind the air cap was the cause. The fix was easy. She disassembled the nozzle and tip area, rewashed the parts, replaced the pieces and was back to spraying.
7. Make Sure Your Paint is Dry
Be sure to follow the drying time instructions on your paint can to ensure your paint is thoroughly dry before applying the next coat. Makayla says “A lot of times we get impatient and think the paint is ‘dry enough’ to apply another coat.” Guilty as charged. I’m impatient and this is one rule I break all the time.
Makayla experienced this firsthand recently when she was painting with a brush. She ended up with an orange peel texture and a bunch of air bubbles on the surface of her project. Even though she used a brush, she thinks the same advice would apply to a sprayer.
Related: How to Clean Paintbrushes (Save Money & Better Results)
Let’s face it, those drying times are on the paint can for reason. So follow the directions and allow your paint to thoroughly dry before applying additional coats.
How to Fix Orange Peel
There’s an easy fix if you’ve sprayed and ended up with orange peel. The fix is wet sanding. First, I fill a spray bottle with water and mist a small area of the project. Then I lightly sand the piece with wet sandpaper. To smooth a less bumpy texture I may use 220 grit sandpaper. For a bumpier texture I may smooth it with 180 grit sandpaper.
Related: How to Sand DIY Wood Furniture (Faster, Easier & Better Results)
After the entire piece has been sanded I remove any remnants left behind from sanding with a wet paper towel or clean rag. Lastly, review the seven tips above and spray one final, smooth coat.
Final Thoughts
Bumpy paint or paint that looks like an orange peel can sometimes happen when using a paint sprayer. To prevent this texture from appearing on your DIY projects, strain the paint to remove air bubbles, thin the paint to create a finer finish, don’t shake your paint, don’t store or spray in high humidity/weather, don’t output too much paint, clean your sprayer, and be sure you paint is thoroughly dry before spraying an additional coat.
Thank you for stopping by. If you found this information helpful, would you please pin it to Pinterest? Other DIYers would appreciate it and I would too! Thank you – Scott
Recommended For You


Hi there – I’m Scott, a woodworking enthusiast and creator of Saws on Skates, a site I started in 2015 to share easy-to-follow tutorials, space-saving shop tips, and project inspiration for DIYers at any skill level. Learn more about my woodworking journey here.
interesting and invaluable advice thanks
Hi Allan – Thank you for stopping by. I’m glad you found this helpful.
Thanks for the tip on thinning the paint
Hi Stan – Thank you for stopping by. I’m glad this helped you.
Very good tips! thank you, Steve