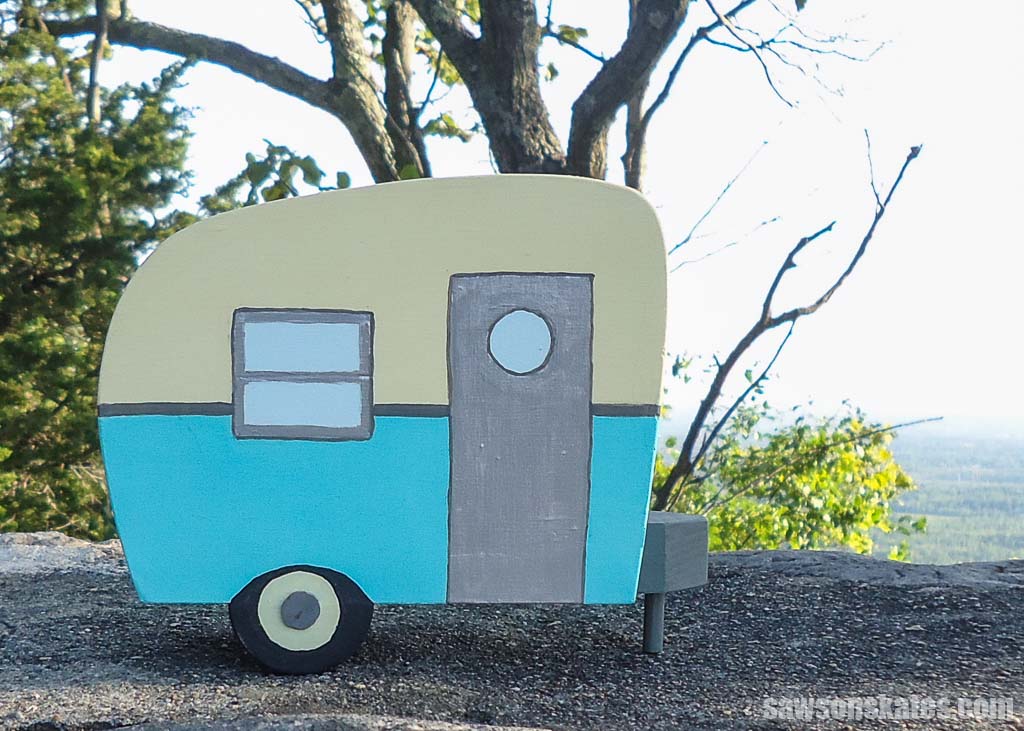
DIY Painted Wood Vintage Camper Napkin Holder
Add some vintage charm to your table with this whimsical DIY camper napkin holder. Free pattern and step-by-step instructions included.
What Should I Build Next?
That's the question I help answer.
Every week, I send woodworking ideas to 17,000 DIYers who love building things.
You'd fit right in.
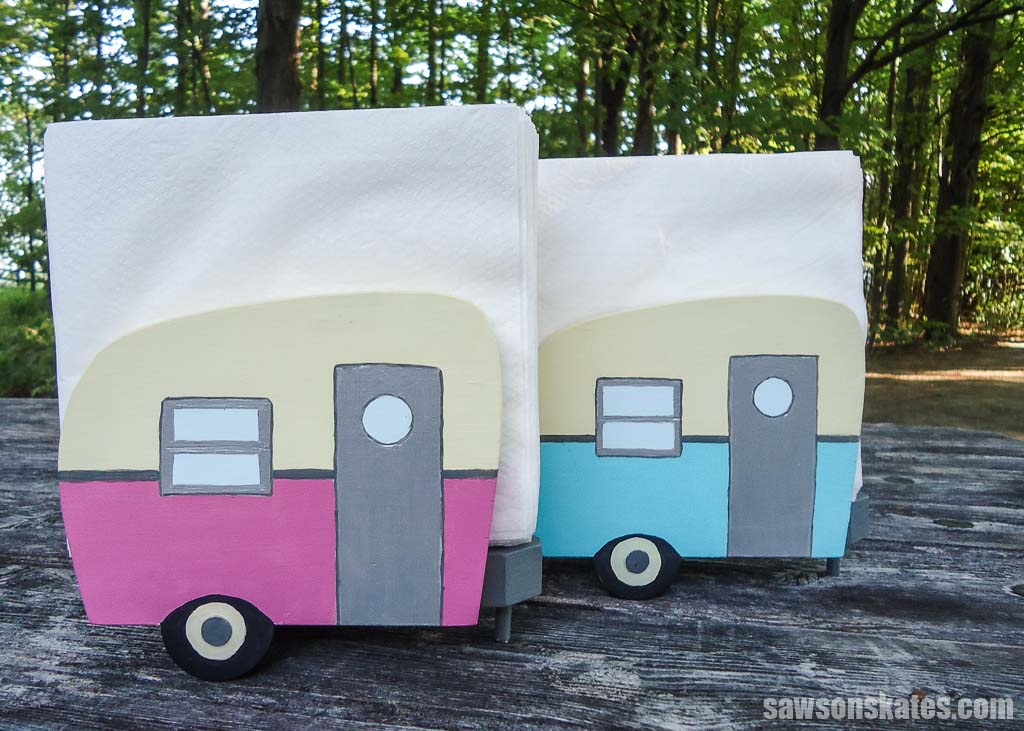
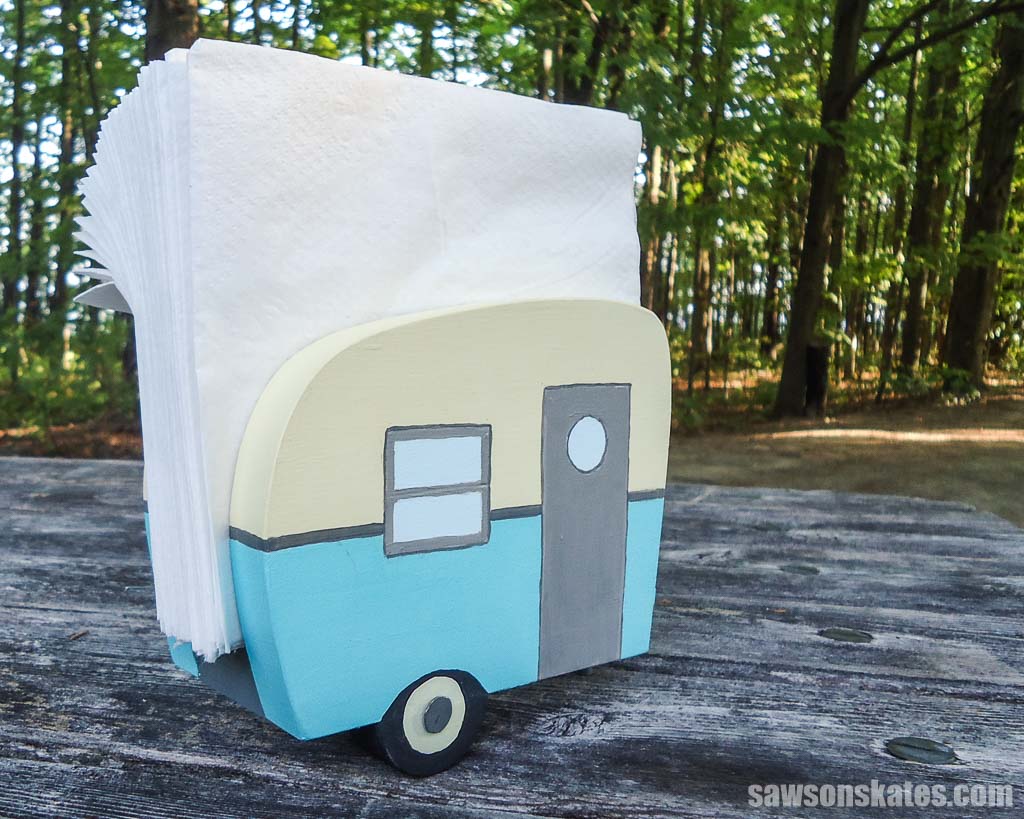
Do you love vintage campers? Want to add some whimsy to your table? Look no further than this DIY vintage camper napkin holder! Using scrap wood and a simple painting technique, you can create a charming and functional addition to your kitchen, backyard BBQ, or RV.
Originally published April 4, 2017, updated June 21, 2023.
Table of Contents
- Inspiration for This Vintage-Style Camper Napkin Holder
- What Tools Do You Need?
- What Wood Should You Use?
- How Do You Paint the Camper?
- How to Make a DIY Picture Frame with Display Shelf
- Get the Free Plan
This article contains affiliate links. If you purchase from these links, I may earn a small commission at no additional cost to you. Visit my site policies for more information.
Inspiration for This Vintage-Style Camper Napkin Holder
I love that classic “canned ham” shape of vintage campers, the chrome, the fun 50s colors, and those retro kitchen areas. I WANT one so bad!
Until I get one, I did the next best thing. I made my own; well, I made a napkin holder that looks like a vintage camper!
Related: DIY Truck Camper (Cabin on Wheels) Cost + Build Tips
My buddy Rich saw these and said, “They remind me of being a kid and camping with my grandparents. Good memories!”
What Tools Do You Need?
You can make this napkin holder with just a few tools. Here’s what I used:
Jigsaw
I used a jigsaw to cut the camper’s curved shape, but you could also use a scroll saw instead.
Miter Saw
I used a miter saw to cut the napkin holder’s bottom to length.
Drill
I used a drill and a drill bit to make a pilot hole for the “tongue jack,” the dowel that keeps the camper level and holds the front of it off the table.
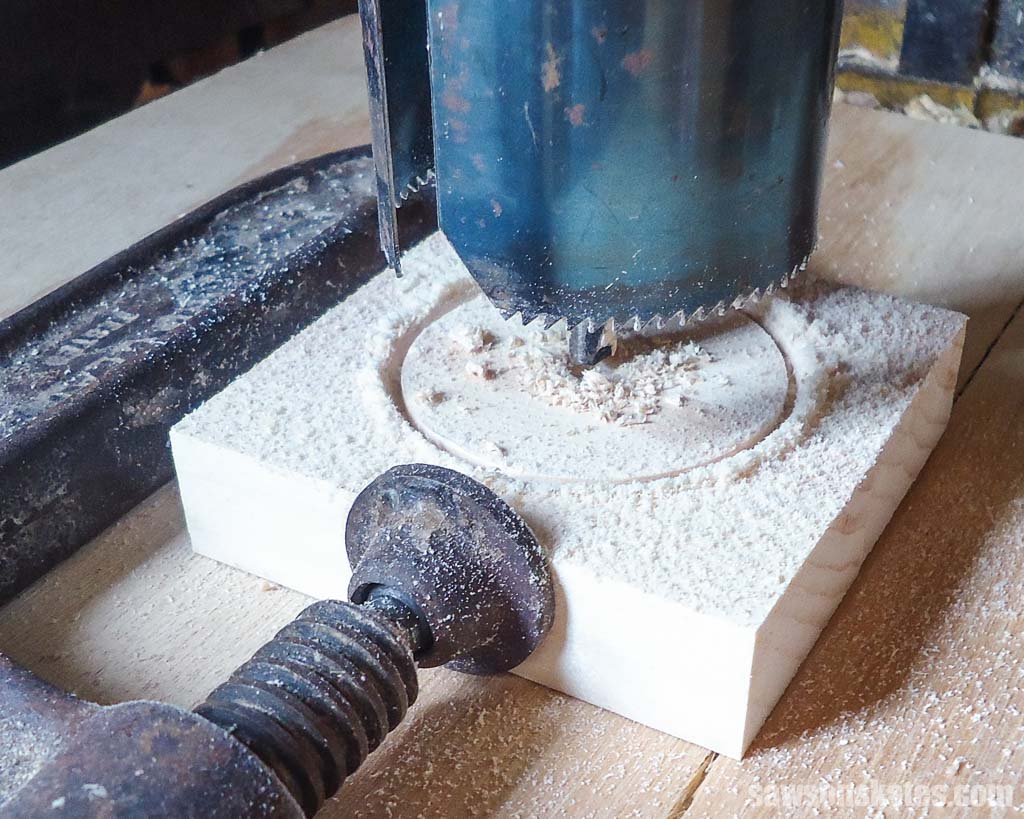
Drill Press
I used a drill press and a hole saw to make the camper’s tires.
Related: 14 Types of Wood Drill Bits (Which to Use & Why)
Brad Nailer
I used a brad nailer to attach the sides of the camper and the tires, but you could use a hammer and nails instead.
Related: Brad Nailer vs Finish Nailer (Which to Choose & Why)
What Wood Should You Use?
This project doesn’t require much wood, so I made mine using scrap pieces of pine.
How Do You Paint the Camper?
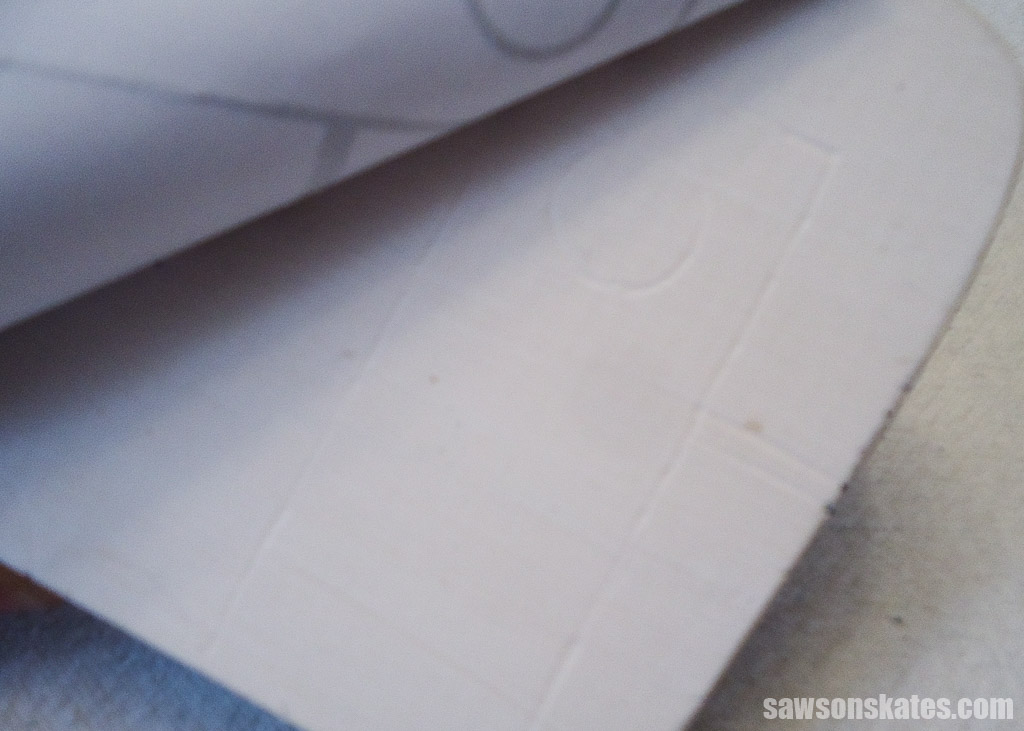
Don’t worry if you can’t paint freehand. Neither can I. Instead, I traced the camper’s pattern onto the wood using a ballpoint pen. The pen creates a shallow indentation in the wood, so all you have to do is paint within the lines. It’s like paint by numbers without the numbers!
I also used this technique on this tiki mask planter and this flower power bus planter.
DIY Vintage Camper Napkin Holder
Printed Plan
Get the FREE plan here (includes detailed instructions, measurements, and bonus tips)
Supplies
- Wood (per the printed plan)
- Wood Glue
- 1-¼” Brad Nails
- Roofing Nails (for the hubcaps)
- Ready Patch or Wood Filler
- Primer
- Craft Paints and Brushes
Tools
- Tape Measure
- Miter Saw
- Jigsaw
- Kreg Multi-Mark
- Drill
- Brad Nailer or Hammer
- 1-½” Hole Saw
- ¼” Drill Bit
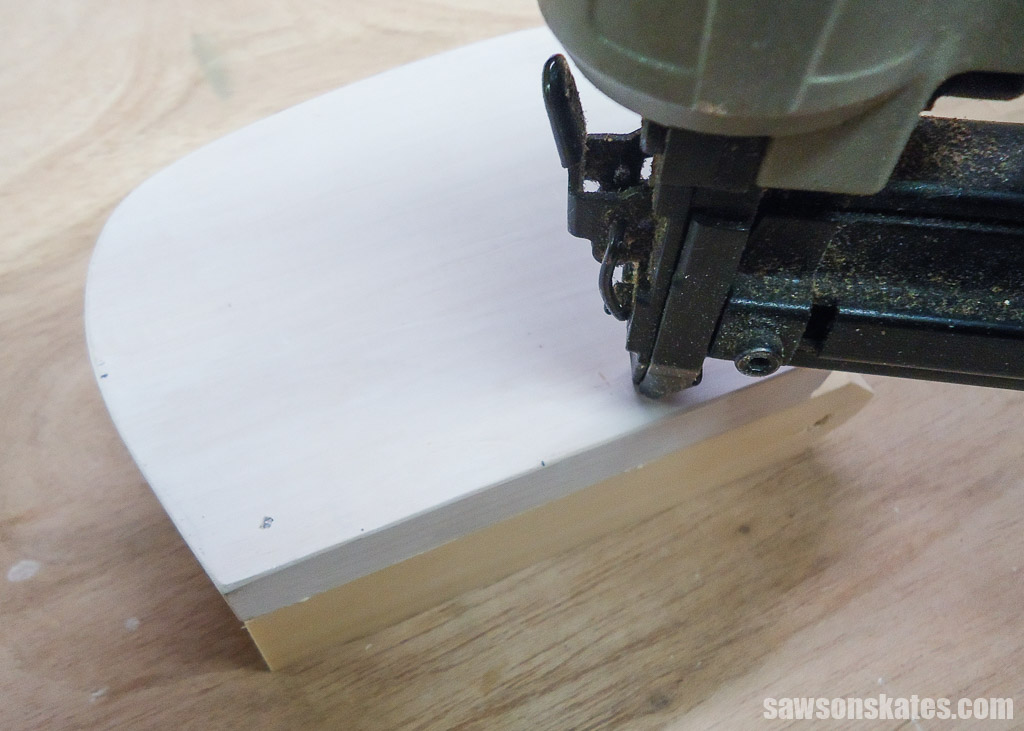
Step 1. Make the Campers
To make the campers, you’ll need two pieces of wood cut to length
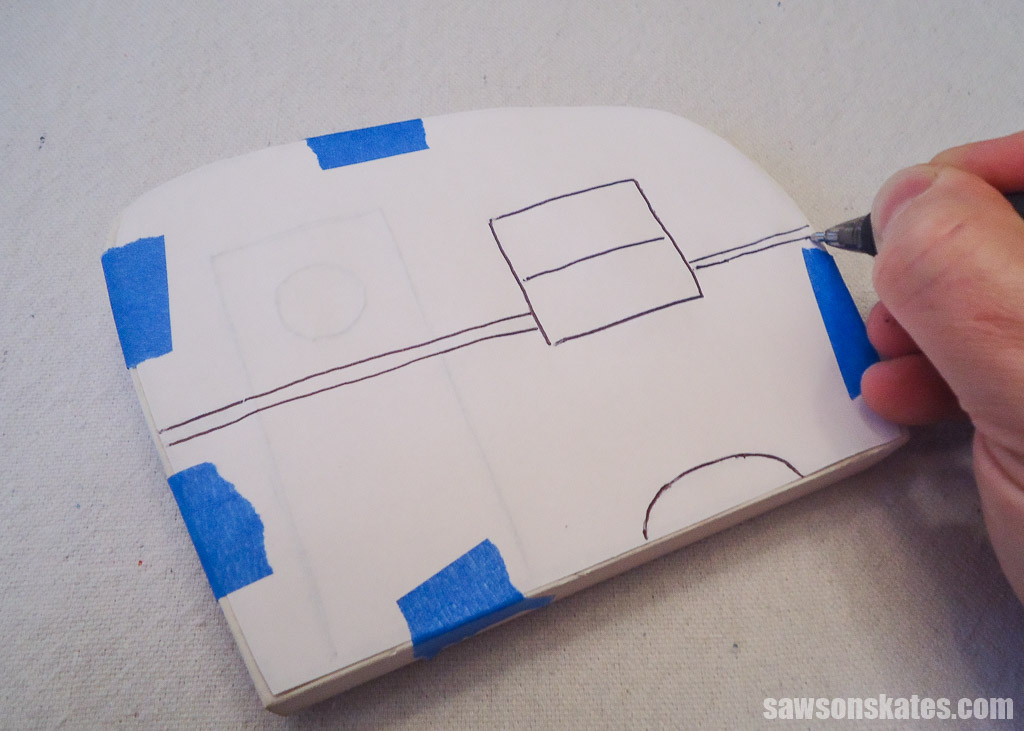
Print the template at the end of the plan and trace it onto the boards.
I cut out my camper shapes using a jigsaw, but you could also use a scroll saw instead.
Sand the edges smooth and temporarily attach the template to one of the cutouts with painter’s tape.

Trace the door, window, horizontal line, and wheel arch with a ballpoint pen.
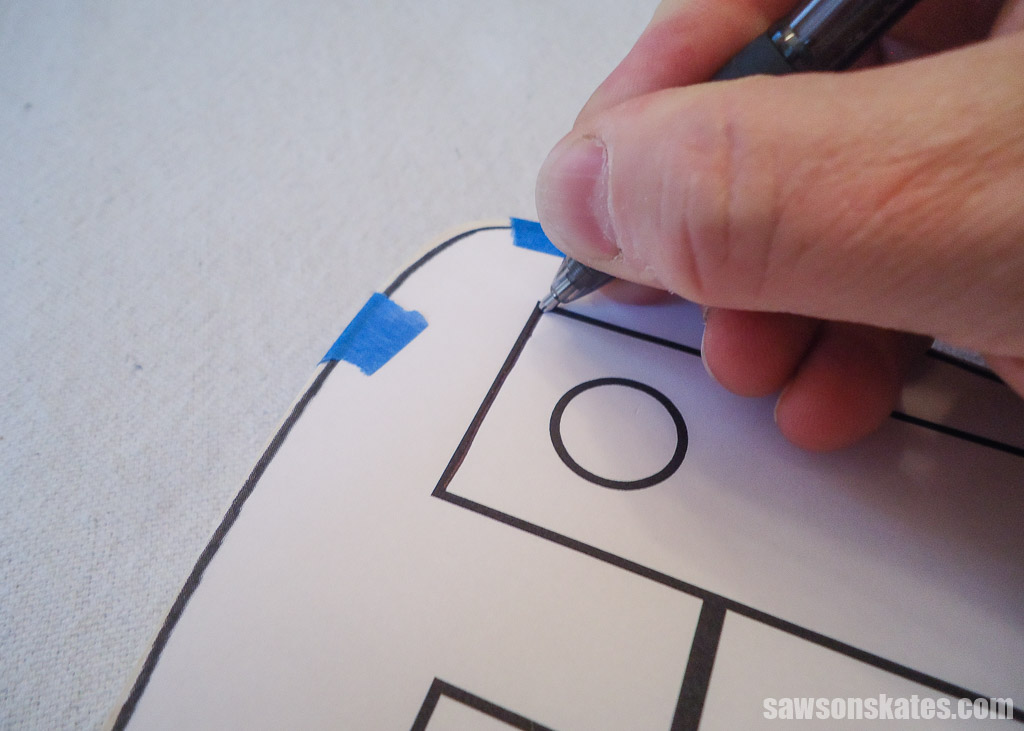
The pen leaves a slight indentation in the wood, so when it’s time to finish, all you have to do is paint inside the lines.
On the second cutout, flip the template, temporarily attach it again with painter’s tape, and repeat the same step above, except don’t trace the door on this side.
Step 2. Attach the Bottom
Cut one piece of wood to length for the bottom. Use the diagram in the printed plan to mark the location for the “tongue” and make the 45-degree cuts using a miter saw.
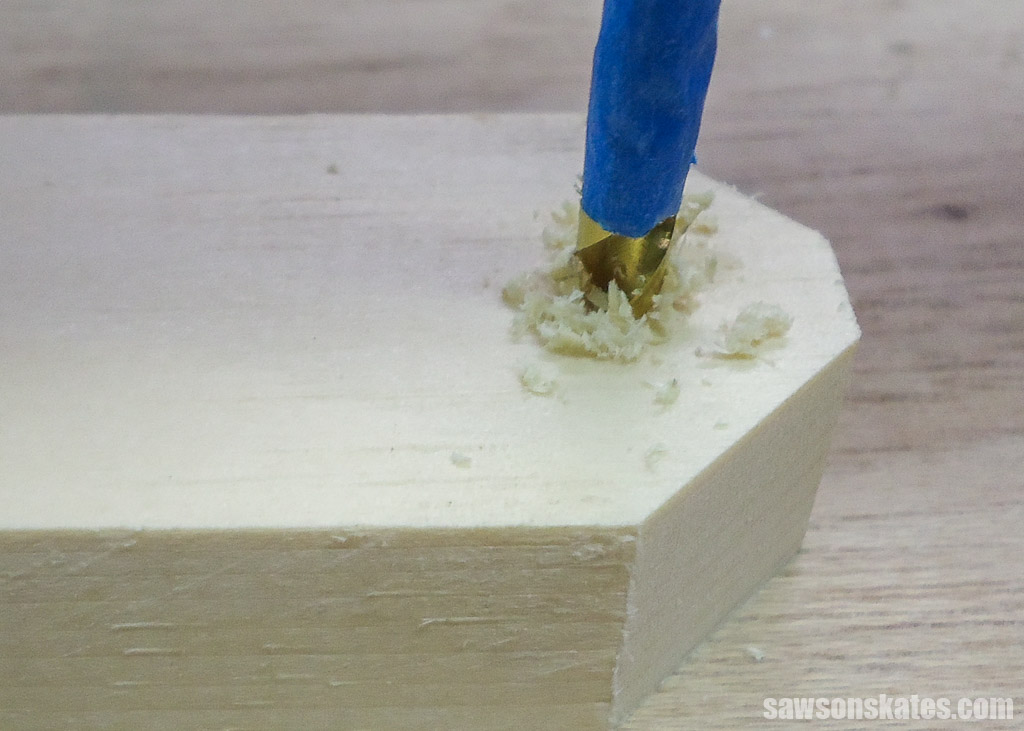
On the tongue end, use the diagram in the printed plan to mark the location for the “tongue jack.”
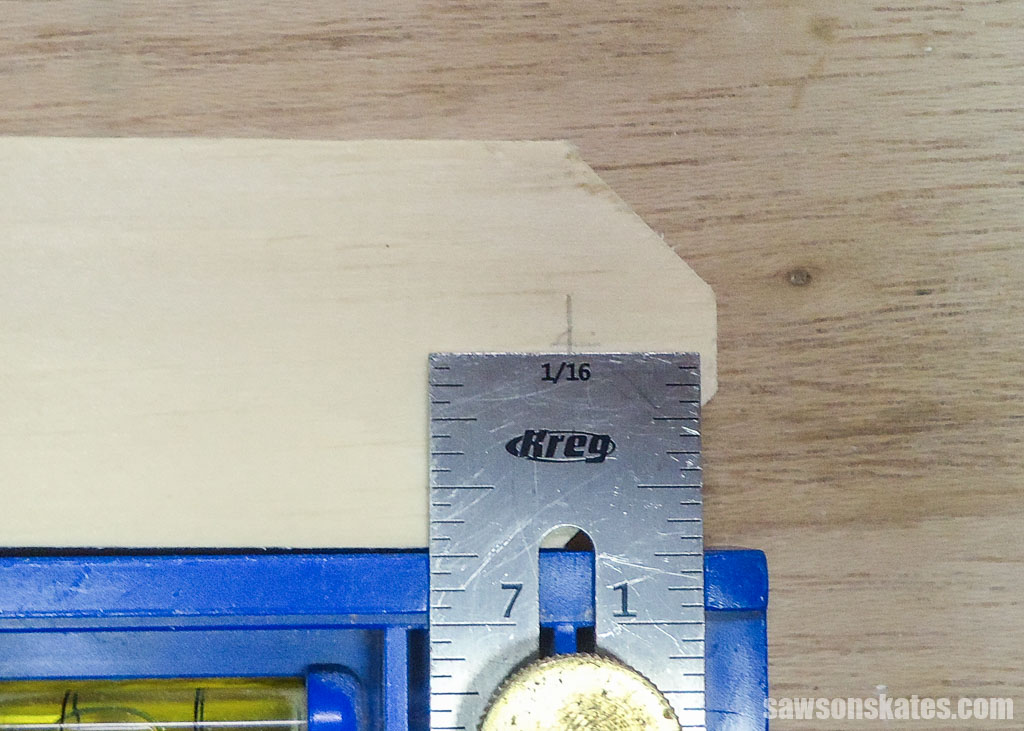
Make a starting point for the drill bit using an awl.
Related: What is an Awl? (+ How to Use It)
Next, use a drill bit to make a pilot hole for the dowel you will use as the tongue jack. I used painter’s tape as a depth stop for the drill bit.
Related: How to Drill Pilot Holes (Why, When & Correct Size)
Apply glue to one edge of the bottom and position the camper cutout, making sure the tongue jack hole faces downward and the lines you traced on the camper in Step 1 face outward.
Attach using brad nails. Repeat for the other side.
Step 3. Attach the Tires
Cut two pieces of wood to length for the tires. Clamp the pieces together and use an awl to mark the center between the two pieces.
TIP: You can draw a diagonal line from corner to corner to help find the center.
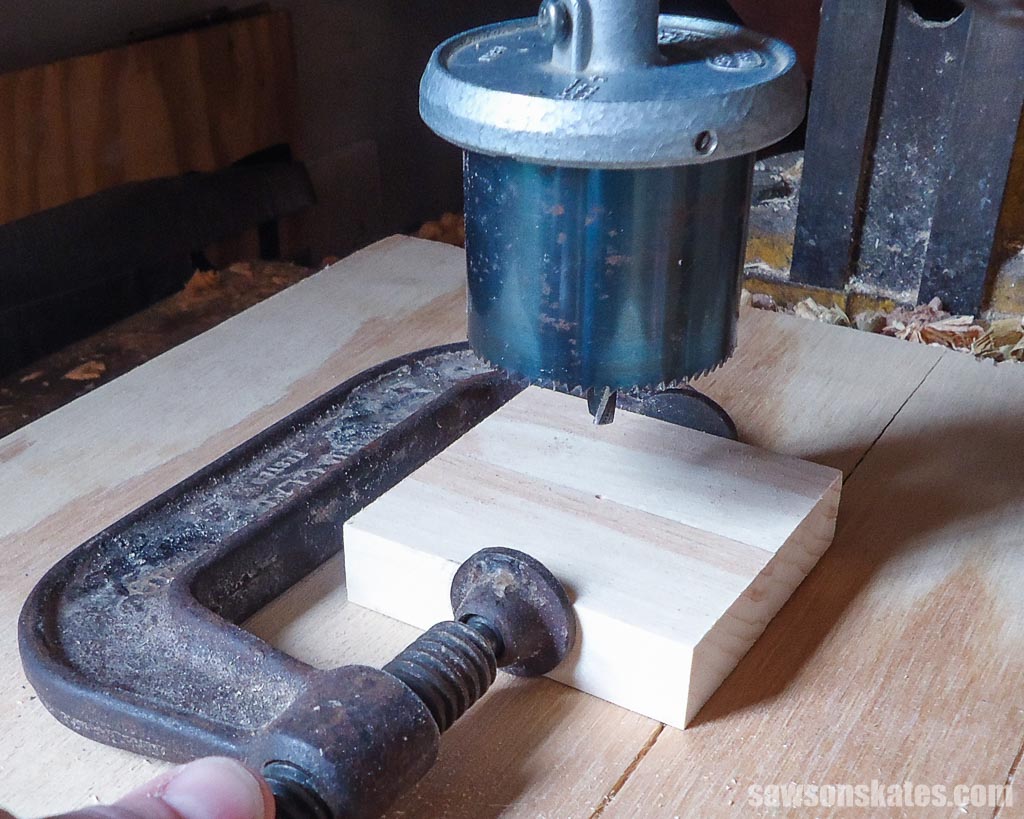
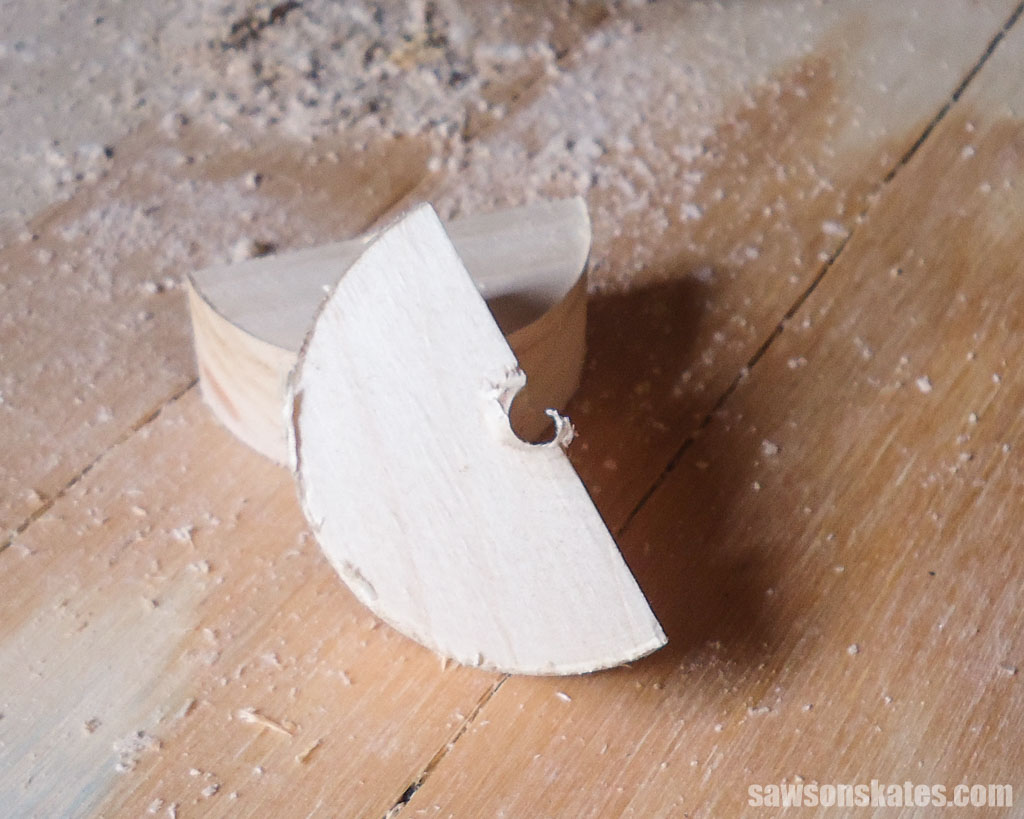
Cut through the two pieces using a drill press, and hole saw. These parts are small, so don’t hold the wood while drilling. Instead, hold the clamp, keeping your hand away from the hole saw.
Once you remove the clamp, you’ll have two half tires. Use sandpaper to smooth the edges.
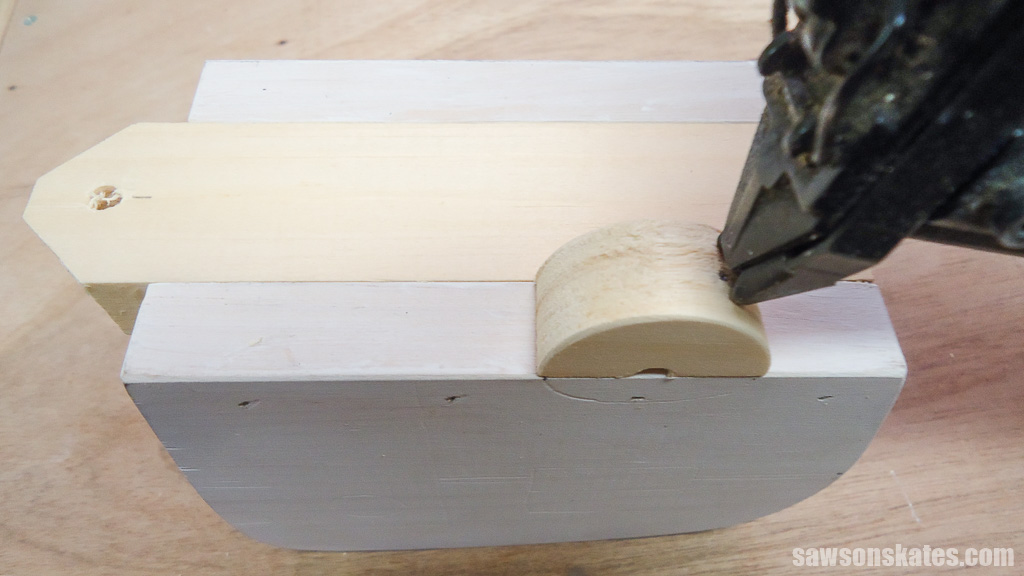
Apply glue to the tires and center on the wheel arch you traced onto the camper in Step 1.
Attach using brad nails.
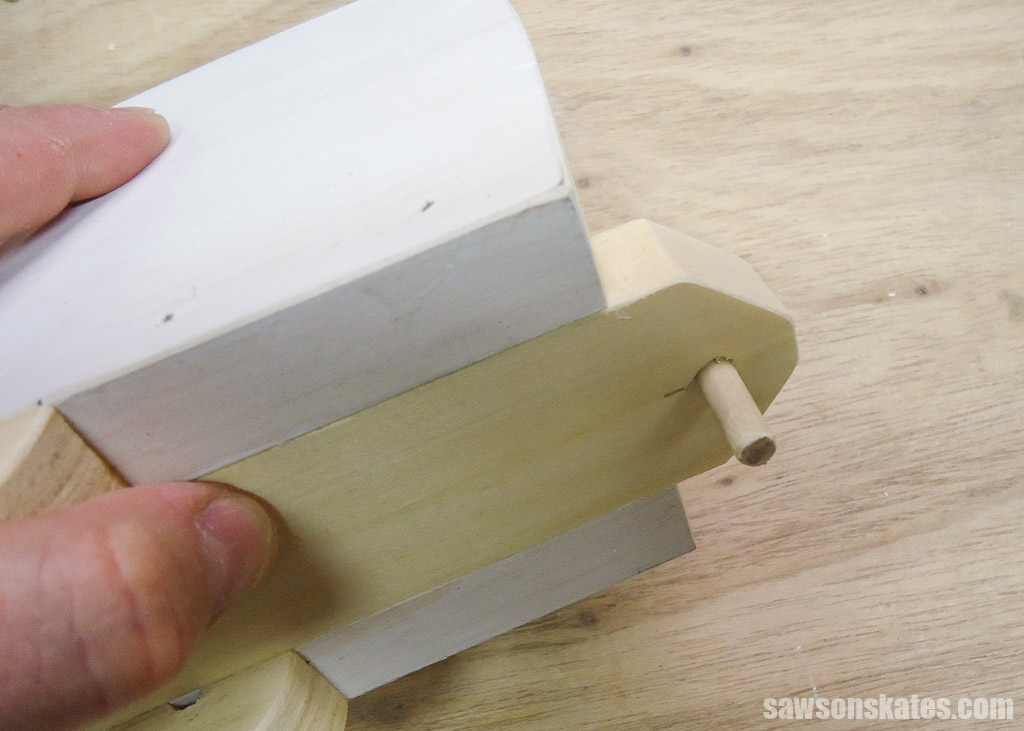
Cut a piece of dowel to length. Apply glue to the tongue jack hole in the bottom and insert the dowel. Ensure the camper sits level and adjust if necessary.
Step 4. Finish the Camper Napkin Holder
First, I filled the nail holes and any gaps between the body and wheels with Ready Patch or wood filler.
Related: Wood Putty vs Wood Filler (Which to Use & Why)
Next, I applied a primer to the entire camper.
Painting the campers is as easy as painting between the lines you traced in Step 1.
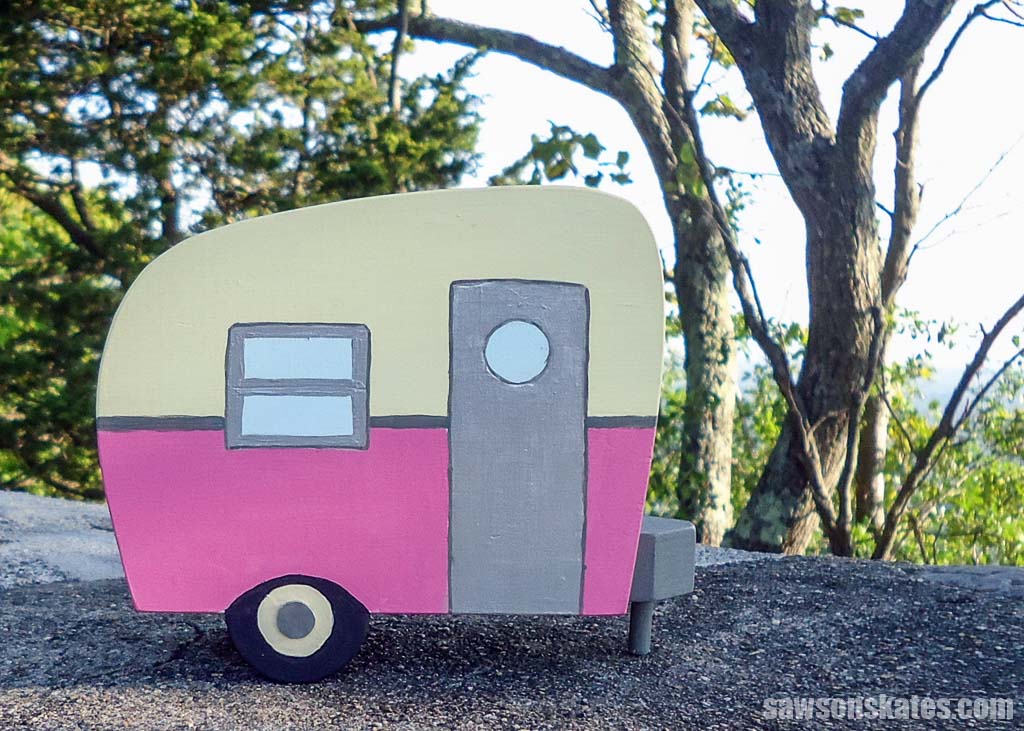
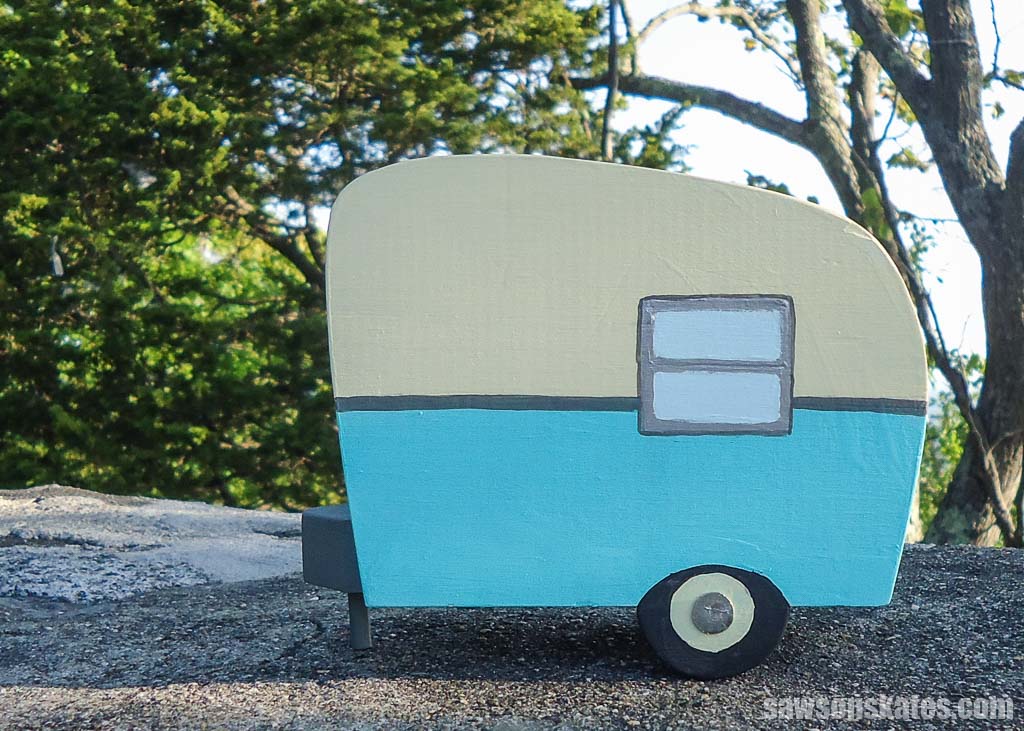
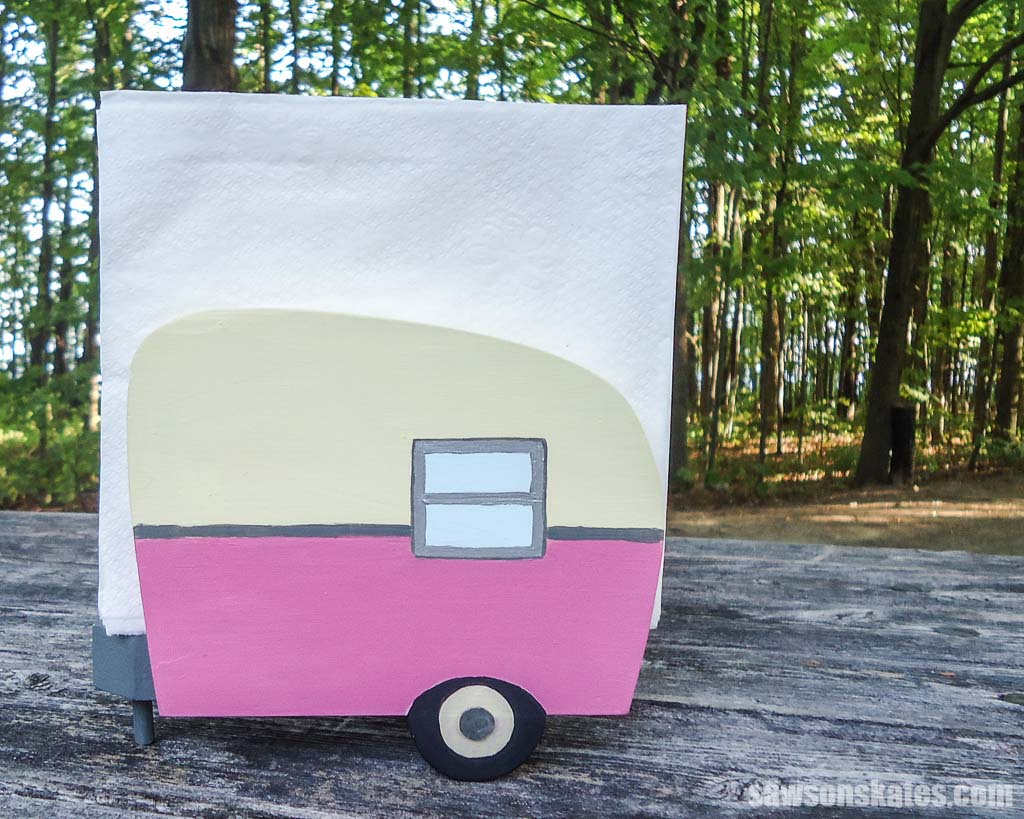
I painted the camper’s top ivory and the lower half pink and vintage blue/green.
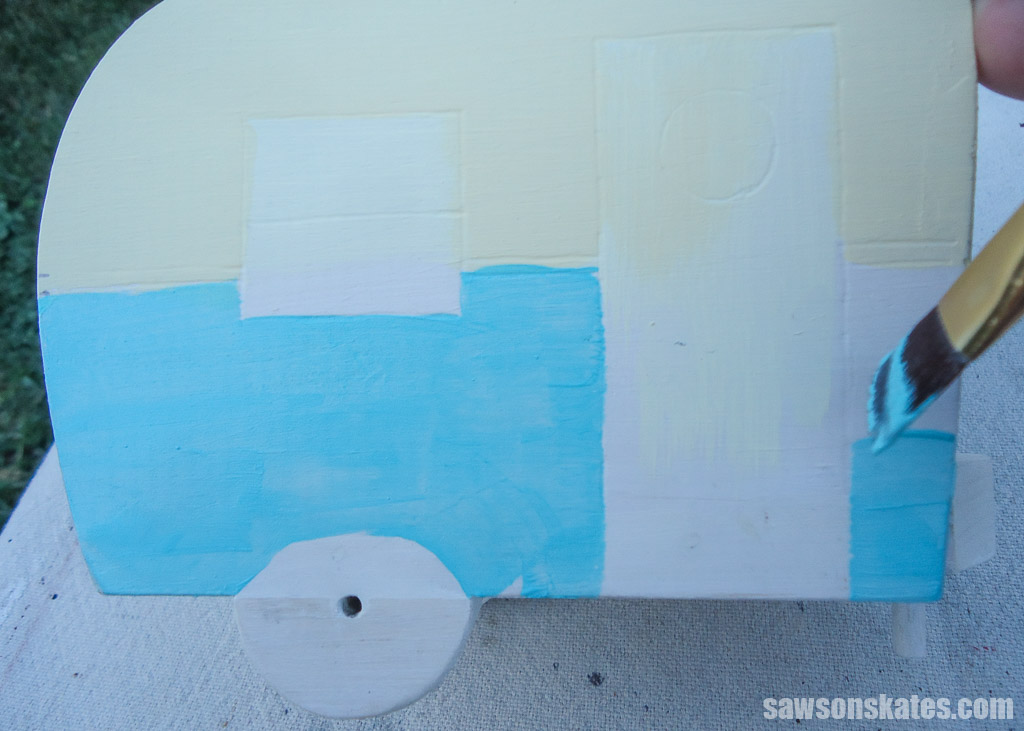
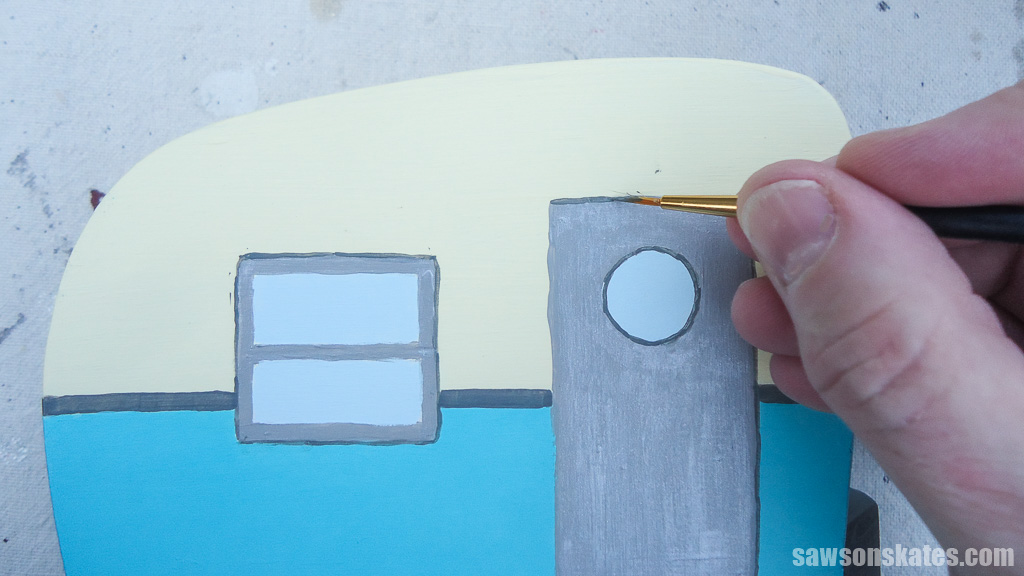
The doors and window trim were painted a light gray and then topped with metallic silver paint.
To help shape the wheels, I installed a roofing nail and painted around it. First, I painted the rims the lower body color, but I thought they blended in too much, so you’ll notice I repainted them ivory in the final version.

Then I painted the tire area between the wheel rim and the wheel arch black.
Finally, I outlined the doors and windows with a dark grey to make them pop.
All that’s left to do is add some napkins, sit back, and smile!
Final Thoughts
Now you can say you own a vintage camper, even if it’s just a napkin holder! I love the way this project turned out. It goes to show that you can make something cool with just a few scrap pieces of wood. And painting the camper’s classic shape was super easy – it was just like paint by numbers without any numbers.
Don’t wait. Get your free plan (including the detailed instructions and measurements) now!
Thank you for stopping by. If you enjoyed this tutorial, would you please take a moment and pin it to Pinterest? I’d really appreciate it!
Recommended For You

Pin This For Later

Hi there – I’m Scott, a woodworking enthusiast and creator of Saws on Skates, a site I started in 2015 to share easy-to-follow tutorials, space-saving shop tips, and project inspiration for DIYers at any skill level. Learn more about my woodworking journey here.
Nice idea, quick project
I am a camper, so I plan on making a few of these for my camper friends, Thank you,
Dayne
Hi Dayne – Thank you for stopping by. That’s a great idea!!!
Even though I am not a camper… but this is really a cute project for the dedicated campers!!
Thank you, Jan! This project always makes me smile 🙂