DIY Book Stand with Storage
This functional and attractive DIY book stand makes reading easier. Learn how to build this simple project that includes a hidden area for storage.
What Should I Build Next?
That's the question I help answer.
Every week, I send woodworking ideas to 17,000 DIYers who love building things.
You'd fit right in.
DIY Book Stand
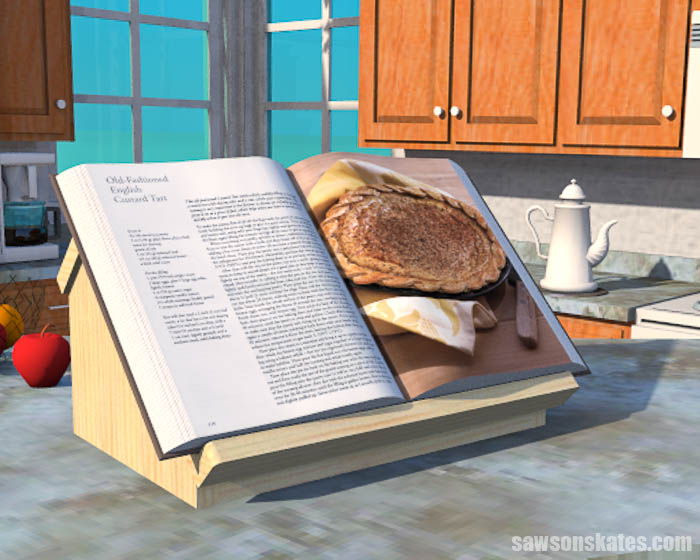
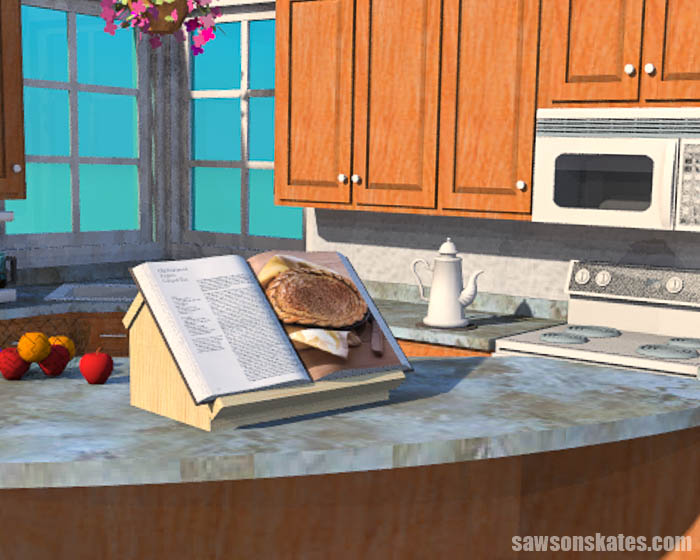
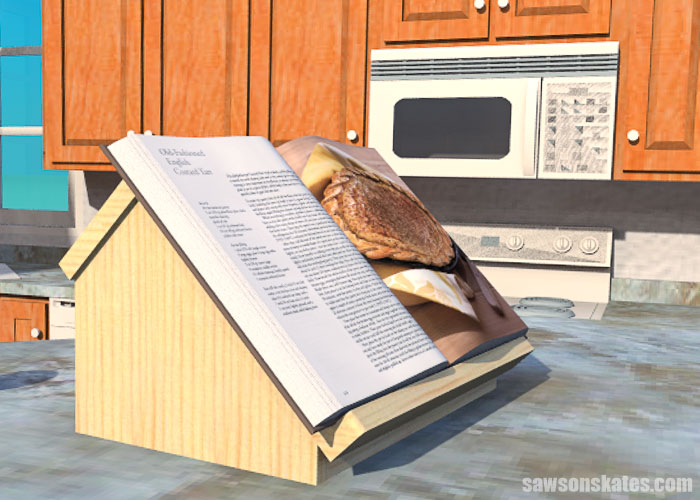
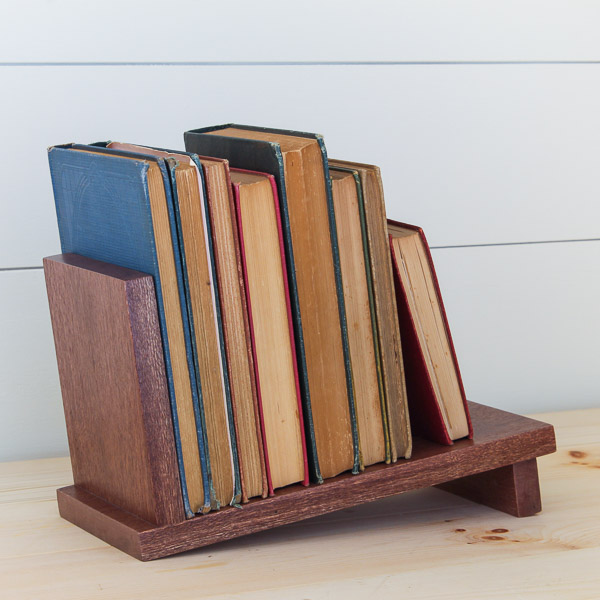
If you’re a bookworm, you may already know a classic book stand is one of the most convenient ways to read a book. This DIY book stand is easy to make and the perfect place to prop up your book, phone, or tablet.
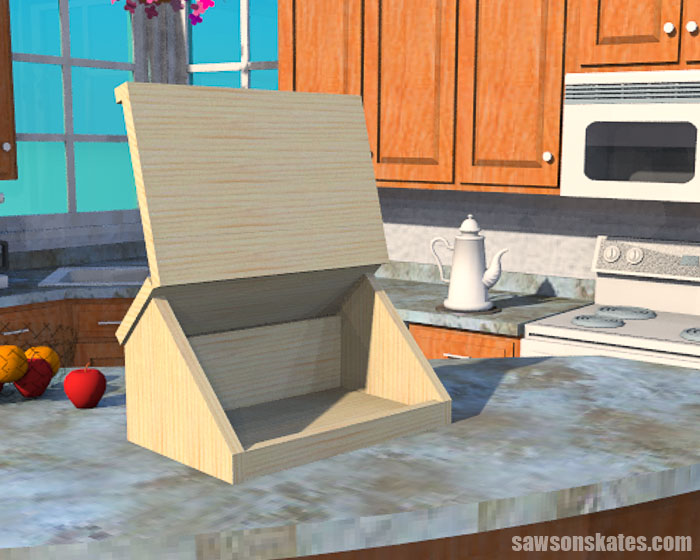
But there’s more. The lid lifts to reveal a hidden storage area that will keep your space neat and organized. Use it to stash magazines, pens, notebooks, and other trinkets.
The free step-by-step plan includes all of the measurements, easy-to-follow instructions, and detailed diagrams.
Table of Contents
- What Tools Do You Need?
- What Wood Should You Use?
- How Do You Finish the Book Stand
- How to Make a DIY Book Stand
- Get the Free Plan
This article contains affiliate links. If you purchase from these links, I may earn a small commission at no additional cost to you. Visit my site policies for more information.
Inspiration for this Book Stand
This DIY book stand was inspired by a clever book stand plan that I spotted several years ago on Chief’s Shop. The Chief’s Shop version included an open area at the back for storage.
This version has a similar shape, but it’s a little smaller, the back is enclosed, and the hinged lid opens to reveal a hidden storage area.
I didn’t build this project, so I’m sharing what the finished book stand may look like using renderings and kitchen scene that I sourced from the SketchUp 3D Warehouse.
What Tools Do You Need to Make a Book Stand?
This easy-to-make book stand is a simple project that you can build in an afternoon using basic woodworking skills and just a few common woodworking tools.
Tools like a miter saw, pocket hole jig, and a drill. You’ll also need an additional saw to cut the angle on the sides of this project.
Miter Saw
You can use a miter saw to cut all of the parts to length for this project. If you have one, you might be able to use a sliding miter saw to make the angled cuts on the sides of the stand.
Related: 7 Miter Saw Tricks Every DIYer Should Know
Pocket Hole Jig
You can use any pocket hole jig to drill the pocket holes for this project.
Related: Which Kreg Pocket Hole Jig Should You Buy?
Drill
You’ll need a drill to make the pocket holes, drive the pocket hole screws that join the parts together, and drive the screws that attach the piano hinge to the lid.
Related: Impact Driver vs Drill: What’s the Difference?
It’s also handy to have a right angle drill attachment. Some of the pocket hole locations on this project could be tricky to reach with a traditional driver.
A right angle drill attachment is the perfect tool to drill in a tight spot or drive screws in hard-to-reach places.
Related: How to Screw in Hard-to-Reach Places
Additional Saw
If you don’t have a sliding miter saw, you will need an additional saw to cut the angles on the sides of the stand. An easy way to make these cuts is with a jigsaw. Use the jigsaw to cut next to the pencil line. Then clean up the cut by using a sander to sand up to the pencil line.
What Wood Should You Use?
I designed this project so that you could make it without plywood. Instead, I created this project so that you could build with common pine boards like 1×2s, 1×3s, 1×4s, and 1×6s.
Related: Beginner’s Guide to Wood Sizes
How Do You Finish the Book Stand?
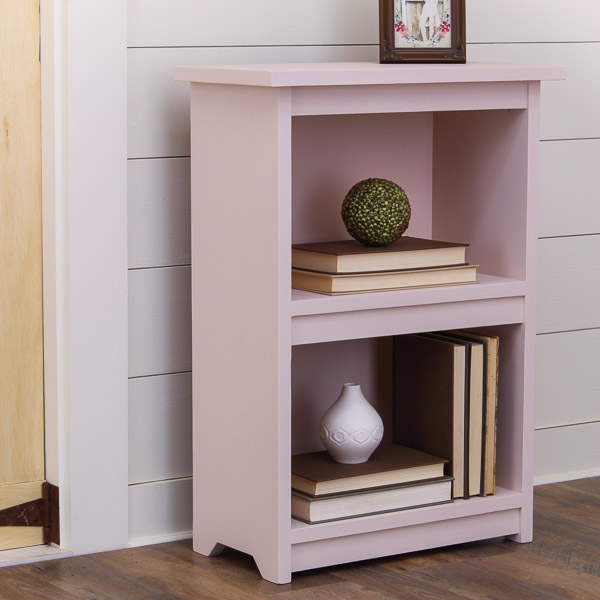
This book stand could be finished in a variety of ways. It could be left natural, painted, stained, or a combination of paint and stain.
How to Make a DIY Bookstand with Storage
Printed Plan
Get the FREE plan here (includes detailed instructions, measurements, and bonus tips)
Materials
- Wood (per the printed plan)
- 1-¼” Pocket Screws
- Wood Glue
- 12″ Piano Hinge
Tools
- Tape Measure
- Drill
- Kreg Jig
- Kreg Multi-Mark
- Miter Saw
- Right Angle Drill Attachment
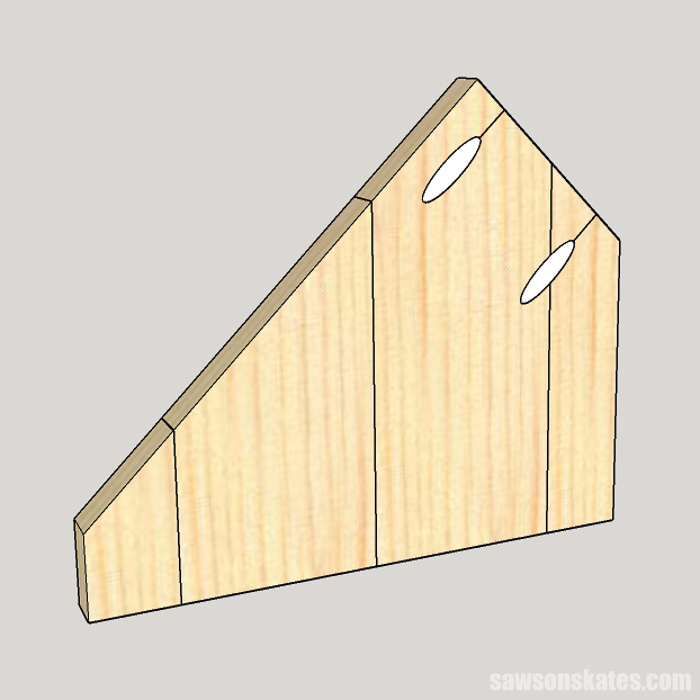
Step 1. Make the Sides
Cut eight pieces of wood to length. Apply glue and clamp to form two panels.
When the glue is dry, use the diagram in the printed plan to layout the angled cuts.
There are several ways to make these cuts. If you have one, you might be able to use a sliding miter saw. First, make the short 45-degree cut. Then, return the blade to zero, place the cut edge against the fence, and make the long straight cut.
⚠️ IMPORTANT: Please use caution when making these cuts. Holding the board with your hand could be dangerous. Using a hold down like the 10 Million Dollar Stick by FastCap is a good way to hold the board and keep your hand away from the blade.
If you don’t have a sliding miter saw, you might be able to make these cuts with a jigsaw instead. Use the jigsaw to cut next to the pencil line. Then clean up the cut by using a sander to sand up to the pencil line.
Related: Best Sanders for Furniture: Which to Choose & Why
Use the diagram in the printed plan to mark the locations for pocket holes and drill pocket holes at each mark. Be sure to make a right and a left side.
Related: How to Use a Kreg Pocket Hole Jig
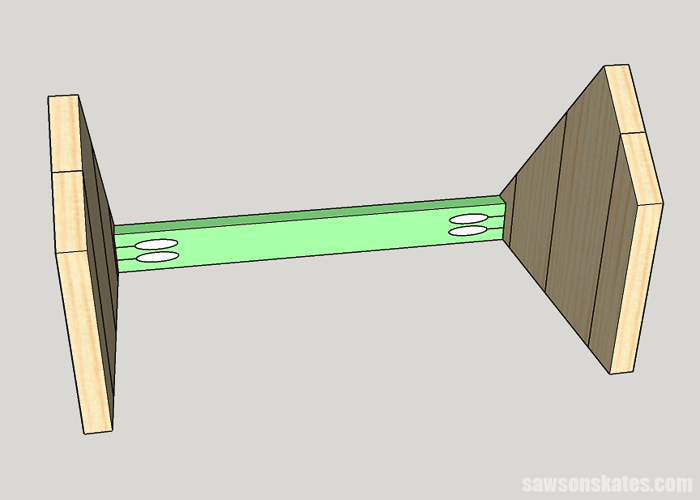
Step 2. Attach the Front Rail
Cut one piece of wood to length and drill pocket holes in each end.
Apply glue to the ends, position on the sides, and clamp. Attach using 1-¼” pocket hole screws.
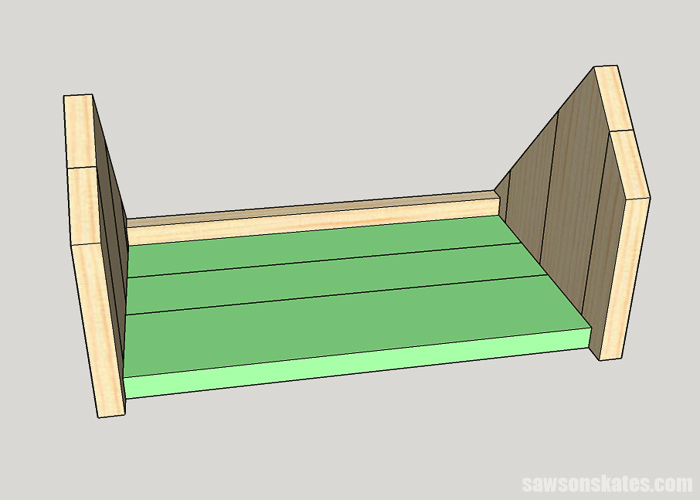
Step 3. Attach the Bottom
Cut three pieces of wood to length for the bottom. Apply glue and clamp to form a panel.
When the glue is dry, use the diagram in the printed plan to drill pocket holes on each end.
Position the bottom with the pocket holes facing down and clamp. Attach using 1-¼” pocket hole screws.
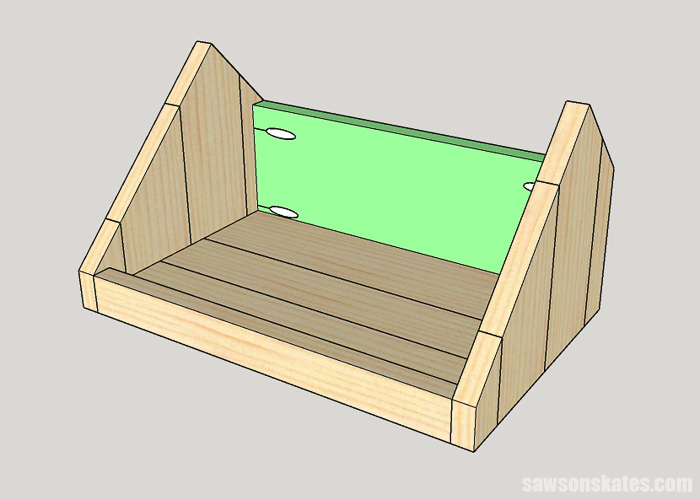
Step 4. Attach the Back
Cut one piece of wood to length for the back and drill pocket holes in each end.
Position at the back of the stand and clamp. Attach using 1-¼” pocket hole screws.
📝 NOTE: You may need a right angle drill attachment to reach these pocket holes.
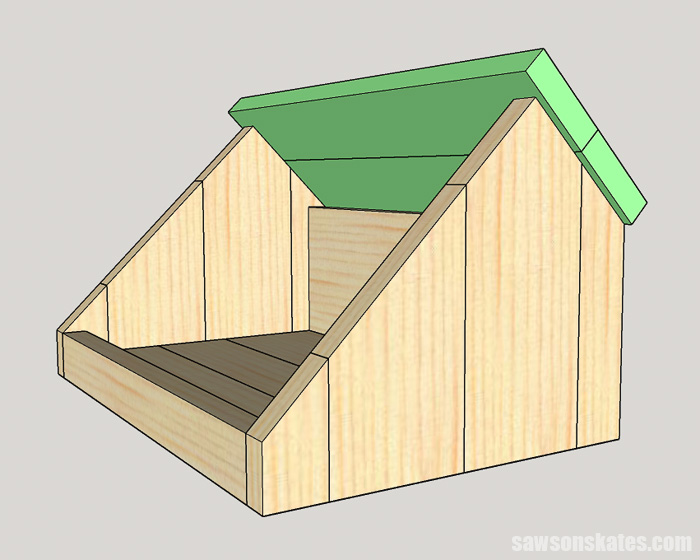
Step 5. Attach the Lid
Cut six pieces of wood to length. Two pieces will be used for the fixed lid, and four will be used for the moveable lid.
Apply glue and clamp to form a panel.
When the glue is dry, position it on the back angle and attach using 1-¼” pocket screws.
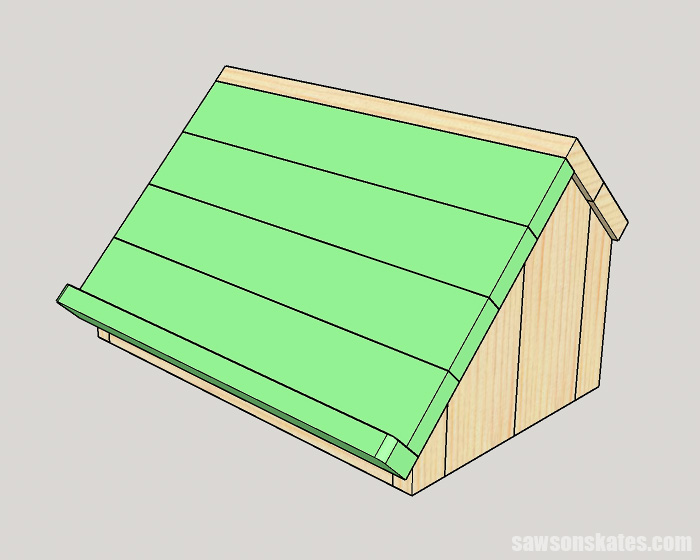
Apply glue to the remaining pieces and clamp to form a panel.
Cut one piece of wood to length for the rail.
🔄 OPTIONAL: You can use sandpaper and a sanding block to round off two of the corners.
Apply glue to the edge of the lid, position the rail, and clamp.
Center the hinge on the fixed lid and attach using the screws included with the hinge. Then use the remaining screws to attach the other side of the hinge to the moveable lid.
Step 6. Finish the Book Stand
This book stand could be finished in a variety of ways. It could be left natural, painted, stained, or a combination of paint and stain.
Final Thoughts
This DIY book stand is the perfect place to prop up your book, phone, or tablet. Plus, the lid lifts to reveal a hidden storage area that will keep your space neat and organized.
Get the free plan (including the detailed instructions and measurements) now!
Thank you for stopping by. If you enjoyed this tutorial, would you please take a moment and pin it to Pinterest? I’d really appreciate it!
Recommended For You
Pin This For Later

Hi there – I’m Scott, a woodworking enthusiast and creator of Saws on Skates, a site I started in 2015 to share easy-to-follow tutorials, space-saving shop tips, and project inspiration for DIYers at any skill level. Learn more about my woodworking journey here.