DIY Small Lumber Cart (With Wheels)
Transform your workshop with this small DIY lumber cart. Maximize space and keep your scrap wood organized with these step-by-step plans.
What Should I Build Next?
That's the question I help answer.
Every week, I send woodworking ideas to 17,000 DIYers who love building things.
You'd fit right in.
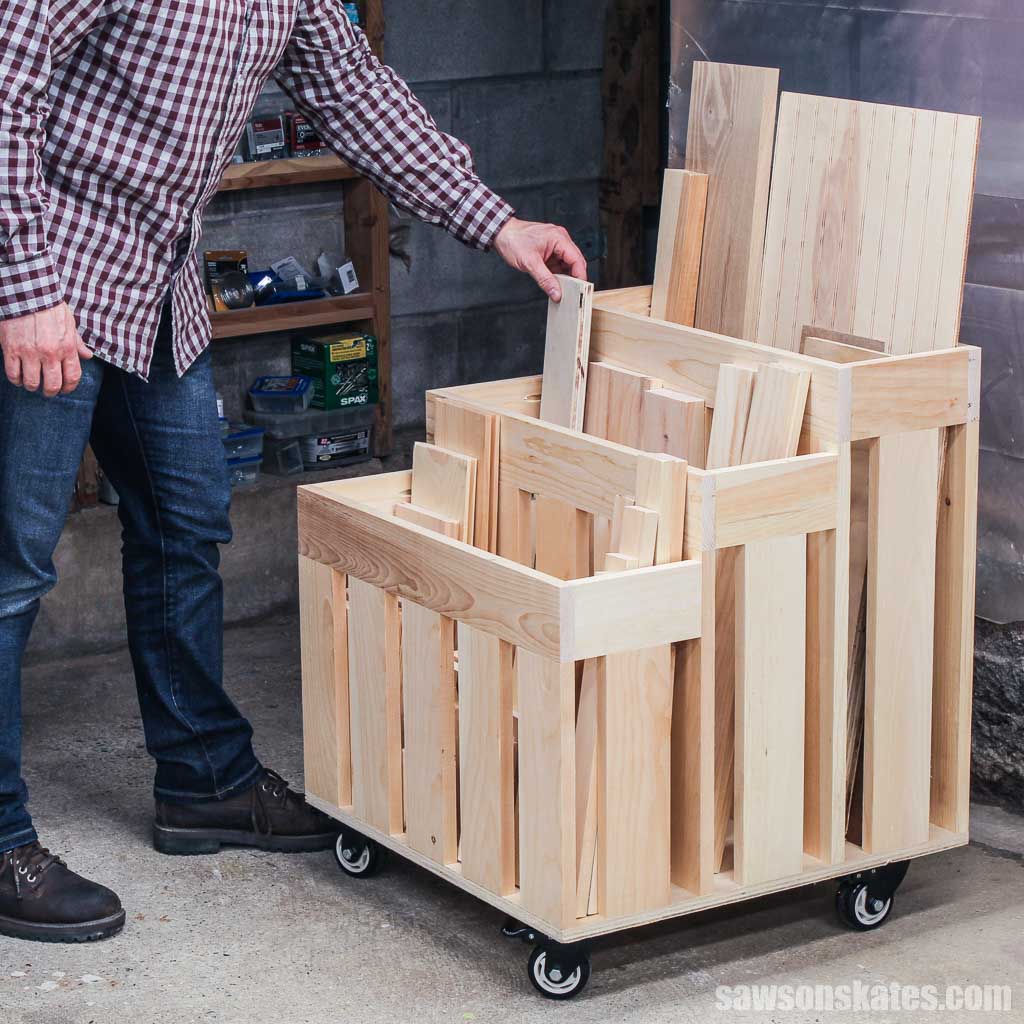
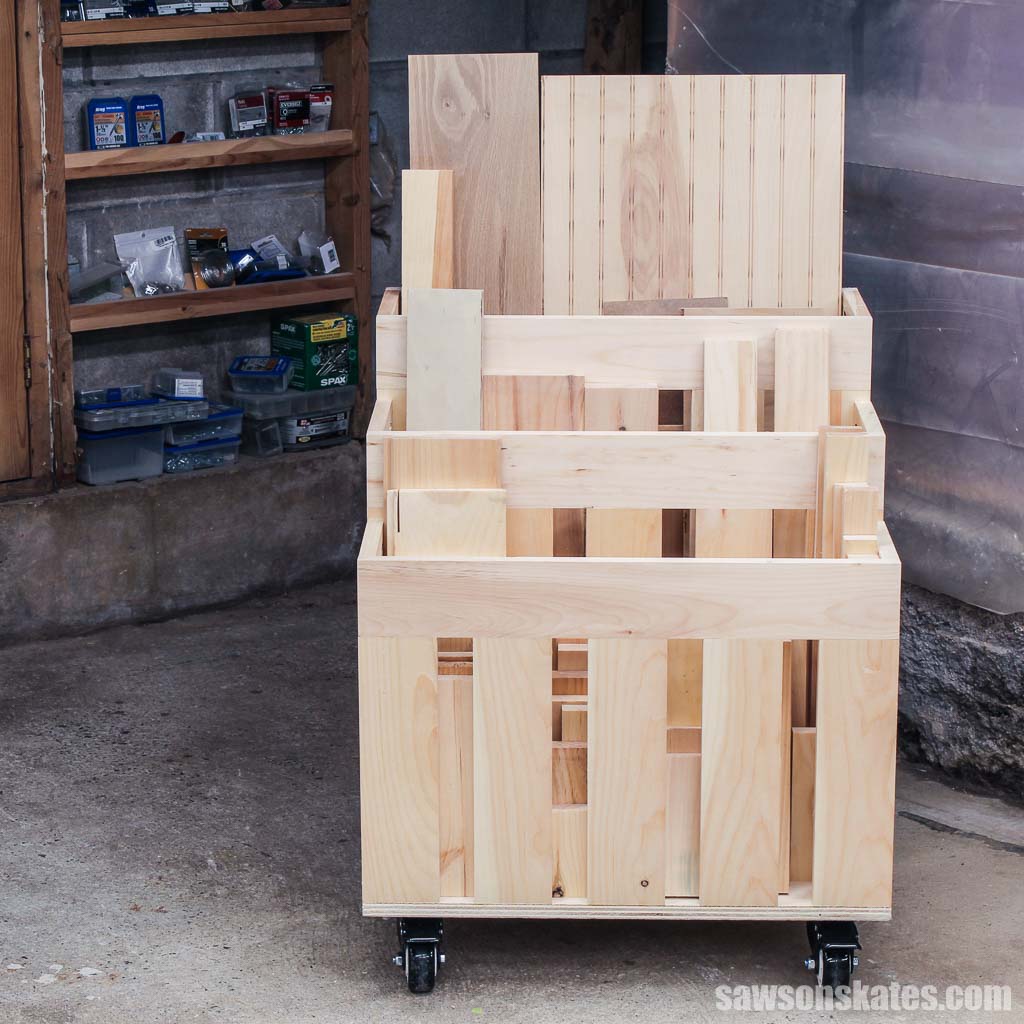
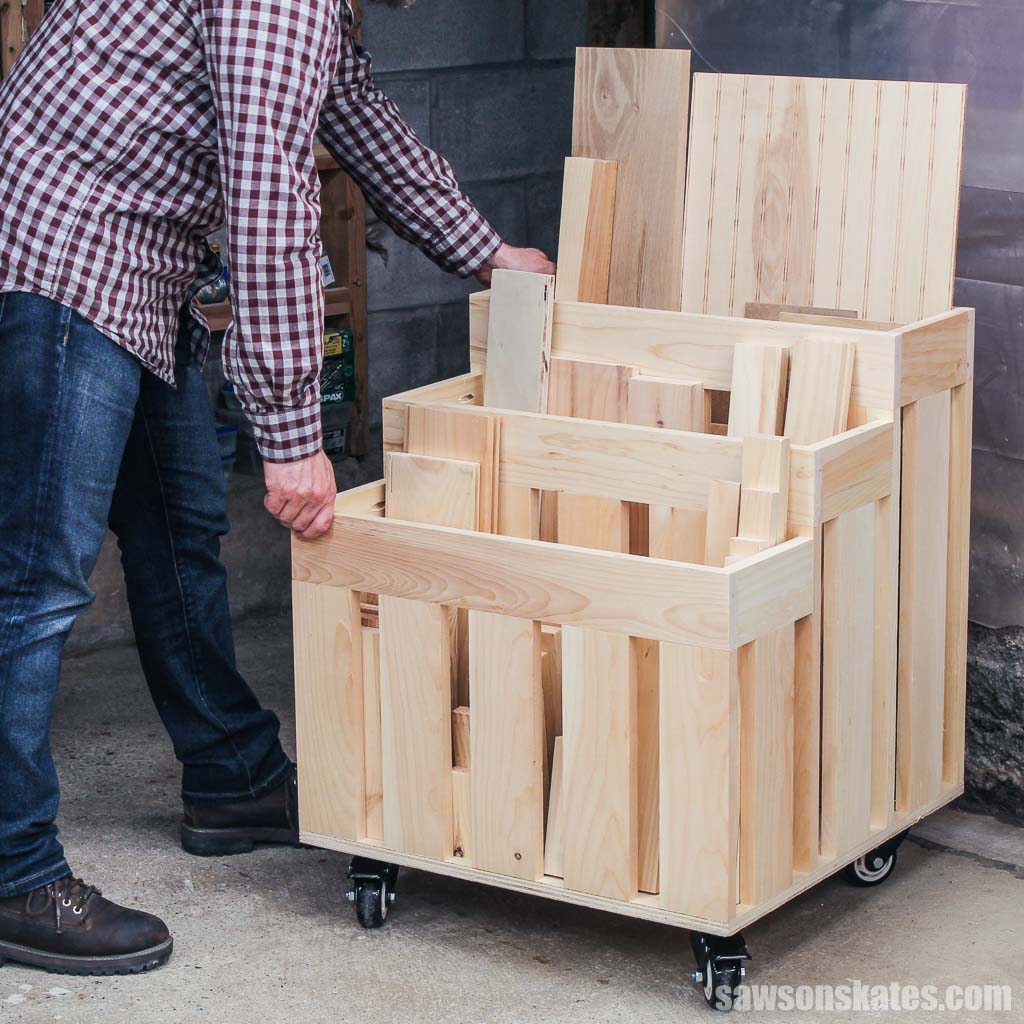
Tired of tripping over piles of wood in your cramped workshop? Need an efficient storage solution that doesn’t take up too much space? This game-changing lumber cart will revolutionize how you organize and store your scrap wood!
With its compact size and wheels for easy mobility, this small DIY lumber cart is ideal for shops that are short on space, keeping your cutoffs organized and within easy reach. Say goodbye to stumbling over stacks of wood and hello to organization with this space-saving cart!
Table of Contents
- Inspiration for This Small DIY Lumber Cart
- What Tools Do You Need?
- What Wood Should You Use?
- How to Make a DIY Small Lumber Cart
- Get the PDF Plan
This article contains affiliate links. If you purchase from these links, I may earn a small commission at no additional cost to you. Visit my site policies for more information.
Inspiration for This DIY Small Lumber Cart
My workshop has wall-mounted racks that do a decent job organizing long lumber, but I needed a better way to store short cutoffs. These scraps are too long to throw away and frustrating to store on the racks because I have to move a bunch of them whenever I need to grab a long board. Instead, they ended up piled all over my shop.
So when I saw a lumber cart in a Facebook woodworking group made from 1× material, I knew I had to build one!
Related: Beginner’s Guide to Wood Sizes
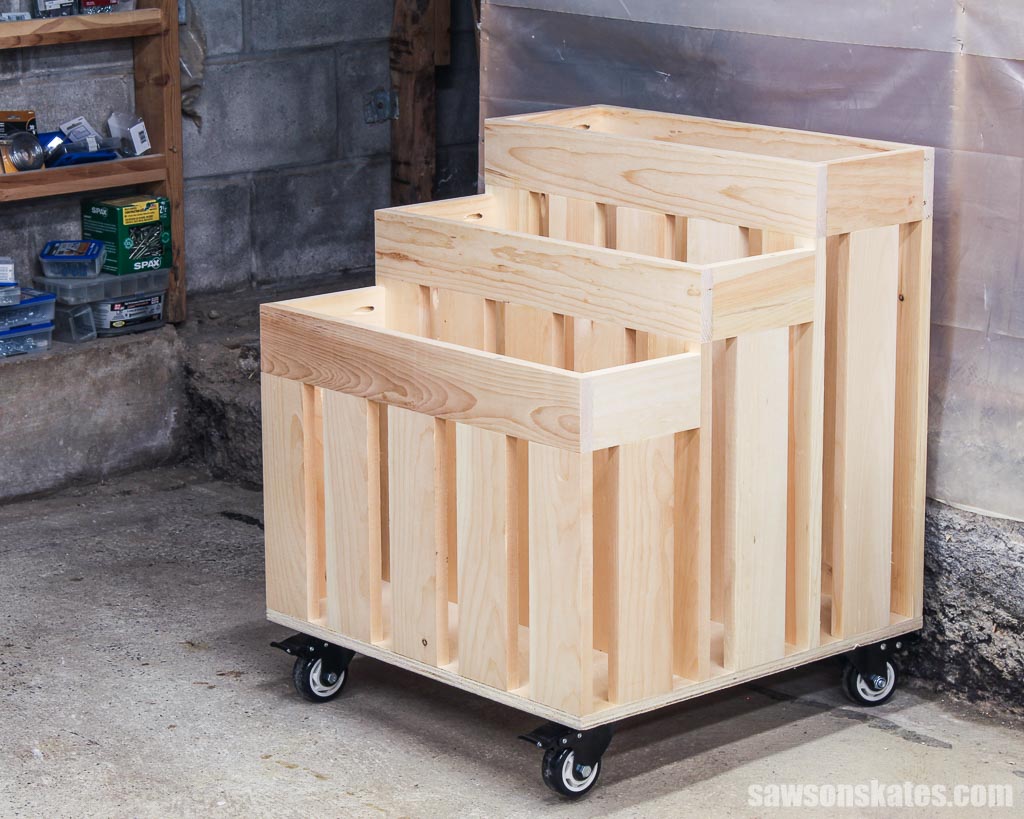
Here’s what I came up with: a compact DIY lumber cart perfect for small shops or even larger ones with limited space. It holds boards and plywood scraps, and its wheels allow you to move it for easy access while working on projects.
What Tools Do You Need?
This small DIY lumber cart with handy wheels is easy to make with just three common tools: a miter saw, a pocket hole jig, and a drill.
Miter Saw
I cut the lumber cart’s components to their required lengths using my miter saw.
Drill
I used a drill to create the pocket holes and attach the parts together with pocket hole screws.
A right angle drill attachment is also useful, as the pocket hole locations on the side rails are hard to reach with a traditional driver.
Pocket Hole Jig
I used my Kreg K5 to drill the pocket holes that join the parts, but any pocket hole jig will work.
Related: Which Kreg Jig Should You Buy? (Here’s the Answer)
What Wood Should You Use?
I designed this lumber cart with pine boards and one small plywood sheet because these materials are:
- Easy to find most home improvement stores
- Easy to maneuver in a small workshop
- Easy to transport in most vehicles
Small plywood sheets are convenient because you don’t need a table saw or circular saw to cut them down to size. However, they’re more expensive per square foot than larger sheets. If you have the tools and space, buying a large sheet and cutting it down is more cost-effective.
Related: Table Saw vs Circular Saw (Which Should You Buy?)
DIY Small Lumber Cart
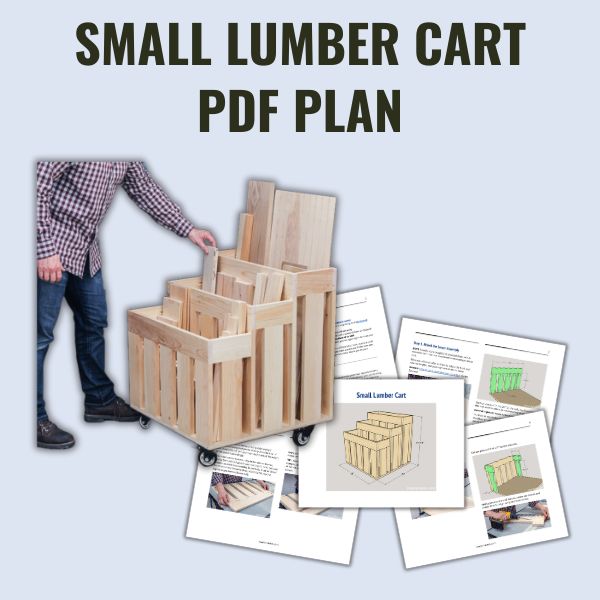
Printed Plan
Get the PDF plan here (includes detailed instructions, measurements, and bonus tips)
Supplies
- Wood (per the printed plan)
- Wood Glue
- 1-¼” Pocket Hole Screws
- (4) 3″ Casters (I used these)
- #10 ¾” Wood Screws
Tools
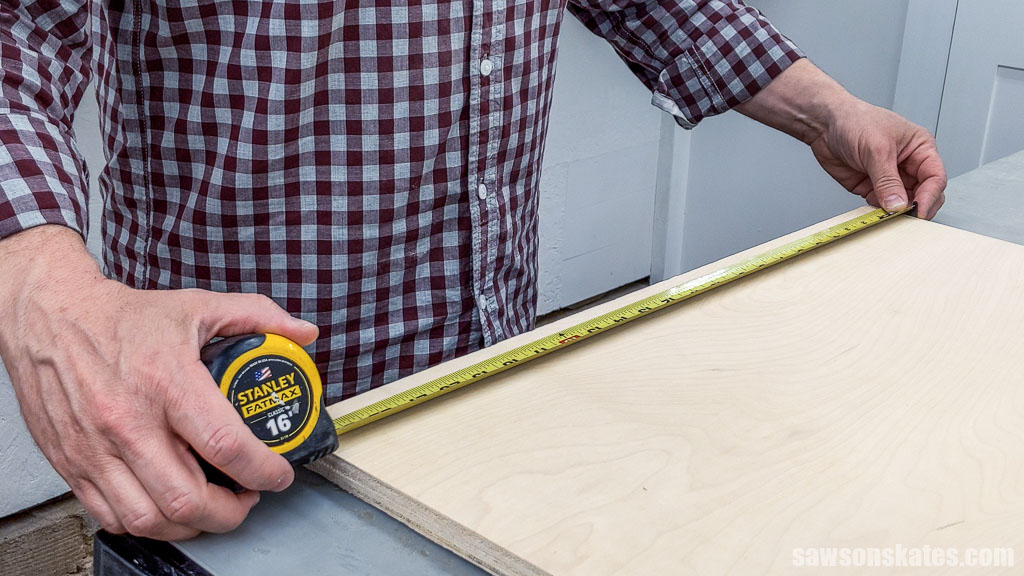
- Tape Measure
- Miter Saw
- Pocket Hole Jig
- Drill
- Drill Bits
- Right Angle Drill Attachment
Step 1. Attach the Lower Assembly
NOTE: I used a store-bought plywood sheet and I recommend measuring to make sure it’s the correct size. Mine was a little smaller, so I had to adjust the front and side rail lengths, and you may have to do the same.
Related: How to Use a Tape Measure Correctly (Tips for Success)
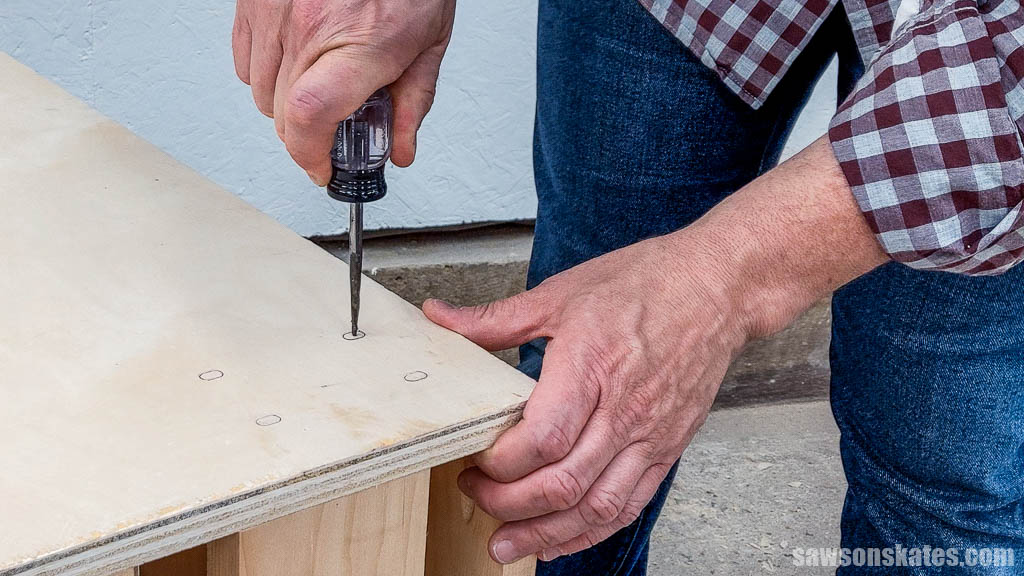
Cut four pieces of wood to length for the rails. You’ll use one in this step and the others in the remaining steps. Don’t drill pocket holes in the rails! You’ll see in the photos that I goofed and did it anyway. I would’ve remade them if this were a furniture piece, but I wasn’t concerned since this is a shop project.
Related: Why Can’t I Make Accurate Cuts? (& How to Fix It!)
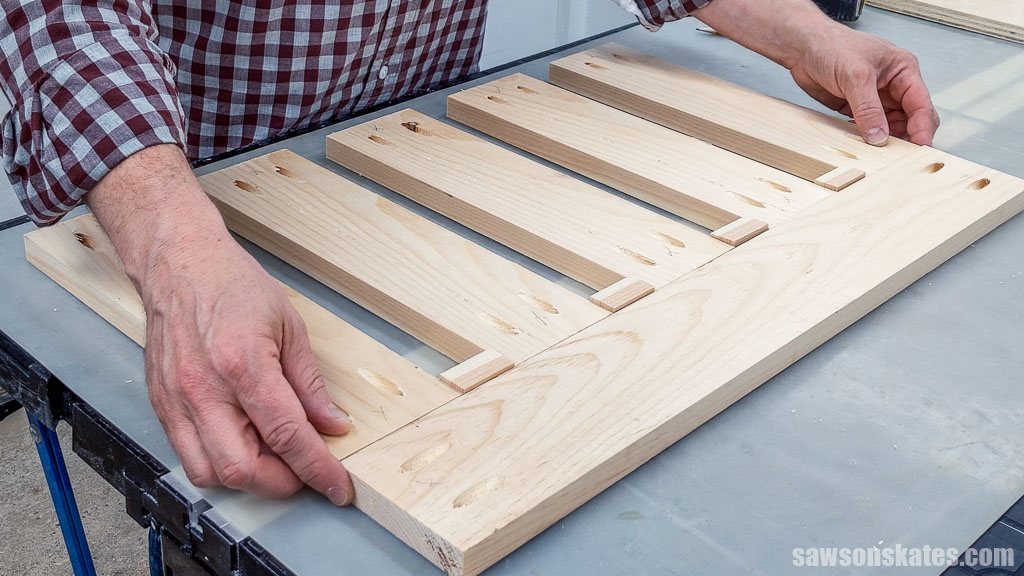
Cut seven pieces of wood to length for the slats and drill pocket holes in each end.
Related: How to Use a Pocket Hole Jig (& Beginner Pitfalls to Avoid)
To help you space the forward-facing slats evenly, I recommend cutting four pieces of scrap wood to length.
Once I had cut the spacers, I dry-fit the slats on the rail, placing them without glue to see how they fit. Wood can vary in width, so while this assembly fit perfectly, I had to “cheat” the others in the following steps, adjusting the spacing slightly to get them to fit correctly.
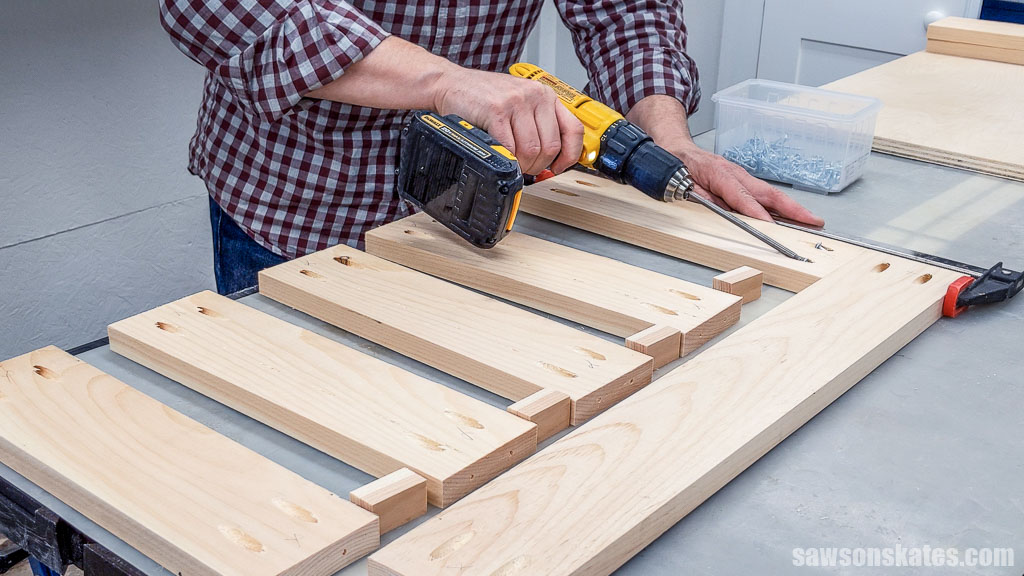
Apply glue to one end of the slats, position on the rail, and clamp. Attach using pocket hole screws.
TIP: I found it easier to attach the slats one by one. I first clamped, then flipped the assembly, ensuring that the face of the slat and rail were flush before driving the pocket screws.
Position the lower assembly on the plywood and clamp. Attach using pocket hole screws.
Cut two pieces of wood to length for the side rails.
Apply glue to one end of the slat, center on the rail, and clamp. Attach using pocket hole screws.

Apply glue to one end of the rail, position on the lower assembly, and clamp. Attach the rail using pocket hole screws.
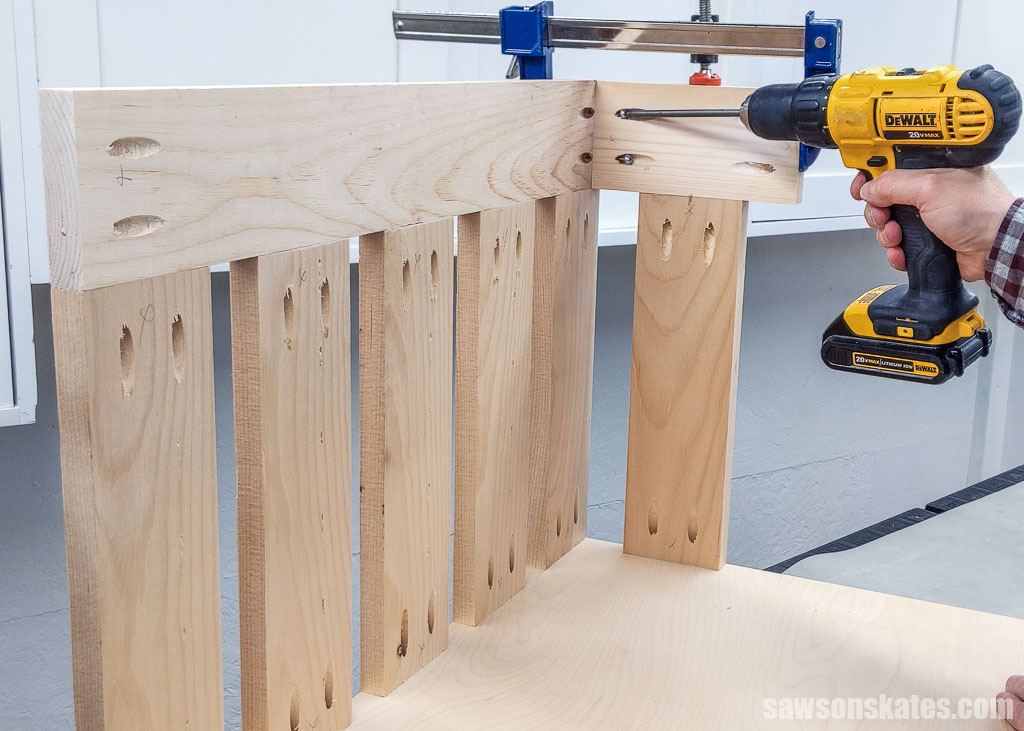
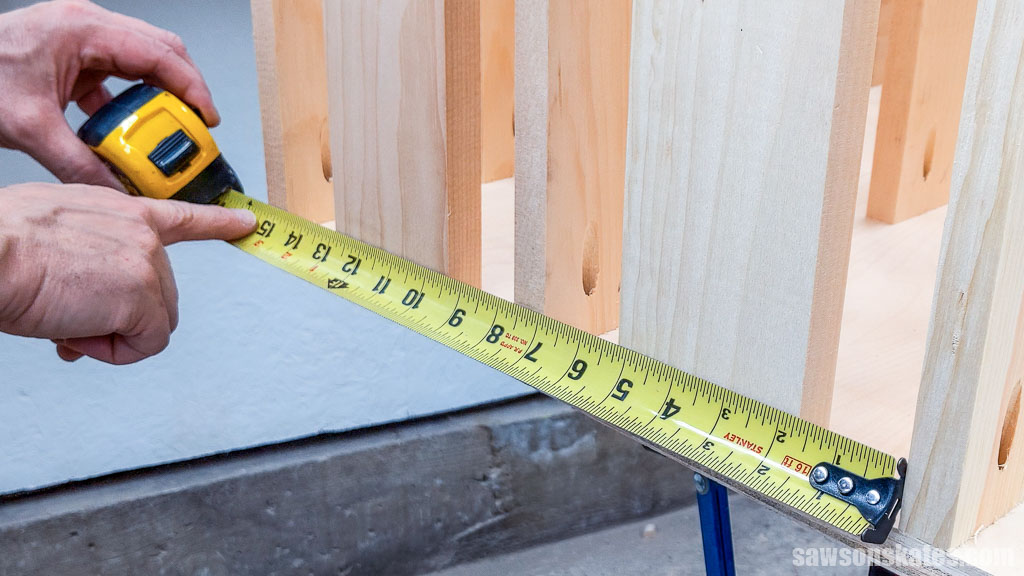
At the top, measure the distance between the slat and the lower assembly. Then, adjust the slat’s bottom so it’s the same distance, and clamp it in place.
Attach the slat using pocket hole screws.

Step 2. Attach the Middle Assembly
The remaining steps are almost identical to the first step, so I won’t include as many photos; otherwise, you’d think, “This looks like what I’ve seen before!”
Cut seven pieces of wood to length for the slats and drill pocket holes in each end.
Using the spacers you cut in Step 1, dry-fit the slats on the rail and adjust the spacing if necessary.
Apply glue to one end of the slats, position on the rail, and clamp. Attach using pocket hole screws.
TIP: I found it easier to attach the slats one by one. I first clamped, then flipped the assembly, ensuring that the face of the slat and rail were flush before driving the pocket screws.
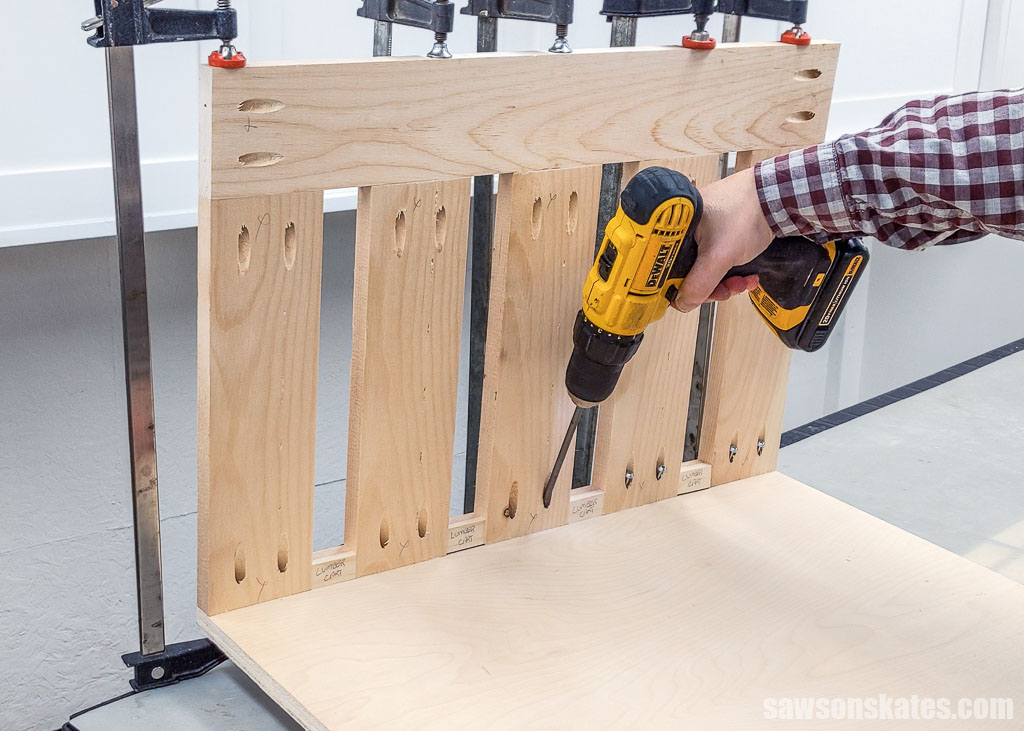
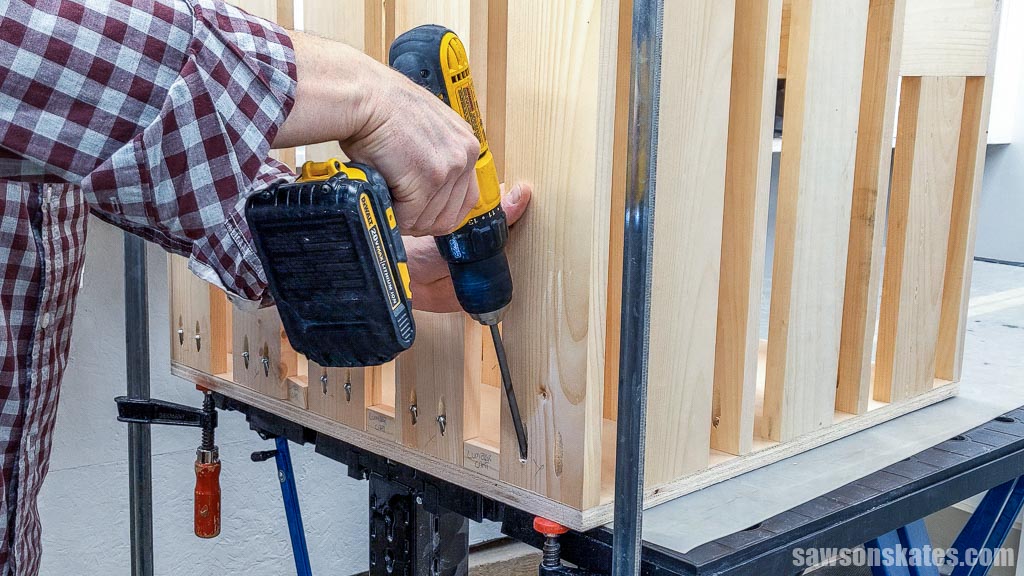
Apply glue to the lower assembly’s side rails, position the middle assembly and clamp.
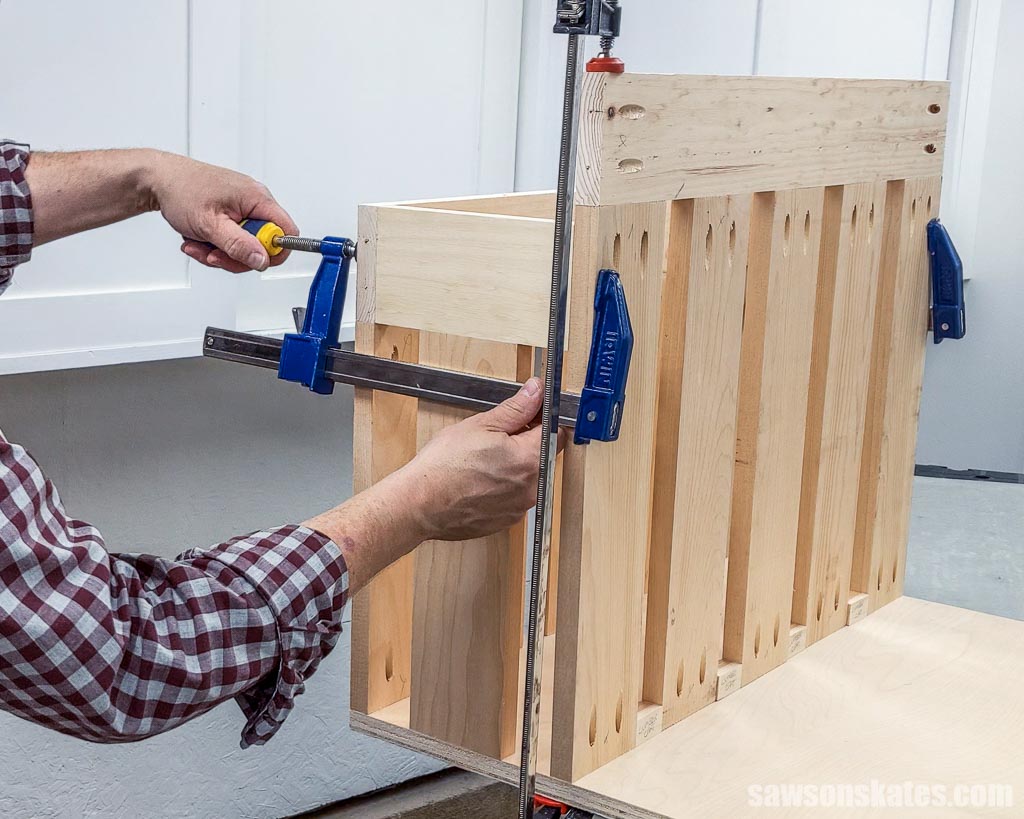
Because these pocket holes are difficult to access, I used a right angle drill attachment to reach them. Attach using pocket screws.
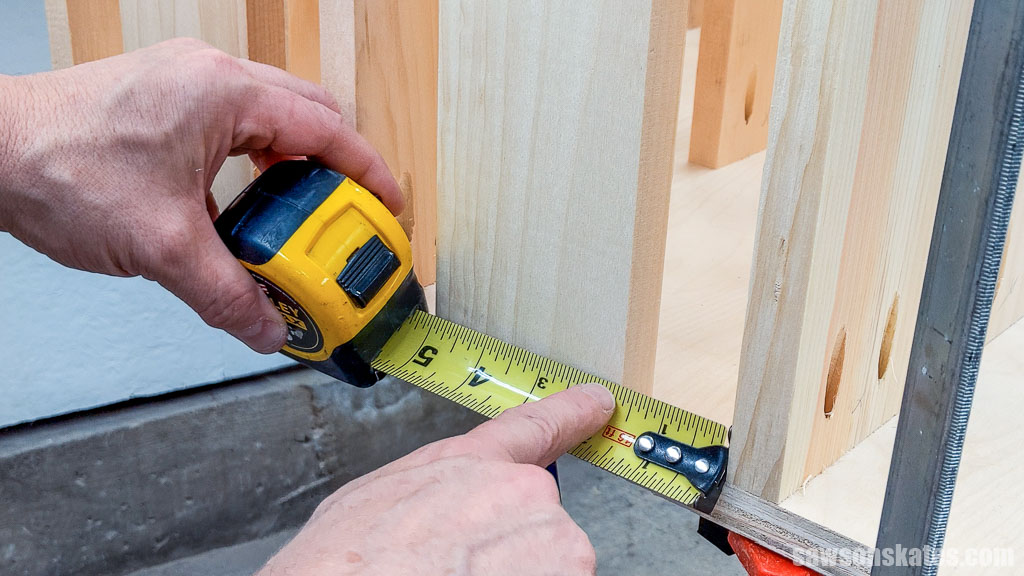
At the top, measure the distance between the slat and the middle assembly. Then, adjust the slat’s bottom so it’s the same distance, and clamp it in place.
TIP: I recommend attaching the two outer slats before attaching the inner slats.
Then, measure the distance between the outer slat and the cart’s front, adjusting the inner slats to that measurement. Attach using pocket screws.
NOTE: This photo shows me measuring the upper assembly after installing it in Step 3, but you’ll use the same measuring technique for the middle assembly.
Cut two pieces of wood to length for the side rails.
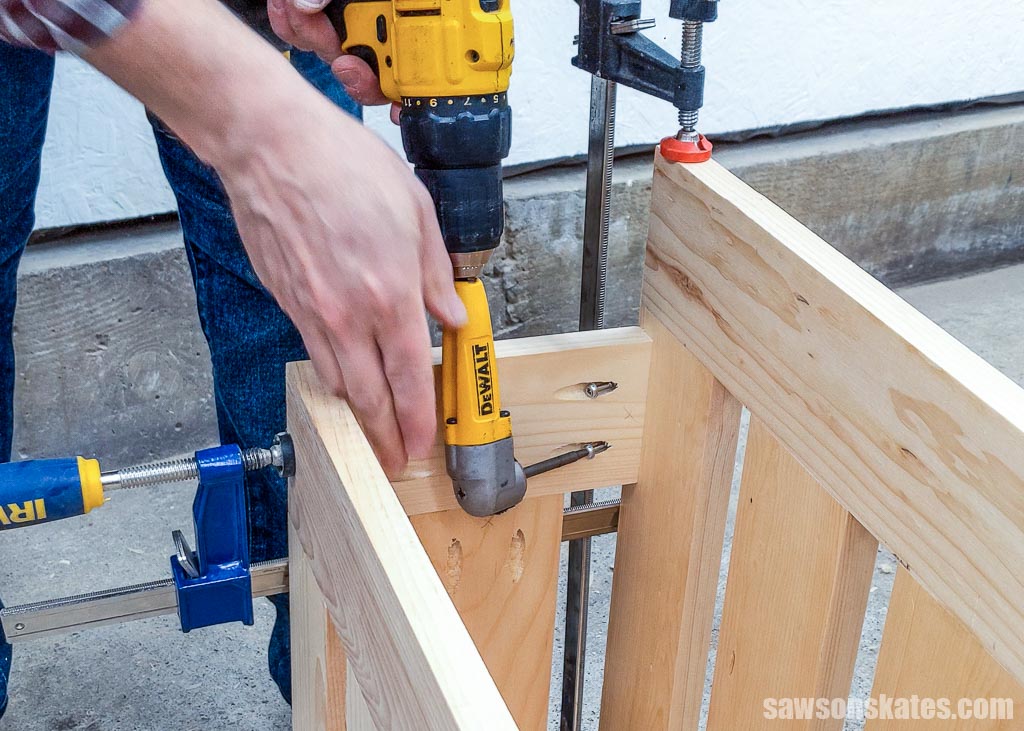
Apply glue to one end of the slat, center on the rail, and clamp. Attach using pocket hole screws.
Apply glue to one end of the rail, position on the middle assembly, and clamp. Attach the rail using pocket hole screws.
At the top, measure the distance between the slat and the middle assembly. Then, adjust the slat’s bottom so it’s the same distance, and clamp it in place.
Attach the slats using pocket hole screws.
Step 3. Attach the Upper Assemblies
The upper assemblies are similar to the lower and middle ones; however, you’ll make two instead of one.
Cut 14 pieces of wood to length for the slats and drill pocket holes in each end.
Then, except for cutting the slats, repeat Step 2 to make and attach the upper assemblies.
TIP: You may have to adjust the length of the side rails for it to fit properly on your plywood.
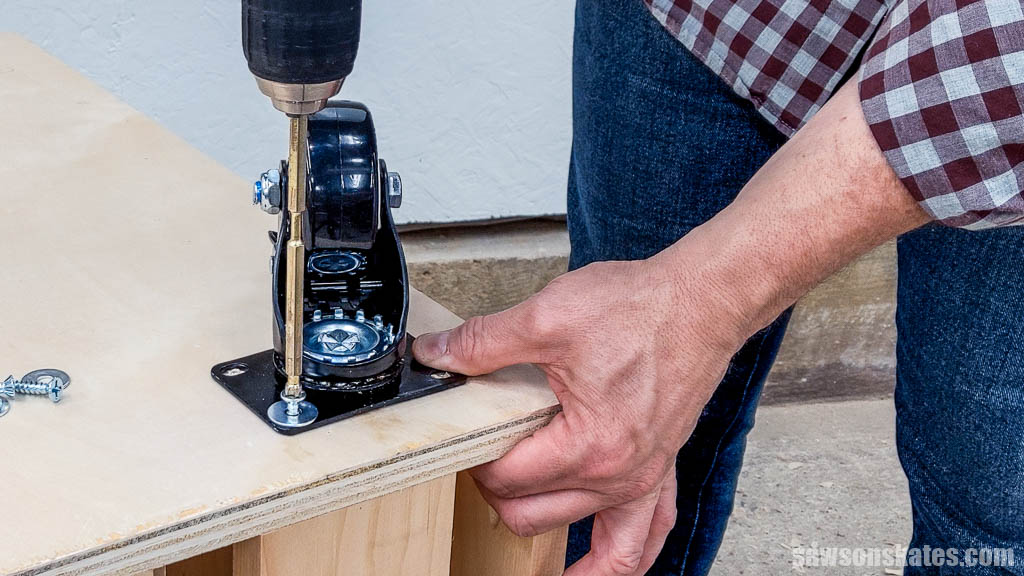
Step 4. Attach the Wheels
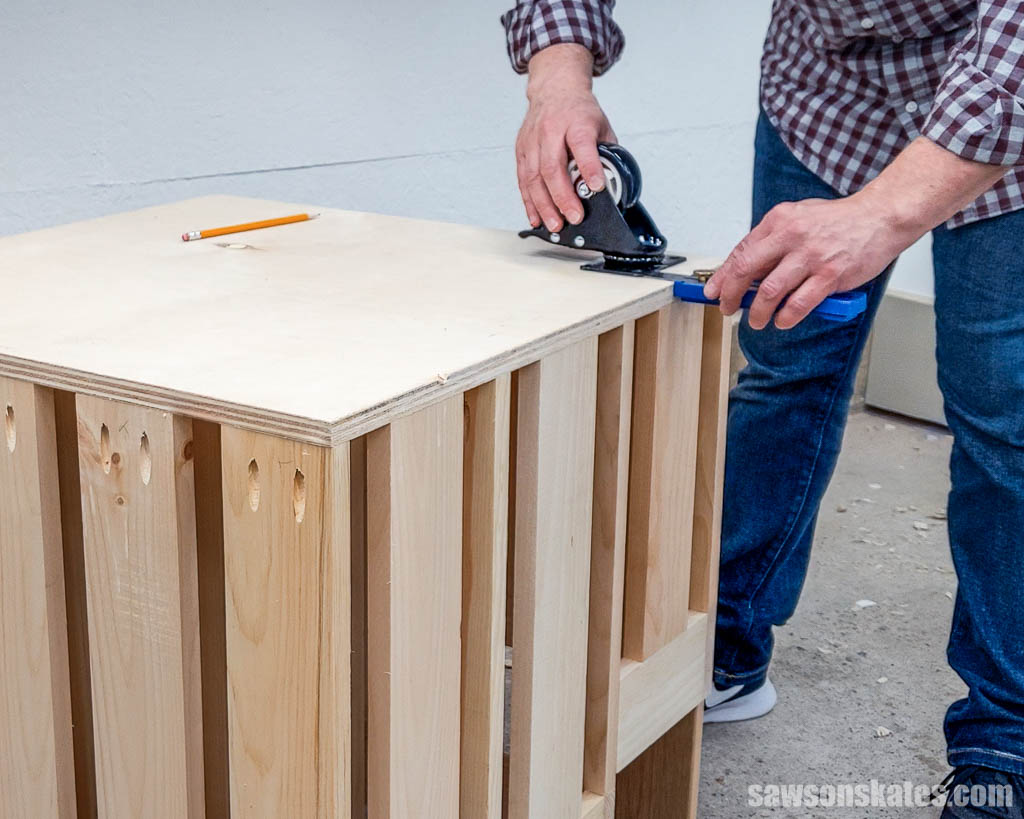
To attach the wheels, I turned the cart upside down and cut two pieces of scrap wood to the same length as the distance between the front assembly and the floor, creating a sturdy, level surface to work on.
I set my Kreg Multi-Mark, positioning each caster from the edge.
Then, I traced the caster’s four holes onto the plywood.
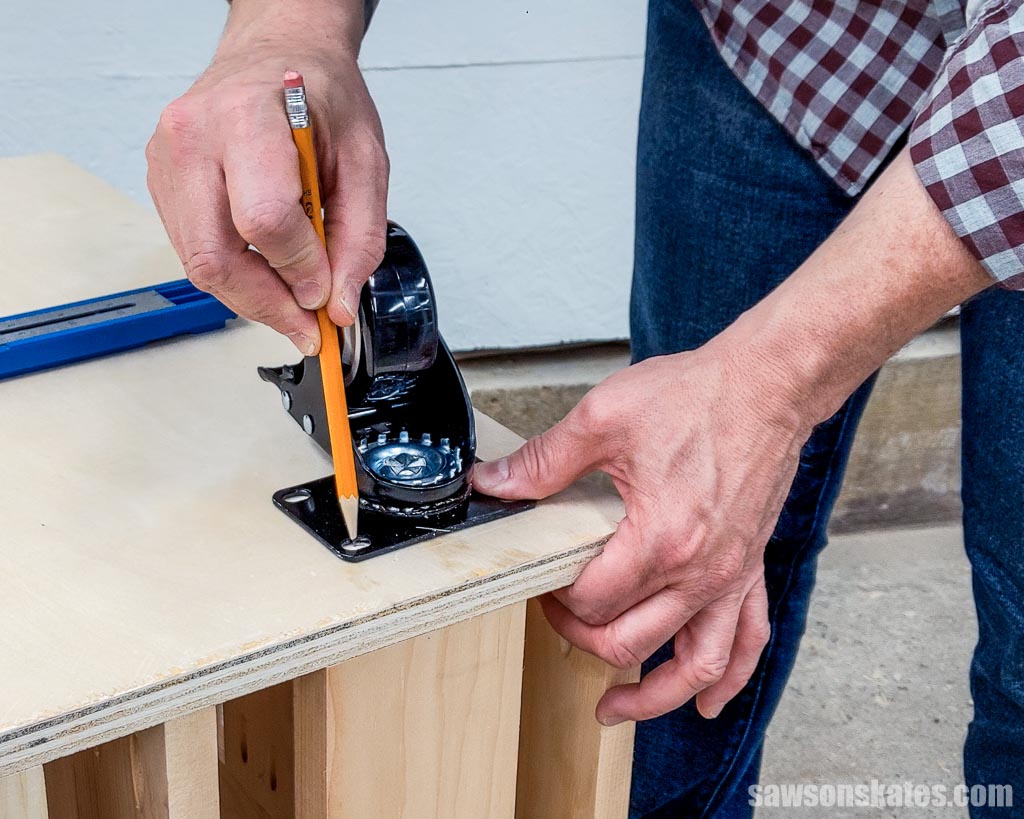
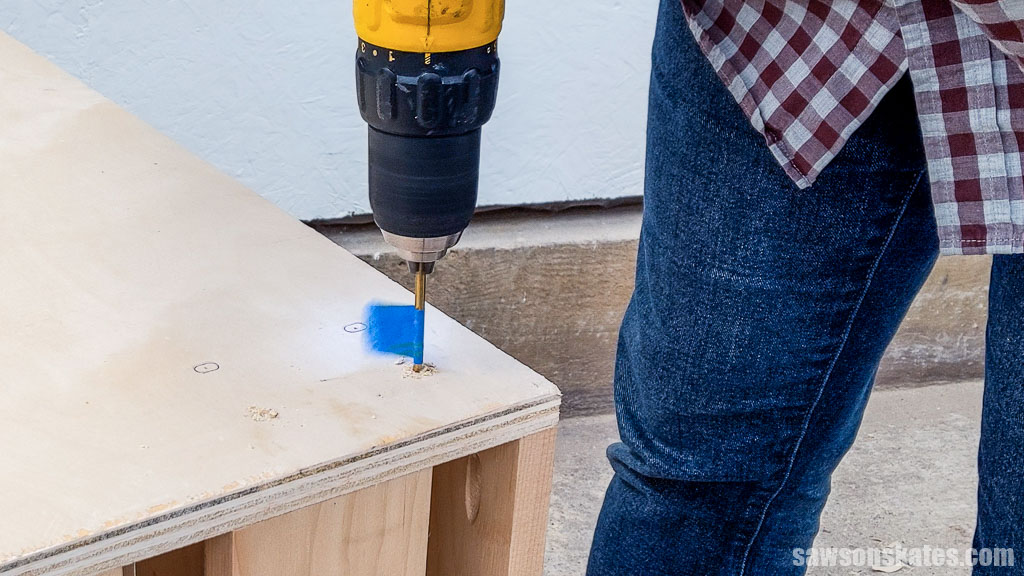
In the middle of each, I used an awl to make a starting point for the drill bit.
Related: What is an Awl? (+ How to Use It)
Then, using painter’s tape as a depth stop, I drilled pilot holes at each mark.
Related: How to Drill Pilot Holes (Why, When & Correct Size)
I positioned the caster and attached using wood screws and the washers that came with the wheels. Repeat for the remaining casters.
That’s it. Your lumber cart is ready to store your scrap wood!
Includes:
- List of tools and materials
- Complete measurements (in inches)
- Easy-to-follow instructions
- Step-by-step photos
- Detailed diagrams
Final Thoughts
This DIY lumber cart is a great project for those with small workshops or limited space. It provides a place to store and organize scrap wood, allowing easy mobility around your workshop.
Don’t wait. Get your PDF plan (including the detailed instructions and measurements) now!
Thank you for stopping by. If you enjoyed this tutorial, would you please take a moment and pin it to Pinterest? I’d really appreciate it!
Recommended For You

Pin This For Later

Hi there – I’m Scott, a woodworking enthusiast and creator of Saws on Skates, a site I started in 2015 to share easy-to-follow tutorials, space-saving shop tips, and project inspiration for DIYers at any skill level. Learn more about my woodworking journey here.
Hi Scott, this cart is a better storage solution than some of the big, lumbering carts that I have seen on other sites. It’s size is appropriate for all of the smaller offcuts that inevitably end up getting stacked somewhere to become a trip hazard! I currently use a cardboard box that sits crammed at the side of my workbench. This isn’t ideal when it gets overfull! It’s literally bulging at the seams!
So, thanks for the plans. I look forward to building this for my she-shed!
Carmel 🙂