How to Make a DIY Spray Paint Turntable
Make your next spray paint project easier with this DIY painting turntable! It’s simple to make with scrap wood and inexpensive lazy susan hardware.
What Should I Build Next?
That's the question I help answer.
Every week, I send woodworking ideas to 17,000 DIYers who love building things.
You'd fit right in.
Table of Contents
- What is a Spray Paint Turntable?
- My Original Paint Turntable
- What Hardware Do You Need?
- How to Make a DIY Spray Paint Turntable
- Get the Free Plan
This article contains affiliate links. If you purchase from these links, I may earn a small commission at no additional cost to you. Visit my site policies for more information.
What is a Spray Paint Turntable?
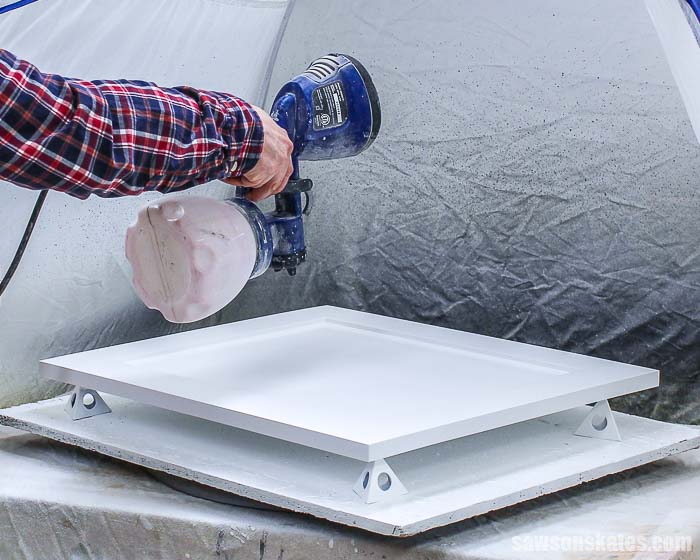
This DIY paint turntable makes spraying paint easier. You’ll never miss coating an area of your project with paint because you can spin your project as you spray. You’ll be able to completely coat your project no matter if you’re using spray paint from a can or your HVLP paint sprayer. You can make your own spray paint turntable with scrap wood and inexpensive lazy susan hardware.
You may also enjoy How to Spray Paint Furniture Indoors Without Making a Mess and 7 Ways to Prevent Orange Peel Texture When Using a Paint Sprayer.
My Original Paint Turntable
My aunt has been DIYing for years. So I wasn’t surprised when she made me a paint turntable using an old kitchen table lazy susan, plywood and a few drywall screws.
I used her turntable for lots of DIY projects. You may have seen me using it for projects like the DIY Ladder Chair, the sign for my truck camper, the DIY Collage Picture Frames and more.
Her turntable worked great for years, but there was a problem. That recycled kitchen table lazy susan was designed to hold salt and pepper shakers not furniture projects.
After years of using my aunt’s turntable the ball bearings started popping out of the lazy susan like gumballs out of a gumball machine! The turntable was a little lopsided without the ball bearings.
What Hardware Do You Need?
You can buy paint turntables like this one, but I really liked the size of the one my aunt made for me. So I did a little research and learned you can buy lazy susan hardware online. There were lots of options, but I bought this inexpensive one that’s rated for 500 pounds.

How to Make a DIY Spray Paint Turntable
Printed Plan
Get the FREE plan here (includes detailed instructions, measurements, and bonus tips)
Materials
Tools
- Tape Measure
- Drill
- ⁷/₆₄” Drill Bit
- ⅜” Drill Bit
- Circular Saw or Table Saw
Step 1. Cut the Plywood
Using either a table saw or circular saw, cut one piece of plywood to size for the top and one piece to size for the base.
NOTE: My project uses repurposed wood, so yours might look different if you’re using new plywood; however, the assembly instructions are the same.
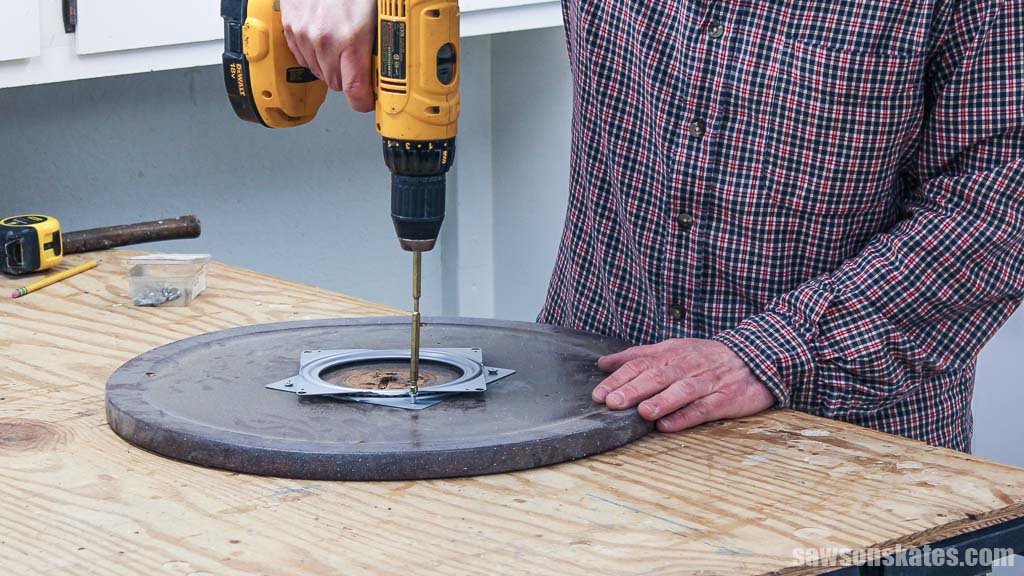
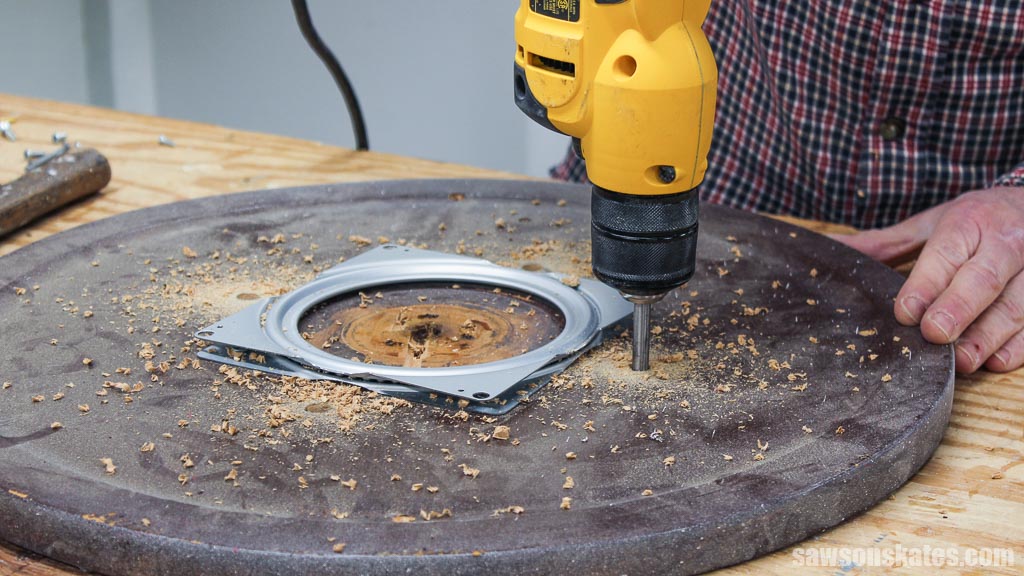
Step 2. Attach the Hardware to the Base
Center the lazy susan on the base. (Remember, I’m using repurposed wood, so my base is round.)
I used an awl to mark the center of the holes in the lazy susan, making a starting point for the drill bit.
Related: What is an Awl? (& How to Use It)
Then, I used a ⁷/₆₄” bit to drill a pilot hole at each location.
Related: How to Drill Pilot Holes (Why, When & Correct Size)
Attach the hardware using ½” wood screws.
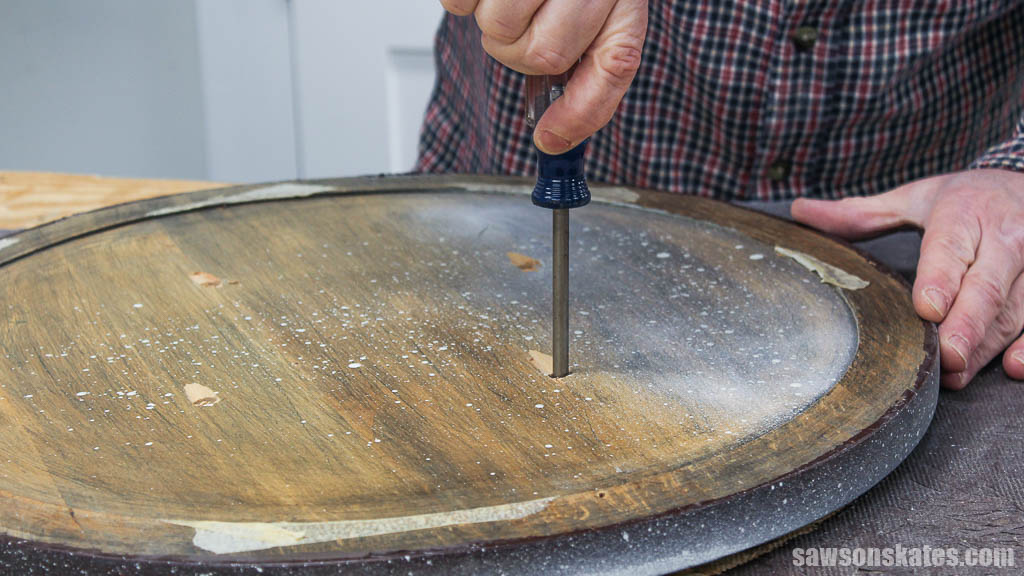
Step 3. Attach the Hardware to the Top
The instructions that came with my lazy susan seemed a bit complex, so I found a different way to attach it.
I began by rotating the lazy susan’s top 45 degrees relative to its bottom. Next, I marked the hole locations with a pencil.
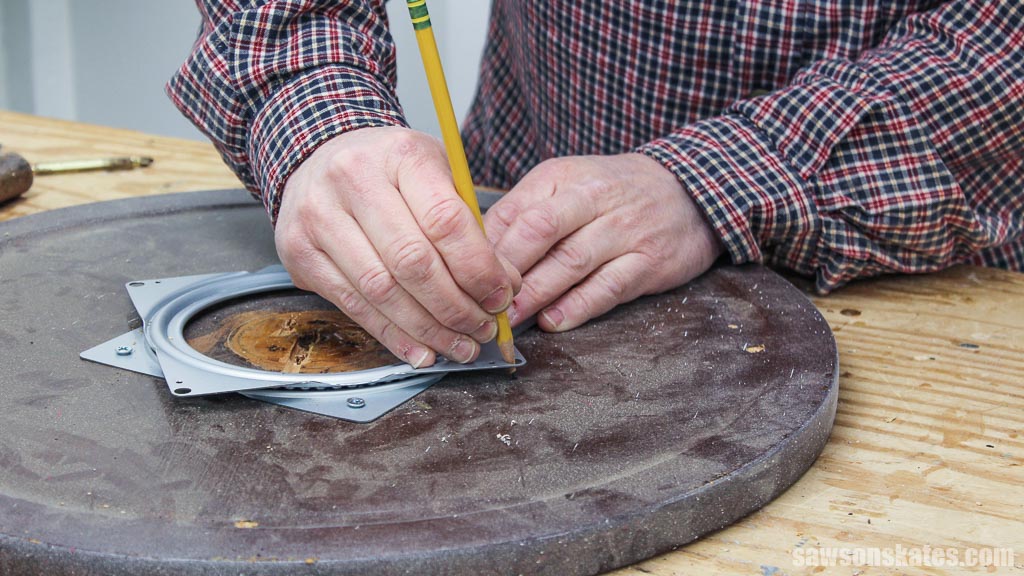
I used an awl to make a starting point for the drill bit and a ⅜” bit to make a hole at each location.
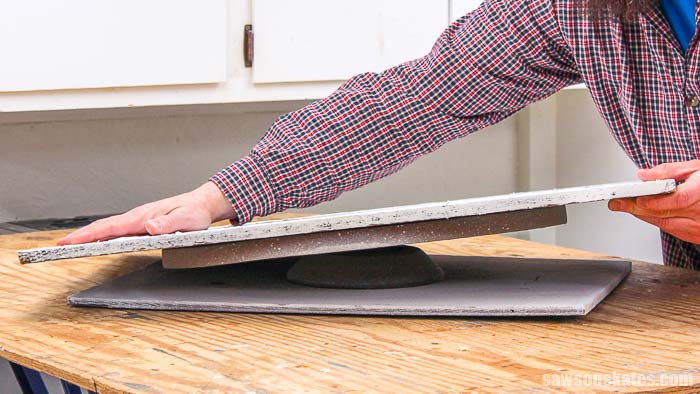
NOTE: I didn’t do it here, but I recommend placing a sacrificial board underneath your workpiece to protect your workbench.
I placed the turntable’s top on my workbench and centered the base on it.
In the base’s holes I drilled in Step 2, I used an awl to mark the center of the lazy susan’s holes and a ⁷/₆₄” bit to drill a pilot hole at each location.
I inserted ½” wood screws into the holes and drove them with a screwdriver.
That’s it. Your paint turntable is ready to use!
Final Thoughts
A DIY paint turntable makes spraying paint easier. You’ll never miss coating an area of your project with paint again because you can spin your project as you spray. You’ll be able to completely coat your project no matter if you’re using spray paint from a can or your HVLP paint sprayer. Make a spray paint turntable today!
Thank you for stopping by. If you found this information helpful, would you please pin it to Pinterest? Other DIYers would appreciate it and I would too! Thank you – Scott
Recommended For You

Pin This For Later

Hi there – I’m Scott, a woodworking enthusiast and creator of Saws on Skates, a site I started in 2015 to share easy-to-follow tutorials, space-saving shop tips, and project inspiration for DIYers at any skill level. Learn more about my woodworking journey here.
I’m building a book case for my granddaughter and build this turntable for use in my Homeright spray enclosure. I am 67 years old and recently had knee replacement surgery. This turntable was a lifesaver. Simply spray and rotate the workpiece. It’s easy to make sure all sides get painted without shuffling around in the spray enclosure.
Great idea Scott.
Hi Bill – I’m glad this paint turntable worked well for your project!