Easy DIY Garden Tool Storage Rack Organizes Tools in One Spot
Want to improve your garden tool organization? Get gear off the floor with this easy DIY garden tool storage rack and reduce clutter in your garage or shed.
What Should I Build Next?
That's the question I help answer.
Every week, I send woodworking ideas to 17,000 DIYers who love building things.
You'd fit right in.
Wall-Mounted DIY Garden Tool Organizer with Shelf
Are your lawn tools scattered across your garage or shed? Are you tired of tripping over that string trimmer? Have you lost the battery for your leaf blower again? Can’t find the extra string for your weed whacker?
Get your garden tools organized with this DIY garden tool holder. It’s easy to make with a few simple cuts and a few common woodworking tools.
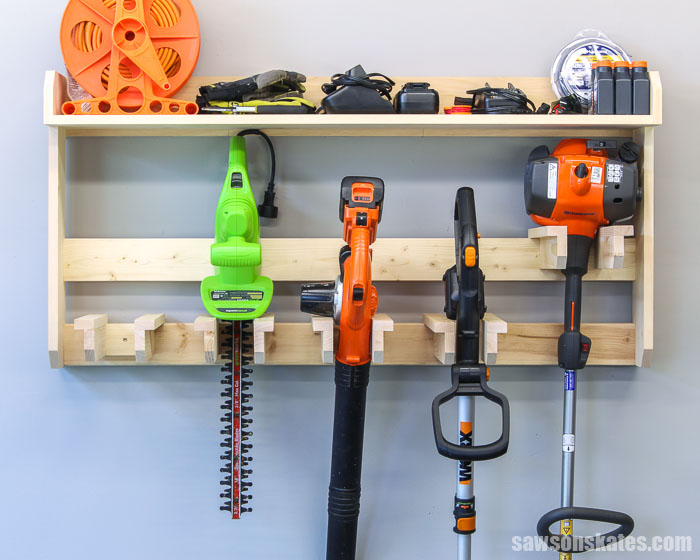
Use this wall-mounted organizer to hang lawn tools in your garage or store tools in your shed.
You can customize the hangers to fit your tools. Use the large storage shelf to organize battery chargers and batteries, extra weed whacker string, extension cords, garden gloves, and more.
The plan includes all of the measurements and detailed step-by-step instructions. Get yours now and build one today.
This article contains affiliate links. If you purchase from these links, I may earn a small commission at no additional cost to you. Visit my site policies for more information.
Why I Needed Better Garden Tool Organization
My garden tools were a disorganized mess. There was a string trimmer propped up in a corner over there. I just tripped over the leaf blower for the third time. And who knows where the extra weed whacker string is. Guess I’ll have to stop everything and search for it AGAIN!
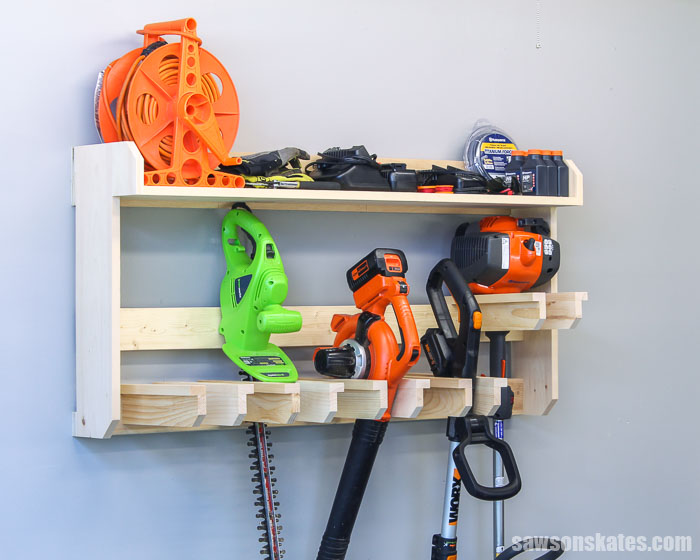
I was tired of my garage being a disaster zone, so I designed this wall-mounted yard tool organizer. It’s the perfect way to organize lawn tools in a garage or shed.
Up top, there is a large storage shelf to organize battery chargers and batteries, extra weed whacker string, extension cords, garden gloves, and more.
Related: DIY Extension Cord Holder (Easy & Cheap!)
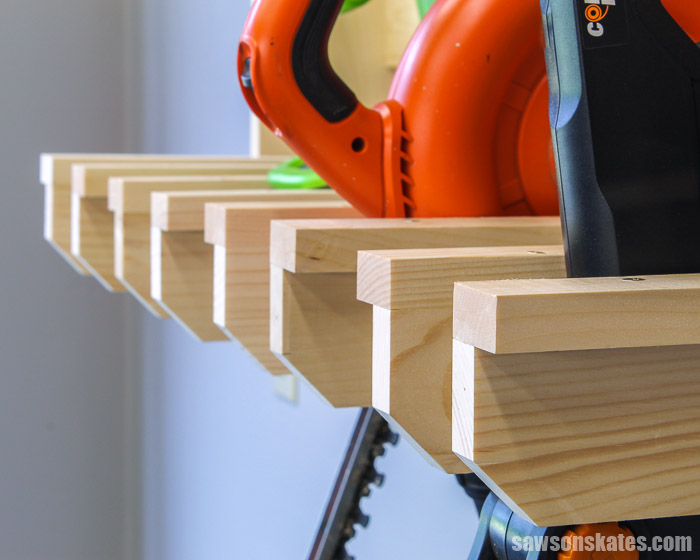
Below are five hangers you can customize to fit lawn tools like a weed whacker, leaf blower, hedge trimmer, and more.
What Garden Tools Can You Organize?
On the customizable hangers, you can store:
- Weed whacker
- Leaf blower
- Hedge trimmer
- And more
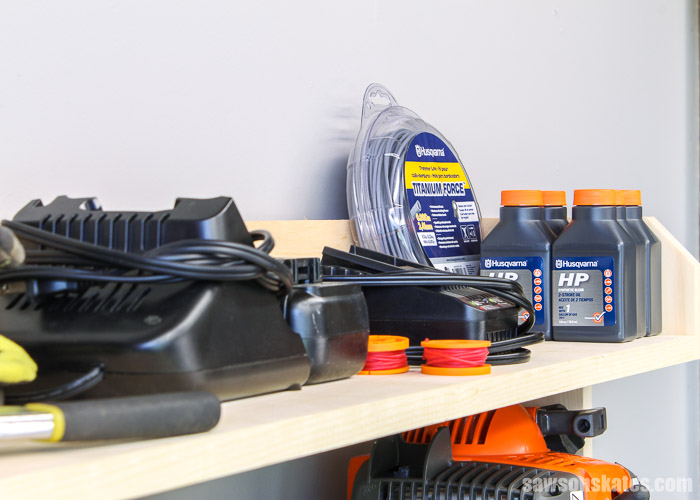
On the large storage shelf, you can store:
- Battery chargers and batteries
- Extra weed whacker string
- 2-Stroke Oil
- Extension cord
- Garden gloves
- Pruners
- And more
What Tools Do You Need to Make a DIY Garden Tool Rack?
This storage organizer is a simple weekend project. It’s easy to make with some basic woodworking skills and just a few common woodworking tools.
Tools like a miter saw, pocket hole jig, and a drill.
Miter Saw
I used a miter saw to cut all of the parts to length for this project.
Related: 7 Miter Saw Tricks Every DIYer Should Know
Pocket Hole Jig
We can use any pocket hole jig to drill the pocket holes for this project. I used the Kreg Jig 320 and the Kreg Jig K5 to drill the pocket holes for my yard tool organizer. The Kreg Jig K5 is no longer available. The Kreg Jig 720PRO has replaced it.
Related: 9 Pocket Hole Mistakes You Don’t Want to Make
Drill
I used a drill to make the pocket holes and countersink holes. I also used the drill to drive the pocket screws and wood screws that join the pieces together.
Related: How to Use a Countersink Bit
It’s handy to have a right angle drill attachment. It could be tricky to reach the top mounting holes on the hangers with a traditional driver.
A right angle drill attachment is the perfect tool to drill in a tight spot or to drive screws in hard-to-reach places.
Related: How to Screw in Hard-to-Reach Places
What Wood Should You Use?
I used pieces of pine 1×2s, 1×3s, 1×4s, 1×6s, and 2×4s to build my organizer.
I purchased the pine at my local home improvement store.
Related: Beginner’s Guide to Wood Sizes
How Do You Finish the Rack?
You could finish this yard tool organizer in a variety of ways. It could be left natural, painted, etc. I chose to leave my project natural.
How Do You Hang the Rack on the Wall?
When I originally published this project, I mentioned two mounting options: attaching it to the wall studs or using a French cleat. While I went with the French cleat for my rack, after a few years, the weight of my gas-powered trimmer caused the rail to loosen and the trimmer to fall. To avoid this issue, I recommend attaching the yard tool organizer directly to the wall studs for a more secure hold.
Attach the Rack to the Studs
First, use a stud finder to locate the studs in the wall. Then, position the rack over the studs and use a level to make sure the rack is level. Next, drill countersink holes through the top rail into the studs. Attach the rack to the wall with 3-½” wood screws.
How to Make a DIY Garden Tool Storage Rack
Printed Plan
Get the PDF plan here (includes detailed instructions, measurements, and bonus tips)
Materials
- Wood (per the printed plan)
- 1-¼” Pocket Screws
- 1-¼” Wood Screws
- Wood Glue
Tools
- Tape Measure
- Drill
- Kreg Jig
- Kreg Multi-Mark
- Miter Saw
- Countersink Drill Bit Set
- Right Angle Drill Attachment
Step 1. Make the Shelf
Cut three pieces of wood to length. Two pieces will be used to make the shelf panel, and the other piece will be used for the back of the shelf. Apply glue and clamp to form a panel.
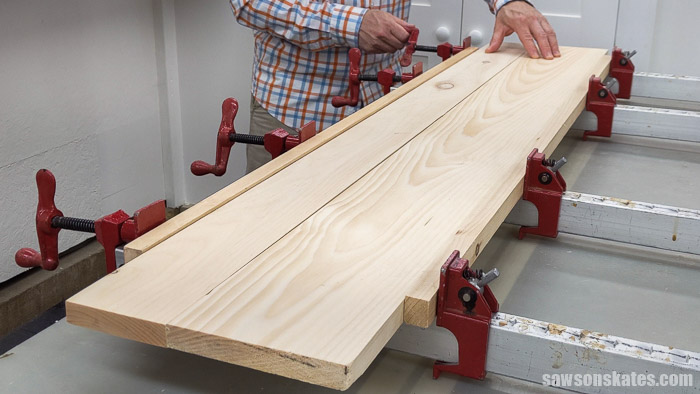
When the glue is dry, use the diagram in the printed plan to drill pocket holes in each end.
Related: How to Use a Kreg Jig
For the back of the shelf, use the diagram in the printed plan to drill pocket holes in each end and along one edge.
Apply glue, position on the shelf, and clamp. Attach using 1-¼” pocket screws.

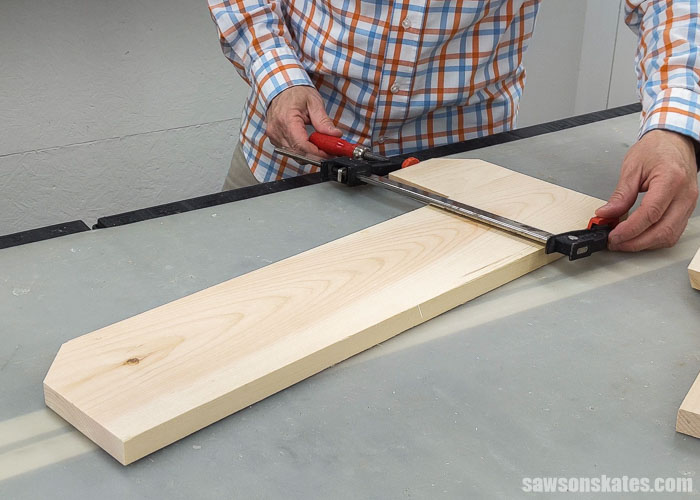
Step 2. Make the Sides
Cut four pieces of wood to length for the sides. Then use the diagram in the printed plan to cut a 45-degree angle on one end.
📝 NOTE: These pieces are small. Please use caution.
Apply glue and clamp to form the side. Repeat for the remaining pieces.
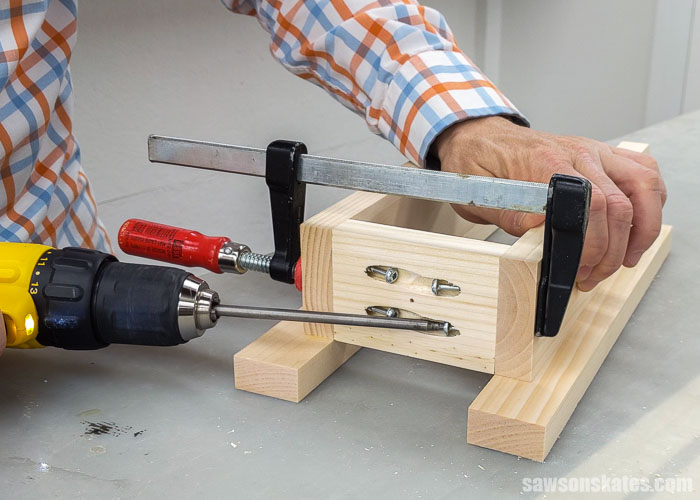
Step 3. Assemble the Rack
Position the shelf on the sides and clamp. Attach using 1-¼” pocket screws.
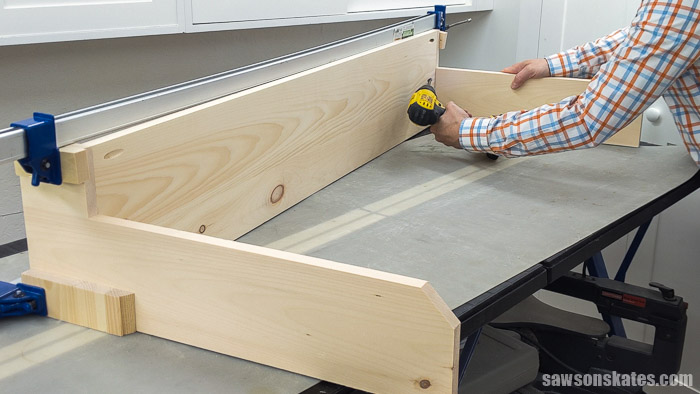
Cut one piece of wood to length for the bottom rail and drill pocket holes on each end.
Apply glue, position at the top of the rack, and clamp. Attach using 1-¼” pocket screws.

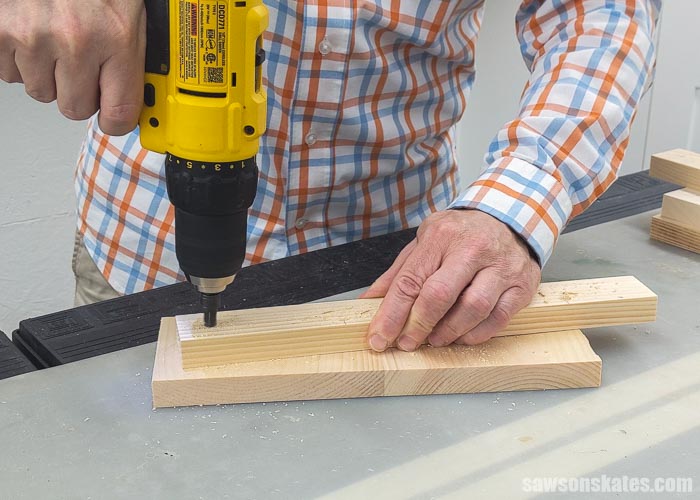
Step 4. Make the Hangers
Cut ten pieces of wood to length. Use the diagram in the printed plan to mark the location for countersink holes.
❕ IMPORTANT: Make five left and five right pieces.

Next, use an awl to make a starting point for the drill.
Related: What is an Awl? (and How to Use It)
Then, use a countersink bit to drill a hole at each mark.
Related: How to Use a Countersink Bit
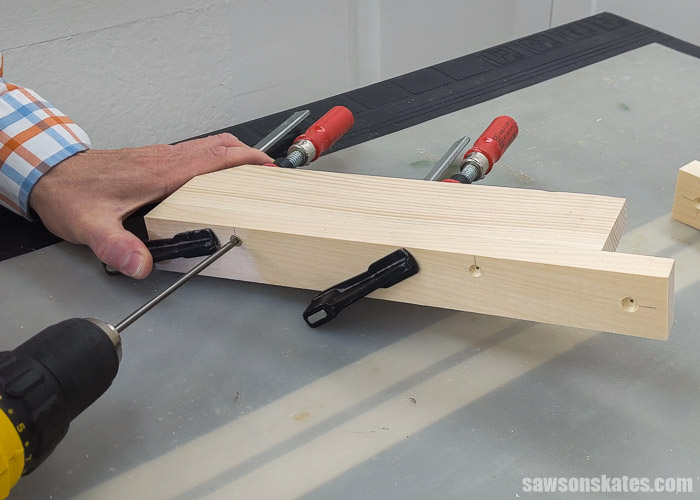
Cut ten pieces of wood to length. Then use the diagram in the printed plan to cut a 45-degree angle.
Apply glue and clamp. Attach using 1-¼” wood screws.
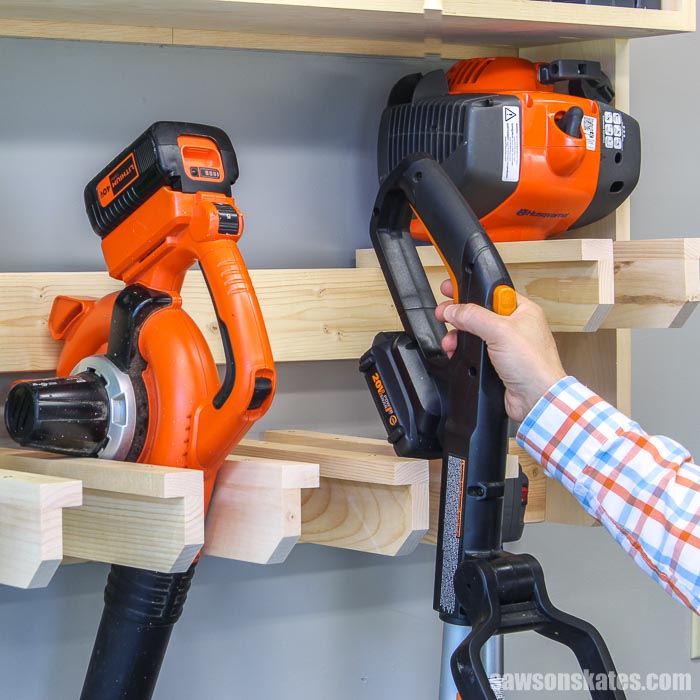
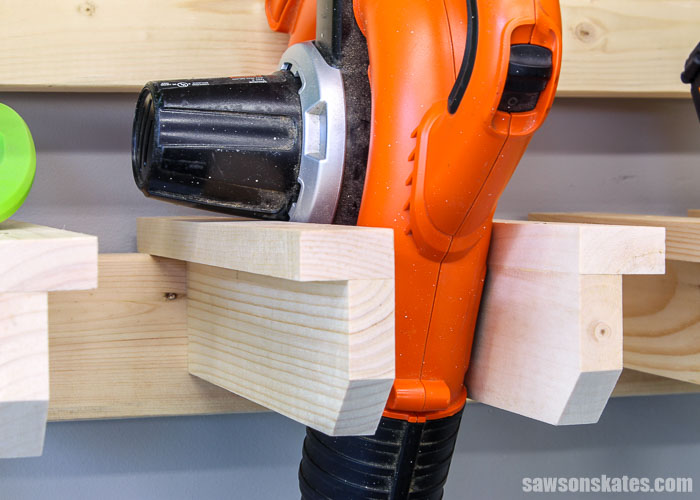
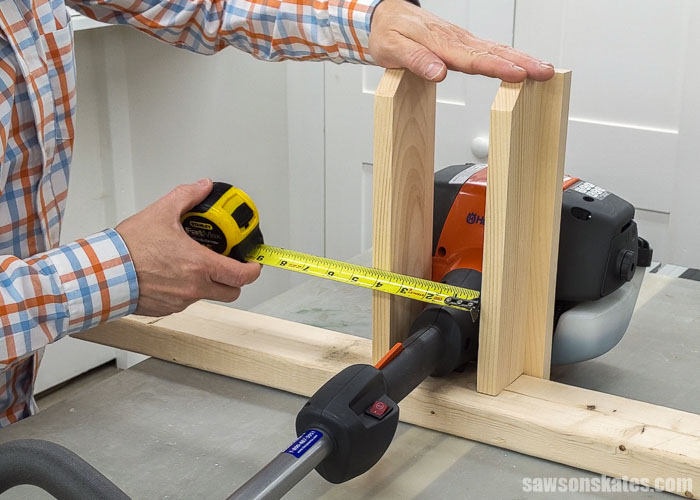
To fit the bracket to the tool, first, I placed a scrap piece of wood on my workbench.
Then, I placed the tool on the scrap wood.
I placed a hanger on either side of the tool. I measured the distance between the hangers and added an ⅛” for clearance.
I cut the hanger connector to that measurement and drilled pocket holes on the back.
On the opposite side, I used a straightedge from corner to corner to locate the center. I used an awl to make a starting point for the drill.
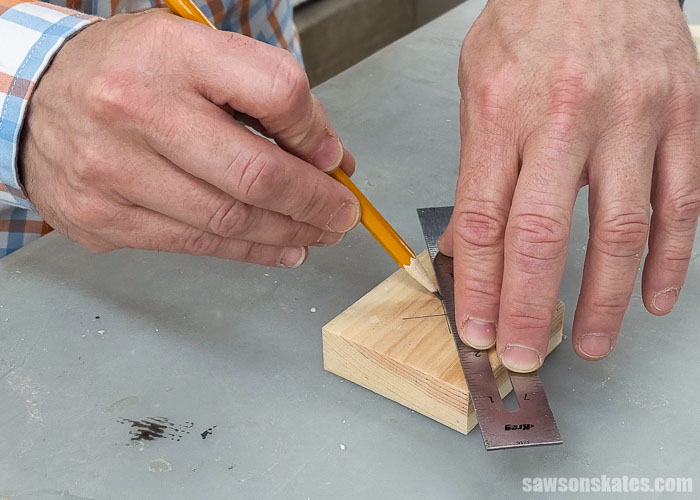
Then, I used a countersink bit to drill a hole in the center.
Position the hanger connector on the hangers and clamp. Attach using 1-¼” wood screws.
Step 5. Attach the Hangers
Position the hangers on the rail and attach using 1-¼” wood screws.
Step 6. Hang the Yard Tool Rack
See How Do You Hang The Rack on the Wall? for more information.
Video: How to Make a DIY Yard Tool Storage Rack

Includes:
- List of tools and materials
- Complete measurements (in inches)
- Easy-to-follow instructions
- Step-by-step photos
- Detailed diagrams
Final Thoughts
This wall-mounted yard tool rack is the perfect way to organize lawn tools in your garage or shed. You can customize the hangers to fit your tools. Use the large storage shelf to organize battery chargers and batteries, extra weed whacker string, extension cords, garden gloves, and more.
Get the PDF plan (including the detailed instructions and measurements) now!
Thank you for stopping by. If you enjoyed this tutorial, would you please take a moment and pin it to Pinterest? I’d really appreciate it!
Pin This For Later

Hi there – I’m Scott, a woodworking enthusiast and creator of Saws on Skates, a site I started in 2015 to share easy-to-follow tutorials, space-saving shop tips, and project inspiration for DIYers at any skill level. Learn more about my woodworking journey here.
Nice plan
Thank you, Don. I’m glad that you like it.
Always good project, and I especially like the free plans. Thanks for sharing your artistic and practical ideas.
You’re welcome, Bart. I’m glad you like the project, and thank you for the compliments.
I was looking at my shed this past weekend and was brainstorming better ways to store my yard equipment. These plans are a great start! Thank you. You deserve a cup of coffee or two for sharing. 🙂
You’re welcome, Linda. I’m glad you like the plans!
Sir, I am really anxious to give this a try. Plans are well designed and look to easy to follow. Thanks