How to Use a Kreg Jig 720 (Review)
Discover everything you need to know about the Kreg Jig 720. From how to use it to an honest review, this comprehensive guide has you covered!
If you are a DIY enthusiast or professional woodworker, chances are good that you’ve heard of Kreg pocket hole jigs. They are some of the most popular on the market, and for a good reason. They make it simple to quickly and easily create strong, durable joints.
In this article, I’m sharing everything you need to know about the Kreg Pocket Hole Jig 720, including what comes in the package, how to use it, and my honest, comprehensive review.
Originally published February 16, 2021, updated April 14, 2023.
Thank you to my friends at Kreg Tool for sending me the 720 Pocket Hole Jig. I received this tool in exchange for my honest review. All thoughts and opinions are my own.
Table of Contents
- What is the 720 series Kreg Pocket Hole Jig?
- Features: Kreg Jig 720 vs Kreg Jig 720PRO
- How Do You Use a Kreg Pocket Jig 720?
- My Review of the Kreg Jig 720
- Should You Buy a Kreg Jig 720?
- Frequently Asked Questions
This article contains affiliate links. If you purchase from these links, I may earn a small commission at no additional cost to you. Visit my site policies for more information.
What is the 720 series Kreg Pocket Hole Jig?
The 720 series is the latest addition to Kreg’s family of popular pocket hole jigs. It was released in early 2021 and replaces the discontinued K5 model. This upgraded jig system comes with a new, sleek design and a number of improvements.
Features: Kreg Jig 720 vs Kreg Jig 720PRO
Kreg offers two versions of their 720 series pocket hole jig: the standard 720 and the 720PRO. Each comes in a sturdy, well-packaged box. Let’s unpack them and compare their features.
Kreg Jig 720 Features
One-Motion Clamping
If you’ve ever used a pocket hole jig, you know that you have to adjust both the drill guide and the drill bit for the material thickness you’re working with.
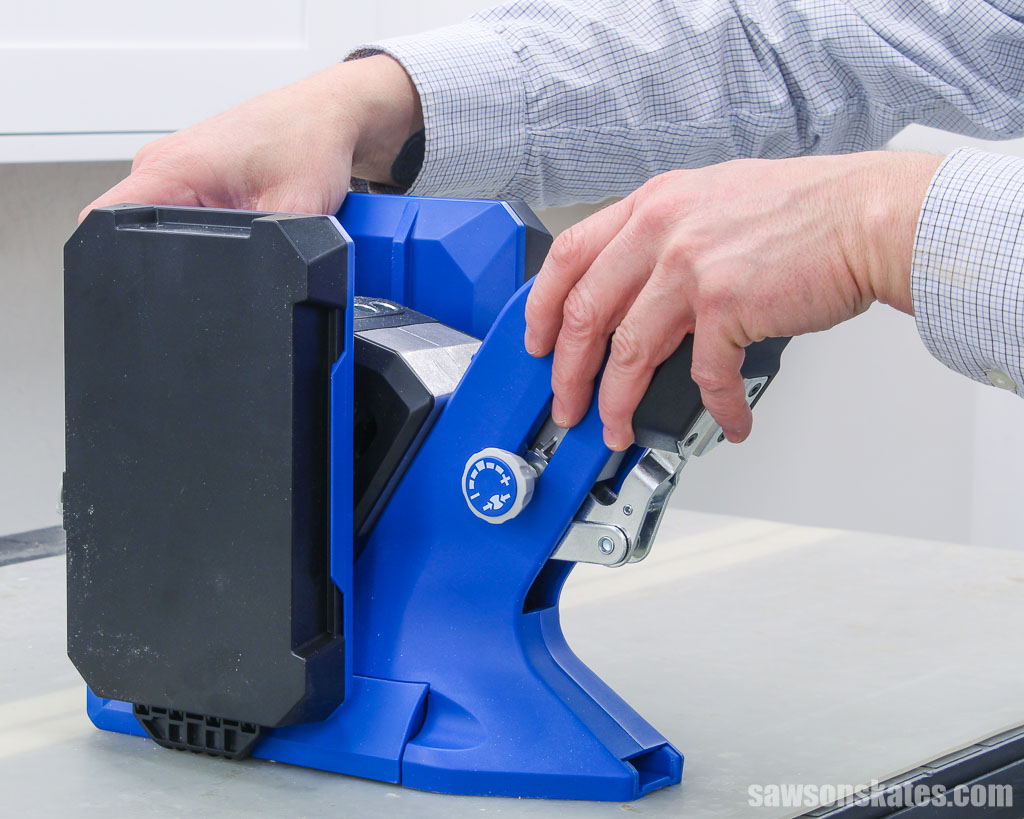
The Kreg Jig 720 simplifies this process with its “Automaxx dual-action clamp.” All you have to do is place your workpiece in the jig, then press down the handle, which simultaneously clamps and automatically adjusts the drill guide to your material’s thickness. The 720 works on materials as thin as ½” and up to 1-½” thick.
The Automaxx clamp is a time-saver, allowing you to make pocket holes in ¾” material, then a 2×4, then ½” plywood without making any adjustments to the drill guide. Just place the material in the jig, press the handle, and the guide instantly adjusts to the correct thickness.
Related: Beginner’s Guide to Wood Sizes
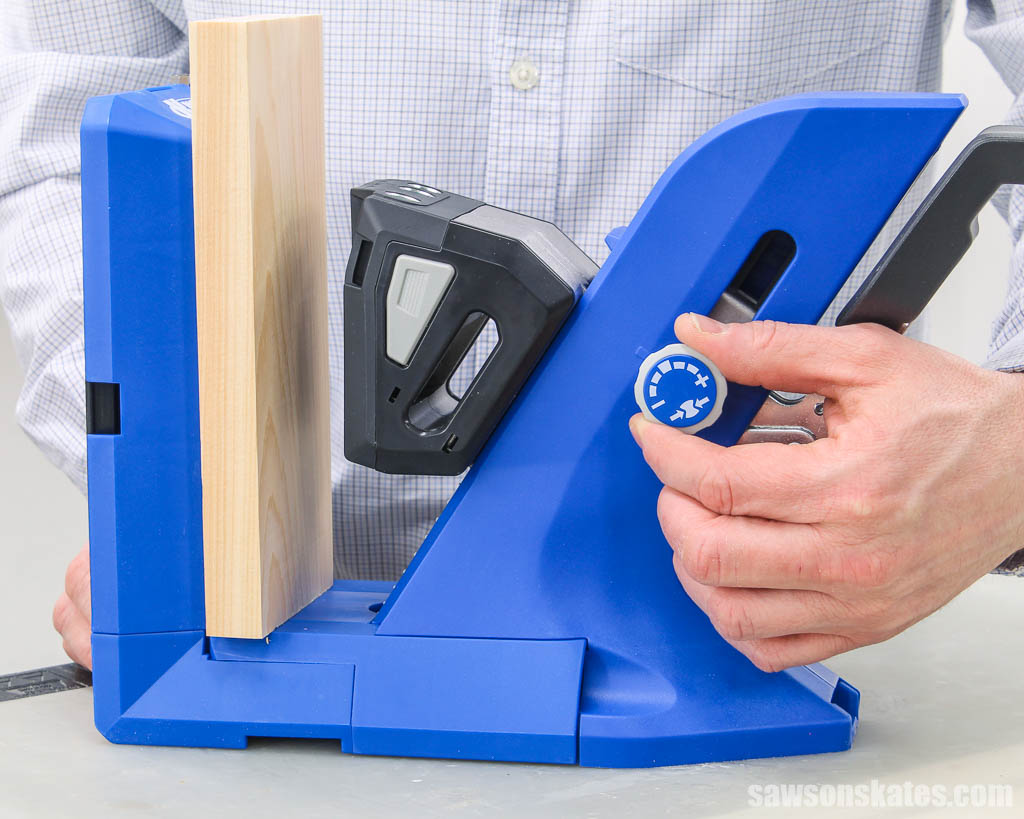
Adjustable Clamp Pressure
By turning the knob on the side of the jig, you can adjust the clamping pressure, fine-tuning the force used to secure your workpiece. Turn the knob to the right for more pressure and the left for less.
Anti-Slip Pad
The 720’s “GripMaxx” anti-slip pad ensures your workpiece stays clamped securely in place and prevents it from shifting while you’re drilling.
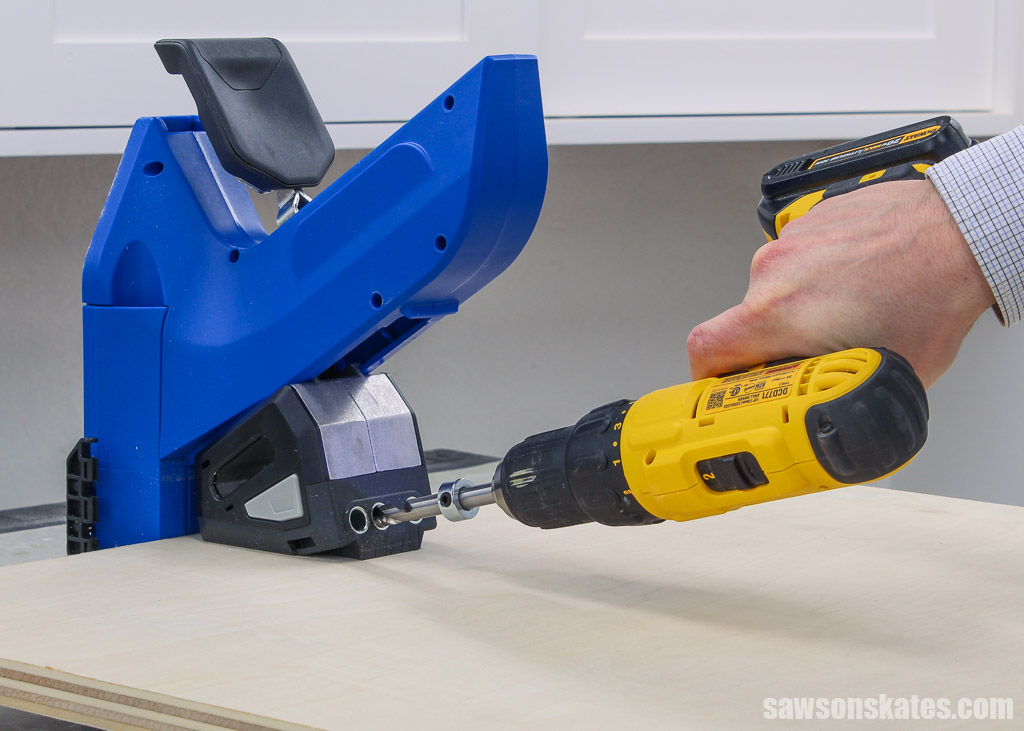
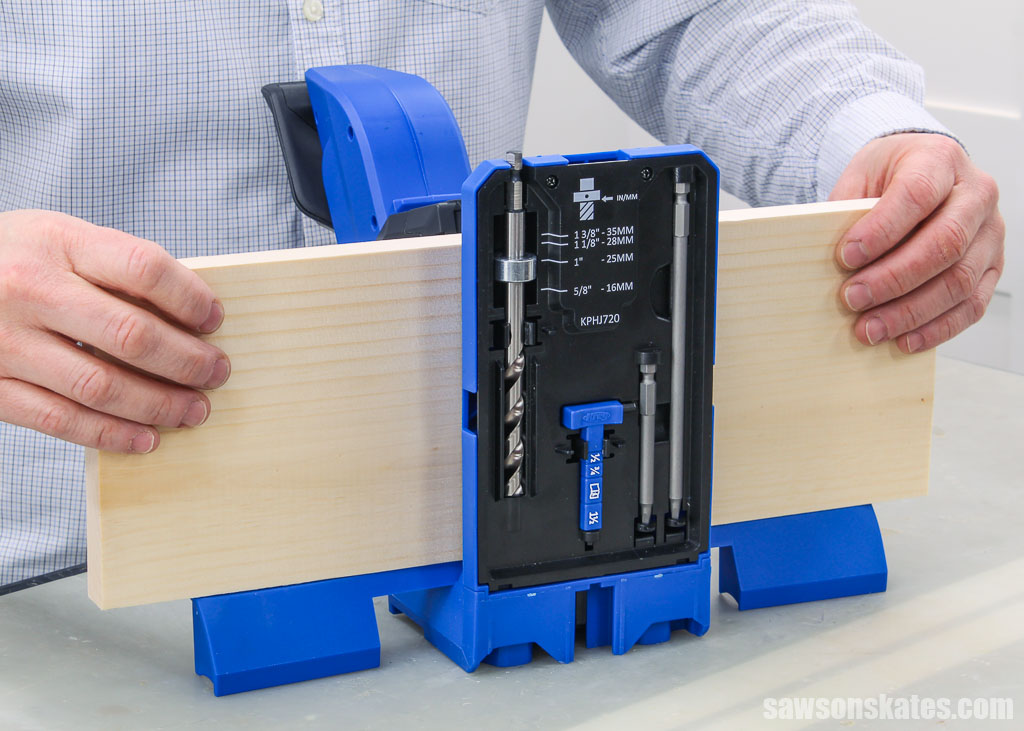
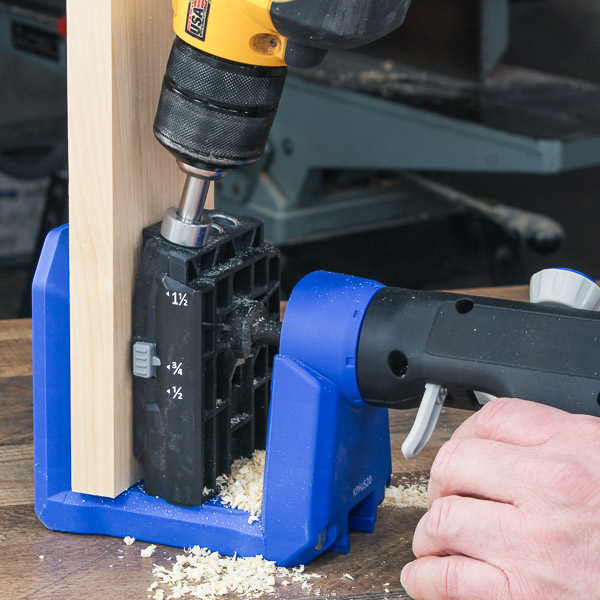
Use Vertically or Horizontally
The dual-position base allows you to use the 720 either vertically or horizontally. The vertical position is excellent when you need to drill pocket holes in the ends or edges of boards.
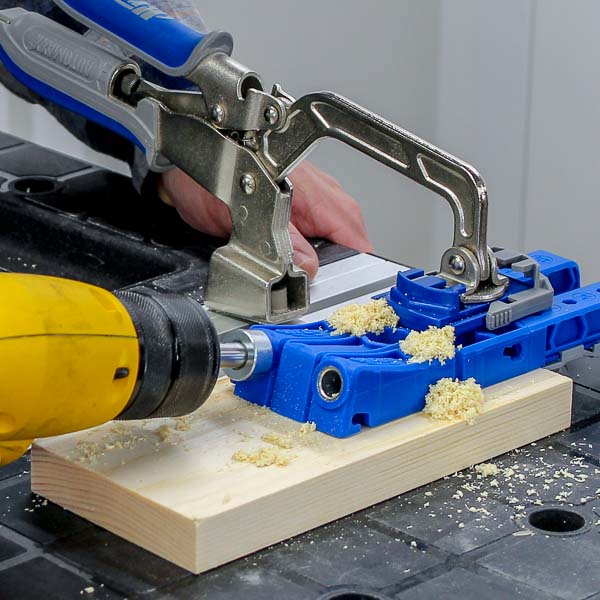
The horizontal position is ideal for large pieces and sheet goods such as plywood.
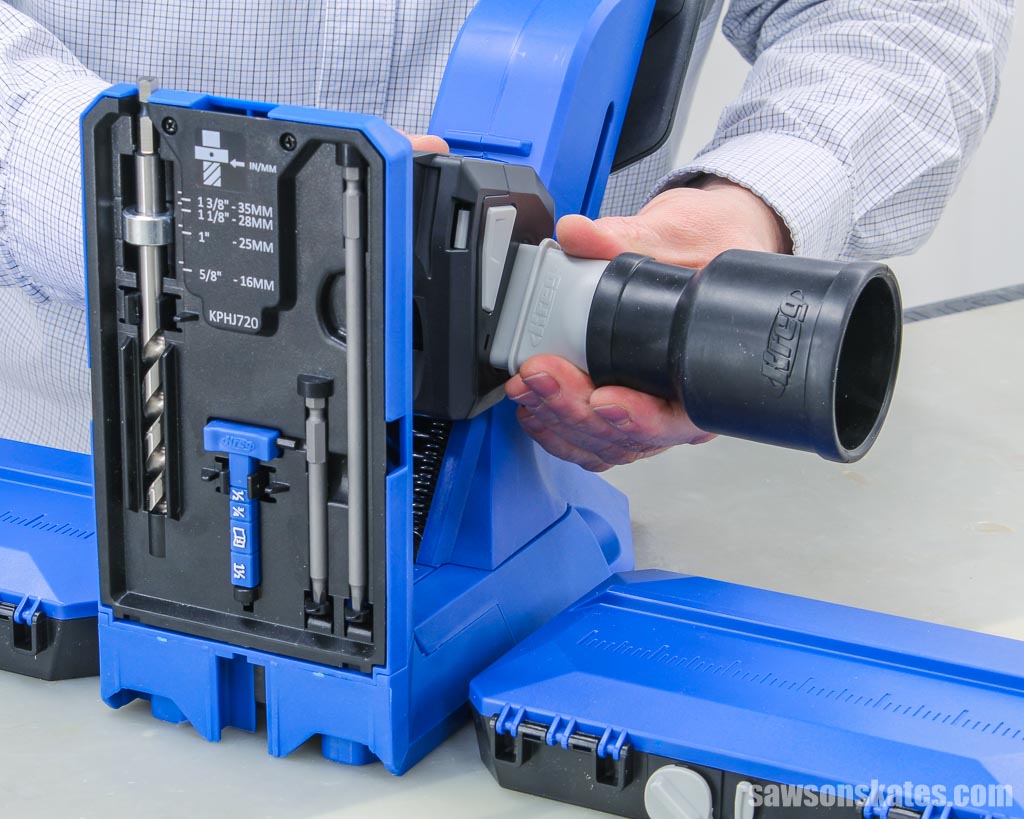
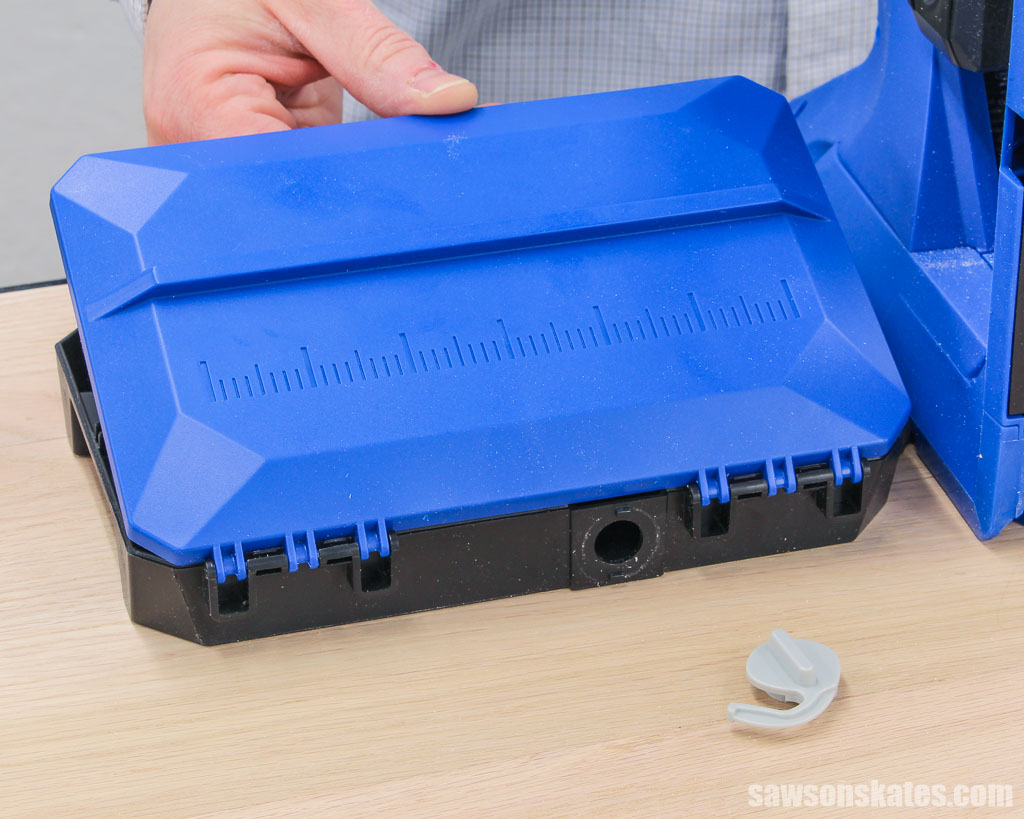
Dust Collection Port
The dust collection attachment helps keep your work area clean and sawdust-free. It attaches to a standard shop vacuum, and you can mount it either on the left or right side. You can also remove if necessary.
Extension Wings
The 720 has built-in extension wings that extend from each side of the jig’s body.
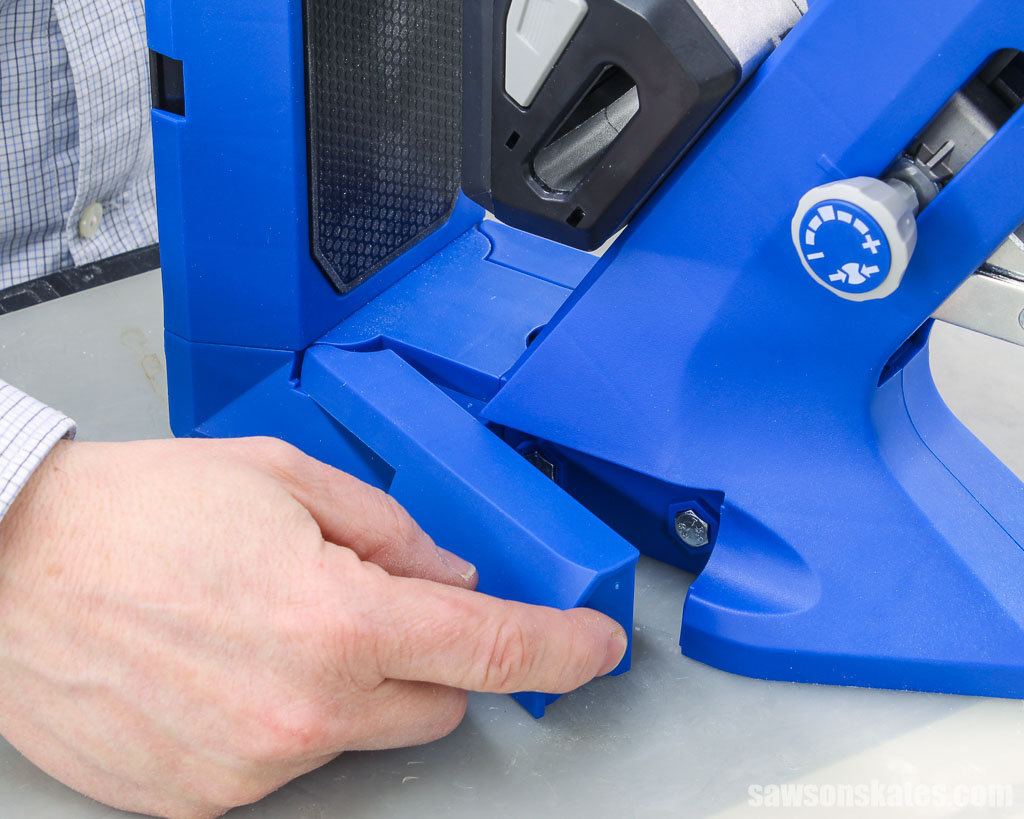
The wings support materials wider than the jig, preventing them from tipping while you work.
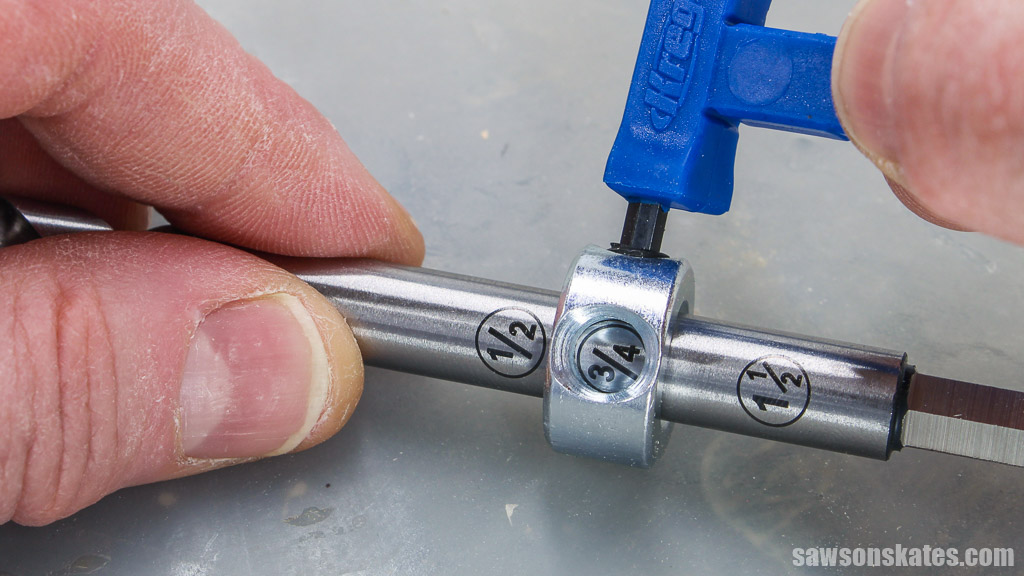
Easy-to-Adjust Drill Bit
The 720’s drill bit shank is etched with common material thicknesses such as ½”, ¾”, and 1-½”, which makes setting the bit’s depth a breeze. All you have to do is slide the window in the stop collar over the bit’s thickness measurement that matches the thickness of your material and tighten the hex screw.
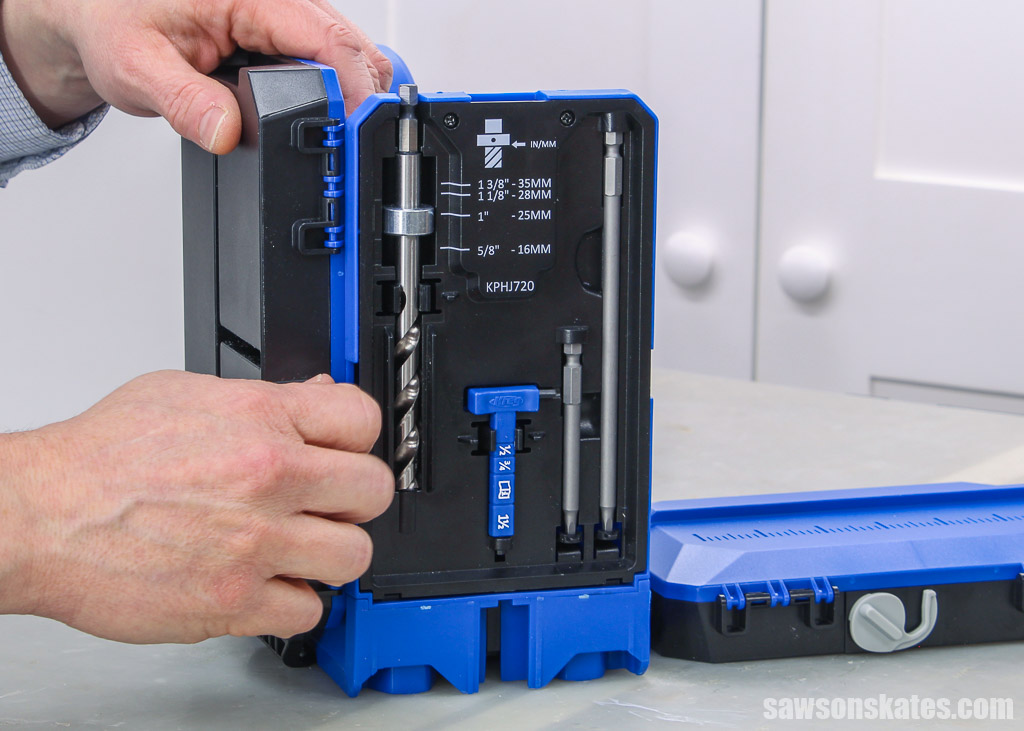
Onboard Tool Storage
The 720 has an onboard tool storage area that keeps your most-used tools at your fingertips, such as the drill bit, material thickness gauge, and driver bits.
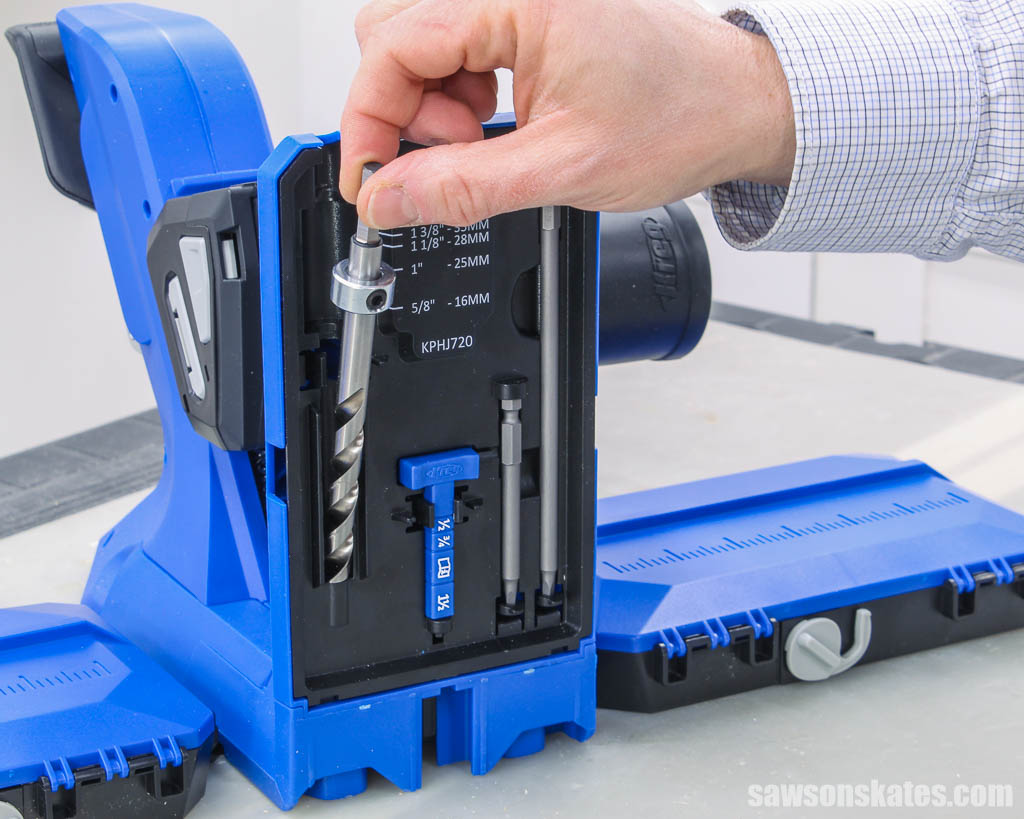
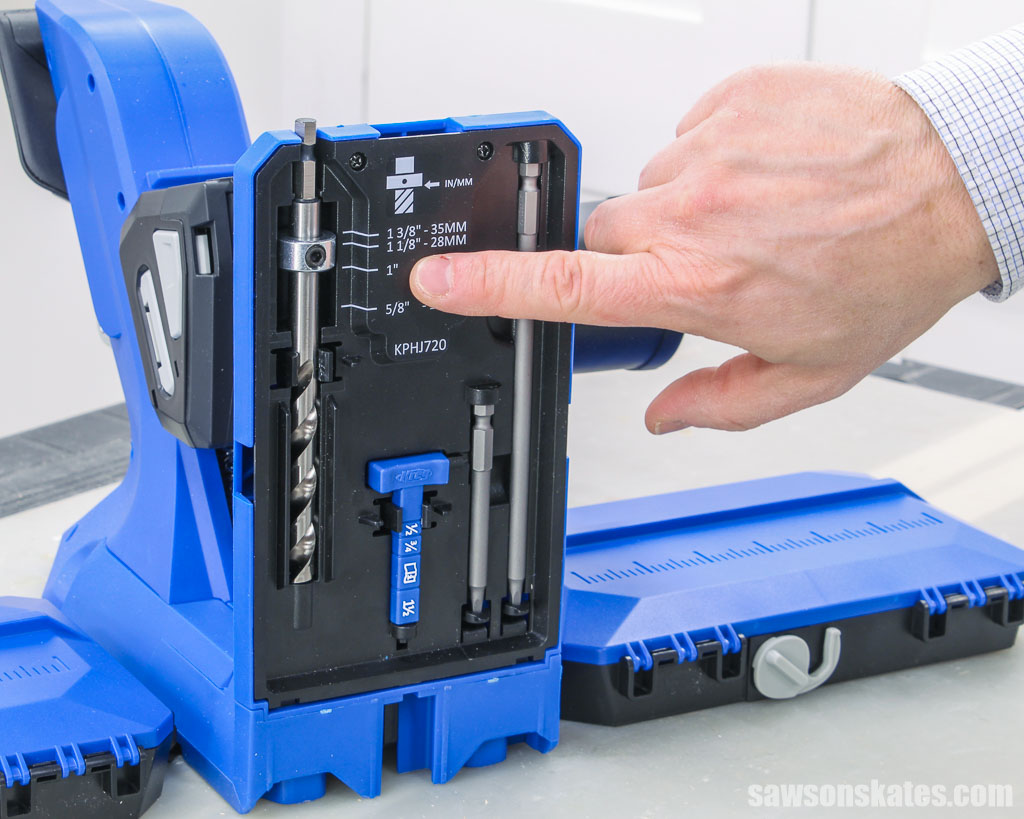
The tool storage area also has a chart with even more drill bit thickness settings.
Kreg Jig 720PRO Features
The 720PRO includes the features mentioned about, plus:
Docking Station Material Support Wings
The PRO’s docking station includes two material support wings that snap into place and can be removed if necessary.
The wings also fold and lock into place, which makes storing and transporting the jig easier.
While the built-in extension wings are good, the material support wings provide even more stability for larger workpieces. They also offer more storage space for tools and accessories, such as spare drill bits and driver bits.
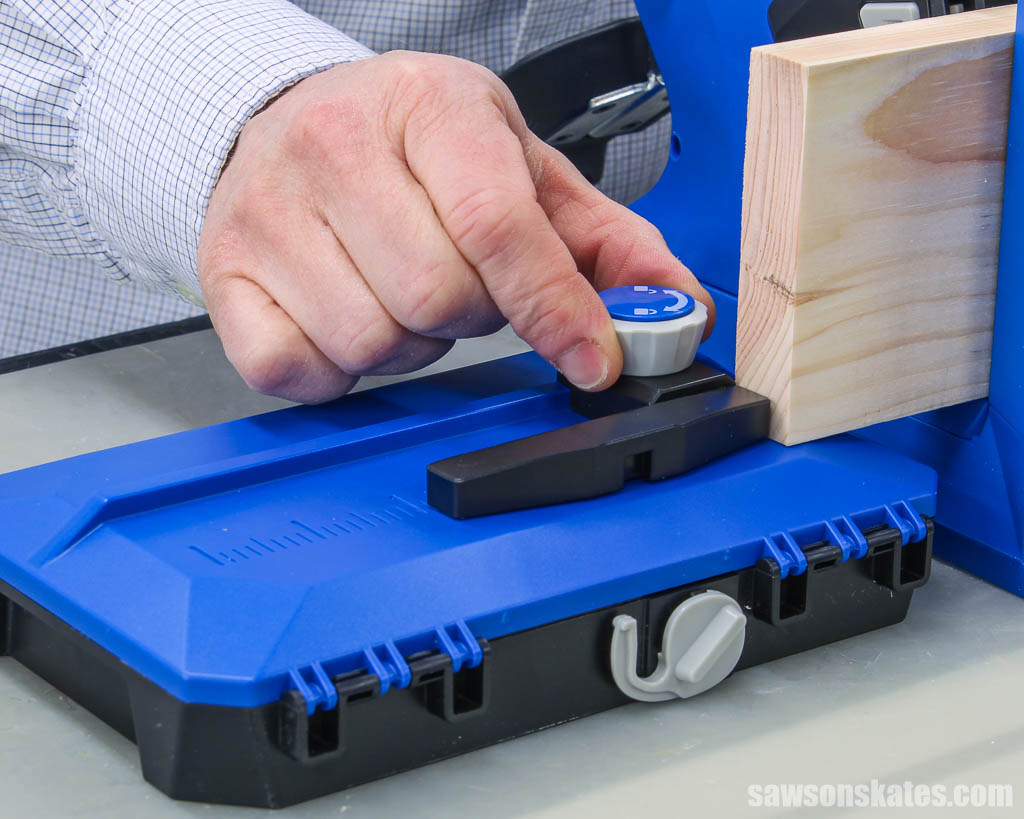
Material Stop
The material stop attaches to the wings allowing you to drill pocket holes in the same spot on multiple workpieces.
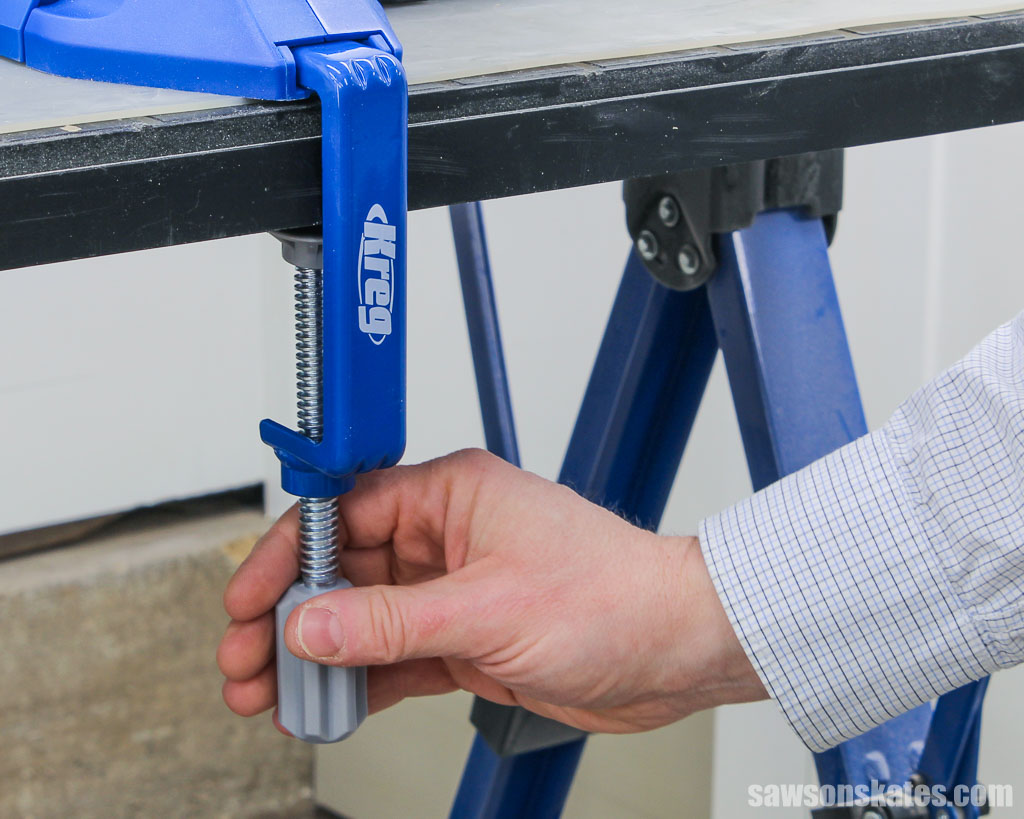
Pocket Hole Jig Clamp
The clamp securely attaches the jig to your workbench or work surface.
Kreg Pocket Hole Jig 720 Optional Accessories
The 720 is compatible with several optional accessories, including the Micro-Pocket Drill Guide Kit and Plug Cutter Drill Guide Kit.
Micro-Pocket Drill Guide Kit
With the Micro-Pocket Drill Guide, you can drill pocket holes that are about 33% smaller than traditional pocket holes, which is ideal for thin and narrow workpieces. You can use these micro-sized pocket holes on material as thin as ½-inch and as narrow as 1 inch.
Plug Cutter Drill Guide Kit
The Plug Cutter Kit allows you to make pocket hole plugs, which hide the pocket hole holes, giving your project a more professional appearance. The advantage of drilling your own plugs is that you can make them from the wood you used to build your project so that they will be an exact match.
How Do You Use a Kreg Pocket Jig 720?
Whether you have the 720 or 720PRO, using a 720 series pocket hole jig is straightforward. For an in-depth look at how pocket hole joinery works, check out How to Use a Pocket Hole Jig (& Beginner Pitfalls to Avoid).
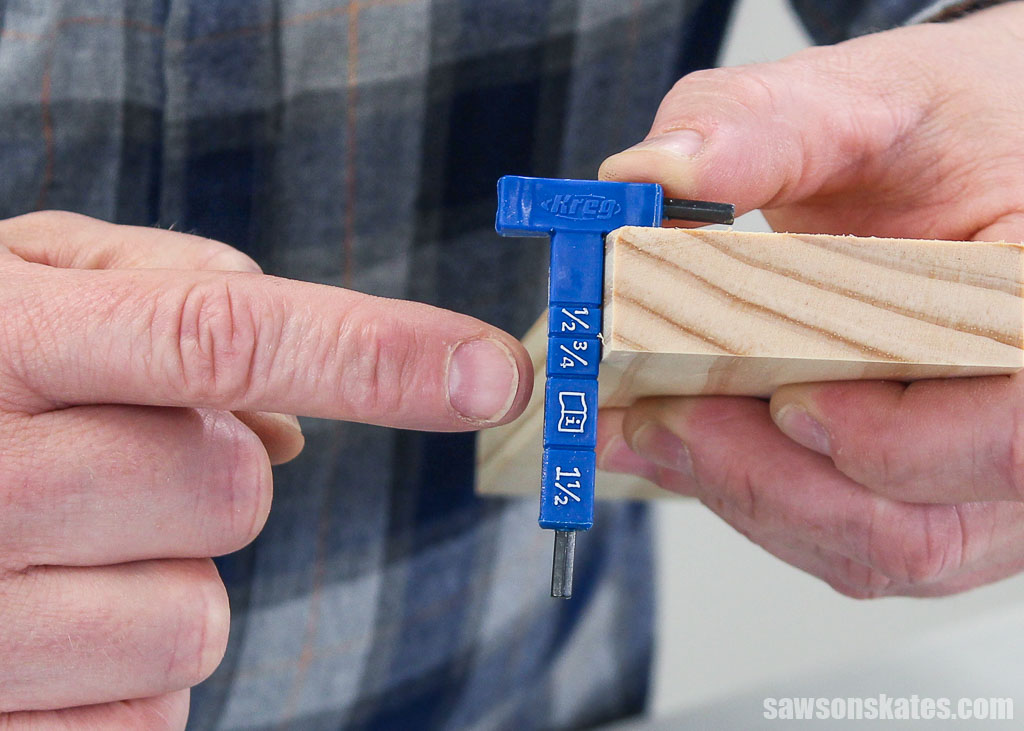
Step 1. Measure the Material Thickness
The first step to setting up your 720 is to determine the thickness of the material you want to join, which you can do either using a tape measure or the material thickness gauge included with your jig. You’ll use this measurement to set up your drill bit.
Related: How to Use a Tape Measure Correctly (Tips for Success)
To use the material thickness gauge, position it on your workpiece and note the measurement where the edge lands between the two indentations.
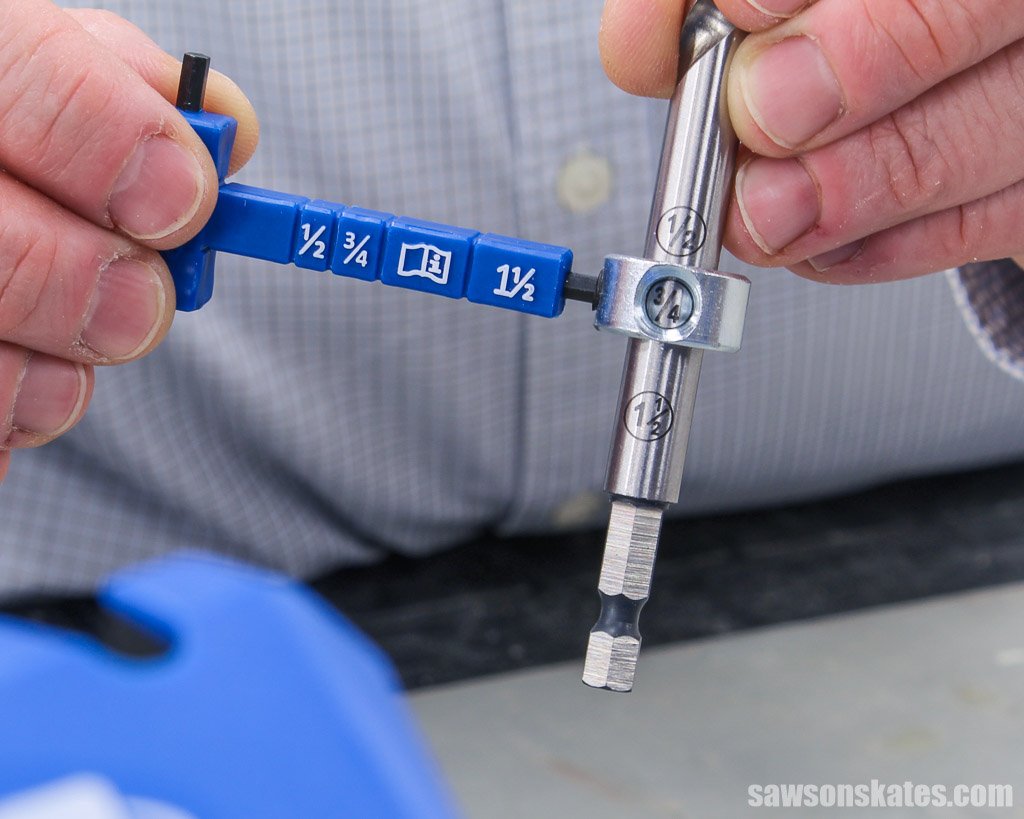
Step 2. Set the Depth Collar
Next, you’ll set the stop collar using the measurement you noted from Step 1.
If your material measures ½”, ¾”, or 1-½”, slide the window in the stop collar over the thickness measurement etched on the bit and tighten the screw using the hex wrench on the end of your material thickness gauge.
If your material’s thickness differs from the measurements etched on the bit, you can use the chart printed on the tool storage area to adjust your bit’s depth.
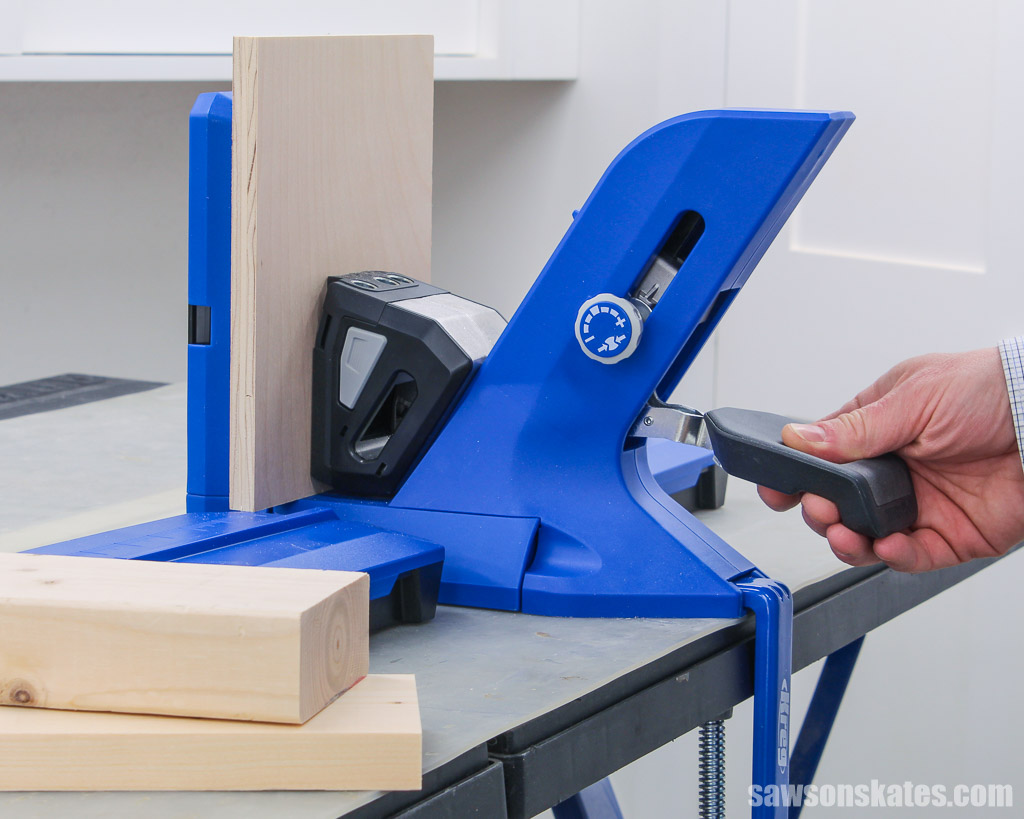
Step 3. Position the Material
Slide your workpiece into the jig and press down on the handle to clamp it in place. The drill guide automatically adjusts to the thickness of your material.
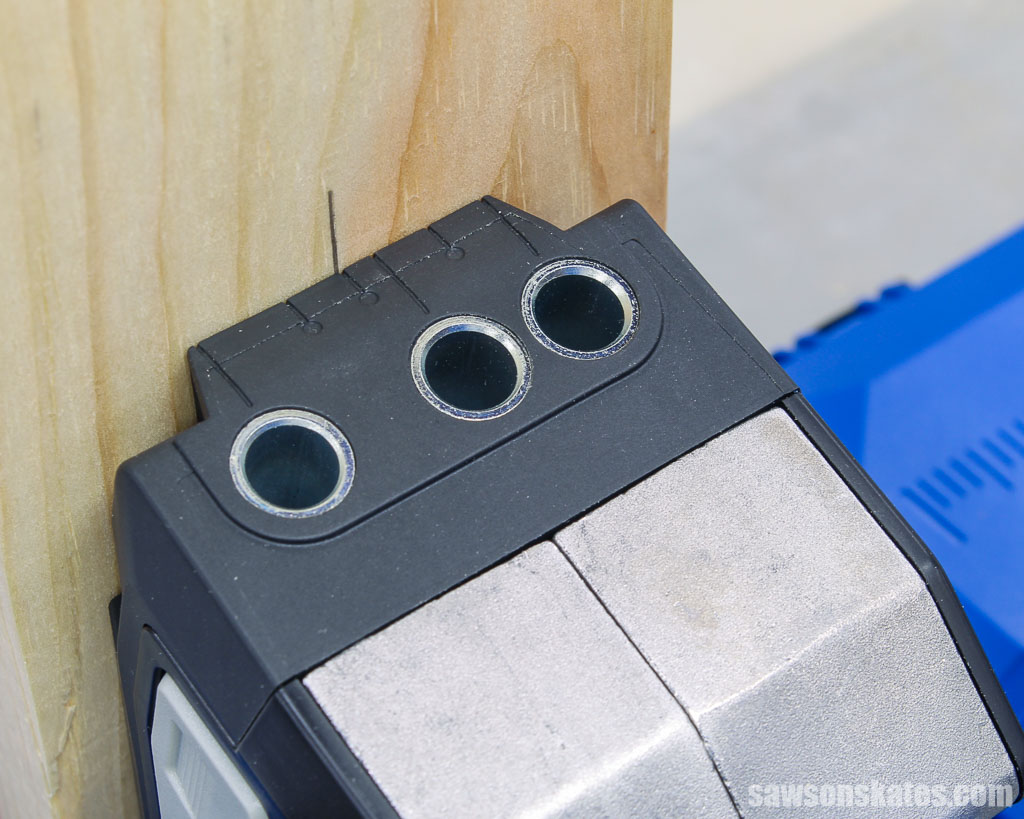
Where Should You Drill the Pocket Holes?
To reduce the risk of cracking your workpieces, I recommend positioning the pocket holes at least ¾” away from the board’s edge. When drilling pocket holes along the length of your material, called edge joining, space the pocket holes approximately every 6″.
| 1×2 (1-½” wide) | 1×3 (2-½” wide) | 1×4 (3-½” wide) | 1×6 (5-½” wide) |
|---|---|---|---|
| Use middle and right guide holes | Use left and middle guide holes | Use left and right guide holes | Drill one hole about ¾” from each edge |
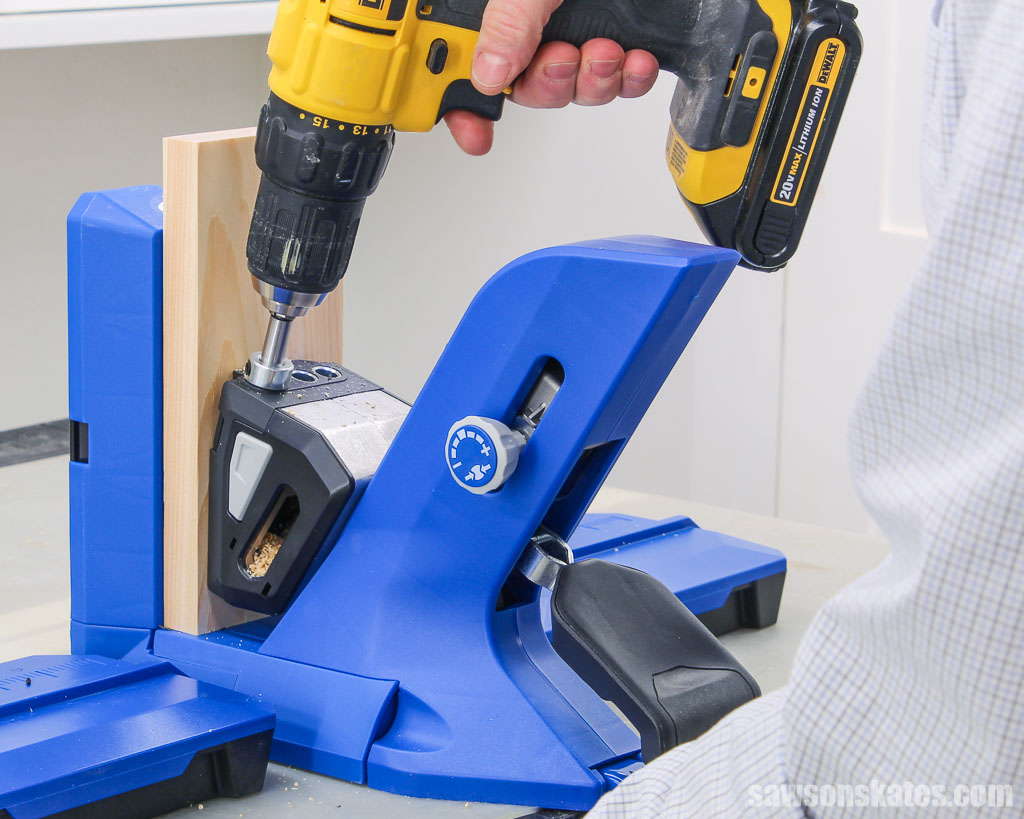
Step 4. Drill the Pocket Holes
Next, chuck the drill bit in your drill. Chucking a bit means putting it into your drill’s chuck.
Related: How to Put a Drill Bit in a Drill (Step-by-Step)
I don’t recommend using an impact driver to drill pocket holes because the impacts can loosen your stop collar resulting in holes that are drilled too deep.
Related: Impact Driver vs Drill (Which to Use & Why)
Once you’ve chucked the bit, adjust your drill’s settings:
- Change the direction to the forward, which is often indicated by an arrow pointing toward the tool’s front.
- Adjust the setting to the highest speed.
- Turn the torque adjustment to the drill setting, typically represented by an image of a drill bit.
Related: How to Use a Drill (Tips & Techniques)
Next, insert the drill bit into the guide block until it touches the workpiece.
Lift the bit slightly away from the material and bring the drill up to its full speed. Gradually lower the bit into the workpiece and begin drilling the pocket hole.
If your drill bit is having a hard time going through the wood, you can lift it a few times to clear out the wood chips that have accumulated in the hole.
Continue drilling until the bit’s stop collar touches the drill guide.
NOTE: When drilling the first few pocket holes with your new 720, it’s normal to see black plastic shavings.
Video: How to Use a Kreg Jig 720
Here’s a quick video tutorial on how to use a Kreg Jig 720.
Connect the Joint With Pocket Hole Screws
Now that you’ve drilled the pocket holes, it’s time to connect the joint.
Start by clamping the joint, insert a pocket screw into each hole, and drive the screws using your drill. Again, I don’t recommend using an impact driver when driving pocket screws because it can break or over-tighten them, causing a loose-fitting joint.
Check out How to Use a Pocket Hole Jig for a comprehensive look at:
- What could happen if you don’t clamp your pocket hole joints
- Why you shouldn’t use wood screws for pocket hole joinery
- Which pocket hole screws you should use for softwoods and hardwoods
My Review of the Kreg Jig 720
Having owned the Kreg Jig 720 for several years, I’ve compiled my list of its pros and cons.
Pros
Its sleek, modern design and helpful features set the 720 apart from other pocket hole jigs.
Goof-Proof Settings
The auto-adjusting drill guide is a game-changer. Previous jigs needed to be set for each material thickness. The 720 eliminates this step. Position the material in the jig, push the handle down, and the guide instantly adjusts to the thickness. This feature is a huge time-saver when you have a lot of pocket holes to drill in materials of varying thicknesses.
Use Vertically or Horizontally
The 720 can be mounted either horizontally or vertically, giving you flexibility when drilling pocket holes for your projects.
Onboard Tool Storage
The onboard tool storage area is a convenient way to maintain organization while your frequently used tools are easily accessible.
Material Stop
I would say that the material stop is my favorite feature, as it takes the guesswork out of positioning workpieces in the jig. You can set the repeatable stop once and drill pocket holes precisely in the exact location on multiple workpieces.
Cons
Despite the 720’s fantastic features, there are some downsides that I’ve found while using it. Before sharing my list of cons, I want to acknowledge that my opinion does not represent the majority.
Based on my observations of posts in Facebook woodworking groups, most owners rave about their 720, so please keep that in mind as you consider my drawbacks.
Size
Compared to earlier Kreg Jig models, the 720 is significantly larger. While I could lift my K5 using only one hand, you’ll probably need to use both hands to transport the 720.
My workshop is small, so I don’t have a dedicated station for my pocket hole jig. Instead, I store it in a cabinet when I’m not using it. The 720 is too tall to fit in my storage cabinet without me having to rearrange my shelves completely.
Speaking of its height, the 720’s clamping mechanism is really tall. Being on the short side (5′ 4″), I have to raise my drill above my shoulder to ensure the drill bit passes over the clamping mechanism whenever I need to drill a pocket hole. Doing this repetitively, especially when I have a lot of pocket holes to drill, leaves my shoulder tired and achy.
Material Support Wings
As I mentioned, I need to move my pocket hole jig frequently. The advantage of my K5’s material support wings is they are rigid, making the jig easy to carry. On the other hand, the 720’s supports are, well, floppy. They are designed to raise and lower, but mine frequently flop around and fall off.
I think the best solution to remedy the floppy support wings would be to permanently mount the jig and wings to a piece of plywood; however, doing so would take up even more valuable space in my small shop.
Support Wing Locks
If you’re impatient like me, you forget to push down the support wing locks completely. Then, the lock pops off when you open the wing’s lid. I’m not good at keeping track of small pieces, so it won’t be long before I lose one or both of these.
Different Thicknesses
One of the often overlooked drawbacks of the 720 is its inability to join a thicker workpiece to a thinner workpiece. When joining materials of different thicknesses, you set your drill guide and drill bit for the thinnest material you’re working with.
Related: How to Join Different Thicknesses with Pocket Holes
While it’s not common, let’s say you want to join a 2×4 to a 1×4. Usually, you would set your drill guide and drill bit for your thinnest material, in this case, the 1×4. However, when you place your 2×4 in your 720, the drill guide automatically adjusts to your thickest material, preventing you from drilling the pocket hole needed for your thinnest material.
While this is just a minor inconvenience, it’s still something to consider if you plan on joining different thicknesses with the 720.
Sound
So this drawback is really nitpicky! I’ll preface this by saying I am super sensitive to certain sounds. I don’t know how to put it tactfully, but the 720’s clamping mechanism spring makes a tinny, metallic sound when I press down, which sounds like nails on a chalkboard!
Should You Buy a Kreg Jig 720?
The Kreg Jig 720 is excellent for anyone who does a lot of pocket hole joinery. It’s one of the most advanced pocket hole jigs in Kreg’s lineup, and the features make it much easier to drill pocket holes than with any of their previous models.
If you’re looking for a pocket hole jig loaded with time-saving features that’s easy to use, the Kreg Jig 720 is an excellent investment. As I mentioned, I’m a member of several Facebook woodworking groups, and people constantly rave about their 720s.
You might be wondering, “Would you buy a 720?” It’s not that I wouldn’t buy one, but I think the Kreg 520PRO is a better fit for me. I like its compact size, you can use it vertically or horizontally, and I don’t have to raise my drill above my shoulder to pass over a clamping mechanism. So for me and my small shop, the 520PRO is a better fit.
No matter which Kreg Jig you choose, you won’t be disappointed. The Kreg Jig 720 is an excellent tool that will help you build better projects faster. So pick the one that best fits your needs and start building those amazing projects!
Related: Which Kreg Jig Should You Buy? (Here’s the Answer)
Frequently Asked Questions
Does the Kreg Jig 720 work on 2×4s?
Yes, the Kreg Jig 720 works on 2×4s and any other material up to 1-½” thick.
What is the maximum thickness of the Kreg Jig 720?
The Kreg Jig 720 can join materials up to 1-½” thick.
Final Thoughts
The Kreg Jig 720 is a great pocket hole jig for professionals and beginner woodworkers. It’s loaded with features that make it efficient and easy to use.
Thank you for stopping by. If you enjoyed this tutorial, would you please take a moment and pin it to Pinterest? I’d really appreciate it!
Recommended For You
Pin This For Later

Hi there – I’m Scott, a woodworking enthusiast and creator of Saws on Skates, a site I started in 2015 to share easy-to-follow tutorials, space-saving shop tips, and project inspiration for DIYers at any skill level. Learn more about my woodworking journey here.
I do think there are some improvements in the new Jig but I won’t buy it for a couple of reasons – I already have K5 and while some things are easier on the 720 they are already available. I can store my tools in the boxes of the wings on k5 which also come off so you can spread them out if you want. While I do have make a 2 step movement to change board thicknesses, the clamp does clamp automatically. I won’t go on. Just to say the change in style is significant and depending on the work you do might be important to you but there is not really a big change in functionality. The sceptic in me thinks sales were dropping of in the k5 and they wanted to rev up the market.
All the pieces of wood are mini, can you use this on much larger cabinet builds, or longer pieces of lumber,
Hi Barbara – I wasn’t actually building a project at the time of this review, so I used what I had on hand… some small pieces of scrap wood for demonstration purposes. The 720 can be used on nearly any length board and plywood.
I would love this but already spent $170 on the Kreg K4MS Jig Master System a couple of years ago. Sigh.
I am new to using a Kreg Jig. I get conflicting stories that you should not edge join wood for say, a Table Top because it doesn’t allow the wood to move. It can cause cracks and out right failure of the joint. I’ve seen when not to use pocket holes, but I just get more confused. Help!
Hi Paul – Edge joining with pocket holes is not really any different than edge joining with glue, biscuits, dowels, etc. The thing that can prevent wood movement is when the table top is attached to the aprons with pocket holes. It doesn’t matter what method was used to edge join the table top, attaching a table top to the aprons with pocket holes does not allow for wood movement. To allow for wood movement, the top should be attached with table top fasteners.