5 Furniture Finishing Mistakes You Don’t Want to Make
Furniture finishing can be difficult. Avoiding these mistakes and following these simple steps will ensure a flawless finish for your DIY project.
If you’re like me you’ve probably had a furniture finishing failure. There are so many factors that affect the outcome of a furniture project from properly preparing the wood to correctly applying the stain and top coat. Today we’ll look at the common furniture finishing mistakes and how to avoid them.
For your convenience, this post contains affiliate links to supplies or tools I used to complete this project. Purchases made using these links help support the Saws on Skates website and allow me to share more DIY projects. and DIY tips with you. There is no cost to you for using these links. Click here to visit my site policies.
What’s your strength and weakness when it comes to DIY? My strength is building DIY furniture and my major weakness has always been finishing those projects. The wood was always blotchy when I stained it, the stain color never looked like the sample on the can and my top coat looked like someone spilled clear nail polish from the dollar store on my project!
Finishing was always sooo FRUSTRATING! I would spend so much time building, drilling pocket holes, clamping to make sure joints were perfectly aligned and then I would end up ruining the piece when I attempted to finish it.
Since starting Saws on Skates in 2015 I’ve worked hard to improve my furniture finishing skills. The following are the mistakes I’ve made along the way and the easy finishing method I’ve developed so that we can easily get a professional look for our furniture projects.
5 Furniture Finishing Mistakes You Don’t Want to Make
Step 1. Start with Sanding
A quality finish begins by properly preparing the surface of your furniture project. All of the stain and polyurethane in the world won’t cover the mistakes of a poorly prepared project. And a quality finish begins with sanding all of the surfaces perfectly smooth.
I’ve taken a lot of heat for what I’m about to say, but I’m going to say it anyway. Don’t use a palm sander to sand your DIY furniture projects! Palm sanders vibrate like a jackhammer and the worst part is they scratch the surface of the wood with “figure 8s”. And if you don’t believe me about the “figure 8s” try the light trick I use when I sand my DIY projects and you’ll see what I mean. Sure you can sand out the “figure 8s” with more sanding, but who wants to sand more than they need to?
So what type of sander do I prefer for sanding my DIY furniture projects? I LOVE my random orbit sander! And for most projects I only need to use 120 grit sandpaper as my final grit.
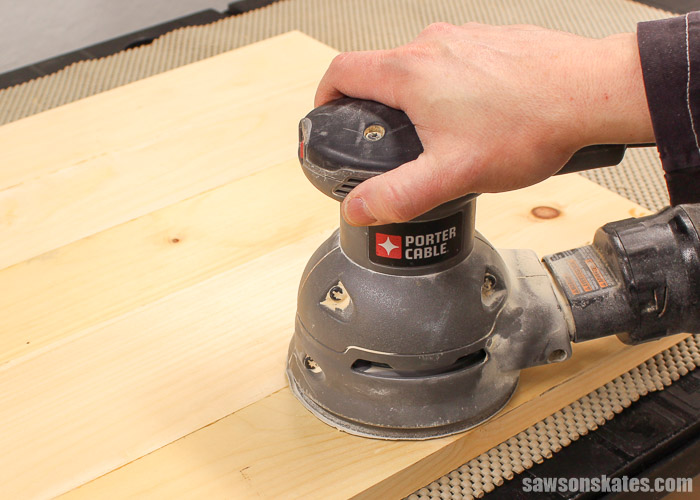
Skate over to How to Sand Your DIY Project for a Flawless Finish for a primer on sandpaper, why I use a non-slip router pad when sanding, how a utility light can highlight imperfections, and sanding tricks to make your projects look more professional.
And while we’re talking sanding and sandpaper, where do you store your sandpaper? Skate over to this post to see the WEIRD way I organize and store my sandpaper.
TIP: Some areas of a furniture project can be difficult to sand when the project is fully assembled, so I like to sand as I build my project. For me, it’s sooo much easier to sand parts when they’re disassembled and flat on my flip-top workbench or Mobile Project Center rather than sanding when the piece is fully assembled.
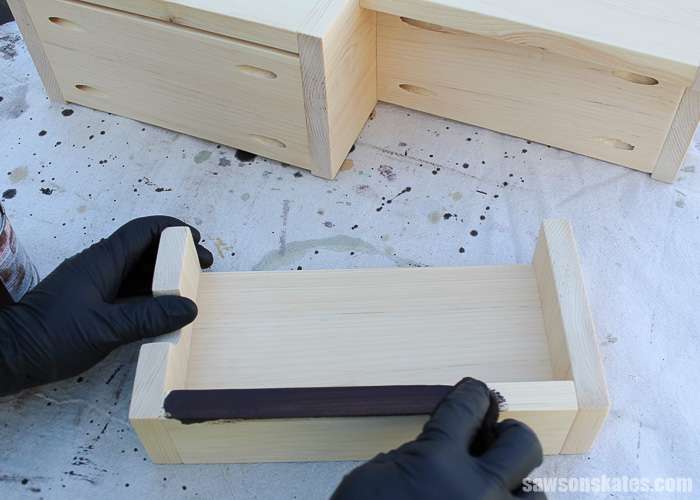
Step 2. Fill any Holes or Gaps
Have you ever used a store-bought wood filler to fill nail holes or small gaps in your DIY furniture projects? In my experience, store-bought wood filler doesn’t look too bad next to raw wood, but it sticks out like a sore thumb when it’s stained.
Any time I would use a store-bought wood filler the wood would stain darker than the filler. To me, store-bought wood fillers just never seemed to match. It’s definitely not the attractive, professional look I want for my DIY furniture projects.
That’s why I started DIYing my own wood filler. This DIY wood filler recipe is made with only two ingredients. The main ingredient is sawdust I collected from my random orbit sander. Oh, just an FYI if your project is made with pine you’ll need pine sawdust to make the wood filler.
Skate over to the DIY wood filler recipe to learn how easy it is to make and the best places to use this wood filler.
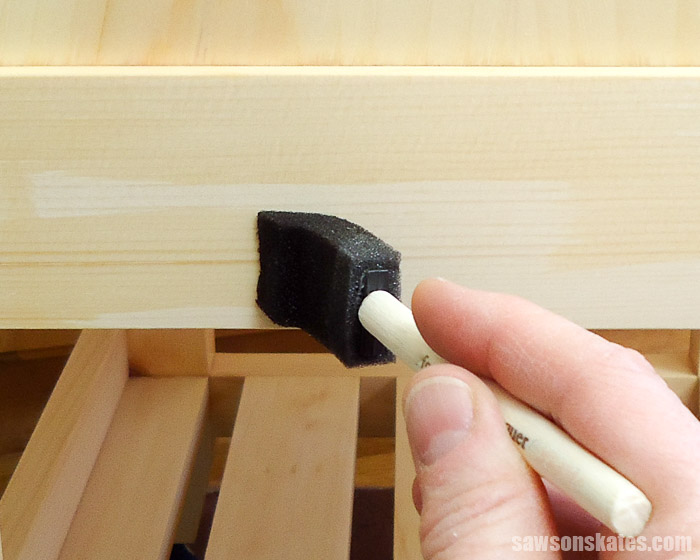
Step 3. Prevent Blotchiness
Softwoods like pine can get blotchy when a wood stain is applied. Blotchy wood is not an attractive look for our DIY furniture projects. Store-bought wood conditioners can be applied to help prevent blotchiness, but I prefer to use tea instead.
Did I just say tea? Yup, tea! Tea or a tea stain has three benefits for our DIY furniture projects. It prevents blotchiness, evens out the wood tone and wood treated with a tea stain will actually stain darker than wood that hasn’t been treated with tea.
Skate over to 3 Reasons Why I Always Apply a Tea Stain to my DIY furniture for tips about why I apply a tea stain before I apply a wood stain and to learn which tea I prefer.
Step 4. Apply a Quality Stain
I’ve tried a lot of stains from different manufacturers over the years, but now I only buy Rust-Oleum Ultimate Wood Stains. For me, Rust-Oleum Ultimate Wood Stains are hands down the BEST. Rust-Oleum stains dry quickly, they produce a deep, rich color and the color always looks like the sample on the container.
What are my favorite Rust-Oleum Ultimate Wood Stains colors? I love the Dark Walnut, Early American, and Kona. Skate over to Wall-Mounted Wine Bar and the DIY Bathroom Vanity to check out the Dark Walnut stain color. It’s gorgeous!
After my furniture project has been sanded, any holes or gaps have been filled with a DIY wood filler and a coat of tea has been applied I’ll then apply a Rust-Oleum Ultimate Wood Stain. When applying the stain be sure to work in a well-ventilated area and protect your eyes with safety glasses, lungs with a respirator and hands with disposable gloves.
I prefer to apply the Rust-Oleum Ultimate Wood Stain with a rag (or sometimes an old sock!) Dip the rag into the container and apply the stain to the wood in a downward, circular motion. This motion forces the stain deep into the fibers of the wood.
Next, remove the excess stain with a clean rag. Just a note about working with Rust-Oleum Ultimate Wood Stains when using a tea stain. Wood treated with a tea stain absorbs wood stain much more quickly than untreated wood. Because of this, you won’t need to leave the stain on as long as recommended by the instructions.
Rust-Oleum recommends removing the excess stain after 5-10 minutes, but you’ll want to watch it closely and start removing it just before it appears like it’s starting to dry. If you leave it on too long, the wood stain will dry and will be difficult to remove.
TIP: The instructions for the Rust-Oleum stain says you can apply a top coat after one hour, but I always wait 24 hours before applying my top coat.
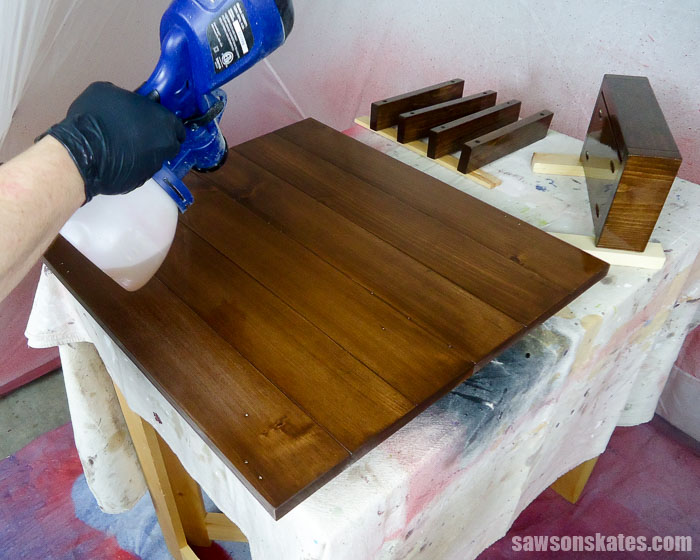
Step 5. Apply a Top Coat
Next to avoiding blotchy stain and getting the stain color right, applying a professional looking top coat has been one of my biggest challenges. In fact, I even wrote a post called 3 Reasons Why I Don’t Use Polyurethane. In that post, I shared that applying poly with a brush was too difficult and instead I top coated my furniture projects with a DIY finish for wood. It’s a recipe I learned while improving my furniture building skills.
The instructor of the furniture class, Bob shared a three ingredient top coat that was easy to make, easy to apply and gave my furniture projects a professional look. THANK YOU, BOB! I’ve nicknamed the finish Bob’s Miracle Finish for Wood and you can skate over here to get the recipe.
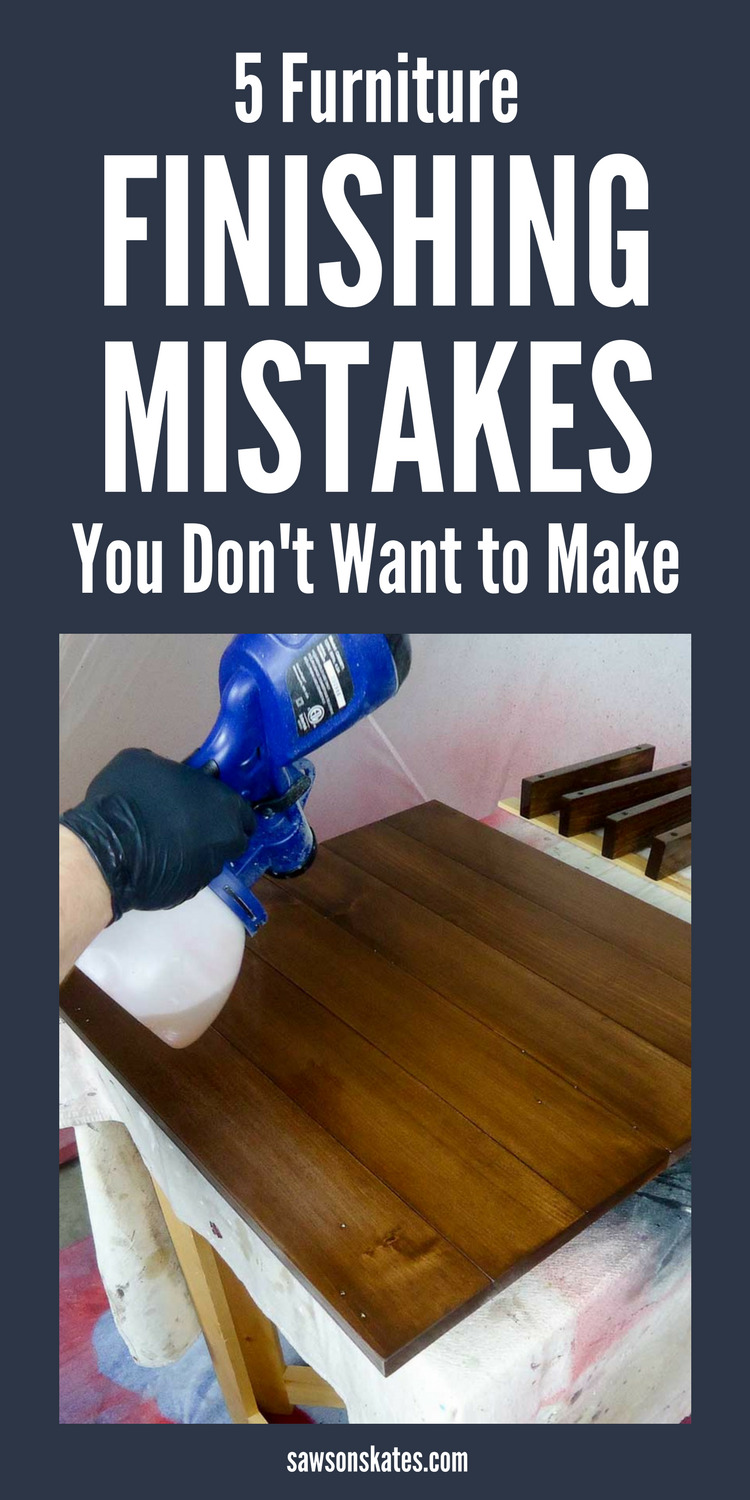
Then I had a polyurethane change of heart. I bought a HomeRight Super Finish Max paint sprayer to spray paint on the Outdoor Coffee Table with 4 Hidden Side Tables and learned the sprayer could spray poly too.
My first attempt at spraying polyurethane was on the Wall-Mounted Wine Bar. I am thoroughly impressed with how the finish turned out. It looks like it came from a furniture factory! Skate over to Spray Polyurethane Rather Than Brush for Professional Looking DIY Furniture for tips about spraying poly. And for paint sprayer mistakes to avoid and to get your FREE paint mixing cheat sheet skate over to 9 Paint Sprayer Mistakes You Don’t Want to Make.
Now I use both techniques on my projects. For furniture projects and home decor projects that see less wear and tear I use Bob’s Miracle Finish for Wood. For furniture projects that need a more durable finish like tables, etc. I use my HomeRight Super Finish Max to spray polyurethane.
Conclusion
Furniture finishing can be difficult. Avoiding these mistakes and following these simple steps will ensure a flawless finish for your DIY project.
Thank you for stopping by. If you found this information helpful, would you please pin it to Pinterest? Other DIYers would appreciate it and I would too! Thank you – Scott
PIN THIS!

Hi there – I’m Scott, a woodworking enthusiast and creator of Saws on Skates, a site I started in 2015 to share easy-to-follow tutorials, space-saving shop tips, and project inspiration for DIYers at any skill level. Learn more about my woodworking journey here.