DIY Coffee Cart (with Serving Tray)
Create a stylish, functional brewing station with this DIY coffee cart and removable serving tray. Easy step-by-step plan included.

What Should I Build Next?
That's the question I help answer.
Every week, I send woodworking ideas to 17,000 DIYers who love building things.
You'd fit right in.
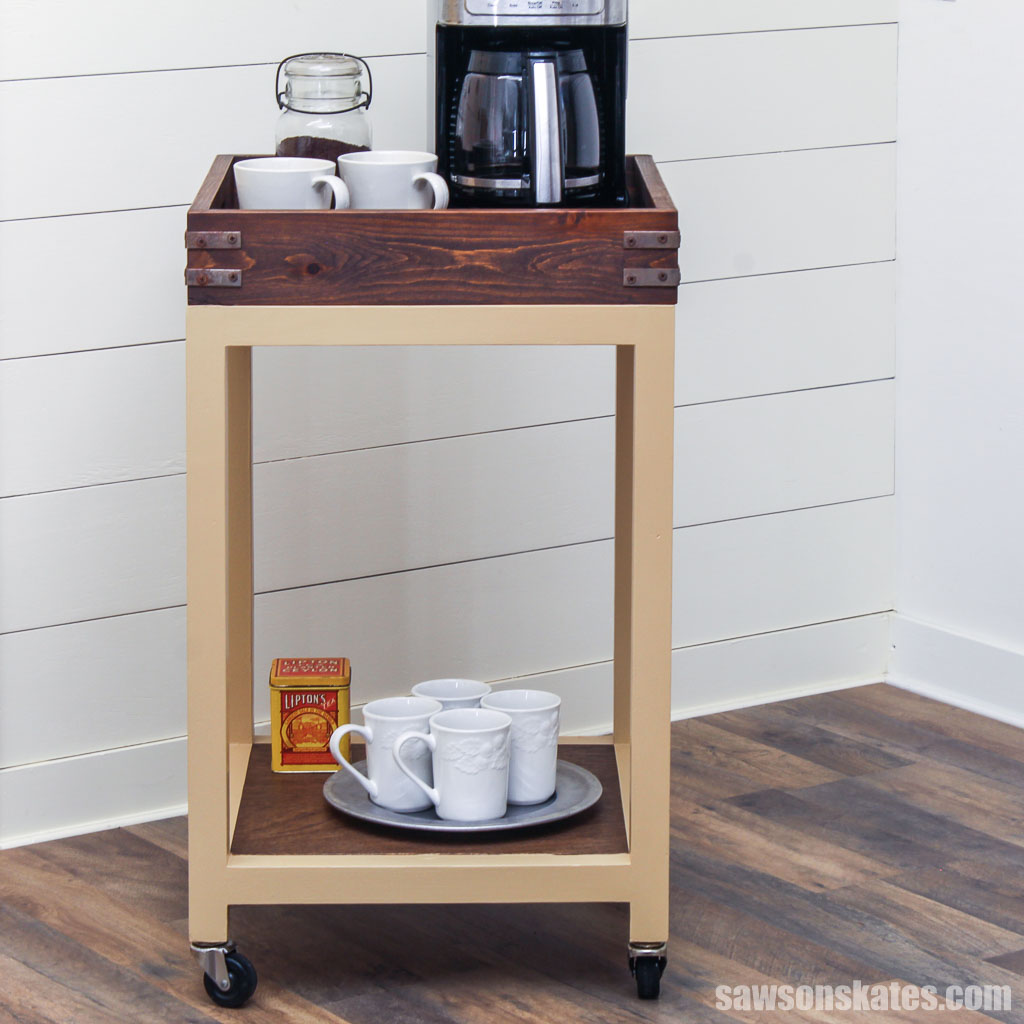
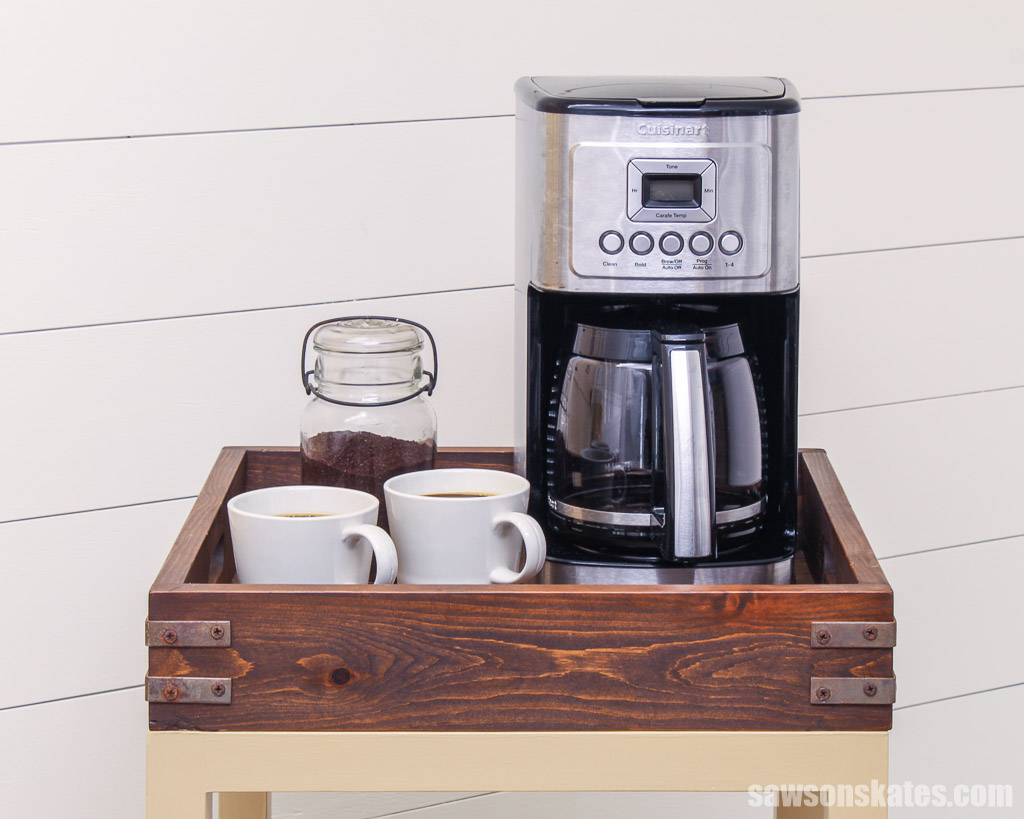
Calling all coffee lovers! Are you tired of cluttering your kitchen countertops with a coffee maker and mugs? I have the perfect solution. This handy and oh-so-stylish DIY coffee cart will streamline your morning routine and add charm to your kitchen or home office.
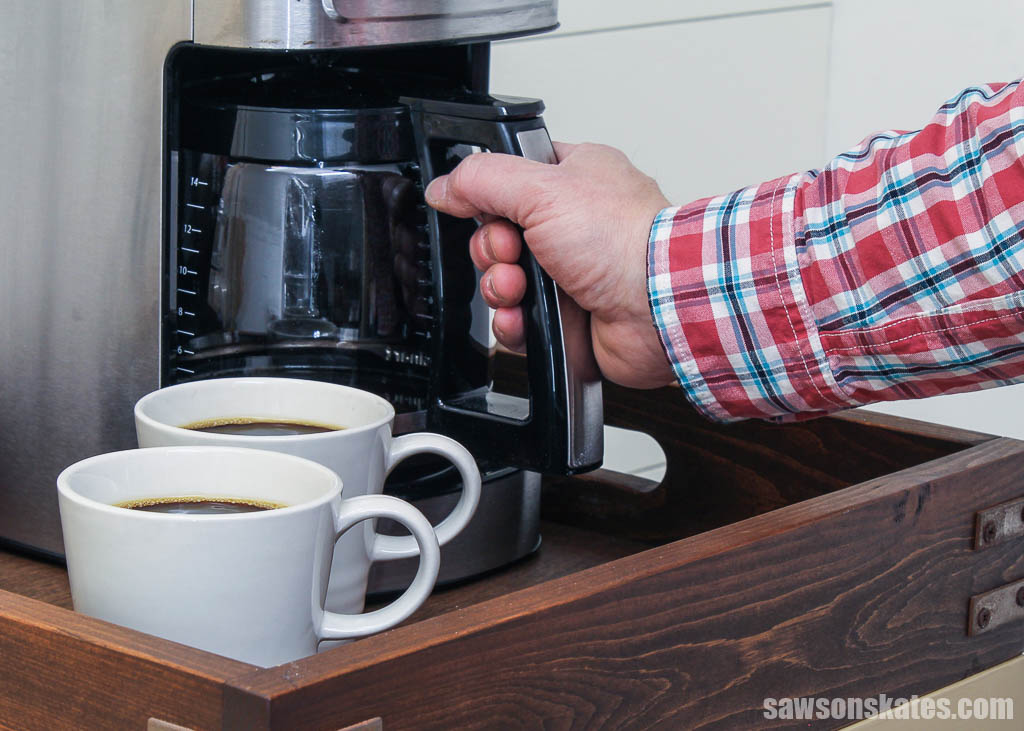
This project is easy to make and includes a removable serving tray for added convenience. Now, you can have your morning brew in style, all while saving precious counter space. So grab your tools and I’ll show you how to make this coffee lover’s dream.
Table of Contents
- What Tools Do You Need?
- What Wood Should You Use?
- How Do You Finish the Coffee Cart?
- How to Make a DIY Coffee Cart
- Get the PDF Plan
This article contains affiliate links. If you purchase from these links, I may earn a small commission at no additional cost to you. Visit my site policies for more information.
Inspiration for This DIY Coffee Cart
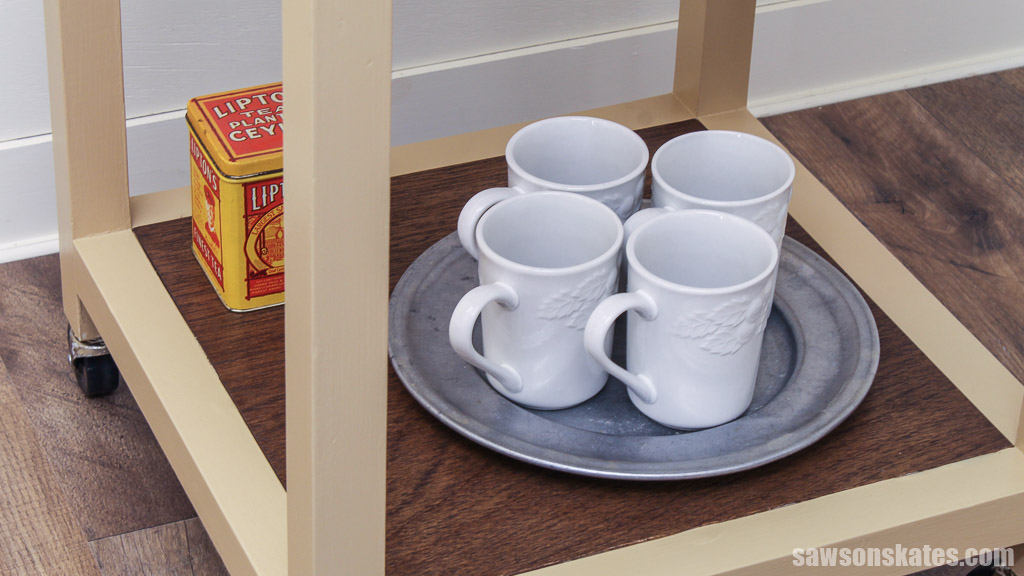
A cramped kitchen in one of my friend’s vacation rentals posed a coffee-making challenge for guests. Inspired by this existing project, I devised a clever coffee cart providing the perfect spot for them to brew their morning cup and keep everything organized, from the machine and coffee to the filters and mugs.
What Tools Do You Need?
Ready to brew up your own DIY coffee cart? You’ll need a miter saw, jigsaw, pocket hole jig, and a drill.
I also used a table saw to cut the cart’s shelf and the serving tray’s bottom. You could make these cuts using a circular saw and a Kreg Rip-Cut if you don’t have a table saw or aren’t comfortable using one.
Related: How to Get into Woodworking Without a Table Saw
What Wood Should You Use?
I made my coffee bar’s serving tray with 1×2s and 1×4s. I designed the cart’s frame to be built with budget-friendly 2×2s. They’re easy on the wallet, but finding ones that aren’t bent or twisted is challenging.
However, you might be able to find some if you give the lumber pile a careful once-over. Be sure to choose the straightest boards with the fewest knots.
Related: How to Buy Wood (Top Tips for Choosing Woodworking Lumber)
Standard 2×2s have rounded edges, which wasn’t the aesthetic I envisioned for my coffee cart. To achieve the desired look, I opted for 2×4s and removed the rounded edge using my table saw before ripping them down to match the width of a 2×2.
Related: How to Cut 2×4s Lengthwise (With a Table Saw)
I also used a small sheet of ½” plywood to make the shelf and the tray’s bottom.
How Do You Finish the Coffee Cart?
I chose to paint my cart’s frame and stain the tray and shelf, but you can customize your finish to suit your taste and decor.
- Cart Frame: I primed the cart and applied two coats of paint.
- Serving Tray and Shelf: I stained the tray and shelf with Rust-Oleum wood stain in “Early American.” I allowed the stain to dry for about 24 hours and sealed the pieces with polyurethane.
DIY Coffee Cart with a Serving Tray
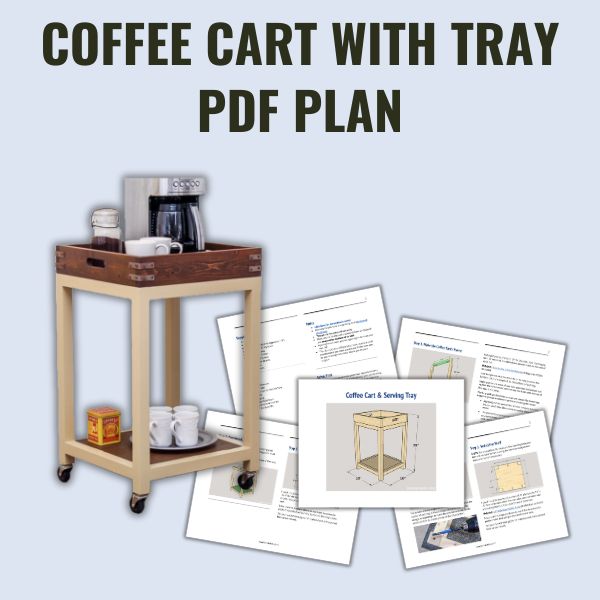
Printed Plan
Get the PDF plan here (includes detailed instructions, measurements, and bonus tips)
Supplies
- Wood (per the printed plan)
- 1″ Pocket Screws
- 2-½” Pocket Screws
- #8 1″ Wood Screws
- (8) 2″ Corner Braces
- Wood Glue
- (4) 2″ Casters
Tools
- Tape Measure
- Miter Saw
- Table Saw or Circular Saw
- Jigsaw
- Kreg Jig
- Kreg Multi-Mark
- Countersink Drill Bit
- 1″ Forstner Bit
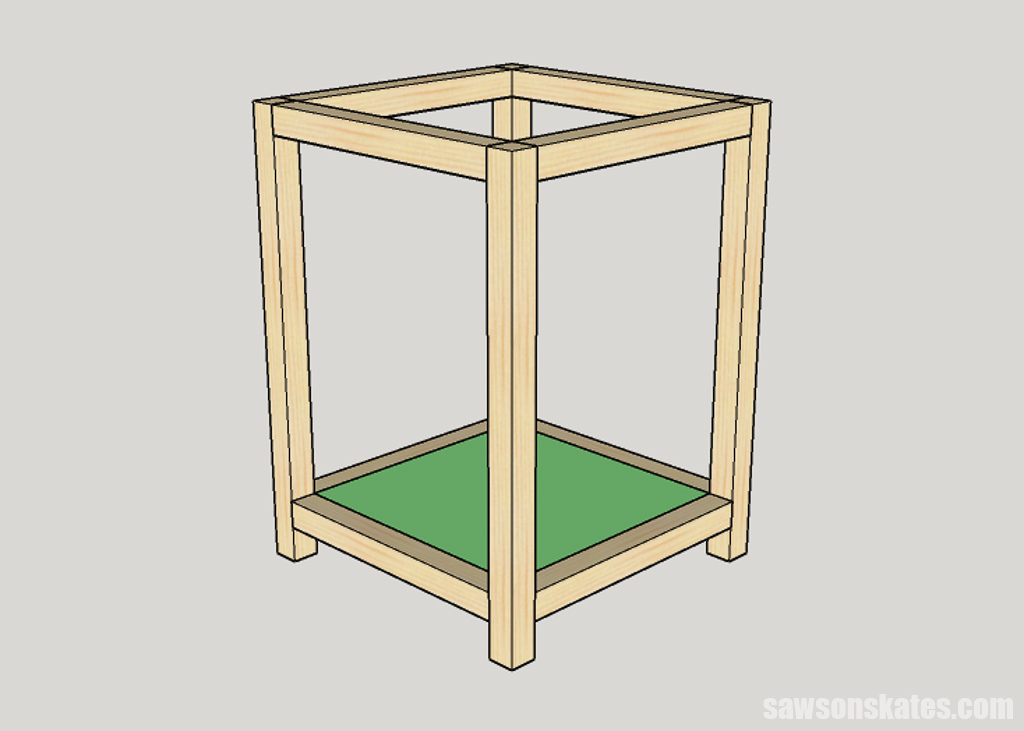
Step 1. Make the Coffee Cart’s Frame
Cut four pieces of wood to length for the legs.
Cut eight pieces of wood to length for the rails. I set my Kreg Jig and drilled two pocket holes in the end of each rail.
Related: How to Use a Pocket Hole Jig (& Beginner Pitfalls to Avoid)
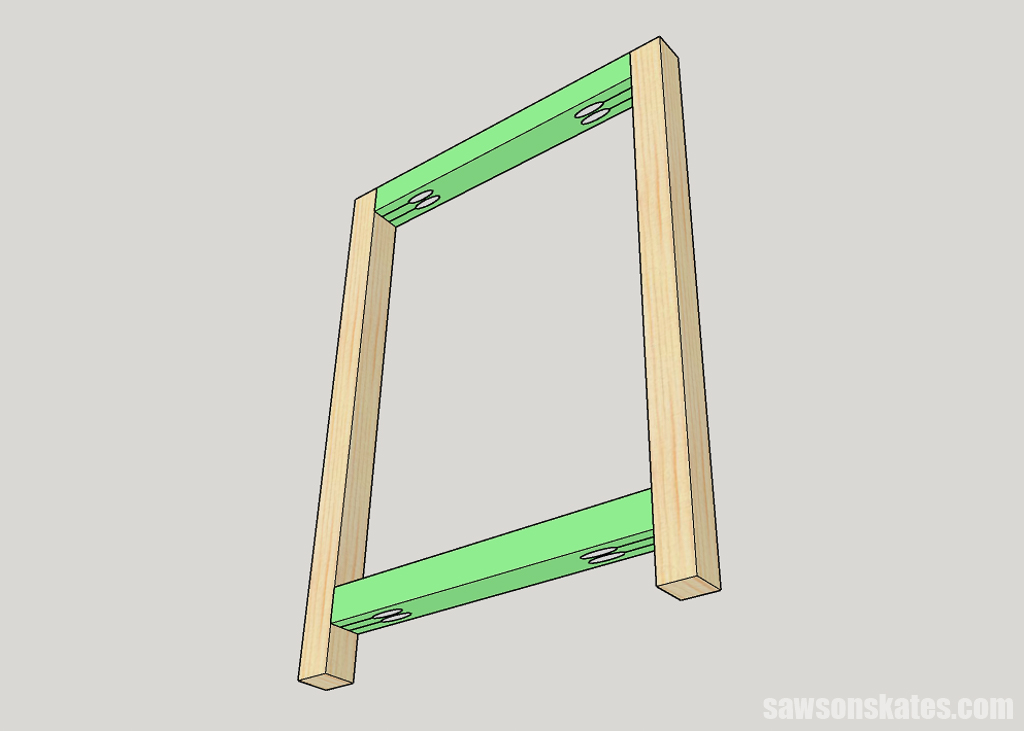
I cut two pieces of scrap wood to length to help position the bottom rail and clamped it to the bottom of each leg.
Apply glue to the ends of two rails, position the bottom rail against the scrap wood and the top rail flush with the top of the legs, and clamp.
Working with pocket holes on narrow pieces like these legs requires special attention to prevent cracking the wood.
- Applying candle wax to the screw’s threads reduces friction and helps them slide smoothly through the wood.
- The pocket hole screws create an outward force as you drive them into the wood, which can cause it to split. Using a Kreg Face Clamp on the joint helps to control this outward force.
- Finally, slowly driving the screws allows you to listen for any signs of stress and stop before a split occurs.
Attach the rails to the legs using pocket hole screws. Repeat these steps for the remaining pair of legs.
Related: 7 Ways to Prevent Pocket Screws from Splitting Wood
Next, follow the previous steps to connect the two leg assemblies with the remaining rails.
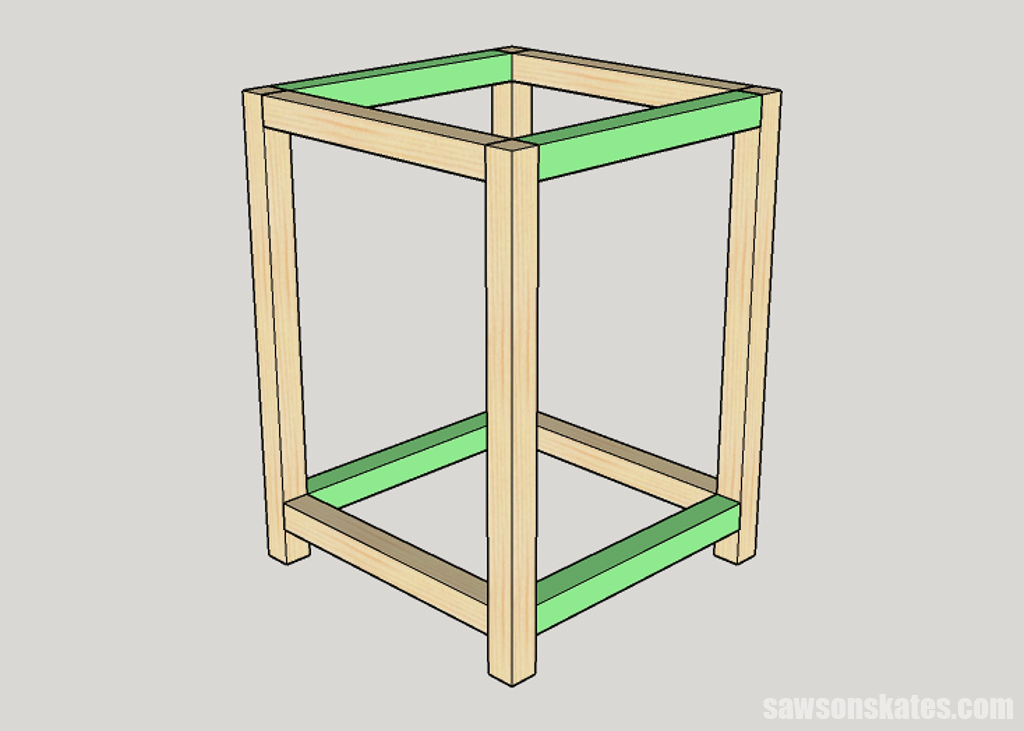
The casters I chose required drilling a mounting hole in the center of each leg. I drew a diagonal line across the leg using a straightedge to mark the precise location. Then, I used a drill bit to create a hole at the intersection.
Step 2. Install the Shelf
NOTE: For a seamless fit, measure the opening between the bottom rails before cutting the shelf and adjust the measurements if necessary.
I used my table saw to cut a piece of plywood to size for the bottom shelf. You can also use a circular saw and a Kreg Rip-Cut if you don’t have a table saw.
Next, use the diagram in the printed plan to mark the locations for pocket holes that will join the shelf to the rails.
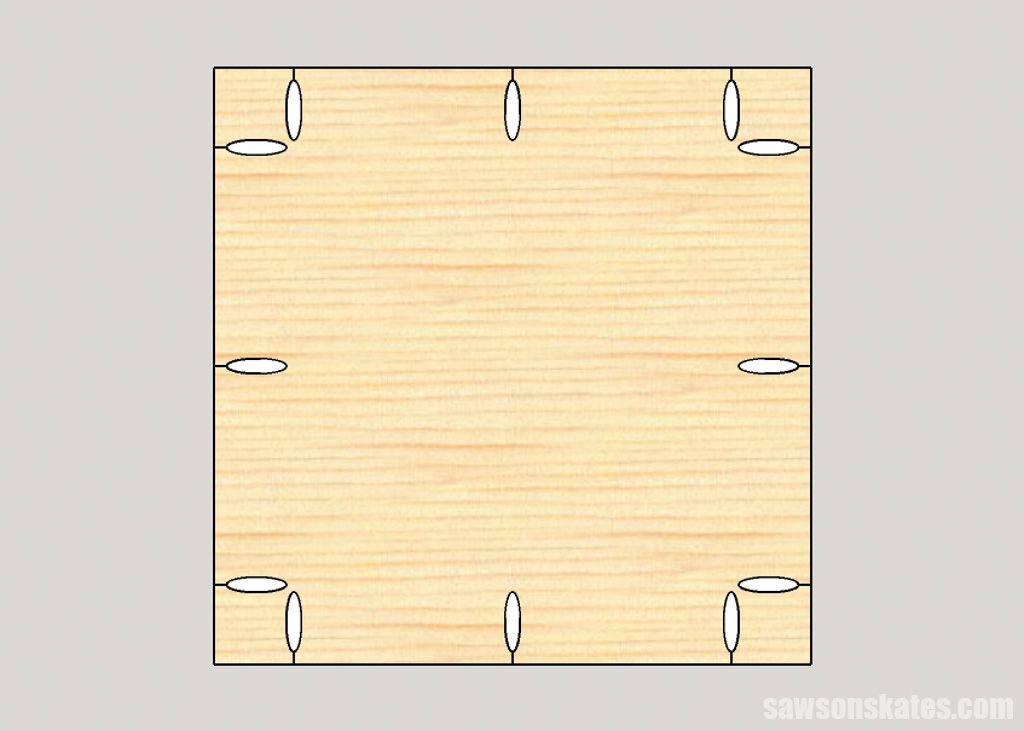
Set your pocket hole jig and drill a pocket hole at each mark.
TIP: For the best results, I recommend applying your desired finishes (paint/stain) to the cart’s legs and shelf separately before installation.
Position the top of the shelf flush with the top of the rails and attach using pocket hole screws.
Step 3. Make the Serving Tray
I used my table saw to cut a piece of plywood to size for the serving tray’s bottom. Again, you can use a circular saw and a Kreg Rip-Cut if you don’t have a table saw.
Next, use the diagram in the printed plan to mark the locations for pocket holes that will join the bottom to the tray’s sides.
Set your pocket hole jig for and drill a pocket hole at each mark.
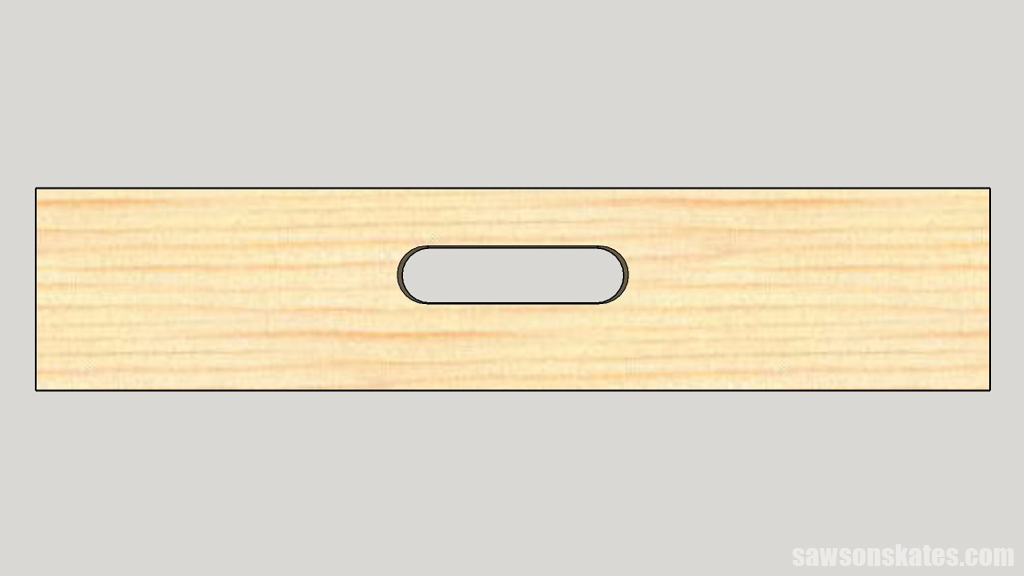
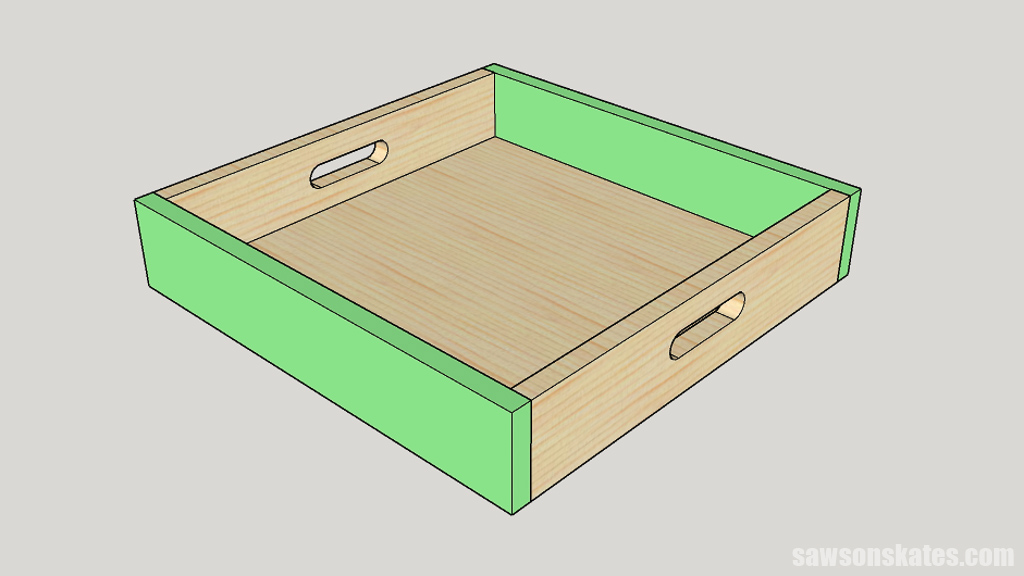
Cut two pieces of wood to length for the tray sides. Use the diagram in the printed plan to mark the location for the handles.
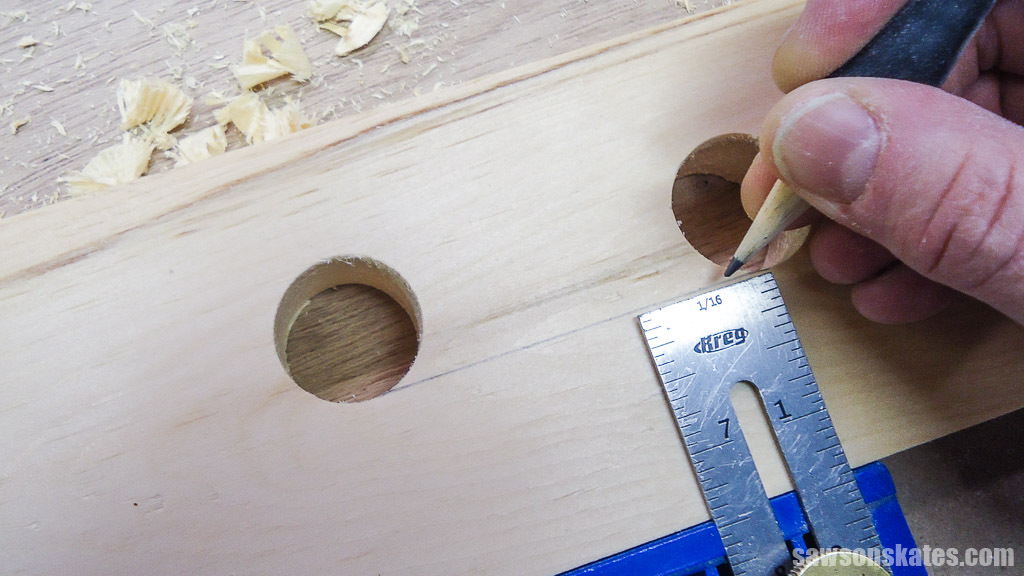
Next, use an awl to make a starting point for the drill bit.
Related: What is an Awl? (+ How to Use It)
Then, use a 1″ Forstner bit to drill a hole at each mark.
Related: What is a Forstner Bit? (& How to Use It)
To define the handle’s shape, I used a Kreg Multi-Mark to draw lines connecting the top and bottom of each hole.
Following these lines, I used a jigsaw to remove the remaining material. Finally, I smoothed the inside edges of the handles with sandpaper, ensuring a comfortable and finished look.
TIP: You can attach store-bought cabinet handles instead of cutting them out, saving time and effort and offering a wider variety of handle styles.
Apply glue to the edges of the tray’s bottom, position the sides, and clamp. Attach using pocket hole screws.
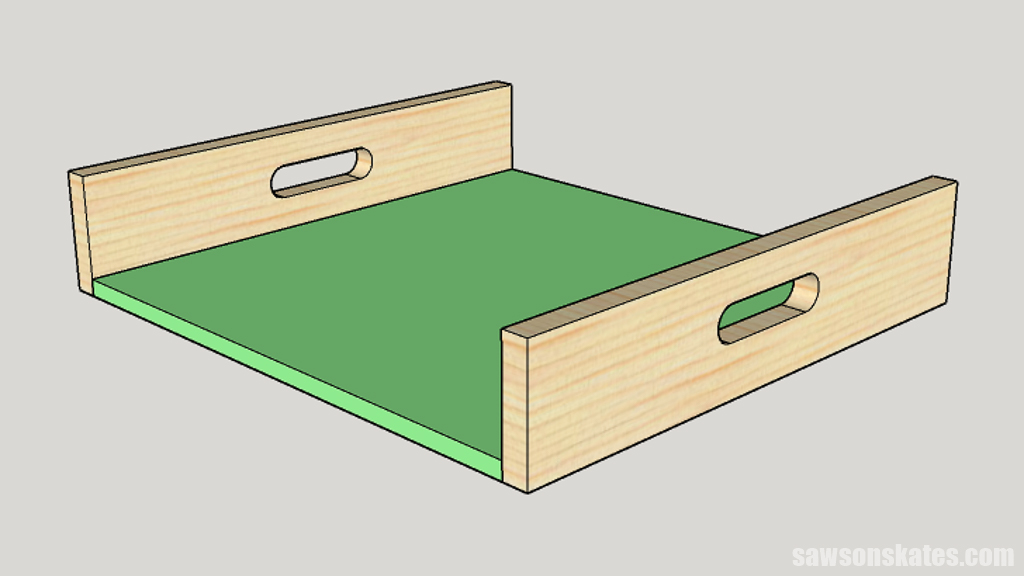
Cut two pieces of wood to length for the remaining sides. Apply glue to the edges of the tray’s bottom, position the sides, and clamp. Attach using pocket hole screws.
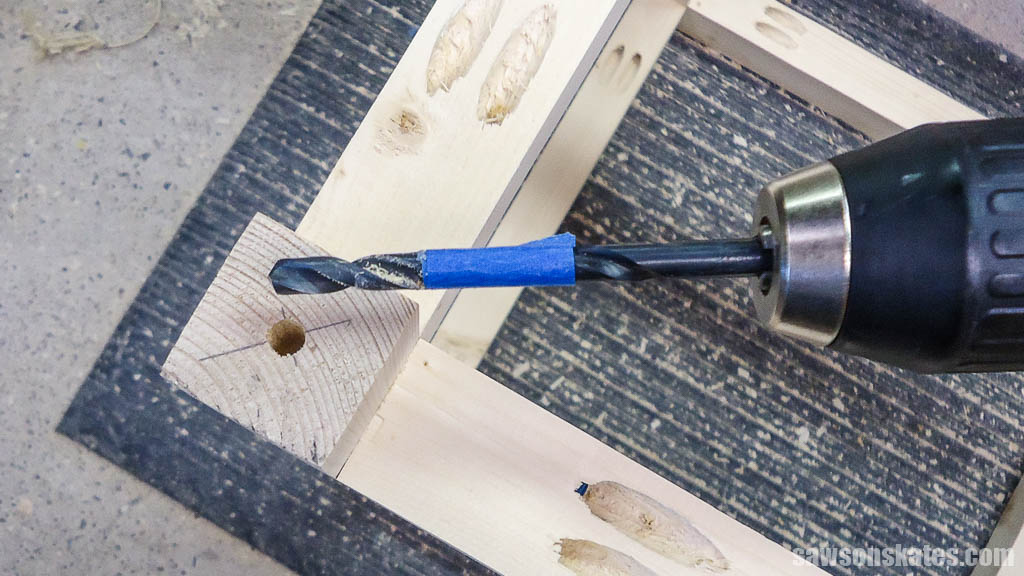
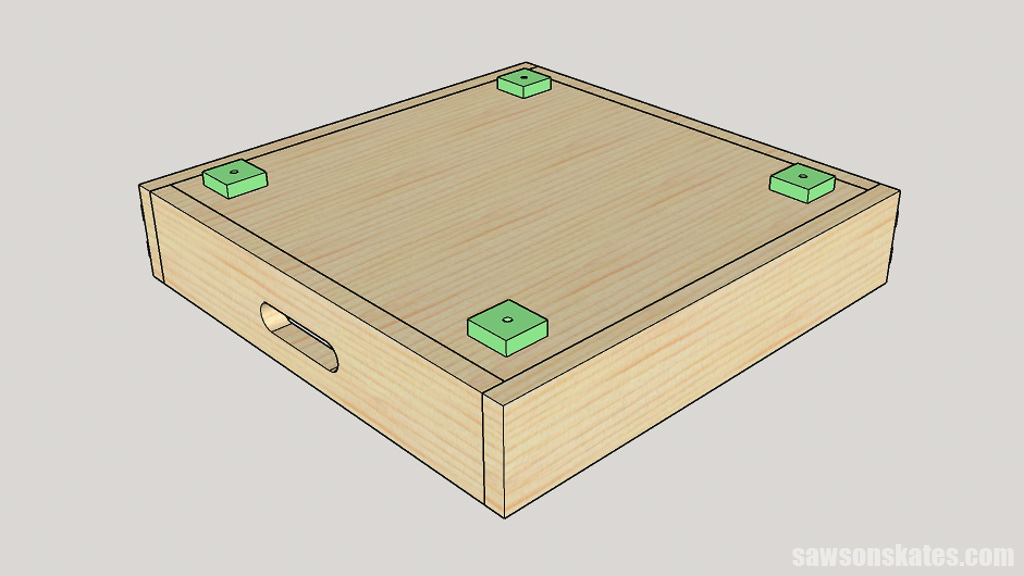
Cut four pieces of wood to length for the feet. These multi-functional pieces elevate the tray and secure it in the cart.
Using a straightedge, I drew a line from corner to corner to locate the foot’s center.
Then, I used an awl at each intersection to make a starting point for the drill.
Next, I used a countersink bit to drill a hole at each mark.
Related: How to Use a Countersink Bit
NOTE: Measure the space between the rails before attaching the feet. Make sure there’s clearance for easy positioning.
Use the diagram in the printed plan to position the feet on the tray and attach using 1″ wood screws.
TIP: You could also attach the feet with a brad nailer instead of screws.
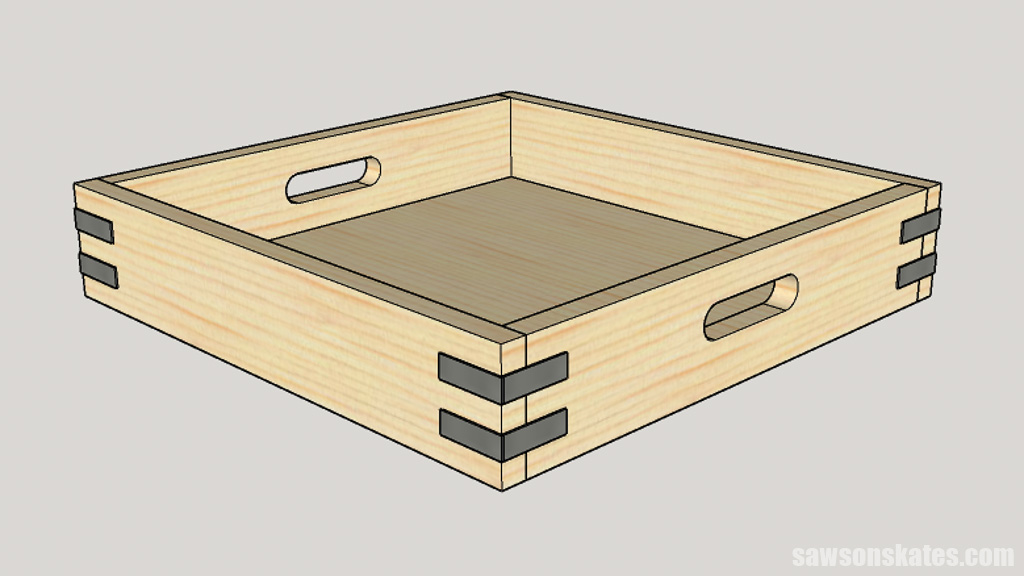
Use the diagram in the printed plan to position the corner braces on the tray and attach using the screws that came with them.
Step 4. Finish the Coffee Cart
Please see “How to Finish the Coffee Cart” for more details.
Includes:
- List of tools and materials
- Complete measurements (in inches)
- Easy-to-follow instructions
- Detailed diagrams
Final Thoughts
Elevate your coffee routine with this DIY coffee cart. It’s an excellent way to clear clutter from your counters and keep your brewing essentials organized in one stylish place. Plus, with a removable serving tray, you can take your coffee and snacks on the go.
Don’t wait. Get your PDF plan (including the detailed instructions and measurements) now!
Thank you for stopping by. If you enjoyed this tutorial, would you please take a moment and pin it to Pinterest? I’d really appreciate it!
Recommended For You
Pin This For Later

Hi there – I’m Scott, a woodworking enthusiast and creator of Saws on Skates, a site I started in 2015 to share easy-to-follow tutorials, space-saving shop tips, and project inspiration for DIYers at any skill level. Learn more about my woodworking journey here.