How to Use Rit Dye on Wood
Rit Dye is a simple, inexpensive way to dye wood in nearly any color. These step-by-step instructions will help you do it right the first time.
Rit Dye on Wood
Rit Dye isn’t just for changing the color of a shirt or sweater. You can also use it to dye wood. Fabric dye is easy to apply, doesn’t have stinky fumes like an oil-based stain, and is available in a variety of colors.
In this tutorial, I’ll share how to dye wood with Rit Dye, including helpful tips, tricks, and mistakes you’ll want to avoid.
This tutorial contains affiliate links to supplies and tools. Purchases made using these links help support the Saws on Skates website and allows me to share more projects and tips with you. There is no cost to you for using these links. Visit my site policies for more information.
Table of Contents
- Inspiration for This Project
- Can You Use Rit Dye on Wood?
- What Do You Need to Stain Wood with Rit Dye?
- How Do You Prepare the Wood?
- Should You Use a Wood Conditioner?
- How Do You Apply Rit Dye?
- How Many Coats of Dye Can You Apply?
- How Long Does Rit Dye Need to Dry Between Coats?
- Do You Need to Sand Between Coats?
- Problems and Solutions
- How Do You Seal the Wood?
- How Long Should You Wait Before Sealing?
- My Recommendation
- How to Stain Wood with Rit Dye
Inspiration for This Project
I recently shared this comparison of seven stainable wood fillers. After publishing the tutorial, I received a handful of messages from readers asking about using wood dye instead of wood stain.
Related: Does Stainable Wood Filler Really Work? (Here’s the Answer)
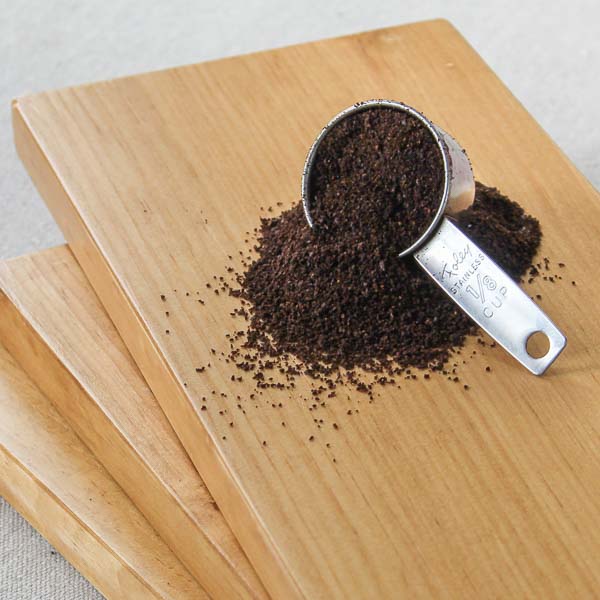
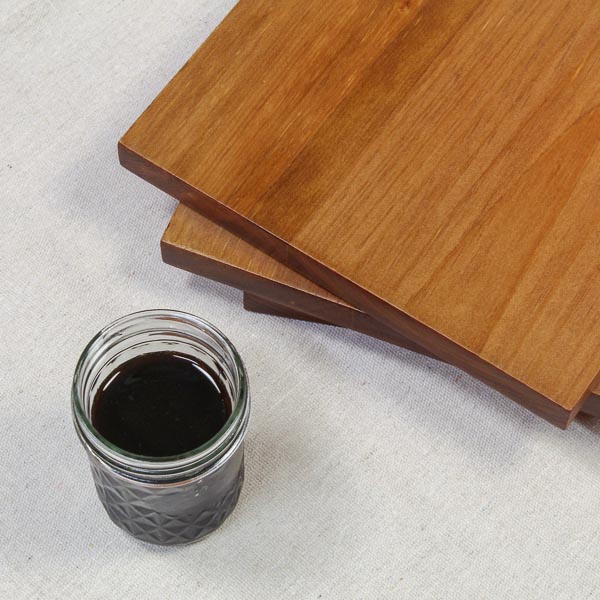
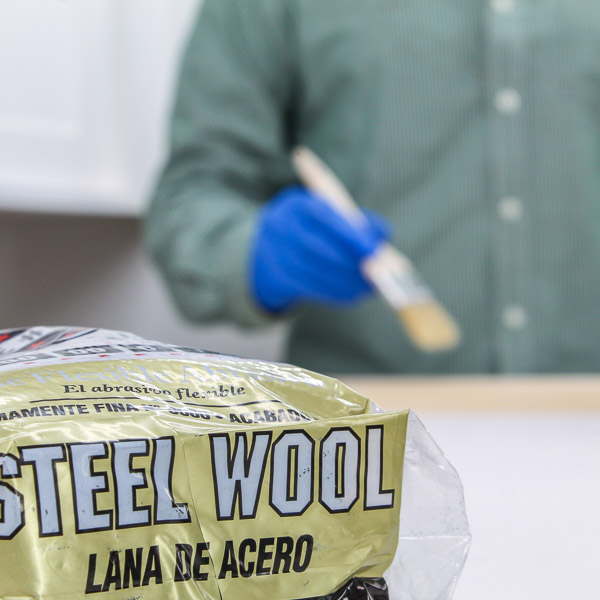
I’ve shared tutorials about making your own stain with coffee, black walnuts, and steel wool and vinegar, but I didn’t have much experience with wood dye, so I did some research.
You can buy store-bought wood dye stains like General Finishes, but I also learned you could change the color of wood with fabric dye, like Rit Dye. Many of the examples I found were bright, rainbow-like colors. So for this tutorial, I thought I would experiment with some traditional colors that you might use for a furniture project.
In this tutorial, I tested two colors of Rit Dye:
I tested the colors on:
- Pine boards
- Plywood
I also compared applying Rit Dye to wood treated with a pre-stain conditioner to wood that was not treated.
Related: What I Use Instead of Wood Conditioner
Back to Table of ContentsCan You Use Rit Fabric Dye on Wood?
Yes, you can use liquid dye or powder dye to color solid wood boards, plywood, or even wicker. I used liquid Rit Dye for this tutorial.
What Kind of Wood Can You Dye?
Just like with any wood stain technique, each type of wood will absorb fabric dye differently.
- Softwood
Softwoods, like pine, are porous and absorb dye more easily. - Hardwood
Hardwoods, like oak and maple, are not as porous. Hardwoods may require more coats to achieve the look you want.
Porous woods can become blotchy when using a wood stain or fabric dye. In most cases, applying a wood conditioner before applying a wood stain can help reduce the blotchiness. I’ll share more about this in the Should You Use a Wood Conditioner? section below.
💡 TIP: It’s always a good idea to try the dye on a test piece before using it on your finished project. This way, you can be sure you’re happy with the look.
Back to Table of ContentsWhat Do You Need to Stain Wood with Rit Dye?
- Rit Dye
- Gloves
- Container to mix the dye
- Drop cloth
- Bristle brush, foam brush, or rag
- Clear sealer
How Do You Prepare the Wood?
Rit Dye must be applied to unsealed, unfinished wood. That means if your project already has a finish like polyurethane, you’ll need to remove it before using the fabric dye.
I used new pieces of raw wood for this tutorial. I sanded all of the samples using a random orbital sander with 120 grit sandpaper. The majority of the sanding dust was removed with a ShopVac, and any remaining dust was removed with a synthetic tack cloth.
Related: Best Sanders for Furniture: What to Buy & Why
The end grain of wood tends to pull in more stain than the rest of the board. I’ve noticed this is especially true when using a water-based product like fabric dye.
One way to help prevent the end grain from pulling in more dye is to sand the end grain to a higher grit than the rest of the board.
I didn’t sand the end grain of the samples in this tutorial. But for other projects, I used this sandpaper assortment to sand the end grain with 180 grit, 220 grit, 240 grit, 280 grit, and finished sanding with 320 grit sandpaper.
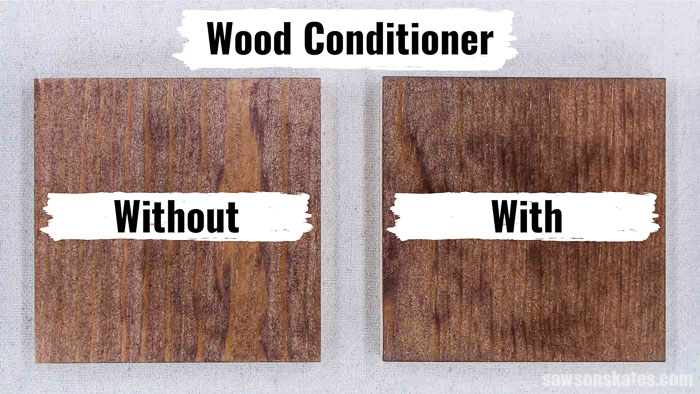
Back to Table of ContentsShould You Use a Wood Conditioner?
A wood conditioner helps wood to stain more evenly. It works by preventing the stain from soaking too deeply into the wood. In most cases, I apply wood conditioner to softwoods like pine before applying store-bought stains.
For this tutorial, I compared wood treated with a wood conditioner to wood that was not treated. I used black tea, one of three natural conditioners that I use instead of store-bought wood conditioner.
What I found is applying a wood conditioner produced inconsistent results when used with fabric dye. On some boards, the conditioner reduced the blotchiness. On other boards, the blotchiness was about the same as a board that was not treated with a conditioner.
I’ll share a solution for this in the Problems and Solutions section below.
Back to Table of ContentsHow Do You Apply Rit Dye?
There are two dye techniques that you can use to apply Rit Dye to wood. You can either immerse the wood in a dye solution or apply the dye with a brush or rag.
Dip or Dye Bath
- Small pieces, like home decor projects, candle holders, etc., are good choices for the immersion or dye bath method.
- A solution of dye and water is mixed inside a container like a pan or plastic storage tote.
- The wood pieces are dipped in the solution for 10 to 20 minutes, swishing or rotating the pieces occasionally for even coverage.
Brush or Rag
For larger projects, you can apply the dye with a bristle brush, foam brush, or rag. The dye can be applied diluted or undiluted.
Diluted
- The dye is mixed with water. You can add more water to make it lighter or more dye to make it darker.
- Diluted dye produces a softer, more subtle look.
- You can apply the dye mixture with a brush or wipe with a rag.
Undiluted
- You can apply undiluted dye straight from the bottle.
- Undiluted dye produces a more intense color that looks similar to store-bought wood stain.
- I think the undiluted dye is easiest to apply with a rag.
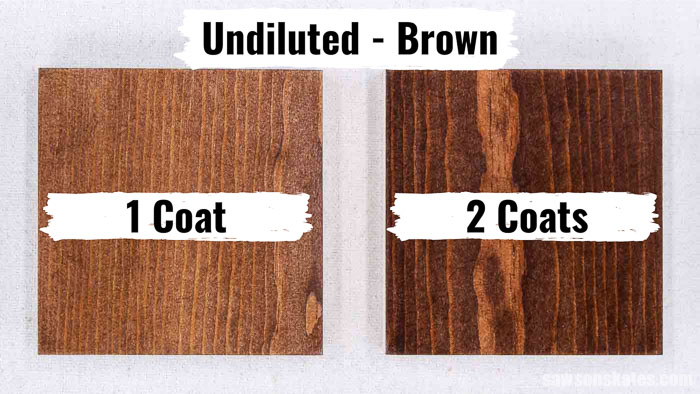
How Many Coats of Rit Dye Can You Apply?
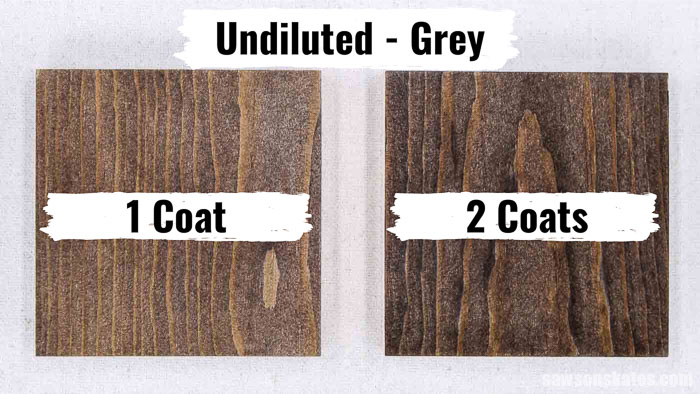
You can apply one coat, or for a deeper tone, you can apply additional coats. For this tutorial, I tested samples with one coat and two coats.
How Long Does Rit Dye Need to Dry Between Coats?
The dye appeared to be dry after a few hours, but I didn’t have a chance to apply the second coat until about 24 hours after the first coat.
Back to Table of ContentsDo You Need to Sand Between Coats?
I did not sand between coats, but I recommend lightly sanding after allowing the final coat to dry.
Water-based products, like fabric dye, raise the grain of the wood. This means the surface of the wood is no longer smooth.
Once the dye is dry, the wood should be lightly sanded with 220 grit sandpaper to smooth the surface. Then remove most of the sanding dust with ShopVac and remove any remaining dust with a tack cloth.
Related: What is a Tack Cloth? (+ What I Use Instead)
Back to Table of ContentsProblems and Solutions
There are several problems you’ll want to be aware of when using Rit Dye on wood.
Blotchiness and Lap Marks
As I mentioned earlier, I tested a wood conditioner for this comparison. The results were inconsistent. The conditioner reduced the blotchiness on some samples. Other samples had about the same amount of blotchiness as the samples without conditioner.
There was hardly any blotchiness on boards where I tested undiluted dye straight from the bottle.
The blotchiness was most noticeable on boards where I used the diluted dye.
I also noticed lap marks and rag marks where my brush or rag first touched the board. These marks were most noticeable with the diluted dye. There were hardly any visible marks with the undiluted dye.
I experimented with dampening the board with water immediately before applying the dye.
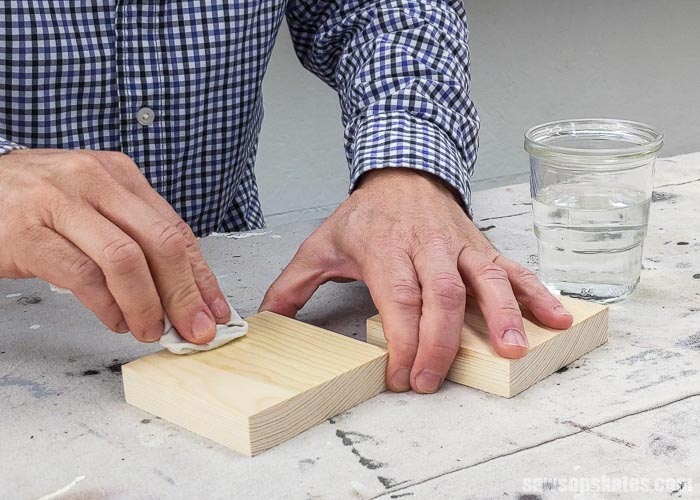
Dampening the wood with water helped reduce the lap marks and appeared to reduce the blotchiness.
SOLUTION: I recommend pretreating the wood with water immediately before applying the diluted dye to help reduce lap marks, rag marks, and blotchiness.
Water Soluble
Just like with this water-based coffee stain and black walnut stain, I tested to see if water would remove the dye. I rubbed the sample with a rag dampened with water, and it removed some of the dye.

That means if you apply a water-based sealer like Polycrylic directly to the wood, it may remove some of the dye.
Related: How to Apply Polycrylic
SOLUTION: You could use an oil-based top coat like polyurethane. Oil-based topcoats usually don’t interact with water-based stains. Or you could apply a coat of wax-free shellac or sanding sealer and then follow up with a water-based top coat like Polycyrylic or a water-based polyurethane alternative. The wax-free shellac will act as a barrier between the dye and the water-based sealer.
Back to Table of ContentsHow Do You Seal the Wood?
As I mentioned in the Problems and Solutions section, applying a water-based sealer like Polycrylic directly to the wood may remove some of the dye.
One option is sealing the wood with an oil-based top coat like poly or Bob’s Miracle Finish. Oil-based topcoats usually don’t interact with water-based stains.
Another option is first applying a coat of wax-free shellac and then follow up with a water-based top coat like Polycyrylic or a water-based polyurethane alternative. The wax-free shellac will act as a barrier between the dye and the water-based sealer.
Related: Polycrylic vs Polyurethane: Are They The Same?
Back to Table of ContentsHow Long Should You Wait Before Sealing?
I usually wait about 24 hours after applying the last coat of stain or dye before applying a top coat.
Back to Table of ContentsMy Recommendation
If I were going to finish one of my projects with Rit Dye, I would use it undiluted, straight from the bottle. I thought the undiluted dye produced the best color, the least amount of rag marks and was the least blotchy.
That said, I probably wouldn’t use fabric dye for an heirloom piece or a big project like a table or dresser. Instead, I would use it for small furniture projects and home decor pieces like frames, shelf brackets, etc.
I didn’t try the immersion technique, but I can see where that could work for small projects.
Back to Table of ContentsStep 1. Prepare the Wood
See How Do You Prepare the Wood? for more details.
🔄 OPTIONAL: You can apply a wood conditioner, lightly sand with 220 grit sandpaper, and remove the sanding dust with a tack cloth. Read my thoughts about using a wood conditioner with fabric dye here.
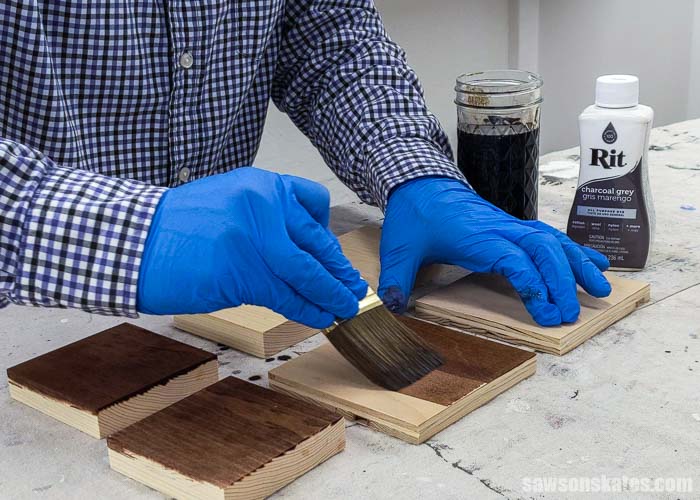
Step 2. Apply the Rit Dye
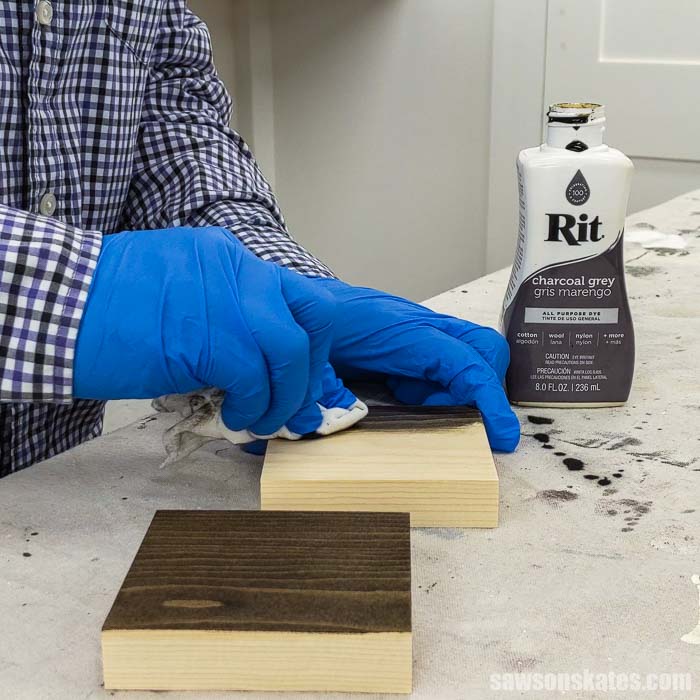
Fabric dye will color anything it touches, so be sure to cover your work surface with a drop cloth and wear disposable gloves.
Vigorously shake the dye container, then use a clean rag to apply the dye to the wood.
Step 3. Apply Second Coat (Optional)
Additional coats can be applied for a darker tone. Allow the first coat to dry before applying additional coats. It usually takes a few hours for each coat to dry.
The dye appeared to be dry after a few hours, but I didn’t have a chance to apply the second coat until about 24 hours after the first coat.

Step 4. Seal the Rit Dye
When the wood was dry, I lightly sanded the boards with 220 grit sandpaper. Then I removed most of the sanding dust with my ShopVac and removed any remaining dust with a tack cloth.
As I mentioned in Problems and Solutions, the fabric dye is water-soluble. In other words, wiping a rag dampened with water removed some of the dye.
See How Do You Seal Wood? for the top coats I recommend for sealing the dye.
How to Use Rit Dye on Wood: Diluted
Supplies
- Rit Dye
- Disposable Gloves
- Container (I used a mason jar)
- Drop Cloth
- Bristle Brush, Foam Brush, or Rag
Step 1. Prepare the Wood
See How Do You Prepare the Wood? for more details.
🔄 OPTIONAL: You can apply a wood conditioner, lightly sand with 220 grit sandpaper, and remove the sanding dust with a tack cloth. Read my thoughts about using a wood conditioner with fabric dye here.
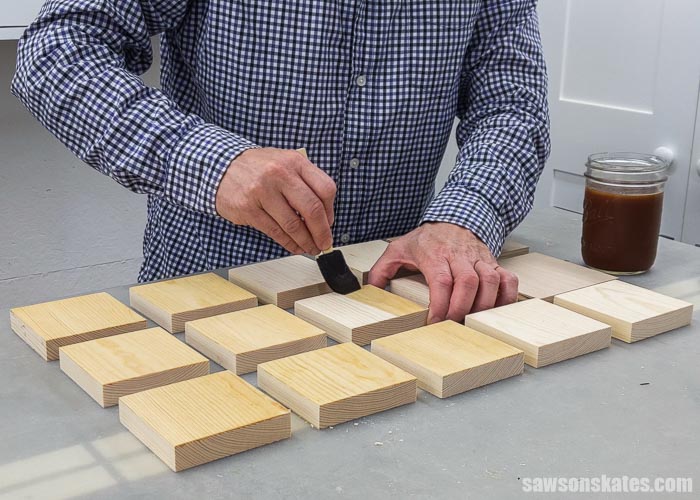
Step 2. Apply the Rit Dye
Fabric dye will color anything it touches, so be sure to cover your work surface with a drop cloth and wear disposable gloves.
Heat 1 cup of water in a microwave.
⚠️ CAUTION: The container and water will be hot.
Pour the water into a container. I used a mason jar.

Vigorously shake the container of dye, then add a ¼ cup of dye to the water.
💡 TIP: You can add more water to make it lighter or more dye to make it darker.
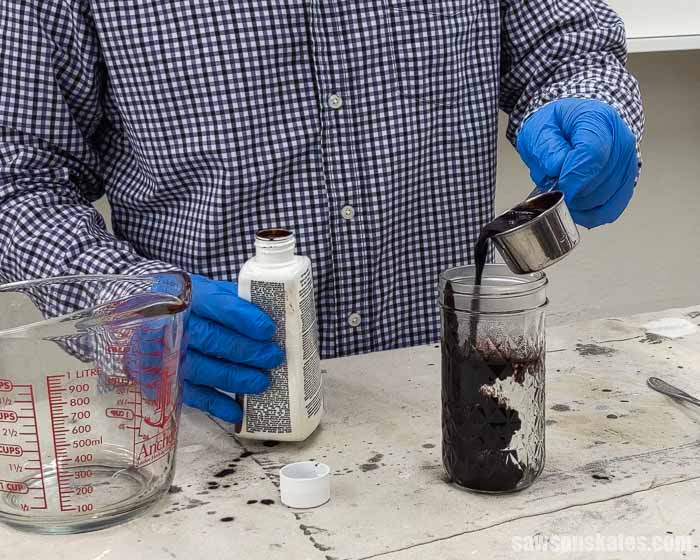
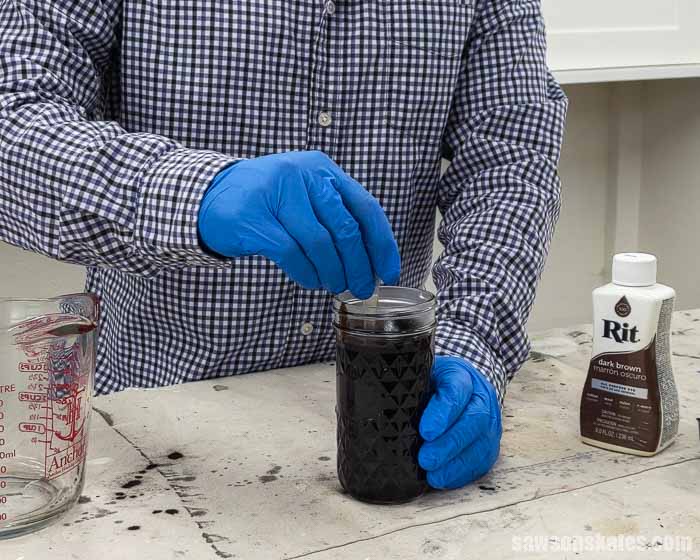
Mix to combine the dye and water thoroughly.
📝 NOTE: The diluted dye works better when it’s hot. Warm it up in the microwave if it begins to cool down.
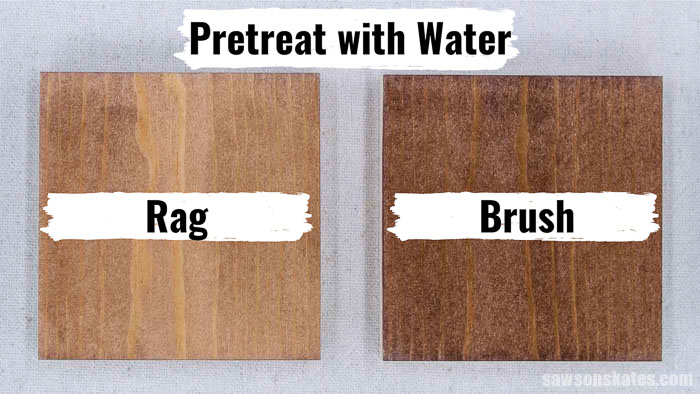
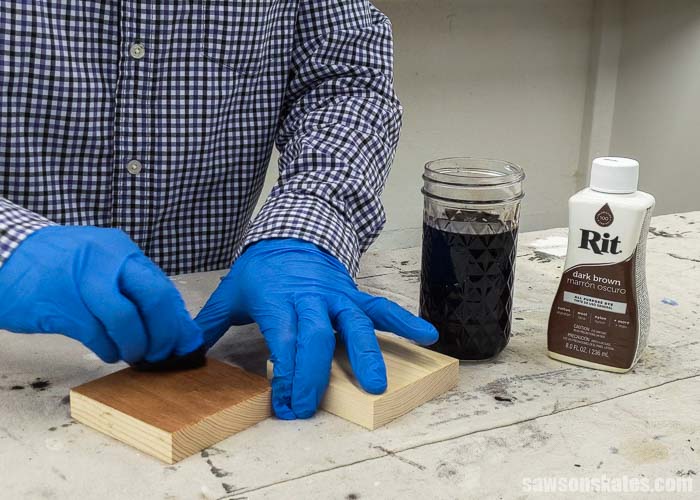
🔄 OPTIONAL: To reduce rag marks, lap marks and help reduce blotchiness, you can dampen the wood with water immediately before applying the dye. See Problems and Solutions for more information.
The diluted dye can be applied with a rag.
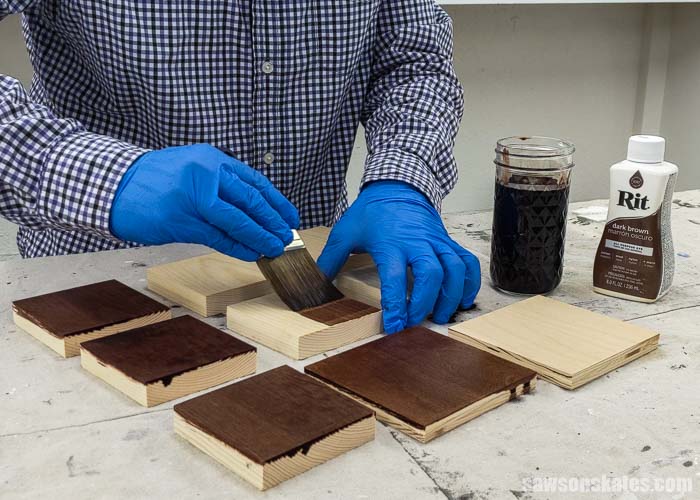
Or the diluted dye can be applied with a brush.
Step 3. Apply Second Coat (Optional)
Additional coats can be applied for a darker tone. Allow the first coat to dry before applying additional coats. It usually takes a few hours for each coat to dry.
The dye appeared to be dry after a few hours, but I didn’t have a chance to apply the second coat until about 24 hours after the first coat.
Step 4. Seal the Rit Dye
When the wood was dry, I lightly sanded the boards with 220 grit sandpaper. Then I removed most of the sanding dust with my ShopVac and removed any remaining dust with a tack cloth.
As I mentioned in Problems and Solutions, the fabric dye is water-soluble. In other words, wiping a rag dampened with water removed some of the dye.
See How Do You Seal Wood? for the top coats I recommend for sealing the dye.
Final Thoughts
You can do more than change the color of clothing with Rit Dye. You can also use it to dye wood. It’s easy to apply, doesn’t have stinky fumes like an oil-based stain, and is available in a variety of colors.
Thank you for stopping by. If you enjoyed this tutorial, would you please take a moment and pin it to Pinterest? I’d really appreciate it!
Recommended For You
Pin This For Later

Hi there – I’m Scott, a woodworking enthusiast and creator of Saws on Skates, a site I started in 2015 to share easy-to-follow tutorials, space-saving shop tips, and project inspiration for DIYers at any skill level. Learn more about my woodworking journey here.
I use RIT Dye on several wood projects but with alcohol not water avoiding grain swelling. My first job as a chemist from college was working with inks and dyes for a large company that helped my dye usage.
Food dyes also work.
Thanks for the great tip !
Barry from Seattle area
I use dyes on turned pen blanks before applying finish. They’re turned down to a thickness of 1/16th or so and I soak them in dye for an hour or so. Very light sanding then finish with CA glue. Will have to try RIT dye!