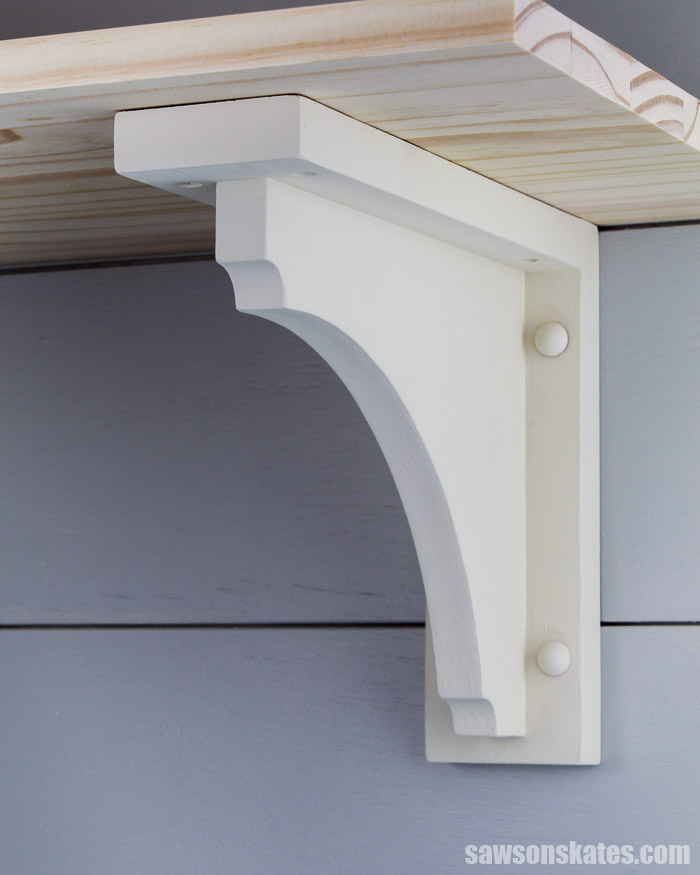
DIY Wood Shelf Brackets
Save money and make your own DIY shelf brackets! These wall-mounted brackets are easy and inexpensive to make with scrap wood and a few common tools.
What Should I Build Next?
That's the question I help answer.
Every week, I send woodworking ideas to 17,000 DIYers who love building things.
You'd fit right in.
DIY Wood Shelf Brackets
Store-bought shelf brackets can be expensive. Make your own DIY shelf brackets and save!
These wall-mounted brackets can be made for free with scrap wood. And they are easy to make with just a few common woodworking tools.
They can be mounted on the wall just about anywhere you need a shelf.
The plan includes all of the measurements, detailed instructions, and two templates to make a small and large bracket.
Get the plan now and build some today.
This tutorial contains affiliate links to supplies and tools. Purchases made using these links help support the Saws on Skates website and allows me to share more projects and tips with you. There is no cost to you for using these links. Visit my site policies for more information.
Table of Contents
- This Project’s Inspiration: Open Shelving
- What Tools Do You Need Make Wood Shelf Brackets?
- What Wood Should You Use?
- How Big Should a Bracket be for a Shelf?
- How Do You Finish the Shelf Brackets?
- How Do You Attach the Shelf Brackets to the Wall?
- How Do You Attach the Brackets to the Shelf?
- How to Make DIY Shelf Brackets Tutorial
- Get the PDF Plan
This Project’s Inspiration: Open Shelving
A friend of mine recently bought two condos to use as vacation rentals. He owns a first-floor unit and a second-floor unit. For the first floor unit, I built these drawers at the bottom of a storage closet. And for the small bathroom, I built this vanity with a hidden toilet paper holder.
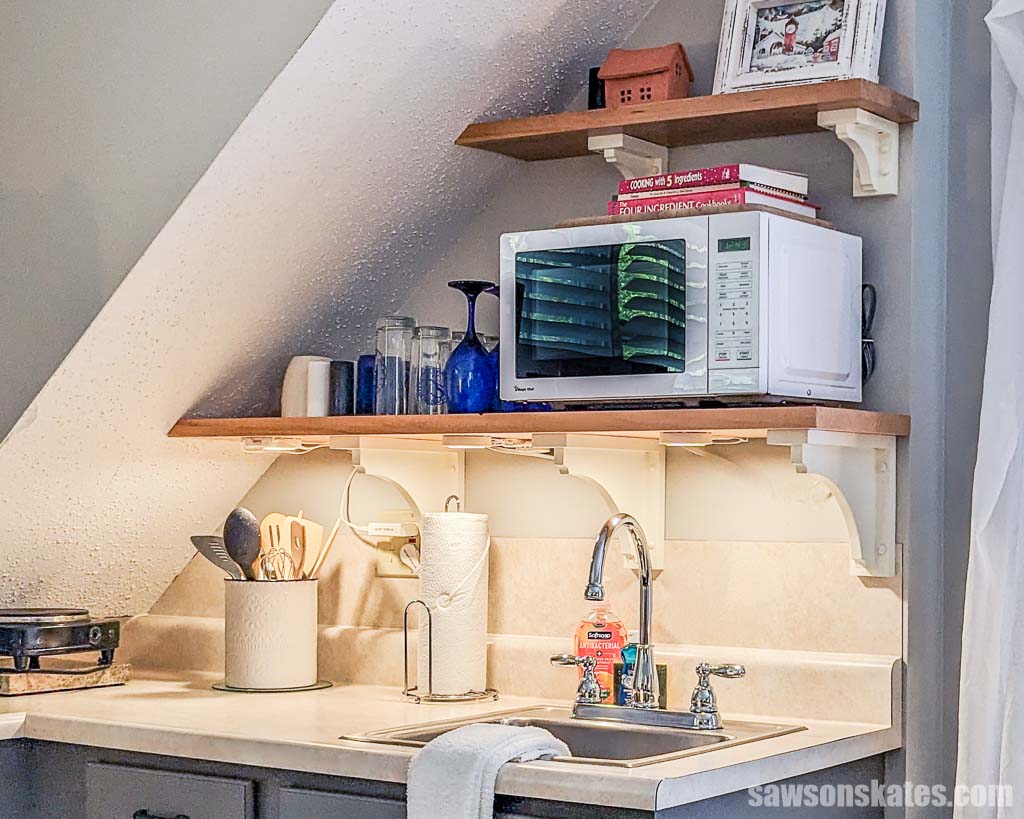
In the second-floor condo, he wanted to make better use of the space in the kitchen. The previous owner installed two small wall shelves above the sink, but they were narrow, and the store-bought metal brackets didn’t fit in with the decor.
He liked the look of the open shelving but wanted them to be longer and to increase the depth of the lower shelf for extra storage.
He couldn’t reuse the existing brackets because he didn’t have enough of them to support the longer shelves, plus they were too small to support the increased shelf depth.
He ran into three problems when searching for new brackets:
- Store-bought shelf brackets are expensive
- Many of the store-bought brackets looked too big in the small space over the sink
- He didn’t like the style of the ones that did fit in the space
But I had an idea.
I took some inspiration from the brackets that he liked and made my own DIY shelf brackets.
First, I designed a bracket for the wide shelf and then scaled it down for the narrow shelf.
The best part is that I made this simple DIY project entirely for free with scrap wood!
What Tools Do You Need to Make Wood Shelf Brackets?
These wood shelf brackets are an easy afternoon project that can be made using basic woodworking skills and just a few common woodworking tools.
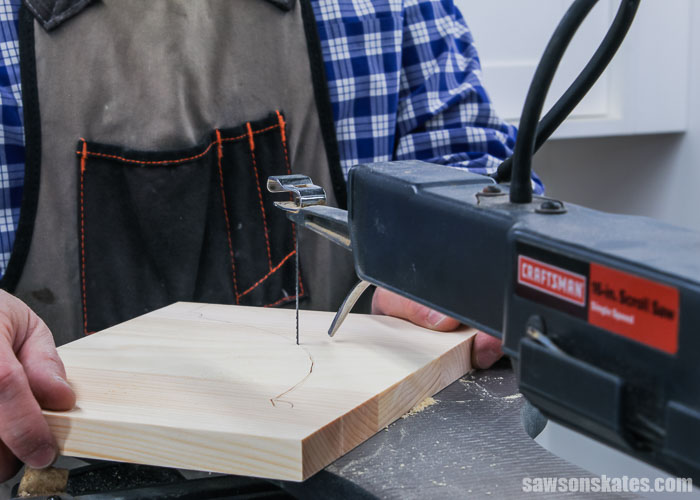
Tools like a scroll saw or jig saw, pocket hole jig, and a drill.
I used a scroll saw to cut the curved detail of the bracket but you might also be able to make these cuts with a jigsaw or bandsaw.
The pocket hole jig was used to join the shelf support to the wall support. You can use any pocket hole jig to drill the pocket holes. The user-friendly Kreg Jig 320 is an inexpensive choice to drill the pocket holes for this project.
Related: 9 Pocket Hole Mistakes You Don’t Want to Make
The drill was used to make the pocket holes and to drill countersink holes in the shelf support and the wall support. A countersink drill bit drills a pilot hole and makes a concave area in the wood. This concave area allows the head of the wood screw to sit flush (or below) the face of the board.
Related: How to Use a Countersink Bit
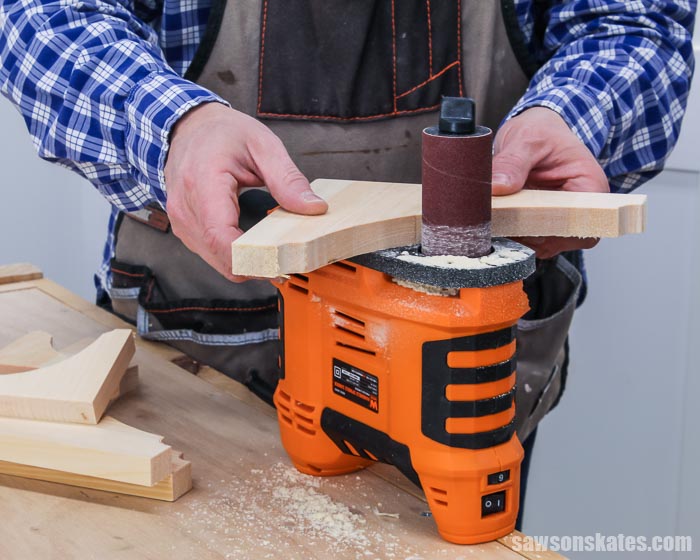
It’s not necessary, but I used this portable spindle sander to sand the curved edges of the brackets. If I didn’t have a spindle sander, I would have sanded the edge by hand with sandpaper.
Related: What’s the Best Sander for Furniture? (Here’s the Answer)
What Wood Should You Use?
These shelf brackets can be made with just about any type of wood. This project doesn’t require much wood so it’s a great way to use up some scrap wood.
Related: How to Decide What Scrap Wood to Keep
Many times I use common pine to build my projects. Pine is inexpensive and easy to work with.
I had plenty of pieces of pine in my scrap wood pile so that’s what I used for this project.
Related: 71 Scrap Wood Projects (Clever Ways to Reuse Old Wood)
If I didn’t have any scrap wood, I would have purchased some pine 1×3s and 1×4s at my local home improvement store.
Related: Beginner’s Guide to Wood Sizes
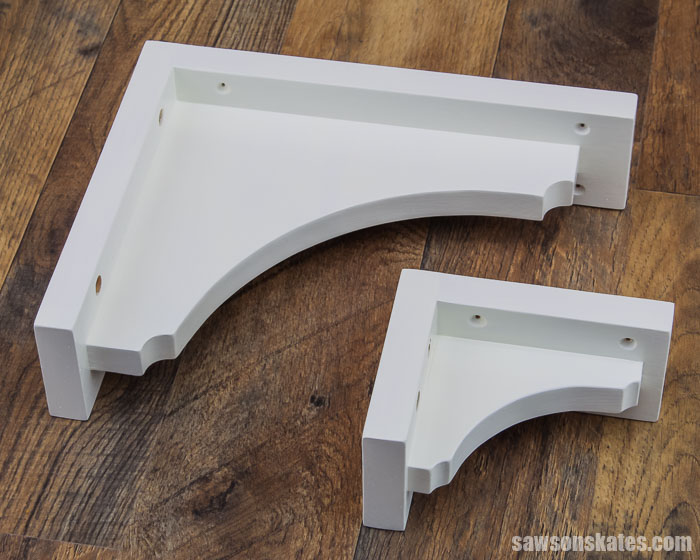
How Big Should a Bracket be for a Shelf?
My friend needed brackets for a narrow and wide shelf. The narrow shelf measured about 6” and the wide shelf measured 11”.
I made the shelf bracket 1” smaller than the width of the shelf.
The bracket for the narrow shelf measures nearly 5” and the bracket for the wide shelf measures about 10”.
How Do You Finish the Shelf Brackets?
These wood shelf brackets could be finished in a variety of ways. They could be left natural, painted, or stained.
My friend wanted his brackets to be painted.
First, I applied several coats of this shellac-based primer to prevent any knots from bleeding through the paint.
Related: How to Stop Knots Bleeding Through Paint
Then, I applied two coats of a Behr color called “Candle Light Ivory”.
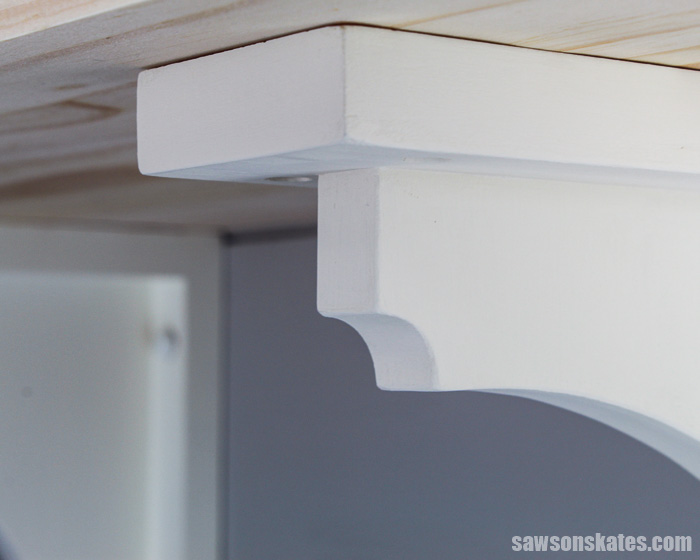
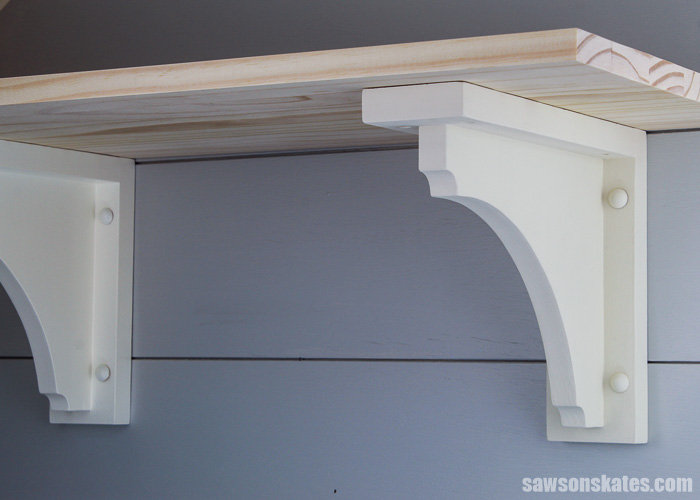
How Do You Attach the Shelf Brackets to the Wall?
These shelf brackets were designed with four mounting holes. You could use all four holes to attach the brackets to the wall, but here’s how I plan to use the mounting holes.
Bracket Spacing
The sturdiness of your shelf will be determined by the thickness of your shelf material and the spacing between your wooden shelf brackets.
Wall studs are spaced 16-inches on center. This means that from the center of one stud to the center of the next is 16-inches. When attaching anything to your wall, you’ll need to take this into account.
If you space the brackets too far apart and use a thin 3/4-inch pine board for your shelf, the board may sag between the brackets over time.
Likewise, if the brackets are spaced too far apart, and you use a heavy, thick maple board, for example, they may not be able to support the weight of the board and any items you place on it.
When in doubt, space your brackets closer together.
When I can attach the brackets to a stud, I’ll use the top and bottom mounting holes on either the left or right side of the bracket.
I won’t be able to attach each bracket to a stud because of where I need to position the shelves on the wall.
In that situation, I’ll use drywall anchors and attach the brackets to the wall with the mounting holes diagonally. For example, I would use the upper hole on the left side and the lower hole on the right side.
Attach the Brackets to the Studs
It’s best to attach the shelf brackets to a stud. First, use a stud finder to locate the studs in the wall. Then, position the shelf bracket on the center of the stud and use a level to make sure the bracket is plumb or straight up and down. Next, attach the bracket to the wall with 2-½” wood screws.
Attach the Brackets to Wall Anchors
You can use wall anchors like these if there isn’t a stud where you want to mount the shelf bracket. I like these self-drilling wall anchors because they are so easy to install in the wall.
First, position the shelf bracket where you want it on the wall and use a level to make sure the bracket is plumb or straight up and down. Next, mark the location of the mounting holes on the wall. I like to use one hole diagonally on either side of the bracket. For example, I might use the upper hole on the left side and the lower hole on the right side.
Once the locations are marked on the wall, insert the wall anchors. Position the brackets on the wall and attach using the screws included with the anchor.
To install the remaining brackets, place a level across the bracket attached to the wall and the next bracket. Then attach the new bracket using the procedure for attaching to the stud or using a wall anchor.
For a Finished Look
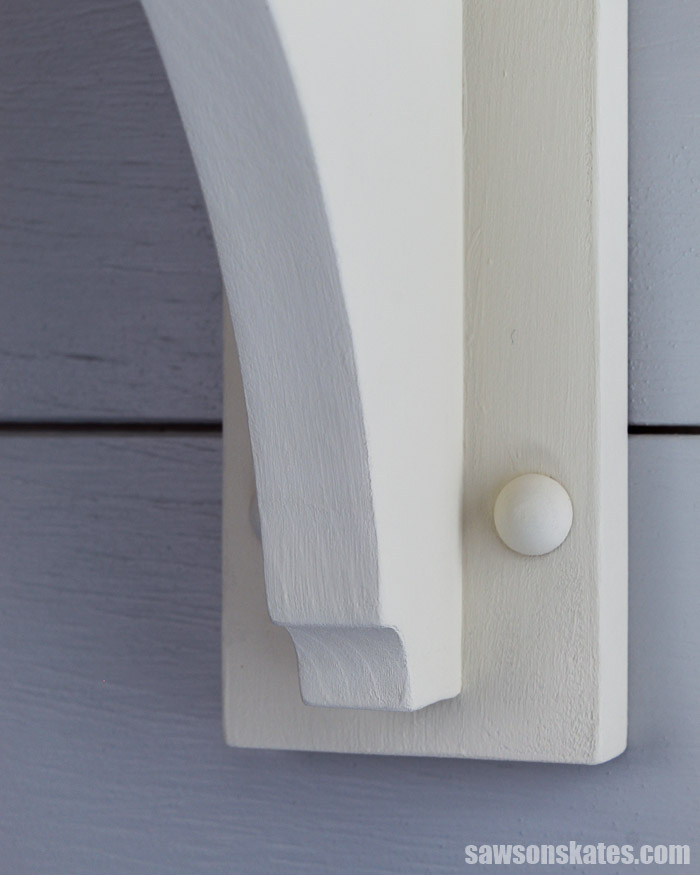
When the bracket was installed on the wall, I covered the mounting holes with these button plugs. A few of the plugs were loose. This could be because I didn’t drill the hole completely straight up and down into the wood. For the loose plugs, I applied a small dab of glue to the sides of the plug and it inserted into the hole.
How Do You Attach the Brackets to the Shelf?
There are four countersink holes that can be used to attach the shelf bracket to the shelf.
The length of the screw that you will use will depend on the thickness of your shelf.
Let’s say you wanted to use a shelf that measured ¾” thick. The shelf support of the bracket is also ¾” thick. So the shelf and shelf support are a total of 1-½”.
1-¼” wood screws would be a good choice to join the shelf to the shelf bracket. 1-¼” wood screws are a ¼” shorter than the thickness of the shelf and shelf support which would prevent the tip of the screw from poking through the shelf.
DIY Wood Shelf Brackets
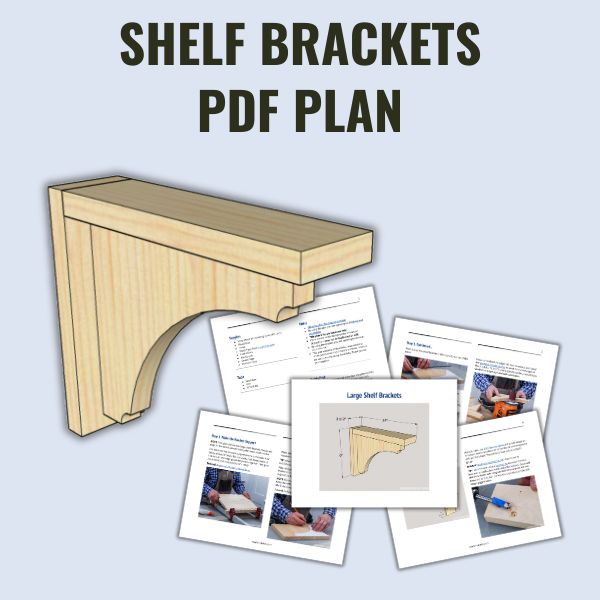
Printed Plan
- Click here to get the PDF plan (includes detailed instructions, measurements, and bonus tips)
Supplies
- Wood (per printed plan)
- 1-¼” Pocket Screws
- 1-¼” Wood Screws
- Wood Glue
- Button Plugs
Tools
- Tape Measure
- Drill
- Kreg Jig
- Kreg Multi-Mark
- Miter Saw
- Countersink Drill Bit Set
- ⅜” Forstner Bit
- ³/₁₆” Drill Bit
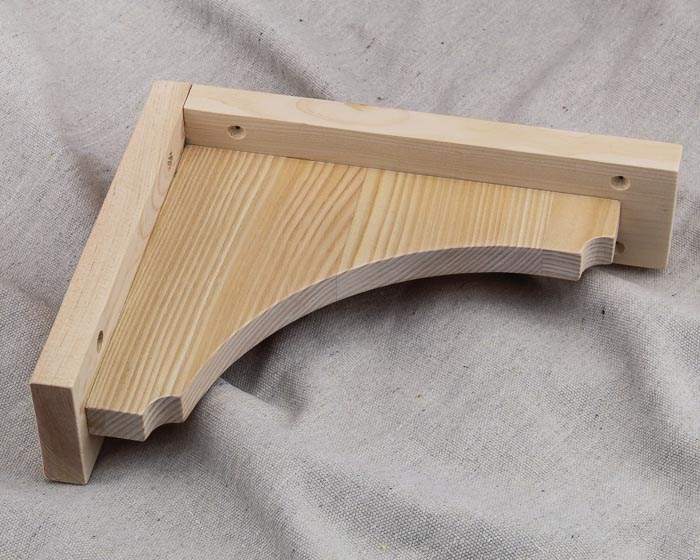
Step 1. Make the Bracket Support
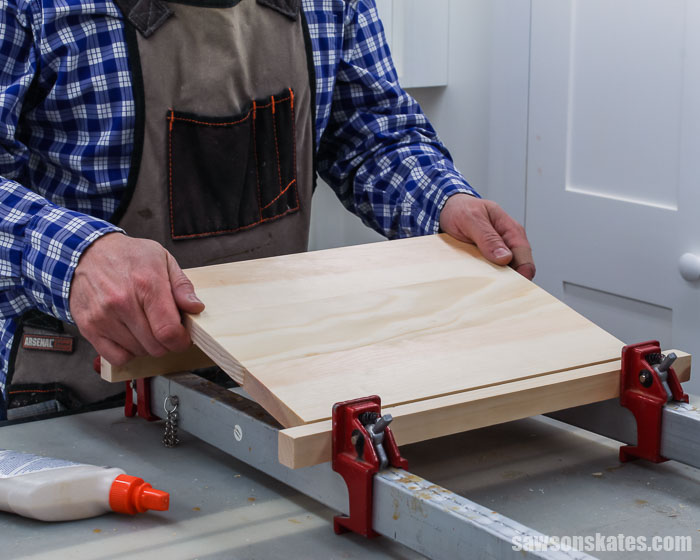
For my bracket support, I cut three pieces of scrap wood to length and edge glued them together.
Related: How I Square Edges Without a Jointer (for Panels and Table Tops)
While the glue is drying, print the template (included with the printed plan) for the bracket support.
💡 TIP: When printing the PDF template, be sure to set the scale to 100%.
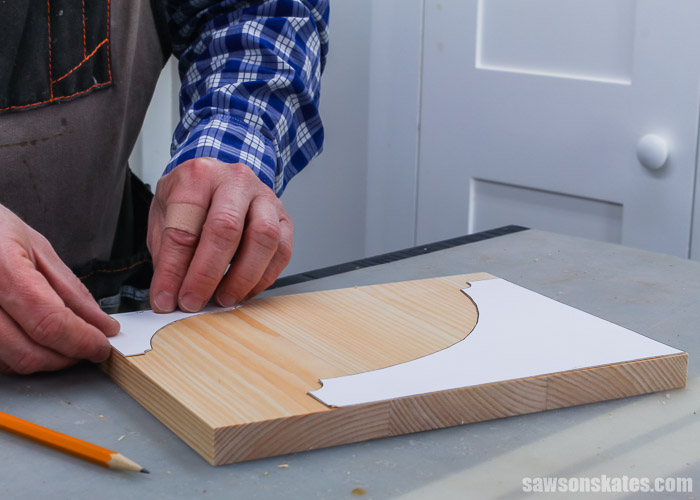
When the glue is dry, trace the template onto the blank. Position the square edge of the template with the square edge of the blank.
I traced the large bracket in one corner of the blank.
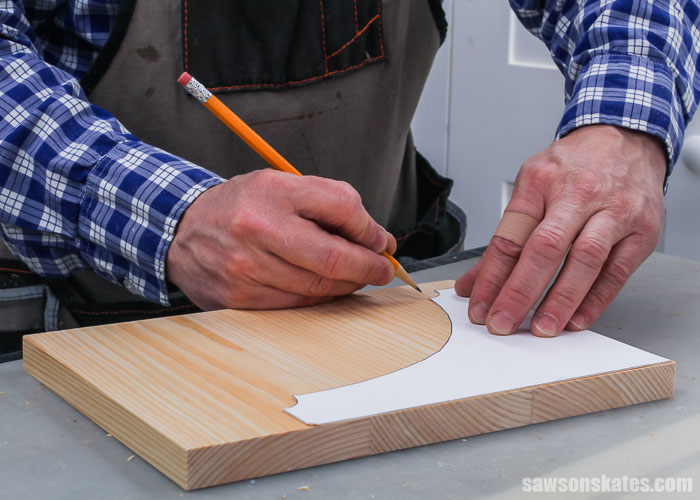
And I traced the small bracket in the opposite corner.
Then, I used a scroll saw with this 10 TPI blade (teeth per inch) to cut out the bracket support.
Next, I smoothed the edges. It’s not necessary, but I used this portable spindle sander to sand the curved edges of the brackets. If I didn’t have a spindle sander, I would have sanded the edge by hand with sandpaper.
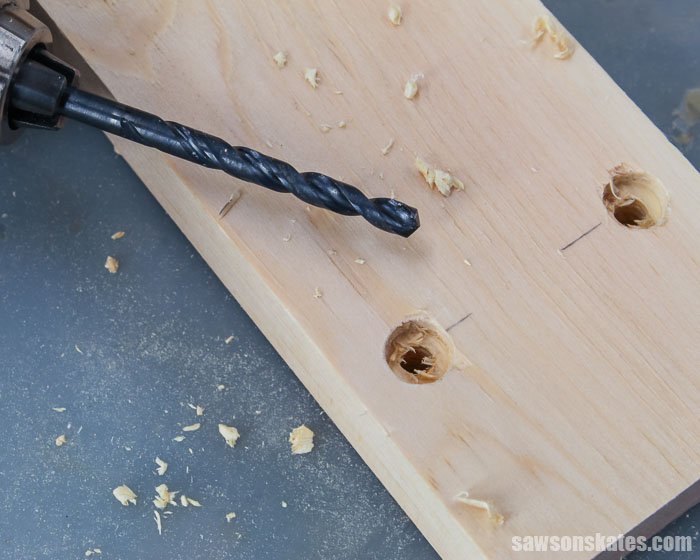
Step 2. Make the Wall Support
Cut one piece of wood to length for the wall support.
On the frontside, use the diagram in the printed plan to mark the locations for the mounting holes.
At each mark, use a ⅜” Forstner bit to drill a hole about an ⅛” deep.
💡 TIP: I recommend using a Forstner bit because it drills a hole with smooth, clean sides and a flat bottom. You could drill these holes with a regular drill bit or a spade bit, but these bits tend to tear the wood and produce a hole with rough, jagged sides.

Next, use a ³/₁₆” drill bit to drill a pilot hole the rest of the way through the wood.
Related: How to Drill Pilot Holes (Why, When & Correct Size)
On the backside of the wall support, use the diagram in the printed plan to mark the locations for countersink holes. Use a countersink bit to drill holes at each mark.
Related: How to Use a Countersink Bit
💡 TIP: A countersink bit drills a pilot hole and makes a concave area in the wood. This concave area allows the head of the wood screw to sit flush (or below) the face of the board. This will make sure the head of the screw won’t stick out and prevent the wall support from sitting flush against the wall.
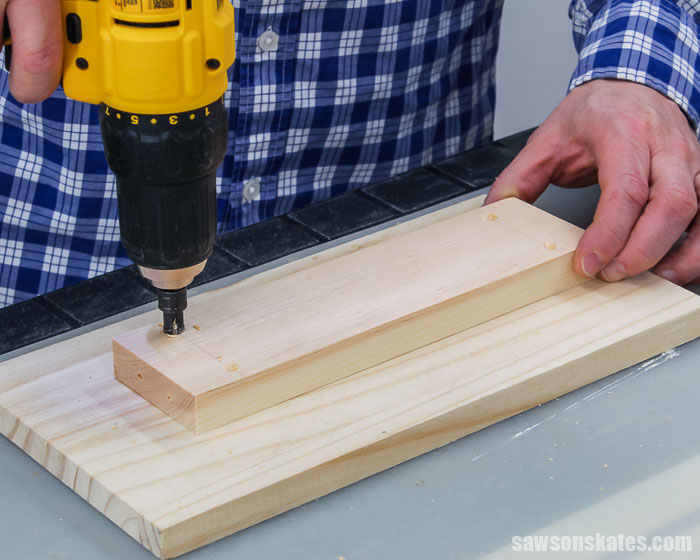
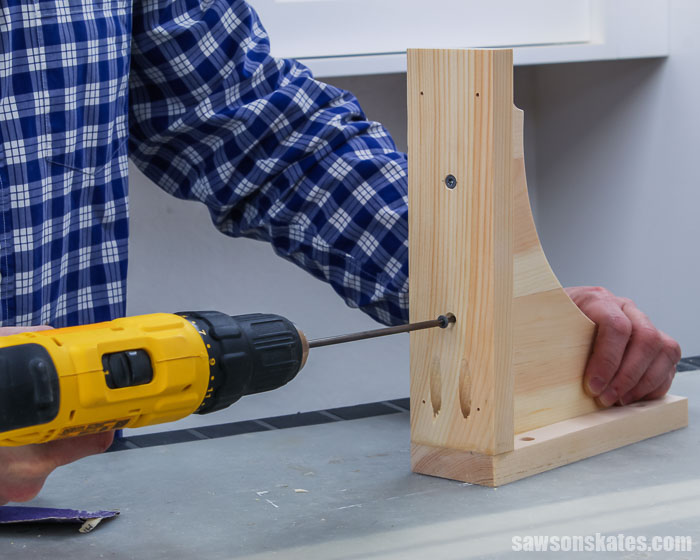
Step 3. Make the Shelf Support
Cut one piece of wood to length for the shelf support.
On the top side of the support, drill two pocket holes in one end. You can use the A and B holes in your Kreg Jig or position the pocket holes ¾” from each edge.
Related: How to Use a Pocket Hole Jig
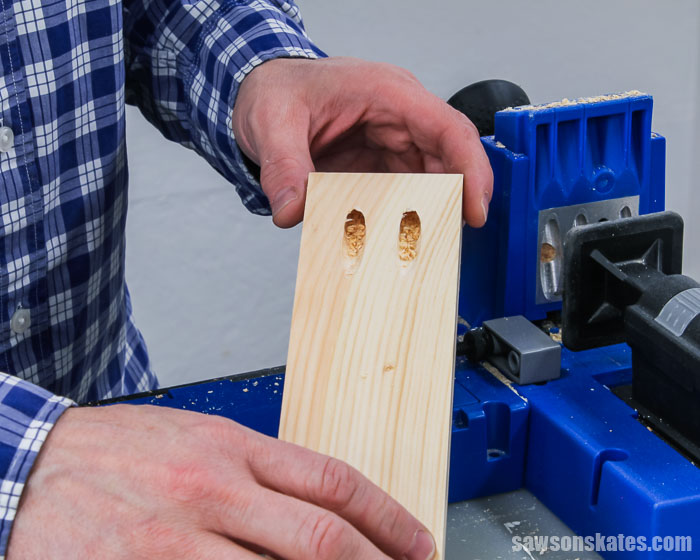
Use the diagram in the printed plan to mark the locations for countersink holes. Use a countersink bit to drill holes at each mark. These holes will be used to attach the shelf support to the bracket support.
On the bottom side of the shelf support, use the diagram in the printed plan to mark the locations for countersink holes. Use a countersink bit to drill holes at each mark. These holes will be used to attach the shelf support to the shelf.
Step 4. Assemble the Bracket
Apply glue to the end of the shelf support, position on the wall support, and attach using 1-¼” pocket screws.
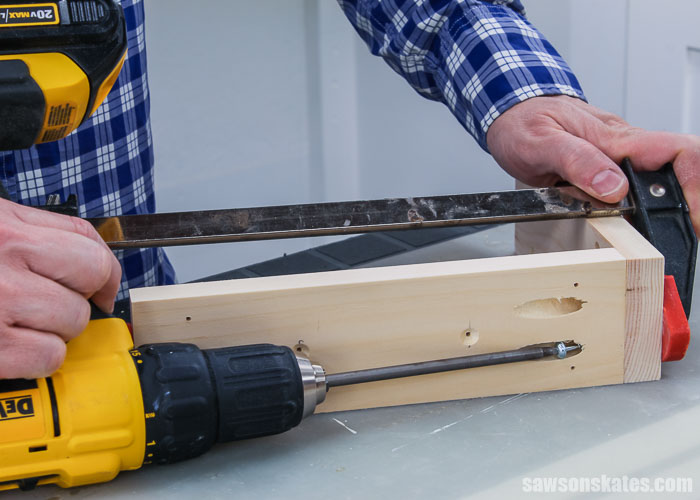
Apply glue to the bracket support and center from side to side.
First, attach the wall support using 1-¼” screws.
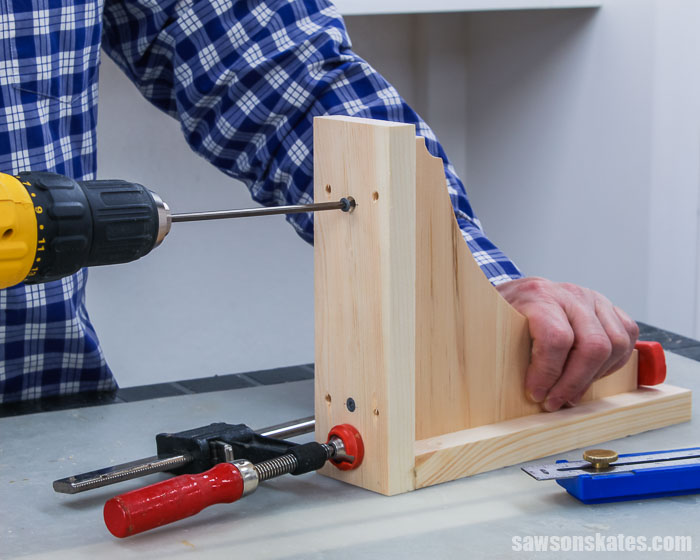
Second, attach the shelf support using 1-¼” screws.
💡 TIP: The joint between the shelf support and bracket support joins the face grain of the shelf support to the end grain of the bracket support. I typically recommend to avoid this type of joint.
Driving screws into end grain does not create a strong joint. The structure of end grain is similar to the end of a box of drinking straws. In other words, driving a screw into end grain is like driving a screw into a hollow tube. There’s not much for the screw to bite into.
In this case, I’m using the screws for alignment purposes rather than a structural purpose. The screws will prevent the top of the bracket support from moving side to side.
Step 5. Finish the Shelf Brackets
See How to Finish for more information.
Step 6. Hang the Shelf Brackets
See How to Attach the Brackets for more information.
Includes:
- List of tools and materials
- Complete measurements (in inches)
- Easy-to-follow instructions
- Step-by-step photos
- Detailed diagrams
Final Thoughts
Store-bought shelf brackets can be expensive. Make your own DIY shelf brackets and save!
These wall-mounted brackets can be made for free with scrap wood. And they are easy to make with just a few common woodworking tools.
Click here to get the PDF plan (including the detailed instructions and measurements) now!
Thank you for stopping by. If you enjoyed this tutorial, would you please take a moment and pin it to Pinterest? I’d really appreciate it!
Pin This For Later

Hi there – I’m Scott, a woodworking enthusiast and creator of Saws on Skates, a site I started in 2015 to share easy-to-follow tutorials, space-saving shop tips, and project inspiration for DIYers at any skill level. Learn more about my woodworking journey here.
The shelf brackets will come in very handy. The wife wants to have some new shelves built in bedroom above the windows. These should work out great.
Thank you, Frank! I’m glad you like the shelf brackets and I hope your wife does too 🙂
Love your well documented plans. Thank you.
You’re welcome, Lee. Thank you for the compliments!
Love your detailed e-mails and plans..
Thank you, Ron. I appreciate your compliments!
Thank you, great inspiration