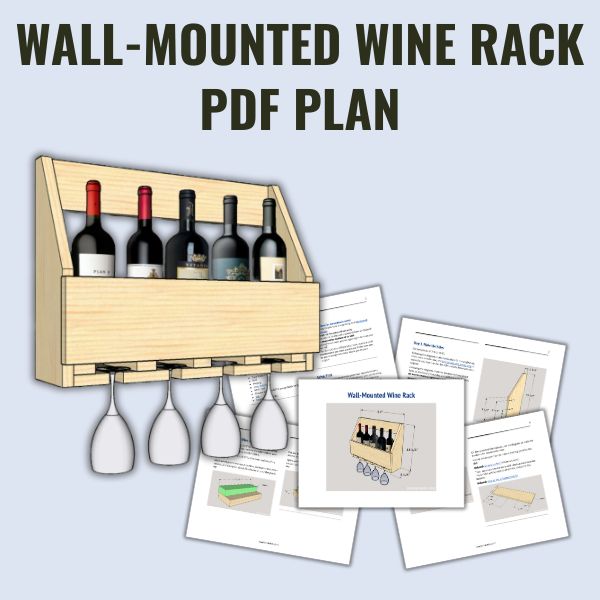
DIY Wall-Mounted Wine Rack
With only a few pieces of wood, you can build this attractive DIY wall-mounted wine rack that will keep your wine bottles and glasses organized.
What Should I Build Next?
That's the question I help answer.
Every week, I send woodworking ideas to 17,000 DIYers who love building things.
You'd fit right in.
DIY Wall-Mounted Wine Rack
Learn how to make this simple and easy-to-build wooden wine rack with this complete step-by-step tutorial.
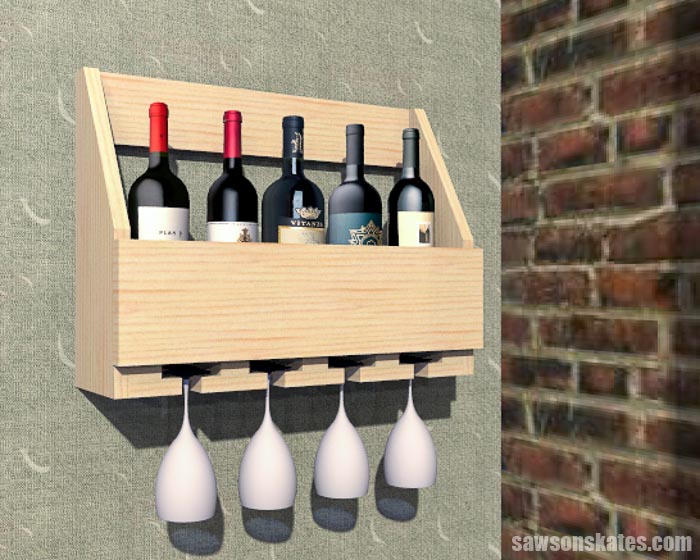
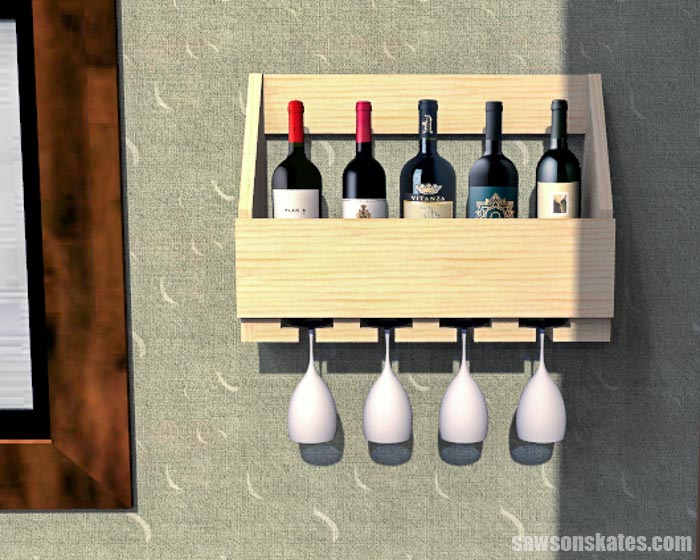
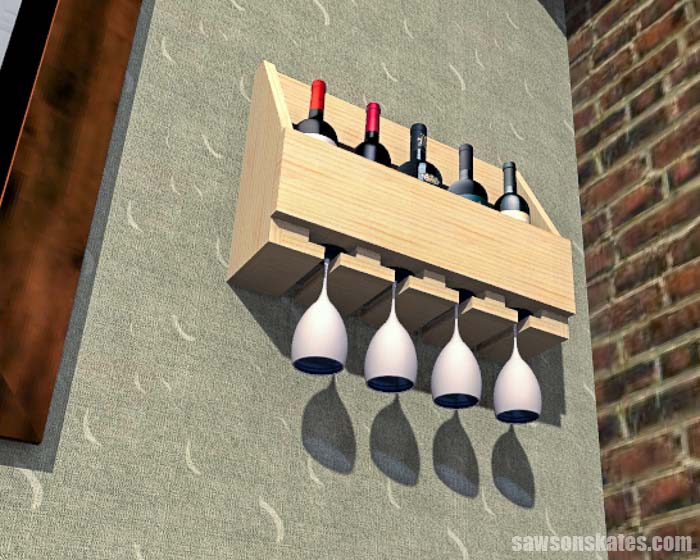
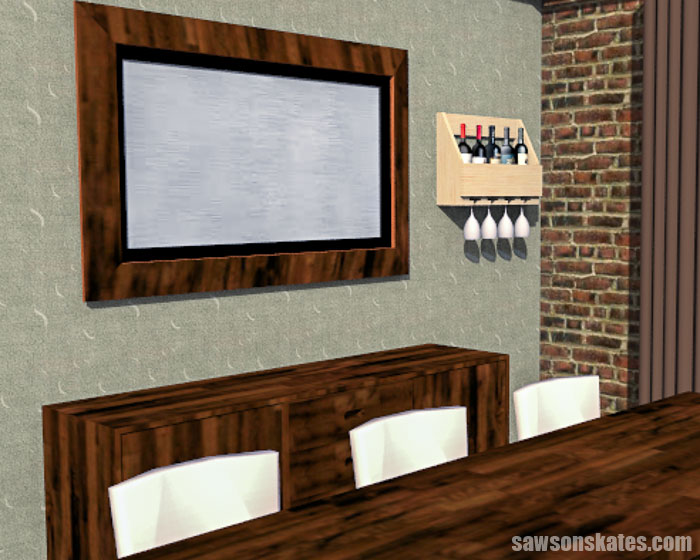
This hanging wine rack features a shelf to display your wine bottles or liquor bottles, and below there is space to store your wine glasses.
This beginner-friendly project is easy to make with a few pieces of wood and a couple of common woodworking tools.
The step-by-step plan includes all of the measurements, easy-to-follow instructions, and detailed diagrams.
Get your plan now and build two, one for yourself and one to give as a gift.
Table of Contents
- Inspiration for This DIY Wine Rack
- What Tools Do You Need?
- What Wood Should You Use?
- How Do You Finish the Wine Rack?
- How Do You Hang the Wine Shelf on the Wall?
- How to Make a DIY Wall-Mounted Wine Rack
- Get the PDF Plan
This article contains affiliate links. If you purchase from these links, I may earn a small commission at no additional cost to you. Visit my site policies for more information.
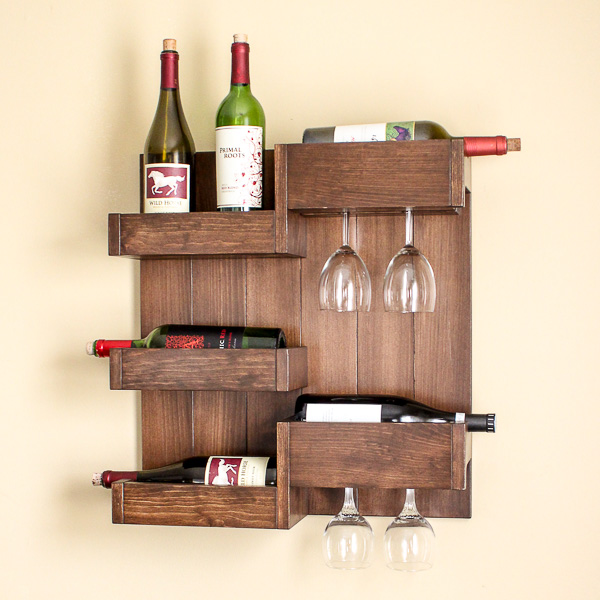
Inspiration for this Wine Rack Plan
A friend and fellow DIYer’s YouTube video inspired this simple wine rack. In the video, she shared some fantastic treasures that she found on a thrift store shopping trip. As soon as she brought the inspiration piece into focus, I paused the video and started taking notes!
I used those notes to design this hanging wooden wine rack with a shelf for wine storage and holders to display your wine glasses. You could even use this project to display liquor bottles instead.
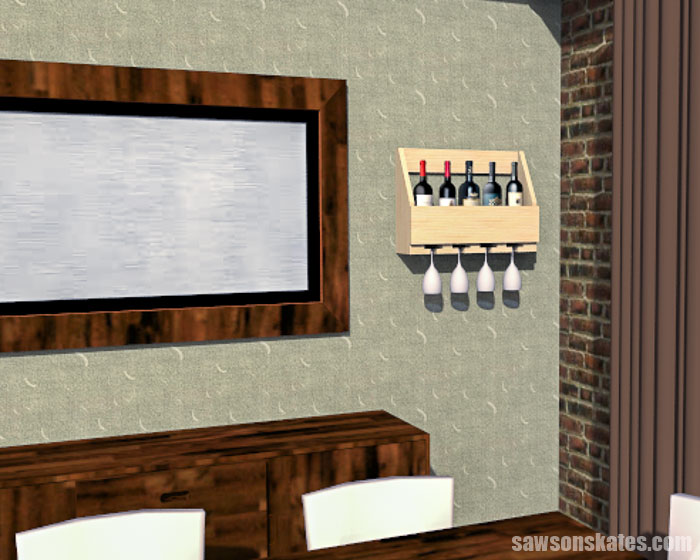
I didn’t build this project, so I’m sharing what the finished wine rack may look like using renderings and dining room scene designed by Addy that I found in SketchUp’s 3D Warehouse.
What Tools Do You Need to Make a Wall-Mounted Wine Rack?
This easy-to-build wine rack is a simple, beginner-friendly project that you can build in an afternoon using basic woodworking skills and just a few common woodworking tools.
Tools like a miter saw, pocket hole jig, and a drill. You’ll also need an additional saw to cut the angle on the sides of this project.
Miter Saw
You can use a miter saw to cut all of the parts to length for this project.
Related: 7 Miter Saw Tricks Every DIYer Should Know
Pocket Hole Jig
You can use any pocket hole jig to drill the pocket holes for this project.
Related: Which Kreg Pocket Hole Jig Should You Buy?
Drill
You’ll need a drill to make the pocket holes and to make the countersink holes that will be used to join the wine glass holders to the rack. You will also use the drill to drive the pocket hole screws and wood screws that join the parts together.
Related: Impact Driver vs Drill: What’s the Difference?
Additional Saw
You will need an additional saw to cut the angle on the sides of the wine rack. An easy way to make these cuts is with a circular saw and a crosscut jig. You may also be able to make these cuts with a jigsaw.
Related: How to Make a DIY Circular Saw Crosscut Jig
What Wood Should You Use?
I designed this project so that you could make it without plywood. Instead, I created this project so that you could build with common lumber like 1×2s, 1×3s, 1×4s, and 1×6s.
Related: Beginner’s Guide to Wood Sizes
This project doesn’t require much wood, so it’s a great way to use up some scrap wood.
Related: How to Decide What Scrap Wood to Keep

How Do You Finish the Wine Rack?
This wall-mounted wine rack could be finished in a variety of ways. It could be left natural, painted, stained, or a combination of paint and stain.
How Do You Hang the Wine Shelf on the Wall?
This wine rack could become heavy when it’s loaded with bottles of wine and wine glasses, so it’s important to securely attach it to the wall.
An easy way to attach the rack to the wall is to use one of these heavy-duty french cleats. You can see how I installed one on this DIY medicine cabinet.
You could also make your own french cleat.
Related: How to Make a French Cleat (2 Easy Ways)
DIY Wall-Mounted Wine Rack
Printed Plan
Get the PDF plan here (includes detailed instructions, measurements, and bonus tips)
Supplies
- Wood (per the printed plan)
- 1-¼” Pocket Screws
- 1-¼” Pocket Screws
- Wood Glue
Tools
- Tape Measure
- Drill
- Kreg Jig
- Kreg Multi-Mark
- Miter Saw
- Circular Saw and DIY Crosscut Guide
- Awl
- Countersink Drill Bit Set
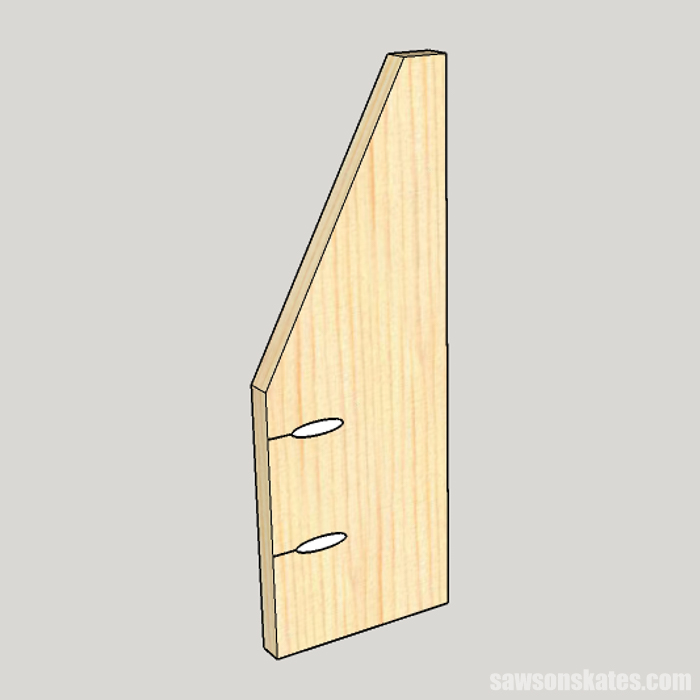
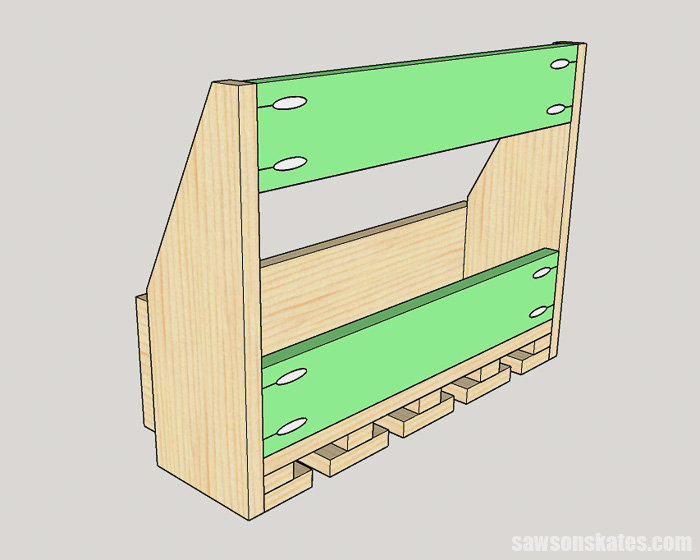
Step 1. Make the Sides
Cut two pieces of wood to length for the sides. Use the diagram in the printed plan to mark the location for the angled cut. Then, use a circular saw, and DIY circular saw crosscut jig to make the cut. You may also be able to make these cuts with a jigsaw.
Use the diagram in the printed plan to drill two pocket holes at the front of the sides.
Related: How to Use a Kreg Pocket Hole Jig
💡 TIP: Be sure to make a right and a left side.
Step 2. Make the Wine Glass Holders
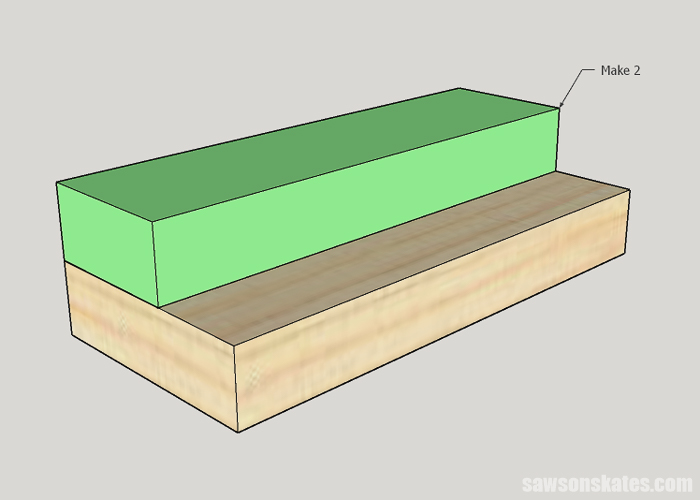
Cut five pieces of wood to length for the upper section of the holder. Two pieces will be used for the side holders, and three will be used for the middle holders.
Cut two pieces of wood to length for the lower section of the side holders.
Apply wood glue to the upper section, position on the lower section, and clamp for about 30 minutes or until the glue is dry.
Cut two pieces of wood to length for the lower section of the middle holders.
Apply wood glue to the upper section, center on the lower section, and clamp for about 30 minutes or until the glue is dry.

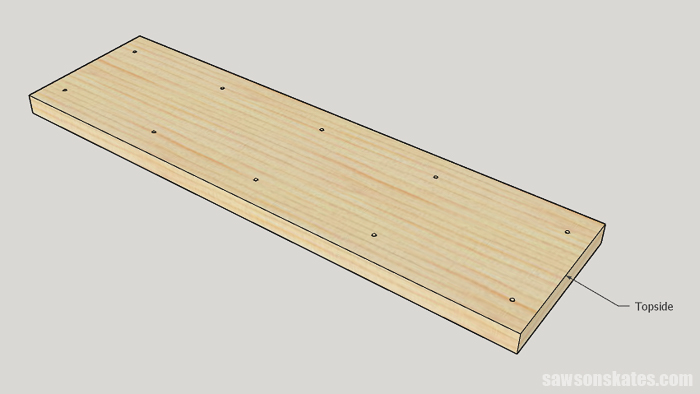
Step 3. Make the Bottom
Cut one piece of wood to length for the bottom.
On the underside of the bottom, drill pocket holes at each end.
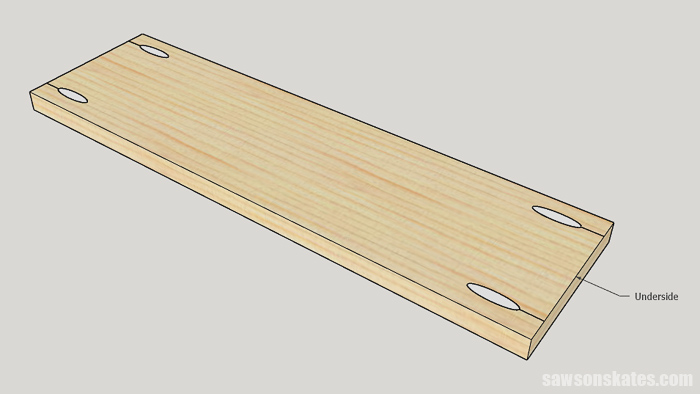
On the topside of the bottom, use the diagram in the printed plan to mark the locations for countersink holes.
Use an awl at each mark to make a starting point for the drill.
Related: What is an Awl? (+ How to Use It)
Then, use a countersink bit to drill a hole at each location. These holes will be used to attach the holders to the bottom.
Related: How to Use a Countersink Bit
Step 4. Assemble the Wine Rack
Temporarily place the side holders on your workbench. Do not attach the holders at this time.
Place the bottom (with the pocket holes facing downward) onto the holders, position the sides (with the pocket holes facing inward) on the bottom, and clamp. Attach using 1-¼” pocket hole screws.
🔄 OPTIONAL: You can give the sides a more finished look by filling these pocket holes with store-bought pocket hole plugs or making your own plugs.
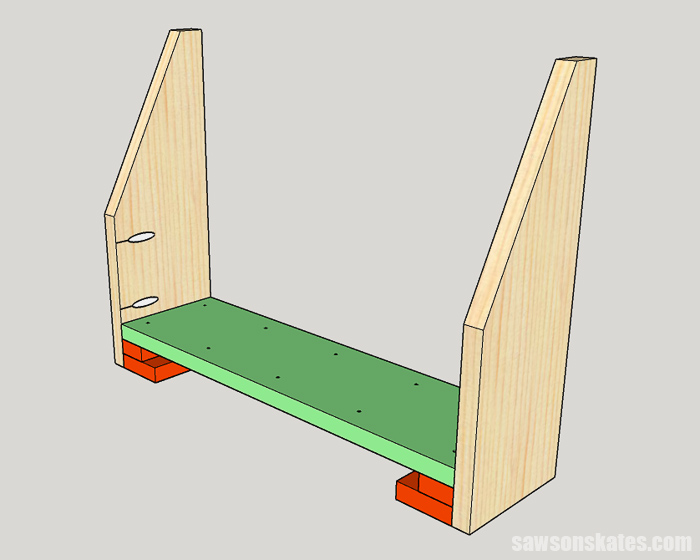
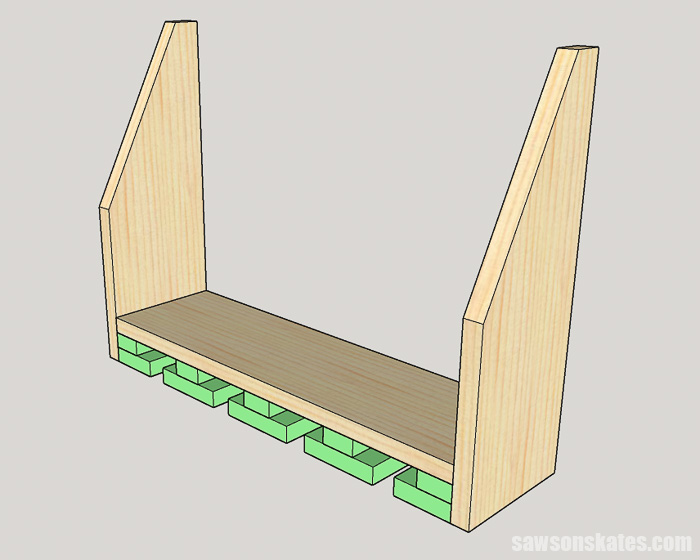
Position the holders on the bottom and attach using 1-¼” wood screws.
💡 TIP: Are you planning to stain this project? These holders will be difficult to access when this project is assembled. I recommend numbering each holder and its location on the rack. That way, you can remove the holders, stain them, and reinstall them exactly where they belong.
Cut one piece of wood to length for the front. Position the front on the sides and clamp. Attach using 1-¼” pocket hole screws.
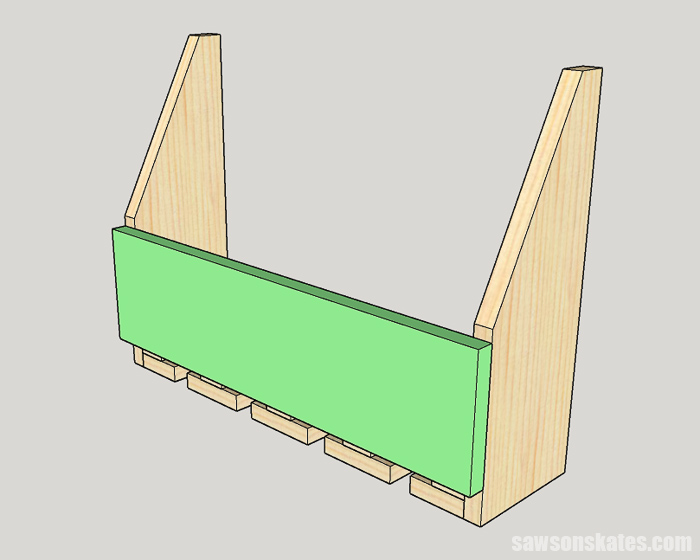
Cut two pieces of wood to length for the back rails and drill pocket holes in each end.
Position on the back and clamp. Attach using 1-¼” pocket hole screws.
Step 5. Finish the DIY Wine Rack
This wall-mounted wine rack could be finished in a variety of ways. It could be left natural, painted, stained, or a combination of paint and stain.
See How Do You Hang the Wine Rack on the Wall? for suggestions about attaching the wine rack to the wall.
Includes:
- List of tools and materials
- Complete measurements (in inches)
- Easy-to-follow instructions
- Detailed diagrams
Final Thoughts
This beginner-friendly wall-mounted wine rack with a shelf to display your wine bottles and storage for wine glasses is easy to make with a few pieces of wood.
Get the PDF plan (including the detailed instructions and measurements) now!
Thank you for stopping by. If you enjoyed this tutorial, would you please take a moment and pin it to Pinterest? I’d really appreciate it!
Recommended For You
Pin This For Later

Hi there – I’m Scott, a woodworking enthusiast and creator of Saws on Skates, a site I started in 2015 to share easy-to-follow tutorials, space-saving shop tips, and project inspiration for DIYers at any skill level. Learn more about my woodworking journey here.
I Really Enjoy this Site.